Posts by Beth @ Tasty Yummies

  1. Gluten-Free & Heart Healthy 2013: Dark Chocolate Pecan Love Bites from The Spicy RD

    Gluten-Free and Heart HealthyNext up in our Gluten-Free & Heart Healthy series in honor of American Heart Health Month, we have E.A. from The Spicy RD.
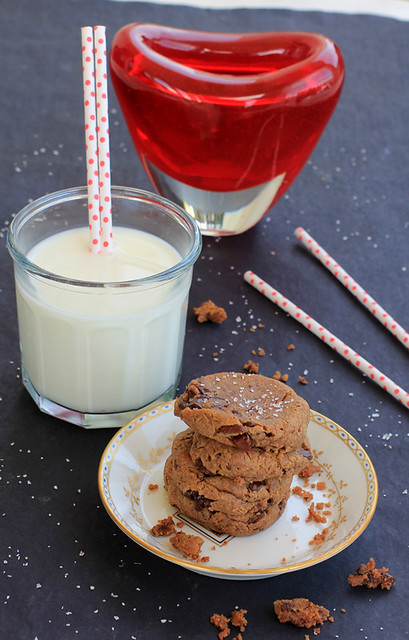
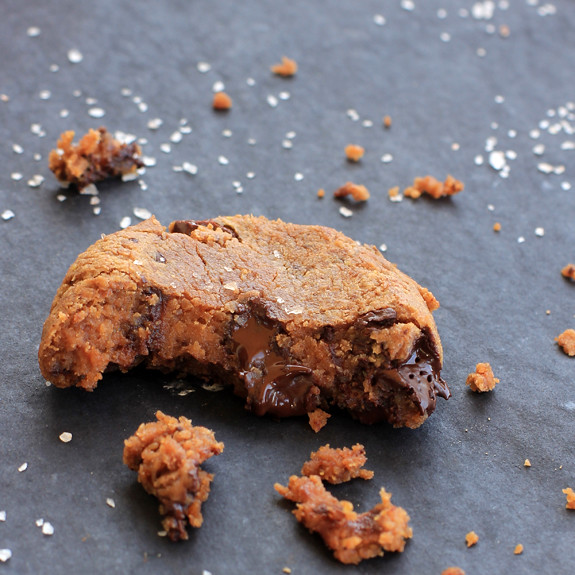
    Chocolate Pecan Love BitesDark Chocolate Pecan Love Bites


    Be still my beating heart!


    I’m thrilled to be partnering with my fabulous 2012 Gluten-Free All Star Hosts as we celebrate American Heart Month in February with another healthy and delicious recipe round-up: Gluten-Free & Heart Healthy 2013.

    Thank you so much, Beth for hosting me at Tasty Yummies today!


    Before I divulge my heart healthy recipe, I thought I would share some of my favorite foods for keeping your ticker in tip-top shape!


    Heart Healthy Foods


    • Fruit and veggies, the more the merrier~especially citrus and apples which are high in soluble fiber to help decrease LDL cholesterol, and polyphenol packed berries, which may lower blood pressure and raise level of good {HDL} cholesterol.
    • Beans, beans, the musical fruit!  Like certain fruits and veggies, beans are a great source of soluble fiber, and also contain a variety of flavonoids which help prevent heart disease by lowering blood pressure, improving circulation, and preventing abnormal clotting of blood platelets.
    • Seedy stuff!  Flax, chia, and hemp, all provide plant sources of omega-3 fatty acids, which, although not as powerful as seafood omega-3’s, may also help with heart health.  In addition, flaxseed contains phytoestrogens called lignans, which may also help prevent cardiovascular disease.
    • Something seems a little fishy to me…Fatty fish such as salmon, mackeral, sardines, tuna, anchovies and trout all provide 1 gram of more of heart healthy omega-3 fatty acids.  Omega-3’s provide cardiovascular protection by lowering triglycerides, decreasing inflammation, reducing blood clotting, and lowering blood pressure.  To choose fish that are not only heart healthy, but are also environmentally friendly and low in contaminants such as mercury and PCB’s, bes ure and check out the Monterey Bay Aquarium Seafood Watch website.
    • Chocolate~the darker the better! Rich in flavonol, the main type of flavonoid in cocoa and chocolate, research has shown that {a little} dark chocolate {choose chocolate with at least 70 % or more cacao} can be a heart healthy choice.
    • Cheers to a glass of vino!  What’s even better than a square or two of dark chocolate?  A glass of red wine {if you choose to drink alcohol} to go along with it.  Another heart healthy polyphenol, resveratrol, makes red wine {in moderation~up to 2 drinks/day for a man or up to 1 drink/day for a woman} another heart healthy choice by helping prevent damage to blood vessels, reducing LDL cholesterol, and helping to prevent blood clots.  In addition alcohol, in general, {again, in moderation}, has been shown to raise good, HDL cholesterol, thereby helping to reduce the risk of heart disease.  Salud!


    And now on to the recipe…


    After looking through my posts from the last two months, aside from my Gluten-Free All-Star buddies’ spectacular sweets, I realized I haven’t shared a proper dessert with you in over 2 months.


    Heck, I didn’t even make any holiday cookies for you this past December 🙁

    So, clearly you are long overdue for something sweet and decadent.


    Oh, and super heart healthy to boot.


    How’s that sound?!


    My inspiration for these dark chocolate chunk pecan love bites comes from these fabulous peanut butter chocolate chip cookies over at Texanerin.


    If you like peanut butter, you MUST make them.


    My version is equally delicious, yet features a different sort of heart healthy nut~pecans.


    Oh, and there are beans and dark chocolate too


    Plus a little maple syrup, and some ground flaxseed…


    Yes, they are very healthy indeed, but healthy without delicious doesn’t exist in my kitchen, so I promise you they will make your heart pound with joy 🙂

    Chocolate Pecan Love Bites

    Thump thump thump…

    Thank so much for reading~Please head on over to my blog, The Spicy RD, for my Dark Chocolate Chunk Pecan Love Bite recipe!


    Oh, and I’d love to continue sharing more of my heart healthy and delicious recipes with you!  Follow my posts here, and let’s connect on Facebook, Twitter, Google +, and Pinterest.  Cheers to a healthy heart!


  2. Photo Fun Day Friday

    Hey guys, it’s a Photo Fun Day Friday from the road. We are in California until next Wednesday. We flew out here to find our new home and we gave ourselves 8 days to do it. If you can believe it, we fell in love and found a place on Day 1. It was the second place we looked at. It is perfection. I cannot wait to show more photos. So now, we get to enjoy the rest of our trip here. I think we are even going to squeeze in a trip to Disneyland on Monday! We are so excited to have some time to spend with our friends out here and get to know what is soon going to be our new home. Just three short weeks.

    Here’s a few photos from the last week. Some from Buffalo and some from here in Long Beach.

    Photo Fun Day Friday

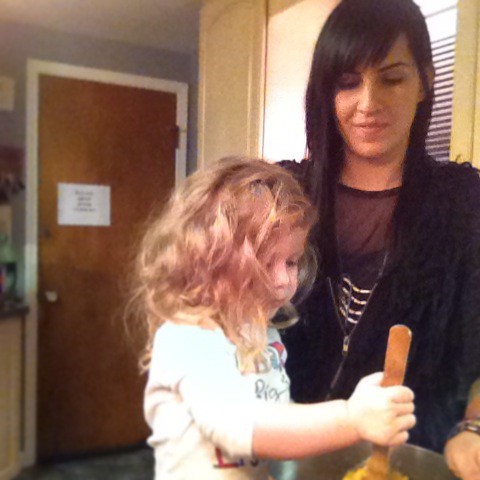
    Teagan helping me bake a batch of my chocolate chip cookie bars.

    Photo Fun Day Friday

    Seri longingly looking out the window on another snowy day. Dreaming of the park.

    Photo Fun Day Friday

    Went to a Sabres game in a suite on Sunday with our friends, Anjuli, Dana, JP and my sister Vicky. They may have lost but it was an awesome time. Also, FYI they have gluten-free beer at the arena. The bar at the Harbour Club  for sure stocks it, not sure about anywhere else.

    Photo Fun Day Friday

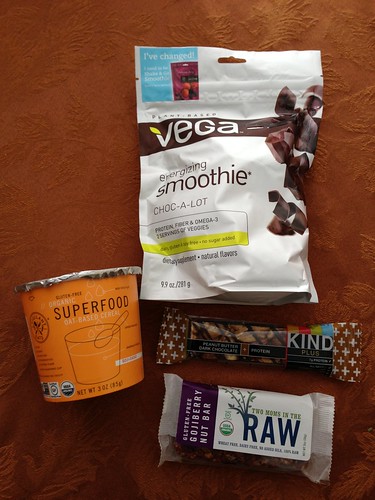
    I stocked u on some healthy goodies for the flights and our time out here.

    Photo Fun Day Friday

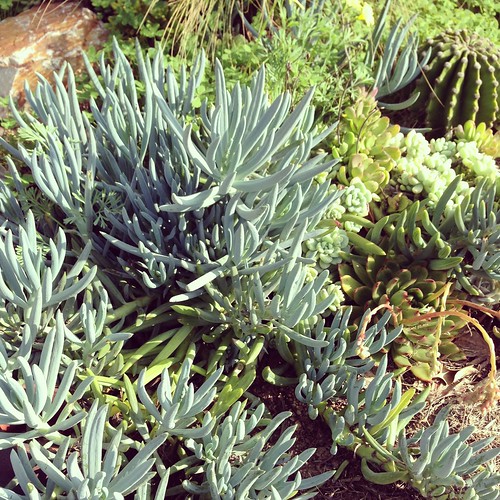
    Succulents and sunshine. Love you California.

    Photo Fun Day Friday

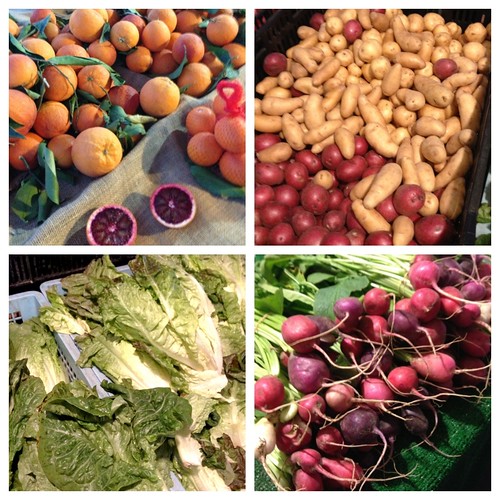
    I went to a farmers market in February and stocked up on veggies. I cannot even believe it. Those blood oranges are to die for.

    Photo Fun Day Friday

    A quick snap shot of the living room and dining room area of our new house. Look at that fireplace, all the natural light, those built-ins on the right, etc. It is seriously to die for. By the way, there are a ton of fruit trees in the large yard. Orange, peach, plum, avocado, fig, banana and there are grape vines. Are you kidding me???

    Photo Fun Day Friday

    Oh and look at the kitchen. Newly updated, lots of storage and countertop space, etc. I am in heaven.

    Photo Fun Day Friday

    The front!! That deck is huge by the way!! Can’t wait to share more photos soon.

  3. Grain-Free Peanut Butter & Jelly Cookies – Gluten-free + Vegan

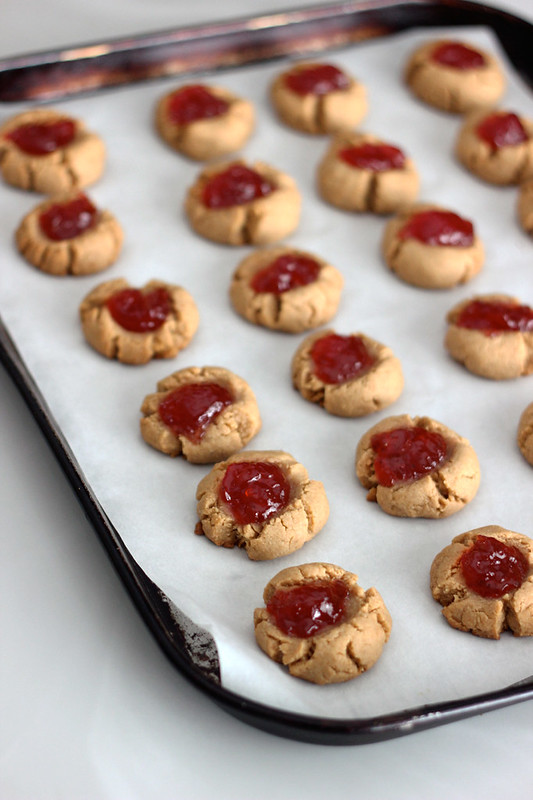
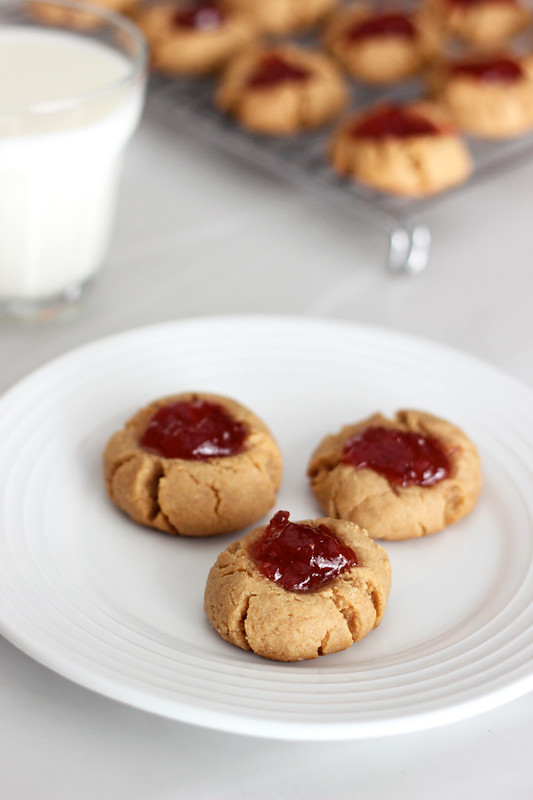
    Grain-Free Peanut Butter & Jelly Cookies - Gluten-free + Vegan

    I am writing up this post and recipe from somewhere in the sky over the middle of America while we fly from New York to California. We’ll be in Long Beach for 8 days checking out homes and hopefully securing something for our March 1st arrival. So exciting!

    I am trying to keep my mind busy during this long flight by writing this up, watching episodes of Gossip Girl and dreaming of these cookies. I only wish I would have grabbed the last few and stuck them in my bag.

    By the time this post goes live, we’ll already be in California for a day and starting to look at houses. I am so excited to find up next place and to start this new chapter. It’s all so exciting!

    Grain-Free Peanut Butter & Jelly Cookies - Gluten-free + Vegan

    OK back to the cookies. I came up with the idea to make these on earlier last week after having a crazy hankering for peanut butter cookies, that I don’t even normally care too much about. I like them just fine, they just aren’t my first pick. Rather than a standard peanut butter cookie, I thought a cookie inspired by the popular sandwich would be fun and super delicious. Plus, one of my least favorite things about a lot of peanut butter cookies is how dry they can be. I thought the jam would be the perfect compliment.

    These cookies came out so great, if I can say so myself. I brought them to my friend Carrie’s house for a little get together along with another sweet treat that I can’t wait to share with you guys. Everyone loved the cookies, hubby even proclaimed “these are the best cookies you’ve ever made”.

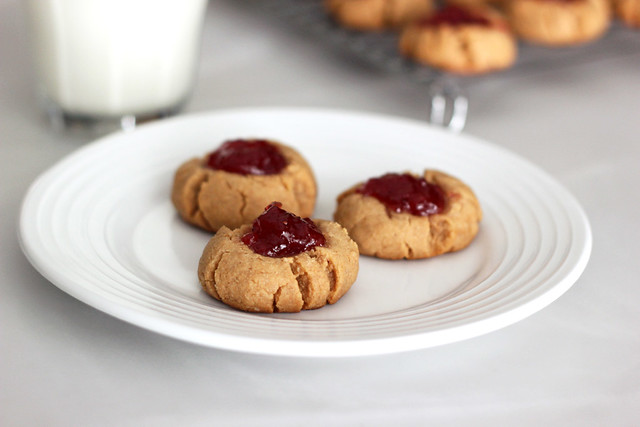
    They are moist and chewy with the perfect amount of slight golden brown crisp to the outside and the jelly center is such a treat. You could use whatever your favorite jelly, jam or preserves is. I used a strawberry jam that I grabbed at the co-op and I was so pleasantly surprised at how well it held up, it didn’t melt or get watery at all. I am sure you could use these same recipe and replace the jam with a hunk of chocolate, too. Something I was certainly dreaming of while these were baking.

    By the way, in case you were wondering, these cookies are AMAZING for breakfast with a nice cold glass of almond milk.

    Grain-Free Peanut Butter & Jelly Cookies - Gluten-free + Vegan

    [print_this]Grain-Free Peanut Butter & Jelly Cookies – Gluten-free + Vegan
    makes approximately 24 cookies

    • 1 1/2 cups blanched almond flour (I use this brand)
    • 1/2 teaspoon sea salt
    • 1/2 teaspoon baking soda
    • 3/4 cup organic creamy peanut butter, almond butter or sun butter (I used this brand)
    • 1/4 cup maple syrup (or honey)
    • 3 tablespoons organic palm shortening (I used this brand)*
    • 1 teaspoon vanilla extract
    • 1 tablespoon unsweetened organic non-dairy milk, such as almond or coconut
    • approx 1/4 cup of your favorite local jelly or jam, I went with strawberry

    *I am sure grass-fed butter would also be great here.

    Preheat the oven to 350ºF.

    In a large bowl, cream peanut butter, shortening, maple syrup, vanilla and non-dairy milk together with mixer. Mix until smooth and creamy.

    In a small bowl mix almond flour, salt and baking soda. Add dry ingredients to the wet. Mix with hand mixer until well combined, it may start out looking crumbly and dry. Just keep mixing it and it will come together into a thick cookie dough. (which by the way is SUPER delicious on it’s own).

    Scoop the  dough 1 tablespoon at a time onto a parchment paper-lined baking sheet. I found it easiest to form uniform sized balls, by rolling the tablespoon worth of dough in my hands. Gently press down and make a large thumbprint in the center of each cookie. Scoop the jam, approximately 1/2 teaspoon’s worth, into the center of each cookie.

    Bake at 350° for 12-15 minutes or until lightly browned and slightly crisp. Allow to cool on the baking pan for 5-10 minutes, they will be quite delicate while they are warm, so make sure you let them cool and set for those few minutes. Then, transfer them off the cookie tray to a cooling rack to finish cooling fully. Store in an air-tight container, in the fridge for a few days. Allow to come to room temperature before serving.

    [/print_this]

  4. Photo Fun Day Friday

    It has been another crazy week. Time is just flying by right now, it is insane. I wish I could slow it all down. We have just been busting our bums getting everything in order for the move and our trip out to California this upcoming week, to find a place to live. On top of all of that, I have been dealing with some nasty back stuff. It has been a huge inconvenience and it could’t have come at a worse time. Which is why I am sure it came at all. It started by me picking up the dog over and over two weekends ago when she injured her paw. First it was a small muscle spasm and ache, then silly me went to yoga, over did and next thing you know I am in full on disc related pain again. Booo! I have been seeing my amazing chiropractor and massage therapist like crazy, I attended a myofascial release/yoga workshop, I am icing, stretching, rolling, etc. It just doesn’t wanna get better as quickly as I wish it would. I am trying to stay positive and not let it get me down, but missing my last few weeks at my beloved yoga studio surrounded by so many amazing people has really made it hard. I go there as an escape and as a way to find myself on my mat. I think that may be the hardest part of being injured is losing that part of my self temporarily.

    At any rate, I am sure I will be back at it soon enough. In the meantime, I have been doing everything I can do make the recovery process go as smoothly as it possibly can.

    I hope you have all been well and have an amazing weekend. We have a lot planned, but I am looking forward to all of it.

    Photo Fun Day Friday

    Our sweet little Seri falls asleep many nights, with her bed in her mouth, kneading. It is heartbreaking,

    Photo Fun Day Friday

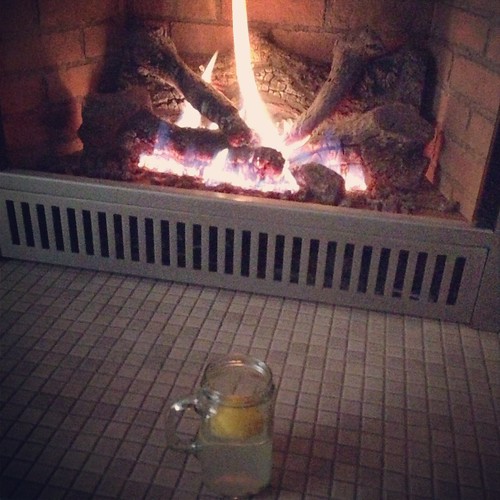
    The perfect way to start the day. A hot fire, hot lemon water and a little yoga. I am still nursing this back injury from over a week ago, but taking it easy with some light yoga every day.

    Photo Fun Day Friday

    Got my makeup done for our Hero / Tasty Yummies photo shoot with Luke Copping on Saturday. Wish I could have someone around to do my makeup daily.

    Photo Fun Day Friday

    My handsome hubby!

    Photo Fun Day Friday

    Me on set getting some shots for Tasty Yummies. So excited to finally have some professional photos of us for both our business and for myself for this site. Can’t wait to share!

    Photo Fun Day Friday

    A quick iPhone snap of us at Victory Studios with Luke Copping.

    Photo Fun Day Friday

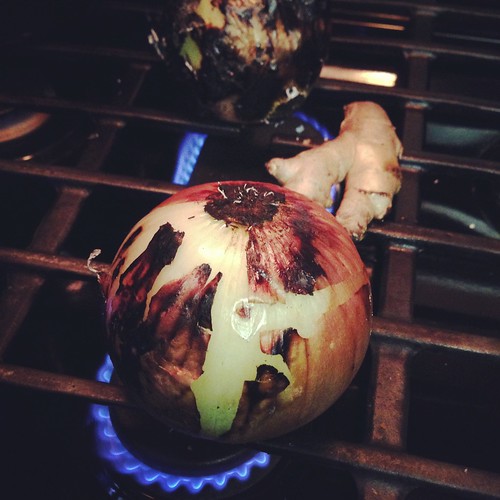
    Charring onions and ginger for some homemade pho.

    Photo Fun Day Friday

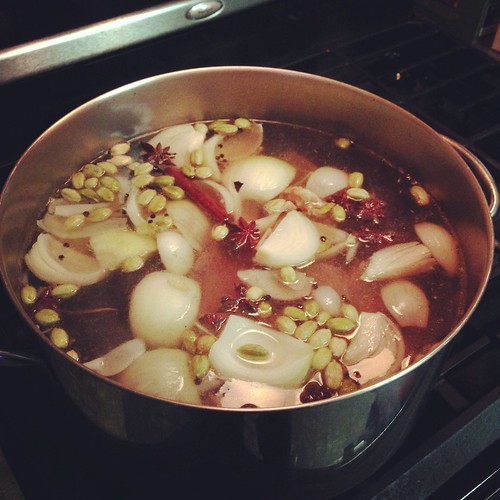
    The pho stock simmering all day long.

    Photo Fun Day Friday

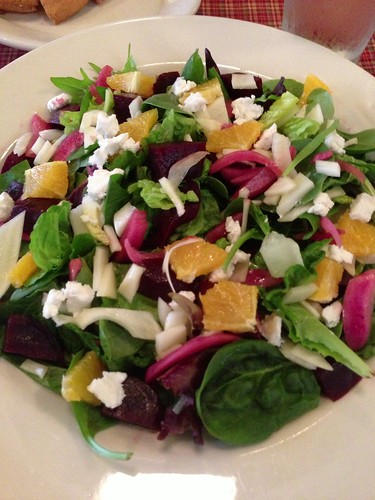
    My beautifully vibrant lunch from Betty’s on Weds. Roasted beets, shaved fennel, goat cheese, orange sections and lots of greens with a ginger orange vinaigrette. It was incredible.

    Photo Fun Day Friday

    It was 65 degrees on here in Buffalo on Wednesday so Seri and I took a nice long, and much needed walk together.

    Took my Seri

  5. A Super Healthy Gluten-Free Super Bowl – A Recipe Round-Up

    A Super Healthy Gluten-Free Super Bowl - A Recipe Round-Up

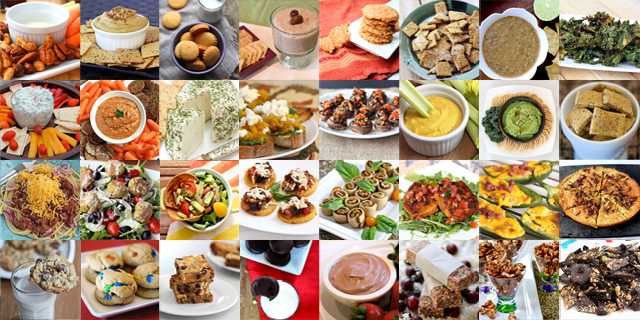
    Are you looking forward to celebrating the big game, but not looking forward to all the junk food that will likely be laid out for hours of grazing? With the help of some of my favorite gluten-free bloggers, here is a list of some of our very favorite snacks, appetizers, finger foods, sweets and the like, that would be perfect for any Super Bowl celebration. Some of the recipes are vegan, some dairy-free, but ALL of the recipes below are gluten-free and mostly healthy (everything in moderation, right? So pick and choose your favorite recipes and make yourself the perfect healthy super bowl menu! I broke it down into quarters to have fun with it, I cannot even imagine actually consuming this much food per quarter, however. Healthy or not, you may have to be rolled out of that party!

    We are celebrating at my parent’s house, as we do every year. Both of my sisters and their kids will be there, as well as our good friends Karen and Vinnie. We will eat, drink, watch the game and criticize the commercials! It’s gonna be great. Although I am rooting for the 49ers, San Francisco doesn’t have a lot of foods it is known for, so I am making some grain-free crab cakes in honor of Baltimore!! I hope the recipes works. Look for it soon, if it does.

    What do you have planned for the big game on Sunday? 

    Thanks so much to all of the lovely bloggers for  allowing me to share their recipes. Please take the time to check out each of their websites!

    A Super Healthy Gluten-Free Super Bowl - A Recipe Round-Up

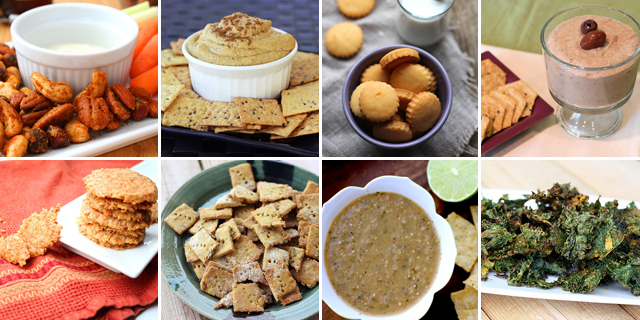
    The First Quarter

    Buffalo Spiced Cocktail Nuts {Gluten-free + Low Carb} from All Day I Dream About Food
    Creamy Indian-Spiced White Bean Dip {Gluten-free + Vegan} from Tasty Yummies
    Homemade Gluten-Free “Cheez-it” Crackers from Beard and Bonnet
    White Bean and Artichoke Dip {Gluten-free + Vegan} from Sarah Bakes Gluten Free Treats
    Chipotle Cheese Crisps {Gluten-free + Grain-free} from All Day I Dream About Food
    Spicy Chickpea Crackers with Chives {Gluten-free + Vegan} from Tasty Yummies
    Roasted Tomatillo Salsa {Gluten-free + Vegan} from Beard and Bonnet
    Curry Kale Chips {Gluten-free + Vegan} from Tasty Yummies


    A Super Healthy Gluten-Free Super Bowl - A Recipe Round-Up

    The Second Quarter

    Creamy Triple Pepper and Kale Dip {Gluten-free} from E.A. Steward, RD
    Eggplant and Roasted Red Pepper Dip {Gluten-free + Vegan} from Tasty Yummies
    Raw Cultured Cashew “Cheese” {Gluten-free + Vegan} from Lexie’s Kitchen
    Pumpkin Pesto Bruschetta {Gluten-free} from E.A. Steward, RD
    Vegan Grain-free Stuffed Mushrooms {Gluten-free + Vegan} from Tasty Yummies
    Raw Nacho Cheese Sauce {Gluten-free + Vegan} from Lexie’s Kitchen
    Roasted Garlic & Kale Hummus {Gluten-free + Vegan} from Tasty Yummies
    Gluten-Free Crackers from Sarah Bakes Gluten Free Treats


    A Super Healthy Gluten-Free Super Bowl - A Recipe Round-Up

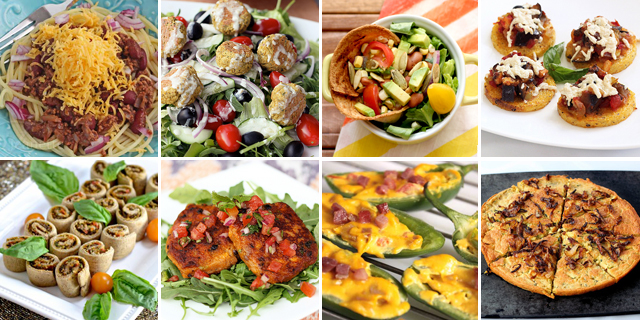
    The Third Quarter

    A Healthier Crock Pot Cincinnati Chicken Chili Recipe {Gluten-free + Dairy-free option} from Jeanette’s Healthy Living
    Baked Falafel Bites with Creamy Tahini Dressing{Gluten-free + Vegan} from Tasty Yummies
    Southwestern Salsa Salad {Vegan & Gluten-Free} from Beard and Bonnet
    Polenta Rounds with Eggplant Caponata {Gluten-free + Vegan} from Tasty Yummies
    Mushroom Pesto Pinwheels {Gluten Free + Dairy Free} from Cara’s Cravings
    Sweet Potato & Black Bean Patties {Gluten-free + Vegan} from Tasty Yummies
    Dairy-Free Jalapeno Poppers {Gluten-free + Dairy-free w/Vegan option} from Lexie’s Kitchen
    Zucchini Socca with Caramelized Onions {Gluten-free + Vegan} from Tasty Yummies


    A Super Healthy Gluten-Free Super Bowl - A Recipe Round-Up

    The Fourth Quarter

    Gluten-Free Chocolate Cranberry Walnut Cookies {Gluten-free + Dairy-free} from Jeanette’s Healthy Living
    Gluten Free Peanut Butter M&M Cookies from Sarah Bakes Gluten Free Treats
    Grain-Free Chocolate Chip Cookie Bars {Gluten-Free + Dairy-Free} from Tasty Yummies
    Chocolate Covered Mint Patties {Gluten-free + Vegan} from Cara’s Cravings
    Nutella Yogurt Fruit Dip {Gluten-free} from Sarah Bakes Gluten Free Treats
    Chocolate Chip Cookie Dough Raw Bars {Gluten-Free & Vegan} from Beard and Bonnet
    Rosemary Caramel Almond Popcorn {Gluten-free + Vegan} from Cara’s Cravings
    Dark Chocolate Bark with Pistachios Dried Bing Cherries and Grey Sea Salt {Gluten-free + Vegan} from Tasty Yummies

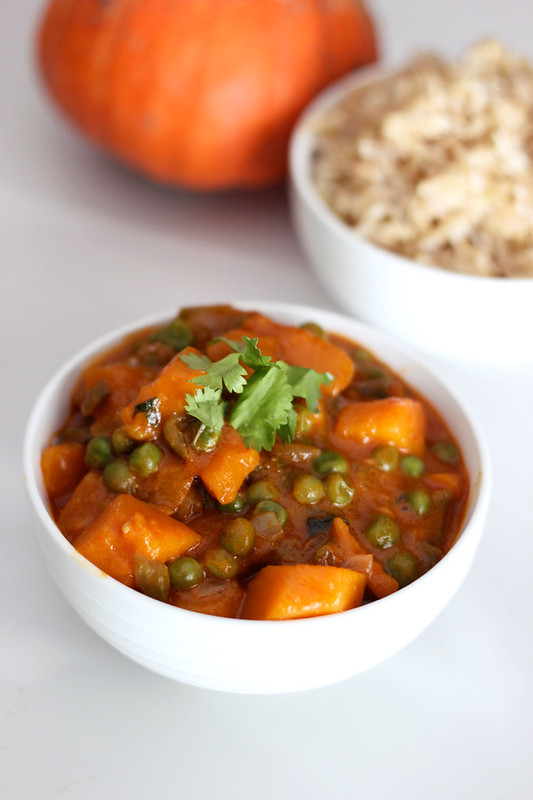
  6. Red Kuri Red Curry – Gluten-free + Dairy-free w/ Vegan Option

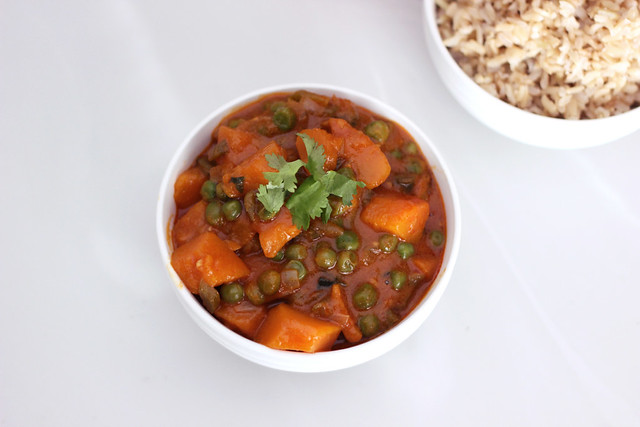
    Red Kuri Red Curry - Gluten-Free + Vegan

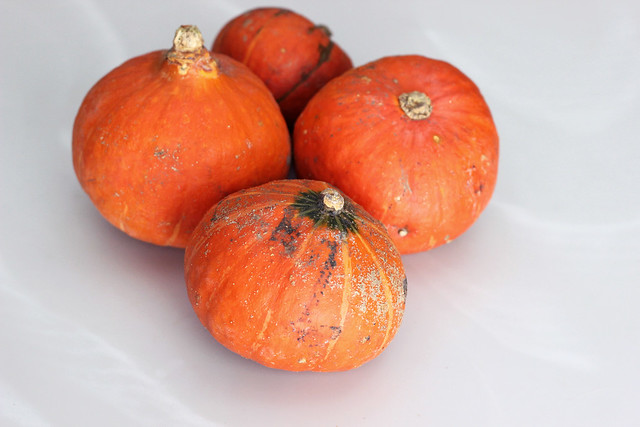
    I know, I know. I went there with the name. But I just couldn’t help it. I had a few red kuri squash left from our CSA in the fall and I wanted to eat them up before they weren’t any good. I was trying to think of what to do with them last week and then out loud I said “red kuri, red curry”. I giggled a bit, then thought about how incredibly delicious it really would be. Squash in any type of curry is incredible, it holds up well and it makes it so substantial and satisfying.

    Meals like this are my favorite. I love one-pot meals that are quick and simple but loaded with amazing flavor. I have also been having fun making vegetarian meals for my parents. My dad is the cook of the house most of the time and he is an amazing, amazing cook! He is creative in the kitchen and has been a huge inspiration to me and my love of cooking (and eating). He tends towards a meal centered around meat, then he plans a starch and lastly a veggie, usually a salad. Not that there is anything wrong with this, this was always how I ate and cooked, but these days I tend to center a meal around an in-season vegetable and it goes from there. Sometimes it features meat, but not always. I find some of my favorite meals to be largely centered around or totally made up of vegetables. I just love them and I never want them to feel like an after thought.

    Red Kuri Red Curry - Gluten-Free + Vegan

    My dad LOVED this, everyone did. OK well Mark maybe liked the leftover fries and wings he had warmed up, a little better, but he ate this and did like it (I can’t compete with fried stuff when it comes to him). This red curry is filling and comforting, creamy and thick but still insanely light. Plus the colors are absolutely beautiful.

    Red Kuri Red Curry - Gluten-Free + Vegan

    [print_this]Red Kuri Red Curry – Gluten-free + Dairy-free (w/ Vegan Option)
    Serves 6-8

    • 1 tablespoon olive oil
    • 1 medium onion, chopped
    • 2 cloves garlic, minced
    • 1 green bell pepper, chopped
    • 1 tablespoon fresh ginger, minced
    • 3 tablespoons red curry paste* (you can use more or less depending on how spicy you like, I used a lot more)
    • 2 small red kuri squash, peeled, seeded & cubed – about 6 cups (butternut squash would also work)
    • 1 cup organic vegetable broth
    • 1 can organic coconut milk, I like Native Forest
    • 1 tablespoon fish sauce (or gluten-free tamari/soy to make vegan)
    • 3 tablespoons coconut sugar (or brown sugar)
    • 2 cups frozen organic peas
    • 1/2 cup fresh cilantro or even better, Thai basil leaves

    Heat olive oil in a large pan, when hot add onion, green pepper, curry paste, garlic and ginger. Cook for a minute or two. Add squash and saute for about 5 minutes then add vegetable broth. Cook for about 15 minutes, stirring occasionally until the squash is tender. Add coconut milk, fish sauce, sugar and peas. Simmer for about 5 minutes until the peas are no longer frozen.

    Serve over brown or white basmati rice garnish with cilantro or thai basil.

    *If you are vegan, you will want to make sure the curry paste you select doesn’t contain fish sauce. [/print_this]

  7. Photo Fun Day Friday

    Well, I am sure you’ve noticed, but it’s been a while since I’ve shared photos as part of my Photo Fun Day Friday series. It wasn’t a conscious choice, but life has just been a bit crazy and more-so just generally out of sorts. After the holidays ended, we were immediately in full-on moving mode and we have just been going non-stop ever since. Here is a just a quick abbreviated visual synopsis of the last month or so. Things are going well over here, we fly out in less than 2 weeks to California to find a place to live in Long Beach, then we fly back to Buffalo pack our car up, grab the dog and hit the road to drive across the good ‘ol US of A! We cannot wait.

    Photo Fun Day Friday

    Our gift to my parent’s this year. A family photo session! We had the shoot this past weekend and it was so much fun! Can’t wait to share some of the photos. Such a fun thing to do before we leave town and I will be so happy to have some really nice photos of my family throughout our new home.

    Photo Fun Day Friday

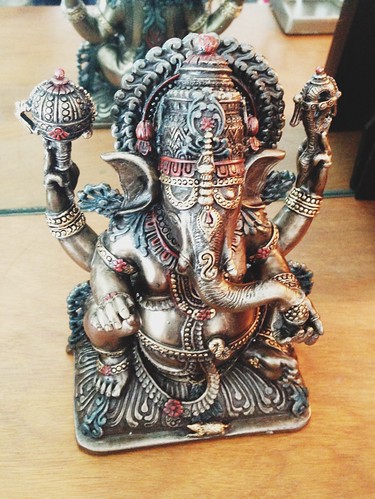
    One of my favorite Christmas gifts this year. A ganesha statue from my Mom and Dad. Can’t wait to find a place for it in our new home.

    Photo Fun Day Friday

    I love my cozy new slippers from my sister.

    Photo Fun Day Friday

    Seri enjoying one of the first big snows of the winter.

    Photo Fun Day Friday

    Me and my baby. Holding her tighter than ever after she was released from the emergency vet after ingesting xylitol.

    Photo Fun Day Friday

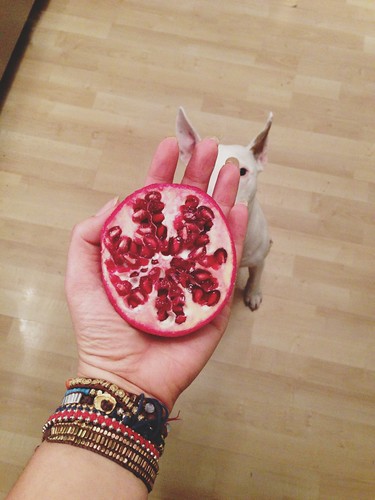
    Mmmm. Pomegranate. (and a sneaky little Seri)

    Photo Fun Day Friday

    At the start of the moving and packing. Surrounded by boxes! (Oh and of course, a nice tall glass of wine)

    Photo Fun Day Friday

    The moving truck all packed up. Sealed it with the kiss of a handstand! Our stuff is all in storage in California waiting for us.

    Photo Fun Day Friday

    Gonna miss my old kitchen SO much. We designed it ourselves to be exactly what we needed.

    Photo Fun Day Friday

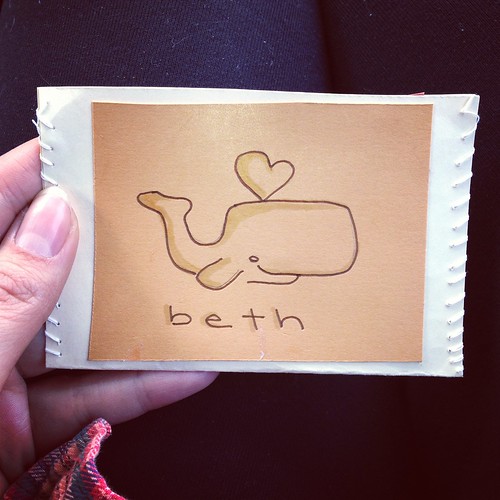
    A sweet card from my lovely friend Alyssa.

    Photo Fun Day Friday

    My handsome boy Jpeg, posing for some pics.

    Photo Fun Day Friday

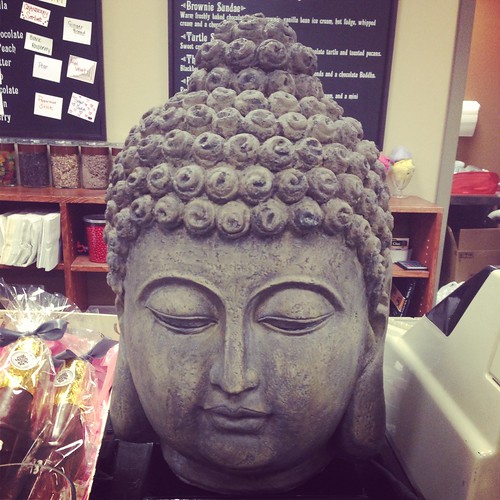
    Buddha and incredibly delicious chocolate at Oh Pour L’amour Du Chocolat. Two of my favs.

    Photo Fun Day Friday

    Our poor Seri has had a rough month. She broke a nail at the park last week and it was broken so high up they had to sedate her, remove it and wrap it up. Poor thing. She is all better now, thankfully.

    Photo Fun Day FridayMy adorable parents at the family photo shoot over the weekend.

    Photo Fun Day Friday

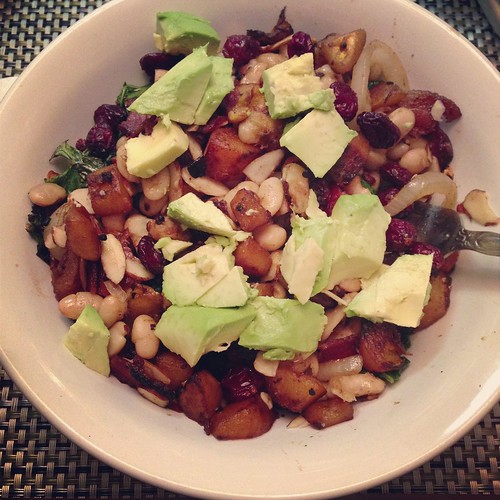
    My kind of dinner. Sauteed kale, red kuri squash, white beans, onions, garlic, sliced almonds, dried cranberries and avocado. It was INCREDIBLE.

    Photo Fun Day Friday

    It has been WAY too cold to go to the park lately, poor Seri is sad.

    Photo Fun Day FridayCarmine, my mom’s cat (aka my little sister’s cat), was posing so sweetly for me yesterday when I was taking photos with my SLR camera. How adorable is that face?


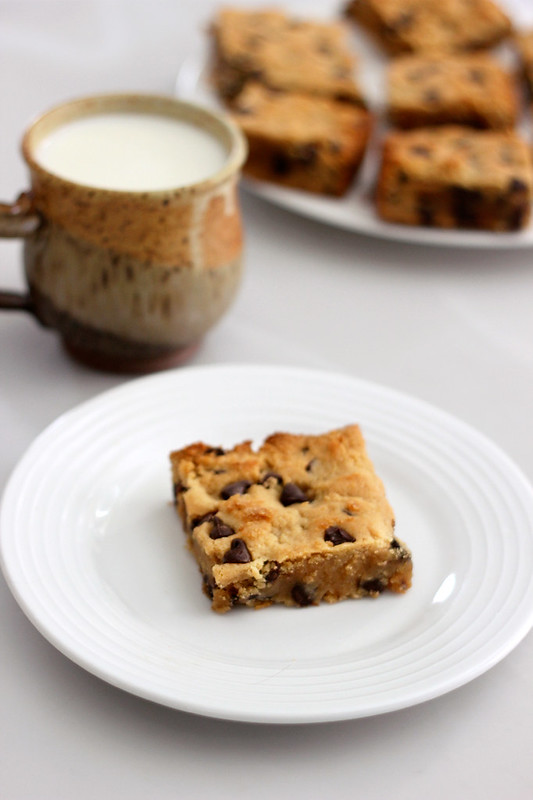
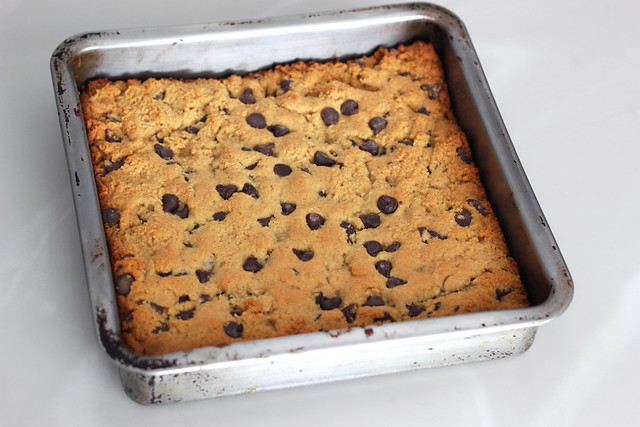
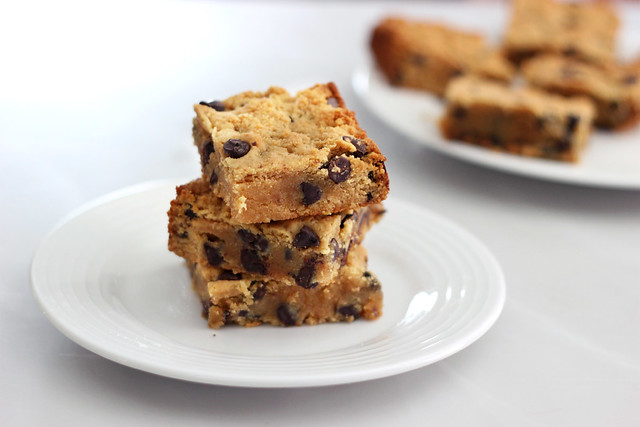
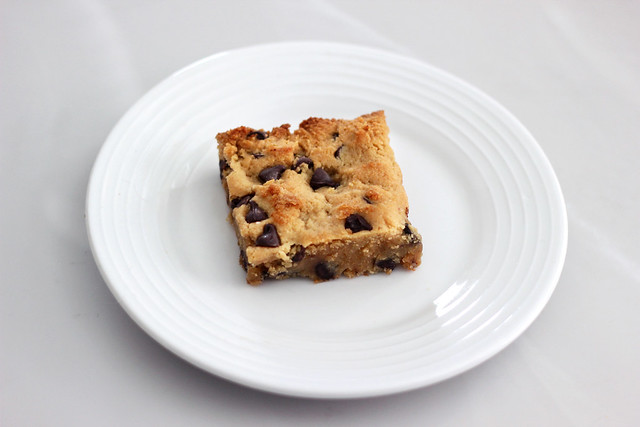
  8. Grain-Free Chocolate Chip Cookie Bars – Gluten-Free + Dairy-Free

    Grain-Free Chocolate Chip Cookie Bars - Gluten-Free + Dairy-Free

    I finally made some time to play in the kitchen with a new baked good recipe and boy am I glad I did. I have been craving chocolate chip cookies like crazy lately but rather than another cookie recipe, which there are a ton of all over the internet, I wanted to make cookie bars. These tasty beauties are soft and chewy and the chocolate just melts in your mouth. They satisfy that craving for chocolate chip cookies, and then some.

    Grain-Free Chocolate Chip Cookie Bars - Gluten-Free + Dairy-Free

    I made these with coconut oil, since that is what I had on hand, but I cannot wait to try it with palm shortening, since whenever I have made cookies with it they are always extra incredible. But, these are definitely not lacking in any way! These bars would be great with other goodies added like dried cherries, chopped walnuts, coconut, etc.

    Grain-Free Chocolate Chip Cookie Bars - Gluten-Free + Dairy-Free

    I cannot wait to share these with my parent’s tonight after dinner. I made these last night and I couldn’t try them until today after I took photos and the anticipation was killing me. As much as I don’t necessarily want to share these, I am quite happy to not only have other recipe testers around, but also a few more mouths to eat my creations, to save me from sitting down and eating ALL of them! Also two more people to judge me if I am a pig and eat ALL of them in one day. Ooh it’s so tempting.

    Grain-Free Chocolate Chip Cookie Bars - Gluten-Free + Dairy-Free

    [print_this]Grain-Free Chocolate Chip Cookie Bars – Gluten-Free + Dairy-Free

    • 2 1/2 cups blanched almond flour (I use Honeyville)
    • 1 teaspoon baking soda
    • 1/2 teaspoon sea salt
    • 1/3 cup honey
    • 2 extra-large local farm fresh brown eggs
    • 1/4 cup coconut oil, melted (grass-fed butter, palm shortening or ghee will also work)
    • 2 teaspoons vanilla extract
    • 1 tablespoon unsweetened non-dairy milk (I used almond)
    • 3/4 cup dairy-free gluten-free semi-sweet chocolate chips (I like Chocolate Dream or Enjoy Life)
    • 1/4 cup walnuts (optional)

    Preheat the oven to 350º F and lightly grease the bottom and sides of an 8″ square baking pan with coconut oil.

    In a large mixing bowl, whisk together all of the dry ingredients. In a smaller bowl, add all of the wet ingredients. Mix well with a hand mixer or a whisk. Add the wet ingredients to the dry and mix very well with a hand mixer. Then fold in the chocolate chips and nuts (if you are including) with a spatula.

    Pour all of the batter into the greased pan and spread evenly with a spatula or your hands, gently press in.

    Bake for 20 – 25 minutes until the top is nice and golden brown and the center is no longer doughy. Allow to cool 10-15 minutes before cutting into bars or they could fall apart.

    *These keep best in an air-tight container in the fridge. You could put these in the microwave for a few seconds when serving to take the chill off or to get them slightly warm. [/print_this]

  9. Maple Cinnamon Crunch Quinoa Granola – Gluten-free, Vegan + Refined Sugar-Free

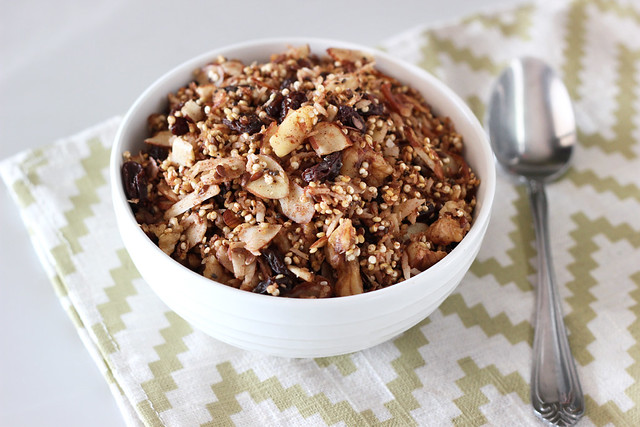
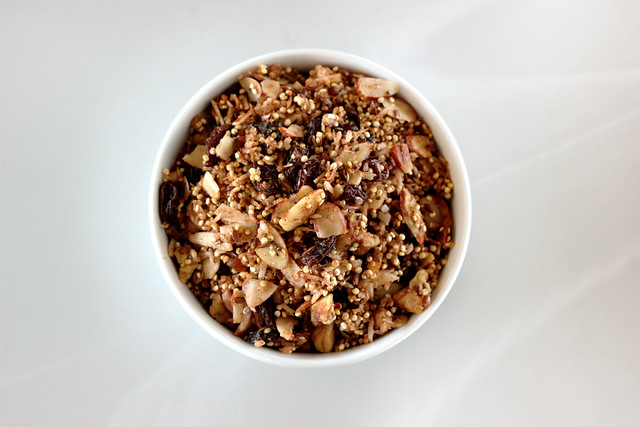
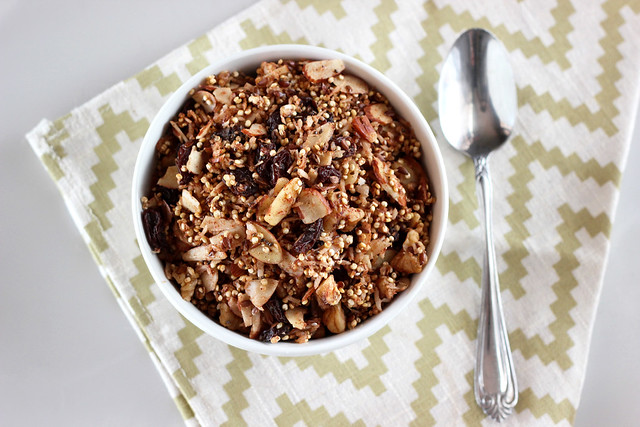
    Maple Cinnamon Crunch Quinoa Granola - Gluten-free + Vegan

    It has been quite a whirlwind for us since the start of the new year. On Friday, January 4th the moving truck to got dropped off at our house and we had that weekend to pack up everything we wanted to keep, to go out to California and go into storage. The truck was on it’s way on the following Monday, January 7 and then we had the rest of the week to finish cleaning up the house, sell off our remaining furniture that we weren’t taking with us and get ourselves temporarily moved over to my parents house where we are staying until the official move to California.

    Yesterday our house closed!! So, after the moving truck pulled away last week and now handing off the keys of our house to the new owners, it is definitely all very real. We have a lot to do before we are officially on our way to California for good, but it is all feeling a little less overwhelming. At least right now. Staying at my parent’s house is going to take some getting used to, since I haven’t lived at home in nearly 10 years, but it is also really nice to spend some quality time with my parent’s before we move across the country.

    Last week was spent getting settled here and wrapping up everything at our house, but over the weekend I finally got some time to sit down and write up some recipes that have been swirling around in my head the last few weeks. I also made time to meal plan for the next week and write a grocery list. Yesterday I made dinner for everyone, hopefully the first of many while we are here. We popped a bottle of prosecco to celebrate the house sale being finalized and I made a huge pot of my chili, with some of the grass-fed ground beef from our farmer and some ground venison from a local hunter. Then I spent some time in the evening making this granola.

    Maple Cinnamon Crunch Quinoa Granola - Gluten-free + Vegan

    I am quite fond of minimal food photos that really allow the food to be the center focus rather than lots of props and other stuff, and I am excited to have some of my photography stuff here, but I really don’t have any of my props besides my nice white back drop. So, look for even more minimal photos than ever here at Tasty Yummies over the coming weeks. Hopefully the food will be as enticing as ever and I can create some fun stuff in the kitchen here at my parent’s place to share with you guys. With or without props and linens. I have some fun stuff in the works for you guys. By the way, the napkin seen in these photos is something I made as a gift for my mom. Designed and hand silkscreened fabric made by me and then I sewed it into a set of napkins. I still owe her a few to make the set complete, but we are going to work on them together, now that I am staying here! Can’t wait.

    I think what I like about this granola is that it is grain-free, something I am trying to be much more aware of, as I definitely feel better and less bloated when I am not consuming a lot of grains. Besides the fact, quinoa, those cute little seeds, often mistaken for a grain, is a nutritional powerhouse of a super-food, take a read here for the long list of benefits quinoa has to offer. I went a bit heavier on the maple syrup than I normally would have, but I really wanted to capture some of the wonderful maple flavor. I wanted to make sure it wasn’t lost in the flavor of the quinoa and cinnamon. Feel free to use less and/or to also consider adding in a tablespoon or two of some blackstrap molasses, which is a great source of iron. And as always with so many of my recipes, you can easily make this recipe your own. Taking out, adding in or swapping your favorite nuts, seeds, fruit and spices. This is a versatile recipe that is quite easily adaptable.

    Maple Cinnamon Crunch Quinoa Granola - Gluten-free + Vegan

    [print_this]Maple Cinnamon Crunch Quinoa Granola
    Makes approximately 4-5 cups

    • 1 cup quinoa, uncooked (rinsed well and drained)
    • 1 cup sliced almonds
    • 1/2 cup walnuts, chopped
    • 1 cup unsweetened shredded coconut or coconut chips
    • 1/3 cup flax seeds
    • 1 tablespoon chia seeds
    • 3/4 cup raisins or dried cranberries
    • 1 tablespoon ground cinnamon
    • 1/2 teaspoon ground nutmeg
    • 1/2 teaspoon sea salt
    • 1/2 cup maple syrup
    • 1/3 cup coconut oil, melted
    • 1 teaspoon vanilla extract

    Preheat the oven to 375°F. In a large bowl or directly in a roasting pan, combine all of the dry ingredients, including the spices. If solid, heat the coconut oil in a small microwave-safe bowl on high for 20-30 seconds until melted. Pour the coconut oil and maple syrup evenly over all of the granola. Toss it all very well to make sure the dry ingredients are all nicely coated.

    Make sure the granola is evenly spread in a thin layer in your roasting pan (you can also use a parchment paper lined baking sheet as well). I like using a roasting pan, since it makes stirring easier, so you don’t lose any over the sides. Bake for 15-20 minutes or until golden brown, and slightly crisp. Stirring a few times while it is baking.

    Cool completely in the roasting pan or on the baking sheet. As it cools the granola will crisp up even more. Cool fully before adding placing in air tight container for storage.

    Enjoy this granola as cereal in your favorite milk (dairy or non-dairy), sprinkled with fresh fruit over your favorite yogurt or ice cream, on top of a smoothie, etc.

    [/print_this]

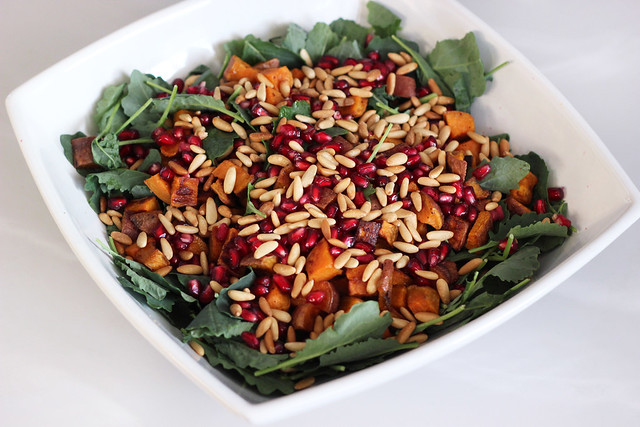
  10. Baby Kale and Roasted Sweet Potato Salad with Pomegranate and Toasted Pine Nuts (Gluten-free + Vegan)

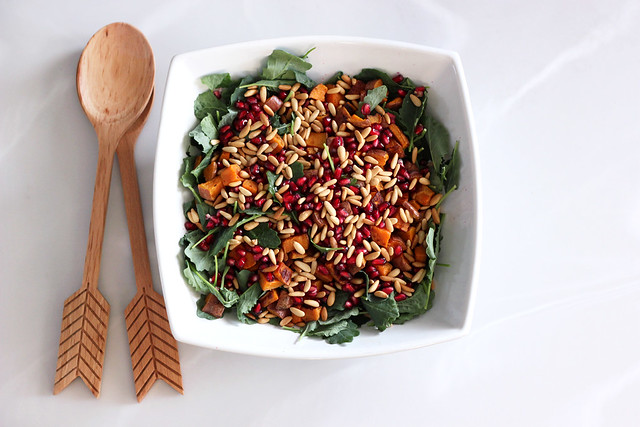
    Baby Kale and Roasted Sweet Potato Salad with Pomegranate and Toasted Pine Nuts

    Happy New Year Everyone!! Is everyone as excited to welcome 2013 as I am? We have a lot on schedule for this year and at the stroke of midnight on New Year’s Eve it all felt very real! We are still in the middle of packing up our house for the big move to California. The moving truck comes on Friday and our house closes in just over a week and we have been working like crazy to wrap up all of the end of year loose ends with the business and to go through the house room by room to decide what is making the move, what can get donated and what can be sold. It has been an arduous few weeks with the holidays squished into the middle of it all, but it was a welcomed distraction during such a stressful time.

    A few days after Christmas we had an emergency scare with our dog Seri, when she got into some gum with Xylitol in it. As you can imagine, this definitely aded to the stress. You can read a little about it here. I do plan to do a post here on Tasty Yummies about our experience, as well. I would like to share my story and get the word out about how dangerous and highly xylitol is for dogs, since the I feel that not enough dog owners know. I am so grateful for the other food bloggers that have mentioned it, otherwise I wouldn’t have known to act quickly. I consciously do not keep it in the house, but I didn’t know it was hidden in so many common things. I was unaware we even had it in the house. She is thankfully (and very luckily) OK now, but it was a very rough few days, my body actually broke out into a full on cold in the middle of it. I could feel I had been fighting it for a few days and I guess the stress of worrying about my baby just brought it on full force.

    With our pooch being back home with us now and yesterday officially ending the holidays and making this move our only focus, the stress of it definitely hit me like a ton of bricks last night. I am not at all a person stricken with anxiety in the least, I consider myself to be mostly calm, but wow, is this move testing me on that. You always hear people say that a big move is one of the most stressful things you can ever go through. They aren’t kidding.

    I have been trying to find as much time to cook as I can in this time, since like my yoga it is one of the most calming and soothing things to me. I made a huge pot of chicken pho when my cold was in it’s full force and it was so perfect! I also made a big feast on New Year’s Eve for hubby and I. Yesterday we had dinner with my family at my parents house and since I am now in full-on clean out the fridge and pantry mode, I decided to come up with a salad inspired by what is in season and in my fridge!

    Everyone absolutely LOVED this salad, which made me so happy! It is full of beautiful vibrant colors and bright fresh flavors. If you can’t find baby kale, you could also use arugula, baby spinach, field greens, frisée, endive, etc.

    I am starting to pack up my kitchen stuff today, so this may be the last recipe post you see for a while. We will be temporarily staying with my parents for a few weeks while we fly out to California to find a house and get everything in order. Hopefully I will have some time to cook for and with my parents in that time.

    What are you most looking forward to in 2013?

    Baby Kale and Roasted Sweet Potato Salad with Pomegranate and Toasted Pine Nuts

    [print_this]Baby Kale and Roasted Sweet Potato Salad with Pomegranate and Toasted Pine Nuts (Gluten-free + Vegan)
    serves 4-6

    Salad:

    • 2-3 small/medium organic sweet potatoes, cleaned well and cut into 1-inch cubes, I leave the skin on
    • 1 tablespoon olive oil
    • 1/2 teaspoon dried thyme
    • 1/4 teaspoon onion powder
    • sea salt and pepper, to taste
    • 5 cups organic baby kale (or arugula, baby spinach, field greens, frisée, endive, etc.)
    • 2 green onions, thinly sliced
    • 1/4 cup toasted pine nuts
    • 1 small organic pomegranate, seeded – you are looking for about 1/2 to 3/4 cup of seeds

    Dressing:

    • 1/2 cup olive oil
    • 1/4 cup fresh squeezed orange juice, plus some fresh orange zest
    • 2 tablespoons champagne vinegar (or white wine vinegar)
    • 2 small cloves garlic, minced
    • 1/8 teaspoon red pepper flakes (optional)
    • sea salt and pepper, to taste

    (I didn’t need all of this dressing, so use as much as you’d like and then store the rest in a sealed container in the fridge for other salads)


    Preheat the oven to 400ºF. Toss the sweet potatoes with olive oil, thyme, onion powder, salt and pepper. Spread into a single layer on a baking pan and roast for 20-30 minutes until they start to brown and are tender. Set aside to cool.

    While the potatoes are roasting make the dressing. Whisk all of the ingredients together. Taste and adjust seasonings, as needed.

    After the sweet potatoes have cooled a bit, layer those on top of the baby kale in a large serving bowl, add the green onions, toasted pine nuts, and top with toasted pine nuts and pomegranate seeds. Toss with the dressing just before serving (you may not need all of it, so add slowly). Grate a little fresh orange zest on top as you are serving.

    [/print_this]
  11. 2012 Gluten-Free All-Star Recipes from Tasty Yummies

    2012 Gluten-Free All-Star Recipes from Tasty Yummies

    I hope everyone has been enjoying this series of delicious recipes from all of the amazing participating bloggers in this 2012 Gluten-Free All-Star Recipes Series. Today it’s my turn in the series, so here are the 2012 Gluten-Free All-Star Recipes from right here on Tasty Yummies.

    2012 Gluten-Free All-Star Recipes

    I know this may be repetitive for many of you that already follow me here, but since I wrote up an introduction to myself for my guest posts on the other blogs, I thought I would share it on here with you guys, too! In case you are unfamiliar with my back story. I started sharing my gluten-free recipes on Tasty Yummies nearly 3 years ago when I decided to clean up my diet, cut out all processed foods and be much more mindful and aware of everything I was eating and where it was coming from. I had already been following a strict gluten-free diet for over 5 years, but I found myself falling into the trap of eating the worst, overly processed and garbage-filled foods, just because they had the label “gluten-free” on them. I was terrified to experiment with baking and creating my own recipes, beyond what I was already making that was naturally gluten-free. In turn, though I felt better and healthier in some ways as a result of following a strict gluten-free diet, I was still feeling sluggish, getting headaches and I had put on weight from all of the junk I was eating. Gluten-free or not, what I was consuming just wasn’t good for me.

    After cleaning up my diet, developing a confidence in the kitchen, and being very mindful to focus on seasonal and clean foods, I quickly and very easily lost 30 pounds and haven’t looked back since. This has been the easiest lifestyle change I have ever made and I have never ever felt better.

    Overall, I eat a lot of naturally vegan foods and I maintain a mostly vegetarian diet. At home we do eat some meat (all grass-fed from a wonderful local farmer named Pierre), at most, once a week, sometimes as little as once a month, so I like to consider myself a “conscientious omnivore”. In addition to eating as healthy as I possibly can for me, I also have a daily yoga practice, which I have found to be the perfect compliment to my lifestyle, mentally, emotionally and physically. For the first time ever, I have found a way of living that fits me and my body, it never feels like work or a struggle and I am constantly grateful for all of it.


    My Favorite From 2012

    2012 Gluten-Free All-Star Recipes from Tasty Yummies

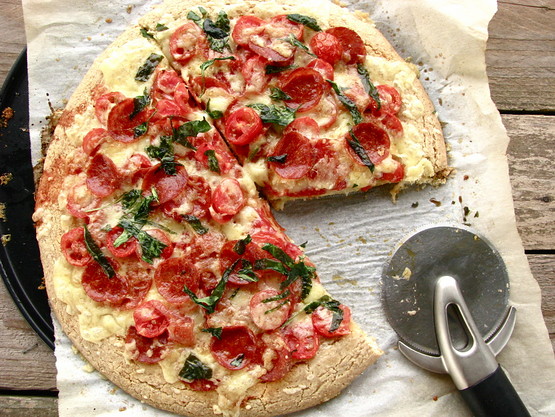
    Before sharing Tasty Yummies’ 2012 Gluten-Free All-Star Recipes, I wanted to celebrate an all-star blogger whom I love and one of her recipes that I absolutely adore. This grain-free pizza crust created by the insanely creative Brittany Angell, is to die for delicious. I knew it would be good, since every recipe I have made from Brittany always is, but I honestly didn’t expect it to be that good. This crust is thick, fluffy and grainy with the perfect amount of crisp to the outside. It holds up really well to toppings and I even replaced the eggs and adapted it to be totally vegan for a cobbler topping, here is that recipe. This recipe is definitely my go-to pizza dough now!

    Be sure to check out Brittany Angell for even more amazing recipes.


    Tasty Yummies 2012 Gluten-Free All-Star Recipes

    I hope you enjoy these most popular recipes from Tasty Yummies this past year. In looking at stats and page visits alone, I have to say, my readers love sweets and chocolate. For someone that prefers savory over sweet every time, this always makes me giggle. Sweet treats definitely get a lot more attention in the blogging world, that’s for sure. These three recipes are not only readers’ favorites, I have to say, all three are favorites in my kitchen as well, and have been made countless times in different variations.


    2012 Gluten-Free All-Star Recipes from Tasty Yummies

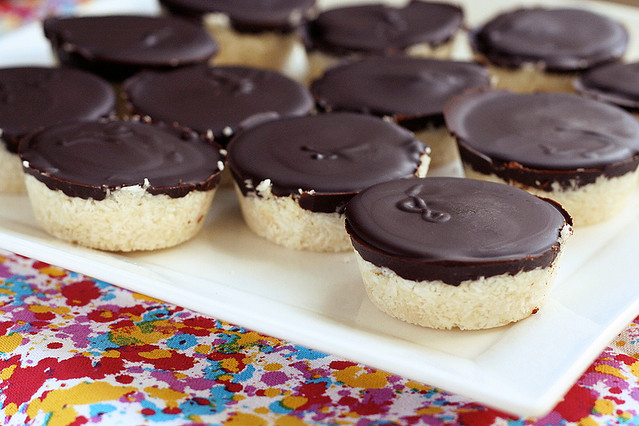
    1) Dark Chocolate Coconut Treats {Vegan, Gluten-free + Refined Sugar-Free}

    These simple to make sweet chocolate treats have become a favorite in our house. We both LOVE the combination of chocolate and coconut and a refined sugar-free version of a classic candy bar, I am sure you know which one 😉 Since I have added a mini muffin pan to my kitchen, I usually make them in there now, for a smaller more bite-sized treat, plus they last longer. Here is the recipe.

    Rose said: “I’ve been eyeing these up for a while. Made them for a group the other night and words out around town already with people asking about them. Yum they were so good.”


    2012 Gluten-Free All-Star Recipes from Tasty Yummies

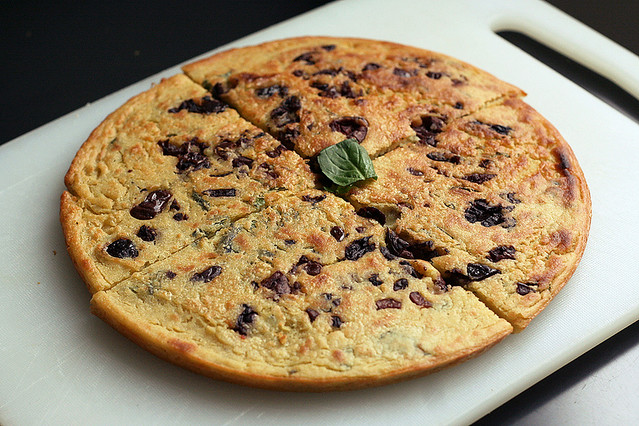
    2) Kalamata Olive and Herb Socca with Roasted Vegetables {Gluten-free + Vegan}

    I honestly cannot believe I hadn’t discovered socca until this year. Boy have I been missing out. Soccas are super simple to make and you can get really creative with add-ins and toppings. You could even make a sweet dessert socca by adding a little sweetness and some cocoa powder. This particular recipe was so simple, I made it for lunch one afternoon in the middle of a work day. Here is the recipe.

    Johanna said: “Thank you for the recipe! That was delicious. Kids ate it too.”


    2012 Gluten-Free All-Star Recipes from Tasty Yummies

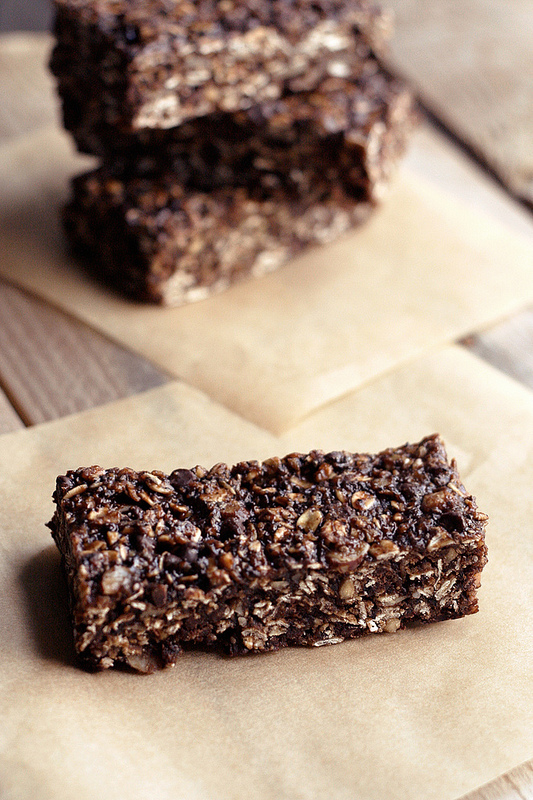
    3) Chocolate Peanut Butter Road Trip Energy Bars {Gluten-free, Vegan + Refined Sugar-Free}

    These bars in some variation or another have become a road-trip staple around here. They are so quick to whip up and they are so sinfully delicious, it is hard to believe they are healthy. Here is the recipe.

    **Bonus: I change the recipe a bit every time I make them, based on what I have on hand, here is a fun seasonal version I made recently for another road trip, Chewy Pumpkin Spice Granola Bars.

    Portia said: “These are in the oven right now and I’m standing here watching the timer do it’s countdown. My younger son and I were eating the “dough” and it was DELICIOUS! The smell is making my mouth water. It’s going to be a “treat before dinner” kind of night:-) One minute to go!”


    Follow Tasty Yummies

    If you would like to keep up with Tasty Yummies, please check out the blog here for more gluten-free recipes that focus on clean, fresh and seasonal eating. Please also feel free to connect with me on FacebookTwitterPinterest and Instagram to see what I am up to.  You can also subscribe to my RSS feed or sign up for to receive emails whenever I post a new recipe.

    Thanks so much to Lexie for organizing this wonderful all-star series and thanks to all of the lovely ladies that are participating. I am honored to be a part of such an amazing community of talented bloggers! Happy Holidays to everyone and I wish you all very tasty, healthy and happy 2013!


  12. Vegan Candy Cane Hot Cocoa Mix (Gluten-free)

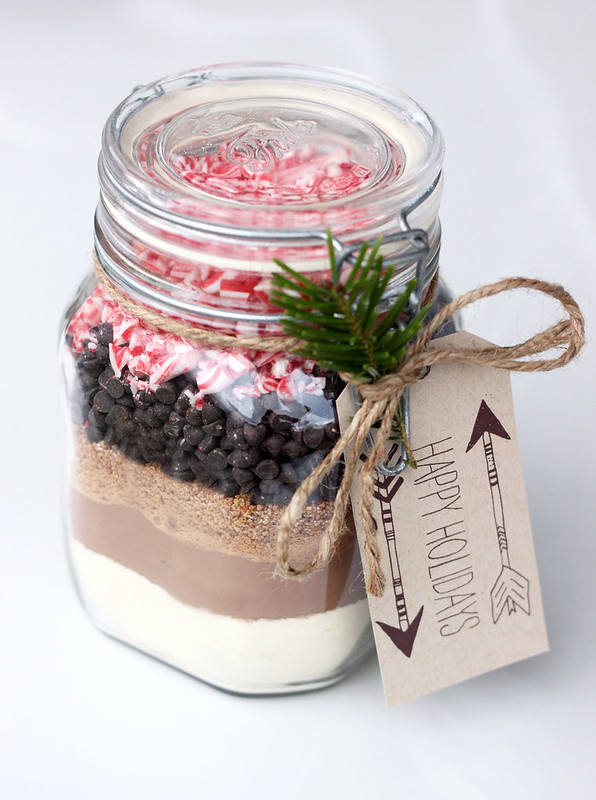
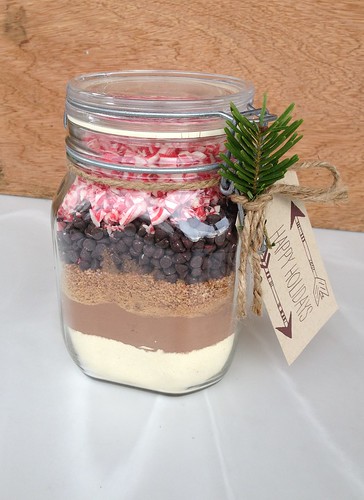
    Vegan Candy Cane Hot Cocoa Mix

    There a some flavor combinations that for me are the classic quintessential tastes of the holiday season. The combination of chocolate and peppermint this is definitely one of those. For my final giftable recipe this month in my series with Free People, I thought a handmade gift that was not only pretty, but tasted amazing would be the best way to end things.  Hot cocoa is not just for kids, but also for the kids at heart.

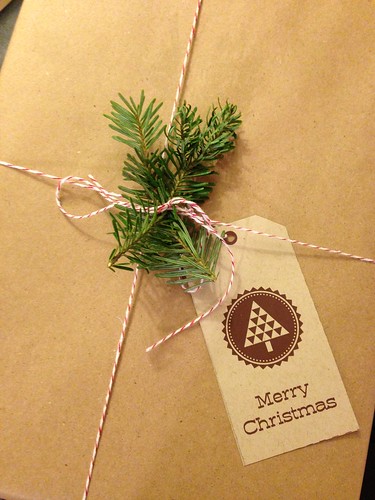
    Layer the delicious ingredients for this homemade candy cane hot chocolate in a jar and add some fun decorative touches like a fresh clipping of evergreen, wrap fabric over the lid, tie twine or ribbon and add a pretty tag. It not only looks beautiful, but it is so tasty, too! The bonus is this hot cocoa mix is vegan and gluten-free and depending on the ingredients you use,  low in refined sugars, as well.

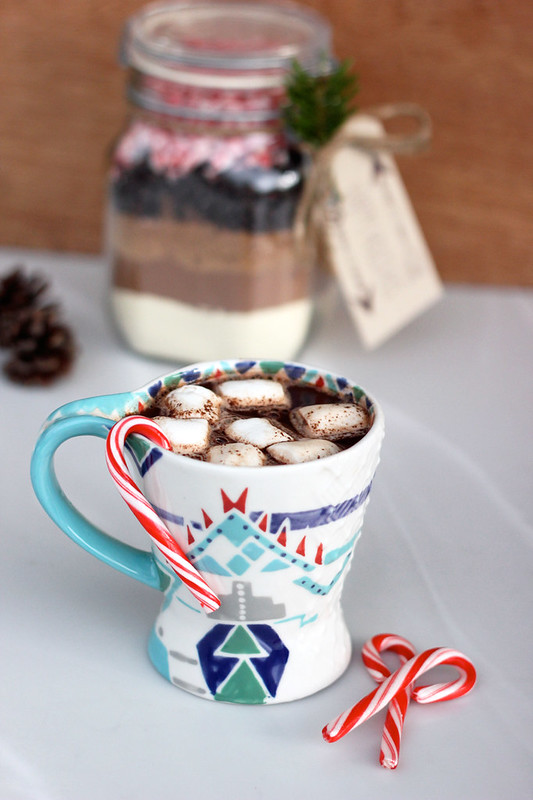
    On it’s own or with a nice mug to compliment it, this simple DIY gift is sure to put a smile on anyone’s face! It’s a great hostess gift, it’d perfect for the secret santa giveaway, or just a thoughtful handmade gift for the chocolate loving vegan in your life. This simple ratio of ingredients can also be used to make a small batch for yourself, anytime you’d like!


    Vegan Candy Cane Hot Cocoa Mix

    [print_this]Vegan Candy Cane Hot Cocoa Mix
    Fills a 1 quart jar, makes 12 servings

    • 1 cup powdered non-dairy milk, such as soy or rice (or powdered dairy milk, if you aren’t vegan)
    • 1 cup unsweetened cocoa powder (be sure it is vegan)
    • 3/4 cup coconut sugar (or raw cane sugar)*
    • 1/2 teaspoon fine sea salt
    • 1/2 cup miniature semi-sweet vegan chocolate chips
    • 1/2 cup crushed vegan peppermint candy (these particular candy canes are great – no GMOs, no HFCS, no artificial dyes, etc )

    Optional:

    • 1/2 cup vegan mini marshmallows
    • A few additional mini or full-sized candy canes

    Layer the powdered non-dairy milk, cocoa powder, coconut sugar, salt, chocolate chips, and peppermint candy. If you’d like, you can add mini marshmallows to the top of the jar, if there is room or attach a plastic bag full to the jar. On the back of the gift tag, write:

    “Mix all of the ingredients together in a large bowl. For each serving, place 1/4 to 1/3 cup cocoa mix in a mug and stir in 1 cup boiling water or non-dairy milk. Mix keeps in airtight container at room temperature for up to six months.”

    OR

    If you wish to leave the powdered milk out, shake all of the remaining ingredients together (you may want to increase the ingredients by 25-50% to fill up the jar without the powdered non-dairy milk). Once fully mixed, add it to the jar and layer marshmallows on top, if there is room. Change the directions on the gift tag to read:

    “For each serving, heat 8 ounces of your favorite non-dairy milk in a small saucepan over medium heat until hot (alternatively, microwave 2-1/2 minutes at full power). Whisk in 1/4 to 1/3 cup hot chocolate mix. Mix keeps in airtight container at room temperature for up to six months.”

    *Consider making a homemade vanilla sugar first, using my recipe for vanilla sea salt, replacing the salt with sugar. Use an equal amount of the vanilla sugar instead of plain sugar in in this recipe and it takes it to a whole new level!!

    **Note: if your container is a different size, just keep the ratio of ingredients constant.**[/print_this]


    This recipe originally appeared on the Free People blog BLDG 25.

  13. Photo Fun Day Friday

    Hope everyone is in the full swing of the holidays and loving and cherishing every moment of it! I have been! It has been an emotional few weeks over here. The emotions have been caused by a variety of different reasons – like this being our last holidays living in this home and in Buffalo for that matter. Of course the sad tragedy of last Friday and the loss of all of those sweet innocent babies hit me just as hard as I know it hit most everyone else. On top of all of this, our family has been dealing with a terrible accident that landed a family member in the hospital the Friday prior, he is in serious condition but very lucky to be alive. Please send if you would, your positive thoughts, prayers, healing vibes, etc. his way, he could certainly use them in his long road to recovery ahead.

     It has been a lot of happiness and sadness for a short time, but it has all made me appreciate the magic of life and love that much more! Life is fragile, every moment a blessing and the only way I know how to embrace that is to live each day to it’s fullest, grateful for all that I have. I hope you are all doing the same, hugging your loved ones a little tighter this holiday season and counting your blessings whenever possible. Love and light to you all!

    As you will see in the photos, this week has been spent full embracing the holidays, shipping out the last minute orders for Hero, shipping gifts to out of town friends and family, packing boxes and squeezing in as much family and friend time as humanly possible!

    Photo Fun Day Friday

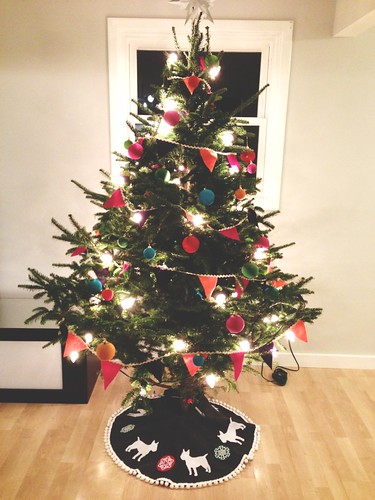
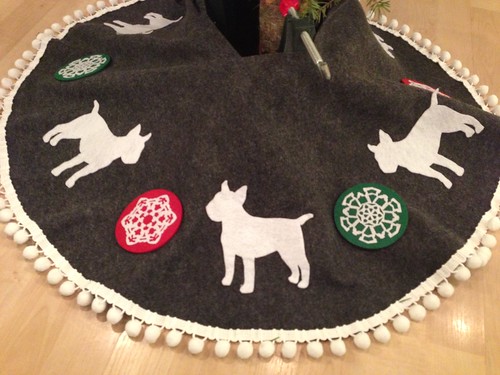
    Our Christmas tree got an update with this custom made (and hand sewed) bull terrier tree skirt made by our friend, Joanne.

    Photo Fun Day Friday

    Here’s a close-up of it! So what, we are a little obsessed with our dog!

    Photo Fun Day Friday

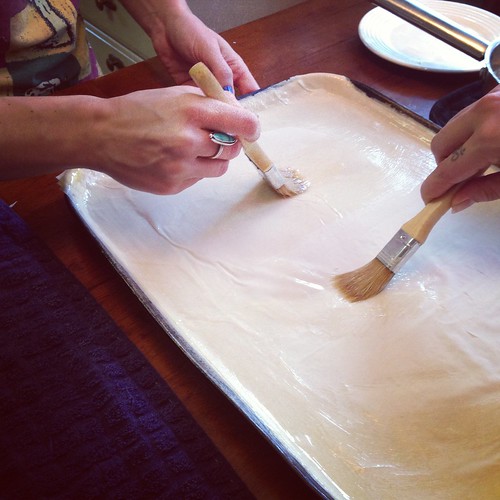
    Got together with the family on Sunday and made TONS of baklava using my late Yia Yia’s recipe. I may not be able to eat it but it makes for great holiday gifts for friends!

    Photo Fun Day Friday

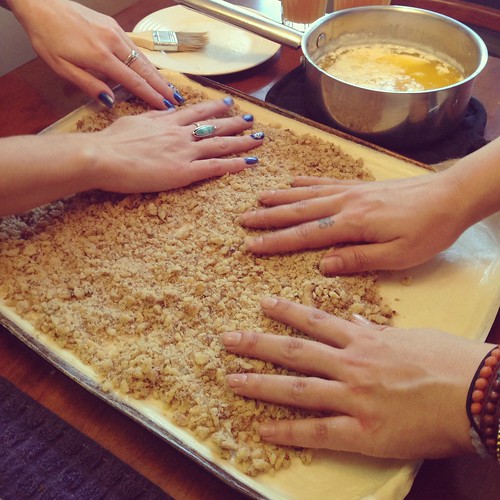
    It is a pretty labor intensive process. You place each layer of phyllo dough, one at a time, and brush with butter. There are 15 layers, then nuts and spices, 10 layers, more nuts, then 15 more layers. Layer by layer, sheet by sheet! I love making it and hanging out with my family, even without the satisfaction of ever taking a bite!

    Photo Fun Day Friday

    Me and my sister Vicky, spreading the nuts layer.

    Photo Fun Day Friday

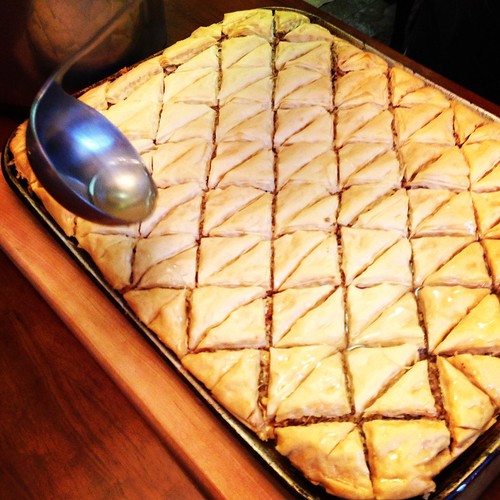
    Pouring the syrup over top of one of the finished trays. Smells soooo good!

    Photo Fun Day Friday

    Photo Fun Day Friday

    I started my Christmas wrapping earlier in the week! It may be my favorite part of the holiday and the gift giving.

    Photo Fun Day Friday

    My final giftable recipe for my series this month with Free People. Look for the recipe on Sunday.

     Photo Fun Day Friday

    Took a break last night from packing and organizing for the move to relax! My relaxation involved a roast chicken from our farmer, a glass of bourbon and Christmas music.

    Photo Fun Day Friday

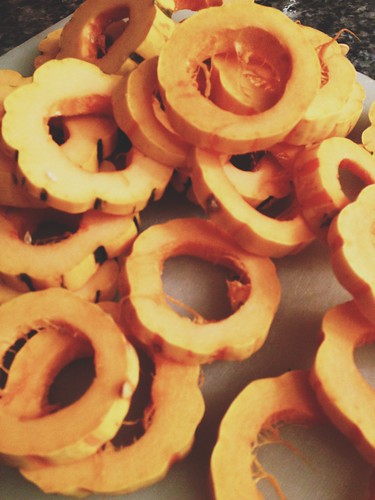
    I cut up some of the delicata squash leftover from our CSA with porter farms. I tossed it with some olive oil, maple syrup and spices and added it to the chicken in the last 35 minutes.

  14. Gingerbread Smoothie – Gluten-free + Vegan

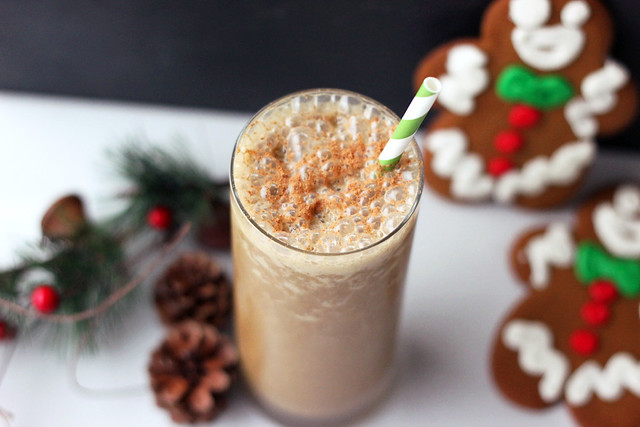
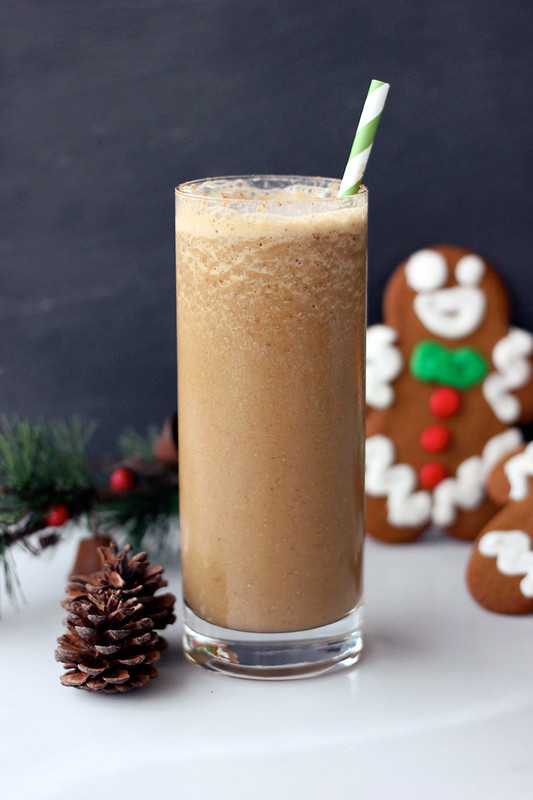
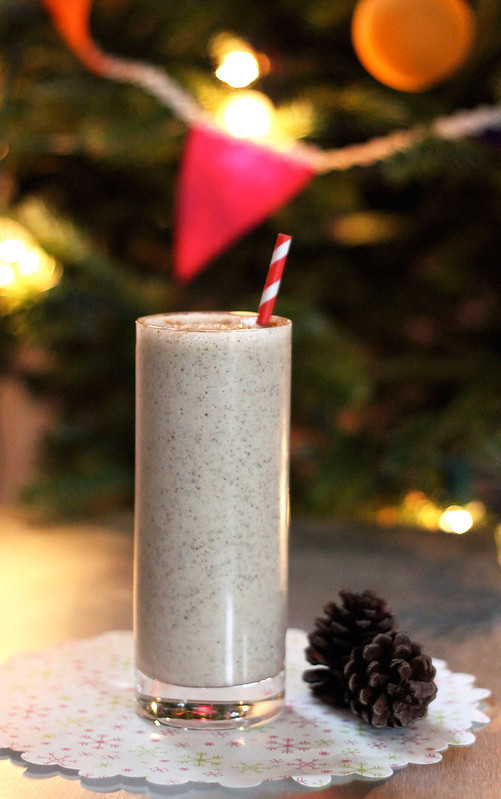
    Gingerbread Smoothie (Gluten-free + Vegan)

    With the lack of time to play in the kitchen right now, I am certainly feeling the loss of certain seasonal flavors and tastes that are quintessential holiday treats for me. So, I have been getting creative when the time allows and enjoying the flavors of the season, however I can.

    I had dreams of creating grain-free gingerbread cookies this year, but there just hasn’t been the time to experiment and play, so instead I created a simple and super tasty gingerbread smoothie to celebrate all of those same flavors, but without all of the mixing, cutting out and baking! It turned out great. The aroma from this simple treat alone is enough to satisfy that holiday hankering for those cute little cut out dudes.

    Plus, you get to really enjoy some health benefits with this smoothie. Blackstrap molasses is just one type of molasses, the dark liquid byproduct of the process of refining sugar cane into table sugar. Blackstrap is my molasses as choice because of the variety of great nutritional benefits that comes with it. Blackstrap molasses is a sweetener that is actually good for you. Unlike refined white sugar and corn syrup, which are stripped of virtually all nutrients except simple carbohydrates, or artificial sweeteners like saccharine or aspartame, which not only provide no useful nutrients but have been shown to cause health problems in sensitive individuals, blackstrap molasses is a healthful sweetener that contains significant amounts of a variety of minerals that promote your health. Blackstrap molasses has a low glycemic index. Plus, because of its high iron content, many use blackstrap molasses to holistically overcome anemia. Blackstrap molasses is also a great source for calcium and magnesium. Potassium is another mineral abundant in blackstrap molasses, and the list goes on and on.

    If you find the bittersweet flavor from the molasses to be a bit pungent, (which can often times happen to those who have taste buds conditioned for years by sugar and artificial sweeteners) or find it lacking as a sweetener, add a bit of additional sweetener of your choice, maple syrup, honey, etc. I personally felt like it didn’t need to be any sweeter. It was just perfect.

    I also couldn’t help but think about how delicious this smoothie would be with a shot of some spiced rum or a good bourbon. Is it bad that’s where my mind goes right now?

    If you are looking for a couple other creative gingerbread recipes, check out my recipes for Gingerbread Granola (gluten-free + vegan) and Pumpkin Gingerbread Muffins with Dried Cranberries (gluten-free + vegan).

    Have you been enjoying the flavors of the season? What’s your favorite holiday treat?

    Gingerbread Smoothie (Gluten-free + Vegan)

    [print_this]Gingerbread Smoothie
    serves 1

    • 1 frozen banana
    • 1 cup unsweetened organic vanilla almond milk (or other non-dairy milk)
    • 1 tablespoon unsulphured blackstrap molasses
    • 1 teaspoon vanilla extract
    • 1 tablespoon flax-seed meal (or ground chia seeds)
    • 1/2 teaspoon ground cinnamon
    • 1/2 teaspoon ground ginger (grated fresh ginger would be extra nice)
    • pinch of ground nutmeg
    • pinch of ground cloves
    • dash of all spice
    • 1 small handful of ice
      *additional sweetener, if needed

    Add all of the ingredients to the blender and process until smooth and creamy.  Pour into your glass, top with a little freshly grated nutmeg (or regular ol ground nutmeg will work too). Serve immediately.

    [/print_this]

  15. A Day of Silence and Remembrance for Sandy Hook

    National Blogging Day of Remembrance

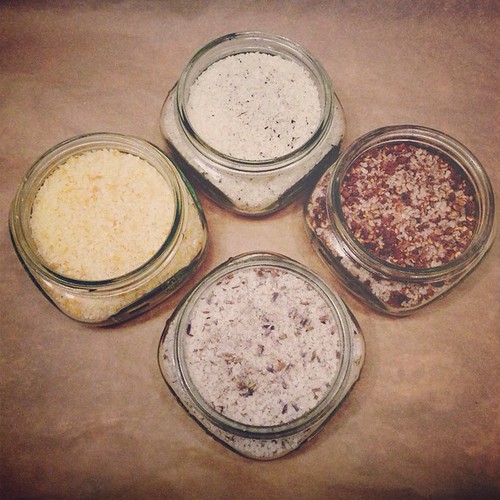
  16. Flavored Finishing Sea Salts

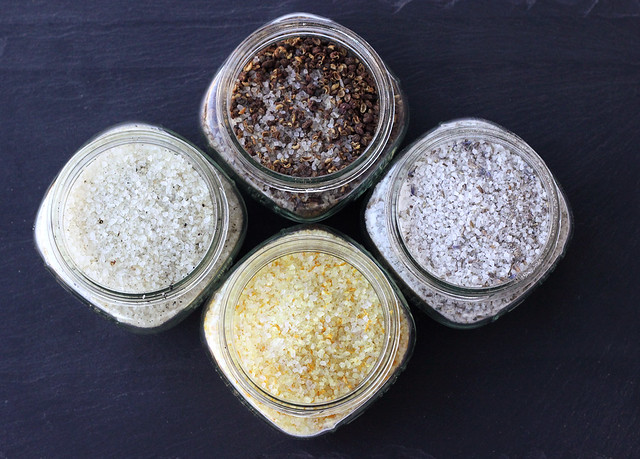
    Flavored Finishing Sea Salts

    Next in my ongoing series with for Free People of Giftable Recipes, is a simple adaptable recipe/DIY for homade finishing sea salts. These would make the perfect gift for any food-lover (dare I say, foodie, I kinda hate that word). You can really have fun with the flavoring on these, creating your own to suit the tastes of the recipient. Or change it up and make flavored sugars, too.

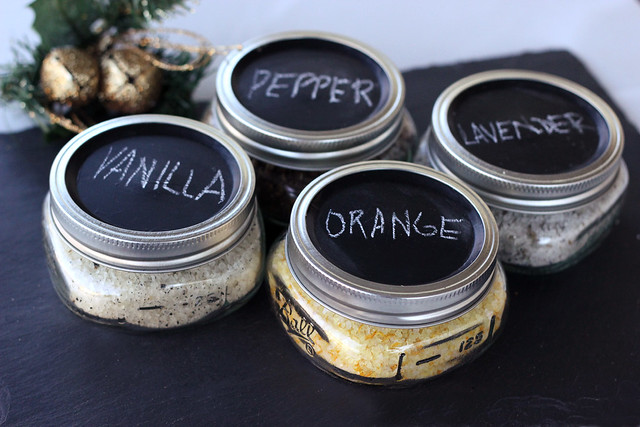
    Plus, you can really have fun with the packaging on these. Package in cute jars, wrap paper or fabric around the lid, finish with ribbons or twine and make fun handmade tags or labels, to really personalize the gift. I kept it simple and just painted the lids with chalkboard paint so I could write what was inside. I plan to actually give these as gifts this year, so I will make some fun personalized gift labels for whoever these end up going to.

    Flavored Finishing Sea Salts 

    Flavored Finishing Sea Salts

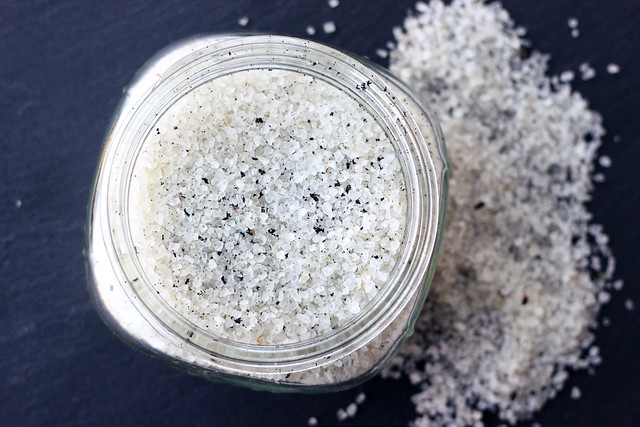
    Vanilla Sea Salt

    This smooth and aromatic salt would be great to rim drinks, for the top of truffles, caramels, cookies and other sweet treats, and don’t let it fool you, it would be great with savory items as well.

    1/2 cup sea salt

    2 vanilla beans, split lengthwise and scraped, seeds reserved

    Remove beans from vanilla pod and mix thoroughly with sea salt. Package in an airtight container of your choice.

    Flavored Finishing Sea Salts

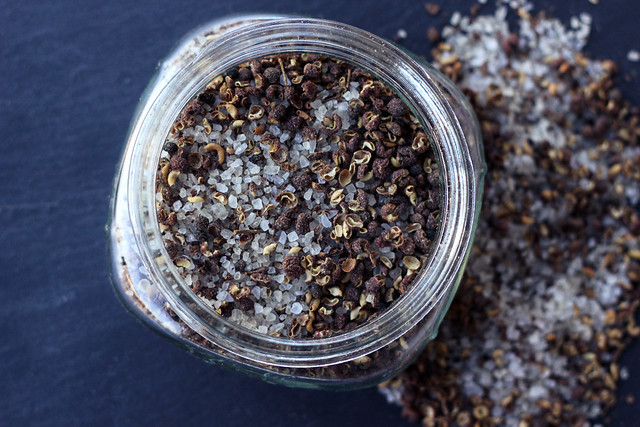
    Sezchuan Peppercorn Sea Salt

    This spicy salt has a kick plus a nice earthy rustic flavor and it would be great on grilled veggies, meat and seafood, popcorn, homemade chips, veggie burgers, stir-fries, etc.

    1/4 cup Sezchuan peppercorns (aka Sichuan peppercorns) or any other peppercorn of your choice

    1/4 cup sea salt

    Dry roast the peppercorns over a medium/high heat in a dry skillet on the stove top for 3 to 5 minutes. Let cool then add to processor (a spice grinder or mortar and pestle would also work) and grind to the size of the sea salt, add the salt to incorporate, pulse a few more times.  Package in an airtight container of your choice.

    Flavored Finishing Sea Salts

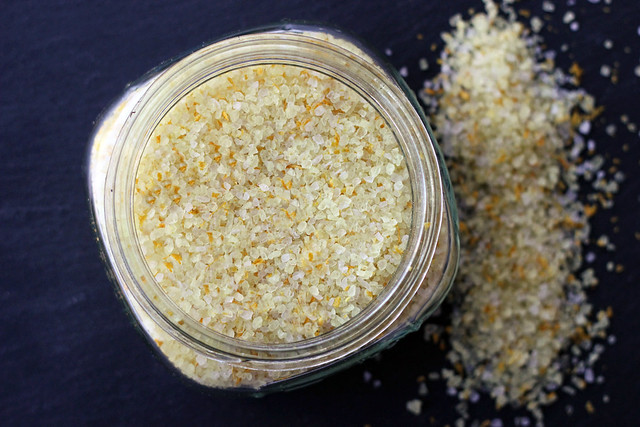
    Citrus Sea Salt

    This bright and fresh flavored salt would be great on vegetables, grilled or roasted chicken or seafood, shellfish, steamed rice, chocolates, cookies etc.

    1/2 cup sea salt

    1 tablespoon fresh citrus zest from well scrubbed fruit such as lime, orange, lemon, grapefruit or any combination of those (I used Organic Navel Oranges)

    Mix together the zest and the salt, making sure there are no large clumps of the zest. Spread out evenly on a parchment paper lined baking sheet. Allow the citrus zest dry out in the oven at 200ºF for about 60 minutes. Once cooled, package in airtight container of your choice.

    Flavored Finishing Sea Salts

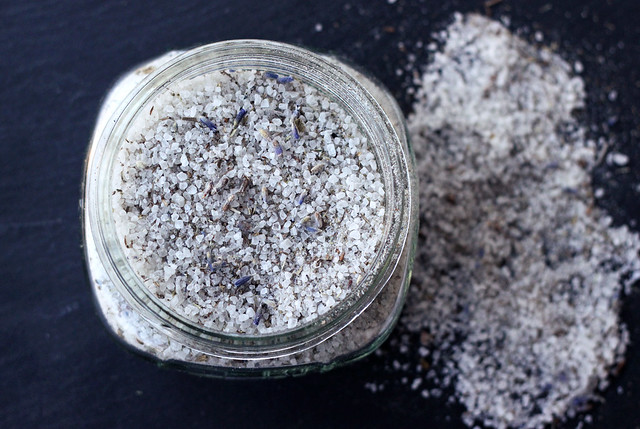
    Lavender Sea Salt

    This fragrant and flavorful salt would be great on sweet treats like truffles, chocolates, ice cream, shortbread cookies, scones, etc. Also try it in savory dishes like roasted squash, herbed flatbreads or with grilled chicken , lamb or salmon, etc.

    1/4 cup dried lavender (make sure it is culinary grade lavender)

    1/2 cup sea salt

    Add the dried lavender to your food processor (a spice grinder or mortar and pestle would also work) to quickly chop the lavender, then add the sea salt, whir it together a bit, then package in an airtight container of your choice.

    Flavored Finishing Sea Salts

    These recipes were originally shared on the Free People Blog BLDG 25. Share your thoughts below on how you would use these particular sea salts or what flavors you would try making yourself?

  17. Photo Fun Day Friday

    Well here it is, another double Photo Fun Friday post. Two weeks worth of photos, since life has been a bit hectic and we were away last Friday! See my last post that explains all of the busy and crazy in my life right now. A funny thing I realized in looking at these photos from the last two weeks, I feel like I have eaten out at more restaurants in the last month than likely the whole year, with all the traveling, birthdays and trying to squeeze in hang time with friends.

    It has been a really fun two weeks, a great way to finish off the year! We were in Chicago two weekends ago and then Pittsburgh this past weekend. That is it for our traveling for 2012 and now we are home for the holidays! Yay! Hope you enjoy all of the photos (there’s a lot of them), and I hope you are enjoying your holiday season. We will be at the Western New York Book Arts Center this weekend, this afternoon and all day tomorrow, for the Last Minute Panic Holiday Marketplace! Come on by if you are local, we will be selling our prints, greeting cards and other goodies. I will be there on and off, since I also need to be at home packing 😉

    Do you have any fun plans this weekend? 

    Photo Fun Day Friday

    The big tree in Downtown Chicago and the Christmas windows at Macy’s.

    Photo Fun Day Friday

    Billy and Mark at their live Adventures in Design podcast show at Schubas in Chicago.

    Photo Fun Day Friday

    Our booth at the Chicago Renegade Holiday Craft Market

    Photo Fun Day Friday

    Hot mulled wine…mmmm.

    Photo Fun Day Friday

    The sweet little Stella Maxine.

    Photo Fun Day Friday

    My favorites!!! Margaux and Stella. I hate how far Chicago will be from Southern California 🙁

    Photo Fun Day Friday

    Super amazing jellyfish installation at Renegade Craft Fair.

    Photo Fun Day Friday

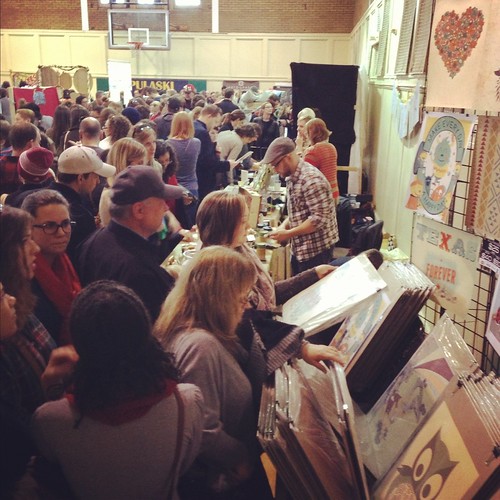
    The crowds were crazy this year.

    Photo Fun Day Friday

    Some of my handprinted gift tags.

    Photo Fun Day Friday

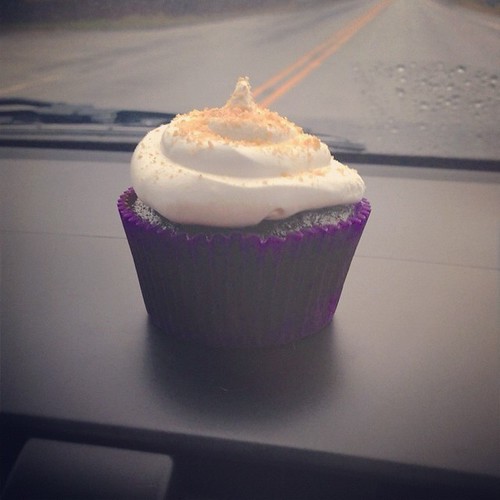
    One of Margaux’s beautiful baked creations. She made these delicious looking s’mores cupcakes for Mark’s birthday. I couldn’t eat one, but I sure appreciated how yummy they looked and the smile they put on my hubby’s face 🙂

    Photo Fun Day Friday

    Printed t-shirts for my yoga studio, East Meets West, with their new logo I designed.

    Photo Fun Day Friday

    A hot Tom & Jerry, a warm fire, Christmas music and lots of great friends. Pretty amazing stuff right there!

    Photo Fun Day Friday

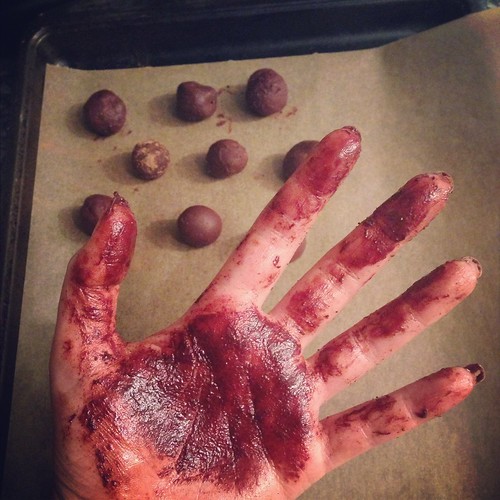
    Making truffles is messy business, but boy is it worth it.

    Photo Fun Day Friday

    Those holiday cups at Starbucks sure make me happy!

    Photo Fun Day Friday

    The beet salad I had at Habitat in Pittsburgh was so good it was gone before I could take a pic 🙂 If you are in Pittsburgh, check that restaurant out. Great seasonal, local farm to table food with a special gluten-free menu. They even have gluten-free bread for sandwiches at lunch.

    Photo Fun Day Friday

    Christmas tree in Market Square Pittsburgh.

    Photo Fun Day Friday

    The view from the convention center in Pittsburgh where we were set up for the Handmade Arcade last weekend.

    Photo Fun Day Friday

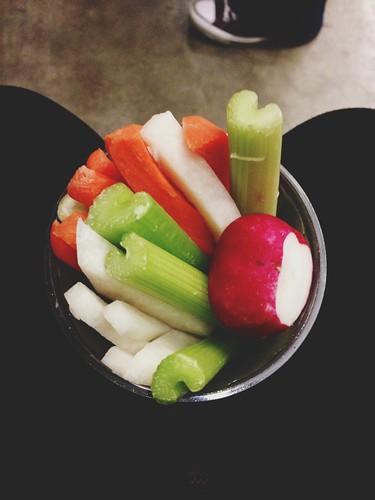
    It was this or french fries for me at the convention center. Yay for will power. (But oooh were those fries calling my name.)

    Photo Fun Day Friday

    We celebrated Mark’s birthday on Sunday with family, friends and some down home soul food from Gigi’s restaurant on the East Side. (I had take-out pho from Pho 99 Fast Food)

    Photo Fun Day Friday

    One more friends dinner for Tom and Jerrys. This time at the Buffalo classic, Schwabls.

    Photo Fun Day Friday

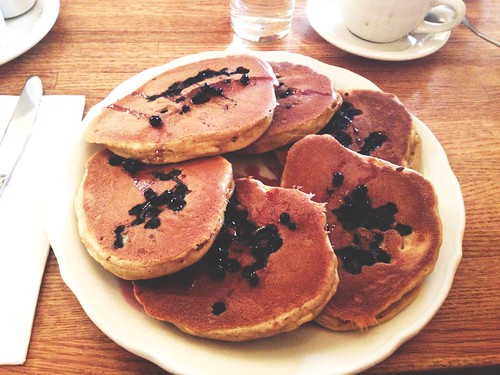
    Gluten-free blueberry pancakes from the Original Pancake House. The perfect fuel for a day of Christmas shopping and planning a HUGE move.Photo Fun Day Friday

    Flavored finishing sea salts. Look for the recipes on Sunday.

    Photo Fun Day Friday

    Amazing illustration from a vintage children’s book in our collection.

    Photo Fun Day Friday

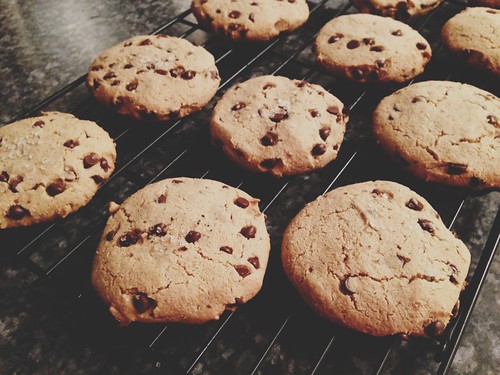
    I finally made time to bake last night. I made these amazing grain-free chocolate chip cookies from Against All Grain and topped them with some vanilla sea salt.

    Photo Fun Day Friday

    Our cat Indie, being silly last night while laying on Mark’s lap.

  18. Banana Nog Smoothie – Gluten-free + Vegan

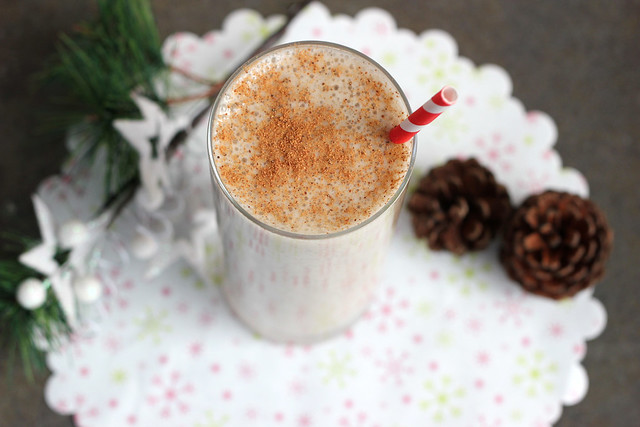
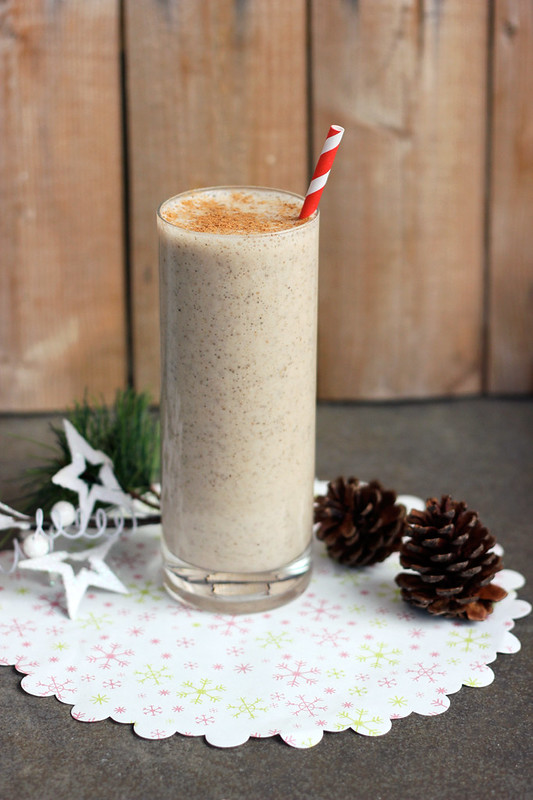
    Banana Nog Smoothie - Gluten-free + Vegan

    It is likely you have noticed how quiet things have been around here on Tasty Yummies. We have been traveling up a storm over here this holiday season to different events and fairs all over the east coast. In the last month we have been to Washington DC, Baltimore, Philadelphia, Brooklyn, Chicago and Pittsburgh. As of this past weekend, are finally done traveling for the year! At the start of the crazy month of travel, in mid-November, we got an offer on our house. YAY!!! Closing is scheduled for early January. I honestly cannot believe it’s all really happening.

    So, besides being overwhelmed with all of the travel and the holidays, we are in the midst of selling our house and figuring out packing up all of our personal and business related belongings to relocate to California in early 2013. I don’t consider myself a stressful person or a worrier in the least, but I have to say, we haven’t even really begun packing up boxes and all of that real stuff, and I am kinda already freaking a little bit. Hubby, of course, continuously reassures me it is all fine and everything will all get done, but I cannot quiet the constant voice in my head reading the long list of the many things that need to get done before closing (and having to be totally moved out) next month, a month from yesterday to be exact. I have surprisingly only moved once in my adult life and that was from living at home with my parents to buying my first home at 23, 9 years ago. So, I am just a bit overwhelmed.

    As you can imagine, between the travels, running the business, preparing for the move and dealing with all the holiday fun of shopping and such, there just hasn’t been much leftover time for me to play in the kitchen. That is the only bummer about all of it. Obviously as with most painful things in life, it is temporary. This time will pass and be over before I know it. Doesn’t make it all any easier though.

    I have been eating well and cooking every single chance I get, but the time to create new recipes, set up photo shoots, edit photos, etc – just doesn’t seem to be there right now and I have tried to do my best to accept that, as much as I am not exactly happy about it. I will obviously be sharing recipes whenever I can, I am not totally disappearing, I just wanted to explain the quiet and lack of recipes. Oh and I have some really fun end of the year stuff planned for the end of the month here on the blog, so stay tuned for that.

    Banana Nog Smoothie - Gluten-free + Vegan

    In the meantime, I created this tasty smoothie this morning after yoga. By the way, another quick side note yoga has been my saving grace this past month. That is one thing that I have made sure to find as many free moments for right now. I need it. It has helped keep me grounded (mostly) and has allowed me to quiet my mind, even if only temporarily, in a way that nothing else can. I am so grateful for my practice every day, but especially in times like this. OK, back to the tasty smoothie…. I wanted to create something that really had some holiday flare to it. I am a Christmas junkie and I have been trying to take in and cherish every single moment of it this year. I like to squeeze in the holiday cheer wherever I can. So, what better way than with the classic flavors of egg nog, in a healthy and hearty smoothie. I actually had planned on using canned coconut milk since I have plentyin the pantry but I had some So Delicious Coconut Milk Nog in the fridge (which I am admittedly addicted to) so I thought that would really bring on the extra nog flavor. Obviously this would be equally as delicious with just coconut plain milk. Feel free to sweeten and spice to your liking. Since I used the nog and my banana was nice and sweet, I didn’t add any sweetener and I went with the below measurements for spices, you may want more though, depending on how strong a flavor you are looking for. This smoothie would of course also be delicious with a shot (or two) of your favorite spirit if you really want to celebrate!

    Banana Nog Smoothie - Gluten-free + Vegan

    [print_this]Banana Nog Smoothie
    makes 1 large serving or 2 smaller servings

    • 1 cup organic coconut milk – the canned kind (or for even more flavor, opt for your favorite vegan eggnog, instead)
    • 1/2 cup unsweetened organic vanilla almond milk (or other non-dairy milk)
    • 1 frozen banana
    • 1/2 teaspoon ground nutmeg
    • 1/4 teaspoon cinnamon
    • pinch of cloves
    • 1 teaspoon vanilla extract
    • 1 tablespoon chia seeds
    • 1 small handful ice cubes

    Optional – 1 tablespoon maple syrup, honey or other sweetener if it isn’t sweet enough for you)

    Add all of the ingredients to your blender and blend on a high speed until thick and creamy. Give it a quick taste and adjust any seasonings or sweetness to your liking. Sprinkle a little nutmeg and/or cinnamon on top. Serve right away. [/print_this]

  19. Dark Chocolate Peppermint Truffles – Gluten-free + Vegan

    Dark Chocolate Peppermint Truffles - Gluten-free + Vegan

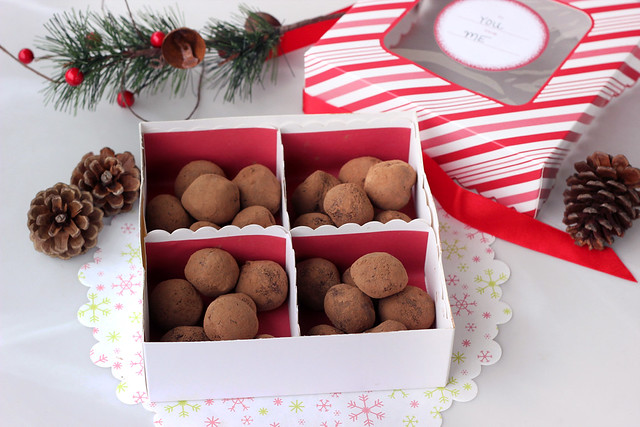
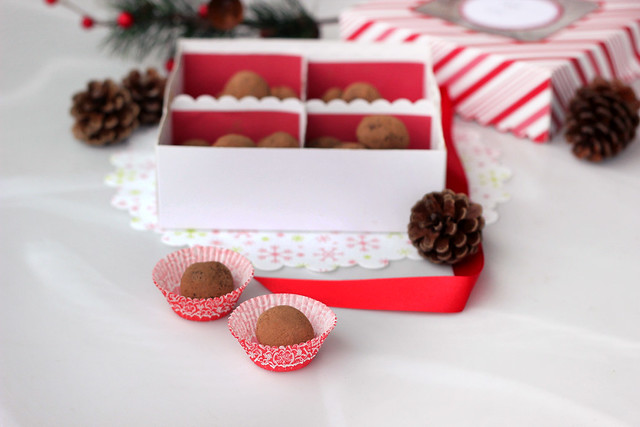
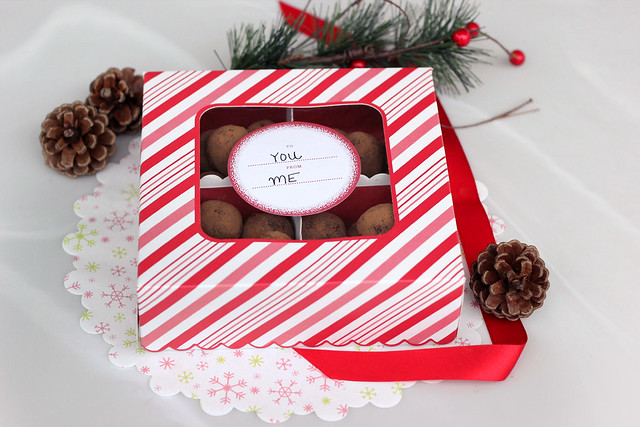
    What better gift to give than the gift of chocolate, right? These dark chocolate peppermint truffles are sure to leave a smile on any chocoholic’s face. Especially when they find out you made these just for them.

    Dark Chocolate Peppermint Truffles - Gluten-free + Vegan

    These truffles are simple to make and they are naturally both gluten-free and vegan. Additionally, they are low in sugar and very simple to make. A few ingredients, a few minutes at the stove and that’s about it. You can even play around with the recipe and leave out the peppermint and roll them into other goodies, like chopped nuts, coconut, melted chocolate or chocolate bits, etc. Make this recipe your own and customize it for whomever will be receiving it.
    Dark Chocolate Peppermint Truffles - Gluten-free + Vegan

    [print_this]Dark Chocolate Peppermint Truffles – Gluten-Free + Vegan
    makes about 24+ truffles (depending on their size)

    • 1/2 cup full-fat coconut milk (the canned kind)
    • 2 tablespoons coconut oil
    • 10 ounces high quality vegan dark chocolate (70% cocoa) – chopped
    • 1 teaspoon vanilla extract
    • 1/2 teaspoon peppermint extract
    • dash of sea salt
    • 1/4 cup cocoa powder

    In a double boiler, heat coconut oil and coconut milk over a low/medium heat, whisking until just melted and well incorporated. Add the chocolate, stirring continuously, not allowing it to heat too quickly. Just as soon as it is melted, remove from the heat and stir very well to make sure it is all well incorporated. Add in the vanilla and peppermint extracts and salt.

    Pour into a 8″ baking dish or a pie pan and refrigerate until the mixture is mostly set , but still pliable. Using a 1″ melon baller or a tablespoon, scoop out the chocolate and roll into balls using your hands, set them on a parchment paper lined cookie sheet. Once all have been rolled, place the sheet into the refrigerator for about 10-15 minutes, up to overnight.

    Place the cocoa power onto a small plate and roll the balls in the cocoa powder to coat, you can also put the cocoa powder in your hands and roll them around that way. Store the finished truffles in the refrigerator.

    These truffles will keep up to two weeks in an airtight container in the refrigerator. Allow to come to room temperature for about 15 minutes, just before serving.

    [/print_this]

    This recipe was originally shared on Free People blog BLDG 25

  20. Eat It Up: Episode 47 – Buffalo Eats Podcast

    I am super excited to share with you guys, my first ever podcast appearance for Tasty Yummies! I recently sat down with Donnie Burtless of Buffalo Eats for an episode of Eat it Up. We chatted for a bit about how I came to find I had a gluten intolerance and how I came to eating the way I do know, why I started Tasty Yummies, we laugh about me missing weird foods like chicken fingers and lots more. Plus, my hubby, Mark, was on the couch in the recording studio, too and you’ll occasionally hear him give his opinions on fast food (aka prostitutes), changing his diet and food guilt. He was in rare form that night, all fired up about food and eating, it was pretty amazing! {Fair warning, there is a tad bit of swearing in this episode, nothing crazy, just a couple of excited “Sh*ts” and “Fu@ks” – food and eating is some fun stuff, guys!} Really though, I had a ton of fun doing this podcast and loved that Mark was there to lighten the mood for me, since I can sometimes get nervous when being recorded.

    I hope you can take a minute to take a listen to this episode (see the player below) and be sure to check out some of the other episodes of the show.

    Eat It Up: Episode 47 – Beth Manos Brickey (Tasty Yummies)

    [mejsaudio src=”http://buffaloeats.files.wordpress.com/2012/12/podcast-47-beth.mp3″]

    If above the player doesn’t work, use this link or see the original post on Buffalo Eats.

  21. How To Stock The Perfect Winter Pantry

    Winter Pantry Staples Shopping List

    Winter Pantry Staples Shopping List

    The time has come, at least where I live, when the local fresh produce has dwindled down to very little and we are hunkering down for a long and cold winter. Just because fresh local produce isn’t quite as plentiful around here as it is in the summer, doesn’t mean that I cook any less. I just find I need to get more creative with what I do have and be very smart in stocking my pantry with healthy staples to get me through. Additionally, I still make sure to buy and eat as many veggies as possible and though they may not be local, I do try to at least select organic and as seasonal as I possibly can.

    Here is a quick list of some of my favorite pantry staples, I am personally gluten-free so this list reflects that. Use this list as a guide, keeping in mind your own intolerances and preferences to create your own pantry staples list and make sure you are well stocked through the entire winter and all year, for that matter.

    Winter Pantry Staples Shopping List

    Winter Pantry Staples Shopping List

    How To Stock The Perfect Winter Pantry

    Winter Pantry Staples Shopping List

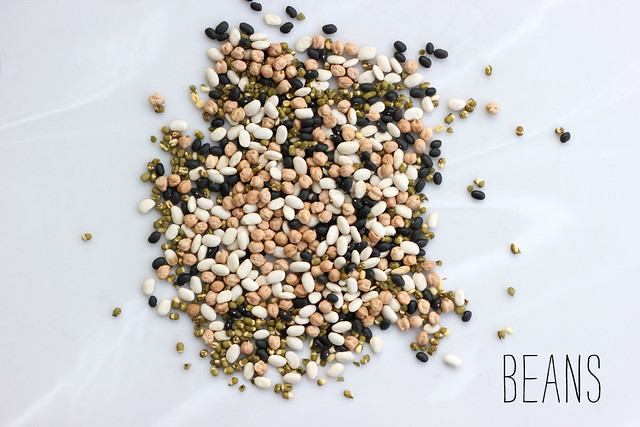
    • Dried and canned beans – black beans, garbanzo, lentil, sprouted mung beans, kidney, white beans, pinto etc.
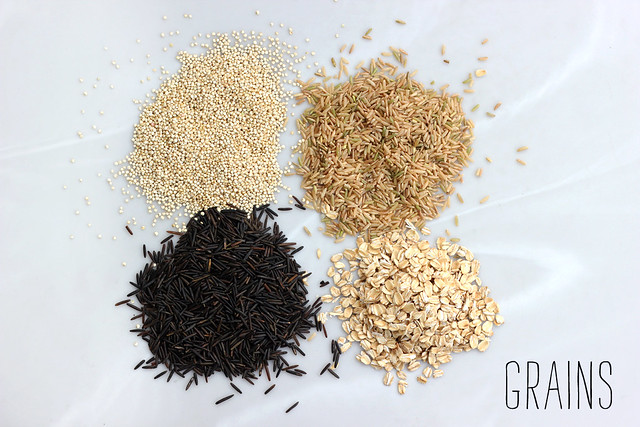
    • Whole grains – brown rice, quinoa, millet, amaranth, wild rice, oats, etc (couscous, barley, bulgur, etc., if you aren’t gluten-free)
    • Oils – coconut oil, olive oil, sesame oil, etc.
    • Soy sauce or Gluten-free tamari, coconut aminos, etc
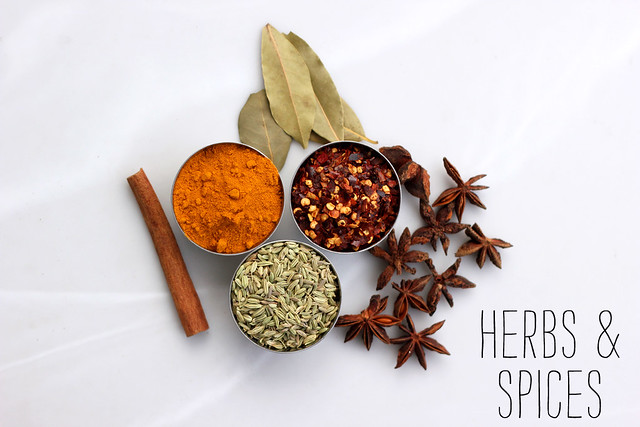
    • Spices and herbs – bay leaves, red pepper flakes, cinnamon, nutmeg, star anise, turmeric, curry powder, italian blend, herbs de Provence, etc.
    • Dried fruit – dates, raisins, cranberries, cherries, currants, etc.
    • Rice noodles and other pastas
    • Sugars and other alternative sweeteners – raw sugar, coconut sugar, maple syrup, honey, coconut nectar, stevia, etc.
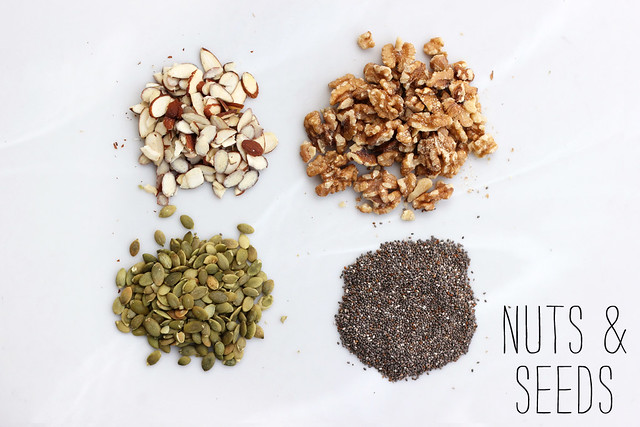
    • Nuts and seeds – almonds, walnuts, pecans, pine nuts, pumpkin seeds, chia seeds, flax seeds, sunflower seeds, hemp seeds, etc.
    • Nut and seed butters – almond butter, peanut butter, sunflower seed butter, etc.
    • Vinegars – balsamic, apple cider, red and white wine vinegars, rice vinegar, etc.
    • Potatoes and sweet potatoes
    • Garlic
    • Onions
    • Winter squash

DISCLAIMER: This website is written and produced for informational and educational purposes only. Statements within this site have not been approved by the FDA. Content should not be considered a substitute for professional medical expertise. The reader assumes full responsibility for consulting a qualified health professional before starting a new diet or health program. Please seek professional help regarding any health conditions or concerns. The writer(s) and publisher(s) of this site are not responsible for adverse reactions, effects, or consequences resulting from the use of any recipes or suggestions herein or procedures undertaken hereafter.