-
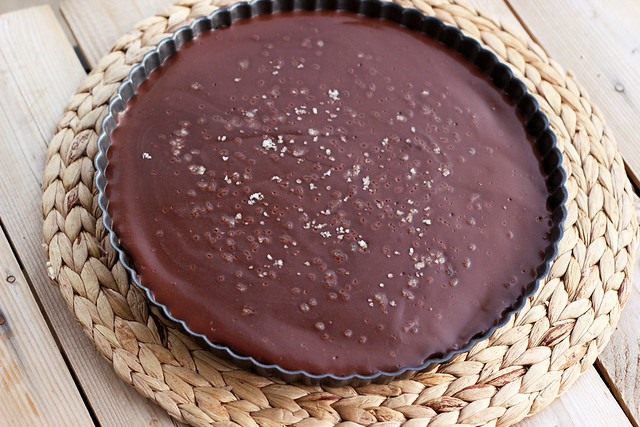
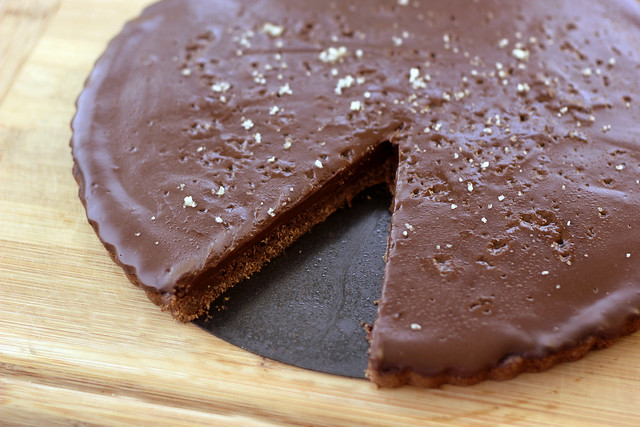
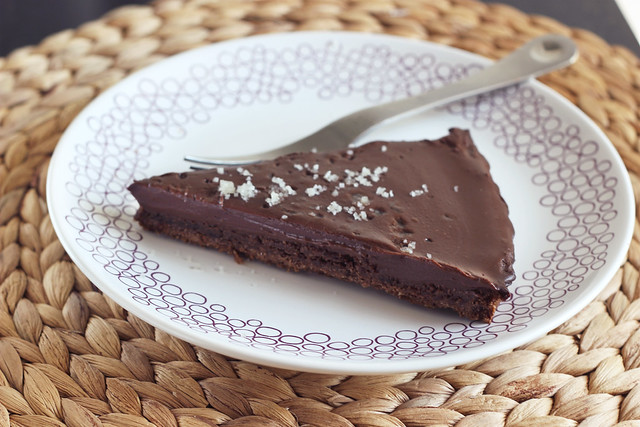
Salted Chocolate Tart – Gluten-free, Grain-free + Vegan
When you are craving something very specific and you want it just how you envision it in your own head, there is nothing left to do but to just figure out how to make it yourself.
I had been wanting a delicious but not too rich simple chocolate dessert, with just a touch of saltiness. There is nothing better than a good quality chocolate treat and tad bit of good quality sea salt. Yum, one of my very favorite things. I decided to just write up a recipe first, that I thought would work and just play it by ear, adding things as I went if I thought it needed it and then hope for the best. I find this to be one of the best ways to cook and bake and I am pleasantly surprised at how often it actually works out.
This tart was super simple to make and it was exactly what I was looking for. A slightly crunchy and nutty crust that needs the littlest bit of baking and a super creamy and velvety filling that is the perfect amount of richness, without going overboard and crossing into the world overly heavy and too rich. One of my biggest complaints of so many desserts. The sea salt on top is so perfect, both in how it looks on top of the glossy chocolate and the delicious treat that it provides your taste buds.
I ended up melting some dairy-free semi-sweet mini chocolate chips (from Enjoy Life) that I had on hand in my pantry, but you can also just use your favorite bittersweet chocolate, coarsely chopped for melting. If you want to make this refined sugar free, you could also try melting unsweetened bakers chocolate, and sweeten it to your liking with whatever you choose, such as stevia, maple syrup, palm sugar, etc.
I am super excited at how simple the crust was on this tart, I definitely plan to make some really fun tarts this spring and summer with this recipe
[print_this]Salted Chocolate Tart – Gluten-free, Grain-free + Vegan
serves 8 to 10Crust
- 2 cups almond flour, aka almond meal
- 2 tablespoons flax seed meal
- 2 tablespoons maple syrup
- 2 tablespoons cocoa powder
- 2 tablespoons coconut oil, melted
- 1/4 teaspoon baking soda
- 1/8 teaspoon salt
Filling
- 10 ounces non-dairy bittersweet chocolate, coarsely chopped (or dairy-free mini semi-sweet chocolate chips)
- 1 1/2 cups unsweetened non-dairy milk (I used a blend of coconut and almond milk)
- 1 tablespoon arrowroot starch (You could also use tapioca starch or corn starch)
- 2 tablespoons coconut oil
- 1 teaspoon vanilla extract
- High quality sea salt for topping (see below note)
Preheat oven to 350º. Lightly grease a 9 or 10-inch tart pan. In a large bowl, add all of the crust ingredients and mix very well. Add the crust mixture to the tart pan and press down firmly into the pan, going up the sides just a tad bit. Bake for 15-20 minutes until golden brown.
Meanwhile, place the chocolate into a glass bowl and set aside. In a small saucepan, add the non-dairy milk and arrowroot starch and whisk very well to combine and remove any lumps. Over a medium-high heat, heat until it just barely starts to boil. Remove from the heat and add in the coconut oil and stir well to melt the coconut oil (if it wasn’t already) and to combine well. Pour the milk mixture over the chocolate and let sit a few minutes until the chocolate is melting, add in the vanilla extract, then stir very well for a few minutes, until the mixture is smooth, glassy and creamy.
Pour the chocolate mixture into the prepared crust and allow it to cool completely. Cover with plastic wrap and place in the refrigerator for at least 4 hours or until fully set. Pop the ring from the tart pan off, sprinkle with a small amount of high quality sea salt, cut into slices and serve chilled.
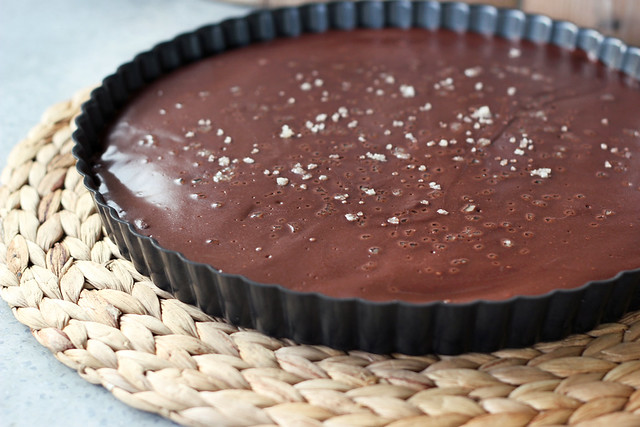
NOTE: Sprinkle the sea salt on just before serving. If you sprinkle the salt on before the tart has fully set, it will start to dissolve into the surface, I had sprinkled a small amount on after it had chilled a bit, but before it was fully set, since I didn’t really think about that happening. It did start to dissolve a bit, so I just sprinkled just a tad a bit more on top before serving and for taking photos.
[/print_this] -
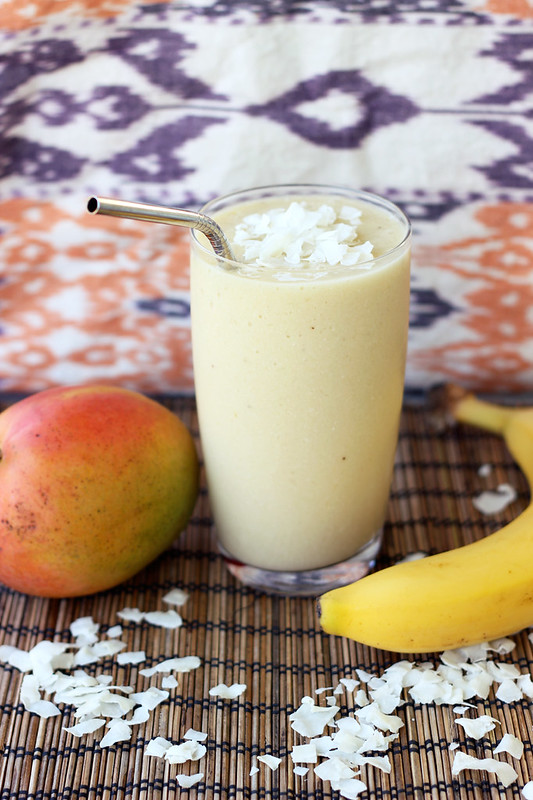
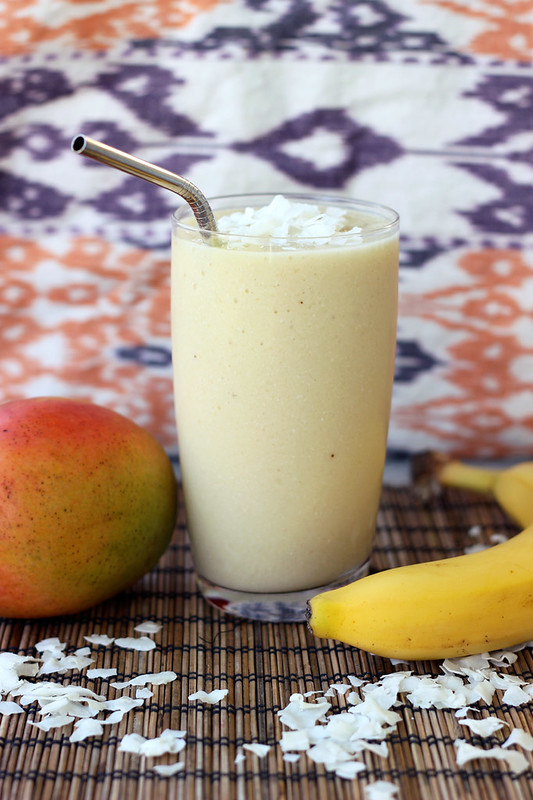
Coconut Mango Banana Smoothie – Gluten-free, Vegan + Refined Sugar-free
Not only did I live through my first run on Thursday evening, but I even went again today! So far, so good, I’m actually really enjoying it and I wasn’t even sore after. I definitely need to take it slowly and not try to do too much, but I could already see a slight improvement from my first run to the second.
In addition to adding running to my weekly fitness routine, I also decided I am going to try to wake up every morning at 6am (or thereabouts). I have found I am quite productive in the morning hours, so I really should be getting up as early as I can. With the sun already being up that early this time of year, it’s actually quite easy. I’ve done it every day this week since we returned home and I’m loving it. Even if I don’t jump right out of bed, at least I’m awake and getting my day started.
This morning I was up at 6 am and out of the house by 8:00 for a 90-minute vinyasa yoga class at East Meets West. Then I got home, grabbed my hubby and my iPod and we went for a 2-mile run together. It felt great to run after being nice and stretched out from yoga. I was hungry but I really didn’t have a huge appetite for a big meal after doing all of that. Since I had an afternoon’s worth of house cleaning to do, I decided to make this deliciously satisfying smoothie and it kept me full for many hours after while I washed flours, did dishes and cleaned the bathtub.
This filling and creamy little drink is so smooth and thick, almost milk-shake like. The flavor from the mango and banana are so bright and fresh which pairs so nice with the smooth creamy taste of the coconut and vanilla. I had grabbed a carton of unsweetened almond milk/coconut milk blend at the store the other day so I used that, but you could use straight coconut milk , almond milk or whatever your favorite non-dairy milk is.
[print_this]Coconut Mango Banana Smoothie – Gluten-free, Vegan + Refined Sugar-free
serves 1- 1 cup unsweetened almond milk / coconut milk blend (or any other non-dairy milk)
- 1 organic mango, sliced
- 1 organic banana, peeled
- 1 tablespoon maple syrup (or any other sweetener of your choice, dates, stevia, hone, raw sugar, etc)
- 1 tablespoon extra virgin coconut oil
- 1 handful of ice
- 1 teaspoon vanilla extract
- 1/2 tablespoon unsweetened coconut flakes for topping, optional
Add all of the ingredients to a blender and puree until smooth and creamy. Serve immediately. Sprinkle some coconut flakes on top, if you wish.
[/print_this]
-
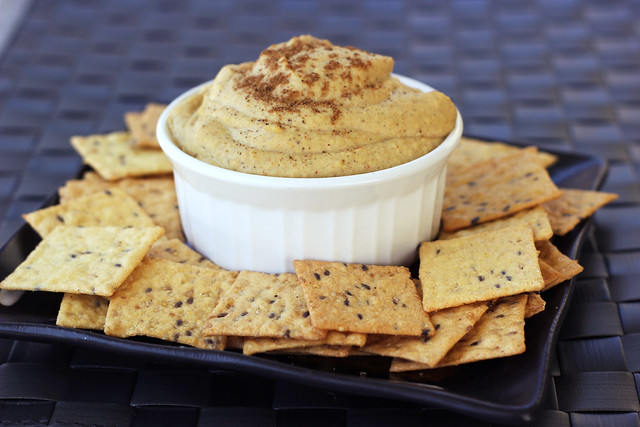
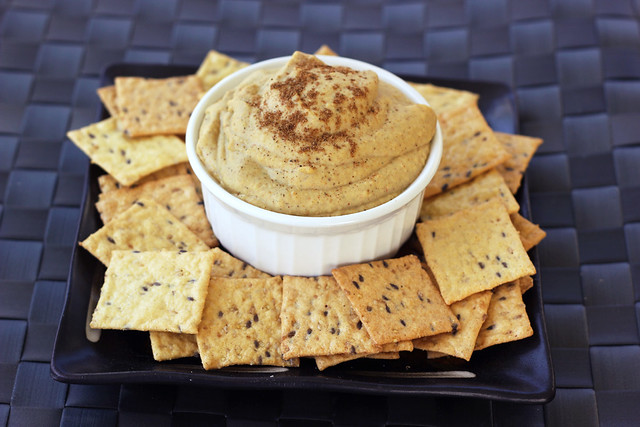
Creamy Indian-Spiced White Bean Dip – Gluten-free + Vegan
I am back home from our trip to California, we landed late last night and I am feeling insanely invigorated. We spent nearly a week out there, exploring neighborhoods and all the different towns, we went to the beach, we celebrated our 5-year wedding anniversary at Disneyland and fell even more in love with everything Southern California has to offer! This was the trip we needed to light that fire under our behinds to get the last few things done before we get our house on the market here in Buffalo and move out west! It is looking like our new home is going be in Long Beach, in a quaint little neighborhood by the beach. We cannot wait to start seriously looking for a house and to get this party started!
We are headed back to California in less than 2 short months for our good friends’ Patrick and Summer’s wedding, so who knows, maybe even by then we will have sold the house and be ready to start the whole process. I really hope so.
Ever since we decided to move out there, I told myself that given we would be living somewhere that has beautiful weather all year long, that I was going to be way more active outdoors. I want to get into running and biking as part of my weekly fitness routine, since both feel like a wonderful compliment to my daily yoga practice. Rather than waiting to get out there to start anew with so many things, I decided on the plane ride home that I was going to get started right away, particularly with the running since I have never really given it a serious shot. I have always found running to be painful and not my favorite way to sneak in exercise. But, the more I have read about running and getting started on a serious plan, it is best to ease your body into it and not try to do too much, too soon, which is probably what I have always done. So, I am going to take advantage of the beautiful spring and summer weather here in Western New York and start my training now, so I can hopefully just hit the ground running (pun intended) whenever we finally get out to the west coast.
Tonight is my first run, I have a good pair of Nike+ running shoes that I bought years ago and only ever wore to the gym, I have a couple of iPhone apps downloaded to help me properly ease into running, so they can tell me when and how I should be running and walking and for how long. I even have a running partner, my hubby, who is ready to get back into running himself. Now, the only thing I have to fear is my annoying low back issues. I tend to keep that all at bay with yoga and an incredible chiropractor, but I am a bit concerned on how the running will affect my back. I have a herniated disc in my low back that is known to cause me issues now and again and from what I have read about running, the pressure and the shock from it can sometimes be a bit hard on that type of injury. Here’s hoping I have strengthened my core and stretched my muscles enough from yoga, that my body can handle it. I really want it to work for me since running seems like the perfect compliment to my lifestyle, especially when we will be living so close to the beach.
My plan, if running and my body can agree on it, is to continue with my daily yoga practice, and getting to at least five 90-minute yoga classes a week, and now adding in 3 days of running. So, every day I will have some type of physical activity going on and on only a couple of days will I have to manage getting to the yoga studio and squeezing in a run, too. Even though yoga doesn’t always have to be a 90-minute thing, I really do prefer to have a practice that is that long and I really enjoy going to the studio. I practice at home on occasion, but I find since I work at home, it can be hard to focus on yoga and not get distracted by everything else around me. That is one thing about running I think I am most drawn to, the change of scenery, being outside and engulfed by nature and the elements and being in control of when, where and how it happens. As long as the weather cooperates and there is a safe and somewhat smooth surface, it seems like you can run virtually anywhere.
Do you like running? Have any tips for someone that is just getting started?
OK, so onto the dip… I made this dip this afternoon as a light snack. With us being gone for a week, I couldn’t wait to get home and get back to eating foods that I prepared. The food is the only downside to traveling for me, eating unprocessed foods that are gluten-free and as often as I can find, also vegetarian, can get a bit tricky when you are away. I did the very best I could and found so many great options, but I still ate so much different than I would ever eat at home. I debated doing a juice cleanse for a couple days after returning home, but with me wanting to start training for running, I didn’t think both were such a good idea, so I decided to start the running and just eat extra light this week. Now that our local farmers market is open for the season, I will definitely be stocking up there on Saturday and doing a lot of juices, smoothies and salads this week. This morning, I made a version of my banana almond butter smoothie for breakfast, adding in a scoop of ground flaxseeds and a scoop of cocoa powder and it kept me full all day. About 3:30pm I realized I hadn’t eaten anything since the smoothie and I had cleaned the whole house and totally unpacked my suitcase. I decided I would make a simple mid-afternoon snack and a creamy white bean dip was calling my name. The bold flavors from the Indian spices were so perfect and subtle and the garlic gave it all a great punch. The white beans made for an incredibly smooth and creamy dip that was delicious on some gluten-free crackers. I wish we had some fresh raw veggies, those would also be great in this dip. That is the other bad thing about traveling, coming home to an empty fridge. If you don’t love garam masala, substitute some yellow curry or another one of your favorite spices. If the heat from the garam masala and the raw garlic is enough, skip the chili powder.
I will check back in tomorrow with a new recipe and to let you know how the running went this evening.
[print_this]Creamy Indian-Spiced White Bean Dip – Gluten-free + Vegan
makes about 1 cup of dip- 1 can white beans
- 1/2 teaspoon garam masala powder
- 1/4 teaspoon turmeric powder
- dash of chili
- 1 clove garlic, peeled and very roughly chopped
- 1/4 teaspoon sea salt
- 1 tablespoon fresh lemon juice
- 1/4 cup olive oil
Add of the ingredients, except the olive oil, to the food processor. Start pureeing and slowly drizzle in the olive oil while the processor is running, until it is all added. Puree the dip until smooth and creamy. Serve immediately or store in refrigerator and serve chilled. Keeps in the refrigerator for up to 3 days.
[/print_this]
-
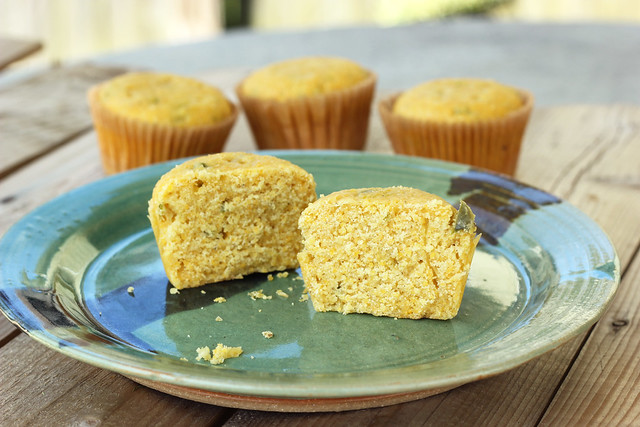
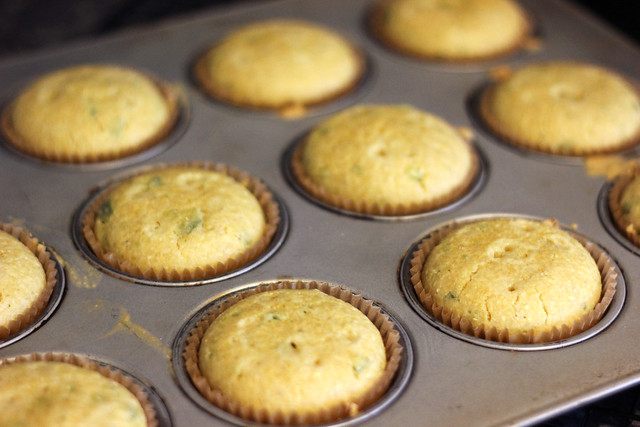
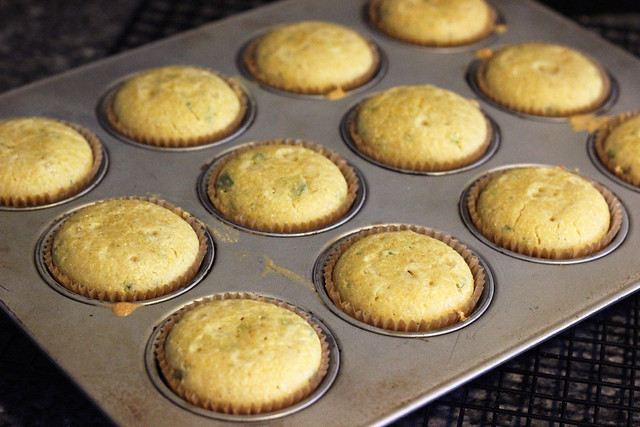
Jalapeño Corn Bread Muffins – Gluten-free + Dairy-free
Hey guys, hope everyone has been well! Sorry for the lack of posts as of late, it has been a bit busy over here with us getting our house ready to get on the market and everything else we have going on, with work and otherwise. We leave tomorrow morning to head to California for the week, where we plan to explore and really dive into what will soon be our new home. Both my hubby and I agreed that with such a HUGE life decision pending, we owe it to ourselves to be 150% positive that this is where we want to move and that this is what we want to do. We are both 99.9% sure, but the last time we were out there, last July, we were talking so casually about it, more like a 5-year plan. Since we really never do anything half-assed, we decided why would we wait so long? Let’s get our house here in Buffalo on the market, sell it and go! So after this week long trip, we plan to get back home, get our house on the market and when it sells, we are gone. We have been painting, putting up lights, decluttering, ebaying, craigslisting and just getting ourselves and the house ready! It has been exciting and worth it though, we can see the progress being made and we are getting that much closer. It looks like if the house here in Buffalo goes on the market in early June, there is a possibility we could be living in California by late Summer. That is so exciting and terrifying, all at once.
As you can imagine, this is partially why I haven’t had as much time to play in the kitchen, play around with recipes, etc. I have been cooking and baking but I have been sticking with trusted and favorite recipes, or just simple throw together things that require very little thought. Though I did try to create a new recipe on Friday night and it just didn’t go as planned, I was trying to make grain-free, vegan ginger snap cookies and they just didn’t come out quite as I had imagined. They tasted amazing but the dough was a bit too thin and the cookies spread out more than I had wanted. So back to the drawing board on those.
Saturday we had a fun little Kentucky Derby party at my parent’s house. So I, of course, did a little baking and cooking! I made oven “fried” okra (vegan and gluten-free), which turned out pretty good and these corn bread muffins. I also made a little something for everyone else, a Louisville favorite, “hot browns”! These are totally not gluten-free, vegan, dairy-free or anything else Beth friendly, but it’s one my hubby’s favorites and it reminds him of home. Rather than butchering a classic trying to make it healthy for me, I took one for the team and made a mini version of the traditional sandwich. Basically a hot brown is roasted turkey served on top of thick toast, topped with a thick, creamy white cheese sauce, some bacon and a slice or two of tomato. All of that is just put in the broiler until browned and bubbly, and you have one happy hubby! This may have been the first time I have ever made something that I couldn’t take a single taste of. I made the cheese sauce from scratch, but since it was thickened with regular flour, I couldn’t taste it. I was relying on everyone else’s taste, it felt strange and foreign. Kinda fun though, too.
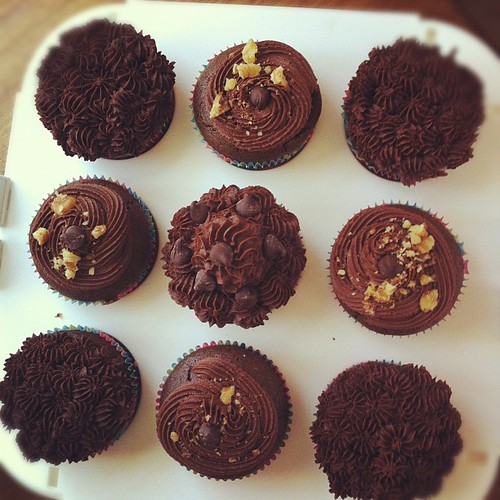
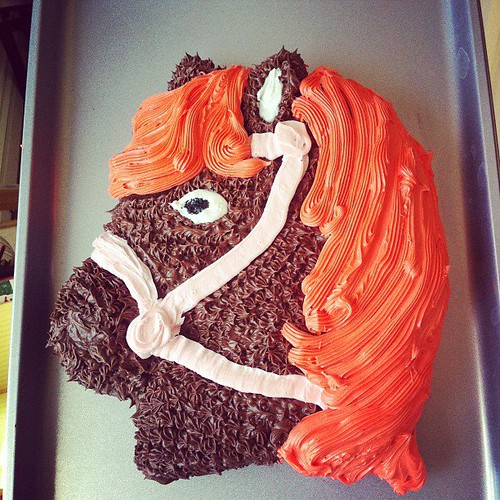
My mom made some oven baked “fried” chicken, we had some delicious beans and greens, some vinegary coleslaw and my dad made pulled pork. Oh, and of course, the bourbon and the mint juleps were flowing freely. My sister made a hysterical horse head cake and for me, she made some incredibly delicious and super beautifully decorated gluten-free and vegan chocolate cupcakes with chocolate frosting, totally from scratch. They were so amazing. My mom also pulled out some of my great grandmother’s (my great Yia Yia) old hats and we all picked one out to wear.
Since I always make sure to make at least one or two things that I know I can eat that are somewhat healthy, besides the simple corn meal crusted fresh okra bits that I baked up to make crispy, I decided to have some fun with these corn bread muffins and add in a little heat with the jalapeños. You could certainly leave those out if you don’t like jalapeños, or you could try chipotle or some roasted poblanos, etc – but I would recommend trying it. The heat and spice is very subtle and it is so nice with the gritty corn flavor. If you like your corn bread more on the sweet side, than savory, just add in a more sugar (or sweetener of your choice).
Our Derby party was super fun and laid back. As we always do, Mark and I hit one of the seedy OTB’s (Off Track Betting) before heading to my parent’s house. It is the only time of year we bet on horse racing. It is our tradition. I always like to bet on one favored horse and one underdog. I put just $10 to win on each of my two picks and didn’t expect much! My underdog horse, #19 – “I’ll Have Another”, actually won and I walked away with $155! Yay!
I am so glad we got to have this little party! This is one of the times of year that Mark gets homesick and we all love a good excuse to party! With us gearing up to move, I cherish these moments more than ever before!!
[print_this]Jalapeño Corn Bread Muffins – Gluten-free + Dairy-free
makes 12 muffins- 1 cup unsweetened almond milk (or other non-dairy milk)
- 2 teaspoons white vinegar
- 2 large farm fresh brown eggs, lightly beaten at room temperature (you could try using an egg replacer here to make vegan,
- but I haven’t done so yet, myself)
- 1/3 cup olive oil (you can also use canola oil or melted coconut oil)
- 1 cup gluten-free stone ground, whole grain medium grind corn meal (If you can’t find whole grain, regular will work and if
- you prefer fine grind over medium, that’s ok, too)
- 1 cup all-purpose gluten-free flour (I used a blend of tapioca, potato starch and sorghum flour)
- 1/4 cup organic raw cane sugar (regular sugar will work, too)
- 2 teaspoons baking powder
- 1 teaspoon sea salt
- 1 to 2 jalapeños, seeded and finely chopped
Preheat the oven to 350ºF. Line a full-sized muffin tin with paper liners.
Mix the vinegar with the milk, and set aside. In a large bowl mix together well all the dry ingredients, corn meal, all-purpose flour, cane sugar, baking powder and sea salt. In a separate medium-sized bowl, whisk together the eggs, olive oil and milk/vinegar mixture. Pour the wet mixture into the dry mixture slowly, mixing all the while. You can use a spoon or a mixer on low, just make sure the ingredients are thoroughly blended. Fold in the finely chopped jalapeños, make sure they are evenly mixed throughout.
Pour the mixture into the prepared muffin tin and bake for 25 to 30 minutes until the top is firm and the edges are slightly browned. Serve warm if you wish.
[/print_this]
-
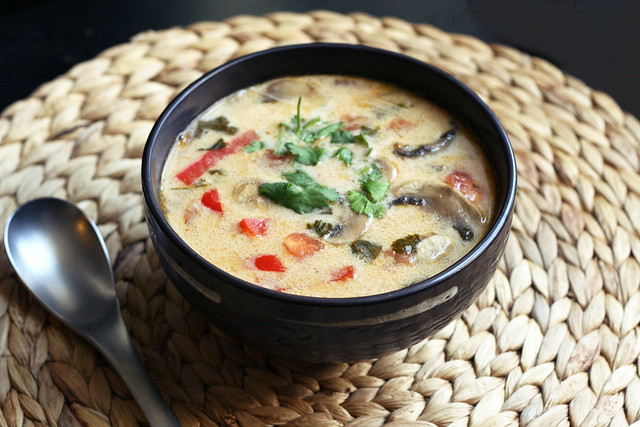
Tom Kha Gai (Thai Coconut Soup) Gluten-free + Dairy-free, w/Vegan options
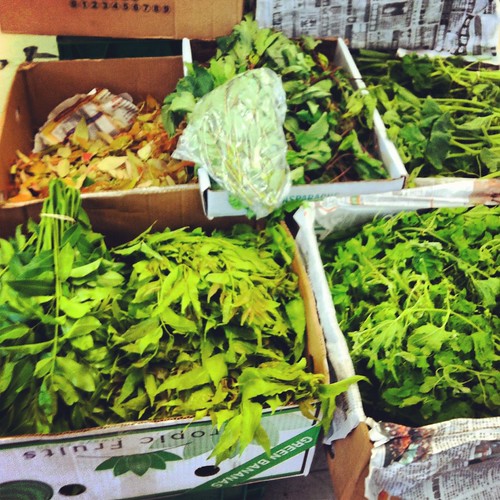
I am really obsessed with Thai food. I actually crave the flavors of Thai food quite often. Honestly, if we could go out for Thai food once a week, I would be totally content. However, we really try to not eat out very often, and I also really prefer to know what exactly is in my food. So, what better way to get what you want, then to just make it yourself. I started looking around at different authentic Thai recipes online and quickly learned to be able to really get the authentic flavors, I would need the proper ingredients. I planned to make Pad Thai and this Tom Kha Gai Soup over the weekend so I had to get all of my ingredients in order to do so. Seeing as a couple of the ingredients I was looking for didn’t exist in my regular circle of grocery shopping, this meant it was time for an adventure. I found there were two different Asian markets on Niagara Street in Downtown Buffalo, conveniently on my way home from yoga, so Saturday morning after my yoga practice, I took my little list and headed over to Niagara Street, feeling very intimidated.
First up, I stopped at A’Chau Oriental Food Market at 833 Niagara St., this is where I was able to grab most of what I needed to make my Pad Thai and Tom Kha Gai Soup, however they were out of fresh kaffir lime leaves. So, after really walking the aisles and grabbing some things not on my list, I headed over to Niagara Asian Market at 937 Niagara Street, where they had fresh kaffir lime leaves and a HUGE basement full of ingredients. In addition to the things I was looking for, I grabbed a few more that caught my eye. I actually picked up a HUGE 4-lb bag of gram flour aka chickpea flour, for just $4.99. I see lots of soccas in my near future! Both markets had so many ingredients I was already familiar with and so many that I had never heard of. They both had unlimited selections of rice noodles, rice flour, tapioca starches, palm sugar etc, available at very inexpensive prices. I could go nuts in those places for sure.
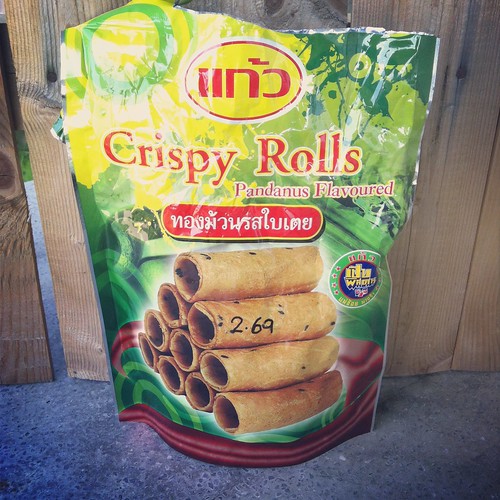
I also grabbed a bag of these Pandanus flavored Crispy Rolls from India, because they caught my eye only having 6 ingredients, coconut milk, tapioca starch, sesame, sugar, salt and pandanus extract. Naturally gluten-free and vegan, what isn’t to like? To be honest, I didn’t (and still don’t) really have a clue what pandanus is, but I didn’t care, I went for it. Some of the best foods and flavors I have discovered that I love are by completely chancing it and trying something totally new. These crispy rolls are super light and crispy, delicious and very satisfying, I love the crunch and the subtle sweetness. Looks like I will be stopping by these Asian markets a lot more than I had planned.
Once I got the few ingredients I couldn’t easily find – specifically the kaffir lime leaves and the galangal root, making this soup was an breeze. I ended up making it for lunch on Sunday! Tom Kah Gai soup has always been one of my favorites. Even when I know I am going to order some type of noodle dish at a Thai restaurant, which is more than enough food, I always feel obligated to order this soup, just because I don’t know when I will have the opportunity again. Now that I know how easy it is to make, I will just make it at home. The flavors in this soup are intense and so wonderful. The bright fresh flavor from the lemongrass is definitely the star of the show, but you get an equal burst of flavor from the keffir lime leaves. It is amazing what a punch those little guys pack! The galangal also brings a pungent flavor very similar to ginger, spicy with a little bit of bite. A little goes a long way with galangal. If you can’t find it easily, ginger will also work great here. Traditionally this soup is made with homemade chicken stock and along with diced or shredded chicken breast. I didn’t have any homemade stock at home so I went with some high quality organic low sodium chicken broth and skipped out on the meat and tofu. I just wanted to enjoy the best part, the delicious broth! To make this soup vegan you could substitute vegetable broth for the chicken and add in tofu or skip it like I did. It won’t be exactly the same flavor profile of traditional Tom Kha Gai soup, but it will still be absolutely delicious.
I am so glad I made the time to make some Thai food at home and explore the Asian markets. Look for my Pad Thai recipe, very soon! I made that Saturday night and both hubby and I were so excited with how it came out that we didn’t take a minute to stop eating so I could take pictures. Mark has already asked me when I will be making it again, so I should have that recipe up soon! Also, if you enjoy Asian foods of any kind (Thai, Chinese, Vietnamese, Japanese, Indian, etc) and you know of an Asian market in your neighborhood, I highly recommend checking it out.
What is your favorite type of Asian food? Do you have a favorite dish? Have you tried making it at home?

[print_this]Tom Kha Gai (Thai Coconut Soup) Gluten-free + Dairy-free, w/Vegan options
serves 44 cups organic free-range low sodium chicken broth (or vegetable broth)
1 15-ounce can full-fat organic coconut milk
1 stalk lemongrass, cut into 1-inch pieces and pounded to really release the flavors
6 kaffir lime leaves
6 thin slices fresh galangal root (or ginger)
1 cup sliced mushrooms
1 small red bell pepper, thinly sliced
1/2 medium red onion, thinly sliced
3 tablespoons fish sauce (or soy sauce)
2 tablespoons fresh lime juice
1/4 teaspoon chili flakes
1 cup firm tofu, diced (optional, you could also add in chicken or shrimp, etc)
1 tomato, diced
1/4 cup thai basil, roughly chopped (optional)
1/4 cup cilantro, roughly choppedBring the chicken broth to a boil in a large saucepan over a medium-high heat, add in the coconut milk, lemongrass, kaffir lime limes, galangal, mushrooms, bell pepper, red onion, fish sauce, lime juice, chili flakes and optional tofu (or meat or shellfish). Simmer for 15 minutes. Add in the diced tomato and stir. Just before serving add in the thai basil and cilantro. Ladle into bowls and serve immediately, topped with additional chopped cilantro, thai basil and maybe some thinly sliced green onions.
[/print_this]
-
Strawberry Basil Almond Flour Muffins – Gluten-free, Dairy-free, Refined Sugar-free
Before I get into chatting about muffins, I wanted to take a minute to thank all of you for your amazing, inspiring and humbling comments on my two year blogiversary post. Besides hearing about how many of you read Tasty Yummies and have been inspired by it, reading all of your touching comments about what makes you happy, seriously moves me. I have read each and every comment and so many of them brought tears to my eyes. So, even though I haven’t responded to all of you, thank you all from the bottom of my heart!
The last week has been a really great one for me, between all the inspiring comments about happiness on my post, meeting a new friend and the wonderful week of yoga I had, I am seriously on cloud nine. I have managed to get to a ton of yoga classes this past week (6 in the last 7 days) and despite my injury a few weeks back, I seem to have found a really sweet spot in my yoga practice, at least it really feels that way to me. Every time I think I couldn’t possibly enjoy the practice of yoga and everything it brings, any more than I already do, I have a breakthrough week. This week that feeling came a few different ways, the first is that I got to spend some time with a fellow student that I have practiced alongside many times. Upon hearing the news that she would be moving back to Rochester tomorrow, after nearly a year of living in Buffalo, before heading off to Africa to teach yoga, we decided we had to get together before she left. We grabbed some food and had a couple drinks and just hung out and got to know each other better. I rarely meet people whom I feel that instant of a connection to, and it was yoga that brought us there. I know that although Lyndsey will be far away and I am relocating to California later this year, we both agreed we will stay in contact and who knows where that connection will take us. I feel there are people in this world that we are meant to meet and even though we wish the circumstances would be different or that they lived closer, etc, it is incredible how powerful it can be that we find one another despite all that. Life is pretty amazing. Besides all of the amazing teachers at East Meets West Yoga that I have gotten to know and love, there are so many other great people that are there, like me, to practice, that I have shared such meaningful conversations with, or even just a warm hello! I feel like I have never ever felt that sense of community anywhere else in my life.
The other thing that made this week of yoga a special one is that I was able to get into three different arm balances that I hadn’t quite been able to master before. I had gotten close on all three in the past at different times, and maybe popped up into them once or twice (likely in happenstance), but it was like I hit a light switch this week and found something that I hadn’t found before. It felt amazing! That is what I love most about yoga, it is ever changing and ever growing. I can’t believe there was ever a time I told myself that I would never be “better” then where I was at that point and that I just couldn’t get into certain poses. Once I let go of that frustration and fear, it not only became so much more enjoyable, but I also found myself doing things I never thought I could. I can honestly say that yoga has changed me both on the mat and off and I will be forever grateful for that.
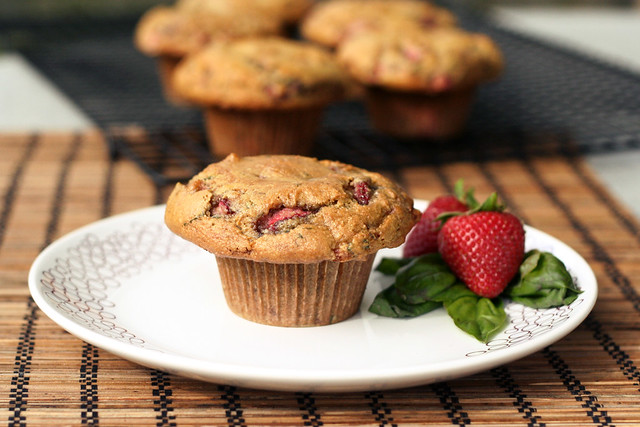
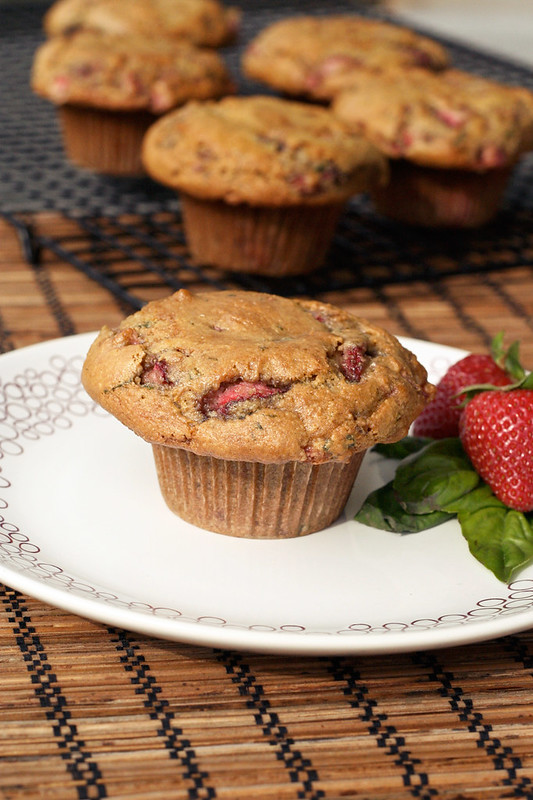
OK, let’s talk muffins! Strawberry basil is one of my absolute favorite flavor combos! I discovered it a few summers back when I was obsessed with mojitos. I started playing with basil instead of mint and adding in strawberries instead of lime. It makes for a great adult drink if you add rum, or a refreshing non-alcoholic drink if you just muddle the two together and top it off with a little sparkling water. They are so perfect together, the tart and subtle sweetness from the strawberries paired with the sweet, almost peppery flavor from the basil. If you aren’t a fan of basil, you can add in fresh mint to these muffins, or just skip it altogether. But I highly recommend trying the two together if you haven’t yet, it is a wonderful surprise for your palette.
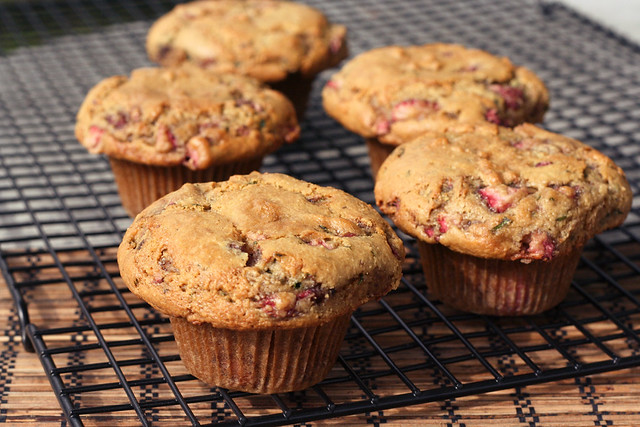
These muffins are bursting with flavor and are also quite healthy for you. They are not only gluten-free, but they are totally grain-free, they are also dairy-free and refined sugar-free. I haven’t yet played with using an egg replacer to make these vegan, but I don’t see why it wouldn’t work. If you do try it out, please do let me know what you think. This recipe makes 6 large muffins. I fill the batter all the way to the very top and as you can see in the photos, that gives you the lovely puffy muffin tops, if you want more muffins, just fill the cups up less and keep an eye on your bake time, it may take a little less time.
Thank you again guys for your wonderful blogiversary wishes and if you haven’t yet entered the contest, please do. You have 5 different opportunities to enter and the giveaway closes on Wednesday.
[print_this]Strawberry Basil Almond Flour Muffins – Gluten-free, Dairy-free (vegan option)
makes 6 or 7 large muffins- 2 1/4 cups blanched almond flour*
- 1 teaspoon baking soda
- 1/2 teaspoon sea salt
- 2 local farm fresh large brown eggs (you can try an egg replacer here, I haven’t yet however)
- 1/4 cup maple syrup (or honey)
- 1/4 cup coconut oil, melted
- 2 teaspoons vanilla extract
- 1 cup fresh strawberries, hulled and roughly chopped
- 1/4 cup fresh basil, finely chopped
Preheat oven to 350˚F. Line a muffin tin with paper liners.
In a medium bowl, whisk together the almond flour, baking soda, and salt. In a separate bowl, beat the eggs. Add in the honey, vanilla and oil and whisk until well combined. Add the dry mixture to the wet, stirring until combined. Carefully fold in the strawberries and basil.
Spoon the batter into the muffin tin, filling to the top if you want a nice muffin dome, or as us ladies know it “muffin tops”. Bake for 25 to 30 minutes or until the tops are golden brown and a toothpick inserted into the center comes out clean. Cool the muffin pan on a wire rack for five minutes. Gently pop the muffins out to continue cooling on the rack (don’t cool them longer than 5 minutes in the hot pan they’ll definitely get soggy). Enjoy a muffin after they have cooled 10 minutes, you know you want to.
I find storing muffins covered tightly in the refrigerator or freezer to be the best. Just pop one out as you want it, heat slightly in the microwave if you want to take the chill off and go.
*Something I have learned from baking on my own and from reading Elana’s Pantry, is that not all almond flour (or meal) is created equal. Bob’s Red Mill makes an almond flour, though easy to find, that doesn’t seem to react quite the same as other almond flours. It doesn’t seem to rise as much and it just seems to leave recipes flat. On Elana’s recommendation I now buy Honeyville brand almond flour in a 5-lb bag from their website.
[/print_this]
-
Tasty Yummies’ Two Year Blogiversary and a Giveaway!
Thank you so so much everyone for participating in the Tasty Yummies 2-year Blogiversary Giveaway and thank you again from the bottom of my heart for all of your lovely comments!! Random.org gave me the random #11 for the winner. Congrats to our winner Alex – who will be getting the Tasty Yummies / Hero Design happiness care package of goodies!! Thanks again everyone!
~~~~~~~~~~~~~~~~~~~~~~~~~~~~~~~~~~~~~~~~~~~~~~~~~~~~~~~~~~~
Today is the two year blogiversary of Tasty Yummies and I can hardly believe it. When I started this blog two years ago, I never thought it could turn into what it has become today. I started writing two years ago just after I lost 30lbs by changing the way I was eating. So many people were asking me what I was eating, how I had time to cook, etc. – so I thought I would start writing up my recipes to share them with people who were interested. I honestly didn’t think anyone would read all of this, let alone be cooking using my recipes or be inspired to change the way they themselves are eating. It still blows my mind every day when I log in here to read the comments and look at the stats. In the last year the amount of people that visit Tasty Yummies seems to go up every week and I am so incredibly humbled by this.
In the last two years so many aspects of my life have changed, but one of the many things that will never change for me is my love for creating in the kitchen and all of the delicious, healthy and clean foods that you can cook and bake, when you just get into the kitchen and start playing. I have so much gratitude for all of the wonderful people, like you, that come to this site, click around, comment and even print out my recipes and try them, you continually inspire me to create more. Just last week I received an email from someone who recently found out she can no longer have gluten, she felt lost and confused and didn’t even know where to begin with her new lifestyle. She wrote me to tell me that she had found my web site and had already tried a few of my recipes and she was instantly put at ease and excited for her new journey. The overwhelming sense of pride that consumes me reading those types of emails and comments give me the energy to make cookies at 10:00 at night or spend an entire weekend trying to figure out a waffle recipe that I know can be done. It makes me happy to know that even if just one of my recipes on here allows someone to see how easy cooking and eating gluten-free and clean can be, then it is all worth it to me.
Tasty Yummies was always meant to be a hobby for me, something I did in between all of the other aspects of my life. Many of you already know this, but my husband and I own our own business, Hero Design Studio, where we specialize in custom design and illustration as well as hand silkscreen printed goods and wares. We are so fortunate to not only do what we love, but to do it with each other. Since we closed our boutique of nearly 5-years ago, just over a year ago and moved our studio home to really be able to focus on our work, I have had even more freedom to create in the kitchen, since it now means just a short walk downstairs. Being that all aspects of my life are more intertwined than ever, I am obviously influenced in many ways from all of my loves. Whether it be design, cooking, yoga, etc – they have all come together in a way, that allows every single day to be a happy one!
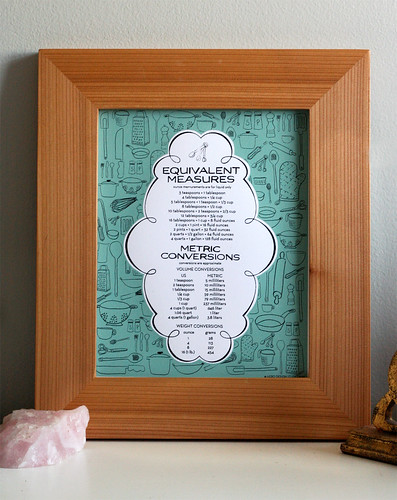
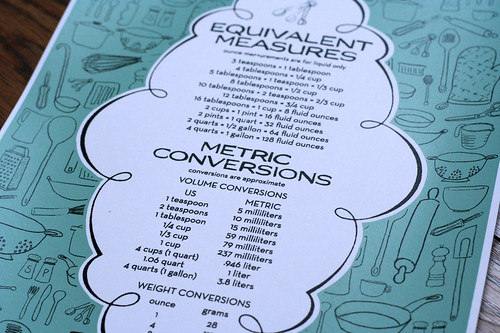
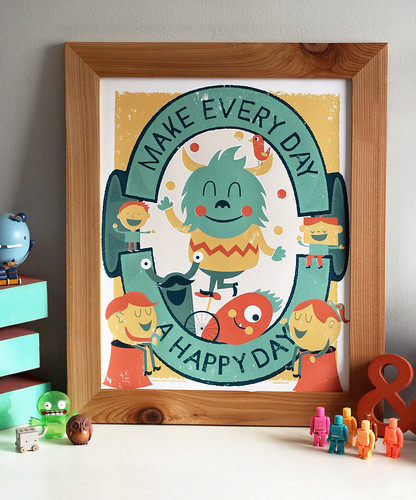
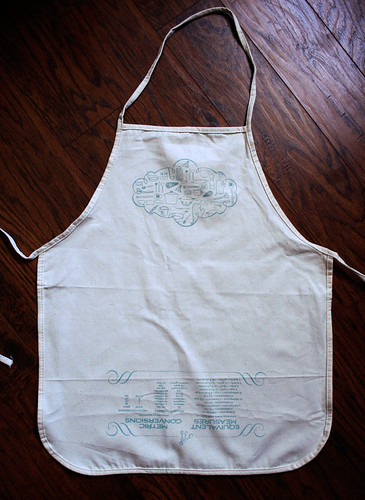
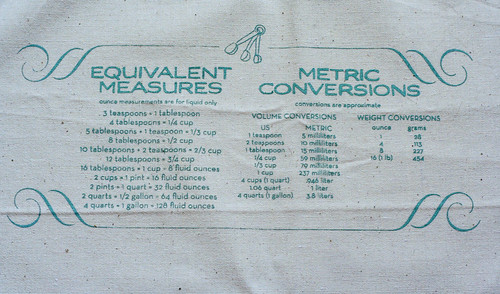
In honor of Tasty Yummies’ two year blogiversary – I wanna share my happiness with you guys. I am giving away a little Tasty Yummies / Hero Design Studio package of goodies. These are just a few things where my love of cooking and creating in the kitchen and the happiness it gives me, has crept in and met up with my love of design, illustration and printmaking! I am giving away all of the items you see below. All are designed and hand silkscreen printed by myself and my husband, Mark.
And thank you again, from the bottom of my heart to all of you that take time out of your very busy lives to read this blog, to try my recipes, to comment, to share my site with others, etc. It truly means the world to me. Namaste.
8×10 2-color Kitchen Tools Art Print
16 x 20 5-color Hand Printed Silkscreen Poster – “Make Every Day A Happy Day”
Kitchen Measurement Conversion Apron (kitchen conversions are printed upside down so you can read them when you are wearing it)
The winner will receive: 1 – 8 x 10 Kitchen Measurement Conversion Print (in the color of your choice), 1 – 8 x 10 Kitchen Tools Print, 1 – 16 x 20 Make Every Day A Happy Day Art Print and 1 – Kitchen Measurement Conversion Apron. This package is valued at over $75.
How to enter:
You can enter up to 5 different ways:
Comment below: Tell me what makes you happy!
Subscribe to the Tasty Yummies RSS feed in your RSS reader or by email
Facebook Like Tasty Yummies
Follow me on Pinterest
Tweet it and while you’re there follow me – @herobeth – You could say something like: Celebrate Tasty Yummies’ 2 year blogiversary by winning a collection of Hero Prints valued at over $75 from @herobeth http://wp.me/p23r4t-y5Please leave a *separate comment* below for each entry!
This giveaway is open to everyone.
The giveaway will be open until the end of the day Wednesday, May 2.
Winner will be selected at random and announced on Thursday, May 3. 1 winner will be selected and notified through email and this post. -
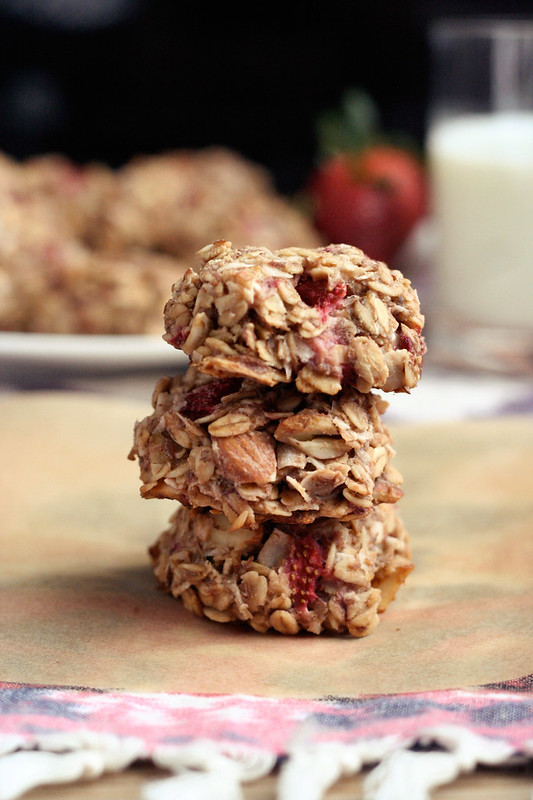
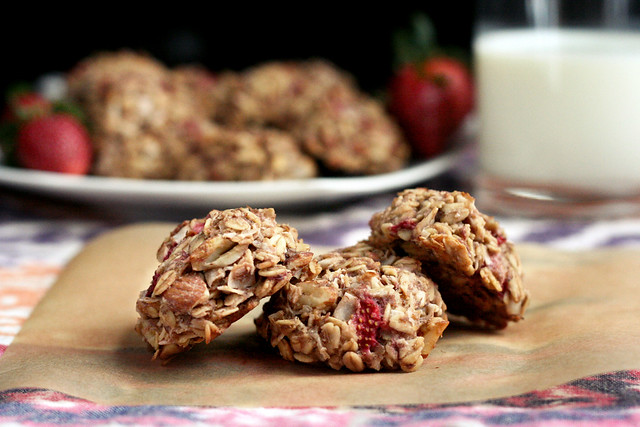
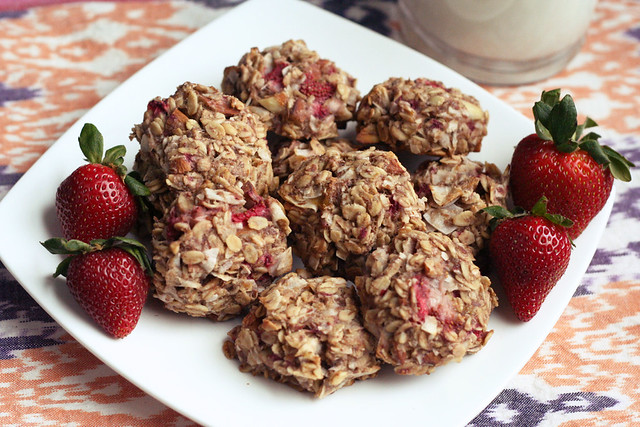
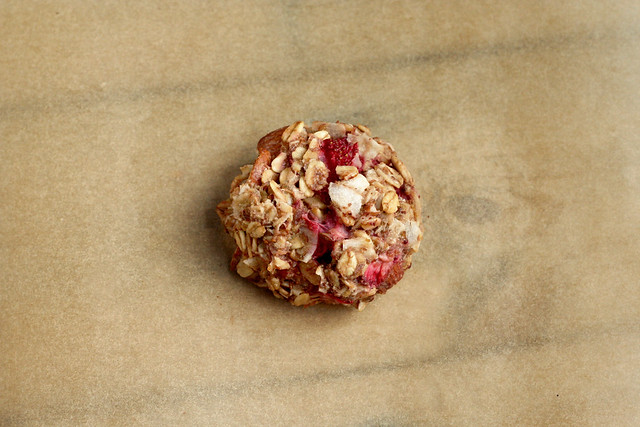
Strawberry Coconut Breakfast Cookies – Gluten-free + Vegan
Since I made my chocolate peanut butter energy bars last month for our road trip to Austin, I have made them a couple more times, sometimes the same exact way, other times tweaking the ingredients a bit to what I had on hand. But, I have been thinking of lots of different things I could do with the recipe since it is so versatile. I had planning to make strawberry almond bars this week until I came across this recipe for breakfast cookies made with dried blueberries. It gave me the idea to instead take the bar recipe I had thought up, and turning it into cookies, to end up with more and smaller servings. Plus, I loved the idea of having cookies for breakfast, even if it is the exact same recipe. Who doesn’t love a cookie for breakfast?
These cookies were so simple to make and they are bursting with flavor! They are subtly sweet from both the bananas and maple syrup and the strawberries bring a bright, fresh and tangy bite. You could definitely substitute your favorite fresh berry in this recipe, raspberries, blackberries, blueberries, etc. You could also use dried fruit, just skip the oat flour and maybe use a little less oats (obviously the fresh berries contain more liquid that dried would, so that is why the difference). Also, you can add your favorite nut, walnuts, pecans, pistachios, etc. Originally I had planned to use almond butter instead of the coconut oil, but I really loved the combination of the strawberry and coconut, two of my absolute favorites, together!
I made these delicious breakfast cookies late last night after we got home from grocery shopping. I, of course, had to have one when they were still a little bit warm, and it was delicious. Then I grabbed one on the way out of the house first thing this morning on my way to yoga. It was the perfect quick little treat. The nice thing about these cookies are they aren’t too sweet, so you don’t have to feel any guilt eating them for breakfast. It’s just like having a granola bar, but better! But they are sweet enough that they are great as a healthy dessert, too!
Do you ever have cookies for breakfast?
[print_this]Strawberry Coconut Breakfast Cookies – Gluten-free + Vegan
makes 18-24 cookies- 2 cups of certified gluten-free rolled oats (I use Bob’s Red Mill)
- 1/4 cup certified gluten-free oat flour (or just process some gluten-free rolled oats into a fine powder)
- 1 cup unsweetened coconut flakes
- 2 tablespoons ground chia seeds or ground flaxseeds
- 1/2 cup almonds, roughly chopped
- 1/4 teaspoon sea salt
- 2 organic bananas, mashed
- 2 tablespoons maple syrup (or honey)
- 1/4 cup coconut oil, melted
- 1 cup fresh organic strawberries, roughly chopped
- 1 teaspoon vanilla
Preheat the oven to 350º F. Line a baking sheet or two with unbleached parchment paper. In a large bowl combine oats, oat flour, coconut, chia seeds, almonds and salt. Stir in bananas, strawberries, coconut oil, maple syrup and vanilla. I use my clean bare hands to mix it all up so I can really get in there and get everything well mixed. You can of course just use a large spoon or spatula.
Form the dough into 2 1/2 inch balls/discs with your hands and place into even rows with just a little room in between them. Press them down very gently to flatten them a bit.
Bake at 350° for 25-30 minutes or until fragrant and golden. Cool on pan for a few minutes than transfer to a cooking rack. Enjoy for breakfast, dessert or an anytime snack.
[/print_this]
-
Vanilla Almond “Sugar” Cookies Made from Almond Milk Pulp – Gluten-free, Vegan + Refined Sugar-free
Every time I make my homemade almond milk, I swear that I am going to do something amazing with the leftover almond pulp. Enter Vanilla Almond “Sugar” Cookies Made from Almond Milk Pulp! Most times I put it in the fridge with really great intentions and plans, then within a few days it has mold and I feel horrid throwing it out. Happens way more often that I would like to admit. Almond pulp has to get used up within a day or two, so if you can muster up the motivation to do something with it, you have to do it quickly. This time as soon as I finished making the almond milk I started looking around online at different recipes I could use the pulp in. I have seen many recipes for savory crackers made from the almond pulp, but since this time the almond milk (and therefore the almond pulp) that I made was sweetened and I added vanilla, I wanted to make some type of sweet cookie. I still want to play around with a cracker recipe, too. So hopefully soon.
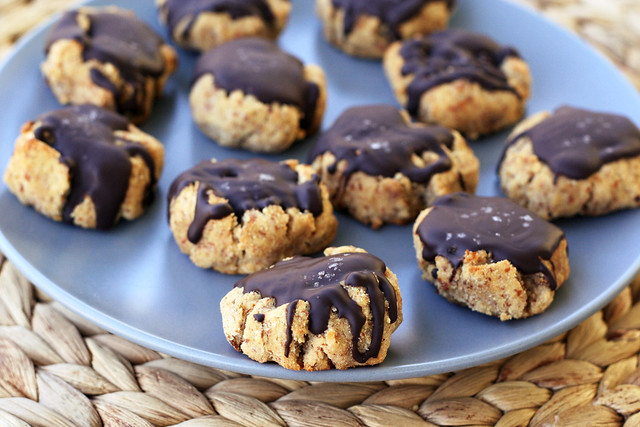
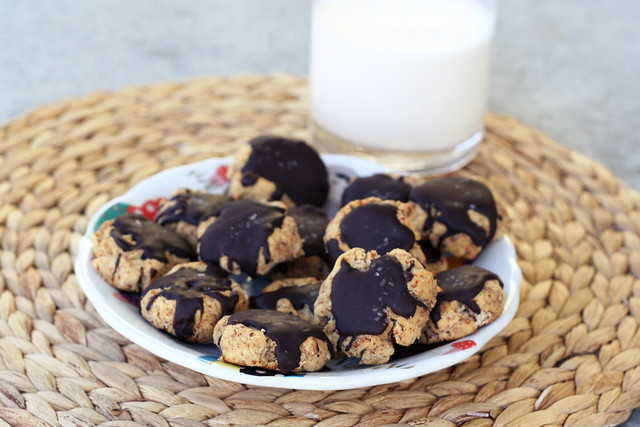
These cookies have a really great vanilla flavor and they are delicious with an ice cold glass of almond milk, or a mug of hot tea or coffee. If you want to skip the chocolate and sea salt on top, go for it, I just felt like it was the perfect compliment to them, who doesn’t love chocolate? These cookies are subtly sweet and reminiscent of a classic sugar cookie, but without all the junk. Side note, even after baking and making dozens of different sweet treats and smoothies, etc – sweetened only by using dates, I am still completely amazed by them. Who knew those funny looking little things could be so sweet and sinful. The sweet nuttiness from the almond pulp is so delicious and pronounced in these cookies, it’s really one of my favorite flavors. After eating a bunch of these, I started thinking about different ways I could play with this recipe. I think you could add cocoa to make a chocolate cookie and I also think a spicy gingersnap version of these cookies made with ground ginger and cinnamon would also be delicious, so I will definitely have to play around with both of those.
Just a quick note, the original recipe has an option to dehydrate these cookies to make them “raw”, but since I don’t have a dehydrator and I was making these at night and wasn’t comfortable leaving them in the oven overnight, I just baked them as the recipe also suggests. The bake time can vary a bit depending on how moist your pulp was when you started, I think mine ended up baking for nearly 30 minutes, but I would suggest checking them around 18 or 20, since you don’t want them to dry out or burn.
[print_this]Vanilla Almond “Sugar” Cookies with Dark Chocolate and Sea Salt – Gluten-free, Vegan + Refined Sugar-free
Makes approximately 2 dozen cookies
Recipe adapted from Choosing Raw- 2 cups almond milk pulp
- 8 soaked and pitted medjool dates
- 1/3 cup almond or coconut flour
- 2 teaspoons vanilla extract
- dash of sea salt
- 1/4 – 1/3 cup melted dairy-free dark chocolate (I melt unsweetened bakers chocolate and sweeten it with a little maple syrup and/or stevia, you can use semi-sweet chocolate chips or whatever your favorite chocolate happens to be)
1 teaspoon course sea salt
Preheat the oven to 350º F. Line a cookie sheet with parchment paper.
Add the almond pulp, dates, coconut flour, salt and vanilla extract into a food processor and process until the “dough” is the same texture and consistency of sugar cookie dough, or there about. You may need to add a little more flour, depending on how moist your almond pulp was to start.
Using your hands, make small little round balls with the dough (about a tablespoon or so each) and line them up in rows on your parchment paper lined cookie sheet. Press each one down very gently using a fork. (the original recipe called for using a fancy cookie press, but since I don’t have one, I improvised)
Bake cookies for about 20 – 25 minutes, or until golden brown. This time may vary depending on how moist your cookies are. Just keep checking on them so you don’t burn them or dry them out.
Allow the cookies to cool totally then drizzle the dark chocolate over top of each cookie and sprinkle a small amount of seat salt on each cookie.
[/print_this]
-
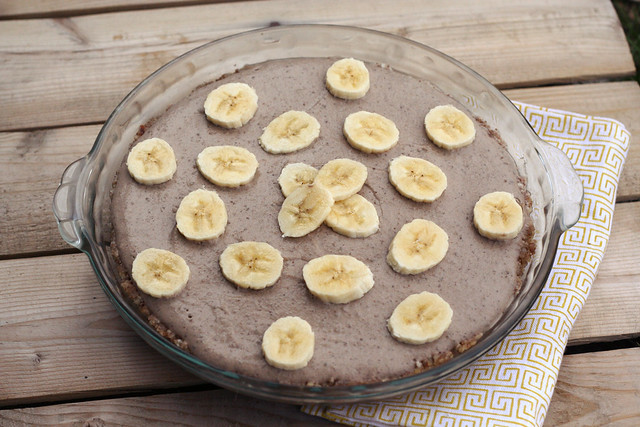
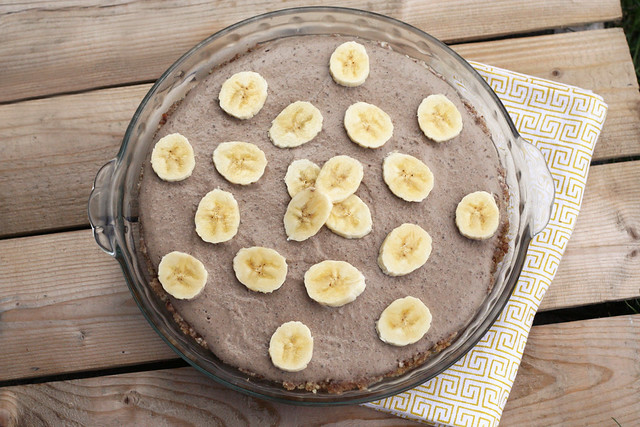
No-Bake Banana Cream Pie – Gluten-free + Vegan
I was very excited when I got an email a few weeks ago from Free People asking if I’d like to be a guest blogger on their popular blog, BLDG 25. I, of course, said yes, and I am a regular lurker of the blog and I really love it. They asked if I would share an exciting recipe for the launch of their newly designed and updated blog, so I knew the perfect recipe to share.
I had been working on a recipe for No-Bake Banana Cream Pie, with a raw nut based crust and a non-dairy filling, so that seemed like the absolute perfect fit. This pie is both gluten-free and vegan and easily made raw, and it is of course absolutely delicious, even without all the sugar, dairy and other yucky stuff. And come on, who doesn’t love pie?
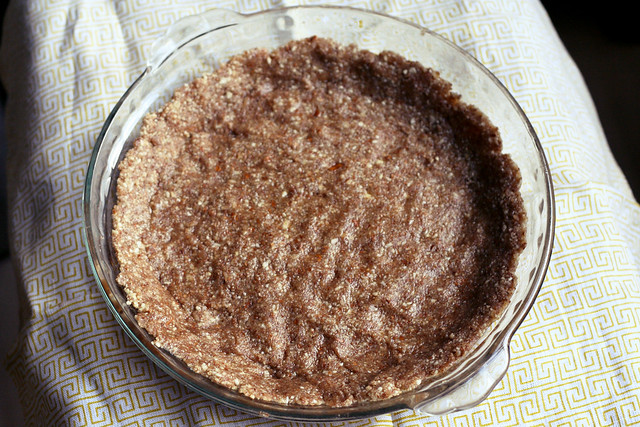
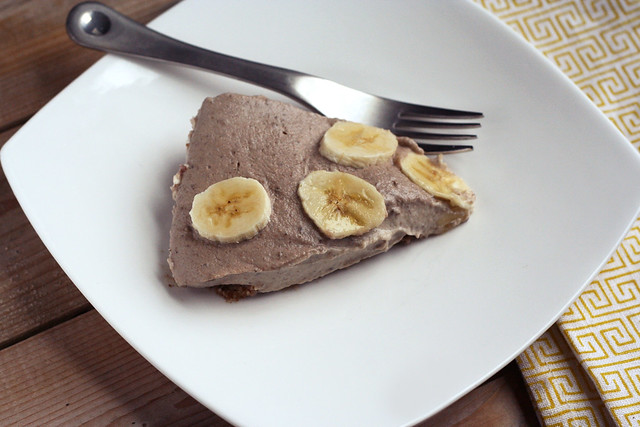
So, go on over to the newly redesigned and updated Free People Blog, BLDG 25, now and check out the recipe for my No-Bake Banana Cream Pie and please take a minute to comment, if you will. There was mentioned of me being an ongoing guest poster, so who knows, there may be more Tasty Yummies on the Free People blog soon enough! Enjoy. -
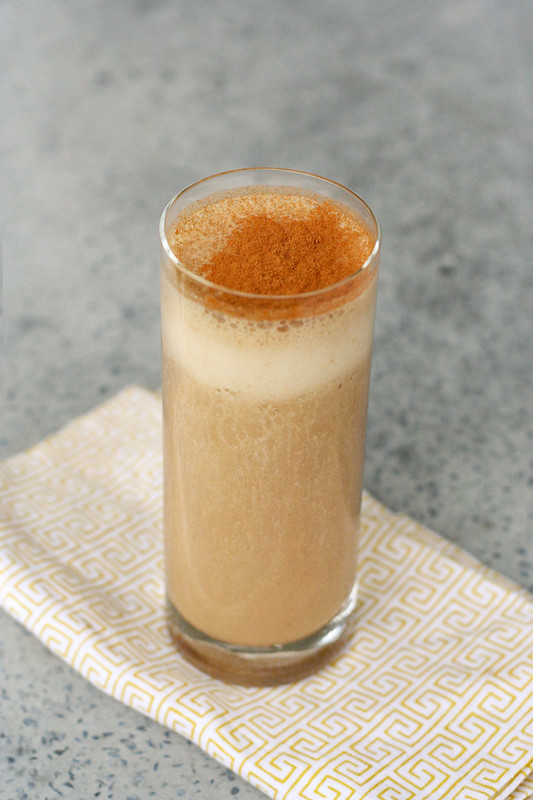
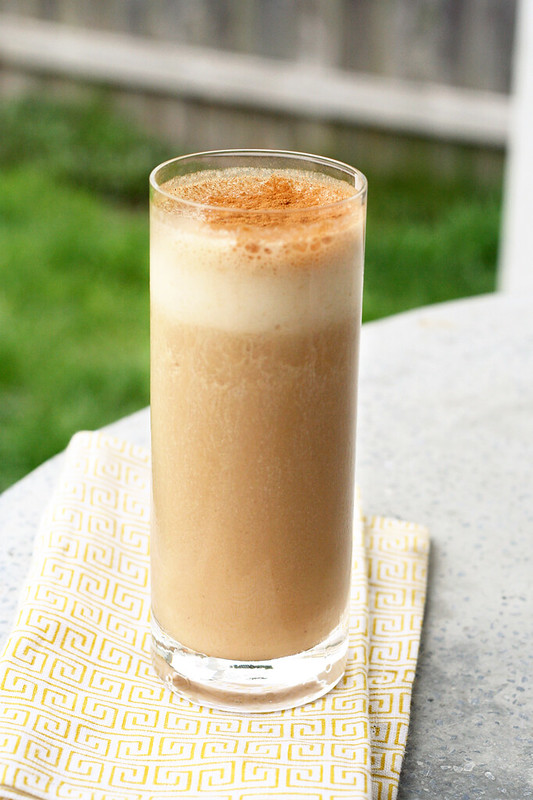
Vanilla Banana Chai Smoothie – Gluten-free + Vegan
So, this is a short but sweet post. I actually didn’t plan on creating this recipe, it just kinda happened. Hence the single haphazard looking photos! But this was too good not to share. Sunday night I made some homemade raw vanilla almond milk. It had actually been a while since I have made it. I forgot how easy it is and how amazing it tastes. I also made my chai concentrate late last week. When I got home from yoga Monday morning, I was in a bit of a rush to get something into my tummy and to get upstairs to get to work so I thought up the idea of a banana chai smoothie. Once again, like the socca I made last week, I am not sure why I haven’t done this sooner. What a lovely combination of flavors, the rich vanilla flavor, the creaminess from the almond milk and the banana, the subtle nutty flavor and all those delicious spices! YUM!
It has actually been a while since I made almond milk at home. Even though it is super simple, I somehow always talk myself out of it when I am at the store looking at the bulk raw almonds, contemplating it. Somehow it seems easier and quicker to just grab a carton of my favorite organic unsweetened almond milk. Then when I do find the time to make it and take one sip, I remember that it is totally worth it. This time, I also finally made an effort to do something with the leftover almond pulp from making the almond milk. I made some delicious vanilla “sugar” cookies drizzled with chocolate, with just a few additional ingredients besides the almond pulp. Look for that recipe later in the week.
If you don’t have chai concentrate at home, see the note at the bottom of the recipe for a suggested alternative. I think it would work just great.
[print_this]Vanilla Banana Chai Smoothie – Gluten-free + Vegan
serves 1- 1/2 cup chai concentrate*
- 1/2 cup vanilla almond milk
- 1 organic banana
- 1 teaspoon vanilla extract
- 1 handful of ice
- Sweetener of your choice, to taste, if your chai and almond milk aren’t sweetened – a bit of maple syrup or a few drops of liquid stevia would be perfect, you could also add 1 or 2 pitted dates
- 1/8 teaspoon ground cinnamon
- 1/8 teaspoon ground nutmeg
Add everything but the cinnamon and nutmeg to the blender and process until smooth and creamy. Pour into your glass and shake a little cinnamon and nutmeg over top. Serve immediately.
*Note – if you don’t have chai concentrate on hand, you could probably just brew a strong cup of chai using a tea bag. I would suggest just adding about 1/2 cup of boiling water to a mug with your favorite chai tea bag, removing the tea bag after it steeps long enough to be a strong dark cup of tea, then chill it and then add it to the smoothie. Or maybe you are inspired to just go with straight almond milk and add some classic ground chai spices themselves to the smoothie like cinnamon, cardamom, ginger, nutmeg, etc. Play around and let me know if you try any of those either variations.
[/print_this]
-
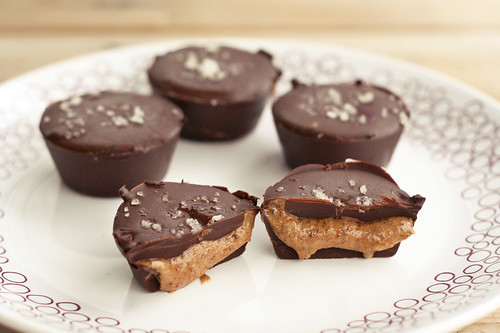
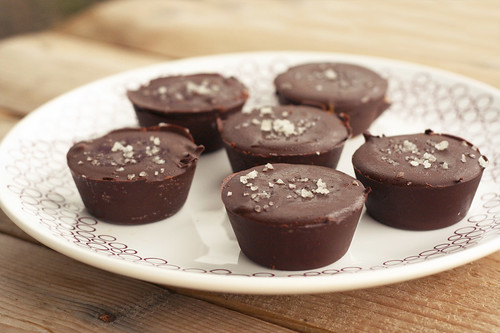
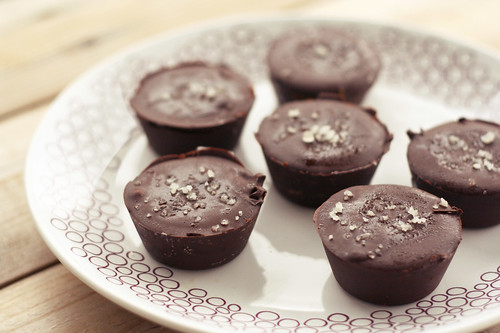
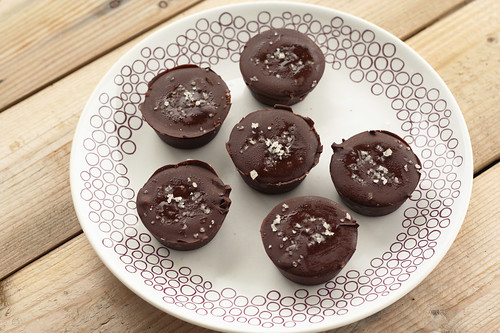
Dark Chocolate, Almond Butter Mini-Cups with Sea Salt – Gluten-free, Vegan + Refined Sugar-free
Ever since I made these dark chocolate coconut treats about a month or so ago, I have been a little obsessed with making simple little chocolate treats at home. On Easter, since we really don’t keep many sweets at home and we didn’t do the Easter basket thing, I was craving chocolate treats and decided to make some dark chocolate peanut butter cups. I didn’t take any photos since they weren’t totally perfect and I also decided I wanted to buy a mini-muffin tin so I could make smaller cups. The full size muffin cups are nice, but it is way more chocolate than what I need. I also thought it would be nice to make them with almond butter instead of peanut butter since I am so obsessed with it. Any nut or seed butter would work here, so play around. You will also see in my notes below that if you don’t wish to sweeten your own dark chocolate, you can simply just melt semi-sweet chocolate chips. I prefer to start with a good quality organic unsweetened dark chocolate something in the range of 70 – 100%, and then sweetened to my own liking since I like my dark chocolate to be subtly sweet. You may find that my measurements are too low and you want more sweetness. Go for it. Or skip sweetening it yourself and buy premade chocolate. Whatever you’d like.
I make these in a non-stick mini-muffin pan, like this one. You could definitely use a candy mold, a full sized muffin tray or maybe even a larger ice-cube tray. If you’d like, you can also line your muffin pan with paper liners. I didn’t happen to have any, so I went without, and very lightly greased my pan with some coconut oil, to be sure they wouldn’t stick. They likely wouldn’t have stuck, but I wanted to be sure of it.
Some of you may be wondering why I included the chia seeds in the almond butter filling or if you could use flax seed meal instead. I decided to include it because besides LOVING chia seeds, I had some leftover ground up chia sees on hand after making these delicious tortilla wraps from The Spunky Coconut, over the weekend. I thought it would help bind together the filling so it wouldn’t be too runny and I also thought it was a nice way to add some of the lovely benefits that chia seeds have to offer. You can read more about all of those lovely benefits here in this post from Lexie’s Kitchen. Feel free to use ground flax seeds instead or to skip it all together. It isn’t a necessity in the recipe.
As far as the sea salt goes, I really adore the flavor combination of dark chocolate with sea salt, so I try to squeeze it into my life whenever humanly possible. It may actually be one of my all time favorite things. If you aren’t a fan of the luscious salty/sweet combo, leave off the salt. You could also press a single almond or some almond slices into each one. Have fun.
What is your favorite flavor combination when it comes to sweets?
[print_this]Dark Chocolate, Almond Butter Mini-Cups with Sea Salt – Gluten-free, Vegan + Refined Sugar-free
makes 12 mini-cupsDark Chocolate Outside:
- 8-9 ounces of dairy-free, dark chocolate – (I used this unsweetened dark chocolate and sweetened it myself, as you can see below. If you use semi-sweet chocolate or chocolate chips you can skip the coconut oil and the sweeteners below.)
(optional if using unsweetened chocolate)
- 1 tablespoon coconut oil
- 3 tablespoons pure maple syrup*
Almond Butter Inside:
- 1/2 cup chilled organic unsalted almond butter (or any other nut butter or seed butter of your choice)
- 1 tablespoon ground chia seeds (you can just grind whole chia seeds in a coffee grinder or Magic Bullet)
- 2 tablespoons pure maple syrup
- a pinch of fine grain sea salt
For Topping:
- 1/2 to 1 teaspoon course grey sea salt (you can also try smoked sea salt)
Using a little coconut oil on some wax paper or a paper towel, very lightly grease a non-stick mini-muffin pan. (the muffin tin may not need to be greased, but since I didn’t use any paper liners, I didn’t want to risk the candies sticking.) You could also use a silicon candy mold. Set the pan aside. Melt the dark chocolate with the coconut oil (or your chocolate chips), either very carefully in a double boiler setup on the stove top or in small increments in the microwave. After the chocolate and coconut oil is melted, whisked together and well combined, remove from the heat (if you melted it on the stove), and add in the maple syrup. Stir well to combine. Give the chocolate topping a little taste to see if you want it any sweeter. Add more syrup, if you wish.
Using about half of the melted chocolate, add a little bit to each cup of your mini-muffin tin. Probably about a teaspoon or so to start. Grabbing either side of the tin, swirl the pan around to start moving the chocolate up the sides of each cup. Try to get it all the way up if you can. You can also use a pastry brush or spoon to push it up the sides, but I find just swirling it around works best. You can also line each cup with a paper mini-muffin liner and just paint the melted chocolate up the sides. Once it is evenly up the sides, you can add a little more chocolate to make sure that the bottom is covered, just don’t add too much, you need to save room for the filling and top.
Place the muffin tin into the freezer to allow the chocolate to set. Meanwhile, start making your filling. Add the almond butter, ground chia seeds, maple syrup and a pinch of sea salt to a small bowl. Mix very well to combine and allow it to sit about 5 to 10 minutes while the chocolate sets up in the freezer.
Once the chocolate has hardened, pull the muffin tin out of the freezer and add about 1 teaspoon of almond butter filling to each cup. Then take the remaining melted chocolate and spread it over top of the almond butter. I find using the back of a spoon is the easiest to give it a nice smooth surface. And if you are adding the sea salt on top, sprinkle a few pieces on top of each cup. Place the muffin tin back into the freezer to allow the chocolate to harden. This will probably only take about 30-minutes, total.
Once hardened, remove the muffin tin from the freezer and carefully pop or slide each chocolate mini-cup from the tin. Should happen very easily. Store these in the fridge or they will get pretty soft and melted.* NOTE about sweeteners: You can use whatever sweetener of your choice and as much as you would like. Traditional sugar will obviously work if that’s your thing, as would honey or other sugar alternatives. Use what you like. Everyone likes their chocolate at different sweetness levels. I prefer mine not too overly sweet. As mentioned above, you could also just melt semi-sweet chocolate chips that are already sweetened and skip adding your own sweetener and coconut oil. Same goes for sweetness in the almond butter filling.
[/print_this]
{this post contains affiliate links}
-
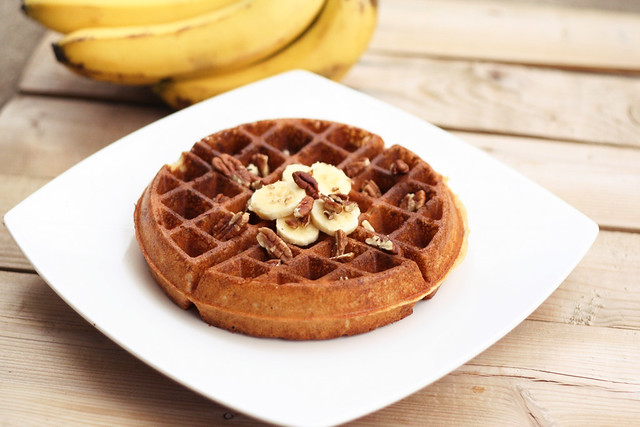
Banana Pecan Waffles – Gluten-free, Vegan + Refined Sugar-free
I am so so so excited about this recipe! I have been playing around with this recipe or some version of it for months. I made it once on a whim, first time I had ever tried and I didn’t measure too accurately and they came out perfectly. I have tried several times since to recreate it, each time without success. It has been a while since I tried, since I tend to get really frustrated when it’s just not working and I know it should. However, yesterday morning was my day! I went back to yoga first thing in the morning for an 8:30am vinyasa class, after a week off due to a slight injury and I couldn’t wait to get home to make these for breakfast. Fully expecting another crumbled, annoying mess, I didn’t really make a big deal about making these. But, alas, the stars aligned, I got my measurements on point and it all just worked! I love that.
Admittedly, one waffle, the first one, was sacrificed for the greater good of this recipe. I tried to open the waffle iron and take it out after just 3 minutes (which seems to usually be the sweet spot with my waffle iron) and it just wasn’t happening. The waffle stuck to either side of the iron and split into two halves when I opened it. That was when I realized I need to give it another minute or two. The remnants of that sacrificed waffle were still edible, so just know on your first time making these, you may lose the first one while learning that perfect time for your iron and this recipe.
I always have different gluten-free all-purpose flour blends on hand, whether pre-mixed or custom made with my own blends of flours and starches. This time I used Bob’s Red Mill since that is what I had on hand. It worked out perfectly. I cannot wait to try this again with one of my multi-grain blends, maybe something with teff, sorghum and/or buckwheat flours. I also can’t wait to try this with applesauce instead of banana for an apple cinnamon waffle.
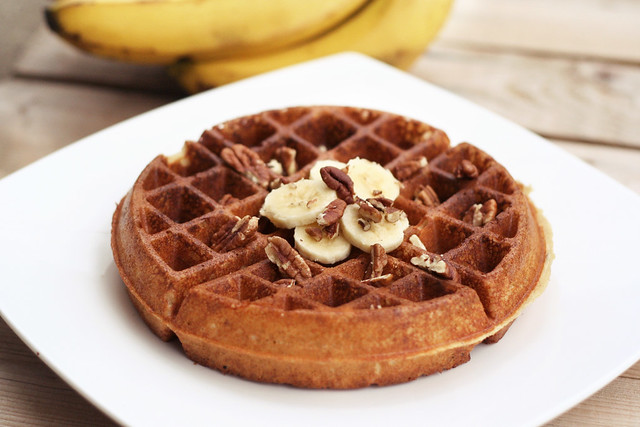
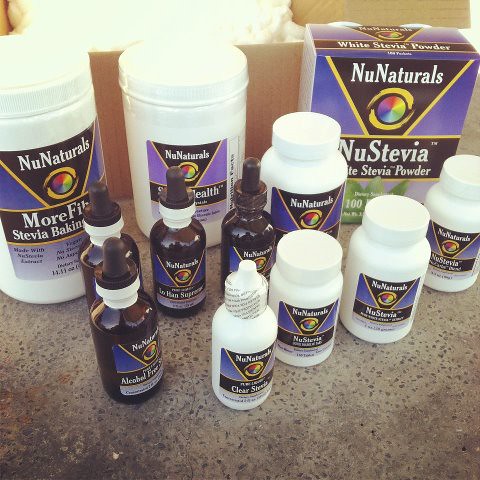
These waffles are wonderfully fluffy with the perfect amount of golden browned crispiness to the outside. From what I have read about most waffle irons, that nice golden brown outside is achieved by using cooking oil instead of cooking spray to grease your iron. I used grapessed oil and I greased it right before I started and again in the middle of making these, after I made the first two. I decided to use some of the Pure Liquid Clear Stevia I received from NuNaturals, to lightly sweeten them. There is some natural sweetness that will come from the bananas, so if you want to skip a sweetener or use a little maple syrup or honey instead of stevia, that will work, too.
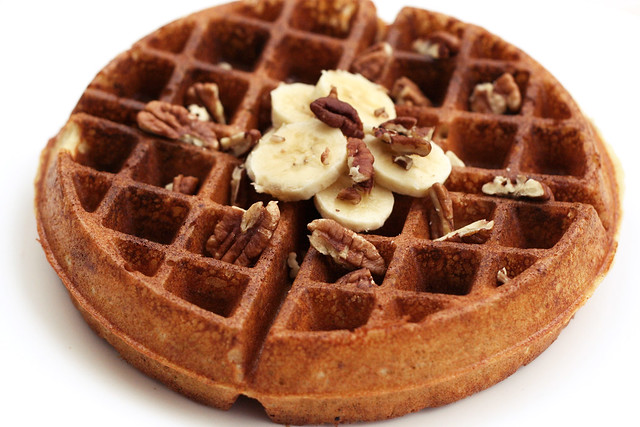
When serving, you can certainly drown these in your favorite local maple syrup and a pat of your favorite butter-alternative, or maybe some non-dairy whipped topping, (like whipped coconut milk). Or, you can just eat them as is, warm, topped with fresh bananas and chopped pecans. Feel free to use whatever your favorite nut is, or maybe try adding in some mini chocolate chips instead, or in addition to. This waffle would also be delicious sectioned into the little wedges and served warm, 1 or 2 of the wedges per person, topped with your favorite ice cream!
[print_this]Banana Pecan Waffles – Gluten-free, Vegan + Refined Sugar-free
makes 4 large Belgium style waffles – may make more depending on the size of your waffle iron- 1 large or 2 small organic banana(s), mashed – you are looking to get approximately 1 cup
- 1 3/4 cups unsweetened vanilla almond milk (or other non-dairy milk) – make sure it is room temperature, not cold
- 1/2 cup coconut oil, melted
- 10-15 drops liquid stevia (or you could use approx. 1 tablespoon of maple syrup or another liquid sweetener of your choice)
- 1 teaspoon vanilla extract
- 2 cups gluten-free all-purpose flour (I use Bob’s Red Mill)
- 1 1/2 tablespoons baking powder
- 1/4 teaspoon sea salt
- 1/2 teaspoon ground nutmeg
- 1/2 cup roughly chopped unsalted pecans (or any other nut of your choice. mini chocolate chips would be really good, too)
Topping:
- 1 banana sliced
- 1/4 cup of roughly chopped pecans
- butter, ghee or coconut butter
- maple syrup
- or anything else you might like.
Preheat your waffle iron. Make sure it is properly greased with cooking oil or non-stick spray. I drizzled a bit of grape seed oil on mine and made sure to spread it around. Cooking oil will give your waffles a nice golden outside that you won’t get with cooking spray.
In a large mixing bowl, whisk together the mashed banana, almond milk and melted coconut oil. Be sure your almond milk isn’t too cold or it will solidify the melted coconut oil. Add in your stevia and vanilla extract and give it a good stir.
Then add in the flour, baking powder, sea salt and nutmeg. Mix very well to combine, then fold in the chopped pecans or other goodies. Allow the batter to sit for 3-5 minutes.
Add 3/4 – 1 cup of batter to your hot waffle iron. Cook for 3-5 minutes, depending on your machine’s instructions. Mine took just over 4 minutes. Any less for me and the waffle would stick to either side of the iron and come apart in two when I opened it to check on it.
You can make as many waffles as you’d like and just store the remaining batter in an airtight container for up to 2 days in the refrigerator. You can also store any uneaten but already made waffles in an airtight freezer bag, either in the refrigerator or in the freezer and you can just heat one up in the microwave and/or toaster oven when you are ready to eat it.
[/print_this]
-
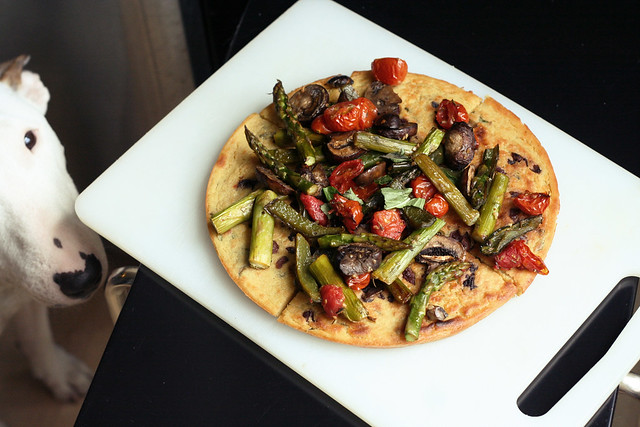
Kalamata Olive and Herb Socca with Roasted Vegetables – Gluten-free + Vegan
Have you ever made a dish or a recipe for the first time and upon the very first bite, immediately wondered why you haven’t been making it for years? That’s what happened when I made socca for the first time! I had seen recipes here and there online and always thought in the back of my mind “I really need to make that”. I finally did yesterday for lunch and it is official, on the first bite – I was OBSESSED.
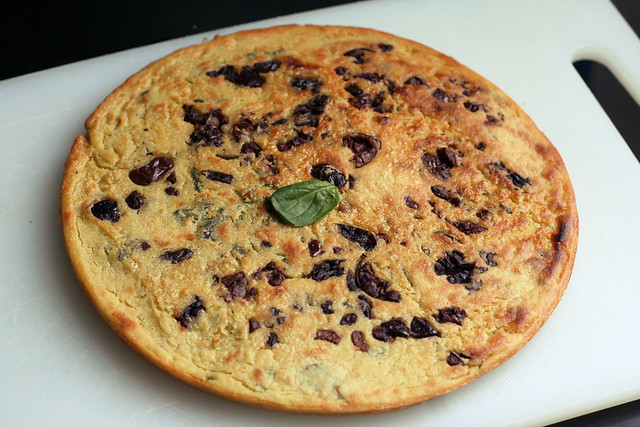
Socca, also known as farinata or cecina, is a sort of thin, unleavened pancake or crêpe of chickpea flour. Served hot and crispy, this chickpea pancake is a quintessential street food found in Nice, France. Many times it is browned or even blackened around the edges, and it has an almost custard like, tender inside. From what I have read, traditionally it is made in a cast iron pan over hot coals or a fire, but it can certainly be made at home in a hot oven, either in a cast iron pan, cake pans or a pizza pan.
Most recipes I came across called for only about a cup of chickpea flour to make 1 big socca in a larger cast iron skillet or two smaller (about 7-inches each). Since I only have a smaller cast iron skillet and I was afraid I would ruin this on my first try, I decided to increase the ingredients to make it work in two 9-inch cake pans. Plus, I wanted to have two soccas and I also wanted them to be a bit thicker to hold up to the roasted veggies. It worked perfectly. If you have smaller cake pans or want to make one large one, or you want two and you want them a bit thinner, just go with 1 cup of chickpea flour and about 1 1/4 cups of water and maybe just 2 to 3 tablespoons of olive oil.
Besides looking incredibly delicious, what really intrigued me about all of the socca recipes I found, were that almost all of them were naturally gluten-free, since the only flour used is chickpea (or garbanzo bean) flour. I happened to have Bob’s Red Mill’s blend of Garbanzo and Fava Bean flours on hand, so I decided to go with that. It worked perfectly, but obviously if you have traditional chickpea (or garbanzo bean) flour that will work, as well. I plan to make this again and again, now that I know how easy it is to make, so there will be plenty of times to use just chickpea flour.
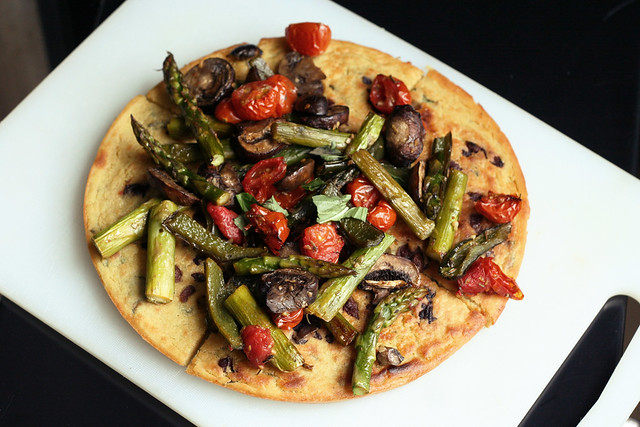
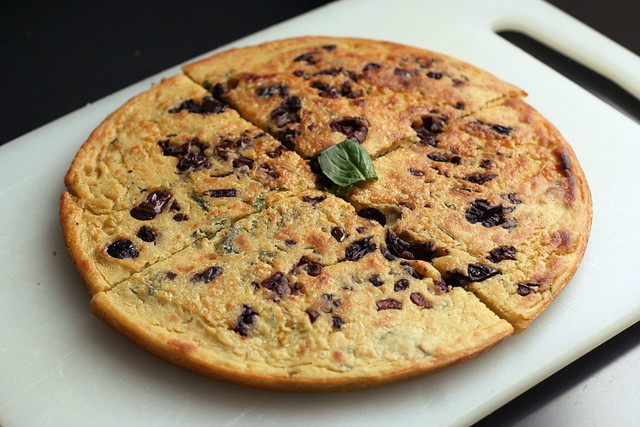
The nice thing about socca is you can simply pop it out of the pan, cut it into wedges and eat it as is or you can play with different toppings and/or ingredients to include in the batter. Cut up into bite-sized pieces it is a great appetizer or snack for a handful of people, or you can top it with lots of fun ingredients and serve it flatbread or pizza style for a meal, kinda like this. I bet you could even opt for sweet ingredients like a little coconut sugar, some cinnamon and a little vanilla and make it a tasty dessert treat or brunch side. So versatile. I am sure traditionalists prefer to not add things like fresh herbs and olives, but I just couldn’t help myself.
This batter comes together very quickly, but you should allow it to rest a few hours before using, at the minimum 30-minutes. You can even make the batter ahead of time and cover it and put it in the refrigerator overnight. Socca is meant to be thin and rustic, so don’t stress if yours breaks apart as you flip it out or try to cut it up, just eat it with your hands and enjoy every bit of it.
My adorable little lurker, Seri, trying to sneak a sniff of the warm socca!
[print_this]Kalamata Olive and Herb Socca with Roasted Vegetables – Gluten-free + Vegan
Adapted from many different recipes
Makes about two nine-inch soccas- 1 1/2 cups chickpea/garbanzo bean and fava bean flour blend (this is what I had on hand, you can use just chickpea (or garbanzo bean) flour alone, which is the traditional way to make it)
- 3/4 teaspoon sea salt
- 1/2 teaspoon freshly ground black pepper
- 1 3/4 cups lukewarm water
- 3 tablespoons extra-virgin olive oil, plus more for the pans
- 2 tablespoons fresh basil, roughly chopped (rosemary would also be good or any other fresh herb of your choice)
- 1/2 cup kalamata olives, pitted and roughly chopped
Roasted Vegetable Topping
2-3 cups roasted in-season vegetables of your choosing (or any other topping of your choice)
I just roasted a bunch of fresh asparagus, 1 cup of sliced mushrooms, 1 poblano pepper, 1 garlic clove and 1 cup of halved cherry tomatoes with about 1 tablespoon of olive oil and a sprinkle of Herbes de Provence and a little sea salt, in a 425º oven for about 20-25 minutes, until tender and lightly browned. Feel free to top your socca with whatever toppings of your choice or just serve it as is.In a large bowl, sift in the chickpea flour, then add in the salt, and pepper. Whisk in water and olive oil. Then stir in the basil. The batter should be very thin, much like a crepe batter. Let sit on the counter, covered, for as many hours as possible, but at least 30 minutes. You can also cover and refrigerate it overnight.
Place two nine-inch round cake pans in the center of the oven and preheat to 500º F. Remove the pans when the oven is to temperature, add a glug of olive oil to each pan (maybe around 1/2 to 1 tablespoon in each pan) swirl around in the pan to get a nice even coating all the way around and up the sides a bit. Return to pans the oven for a couple of minutes to heat up the oil. Once the oil is heated up, carefully remove the hot pans from the oven and pour half of the batter into each pan, split the chopped up olives in half and add half to each pan, just sprinkle over top of the batter. Bake for about 5 to 8 minutes or until the pancake is firm and the edges are set. Then place the pans into the broiler (or turn on the broiler in your oven) and broil for an additional 3-5 minutes, until the top gets some nice browned/black spots. Remove from oven and carefully flip out onto a cutting board. Cut into wedges and top with toppings of your choice. This is great as a meal or as an appetizer. If your pancake is a little thinner and it’s breaking apart, no worries at all, this snack is meant to be rustic and eaten with your fingers.
[/print_this]
-
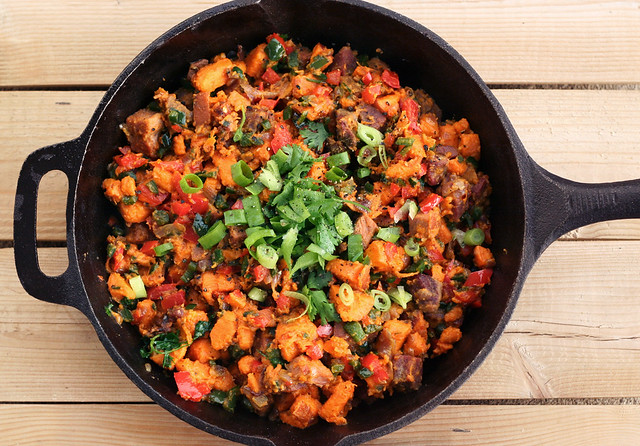
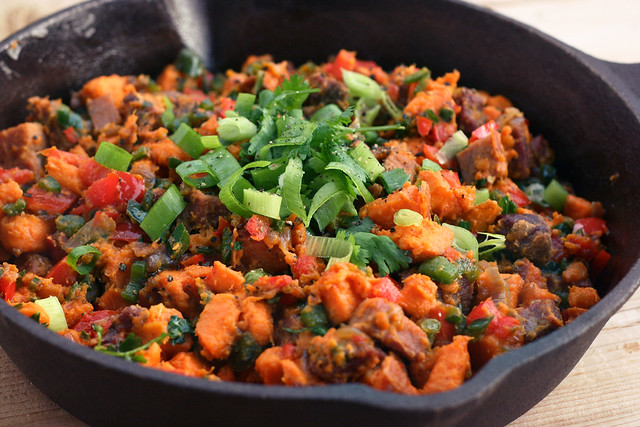
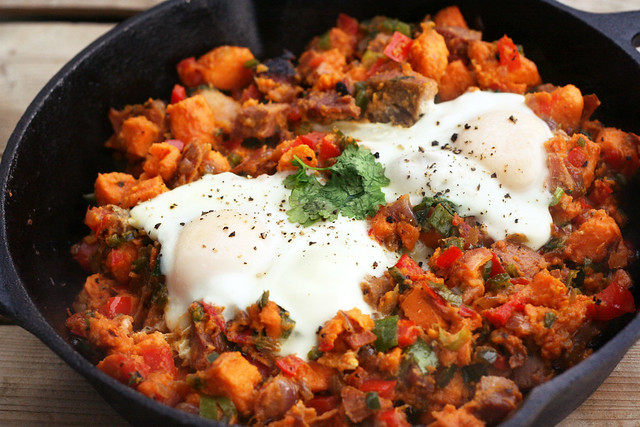
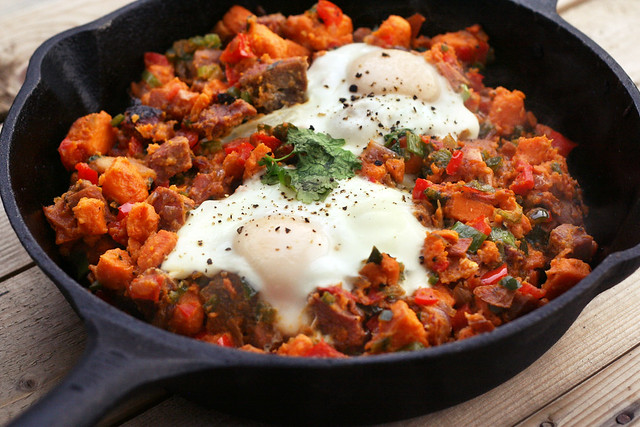
Sweet Potato and Poblano Hash – Gluten-free + Dairy-free with Vegan Option
And the craziness of life continues. We are still quite busy with work, though it seems to be getting a bit easier each day as we check things off of our list. We were lucky enough to be able to enjoy our holiday weekend, though I had a little bump in the road along my way. Saturday morning in the middle of my 8:30 am 90-minute Vinyasa yoga class, I suddenly had a strange pain in my upper back, near my right shoulder blade. It came on sharp and so suddenly, but nothing ever seemed to happen to cause it. I sat back into child’s pose and gave it a second, took a deep cleansing breath, then I stood up and attempted to meet up with the class in Utthita Trikonasana, extended triangle pose. That really hurt. Weird. So back to child’s pose I went. It wasn’t my shoulder, I had full mobility, but it was something in that area, and it really hurt when I twisted my torso. I took restorative poses for the remainder of the class and thankfully my teacher that day was Elyssa, my super amazing chiropractor!! She immediately knew what it was. A rib subluxation, in other words, my rib popped out of place. If this hadn’t happened to me before, on 2 or 3 other occasions, I may have been concerned upon hearing that. Thankfully I knew that I just needed it to be popped back in and I would be on my merry way. Elyssa, fit me in, gave me an adjustment, gave that rib a good jarring “umph!” and I felt some immediate relief, though I was still very sore. I spent the remainder of the weekend, icing and trying to take it easy. Elyssa told me that unfortunately this is the result of hyper-mobility or being extra flexible. Sometimes our bodies can do something easily, that they maybe shouldn’t. So yay!
I get so frustrated when I have an injury, not because of the pain or the injury itself, but more because that means I have to take time off from my daily yoga practice. It has become such a part of my daily routine and I feel like it is what makes me, ME! When I am forced to take a few days off, it is so much harder for me mentally, than any physical pain I could endure. I guess in some ways it is good for me though, it gives me time to take a step away and reflect on my practice, on everything it means to me and what I can do to continue evolving it.
I plan to be back to my usual practice by this weekend, hopefully. I am feeling better each day. I think I just may have to make some modifications and take it easy for a while, so as not to risk another unexpected rib popping!
What do you dislike the most about being injured? Do you like the forced time away from your daily workouts or do you dread it?
While I am on this forced time away from yoga, I did get to squeeze in some time for a new tattoo!! I guess if I am already gonna be out of commission with yoga for a few days, why not, right? Josh Schlageter, at Hand of Doom Tattoo, drew up this lovely lady for me and he tattooed her on my left thigh yesterday. I am so excited about it. It is huge and the colors are absolutely beautiful. This iPhone photo doesn’t do it any justice, so I will have to post another once it is fully healed. I keep thinking I am done getting tattooed, that I have enough. Then I end up with more. Oops!
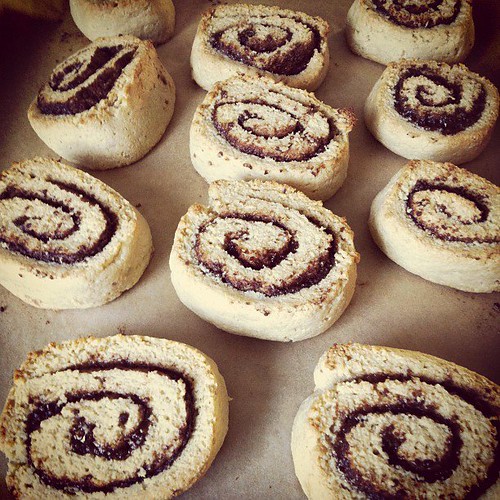
So, besides popping ribs and tattooing thighs, I have actually been able to find a bit more time in the kitchen. Over the weekend, I got to play a little, I made these delicious almond-flour cinnamon rolls (recipe courtesy of The Urban Poser), I was honestly amazed at how incredible they turned out! I subbed coconut sugar for the honey in the filling and I skipped out on the raisins and nuts in the filling. I am telling you – if you love warm cinnamon rolls, these hit the spot! They are almost a bit biscuit-like. It is incredible that they are totally grain-free! Recipes like this, honestly get me dancing around the kitchen. Totally brilliant.
I also made a delicious Easter dinner for us on Sunday night since my parent’s are away on vacation. I roasted one of our delicious pasture-raised smoked hams from Sojourner Farms in Olean, NY, and I served it with some oven-baked sweet potato fries and roasted asparagus. It was a perfect and simple dinner. But, of course, we had a ton of ham leftover and I bought way too many sweet potatoes, so I had to figure out something to do with all the leftovers. That is where this delicious breakfast for dinner hash came in.
It was simple to put together and it is easily customizable to what you have on hand. If you are vegan, simply don’t add any meat or eggs. If you are a cheese addict, sprinkle a bit of sharp cheddar, jack or whatever your favorite cheese is, over top. You could also add cherry tomatoes, jalapeño, corn, black beans, etc. I feel like there are no rules with hashes! So have fun with it. This hash would obviously work as a main breakfast dish or a brunch side dish, but really it is great for dinner or even lunch. It takes such little time to prepare and you could even eat it right out of the pan to keep it really simple. Since I had just picked up some local farm fresh eggs this morning, I decided to top the hash with one egg for each of us, since they cook so easily and perfectly on top of the sizzling hash. If you don’t like or want eggs, you can leave them off and the hash will still be incredible.
[print_this]Sweet Potato and Poblano Hash – Gluten-free + Dairy-free, Vegan Option
Serves 2 as a main course, more as a side dish- 1 large organic sweet potato (mine weighed just over 1 pound), cubed (I leave the skin on because I like it, feel free to peel away)
- 1 red onion, diced
- 2 tablespoons olive oil
- 2 cloves garlic, minced
- 1-2 poblano peppers, diced
- 1 red bell pepper, diced
- a pinch or two crushed red pepper, to taste
- salt and pepper, to taste
- 1 cup leftover local pasture-raised smoked ham, cubed (optional)
- 2 farm fresh local brown eggs (optional)
- 1 handful of cilantro, roughly chopped
- 4 scallions, thinly sliced
Heat olive oil in a cast iron skillet over a medium-high heat. Add the onion and cook for about 2 minutes until they begin to soften, add the sweet potato, salt, pepper and crushed red pepper. Cover and cook about 5 minutes, until the potatoes begin to soften. Try not to stir around too much, just enough to keep them from sticking. You want them to get a nice brown outside to them.
Remove the lid and add in the garlic, peppers and ham. Toss everything around to combine and try to leave in a single layer so the potatoes can begin to brown a bit. Allow to cook for another 5 to 8 minutes. Tossing once the underside begins to brown. Taste and season with salt and pepper, if needed. Toss in half of the cilantro and the scallions.
If you are adding eggs, crack two eggs on top of the hash. Cover the pan and allow to cook another 3 to 5 minutes until the whites are set. Serve immediately topped with the remaining fresh cilantro and green onions.
[/print_this]
-
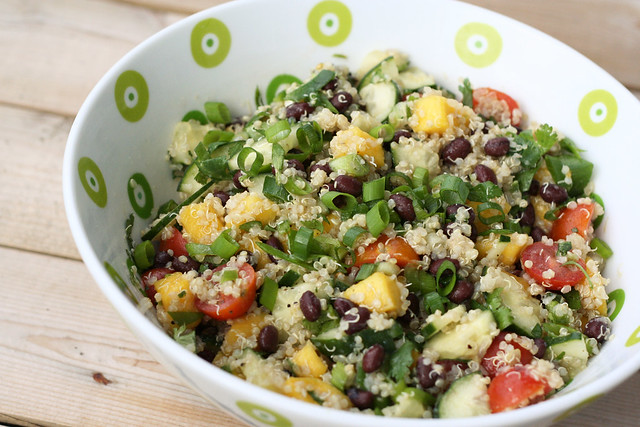
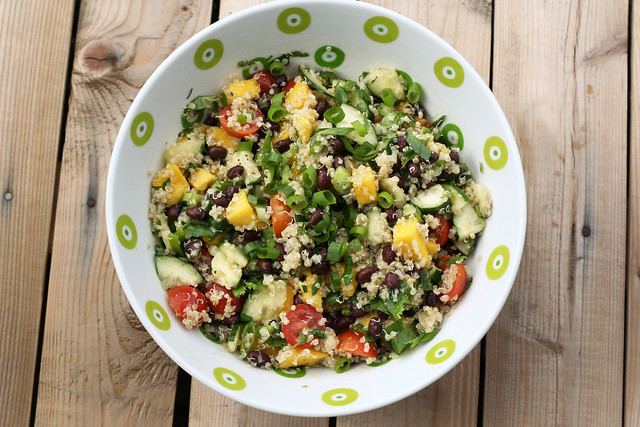
Sprouted Quinoa Salad with Mango, Black Beans and Avocado – Gluten-free + Vegan
Phew! Life has been a bit busy lately. We’re still trying to get caught up on all the work we have going on right now. Between being away from the studio for 2 weeks and with how much client work we have booked, we’ve really been putting in the hours. We also spent the weekend painting the downstairs here at the house, getting it ready to sell. OK, well actually we had a friend here doing most of the painting while we worked on client work, but I helped for a handful of hours on Sunday! We also spoke at the State University at Fredonia on Monday night, to final-year design and print making students, which was really, really fun. On top of all of this, I have been trying to get to yoga every morning for my 90-minute practice. I have had to miss a day here and there, but when life is busy, it is when I need it the most.
The last week and a half actually seems a little bit like a blur. So, I have been trying to sneak time into the kitchen here and there, when I can, but it is proving to be a bit difficult right now. Last week, besides the delicious Baingan Bharta that I made, I made a HUGE pot of vegetable soup and I also made a version of this delicious gluten-free flatbread with roasted vegetables from Karina, the Gluten-Free Goddess. I basically lived off of those meals and that worked fine, but now I am ready for life to calm down a bit, so I can start playing with new recipes!
I am hoping to have some time this weekend to play around with some gluten-free, vegan waffle recipes and I am also thinking of making a fun new dessert treat, similar idea to the coconut dark chocolate treats that I made and everyone has been loving so much! Plus, I have been dreaming of a pie recipe, that I just need to find the time to actually make. So look for those recipes, hopefully really soon, and definitely some others, too.
In the meantime, I made this salad for lunch today and I was really glad that I made the time to do so. It was super simple and a really nice bright and fresh spring meal. I happened to have sprouted quinoa that I had picked up at the market, but any regular quinoa would do. I also ended up topping this salad with avocado when I served it. I forgot about the avocado when I took the photos, but it was a perfect addition. You could also add in some red bell pepper if you have some on hand or fresh corn, etc. If you don’t want a little spice, skip the jalapeño or just start with half of one.
The weather is starting to really warm up here, but more than the temperature, the biggest change in this time of year that I absolutely adore is the sunshine. I miss the sunshine during the winter months and it is my favorite part of the spring. Salads like this feel like the perfect light meal to eat when the sun is shining!
What have you been eating lately? Have you had a lot of time in your kitchen or has life been hectic?
[print_this]Sprouted Quinoa Salad with Mango, Black Beans and Avocado – Gluten-free + Vegan
serves 4-6- 2 cups cooked organic sprouted quinoa
- 1 mango, diced
- 1 cup of canned organic black beans, drained and rinsed
- 1 cucumber, quartered the long way, then sliced
- 1 cup organic cherry tomatoes, halved
- 1 jalapeño, seeds removed, minced
- 3-4 scallions, sliced thinly
- 1/4 cup fresh cilantro, roughly chopped
- 1 avocado, diced
Dressing
- juice from 1 lime
- 2 tablespoons olive oil
- 1 clove garlic, minced
- zest from 1/2 lime
- salt and pepper, to taste
Cook the quinoa according to package directions. After it is cooked, fluff the quinoa with a fork and set aside to cool.
While the quinoa is cooling, mix the dressing in a small bowl, whisk well to combine.Once the quinoa is cooled, toss it with the mango, black beans, cucumber, tomatoes, jalapeño, green onions and cilantro. Drizzle the dressing over top the salad, and toss gently to evenly coat. Salt and pepper to taste.
Serve the salad at room temperature or chilled topped with a small sprinkle of sliced green onions and fresh cilantro, as well as some diced avocado on top, if you wish.
[/print_this]
-
Baingan Bharta (Roasted Eggplant Curry) – Gluten-free + Vegan
I have always loved Indian food, my husband, Mark, not so much. I have always had to either eat it without him or con him into going for my birthday, since I obviously get full say in what restaurant we go to on that night. I can get away with making different curries and such at home, but he generally didn’t get too excited about the idea of going out for Indian food. A month or so ago, I convinced Mark to give it a try again and our waiter suggested a Gufran platter for him, that had a few different Tandoori cooked meat and seafood dishes on it, this way he could try a few different things. He loved it. His favorite was a tandoori style fish in a really spicy sauce. YAY success!! After that, he kept asking me when we were gonna go again, as you can imagine this made me so very happy. So while we were in Austin for SXSW, since many of our friends are vegetarian, I suggested we go for Indian food one night. Everyone, including Mark, was down with the idea and excited to go. We ended up with a table of 17 of us! The company was amazing, the food was great, and I of course ordered my usual favorite, Baingan Bharta, while Mark ordered some Tandoori chicken and some chicken naan. All was well in the world.
This was until Mark woke up the next morning with what appeared to be food poisoning. He was the only one out of our large group that got it, but seeing as it came on very quickly, and was gone within 24 hours, that is what we assumed it to be. No one else at the table ate chicken, so it is very possible that was the culprit. But, at any rate, we are back to square one with Indian food in our household. Even though Mark says it is temporary, he needs a bit of a break until he’ll go back to it! Understandable, but still, selfishly, I am quite bummed.
So, what was I to do? I was craving Indian food since we got home. I wasn’t gonna go out for Indian food on my own and there isn’t a restaurant close by for take-out, so I decided I wanted to try to create my favorite Indian dish at home. I asked Mark if that would be OK and if the smell of it cooking would bother him, and he said he is OK with it, he just wasn’t going to eat it this time. So, while my baingan bharta cooked away, Mark made himself a frozen pizza and surprisingly he commented many times at how delicious my meal smelled. Baby steps.
Besides all of the curries I make, I really haven’t tried cooking too much Indian food at home, since frankly it intimidated me. So, I did a little looking around at classic and authentic Indian recipes for this tasty eggplant dish and then I dove right in. I am really excited at how simple it was to make and how amazing it turned out. It honestly took more time to chop, mince and dice than anything else. The actual preparation of the dish was quite simple.
This mélange is classically a bit spicy, but if you don’t want the heat, eliminate the chiles (jalapeños) or just go with a half of a small one to start. I like spicy so I went with two large peppers. I served this over some fluffy organic brown basmati rice and made a quick creamy vegan cucumber side salad (I made a simple dressing with some grapeseed vegenaise, rice wine vinegar, garlic and a little sea salt) to ease my mouth from the heat of the dish.
The key flavor to this dish is the smoked/roasted eggplant. There are a couple different ways that you can achieve this (see the first part of the recipe), classically the eggplants are grilled over charcoal or direct fire to impart a smoky flavour to the flesh of the eggplant.
Oh and by the way, if you are like me and have been wishing and hoping to come across a good gluten-free naan recipe – fear not – the lovely Leanne from Healthful Pursuit has conquered that beast. Check out her gluten-free naan recipe here. Since she had mentioned it on Facebook earlier in the day, I was dreaming about her naan the entire time I was making this dish, but Leanne hadn’t yet posted the recipe when I made this. So, it looks like I will have to make this recipe again, with her naan on the side. Thanks Leanne.
[print_this]Baingan Bharta (Roasted Eggplant Curry) – Gluten-free + Vegan
serves 4-6- 3 medium-sized eggplants
- 2 tablespoons cooking oil such as olive oil, grapeseed oil, etc (I used olive oil for brushing on the eggplant and cooked the veggies in ghee*)
- 2 medium-sized yellow onions, chopped fine
- 1 teaspoon of cumin seeds or 1/2 tsp cumin powder
- 3-5 cloves of garlic, minced
- 1-inch piece of ginger, grated or minced fine
- 1-2 green chilies (jalapeños), seeds removed and minced (optional)
- 2-3 large tomatoes, diced
- 1/2 teaspoon coriander powder
- 1 teaspoon turmeric (I was lucky enough to find fresh turmeric root at the store, that I finely minced, but I also still added a bit of the ground dried stuff, too)
- 3 teaspoons garam masala
- 1 bunch cilantro, roughly chopped
You can roast your eggplant either in your oven, on a grill or directly on your gas cooktop. If cooking your eggplant on your cooktop or grill top, place the eggplant straight on the burner or grill top, keeping the flame low. Keep turning the eggplant until the skin is charred and the inside flesh is soft and tender.
You can also roast the eggplant in your oven. Preheat oven to 425ºF. Slice the eggplant in half lengthwise and sprinkle salt on the fleshy side. Rub olive oil on both sides, place skin side up on a baking sheet and roast for 25-30 minutes until the flesh is tender and the outside is a nice dark charred color and the outside layer of the flesh is a bit caramelized.
While your eggplant is roasting, start preparing your vegetables and spices. Just before the eggplant is done, heat up the remaining oil (or ghee) in a large pan over a medium-high heat, add in the cumin seeds (if using powder, add it in at the same time as the onions) and cook for a minute or two until they get toasted and fragrant and begin to dance around in the pan. Add in the onion and chiles, sauté for 5 to 8 minutes until the onions are tender and translucent. Add in the ginger, garlic and turmeric root (if you are using fresh), sauté for about 2-3 minutes. Add in the tomato and the remaining spices, turn the heat to a medium low and allow it to cook about 5 to 10 minutes or just until the eggplant is done, stirring often.
Once the eggplant is done, allow to cool a bit and peel off and discard the charred skin, scoop the flesh into a bowl and roughly mash it. Add the eggplant to the sauce and stir well to combine, allow to cook another 3-5 minutes. Add in some of the chopped fresh cilantro and stir to combine. Turn off the heat. You can serve the sauce as is or puree it, which is how it is traditionally served.
To puree the sauce, carefully spoon the mixture into your food processor and process until smooth and return to the pan or a large serving bowl. Serve over basmati rice with a sprinkle of fresh cilantro. Serve with papadum or naan on the side. (check out Leanne from Healthful Pursuit’s gluten-free naan recipe here.)
* ghee is made from dairy, but during the clarification process, milk solids are removed, therefore all lactose and casein is removed, leaving the healthy butter fats behind. Small, trace amounts of casein and lactose can possibly remain in the ghee, but unless a person is extremely sensitive, consuming ghee will be fine, even if dairy is not. Obviously use your own judgement, and if you are making this vegan, skip out on using ghee and use whatever your cooking oil of choice is.
[/print_this]
-
I’m Back!! Overnight Chai Oatmeal – Gluten-free, Vegan + Sugar-free
I am finally back guys and I have never been happier to be home and sitting at my desk! We actually got home on Friday but it has taken a few days for us to get through mountains of mail, email, orders, voicemails and well, just life! I hope you enjoyed all the lovely guest bloggers that were kind enough to post here on Tasty Yummies while I was away. It was so fun for me!
Our road trip to SXSW was so wonderful, overall one of the best we have ever taken. It had a few bumps along the way, but it is always so nice to be on the open road with the person I love more than anything, to see our friends from all over the world, meeting and chatting with customers and clients new and old! Plus the insanely warm weather, delicious food and rowdy nights don’t hurt either. This yearly trip is by far one of my favorites. This year’s 4-day Rock Poster Convention, Flatstock, was our most successful one yet. All of our hard work in preparing our booth and products felt like it really paid off. Oh and in addition to all the awesome work goodness, we even got to attend a private party at Willie Nelson’s ranch with a client.
In between all of the work and hangouts I was able to sneak in some yoga where I could either in hotel rooms or at a great little studio I found around the corner from our hotel in Austin, and we were able to stay on track with our eating both by enjoying all of the foods I made for us and a couple of trips to the Whole Foods flagship store. All in all a really great trip!
Unfortunately, on the way home from Austin, as we were making our way back to Louisville to spend time with my husband Mark’s family for a night before the last leg of the trip home to Buffalo, we got a phone call when we were just 5 hours away that his Grandmother, “Momo” had passed. We all knew this day was coming and although it was a sad one and she will be deeply missed, everyone was happy that she was no longer suffering. Mark and I were lucky enough to have stopped by the hospital on our way down to Austin, and we spent a few hours with her. She knew we were there and was able to speak with us, so we both feel insanely blessed for those precious moments. Thankfully we were able to extend our trip by a few days to attend the funeral, be with family and celebrate the life of one of the most amazing women I have ever met. It’s funny how life works.
So after two weeks on the road with many emotional ups and downs, when we pulled onto our street all I could think about was cuddling with my pets, who I missed dearly, getting back to my daily yoga practice, juicing, cooking in my kitchen, sleeping in my own bed and of course, all the amazing client projects we have lined up for the coming months. Even though I am doing a simple and quick cleanse this week to get my body back to feeling like itself after all of the traveling, I plan to finally have some recipes for you this week and next.
What is your favorite part of coming home after a long trip?
This first recipe is something I thought up on one of our long stretches of driving when I was thinking of all the mornings I get home from yoga and I want to get right to my desk and get to working. Many times I will just grab a homemade bar of some sort or make some juice or a quick smoothie. I wanted to come up with another simple breakfast like my overnight cinnamon raisin chia pudding or my banana cream chia pudding (which can also be made overnight). I have seen many versions of overnight oats made in a similar way so I thought up this fun version. Overnight Chai Oatmeal.
This tasty breakfast treat can easily be put together the night before, popped into an airtight glass mason jar or a covered bowl and left to soak. By the time morning rolls around you will have a delicious breakfast that can be served chilled or warm. You can have fun with your toppings, adding dried fruit or nuts or maybe even some shredded coconut. I just added a small handful of raisins.
Play around with this spices and get it to your liking. I like my chai spicy, as I am sure you recall from my chai concentrate recipe. I add in a pinch of black pepper, but you can leave that out. Have fun with it and make it your own.
Much like the chia puddings I make, I cannot wait to make this again and play with different flavor combinations. Imagine sinful chocolate peanut butter overnight oats. Mmmm…
Have you ever made overnight oatmeal or chia pudding? What is your favorite flavor combo?
When I arrived home from our trip, I came in to a large box of goodies from NuNaturals. They asked me to give their products a try, see what I think of them, develop some recipes with them, etc. I haven’t really done much official research and reading on stevia products yet, but I have been meaning to try them for sometime, as many bloggers who I follow love to cook and bake with it, so I am excited to get to experimenting with all of this. Look for more recipes in the coming weeks using NuNaturals products. I decided to use the Pure Liquid Clear Stevia for this overnight oatmeal, feel free to use whatever your favorite sweetener is, just add it to taste when mixing or when serving.
[print_this]Overnight Chai Oatmeal – Gluten-free, Vegan + Sugar-free
serves 2- 1 cup gluten-free rolled oats (not quick cooking) – make sure they are certified gluten-free
- 2 tablespoons chia seeds
- 1 cup unsweetened almond milk (you can also use soy, hemp, flax-seed milk, oat milk, whatever your favorite is)
- 1 teaspoon vanilla extract
- 5-10 drops of liquid stevia (or to taste of whatever sweetener you wish, maple syrup or coconut sugar would be great)
- 1/4 teaspoon ground cardamom
- 1/4 teaspoon ground cinnamon
- 1/4 teaspoon ground ginger
- 1/4 teaspoon ground nutmeg
- 1/4 teaspoon ground anise
- a pinch of ground black pepper
- a pinch of ground cloves
Mix together all of the above ingredients in a glass jar or a bowl, cover and refrigerate overnight. Serve the oatmeal chilled or slightly warmed up. Top with a dash of cinnamon, some raisins or whatever other toppings you wish.
[/print_this]
-
Wheat Free Meat Free: French Toast Baked Polenta Sticks – Gluten-free + Vegan
This next guest post comes from someone who should really call her blog “Wife of the Year”! Kalinda from Wheat Free Meat Free likely has the happiest and most spoiled husband around. Why, you ask? Kalinda’s husband Mike was diagnosed with Celiac Disease, so he can’t eat any gluten and he is also vegetarian. Kalinda does all the cooking and she is neither gluten intolerant, nor vegetarian. But in her words “She loves Mike, so she makes gluten-free vegetarian food for them to enjoy.” How adorable and insanely sweet is that? Not only does she cook for him, but she keeps a blog about it. As if the recipes and beautiful photos weren’t enough to make me stick around on Wheat Free Meat Free, once I read that sweet little detail right there, it sealed the deal for me. Although things are a bit opposite in our home, me having the gluten-intolerance and preferring to eat very little meat, etc – I did start my blog at my husband’s request, so he could “have a menu to choose from”. Ah, the things we do for our husbands.
Kalinda was kind enough to create a brand new, mouth watering recipe to share with all of you and I am seriously bummed that I won’t be able to make these until we get home from Austin. These look incredible. Check it out…
Like most of you, I think Beth and her blog are super duper. So I was quite flattered that she asked me to write a post for her while she’s off at SXSW and Flatstock.
Actually, I was flattered and intimidated because, oh man, that means I had better take some good pictures. And, you know, produce a stand-up recipe. I hope this qualifies.

[print_this]French Toast Baked Polenta Sticks – Gluten-free + Vegan
- 1 cup polenta (may also be called medium or coarse ground cornmeal or grits)
- 1 15-ounce can coconut milk
- 1 1/4 cups water
- 1 tablespoon ground cinnamon
- 2 tablespoons maple syrup
- 1 teaspoon vanilla extract
- sea salt
- Lightly grease a casserole dish. Put the coconut milk and water in a medium to large sized saucepan and place over high heat.
- Once simmering, reduce heat to medium. While stirring, slowly pour in the polenta. Once all the polenta is mixed in, stir in the cinnamon, maple syrup, vanilla extract, and a pinch of salt.
- Cook, stirring regularly, until polenta is thickened and will hold its shape. If it looks like the polenta is scorching, reduce heat to medium-low.
- Press into the casserole dish, spreading evenly, aiming for 1/2 inch thickness. Chill in the refrigerator for at least one hour.
- Preheat the oven to 450 degrees Fahrenheit. Lightly grease a baking sheet. Invert the polenta onto a cutting board, and slice into pieces around 3-4 inches long and about 1/2 inch wide.
- Arrange on the baking sheet, and bake for 10-15 minutes, flip the pieces, then continue baking another 10-15 minutes, until golden brown on the outside. Remove and serve with maple dipping sauce.
Maple Dipping Sauce
- 1/4 cup plain non-dairy yogurt
- 1 tablespoon maple syrup
- 1/4 teaspoon vanilla extract

Polenta cooking time will vary by the type. Mine was a rather coarse grind and took about 15 minutes. Finer grinds would take less time. Polenta sputters, especially in the first few minutes of cooking. Stirring helps, but be aware you might end up wearing some.
I used a 7″ x 11″ casserole dish to chill my polenta. That gave me the 1/2-inch thickness I wanted. It’s certainly OK to spread it out on a large baking sheet free form. If you wanted to make this for breakfast, the polenta can be prepared then chilled overnight.
I really wanted to use coconut milk yogurt to keep with the coconut theme, but I couldn’t find any. Soy yogurt it was. Plain old cow yogurt can be used for the dairy loving types.
Thanks to Beth for letting me stop in. Please come visit me sometime. [/print_this]

-
Tessa, The Domestic Diva: Maple Apple Cinnamon Donuts – Gluten-free + Vegan
As much as it saddened me to take nearly 2 weeks away from Tasty Yummies while we travel to Austin, Texas for SXSW and the Flatstock Rock Poster Convention, I am also very excited for the first time ever, to have a series of wonderful and very lovely guest bloggers holding down the fort while I am away. Right now I am in the car starting our journey from Buffalo, NY to Austin, TX, likely dreaming of these very doughnuts and all of the other delicious treats we have for you while I am gone. If only I could have found the time to make one of everything to take on the road with me, so I wouldn’t miss my kitchen too much.
I am excited that the first Tasty Yummies guest blogger, Tessa the Domestic Diva, made a very special donut recipe, just for you guys after reading about my own experience of making donuts for the very first time, not too long ago. Additionally she shares her three very popular donut recipes, which are all gluten-free and vegan. Tessa’s blog grabbed my attention recently both from the Allergy-Free Wednesday series she hosts with 5 other bloggers and more specifically with her Coconut Secret Bars, that inspired me to create my own Dark Chocolate Coconut Treats. I am so excited to have found her blog! All of Tessa’s recipes on her blog are free of gluten, dairy, and corn and each looks more delicious than the last. So now that you are drooling at the thought of even more donuts, please enjoy Donut Mania with Tessa the Domestic Diva!
When Beth asked me to do a guest post, I knew almost immediately I would like to create a donut for her. I enjoyed reading about her first donut adventure, and knew she would love some more spins to put that donut pan to good use, and that YOU all might too! I already had three donuts up on my blog, but the possibilities are really endless! (SSH!! Let me let you in on a little secret: baked donuts work well with most muffin batters! Add a hole and a little frosting, and you’ve created a crowd-pleasing donut! I won’t tell if you don’t!)
Donuts lend themselves to personal creativity and tastes very nicely. Think of a favorite flavor combo, and most likely you can make it happen. Go ahead, don that baker’s hat and start cooking! And if you are feeling less than adventurous (my sisters tease me all the time how I can whip things together in 10 minutes when it would take them 60), here is a recipe to get you started, and a few more to make sure you’re fully inspired and ready to bake!!
Here are some alternative donut recipes, with loads of frosting/topping options that can be used on ANY donut, all of which are wholesome, gluten-free, and vegan:Pumpkin Donuts
Healthy Cake Donuts (this post also talk about how to make donuts WITHOUT a donut pan!)
Banana Donuts
[print_this]Maple Apple Cinnamon Donuts, Vegan + Gluten-free
makes approximately 18 mini-donuts or 7-8 regular sized donuts (this depends on your pan)Wet:
- 1/2 cup applesauce
- 1/4 cup oil (I used melted coconut oil)
- 2 tablespoons chia meal/flax meal mixed w/ 3 tablespoons hot water
- 1/2 cup palm sugar (or other granulated sugar)
- 2 tablespoons maple syrup
- 1 teaspoon molasses
- 1 teaspoon vanilla
- 1/4 teaspoons maple extract (optional but yummy!)
Dry:
- 1/2 cup oat flour
- 1/2 cup teff flour (or brown rice)
- 1/4 cup potato starch (or tapioca)
- 1 1/2 teaspoons baking powder
- 1/2 teaspoon salt
- 1/4 teaspoon guar gum (optional)
- 1/2 cup finely diced tart apple
Maple Butter Glaze:
- 2 tablespoons Earth Balance (or butter)
- 2 tablespoons vegan cream cheese (Trader Joe’s has a new one made w/ coconut oil!)
- 2 tablespoons maple syrup to achieve desired consistency
Preheat your oven to 350 degrees. In a medium-mixing bowl, whisk the wet ingredients. Place the dry ingredients minus the diced apple, in order over the top. Whisk in to fully incorporate all ingredients. Fold in the diced apple.
Dollop spoonfuls of the batter into a greased donut pan. Fill about 2/3 full. Bake for about 8 minutes for mini donuts, and 12 for regular. You want the tops to be just done! I used a mini donut pan (12 holes) and made about 18 mini donuts.
Mix your glaze: Beat the cream cheese, butter, and maple syrup until smooth (I used an immersion blender to eliminate the lumps). Drizzle over the muffins. If you like your glaze thinner, you can add more maple syrup or milk of choice. If you like yours more like a spreadable frosting, reduce the amount of liquid!
[/print_this]
-
Chocolate Peanut Butter Road Trip Energy Bars – Gluten-free, Vegan + Refined Sugar-Free
We leave bright and early tomorrow morning for our big road trip to Austin, Texas for SXSW and Flatstock 33, where we will be selling our (Hero Design Studio) handmade goods and wares for 4 days in the convention center. Since I do my very best to maintain my eating lifestyle no matter where I am, I have packed a ton of food for the trip, both for the road trip down and maybe for the first few days we are there, depending how much eating happens in the car, then I plan to hit Whole Foods once we get there to stock up for the trip back. I have some almond milk and honey packed up, since I know those will both come in handy along the way. I also packed a few bottles of my homemade kombucha and to snack on, I have some nut and dried-fruit trail mix, stove-top popped butter-free spicy popcorn, gluten-free vegan jerky from Primal Spirit Foods and I made these delicious road trip energy bars. It is absolutely imperative that I have some type of chocolate available to me when I am on a road trip. For whatever reason, I always crave chocolate on very long drives. Who knows!
These energy bars were super easy to make. To be completely honest, I quickly wrote up a rough idea for a recipe, headed to the kitchen and just winged it, I assumed I would just figure it out as I went along. What I love most about these bars are how easily you could tweak them to make them your own. If you don’t want chocolate, leave out the cocoa and chocolate chips, maybe adding in some raisins or dried cranberries and some cinnamon instead. You can add whatever your favorite nuts or seeds are. The possibilities are really endless. I have made a few notes below with additional suggestions.
These bars are almost a bit sinful, with that addicting combo of peanut butter and chocolate. How can you resist? The car is gonna smell amazing. With just one bite of these chewy snacks, you will fall in love. My hubby, Mark, absolutely LOVES coffee and although I rarely drink a cup anymore, I do love the flavor and the smell of good coffee beans. So, I thought that would be a fun addition to these bars. Feel free to leave it out or substitute caffeine-free coffee if you can’t handle caffeine. I think the smell alone that the espresso powder gave these bars is worth it. I really cannot wait to bust into one of these tomorrow, I am sure I will be indulging in one before we even hit the Pennsylvania border.
Although I will be away from tomorrow until March 21, I have a wonderful group of amazingly talented guest bloggers to hold down the fort while I am away. They have some lovely guest posts and tons of great recipes to share with all of you, so I do hope you check back often to see what they have up their sleeves. I hope you like it and I cannot wait to get home and start cooking again.
[print_this]Chocolate Peanut Butter Road Trip Energy Bars – Gluten-free, Vegan + Refined Sugar-Free
Makes 8 bars (you can also cut them into smaller squares to 16 or more)- 1 ripe organic banana, mashed (try adding a second or third banana if you wish to make these sugar-free)
- 2 cups certified gluten-free rolled oats
- 1/4 cup gluten-free oat flour (or just process some gluten-free rolled oats into a fine powder)
- 1/2 cup mini chocolate chips, dairy free (I like Enjoy Life brand mini-chocolate chips)
- 1/4 – 1/2 cup maple syrup (you could also use honey, coconut nectar, brown rice syrup, etc or skip and add extra bananas)
- 1/2 cup organic natural peanut butter, chunky or creamy, (or any other nut or seed butter)
- 2 tablespoons organic baking cocoa
- 2 tablespoons chia seeds, (you could also use flax seeds, sunflower seeds, pepitas, etc)
- 1/4 cup almond slivers (or any other nut of your choice)
- 1 teaspoon vanilla extract
- 1 – 2 tablespoons espresso powder (optional)
- 1/4 teaspoon sea salt
* Note – Remember, you can easily make these energy bars your own, by adding, substituting and skipping ingredients as you’d like. To make these sugar-free replace the syrup with stevia or another banana. They could also easily be made nut-free by skipping the almonds and using sunflower seed butter instead of peanut butter. If you don’t like coffee, skip the espresso powder. Have fun with this recipe.
Preheat oven to 350º F. Grease an 8″ x 8″ glass baking pan very well, or line it with foil, leaving some overhang on two of the sides so you can easily pull it out of the pan to make cutting even easier (this is what I did).
In a large mixing bowl, add all of your ingredients. Mix and mash up very well until it is all well combined. Get your hands in there if you really want to.
Press the mixture firmly and evenly into your pan. Place the pan into the oven and bake for 20-25 minutes. Don’t worry if the bars seem a bit soft, they will firm up as they cool. After it has completely cooled, either lift the entire thing out of the pan and cut into bars or squares, or cut while it is in the pan.
These can be stored individually in the fridge or freezer. Since I made these two days ago, I stored them in the fridge and then wrapped each one individually in a little piece of parchment paper and a sandwich bag for easy eating in the car.
[/print_this]
Posts by Beth @ Tasty Yummies
-
Tasty Yummies’ Two Year Blogiversary and a Giveaway!
Thank you so so much everyone for participating in the Tasty Yummies 2-year Blogiversary Giveaway and thank you again from the bottom of my heart for all of your lovely comments!! Random.org gave me the random #11 for the winner. Congrats to our winner Alex – who will be getting the Tasty Yummies / Hero Design happiness care package of goodies!! Thanks again everyone!
~~~~~~~~~~~~~~~~~~~~~~~~~~~~~~~~~~~~~~~~~~~~~~~~~~~~~~~~~~~
Today is the two year blogiversary of Tasty Yummies and I can hardly believe it. When I started this blog two years ago, I never thought it could turn into what it has become today. I started writing two years ago just after I lost 30lbs by changing the way I was eating. So many people were asking me what I was eating, how I had time to cook, etc. – so I thought I would start writing up my recipes to share them with people who were interested. I honestly didn’t think anyone would read all of this, let alone be cooking using my recipes or be inspired to change the way they themselves are eating. It still blows my mind every day when I log in here to read the comments and look at the stats. In the last year the amount of people that visit Tasty Yummies seems to go up every week and I am so incredibly humbled by this.
In the last two years so many aspects of my life have changed, but one of the many things that will never change for me is my love for creating in the kitchen and all of the delicious, healthy and clean foods that you can cook and bake, when you just get into the kitchen and start playing. I have so much gratitude for all of the wonderful people, like you, that come to this site, click around, comment and even print out my recipes and try them, you continually inspire me to create more. Just last week I received an email from someone who recently found out she can no longer have gluten, she felt lost and confused and didn’t even know where to begin with her new lifestyle. She wrote me to tell me that she had found my web site and had already tried a few of my recipes and she was instantly put at ease and excited for her new journey. The overwhelming sense of pride that consumes me reading those types of emails and comments give me the energy to make cookies at 10:00 at night or spend an entire weekend trying to figure out a waffle recipe that I know can be done. It makes me happy to know that even if just one of my recipes on here allows someone to see how easy cooking and eating gluten-free and clean can be, then it is all worth it to me.
Tasty Yummies was always meant to be a hobby for me, something I did in between all of the other aspects of my life. Many of you already know this, but my husband and I own our own business, Hero Design Studio, where we specialize in custom design and illustration as well as hand silkscreen printed goods and wares. We are so fortunate to not only do what we love, but to do it with each other. Since we closed our boutique of nearly 5-years ago, just over a year ago and moved our studio home to really be able to focus on our work, I have had even more freedom to create in the kitchen, since it now means just a short walk downstairs. Being that all aspects of my life are more intertwined than ever, I am obviously influenced in many ways from all of my loves. Whether it be design, cooking, yoga, etc – they have all come together in a way, that allows every single day to be a happy one!
In honor of Tasty Yummies’ two year blogiversary – I wanna share my happiness with you guys. I am giving away a little Tasty Yummies / Hero Design Studio package of goodies. These are just a few things where my love of cooking and creating in the kitchen and the happiness it gives me, has crept in and met up with my love of design, illustration and printmaking! I am giving away all of the items you see below. All are designed and hand silkscreen printed by myself and my husband, Mark.
And thank you again, from the bottom of my heart to all of you that take time out of your very busy lives to read this blog, to try my recipes, to comment, to share my site with others, etc. It truly means the world to me. Namaste.
8×10 2-color Kitchen Tools Art Print
16 x 20 5-color Hand Printed Silkscreen Poster – “Make Every Day A Happy Day”
Kitchen Measurement Conversion Apron (kitchen conversions are printed upside down so you can read them when you are wearing it)
The winner will receive: 1 – 8 x 10 Kitchen Measurement Conversion Print (in the color of your choice), 1 – 8 x 10 Kitchen Tools Print, 1 – 16 x 20 Make Every Day A Happy Day Art Print and 1 – Kitchen Measurement Conversion Apron. This package is valued at over $75.
How to enter:
You can enter up to 5 different ways:
Comment below: Tell me what makes you happy!
Subscribe to the Tasty Yummies RSS feed in your RSS reader or by email
Facebook Like Tasty Yummies
Follow me on Pinterest
Tweet it and while you’re there follow me – @herobeth – You could say something like: Celebrate Tasty Yummies’ 2 year blogiversary by winning a collection of Hero Prints valued at over $75 from @herobeth http://wp.me/p23r4t-y5Please leave a *separate comment* below for each entry!
This giveaway is open to everyone.
The giveaway will be open until the end of the day Wednesday, May 2.
Winner will be selected at random and announced on Thursday, May 3. 1 winner will be selected and notified through email and this post.
