Posts by Beth @ Tasty Yummies

  1. On the Road / A Very Tasty Thanksgiving

     Hey everyone!! Some of you may have heard read me mention that we had some upcoming travels that would take me away from my kitchen for a bit this month! We are leaving at the end of this week on a 10-day East Coast tour for our business, Hero Design Studio. In a brief explanation we are going to be traveling from Buffalo to Washington, DC, with a quick stop in Baltimore, then we are on to Philly and lastly Brooklyn. We have a bunch of different events and appearances planned for this time, all of which you can read about in detail here on the Hero blog. If any of you will be in the area of DC or Brooklyn, be sure to swing by and see us at the craft fairs we will be vending at. I’d love to meet some of you!

    Of course, while we are away that also means I won’t be in my kitchen creating and with it being one of my favorite times of the year for food and eating, I just couldn’t leave you guys without some seasonal yummies! So, I enlisted the help of some of my most talented friends.

    A Very Tasty Thanksgiving

    We are calling it A Very Tasty Thanksgiving and starting tomorrow, November 8th until November 21st, each day we will have a brand new post featuring clean, unprocessed, wholesome, healthy and of course, gluten-free and dairy-free creations for your holiday feasts!  Plus, we have some extra special posts featuring seasonal transition tips, yoga asanas, holiday stress relieving tips and more. If you aren’t in the US and therefore won’t be celebrating Thanksgiving, consider this a jump start on your holiday meal and life planning, I am sure there are lots of celebrations coming up in the next month or so where these delicious, seasonal recipes and tips will certainly come in handy.

    Visit the Very Tasty Thanksgiving page to follow the entire series, see the full list of participating bloggers and we will be updating that page daily with the new posts. Be sure to check back every day as we have a new guest here to help make your holidays a little tastier and take a moment to comment on the posts and let our guests know we appreciate them being here!

    Thank you so much to all of the wonderful contributors that are filling in for me while I am away, it is so comforting knowing Tasty Yummies is in such good hands.

    *PS – If you have any suggestions on places to eat, practice yoga or just check out in any of those four cities, please feel free to comment below. We are staying in Arlington, VA when we are in DC, right downtown in Philly and on the edge of Greenpoint and Williamsburg in Brooklyn! Thanks!


  2. Vegan Grain-free Stuffed Mushrooms (Gluten-free + Vegan)

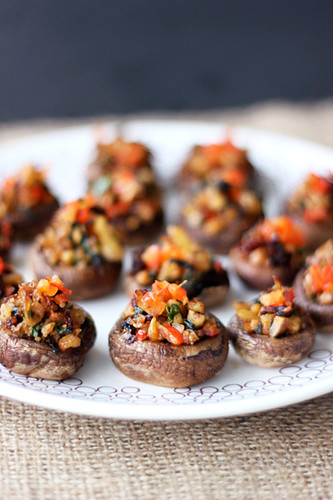
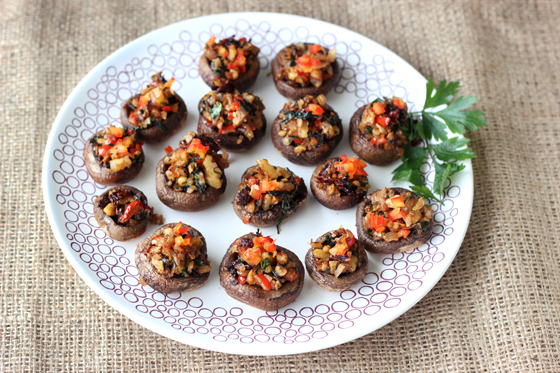
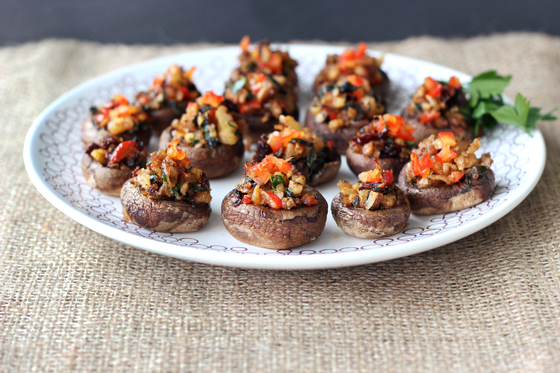
    Vegan Grain-free Stuffed Mushrooms (Gluten-free + Vegan)


    If you know me even just a little bit, you’d know how much I love a good party, especially those centered around eating, and OK yes, drinking, too! Everything in moderation, right? I love an excuse to wear a fun outfit, make some special treats and just enjoy myself. Our house is fairly small so it is very rare that I entertain at home, so I have to wait on other people to have parties and invite me, but when they do, I always jump at the chance to create something yummy to share with others. Besides the joy I get by making people happy with the food I make, the biggest reason I enjoy bringing something to share is the guarantee that I will have at least one thing to eat. Being that I am gluten-free and dairy-free and I also refrain from eating processed foods, it can be quite hard to indulge at parties and other get-togethers.

    Vegan Grain-free Stuffed Mushrooms (Gluten-free + Vegan)


    The other reason I love being able to bring some food to share to a party, is so I can spread the good word about eating clean and healthy. I think many people attribute the words “clean”, “processed-free” or even “gluten-free”, to mean taste-free and unexciting. I love changing people’s perceptions on food and eating and showing them just how much fun you can have with your food, even with a clean diet.

    This recipe would be great for many different types of cocktail parties, whether it be a casual sports party for the Super Bowl or a fancy New Year’s Eve bash. They are as dressed down or dressed us as you need them to be. These stuffed mushrooms are grain-free and vegan, they are perfectly bite-sized and so full of flavor and texture. They are so quick to make, too. Plus, you could make these ahead of time, stuff them and put them in the oven just before the guests start to arrive.

    Vegan Grain-free Stuffed Mushrooms (Gluten-free + Vegan)


    These Vegan Grain-free Stuffed Mushrooms are so simple to make and are the perfect small-bite party food. If the party isn’t at your place, make them ahead and pop them in the oven just before serving at your holiday or cocktail party destination. They are of course perfect for any gluten-free and/or vegan eaters, but I promise all of the party guests will enjoy them and the bonus is they are easy on the waistline at a time of year when temptation is around every corner.

    It was fun making these on a random work day (since we work from home) and eating them in the middle of the day, felt like we had a little party of our own.

    Do you like bringing a dish or a treat to share when you go to a party or would you rather just eat what others make?

    This recipe was originally shared on Cara’s Cravings as part of her Clean Eating Cocktail Party. Cara’s site is full of creative and delicious recipes that are always seasonally inspired and clean. Cara’s recipes will always give you the excitement and comfort we crave from food, but without any of the guilt.

    Vegan Grain-free Stuffed Mushrooms (Gluten-free + Vegan)

    [print_this]Vegan Grain-free Stuffed Mushrooms
    YIELD: 4-8, depending on size and quantity of mushrooms
    What’s a party without the ever-popular stuffed mushrooms? These ones are loaded with walnuts, spinach and sundried tomatoes, a savory burst of flavor to feed any appetite.

    • 1 1/2 lbs. mushrooms, you can use baby portobellos, cremini or button
    • 2 tablespoons olive oil
    • 1/4 cup fresh parsley, roughly chopped
    • 1 small red bell pepper, finely chopped – reserve a little for serving
    • 1 small shallot, finely chopped
    • 2 cloves garlic, finely minced
    • 1/4 cup sun dried tomatoes, finely diced
    • 3/4 cup walnuts, finely, roughly chopped
    • 1 cup baby spinach, finely, roughly chopped
    • salt and pepper, to taste

    Directions:
    Preheat the oven to 375ºF.

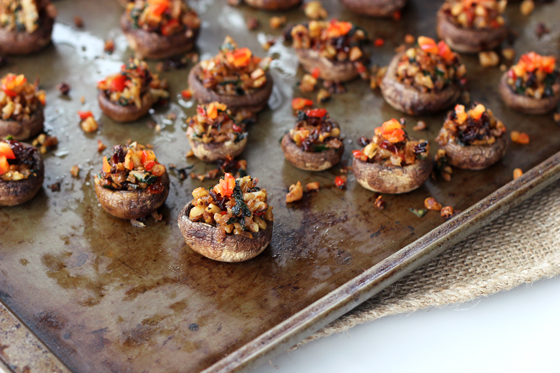
    Remove the stems from the mushrooms, set aside to dice and add to the filling. Brush mushrooms with a little olive oil, place stem side up and bake for 8-10 minutes.

    In a medium pan over medium-high heat, add 1 tablespoon of olive oil. Saute the shallots, bell pepper, garlic and sun dried tomatoes for about 3 minutes until they start to get tender. Add in the parsley, finely chopped mushroom stems and chopped walnuts, cook another 2-3 minutes. Add in chopped baby spinach and allow it to wilt. Salt and pepper to taste.

    Remove the mushrooms from the oven, pour off or soak up any water that accumulates in the mushrooms. Spoon the filling into the mushrooms and bake for an additional 10-12 minutes. Topped with fresh, raw diced red bell peppers and serve warm.[/print_this]

    SaveSave

  3. Pumpkin Pie Power Smoothie & Vega One French Vanilla Nutritional Shake Giveaway

    ********* The giveaway is now closed! Thank you so much to everyone that entered and congrats to, Chef Amber Shea, our randomly selected winner! *********
    (winner was randomly selected using Random.org)

    I will be emailing you to let you know you have won and to get your mailing address.

    *******************************************************************

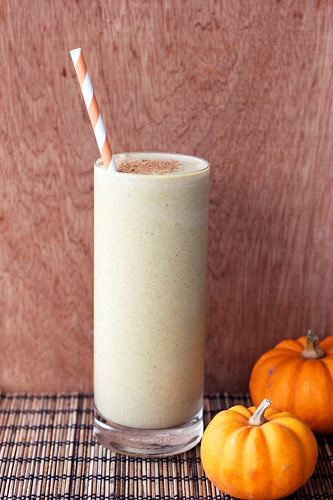
    Pumpkin Pie Protein Smoothie & Vega One French Vanilla Nutritional Shake Giveaway

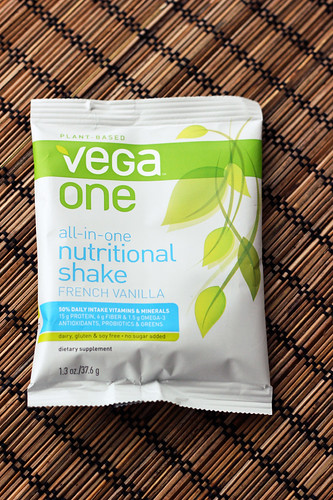
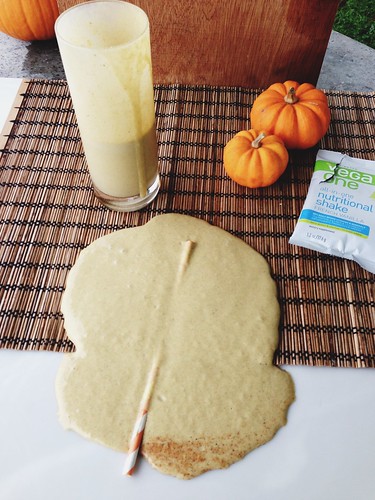
    A while back Vega One contacted me and asked if I would like to try their new French Vanilla Vega One Nutritional Shake, I of course obliged, I mean who doesn’t love sampling new (and hopefully yummy) food products? I received two packets and with the first I made it straight-up, as is with just some almond milk and ice in the blender. It was quite good, super thick and creamy and it had a really nice flavor. It definitely had just a little of the chalkiness that we’ve all come to know with these types of products, but it was still very appetizing and satisfying and had a really good flavor.
    Pumpkin Pie Protein Smoothie & Vega One French Vanilla Nutritional Shake Giveaway
    After making the first one straight-forward, I decided to have fun with the second shake and I made a pumpkin pie smoothie. I enjoyed this even more than the first one I made, that is besides the fact that I spilled a good 3/4 of it when the wind blew over my photo back drop (thankfully that was the only tragedy we experienced in over here Western New York due to Sandy). Check out my Photo Fun Day Friday post where I show a little behind the scenes blooper shot of this smoothie’s ultimate demise.

    The smoothie was even creamier and it had a fun color to it, the spices and the pumpkin were nicely complimented by creaminess and the smooth french vanilla taste, it kept me full longer than most smoothies I make.

    [print_this]Pumpkin Pie Power Smoothie

    serves 1 or makes 2 smaller servings

    1/2 cup organic coconut milk, the canned kind (full fat or lite)
    1 cup unsweetened vanilla almond milk
    1/2 cup organic pumpkin puree
    1/2 teaspoon ground cinnamon
    1/4 teaspoon ground nutmeg
    1/8 teaspoon ground ginger
    1 level scoop (or one snack pack) of Vega One French Vanilla Nutritional Shake
    sweetener of your choice, if needed – I add a couple of drops of vanilla liquid stevia
    small handful of ice

    Add all of the ingredients to the blender and process until smooth and creamy.

    [/print_this]

    Besides being quite tasty, Vega One‘s Nutritional Shakes pack a serious nutritional punch! Here is some more info:

    Vega One- All-In-One Nutrition Shake – Use on a daily basis to cover your key nutritional requirements for optimum health.

    “Cover your bases”

    · Great tasting foundational nutrition to build your day on. All the essentials. All-in-one.
    · Contains 10 different supplements including: Protein, Multi-vitamin, Multi-mineral, Essential fatty acids, Digestive enzyme, Probiotics, Antioxidant, Chlorella/greens, Maca.
    · 50% of RDI for vitamins/minerals-replaces your multivitamin!
    · 15 g protein, 6 g fiber, 1.5 g omega 3
    · Dairy, gluten and soy free
    · Low Glycemic (19.2)
    · No added sugar-sweetened with stevia

    Good for your body and the planet, Vega One Nutritional Shake is the clean, plant-based choice to fuel your healthy, active lifestyle—without compromise. Made from natural, whole food ingredients, Vega One is a convenient, all-in-one supplement.

    Vega One is free from dairy, gluten and soy, and contains no added sugar, artificial flavors, colors or sweeteners.

    Some bonus info, I read that Vega One can also be used in recipes to replace a portion of flour for a gluten-free and protein-rich addition to brownies, pancakes and more.

    Pumpkin Pie Protein Smoothie & Vega One French Vanilla Nutritional Shake Giveaway

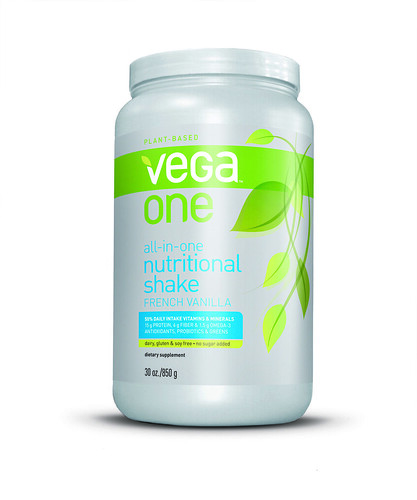
    Since, I enjoyed the French Vanilla Vega One Nutritional Shake so much, we are giving away a large 30 oz tub of it to one special winner, so you can enjoy it, too.

    The giveaway is just open to US and Canada residents only.

     Enter the contest

    Please leave a *separate comment* below for each entry!
    You can enter up to 4 times

    1) In order to be entered into the giveaway, please comment below and share your favorite smoothie or shake that you would love to recreate using Vega One French Vanilla Nutritional Shake?

    Additional entries will be accepted for the following:

     2) Like both the Tasty Yummies and VegaOne pages on Facebook.
    Share the post I put up on the Tasty Yummies page to be included in the giveaway then come back and comment here telling me you liked both pages, that you’ve shared my post.

    3) Tweet about the contest and while you are there follow me on Twitter @herobeth and follow @VegaTeam
    You could say something like: “Enter to win a large tub of French Vanilla #VegaOne from @VegaTeam & @herobeth on Tasty Yummies http://wp.me/p23r4t-Jq #plantstrong #vegan”
    Make sure you comment here to let me know that you posted about the giveaway.

    4) Subscribe to the Tasty Yummies RSS feed in your RSS reader or by email
    or follow me on Pinterest. Again, make sure to comment here to let me know that you subscribed or follow me.

    Please note – this giveaway is only open to the US and Canada.

    Again, please make sure you leave a *separate comment* below for each entry,
    if you don’t comment you will not be entered!

    The giveaway will be open until the end of the day Monday, November 12.
    Winner will be selected at random and announced on Tuesday, November 13. 1 winner will be selected and notified through email and this post.

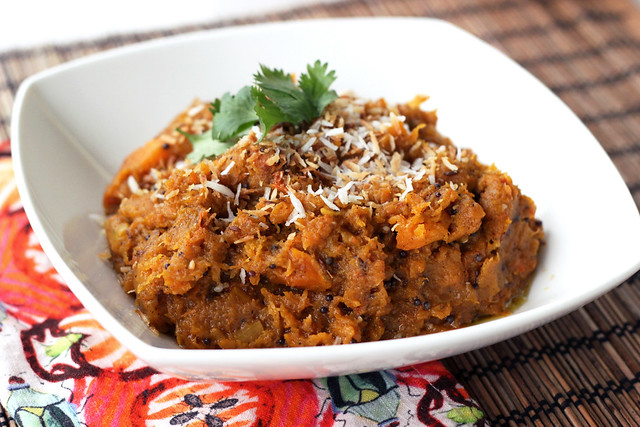
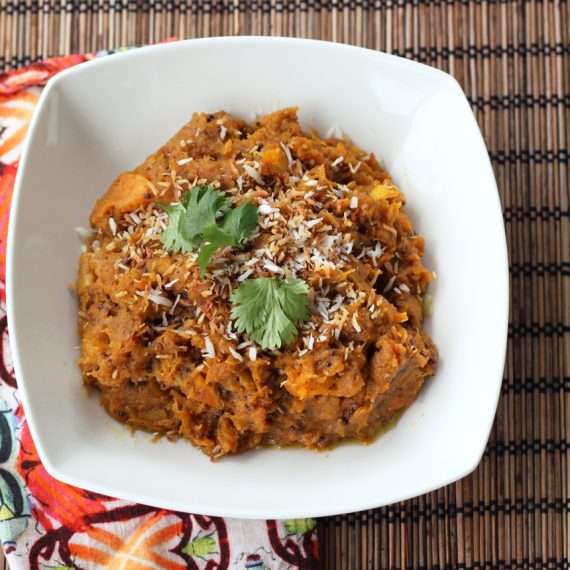
  4. Indian-Spiced Butternut Squash Mash with Toasted Coconut (Gluten-free + Vegan)

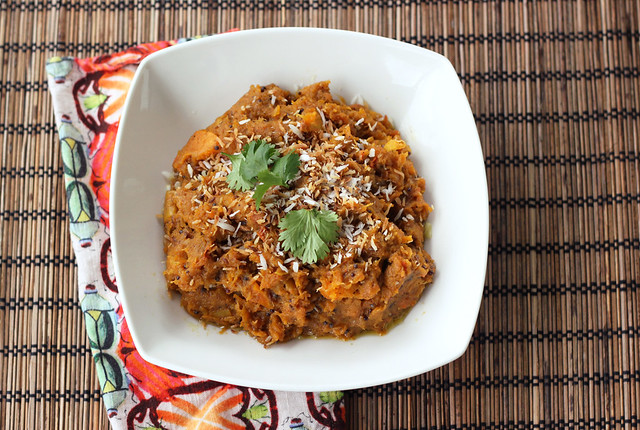
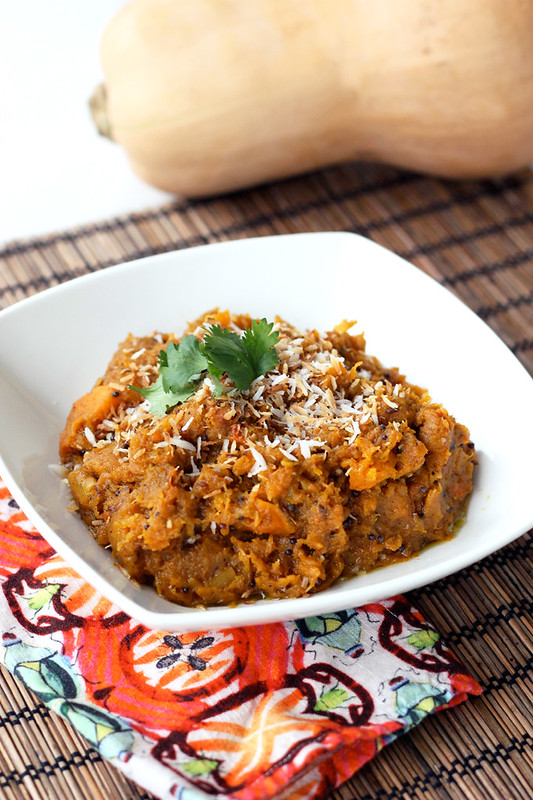
    Indian-Spiced Butternut Squash Mash with Toasted Coconut (Gluten-free + Vegan)

    This month as part of my ongoing series with Free People, I am sharing a series of healthy gluten-free and vegetarian Thanksgiving recipes.  I absolutely love Thanksgiving, the entire holiday season really, and I get excited to start planning my Thanksgiving menu as soon as the fall season hits.

    For this series, I will be sharing both classic recipes re-imagined and some unique and totally non-traditional recipes that you aren’t used to seeing amongst your traditional Thanksgiving spreads.

    Indian-Spiced Butternut Squash Mash with Toasted Coconut (Gluten-free + Vegan)

    A blend of classic traditional Thanksgiving ingredients with a little non-traditional Indian inspiration, this butternut squash mash is sure to please everyone at your feast, but especially those who are gluten-free and/or vegan, who may likely have limited options. It is creamy, rustic and full of so many amazing flavors.

    Indian-Spiced Butternut Squash Mash with Toasted Coconut (Gluten-free + Vegan)

    Head to the Free People blog BLDG 25, to get the full recipe and stay tuned throughout the entire month of November as I share a new gluten-free vegetarian Thanksgiving creation each week! Plus, make sure to check in here on Tasty Yummies starting later this week, where I have a really fun Thanksgiving series planned for you guys. More on that soon.

    Indian-Spiced Butternut Squash Mash with Toasted Coconut (Gluten-free + Vegan)

    Print Pin Rate
    Servings: 4 -6

    Ingredients 

    • 2-3 lb butternut squash, halved and seeded, peeled and diced into 1-inch cubes
    • 1-2 tablespoons olive oil
    • 2 tablespoons coconut oil
    • 1 teaspoon mustard seeds
    • 1 teaspoon cumin seeds
    • 3 cloves garlic, minced
    • 1 2- inch piece of fresh ginger, finely minced or grated
    • 1 tablespoon garam masala powder, you can add more if you want the flavor to be even more powerful
    • ½ teaspoon sea salt
    • ¼ cup coconut milk, full-fat canned kind
    • cup finely shredded unsweetened coconut
    • fresh cilantro for serving, optional

    Instructions

    • Preheat the oven 400º F.
    • Toss the squash with oil, salt and pepper and spread out in a single layer on a rimmed baking pan. Roast, tossing occasionally, until just tender and golden brown, about 30-40 minutes. While the squash is roasting, arrange the raw coconut in a single layer on another baking sheet. Once the squash comes out, place the coconut in, bake for about 3 to 5 minutes, toss around and then bake another 3 to 5 minutes. Watch it carefully, as it can burn quickly.
    • Once the squash and coconut are both ready and out of the oven, heat the coconut oil in a large saucepan over a medium heat, add in the mustard and cumin seeds, heat for a few minutes until the spices begin dancing around the pan, popping and jumping. Add in the garlic, ginger, garam masala powder and salt. Stir around for a minute or two, reduce the heat to low or off, add in the roasted squash cubes and coconut milk and mash by hand with a potato masher, until as smooth and creamy as you’d like it to be. Salt to taste, serve immediately topped with toasted shredded coconut and a little fresh cilantro, if you’d like.


  5. Photo Fun Day Friday

    Hey everyone!! Happy Friday. It has been a bit crazy over here, as you probably noticed by the lack of a Friday post last week. Last weekend our very good friends, Summer and Patrick were in town from California for their Buffalo wedding reception. It was really fun to just spend the entire weekend with them and their families and to celebrate their marriage again!

    A couple of weeks ago we found out that we (Hero Design Studio) got accepted into an art and craft fair in DC, Crafty Bastards, on the weekend of November 10th and since we have a craft fair, Renegade Craft Fair, scheduled the following weekend in Brooklyn, we decided it made sense to just book our schedule full of different events in between and stay on the road, versus driving all the way home and then turning around again and heading back to the coast. More on all of that in a later post, but for now we are dealing with the craziness of going on the road for 10 days and getting all of the work done beforehand that needs to get done. Plus, we have had a rush of house showings this week, which has been great for obvious reasons, but it has made getting all the work we need to get done before we go, even harder. So it has been a bit hectic over here, to say the least, we didn’t even get to celebrate Halloween, we had a showing and then we spent the rest of the evening working. We have a pretty full schedule until we hit the road next Friday, a week from today, but don’t worry I have some really fun stuff planned for you while I am gone, stay tuned.

    What have you been up to lately? Did you do anything fun for Halloween?

    Photo Fun Day Friday

    Seri being all cute.

    Photo Fun Day Friday

    A brand new Halloween print we made for this year, available here.

    Photo Fun Day Friday

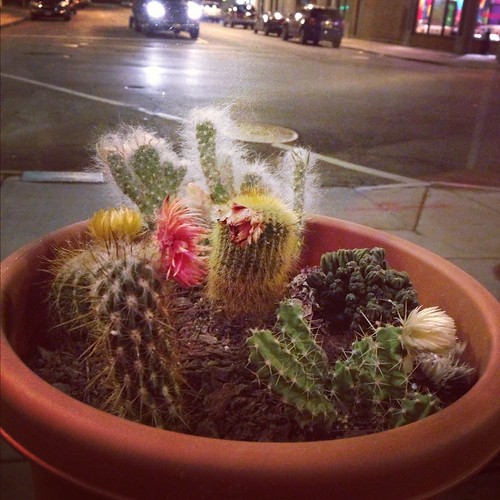
    A cactus-eyed view of Allentown from Cantina Loco.

    Photo Fun Day Friday

    A new shirt I designed for Modern Nostalgia that we printed last week.

    Photo Fun Day Friday

    My sweet orange boy, Jpeg.

    Photo Fun Day Friday

    My favorite thing about the cooler weather is getting to wear fun patterned tights like these.

    Photo Fun Day Friday

    Spend all of last weekend hanging with our besties, Summer and Patrick. Such a great weekend!

    Photo Fun Day Friday

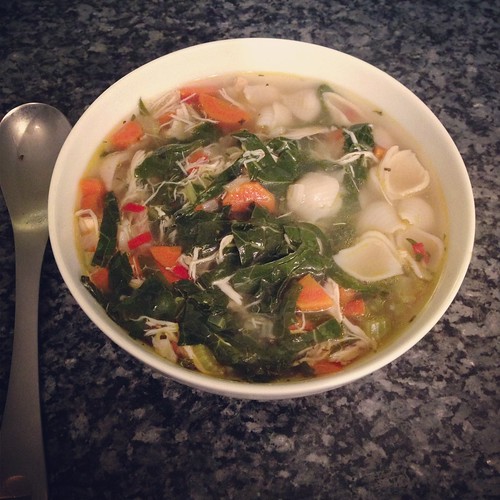
    I made a big huge pot of chicken and vegetable noodle soup on Monday while we waited for the possible arrival of Sandy.

    Feeling pretty lucky that some wind and rain, and a small amount of power outages is the worst of what we received here on our side of New York state. Meanwhile there are people just a few short hours away that lost everything, their homes, their neighborhoods and some so much worse. So much devastation. That Mother Nature is one cruel, cruel B*tch! If you can, donate to the American Red Cross, your monetary donation can aid in their efforts to help those in need at this time of crisis.

    Photo Fun Day Friday

    From the Tasty Yummies blooper reel. This is what happens when you still have strong winds and you attempt to take your food blog photos outside! Wah wah, somehow I did get a shot before the wood back drop fell and spilled it everywhere. (see this coming Monday’s post)

    Photo Fun Day Friday

    A little sneak at a brand new print we designed and printed for Fawn & Fox Salon.

    Photo Fun Day Friday

    My sweet niece Teagan went as sushi for halloween this year. Couldn’t you just eat her up…. hehe!  My sis, Vicky made the whole costume herself, complete with a cute little chopsticks, wasabi and ginger hair piece. GAH!

  6. Seasonal Shopping: Fresh Fruit & Veggies to Buy in November!

    I am not sure how, but November is now upon us. So many of the beautiful, colorful leaves have fallen from the trees, there is a crisp coolness to the air that reminds us that winter isn’t too far off (OK, well that’s the case over here in Western New York anyhow), I know you Southern Californians have been dealing with a super HOT fall! I am still getting myself used to the idea of that for when we eventually get there.

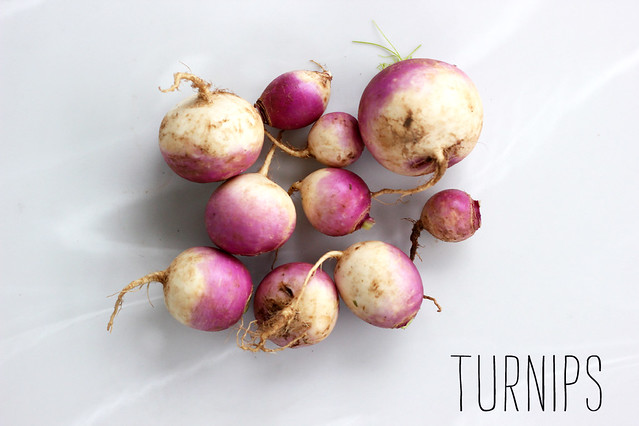
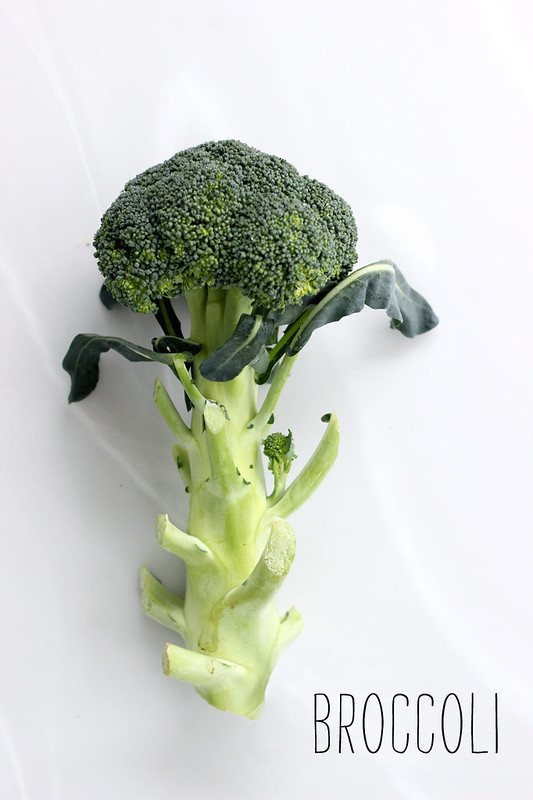
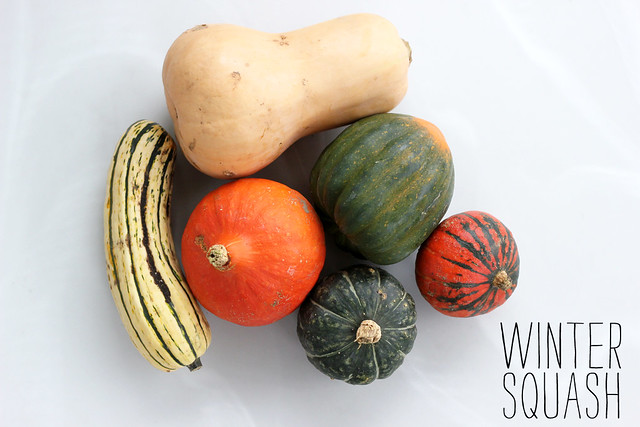
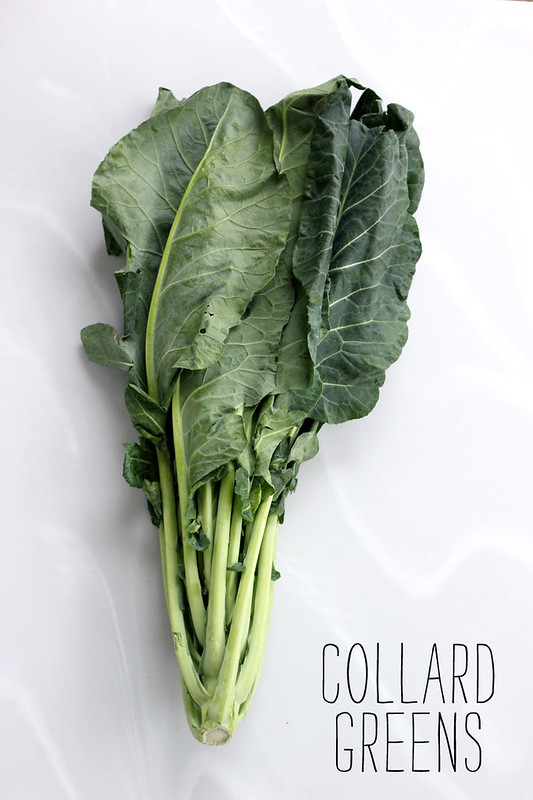
    Considering how cold it actually has been, it is always so surprising to me how much produce is still growing around here and just how delicious and tasty it all is! We are loaded up on squashes and peppers from our CSA, I think I could be set for the winter just on those two, but we’ve been getting so many other delicious fresh goodies too, like kohlrabi, collards, broccoli, beets, turnips, and so much more! It’s a really fun time for fresh produce.

    I still think the squash is my absolute favorite thing this time of year, how about you?
    Seasonal Shopping: Fresh Fruit & Veggies to Buy in November!

    Seasonal Shopping: Fresh Fruit & Veggies to Buy in November!

    Seasonal Shopping: Fresh Fruit & Veggies to Buy in November! 

    Broccoli

    Winter Squash

    Collard Greens

    Turnips

    Parsnips

    Brussels Sprouts

    Cranberries

    Apples

    Arugula

    Garlic

    Kale

    Onions

    Potatoes

    Carrots

    Radishes

    Beets


    Seasonal Shopping: Fresh Fruit & Veggies to Buy in November!
    Seasonal Shopping: Fresh Fruit & Veggies to Buy in November!

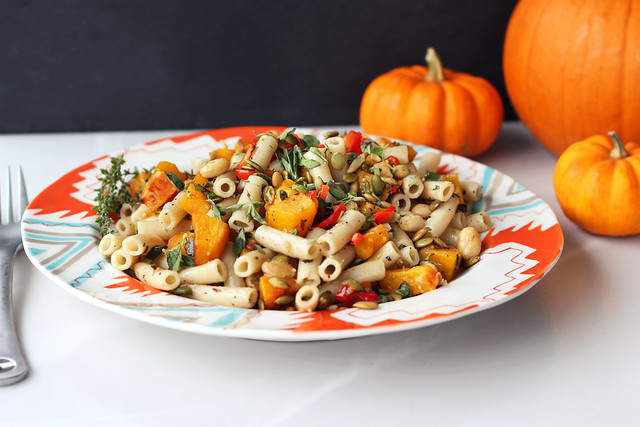
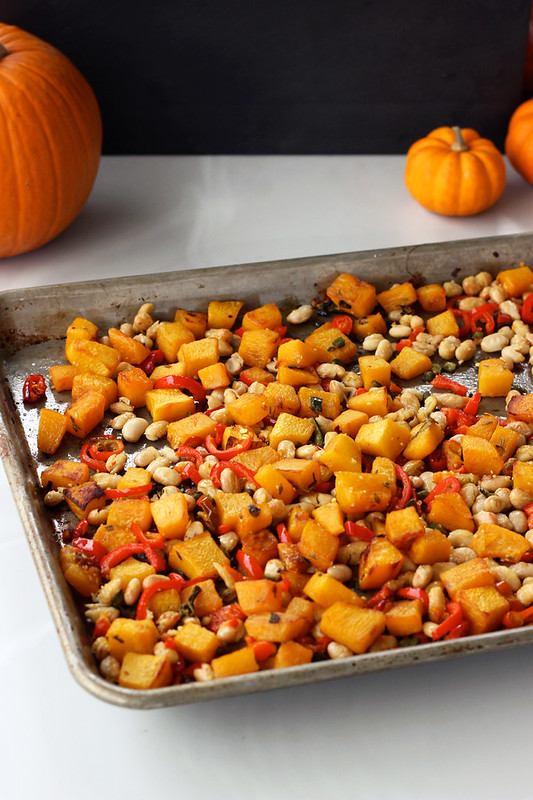
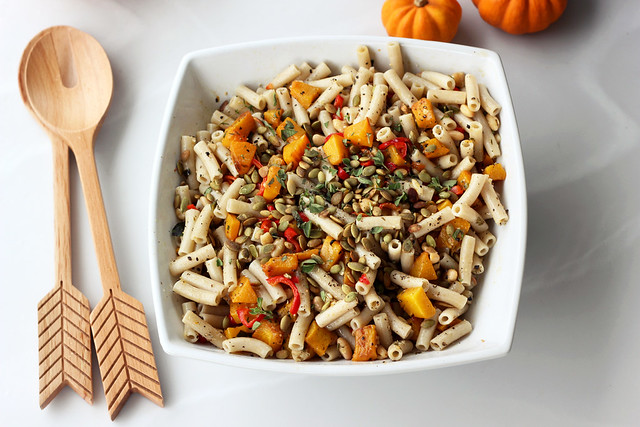
  7. Pasta with Roasted Pumpkin, Peppers and White Beans – Gluten-free + Vegan

    Pasta with Roasted Pumpkin, Peppers and White Beans - Gluten-free + Vegan

    I made this recipe last weekend for a fun fall party at our friends Erika and Devin’s. Even though many of the fun fall events they had planned got cancelled due to rainy cold weather, it was still a really fun night, my sweater still smells like yummy camp fire! My favorite.

    They made some meat-eater friendly dishes, so I decided to make and bring something gluten-free that I could eat, but that would also be great for any vegetarians or vegans. This pasta dish was really delicious warm, but it was equally as yummy when it cooled off a bit and was more of a pasta salad.

    A little FYI, if you are a cheese-lover, this would be super delicious with some grated sharp Parmigiano-Reggiano and/or Romano cheeses. It’s been many months since I cooked with cheese at home, or really even thought about adding it to a dish I was making, but the thought definitely crossed my mind with this one.

    Pasta with Roasted Pumpkin, Peppers and White Beans - Gluten-free + Vegan

    Besides being full of so many of my very favorite foods, I think what I liked the most about this is the nice crunch from the toasted pumpkin seeds and all of the beautiful colors. You will notice in the recipe below I used 3 different kinds of peppers, we have an insane amount of peppers right now from our CSA so I was using up what we had a lot of, feel free to use whatever peppers you have on hand, even if it is just one of two of your standard bell pepper. It will be good either way.

    On a side note, the weather is definitely quite icky here due to Hurricane Sandy (I am located in Buffalo, NY). Supposed to be the worse tonight and into tomorrow (I am writing this on Monday night). I hope all of my East Coast readers are staying safe and get through this storm without incident! I am anticipating lots of wind and rain over the next few days and I have my fingers crossed that we have no flooding (there is a river at the end of our dead end street). I made a huge pot of soup, my perfect comfort food for the super windy, cold and rainy times like this.

    How is the weather near you? Are you experiencing Sandy’s wrath? Stay safe everyone!

    Pasta with Roasted Pumpkin, Peppers and White Beans - Gluten-free + Vegan

    [print_this]Pasta with Roasted Pumpkin, Peppers and White Beans – Gluten-free + Vegan
    Serves 6-8

    • 1 small pie pumpkin (about 2 lbs), peeled, seeded and diced into 1-inch cubes
    • 1 teaspoon fresh marjoram, roughly chopped
    • 1 teaspoon fresh thyme, roughly chopped
    • 6 tablespoons olive oil, split in half, plus possibly a bit more
    • 1/2 teaspoon sea salt
    • 2 cloves garlic
    • 1 red bell pepper, diced*
    • 1 red carmen pepper, diced*
    • 1 poblano pepper, diced*
    • 1 can organic white beans, drained and rinsed
    • 16 ounces organic gluten-free brown rice penne pasta
    • salt and pepper to taste
    • additional fresh marjoram and thyme
    • 1/2 cup hulled pepitas, lightly toasted

    *These were the peppers I had on hand from our CSA, we have a lot of peppers right now so I have been getting creative with adding them to recipes, feel free to use whatever pepper(s) you want.

    Preheat your oven to 425ºF, toss the pumpkin cubes with 2 tablespoons olive oil, the fresh herbs and salt on a large baking sheet. Arrange in a single layer and roast for about 15-20 minutes, then take the pan out and add the diced peppers, white beans and garlic, continue baking another 15-20 minutes until the pumpkin and peppers are tender and browned.

    While the pumpkin is roasting, prepare your pasta. Cook your pasta according to package directions and place in a large serving dish once cooked and drained. You can reserve a bit (approx 1/4 cup) of the cooking liquid if you want to add it to the pasta dish, which I like to do.

    Once the pumpkin, white beans and peppers are cooked, add that to the serving bowl with the pasta. Add some fresh herbs, 2-3 tablespoons olive oil (pasta cooking liquid if you are using it) and half of the toasted pepitas, salt and pepper to taste. Toss to combine and taste, see if it needs any salt, pepper, or additional herbs. Serve topped with toasted pepitas.

    [/print_this]

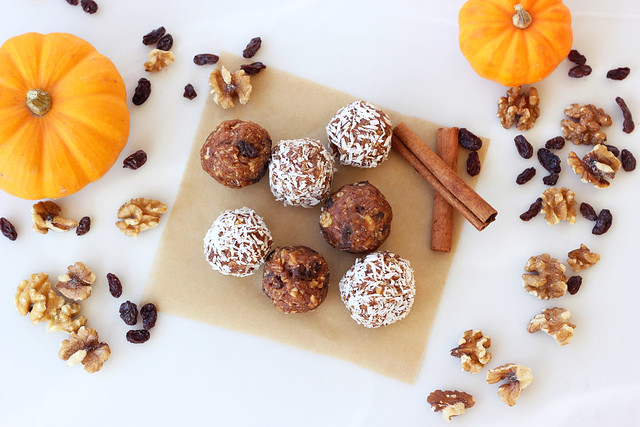
  8. No-Bake Pumpkin Spice Cookie Balls (Gluten-free, Vegan + Sugar-free)

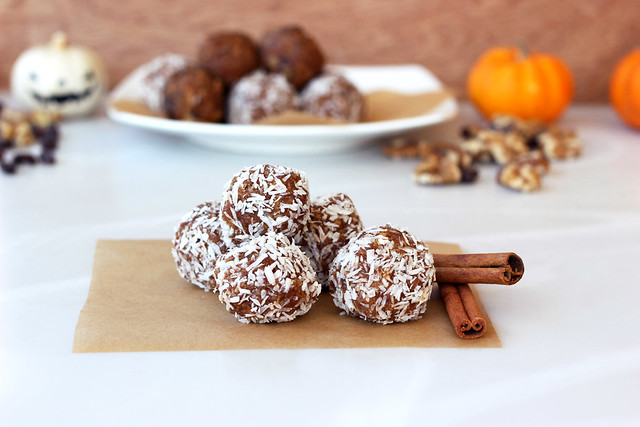
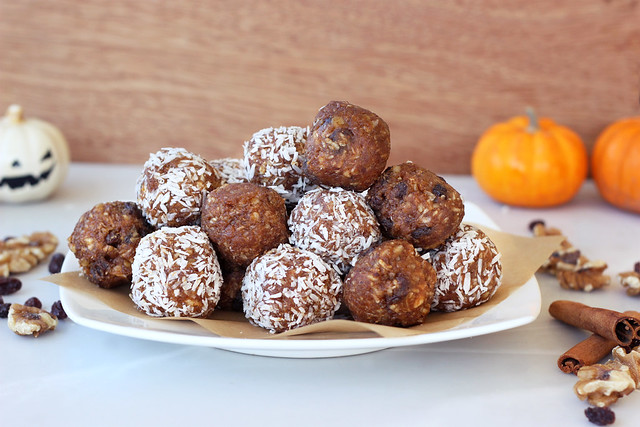
    No-Bake Pumpkin Spice Cookie Balls (Gluten-free, Vegan + Sugar-free)

    My final recipe in my healthy Halloween series with Free People this month is for a simple, quick no-bake cookie ball, that is full of delicious fall flavors. Instead of the cut-out cookies and donuts and wayyy too much Halloween candy, why not snack on these? Gluten-free, vegan and sugar-free these no-bake treats will still wow your socks off.

    No-Bake Pumpkin Spice Cookie Balls (Gluten-free, Vegan + Sugar-free)

    The spicy pumpkin flavor is perfect for this time of year and the whole recipe can be put together from start to finish in about 15 minutes. Plus, you can have fun with these and add in your own favorite extras like coconut, raisins, additional nuts, chocolate chips, powdered sugar or maybe even a drizzle of caramel sauce.

    No-Bake Pumpkin Spice Cookie Balls (Gluten-free, Vegan + Sugar-free)

    This recipe was originally shared on the Free People Blog, BLDG 25 

    [print_this]No-Bake Pumpkin Spice Cookie Balls (Gluten-free, Vegan + Sugar-free)

    Makes approximately 18 balls

    • 8 Medjool Dates, pitted
    • 1/4 cup creamy almond butter
    • 2 tablespoons pumpkin purée (canned or fresh, if you use fresh be sure to drain as much water out as you can)
    • 1 teaspoon ground cinnamon
    • 1/2 teaspoon ground nutmeg
    • 1/4 teaspoon ground ginger
    • Dash of ground cloves
    • Pinch of salt
    • 1 teaspoon vanilla extract
    • 3/4 cup raw walnuts
    • 1/2 cup unsweetened shredded coconut plus more for rolling

    Optional Add-ins:

    • raisins (I used raisins in half of the recipe, about 1/4 cup)
    • additional coconut for rolling
    • additional chopped walnuts for rolling
    • mini chocolate chips

    Add just the pitted dates to the food processor and process for a minute or two until a thick paste forms – if they are quite dry, you may need to add a teaspoon or two of water to get it moving. If they are pureed and form a large ball in the food processor, don’t worry too much, the other ingredients will thin it out. Next, add the almond butter, pumpkin puree, the spices, salt and the vanilla extract. Process for a minute or two again until thick and creamy. Add in the nuts and coconut and pulse a few times until the nuts are chopped and it all comes together into a thick dough. Try to roll a little in your hand, if it is holding together it is ready, if it is too crumbly try adding more almond butter and/or pumpkin. If it is too creamy and sticky, add more nuts and coconut. If you are adding raisins, just fold them in by hand with a spoon or spatula.

    Take the blade out of the processor and roll the dough into balls, about 1 1/2-inches in diameter. Roll into shredded coconut, if you wish. You should end up with approximately 18 cookie balls. You can eat them right away, or place them in the fridge for a bit to firm up (which is what I prefer).

    [/print_this]
  9. Grain-free Banana Coconut Mini-Loaves – Gluten-free, Dairy-free + Refined Sugar-free

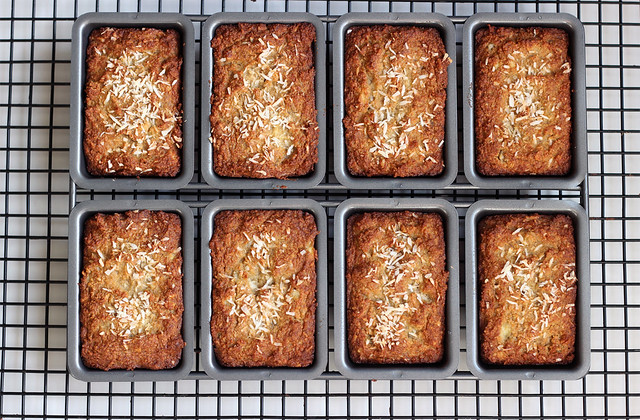
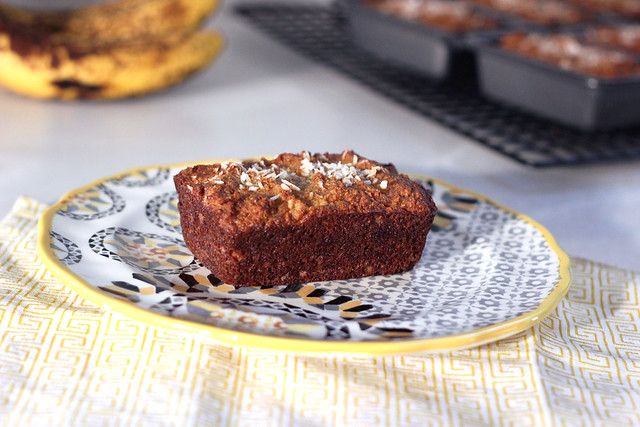
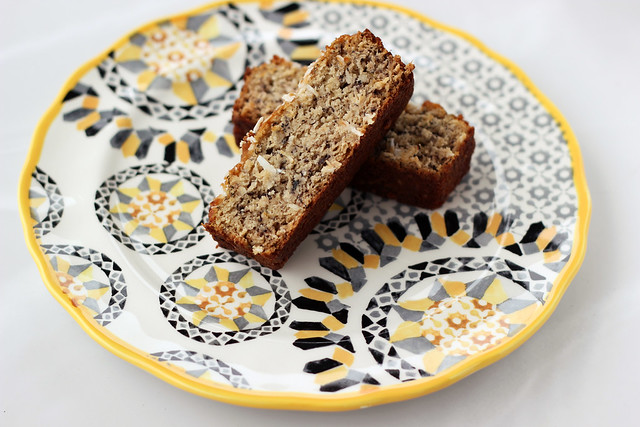
    Grain-Free Banana Coconut Mini-Loaves - Gluten-free, Dairy-free + Refined Sugar-free
    If you follow me on Instagram you probably already know this, but I just love Instagram 🙂 It is probably my favorite social networking platform there is right now, because it is just a little glimpse into people’s lives. Very few words, just a quick glance. It doesn’t feel totally invasive and it is rare that you have people complaining on there or posting political rants, etc. I just feel like it is a big celebration of everything happy going on in our lives. I love seeing peoples pets, their kids, what they are working on, a snapshot from their amazing vaction and of course, all of the food. Some days I put up so many photos of food, I am sure most of my non-food blogging friends want to (or do) unfollow me, but I personally love seeing what is happening in everyone’s kitchens. It is always so inspiring and exciting.

    Grain-Free Banana Coconut Mini-Loaves - Gluten-free, Dairy-free + Refined Sugar-free

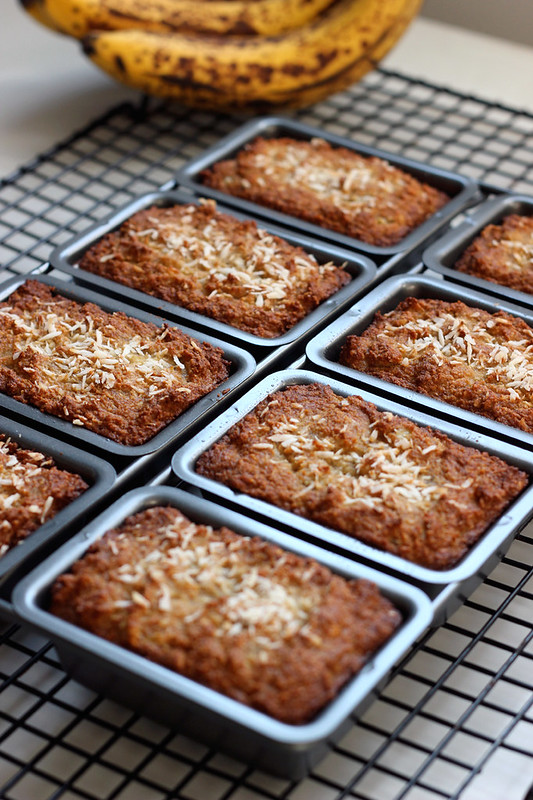
    A week or two ago my good friend Esther, who I sadly haven’t seen in a while, posted a photo on Instagram of some amazing little mini-loaves she just pulled out of the oven. They looks delicious and I loved the pan she made them in. The pans are all connected and just the perfect sized little treat, I had never seen anything like it. I mean, what is it about miniature things that is just so irresistible? When I asked Esther where she got it from, she said just up the street from her (she lives in Princeton, NJ), and she offered to pick one up for me. Yay! So, I told her to tell me what it costs and I would send her the money. Next thing I know a package comes in the mail to me, with the pan and a sweet note, as a birthday gift from Esther. It made my whole day! Thank you again so much Esther! The very next morning I started thinking about what I would make with it.

    Grain-Free Banana Coconut Mini-Loaves - Gluten-free, Dairy-free + Refined Sugar-free

    I had some bananas in the pantry that were definitely overripe, so I thought I had to make some banana bread but I wanted to do something a little different and create a grain-free recipe made with my favorite, almond and coconut flours, that also included some yummy coconut, since the two go so well together.

    Grain-free Banana Coconut Mini-Loaves - Gluten-free, Dairy-free + Refined Sugar-free

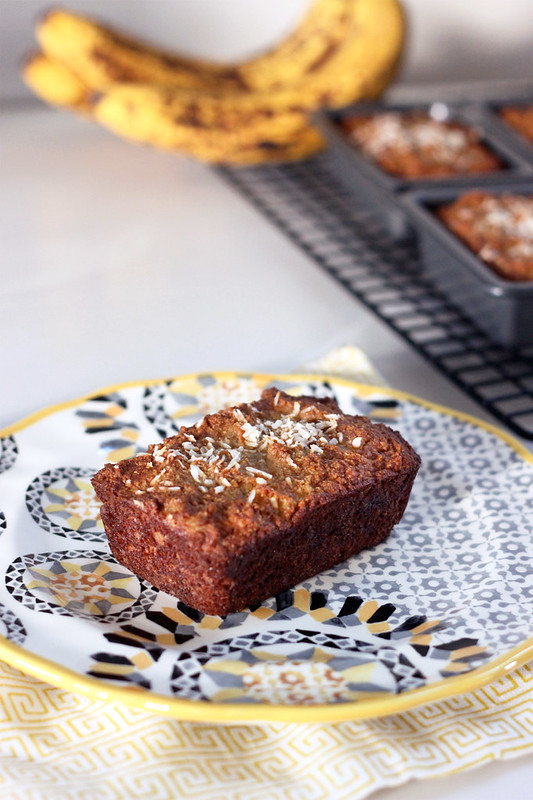
    Even after playing around with so many baked-good recipes that use the combination of almond and coconut flours, I am still amazed every time I bake with it and it comes out with a grain-like quality to it, it really surprises me each time. I always expect a weird goopy mess that doesn’t quite work. These mini-loaves are just perfection, they are moist and spongey like any good banana bread should be, plus I really love the little bits of coconut throughout and on top. These loaves would also be good with nuts on top or some mini-chocolate chips (both of which I thought of after it was too late). By the way, how great is that plate? Perfect for these mini-loaves right? That was a super thoughtful birthday gift from my friends Sarah and Brian. I have some pretty amazing pals!

    What’s your favorite mini-food or mini kitchen gadget?

    FYI – this is the mini-loaf pan that I used for reference. Each loaf well measures 3 13/16″ x 2 1/2″ and 1 1/2″ high, I haven’t tried this recipe as a single loaf or even the slightly larger mini-loaf pans, so I cannot attest to how it will come out, likely it will work, the loaves will probably have less height to them and you will have to bake it for longer. If you experiment with different loaf pans and this recipe, please let me know how it comes out. Thank you!

    Grain-Free Banana Coconut Mini-Loaves - Gluten-free, Dairy-free + Refined Sugar-free

    [print_this]Grain-free Banana Coconut Mini-Loaves – Gluten-free, Dairy-free + Refined Sugar-free
     makes 8 mini-loaves

    • 1 1/2 cups blanched almond flour (I like Honeyville)
    • 1/4 cup coconut flour
    • 1 teaspoon baking soda
    • 1 teaspoon sea salt
    • 1/2 cup unsweetened finely shredded coconut, saving a small amount for the top of the loaves
    • 2-3 large ripe bananas, mashed (you are looking to get about 1 1/2 cups)
    • 4 extra-large local farm fresh brown eggs
    • 1/4 cup coconut oil, melted
    • 1 tablespoon honey or maple syrup
    • 1 tablespoon vanilla extract

    Preheat the oven to 350º F. Grease your mini-loaf pans with a little coconut oil, I used this pan.

    In a large bowl combine the almond and coconut flours with baking soda, sea salt and shredded coconut. In a small bowl combine the eggs with the coconut oil, maple syrup, vanilla extract and the mashed bananas, whisk until very well combined.

    Pour wet ingredients into the dry and mix well until fully incorporated.

    Divide the batter evenly into the 8 mini-loaf pans, smooth it out a bit with a spatula and sprinkle a little shredded coconut on top of each loaf.
    Bake for 30 to 35 minutes. Test with a tooth-pick for doneness. Remove loaves from oven, let cool in pans for 10-15 minutes and then transfer to a wire rack to continue cooling.

    I find for these type of grain-free baked goods, that storage in the fridge seems to be best, I usually just cover or wrap them in plastic wrap or put them in a large ziplock bag. When I am ready to eat one, I pull it out, give it 20 seconds in the microwave or a minute or two in the toaster oven and then I slather a little coconut oil on top.

    [/print_this]

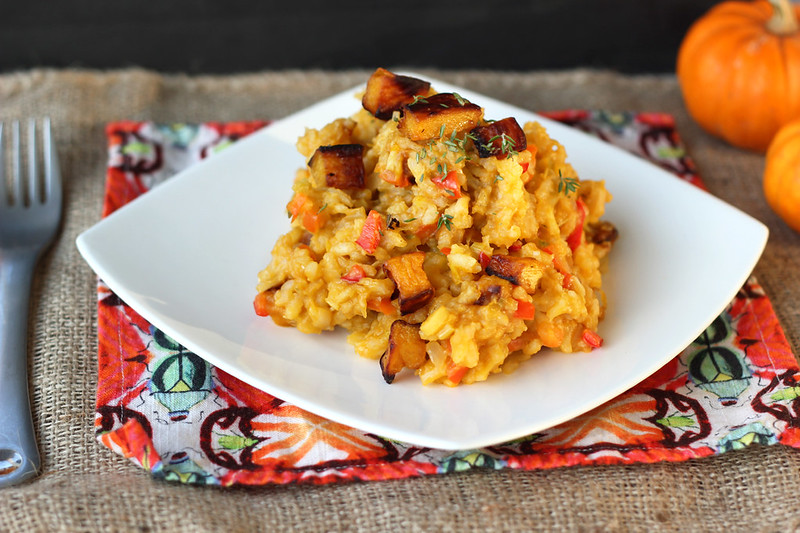
  10. Creamy Crock-Pot Pumpkin Risotto – Gluten-free + Vegan

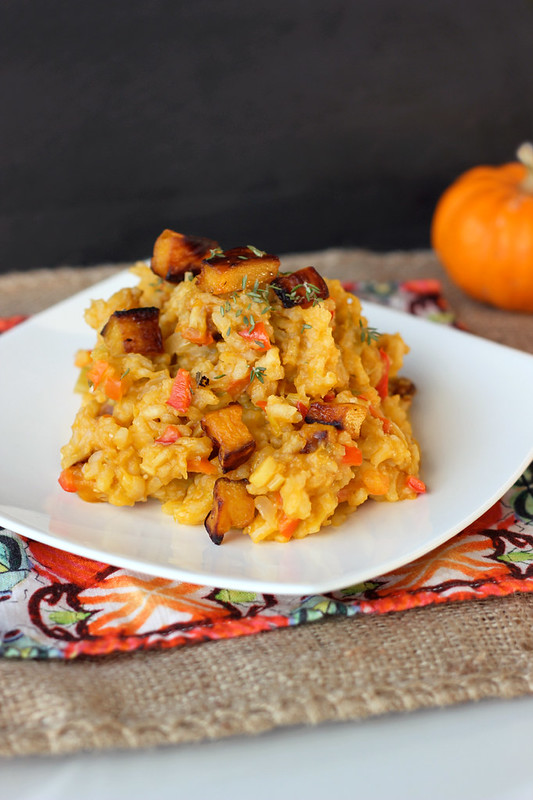
    Creamy Crock-Pot Pumpkin Risotto – Gluten-free + Vegan

    If it isn’t apparent yet, I am all-in on the fall-inspired dishes right now. Apples, squash, pumpkin anything…I am all about it. All of it. I love the shift into comfort food at the start of Autumn and I know that my body is craving it for a reason. Ask and you shall receive hungry tummy! What better way to combine Autumn flavors and produce with comfort food, than a delicious creamy pumpkin risotto.

    Creamy Crock-Pot Pumpkin Risotto – Gluten-free + Vegan

    I had been dreaming of a pumpkin risotto for a few weeks now and even had a few readers request a recipe, but instead of a traditional risotto like this one or this one, I wanted something that wasn’t quite so labor intensive. I never mind standing over the pot, spooning the broth or stock in, one ladle-full at a time, it is always worth it, but I wanted to see if I could create a simpler method for those days that you don’t have the extra time to dedicate an hour of your life to just one pot of food. In comes the magical Crock-Pot, the closest thing I will ever have to a personal chef!

    Creamy Crock-Pot Pumpkin Risotto – Gluten-free + Vegan

    This risotto is creamy, rich and comforting without any dairy at all. It’s quite unbelievable that this is not only gluten-free, but it is also vegan. The roast pumpkin and the pumpkin puree and not only provide a beautiful rich autumn-inspired hue to the dish, but a delicious hearty flavor. If you aren’t vegan and/or dairy-free this would also be quite delicious with a good chicken stock and some Parmigiano-Reggiano at the end, though I can say with confidence neither are needed or missed. The key to a creamy risotto is opting for arborio rice rather than the trational long grain.

    Creamy Crock-Pot Pumpkin Risotto – Gluten-free + Vegan

    [print_this]Creamy Crock-Pot Pumpkin Risotto – Gluten-free + Vegan
    serves 6-8

    • 3 tablespoons olive oil
    • 2 cloves garlic, minced
    • 1 leek, cleaned, halved the long way then thinly sliced (white and light green parts only)
    • 1 small onion, diced
    • 1 red bell pepper, diced
    • 3/4 cup dry white wine
    • 2 cups uncooked Arborio rice
    • 1 teaspoon sea salt
    • 5 cups low-sodium vegetable broth
    • 1 tablespoon fresh thyme, split in half.
    • 1 cup pumpkin puree, canned or fresh
    • 1-2 tablespoons olive oil
    • 1 small pie pumpkin, seeded, peeled, and cut into 1-inch cubes
    • salt and pepper

    Optional – 1/2 to 2/3 cup freshly grated Parmesan cheese — preferably Parmigiano-Reggiano

    Heat the olive oil in a medium sauté pan over medium-high heat and sauté the leeks, onions and red bell pepper until they have softened up a bit, about 3-5 minutes. Add the garlic and cook another minute or two, then add all of the veggies to the crock-pot. Next pour the wine into the pan that the veggies were cooked in and scrape up any leftover bits in the pan, then add in the rice, stir around and cook until all of the wine has been absorbed. Add the rice to the slow cooker along with the broth, salt and half of the fresh thyme. Cover and cook on HIGH for about 1 1/2 to 2 hours or until all the liquid is absorbed.

    While the risotto is cooking roast the pumpkin. Preheat the oven to 425ºF. Toss the pumpkin cubes with olive oil and a little salt, and roast for 30-40 minutes until lightly browned and tender. Stirring after 15 minutes. Remove from the oven and set aside.

    Just before serving, stir in the pumpkin puree, roasted pumpkin and the remaining thyme. If you are adding cheese, add it now. Stir it all together, cover and let sit for another 3-5 minutes, then serve.

    [/print_this]
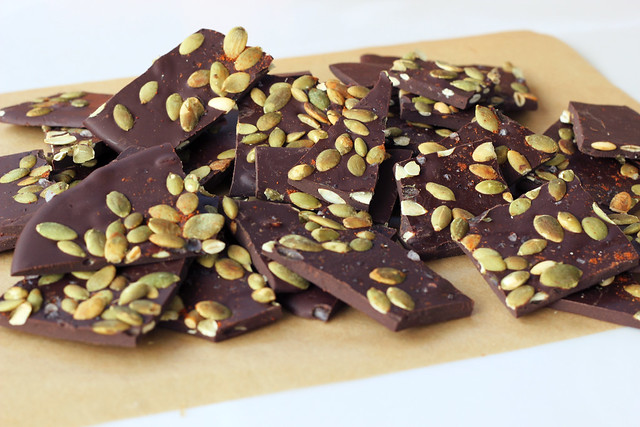
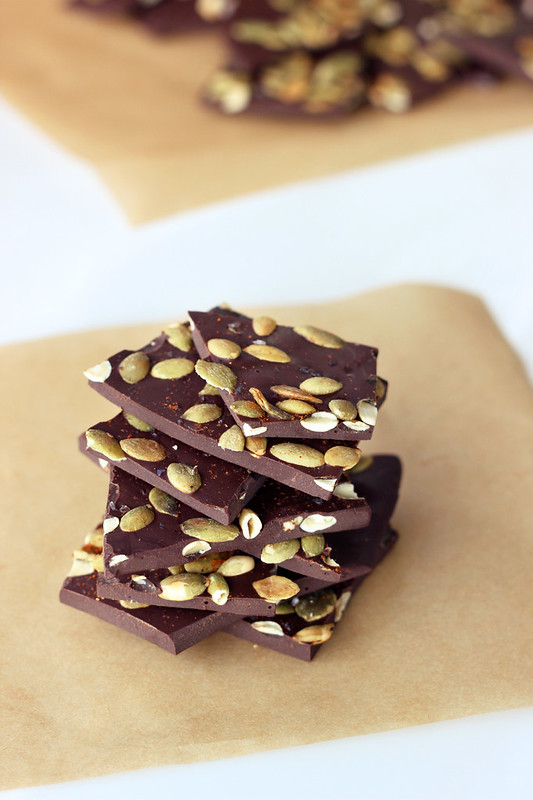
  11. Spicy Dark Chocolate Bark with Toasted Pumpkin Seeds and Sea Salt – Gluten-free + Vegan

    Spicy Dark Chocolate Bark with Toasted Pumpkin Seeds and Sea Salt

    I know I mention not being one of those people that is overly obsessed with sweets, and while that is true, one thing I can never walk away from is really good dark chocolate. That bitter bite with the subtle sweetness is the perfect combination, add some spice, crunch and salt and then you’ve really got me hooked.

    I started making bark a year or two ago, as the perfect treat to make for a dinner party, or you can wrap it up in some really nice handmade packaging and even give it as a gift. I always buy the highest percentage of cocoa containing dark chocolate I can find since that darker and more bitter, the better. Lately I have been loving Endangered Species 88% Dark Chocolate, and the bonus is that instead of refined white sugar, the sweetness in their bars comes from unbleached beet sugar. How cool is that?

    Spicy Dark Chocolate Bark with Toasted Pumpkin Seeds and Sea Salt

    One of my favorite things about making my own chocolate bark is all of the fun combinations you can create with different ingredients. You can use dried fruits, different nuts and seeds, spices, herbs, etc. You can really make something special every time. Since I was creating another healthy Halloween treat for my ongoing series this month with Free People, I thought that adding toasted pumpkin seeds was the perfect seasonal twist on this, and the addition of the spices bring a nice unexpected heat, and the chipotle powder has a nice subtle smokey flavor.

    Feel free to play around with your own favorite add-ins, and make this your own. Here is another dark chocolate bark recipe that I made a while back, that I love.

    This recipe was originally shared on the Free People Blog BLDG 25.

    Spicy Dark Chocolate Bark with Toasted Pumpkin Seeds and Sea Salt


    [print_this]Spicy Dark Chocolate Bark with Toasted Pumpkin Seeds and Sea Salt

    • 12 ounces of gluten-free, vegan dark chocolate (I used this)
    • 1/2 cup of hulled, unsalted pumpkin seeds
    • 1/4 teaspoon of smoked chipotle powder, plus a bit extra
    • 1/4 teaspoon of chile powder
    • 1/2 teaspoon of ground cinnamon
    • 1/4 teaspoon coarse grey sea salt (Fleur de sel)

    Place the pumpkin seeds in a dry skillet over a medium heat. Toast the pumpkin seeds for about 3-5 minutes, until they jump around a bit in the pan. Set aside to cool.

    Line the bottom of baking sheet with parchment paper leaving a small overhang. (I drizzle a small amount of oil on the pan first so the parchment paper will stay put and not wrinkle).

    Melt the chocolate in a double boiler over hot water, or in a microwave on low in 30-second bursts. Stir often with a rubber spatula so it melts evenly. Stir in the spices and half of the pumpkin seeds.

    Pour the chocolate onto the baking sheet and smooth with a spatula into an even layer. Sprinkle with the remaining pumpkin seeds and a pinch or two of additional smoked chipotle powder and the sea salt. Chill in the refrigerator until completely set, about 20-30 minutes, or in the freezer for 5 minutes.

    Peel the bark off the parchment paper and break into irregular pieces. Store in an airtight container in the refrigerator, it is best in the first a couple of days but can be stored up to two weeks.

    [/print_this]

  12. Photo Fun Day Friday

    Happy happy Friday! Hope everyone is having a great week and has a fun weekend ahead. Most of this week’s photos come from our trip out to the lake over the weekend and at the start of this week.  We had so much fun, the weather was perfect and it was exactly what we all needed. A little “fancy camping”, as we were calling it. My cousin Andrea and her boyfriend Mike came in from Albany for a night, then my sister Vicky and my neice Teagan and my parents all came out. We ate, drank, walked on the beach, watched movies, had beach fires (and smores) and just relaxe. It so was perfect and I didn’t want it to end.

    We don’t have a lot of fun on tap for this weekend, we have an open-house on Saturday from 11am-1pm (let me know if you are in the area and looking and I will send you the info), and a house showing on Sunday, so I have my fingers (and toes) crossed for some action. Other than that, I hope to get some baking and cooking done. What do you have planned for this weekend? Happy weekend everyone!

    Photo Fun Day Friday

    Mark and Seri doing some serious cuddling.

    Photo Fun Day Friday

    The beach makes me happy.

    Photo Fun Day Friday

    Uncle Mark and Teagan.

    Photo Fun Day Friday

    Seri.

    Photo Fun Day Friday

    My niece, Teagan and my sister, Vicky.

    Photo Fun Day Friday

    Mark and Seri taking in the sights and sounds of fall.

    Photo Fun Day Friday

    Mark and Seri again 🙂

    Photo Fun Day Friday

    I love the colors this time of year.

    Photo Fun Day Friday

    Me and my baby on the beach.

    Photo Fun Day Friday

    Campfire on the beach. My favorite.

    Photo Fun Day Friday

    The weather on Sunday was a beautiful 70+ degrees and sunny. It was perfect.

    Photo Fun Day Friday

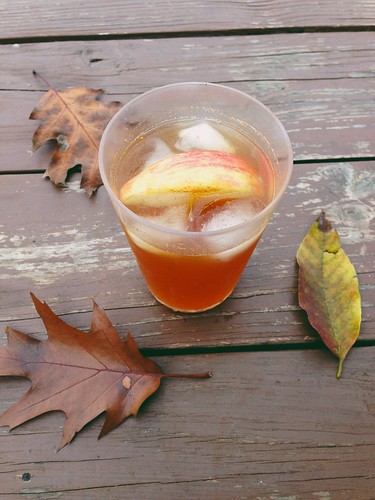
    I made spiced apple cider sangria.

    Photo Fun Day Friday

    Vicky and Teagan.

    Photo Fun Day Friday

    The little princess.

    Photo Fun Day Friday

    Look at that view and those colors. It was hard to leave on Monday.

    Photo Fun Day Friday

    Mark got me the most delicious chocolate birthday cake on Tuesday from Bon Bon’s Gluten Free Bakery in West Seneca

    Photo Fun Day Friday

    Had a great dinner at Taste of Thai with so many of my favorites. I’m a lucky girl!

    Photo Fun Day Friday

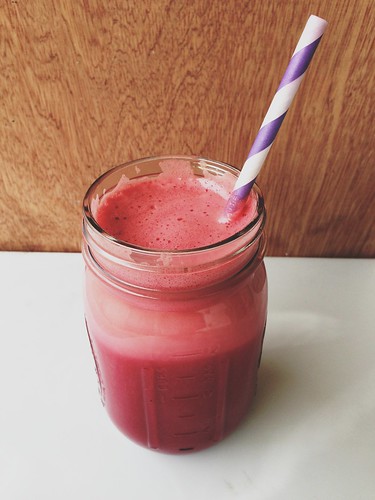
    After a weekend at the beach and birthday celebrating that meant a week of extra careful eating and a little detoxing/cleansing. Beet, apple, orange and carrot juice was a great way to kick it off.

    Photo Fun Day Friday

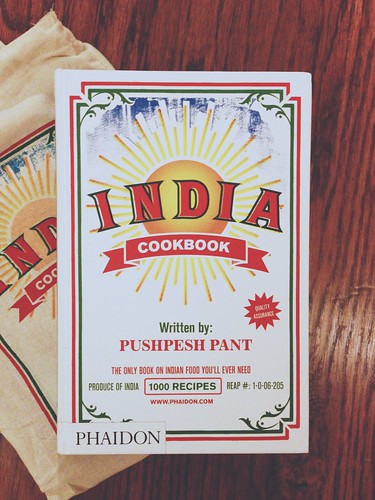
    Super excited about this cookbook that I got from our friends Anne and Billy.

  13. Vegetable Stir-Fry with Kelp Noodles – Gluten-free and Vegan

    Vegetable Stir-Fry with Kelp Noodles - Gluten-free and Vegan

    I had a wonderful birthday complete with the perfect yoga class, a fun day of work, dinner with hubby and so many wonderful friends, a delicious cake and I finished the night off with a glass of wine and a visit to my parents house. A wonderful and blessed day, indeed.

    Besides it being my birthday month and my absolute favorite season, the only thing (besides the cold) that I really dislike is how early the sun sets this time of year, and it’s just gonna keep getting earlier, too. I miss the beautiful and perfect end-of-day light when I am in the kitchen cooking, after I am done working for the day. Most nights as of recent, by the time we are done working and dinner is made and ready to eat, it is pitch black outside. For some reason I find that to be so depressing. This also poses a problem for taking photos of the dinner that I prepared, if I plan to share the recipe on here. So this fall and winter I am going to try something a little different, since we work from home, on the days I have a recipe I want to create to share with you guys, I am going to actually cook it and serve it for lunch, this way I can take all of my photos, and we can eat it fresh and hot. Win win. Then I can work a bit later in the day and we can just eat a light dinner. I am pretty excited about this as most days I am much hungrier in the middle of the day anyhow, since I got to yoga in the mornings. I think hubby and our assistant are both going to be more than happy about this new schedule, too.

    Vegetable Stir-Fry with Kelp Noodles - Gluten-free and Vegan

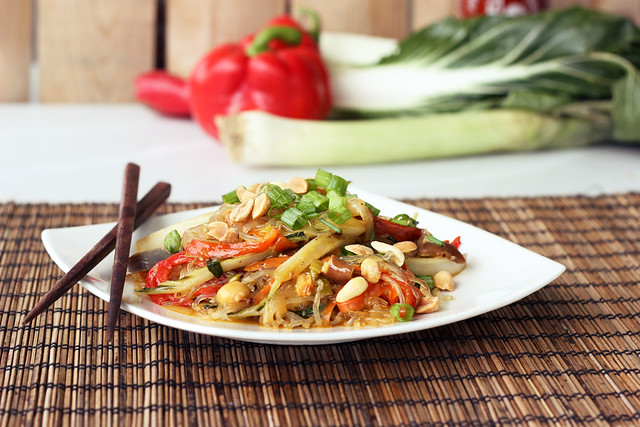
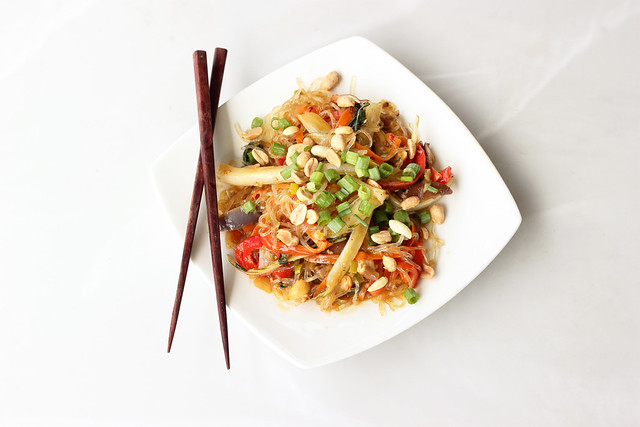
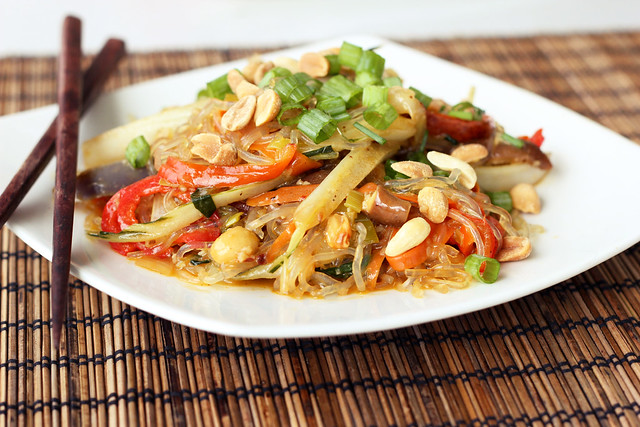
    For this stir-fry I used some of the beautiful veggies we got in this week’s CSA. Bok choy, leeks and lots of peppers, plus I added in some shitake mushrooms and carrot that I grabbed at the Co-Op this morning. I served it all with some kelp noodles that I have been so excited to try. After my obsession with zucchini noodles this summer, I thought kelp noodles sounded like another fun grain-free noodle alternative, especially for Asian meals like this one and woah, was I right. They were perfect in this stir fry and I am already dreaming of other fun Asian inspired dishes that they would be great in. (Please note that kelp noodles do have a unique crunch to them from the kelp and their texture is different from that of regular noodles.)

    Vegetable Stir-Fry with Kelp Noodles - Gluten-free and Vegan

    I included some notes below on preparing the kelp noodles, since they technically do not need to be cooked. I ended up rinsing them and running super hot water over them for a while to heat them up a tad, then I tossed them right in the wok with the stir-fry so they would get mixed right in and served right away.

    Have you ever tried kelp noodles? How do you like them served? 

    Vegetable Stir-Fry with Kelp Noodles - Gluten-free and Vegan

    [print_this]Vegetable Stir-Fry with Kelp Noodles – Gluten-free and Vegan (Grain-free)
    Serves 4

    Kelp Noodles:

    1 16-ounce package of kelp noodles, I used these

    Kelp noodles come ready to eat, no need to cook. You just need to rinse them, however they are very crunchy so I rinsed them and ran them under hot water for a bit to soften them up. I found the noodles were best tossed with the vegetable stir fry and the sauce and heated up a bit, they softened up a tad this way rather than just spooning everything over. I have also read that letting them soak in water and lemon for about 30 minutes and massaging them a bit with your hands (as you would kale), makes them a bit softer and not as crunchy. I like the crunch and found it to be a nice texture in the stir-fry

    Sauce:

    • 1/4 cup gluten-free tamari
    • 1/4 cup vegetable broth
    • 1 tablespoon coconut sugar
    • 1-2 teaspoons sriracha sauce
    • 1 tablespoon rice wine vinegar
    • 1 tablespoon sesame oil
    • 1 tablespoon sesame seeds
    • 1 teaspoon of corn starch or arrowroot starch
    • optional: 2 teaspoons of fish sauce, if not vegan

    Whisk all of the ingredients together in a small bowl and set aside.

    Stir Fry:

    feel free to use whatever vegetables you have on hand, I went with what we had on hand from our CSA and the market

    • 2 tablespoons sesame or peanut oil
    • 1 small onion, diced
    • 1 leek, rinsed very well, slice thinly the white and light green parts only
    • 2-3 bell peppers, sliced (I used a purple bell, red bell and red cubanelle pepper)
    • 2-3 cloves garlic, minced
    • 1 3-inch piece of ginger, peeled then grated
    • 1 bunch Bok Choy, sliced thinly the long way, you want about 3-4 cups
    • 1 carrot, peeled into ribbons
    • 4 ounces of shitake mushrooms, sliced
    • 1/4 teaspoon dried red-pepper flakes

    Additional ingredients:

    • Scallions, sliced
    • Sesame seeds
    • Roasted Peanuts

    Heat a wok or large skillet over high heat until a drop of water evaporates immediately. Add oil, then stir fry onions, leeks and bell peppers for about 2-3 minutes. Then add in the ginger and garlic and cook for another minute. Add the remaining ingredients to the wok, the bok choy, carrot ribbons and mushrooms. Toss around and cook until the vegetables are just tender. Add in the sauce, reduce the heat and simmer, stirring occasionally, until thickened, 1 to 2 minutes. Stir in some of the scallions, peanuts and sesame seeds, leaving some for sprinkling on top.
    Serve over the kelp noodles or add the kelp noodles to the wok and toss it all around. Serve topped with sliced scallions, peanuts and/or sesame seeds.

    [/print_this]

  14. Beth’s Birthday – 1 Gallon Gold Label Virgin Coconut Oil Giveaway

    ********* The giveaway is now closed! Thank you so much to everyone that entered and congrats to Janet our randomly selected winner! *********
    (winner was randomly selected using Random.org)

    Janet I will be emailing you to let you know you have won and to get your mailing address.

    If you’ve been following my blog for a while now, you know how obsessed I am with coconut oil. I use it in just about everything I make, baked goods, smoothies, chocolate treats, roasted veggies, etc. So, in honor of my birthday today, instead of all of the gifts being for me, I wanted to share the gift of coconut oil with one lucky reader – so I am giving away 1 gallon (yes, gallon) of Tropical Traditions’ Gold Label Virgin Coconut Oil! Before we get into how to enter, below are some of favorite ways to use coconut oil in the kitchen! Now if I could just get someone to create the perfect gluten-free birthday cake for me today with some of this delicious coconut oil and maybe some amazing dark chocolate, that would just make my day. If I could clone myself for just one day for that reason, I’d say that is a good enough reason.

    Some of my recent favorite recipe featuring Tropical Traditions’ Gold Label Virgin Coconut Oil are:

    Joyful Almond Coconut Chocolate Bites - Vegan + Gluten-free (Refined Sugar-free Option)

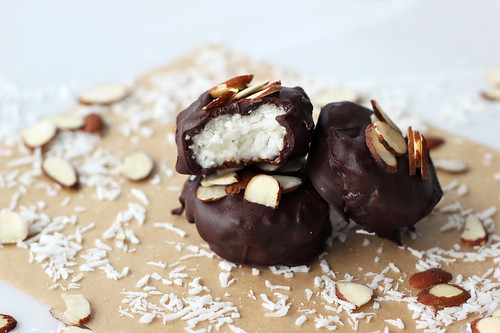
    These homemade vegan versions of Almond Joys that I call Joyful Almond Coconut Chocolate Bites, are my new obsession. A perfect halloween sweet without all the processed junk found in the candy lining the aisles at stores right now.

    Grain-free Mini Pumpkin Pie Tarts (Gluten-free, Vegan + Refined Sugar-free)

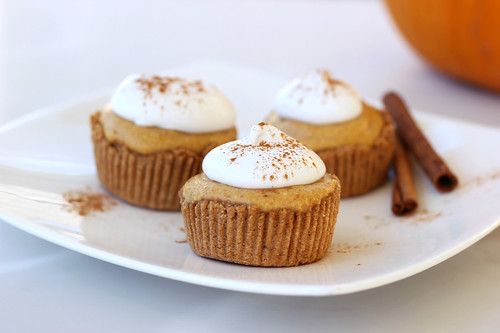
    It’s that time of year, pumpkin recipes are everywhere and I cannot get enough. These Grain-free Mini Pumpkin Pie Tarts are the perfect way to enjoy to have all of the yummy flavors of a pumpkin pie without the guilt, or the stomach aches!

    Grain-free Pistachio Chocolate Chip Cookies with Sea Salt - Gluten-free + Dairy-free (Vegan option)

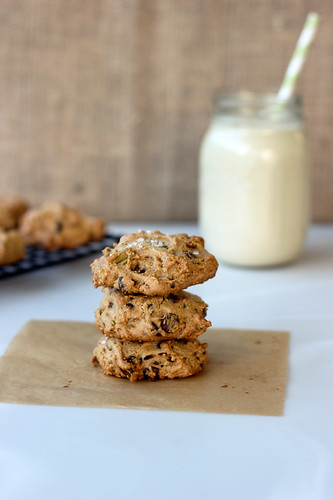
    I love using coconut oil in baked goods, especially cookies. These Grain-free Pistachio Chocolate Chip Cookies with Sea Salt  are simple to make and are soo delicious. The most wonderful combo of salty and sweet all wrapped up into one delicious cookie.

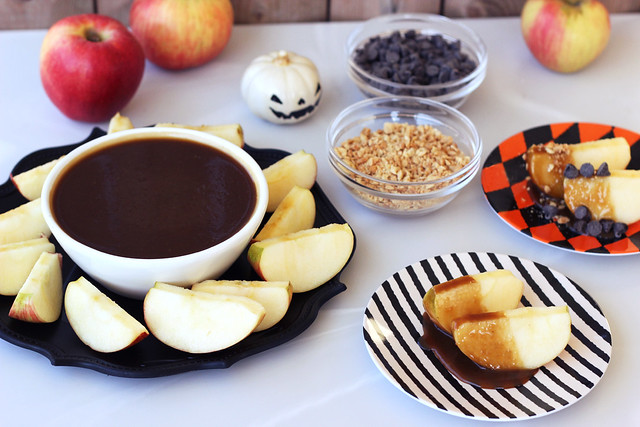
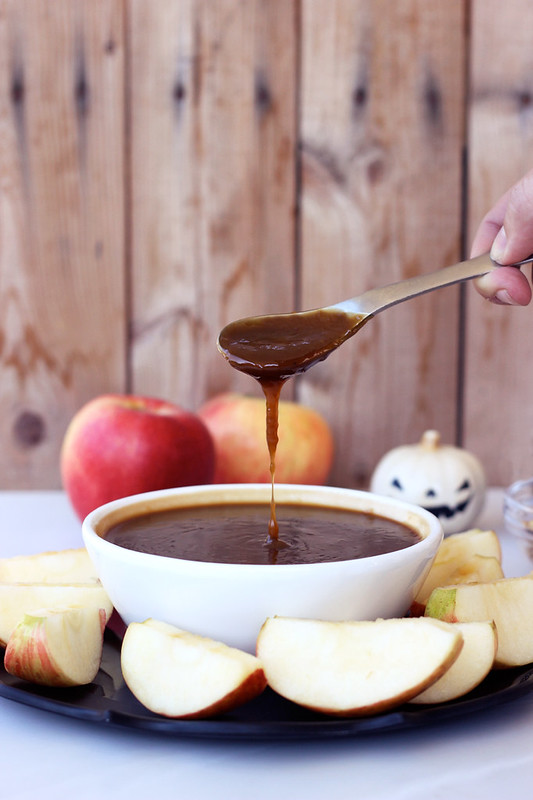
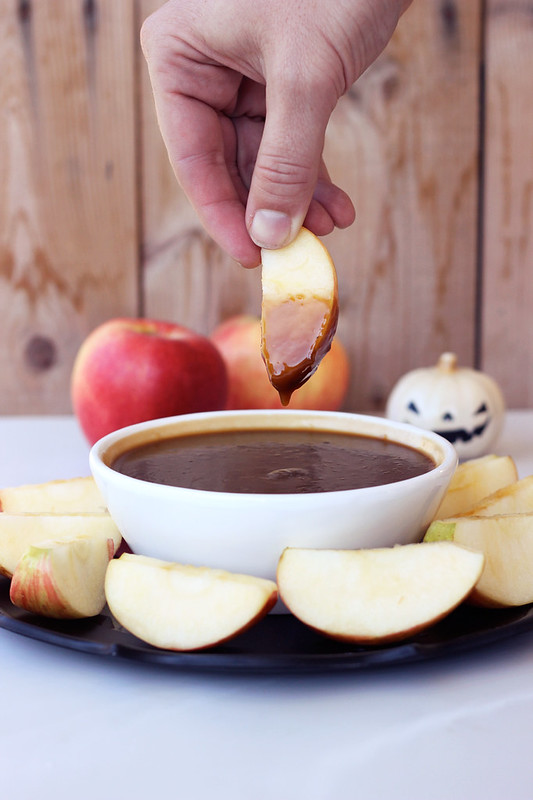
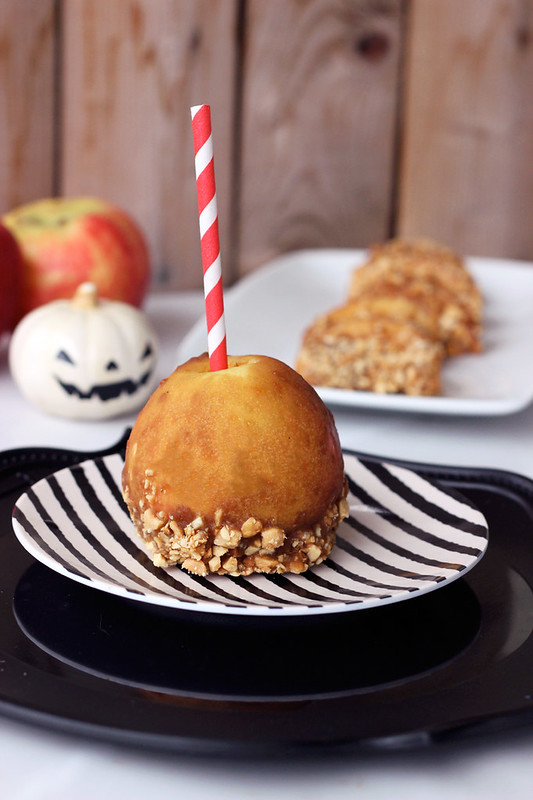
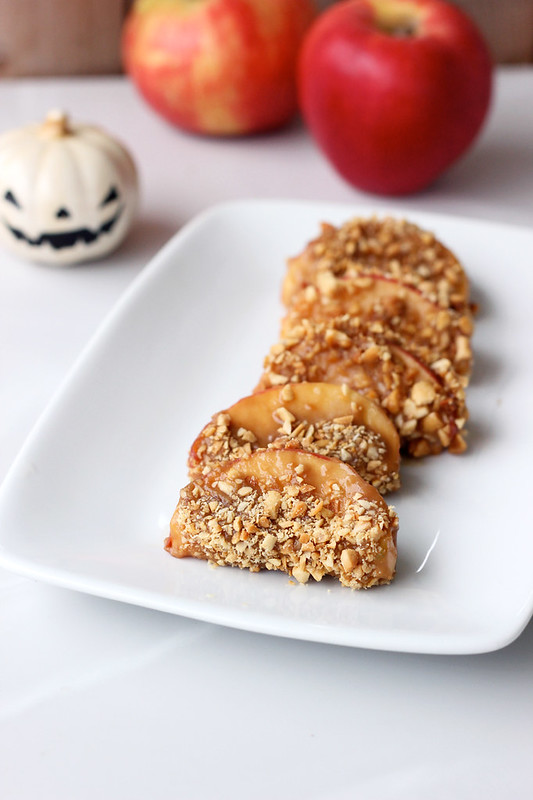
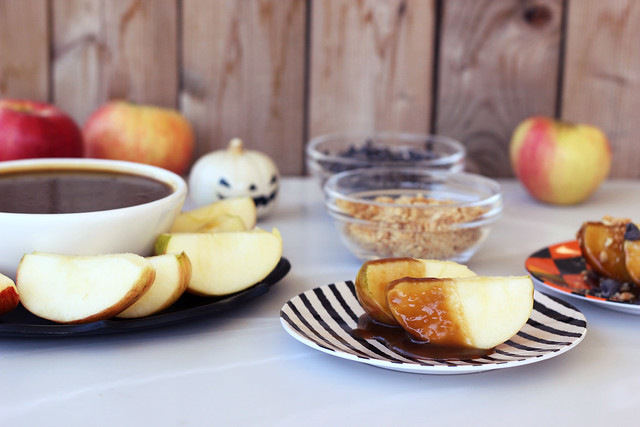
    Vegan Caramel Apple Dipping Sauce (gluten-free)

    With Halloween looming around the corner, I am sure you are craving some delicious caramel apples, too, right? Here is my updated healthier version of the classic treat, Vegan Caramel Apple Dipping Sauce (Gluten-free). This dipping sauce features lots of yummy coconut ingredients, including some delicious coconut oil.

    And of course there are always all of these favorite recipes, too…


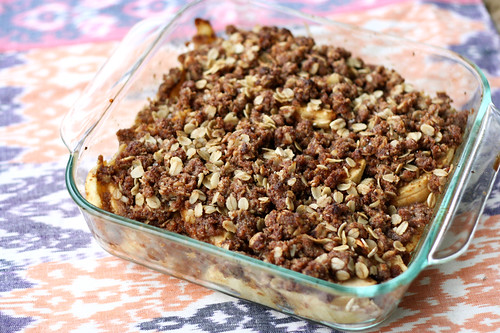
    Apple Crisp (Gluten-Free and Vegan)

    What could be better than a homemade vegan and gluten-free apple crisp this time of year? Nothing! Instead of the usual butter, replace it with some delicious gold label virgin coconut oil.

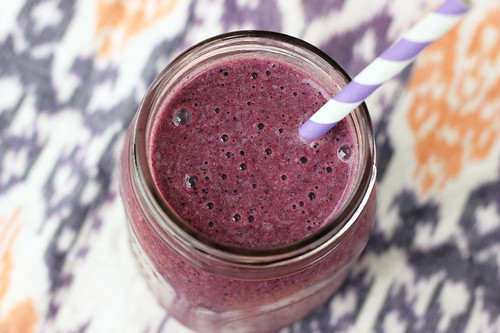
    Banana Blueberry Coconut Smoothie  - Vegan + Gluten-free

    As I mentioned a little while back, I recently received a sample of Gold Label Coconut Oil from Tropical Traditions and I have really been enjoying making things with it. One of my favorites has been this Banana Blueberry Coconut Smoothie, that I featured recently. Sometimes I make a similar smoothie but instead of blueberries, I add in a tablespoon or two of unsweetened organic baking cocoa. Wow, what a delicious and sinful treat.

    Blueberry Rosemary Multi-grain Galette

    Another recipe that I made recently that really used coconut oil in a different way was this Blueberry Rosemary Multi-Grain Galette, instead of butter or a butter alternative, I use frozen coconut oil to give the crust of this galette the perfect texture, it is so easy and perfect if you are dairy-free or vegan.


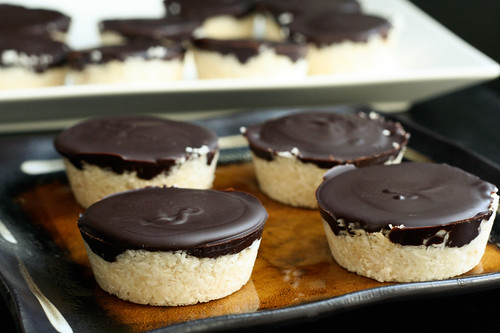
    Dark Chocolate Coconut Treats - Vegan, Gluten-free + Refined Sugar-Free

    And of course, the most popular recipe here on Tasty Yummies that really features coconut oil are my Dark Chocolate Coconut Treats, which can easily be made in a regular sized or mini-sized muffin tin. These may just be my favorite use for coconut oil.

    A quick search for coconut oil here on Tasty Yummies will quickly show you just how often I use coconut oil and it will get you tons of great recipes to play around with and to be inspired by. In addition to being great to cook with, I also from time to time use coconut oil on my skin and hair (and the same goes for the dog), since it makes a really great natural moisturizer. The coconut oil that I received from Tropical Traditions really stands out for me among the different brands I have used, it has a great subtle flavor and it is very high quality. I find the coconut oil from Tropical Traditions tastes cleaner and more pure than any other brand I have tried. I cannot wait to continue making yummy things with it. A lot of you already know the great benefits that coconut oil provides and as much as I would love to go into that on here, the FDA does not want us to discuss the health benefits of coconut oil on a page where it is being sold or given away, so here is the best website to read about the health benefits of coconut oil.

    Since, I am really enjoying the Gold Label Virgin Coconut Oil from Tropical Traditions so much, I am hosting a giveaway for a 1 gallon pail. (Yes, it a pail of coconut oil!)

    Read below to see how you can enter to win.

    Gold Label Virgin Coconut Oil - gallon.

    Win 1 gallon of Gold Label Virgin Coconut Oil!

    Tropical Traditions is America’s source for coconut oil. Their Gold Label Virgin Coconut Oil is hand crafted in small batches by family producers, and it is the highest quality coconut oil they offer. You can read more about how virgin coconut oil is different from other coconut oils on their website: What is Virgin Coconut Oil?

    You can also watch the video they produced about Gold Label Virgin Coconut Oil:

    Tropical Traditions also carries other varieties of affordable high quality coconut oil. Visit their website to check on current sales, to learn about the many uses of coconut oil, and to read about all the advantages of buying coconut oil online. Since the FDA does not want us to discuss the health benefits of coconut oil on a page where it is being sold or given away, here is the best website to read about the health benefits of coconut oil.

    Disclaimer: Tropical Traditions provided me with a free sample of this product to review, and I was under no obligation to review it if I so chose. Nor was I under any obligation to write a positive review or sponsor a product giveaway in return for the free product.

     Enter the contest

    Please leave a *separate comment* below for each entry!
    You can enter up to 4 times

    1) In order to be entered into the giveaway, you *must* sign up for the Tropical Traditions newsletter here.
    Please comment below to let me know that you have done so (with a working email address) to enter yourself in the giveaway *

    Additional entries will be accepted for the following:

     2) Like both the Tasty Yummies and Tropical Traditions pages on Facebook.
    Share the post I put up on the Tasty Yummies page to be included in the giveaway then come back and comment here telling me you liked both pages, that you’ve shared my post and what you’d make if you won the gallon-sized pail of coconut oil.

    3) Tweet about the contest and while you are there follow me on Twitter @herobeth and follow @troptraditions and/or @ttspecialdeals
    You could say something like: “I just entered to win @troptraditions Gold Label Virgin Coconut Oil from @herobeth on Tasty Yummies  http://wp.me/p23r4t-Ia”
    Make sure you comment here to let me know that you posted about the giveaway.

    4) Subscribe to the Tasty Yummies RSS feed in your RSS reader or by email
     Again, make sure to comment here to let me know that you subscribed.

    Please note – this giveaway is only open to the US and Canada.

    Again, please make sure you leave a *separate comment* below for each entry,
    if you don’t comment you will not be entered!

    The giveaway will be open until the end of the day Tuesday, October 23.
    Winner will be selected at random and announced on Wednesday, October 24. 1 winner will be selected and notified through email and this post.

    Please note: If you order by clicking on any of my links and have never ordered from Tropical Traditions in the past, you will receive a free book on Virgin Coconut Oil, and I will receive a discount coupon for referring you.

  15. Vegan Caramel Apple Dipping Sauce (Gluten-free)

    Vegan Caramel Apple Dipping Sauce (gluten-free)

    I am so very excited to share this recipe with you guys. I had so much fun creating it and even more fun eating it! In theory, caramel apples always sound amazing, but in reality they are always a sticky mess, hard to eat, and so sugary they actually hurt my teeth. I have learned to just pass on by and only dream of their caramel goodness. Until now. I finally decided to re-imagine a caramel recipe without heavy cream or butter, but I also wanted the sweetness to come from somewhere other than refined overly processed white sugar.

    I am really excited with how this came out.

    Vegan Caramel Apple Dipping Sauce (gluten-free)

    It has a beautiful dark hue from the coconut sugar and it is thick and luscious and perfectly creamy, and the right amount of sweetness without feeling yourself getting a cavity as you are eating it.

    Vegan Caramel Apple Dipping Sauce (gluten-free)

    This caramel is great as both a dipping sauce for fresh apples (or whatever else you would like) that can be served while it is still a little warm or totally chilled, or you can let it fully chill, get nice and thick and actually coat whole or sliced apples in it, then coat them in nuts, chocolate, sprinkles or whatever you’d like.
    Vegan Caramel Apple Dipping Sauce (gluten-free)

    Vegan Caramel Apple Dipping Sauce (gluten-free)

    Obviously, just because this caramel sauce is healthier than the original, it doesn’t mean you should sit down and eat a bowl of it in one sitting, though you easily could. Sugar is still sugar, but at least with this refined sugar-free, vegan version you can have a bit less guilt while you indulge.

    Vegan Caramel Apple Dipping Sauce (gluten-free)


    [print_this]Vegan Caramel Apple Dipping Sauce (gluten-free)

    makes about 2 cups

    • 1 cup organic coconut sugar
    • 2 tablespoons maple syrup
    • 1 tablespoon water
    • 1/4 cup coconut oil, melted
    • salt
    • 1 cup full-fat organic coconut milk, the canned kind
    • 1 tablespoon vanilla
    • 1tablespoon arrowroot starch (corn starch or tapioca starch would also work)

    In a medium saucepan over a medium heat, mix together the coconut sugar, maple syrup, coconut oil and water, stirring often and well until the sugar has dissolved and it is smooth and creamy. Bring it up to a slight simmer, add a dash or two or salt and the coconut milk, whisking and bring back up to a simmer.

    Once it has been simmering for about 5 minutes, add in the vanilla and the arrowroot starch. I find that slowly adding the arrowroot starch while whisking (by sprinkling it in), versus just a big dump, keeps the lumps to a minimum. Lower the heat and whisk until the arrowroot starch has dissolved and the sauce is nice and thick. Remove from the heat.

    It is great served warm or cool as a dipping sauce for apples (or whatever else you might like to dip in it). Serve with chopped nuts or chocolate on the side as well.

    Or you can let the sauce cool fully and it will get a little thicker and then you can roll whole apples or apple slices in it, cover with chopped nuts or chocolate pieces and place in the fridge to chill and harden up a bit.

    [/print_this]

  16. Photo Fun Day Friday

    Hey guys, happy Friday!! Hope your week has been great. We’ve been having a lot of fun over here, really enjoying the fall. Last weekend we went apple picking and this weekend we are out at my family’s beautiful big beach house on Lake Erie in Angola. We’ve got some time alone and some time with family. We’re relaxing, enjoying the views, going for walks, hopefully we’re gonna have a camp fire or two on the beach, I plan to sip on some hot spiced(and spiked) cider and play some board games, etc. My kind of long weekend.

    Untitled

    Om.

    Untitled

    A little detail on a new poster we printed this week.

    Untitled

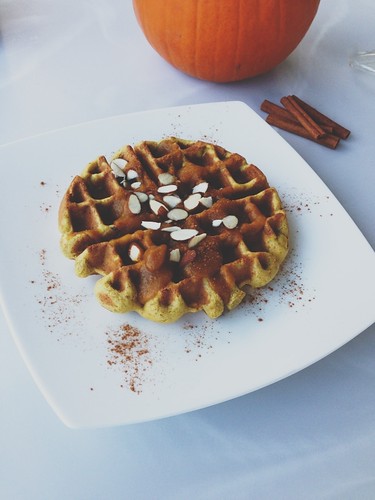
    Homemade pumpkin spice waffles (I wanna rework this recipe a bit before I share it)

    Untitled

    One of the farmers at Blackman Homestead with his helper.

    Untitled

    At Blackman Homestead Farms

    Photo Fun Day Friday

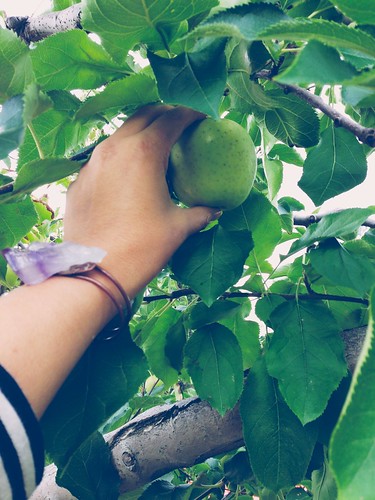
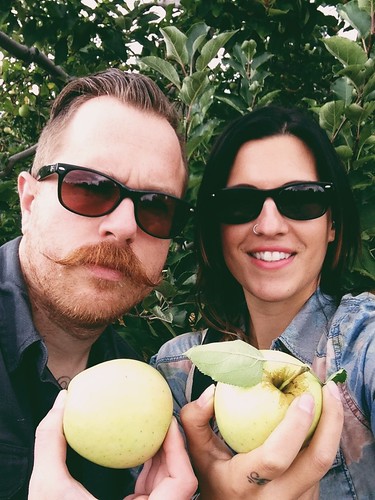
    Apple picking.

    Photo Fun Day Friday

    Picking crispin apples.

    Photo Fun Day Friday

    Apple picking.

    Untitled

    Got some goodies for home.

    Photo Fun Day Friday

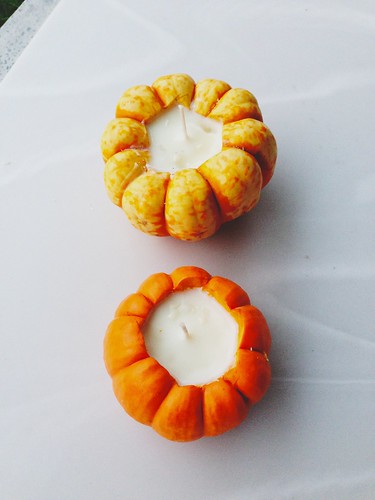
    Did some fall crafting. Made these autumn-scented mini-gourd soy candles.

    Photo Fun Day Friday

    Seri trying to stealby breakfast.

    Untitled

    Om.

    Photo Fun Day Friday

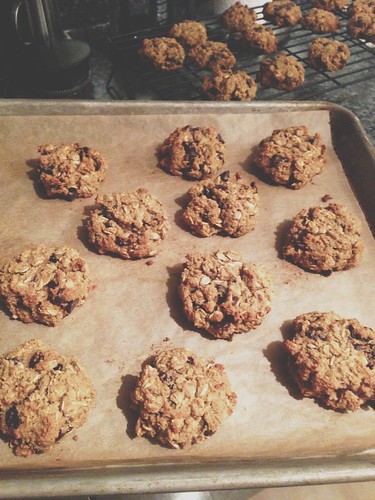
    Homemade pumpkin oatmeal chocolate chip cookies. A variation on this recipe.

    Photo Fun Day Friday

    Jpeg in his teepee. This kills me every single time.

    Photo Fun Day Friday

    Our view for the next 5 days. Angola on the lake.

    Untitled

    Seri is loving the view, too.

  17. Orange Spice Granola with Black Mission Figs and Pistachios – Gluten-free, Vegan + Refined Sugar-free

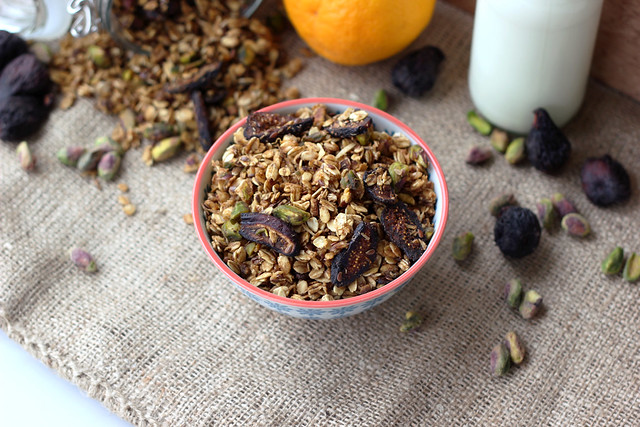
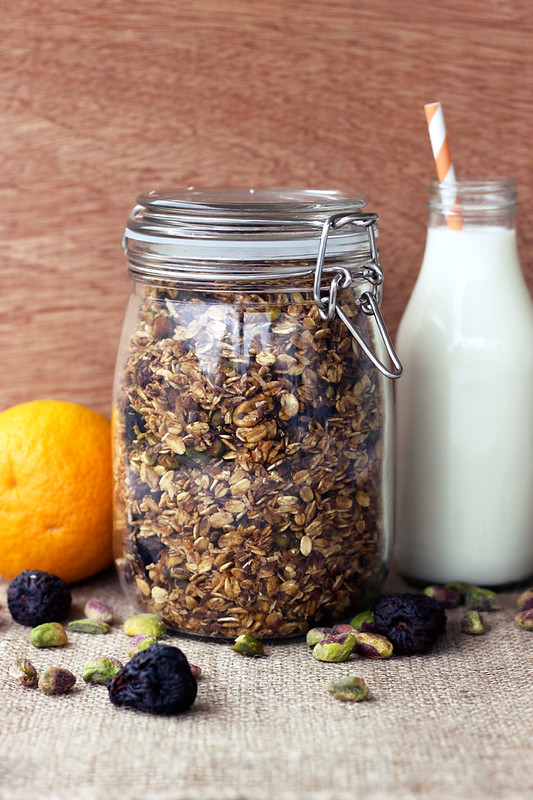
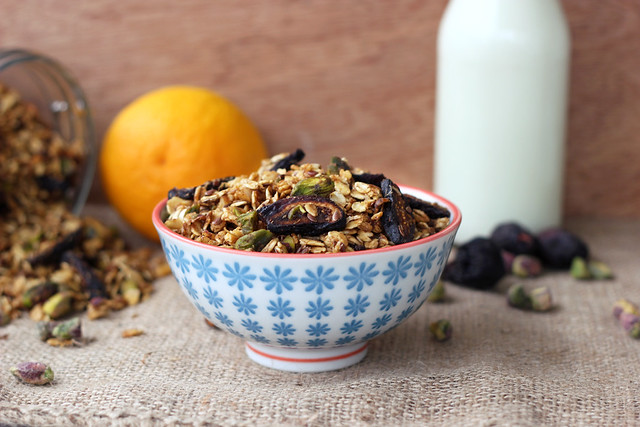
    Orange Spice Granola with Black Mission Figs and Pistachios - Gluten-free, Vegan + Refined Sugar-free

    This granola was something I quickly created with what I had on hand for our road trip to Chicago a couple of weeks ago. When I shared the photo on Instagram and Facebook, people were asking for the recipe like crazy! So, twist my arm, of course I made it again and this time I actually measured and paid attention to what I added in.

    Orange Spice Granola with Black Mission Figs and Pistachios - Gluten-free, Vegan + Refined Sugar-free

    If you are gluten-free and can tolerate (and enjoy) gluten-free oats, you have to make your own granola. It is so simple, so inexpensive and you can always make it just the way you want it. Plus, I really enjoy cleaning up the pantry and making use of all of the random leftover seeds, nuts and dried fruit by just dumping it all into a delicious and creative granola. The bonus is how incredible it makes the house smell, too. Obviously if you aren’t gluten-free, you can just make this with regular rolled oats!

    Orange Spice Granola with Black Mission Figs and Pistachios - Gluten-free, Vegan + Refined Sugar-free

    This granola keeps quite well in sealed glass jars or you could also just store it in ziplock bags, etc. It’s great straight-up as cereal with your favorite non-dairy (or dairy) milk with some freshly sliced bananas, sprinkled over ice cream or yogurt, you could also use it as a topping or filling on a baked apple, on top of muffins, etc. Get creative  and do yourself a favor and make your own granola ASAP if you never have. You will be obsessed.

    Orange Spice Granola with Black Mission Figs and Pistachios - Gluten-free, Vegan + Refined Sugar-free
    [print_this]Orange Spice Granola with Black Mission Figs and Pistachios – Gluten-free, Vegan + Refined Sugar-free

    • 4 cups certified gluten-free rolled oats
    • 1 cup dried organic Black Mission figs, sliced
    • 3/4 cup shelled pistachios (raw or roasted will work)
    • 1/2 cup finely shredded unsweetened organic coconut
    • 1/4 cup flax seeds
    • 1 teaspoon ground cinnamon
    • 1/4 teaspoon ground nutmeg
    • 1/8 teaspoon ground cloves
    • 1 pinch of ground ginger
    • Juice from 2 oranges (about 1 cup)
    • 1-2 teaspoons orange zest
    • 1/4 cup maple syrup (honey or any other liquid sweetener will work, too)
    • 1 1/2 teaspoon vanilla extract
    • 1 tablespoon blackstrap molasses (optional)

    Preheat oven to 300ºF.
    Line a large baking sheet with parchment paper. You can also use a roasting pan, which is nice since you can just mix all of the ingredients right in it, without losing things over the edge.

    Combine all of your dry ingredients: oats, figs, pistachios, flaxseeds and coconut with all of your spices, in a large bowl (or in your roasting pan). Mix well.

    In a small bowl stir together all the wet ingredients: orange juice, zest, maple syrup, vanilla and blackstrap molasses.

    Pour the wet ingredients over the dry ingredients and stir until well coated. Let sit 5 to 10 minutes.

    If you aren’t using a roasting pan, spread the granola from the bowl onto the baking sheet(s) and bake for 30-40 minutes. Toss every 10 minutes or so to provide even toasting.

    Let cool completely – it will get crispier as it cools. Keep in airtight container.

    [/print_this]

  18. Apple Pie Smoothie – Gluten-free, Vegan + Refined Sugar-free

    Apple Pie Smoothie - Gluten-free, Vegan + Refined Sugar-free

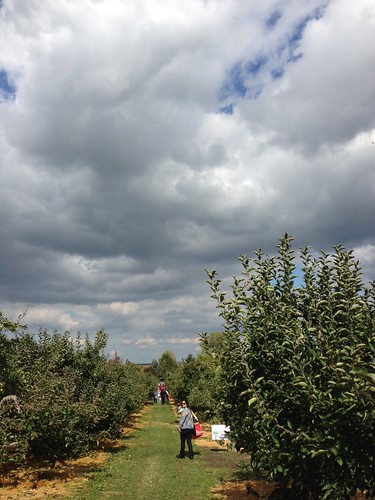
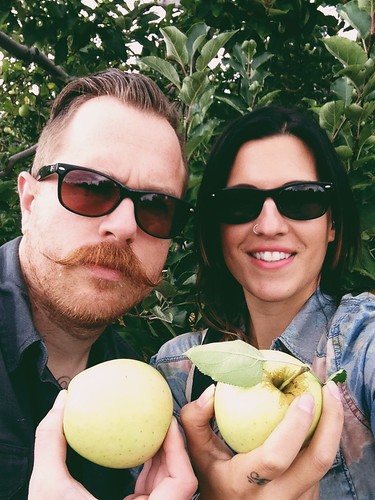
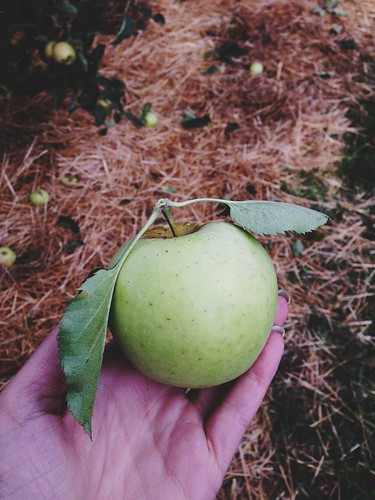
    I honestly think I love fresh local apples this time of year just as much as pumpkins and I feel like they don’t get nearly the same amount of love! We finally got out this weekend apple picking at Blackman Homestead farm in Lockport. I didn’t realize it until it was too late that most all of the local farms that normally offer u-pick options started the u-pick earlier this year due to the unseasonably warm winter we had that started the trees blossoming early. That plus some late spring frosts and lots of rain and an extremely hot and dry summer – crops all across the region were definitely affected in lots of different ways. Thankfully most apple farms were affected by all of this only by having early harvests, otherwise no worse for the ware. (Most local apple farms may not have u-pick options, but almost all of them do have their apple harvest already picked and ready for purchase, so please make sure to continue to support your local farms whenever possible)

    Apple picking

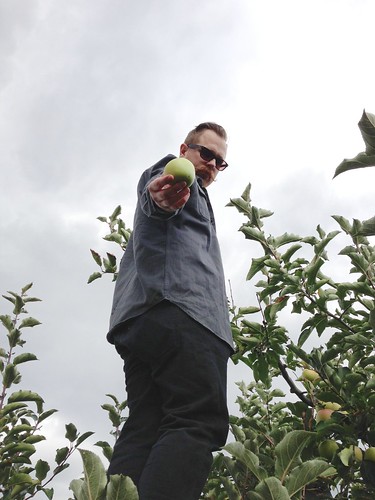
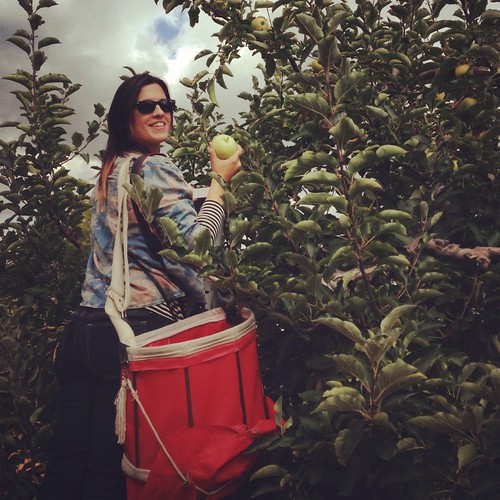
    We were lucky that as of Friday at Blackman Homestead the Crispins were ready for picking so we were able to make the trip out on Saturday morning, grab some bags and pick some of the beautiful brightly hued apples! Most of the apples that were left were at the way tops of the trees, but we didn’t mind, we climbed up the ladders and grabbed as many as we could. It was the perfect crisp cool fall weather and the sun was even out for most of our time there. I didn’t want to bombard this post with photos so look for more pics from our trip in this week’s upcoming Friday Photo Fun Day post.

    Apple picking

    Apple picking

    I plan to make lots of fun baked goods and also some fun savory dishes, with the Crispin apples we picked so look for more apple recipes in the coming weeks! I of course also grabbed a bag of my very favorite apple there is, the honey crisp. I seriously am in love with honey crisps, they are so amazing just on their own, sliced up. YUM!

    Apple picking

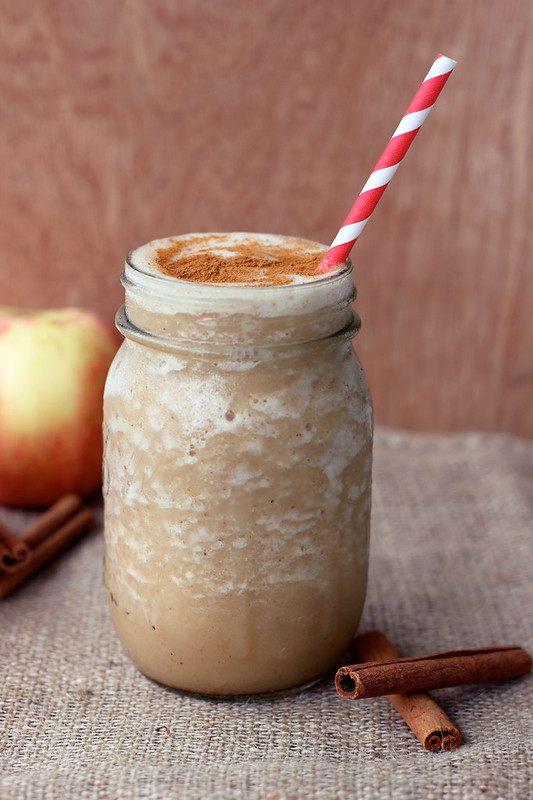
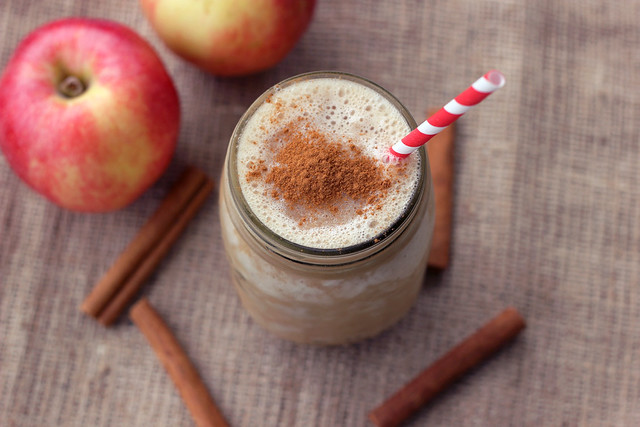
    While we were at the farm, I of course grabbed a gallon of their delicious fresh pressed cider. Made from their apples and with no other junk added, it is so delicious. I love apple cider just on it’s own, but I also really love it hot and spiced (and sometimes spiked), it is great in baked goods and now, smoothies! This smoothie is so simple to throw together and it is like fall in liquid form. The comforting apple pie aromas from the spices and the crisp apple cider, plus a little bit of creaminess from the almond milk, it was perfect!

    Apple Pie Smoothie - Gluten-free, Vegan + Refined Sugar-free

    [print_this]Apple Pie Smoothie – Gluten-free + Vegan
    makes 2 small servings or 1 large serving

    • 1 frozen organic banana
    • 1 cup unsweetened organic almond milk (I use homemade)
    • 1 cup unsweetened local apple cider* (look for good quality made with just apples, no sugar or preservatives added)
    • 2 or 3 Medjool Dates (or use your own sweetener of choice such as maple syrup, stevia, honey,coconut sugar, etc.)
    • 1 teaspoon ground cinnamon
    • 1/4 teaspoon ground nutmeg
    • dash of ground ginger
    • dash of ground cloves
    • 1 small handful of ice

    Add all of the ingredients to the blender and blend until smooth and creamy, add as much ice as you would like. Top with a light sprinkle of ground cinnamon and serve.

    NOTE: If you don’t have apple cider, a high quality apple juice will also work

    [/print_this]

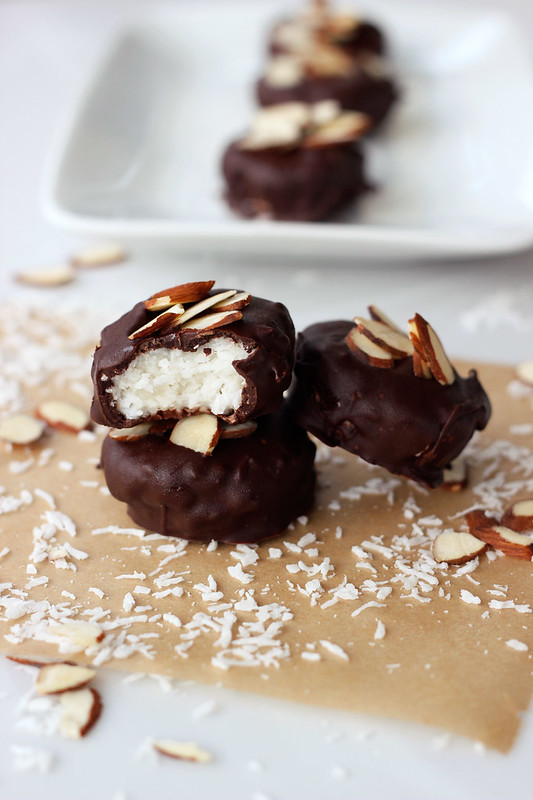
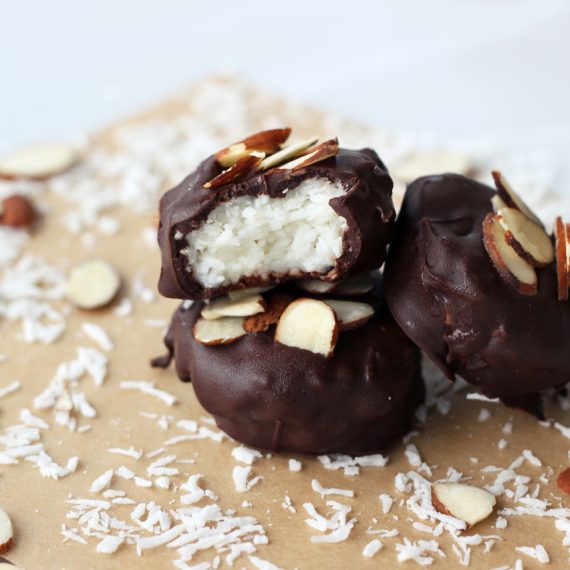
  19. Joyful Almond Coconut Chocolate Bites – Vegan + Gluten-free (Refined Sugar-free Option)

    Joyful Almond Coconut Chocolate Bites - Vegan + Gluten-free (Refined Sugar-free Option)

    This month for my ongoing series with the Free People Blog, BLDG 25, in celebration of Halloween I am sharing a series of healthy sweet treats. I always feel like the sugary stuff haunts me this month with Halloween looming on the calendar, it seems everywhere I turn there is some sweet treat lurking in the darkness.

    Joyful Almond Coconut Chocolate Bites - Vegan + Gluten-free (Refined Sugar-free Option)

    I really don’t find myself actually craving sweets very often, but boy, this month I do. There are halloween inspired sugary treats everywhere you turn and most all of them are terrible for you, loaded with refined sugars, high fructose corn syrup and other processed junk and fillers.

    Joyful Almond Coconut Chocolate Bites - Vegan + Gluten-free (Refined Sugar-free Option)

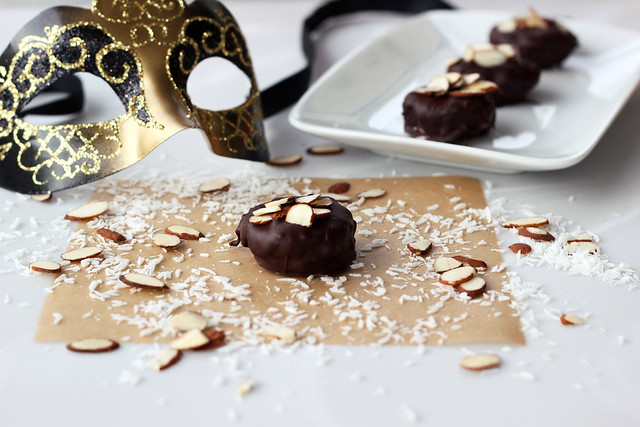
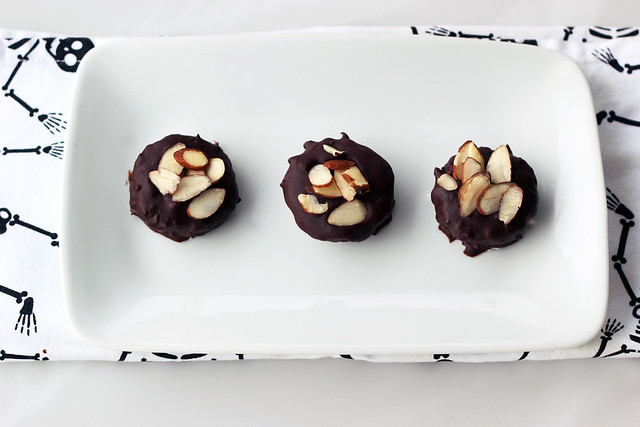
    So, why not have your cake and eat it, too? Or candy, or fudge, or whatever! First up in the series, I reimagined a classic candy bar that I have always loved. The combination of coconut, chocolate and almonds is a favorite of mind. It’s a joy to eat, if you catch my drift.

    These treats bear a spooky resemblance to the original, but without all the yuckiness that will haunt you later. See, all treats, no tricks! What more can you ask for to kick off Halloween month?

    And truly, is there anything better than dark chocolate and coconut together? I think not. A marriage made in heaven!! These Joyful Almond Coconut Chocolate Bites may have been inspired by Almond Joys, but they are so so much better!!

    Joyful Almond Coconut Chocolate Bites - Vegan + Gluten-free (Refined Sugar-free Option)


    Joyful Almond Coconut Chocolate Bites - Vegan + Gluten-free (Refined Sugar-free Option)

    gluten-free, paleo, vegan, dairy-free, egg-free, nut-free option, keto-option
    Print Pin Rate
    Servings: 12 treats

    Ingredients 

    Coconut Filling:

    • 1 ¼ cups unsweetened organic coconut, finely shredded
    • ¼ cup melted coconut oil
    • 2 tablespoons maple syrup, you could also use honey, a few drops or stevia or liquid monkfruit
    • 1 teaspoon vanilla extract

    Dark Chocolate Coating*:

    • 10 ounces of high quality dark chocolate, 85% dark is my choice*

    Optional:

    • Plus: approximately 1/3 cup toasted almond slices

    Instructions

    • Lightly grease a nonstick mini-muffin tin with a little coconut oil and set aside. In a medium-sized mixing bowl, combine all of the coconut filling ingredients and mix together until very well combined. Evenly divide up the filling between the 12 mini-muffin cups, pressing it in very tightly, making sure it is somewhat even. Don’t worry they won’t stick. Place the muffin pan in the freezer make sure it is sitting flat, and freeze until the filling is solid, about 30-45 minutes.
    • Take the muffin tin with the frozen coconut mixture out of the freezer, carefully remove each coconut treat out of the pan, running a thin knife around the edge to loosen and pop them out. Place them on a parchment or wax paper lined baking sheet, if you want to place the pan back in the fridge to keep them cool while you melt the chocolate, you can do that.
    • Once you are ready to coat the treats with the chocolate you can carefully melt the chocolate using a double boiler setup on the stove top or you can carefully melt it in small increments in the microwave, stirring often. (Definitely use the double boiler if you are making the refined sugar-free version with the bakers chocolate).
    • Turn off the heat on the stove and keep the bowl of chocolate over the pan, remove the coconut treats from the fridge. Place one coconut treat on a fork and slowly lower it into the chocolate, spoon additional chocolate over it to fully coat it. Lift the fork out and gently shake to release any of the excess chocolate. Scrape the bottom of the fork along the side of the bowl and place on the lined baking sheet. Sprinkle a few toasted almond slices on top into the chocolate. Repeat until all of the treats are coated in chocolate and have almonds on top. If the chocolate gets too thick, you just turn on the flame and heat slightly to melt it again.
    • Put the tray back in the fridge and let them harden for about 45 minutes.
    • After these are set, you could store them in the freezer to keep them really cold and totally solid or of course, you can just store them in the fridge or even at room temperature if it isn’t too hot out.

    Notes

    *NOTE:
    You can also use semi-sweet or bittersweet chocolate chips or stevia sweetener dark chocolate or chocolate chips.
    Or n place of chocolate chips or dark chocolate, you can instead melt 10 ounces of a good quality 100% unsweetened organic dark chocolate (aka bakers chocolate in bar form) with 1 tablespoon coconut oil in a double broiler and whisking in 1/3 cup maple syrup, honey (or other liquid sweetener of your choice, a few drops of stevia, etc) after it is removed from the heat. You can then add more sweetener to your liking, if needed.


    This recipe was originally shared on the Free People Blog.


  20. Photo Fun Day Friday

    The last week or two has been a bit of a blur. Getting ready for our Chicago trip, being away for just under a week and then getting home and getting caught up from being away. It is all pretty draining. Thankfully it is all worth it! Getting to Chicago, taking a road trip with my hubby (one of my favorite things in the world), seeing all of our friends, celebrating their marriage and everything in between. Life really doesn’t get much better than all that.

    I hope you all had a lovely week and an even better weekend! We hope to get out tomorrow to go apple picking before it’s too late and then I plan to bake up a storm on Sunday with all of the yummy apples we bring home.

    Got anything fun planned for this weekend?

    Photo Fun Day Friday
    When I travel, I miss my daily yoga practice at my studio here in Buffalo, so much. I always try to hit a studio or two while in whatever town I am visiting. It keeps me grounded and I love checking out all the different yoga studios. Last Friday was Bloom Yoga in Chicago.

    Photo Fun Day Friday
    Me and my good friend, Jason.

    Photo Fun Day Friday
    Billy and Anne – wedding #1 on Friday night.

    Photo Fun Day Friday
    Billy and Anne

    Photo Fun Day Friday
    Yoga studio #2 on Saturday morning before the wedding. Moksha.
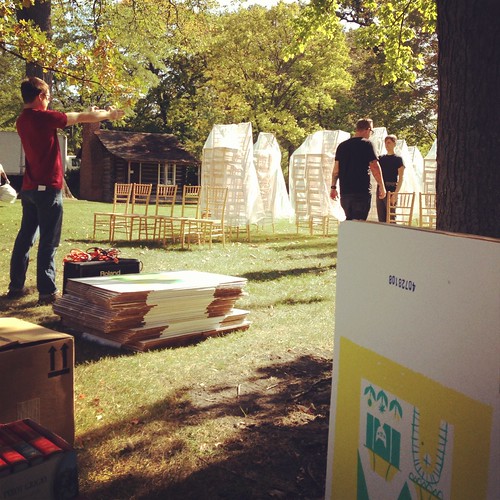
    Photo Fun Day Friday
    We got there bright and early to help get the wedding all set up.

    Photo Fun Day Friday
    We helped assemble this awesome box wall / alter that Billy and Anne designed.

    Photo Fun Day Friday
    Wedding #2 performed by my handsome and witty hubby, Mark. Such a touching ceremony, not a dry eye in the place after they read their vows to each other.

    Photo Fun Day Friday
    This guy 🙂

    Photo Fun Day Friday
    We could have smiled a little bit bigger. Geesh.

    Photo Fun Day Friday
    The adorable Desi. One of my favorite kids ever! Such an amazing little personality for 3.

    Photo Fun Day Friday
    “Smile”

    Photo Fun Day Friday
    Me and my good friend Allison from Pittsburgh.

    Photo Fun Day Friday
    Me and Mandy.

    Photo Fun Day Friday
    Desi patiently waiting for cake.

    Photo Fun Day Friday
    Adorable paper doll versions of the bride and groom as a cake topper.
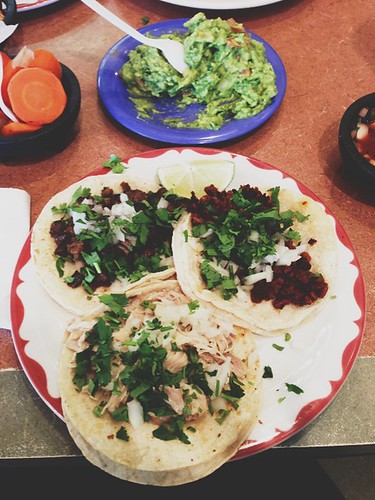
    Photo Fun Day Friday
    Kocio.

    Photo Fun Day Friday
    Obligatory trip to a Chicago taqueria. We went to Taqueria Moran in Logan Square.
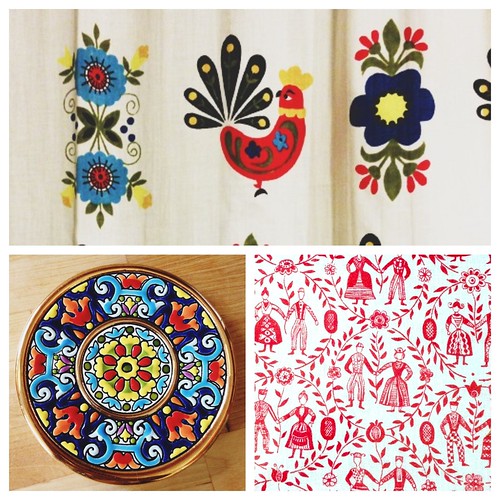
    Photo Fun Day Friday
    Some random visual goodies from Anne and Billy’s kitchen.

    Photo Fun Day Friday
    Nothing makes me happier than to get my baby back after a week away! I love this dog!
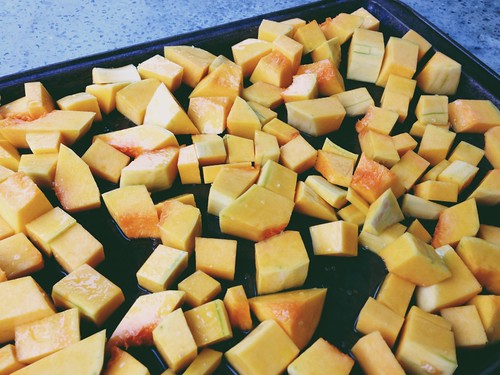
    Photo Fun Day Friday
    Roasted butternut squash for vegan butternut squash mac n’ cheeze.

    Photo Fun Day Friday
    Spending some time going back through our full catalog of posters and photographing prints that haven’t been yet for our wholesale and retail catalogs. Ironically our Chicago print was one of the first on the list.

  21. Mixed Greens Salad with Apples, Caramelized Leeks and Maple Dijon Dressing – Gluten-free + Dairy-free (vegan option)

    Mixed Greens Salad with Apples, Caramelized Leeks and a Maple Dijon Dressing

    This has been a bit of a trying week for me, getting back into town after being on the road for a week, plus I generally feel just a little bit down. Could be the change of the season and the daylight hours shifting (both always affect me with every season, even with fall, my favorite season) or maybe it’s the lack of sleep from traveling or the stress of this house-selling business. I have generally been staying upbeat and positive about trying to sell this house and our pending move to California, but I think it all might finally be getting to me. While we were away we had my mom come by the house to make sure it was all ready for a showing we had scheduled (we had it all cleaned and ready, but I wanted her to make sure there wasn’t mail sitting on the porch and I had her open windows and make it smell nice). While she was at our house and texting me about what to do,  I got notice that the showing for 2 hours later was now cancelled. It happens, I know that. They have actually already rescheduled, so no major loss there, but there was something about being so far away, feeling terrible about my mom having to go out of her way to help and everything else on my mind. I actually welled up with tears and felt like I could lose it. Over one showing. I guess I hit my breaking point. Doesn’t happen often, but it does happen.
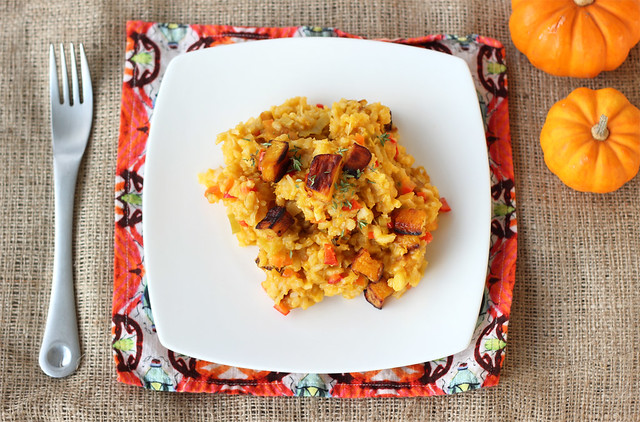
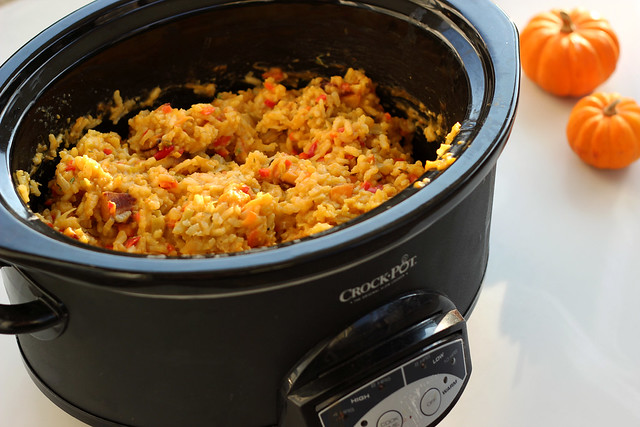
    Mixed Greens Salad with Apples, Caramelized Leeks and a Maple Dijon Dressing

    Really none of that has anything to do with this salad, except that with the change of the season and the general feeling of being a little down, I still know what my body craves and it is craving all of the wonderful seasonal produce we are surrounded by right now. Besides craving comforting foods like warm soups and stews, I also find myself craving beautiful vibrantly colored meals. Celebrating what is happening all around me outside, but also knowing that in a few short months it will be hard to find those beautiful hues. My very good friend April is beginning a new journey into Holistic Health Coaching and she sent out her first newsletter this morning. Not only was it super informative and so timely for me, but it had a line that really stuck with me “The transition to fall may leave us feeling exhilarated but unsettled, ungrounded.” That thought really resonated with me and definitely allowed me to accept what I was feeling right now with a bit less judgement and harshness.

    With so much great produce in season right now, it is easy to plan simple meals to celebrate it all. This week I have been celebrating squash and apples specifically, but with this quick and light dinner I wanted to also include some of the beautiful greens that are in season as well as the leeks, both of which I picked up at my local Co-Op. This salad is so simple to put together and it really packs a beautiful punch of flavor from the applewood smoked bacon, the crisp and tart local gala apple, the delicious crispy and rich flavor from the caramelized leeks and of course the tart and slightly sweet maple dijon dressing. So much delicious goodness in one small salad.

    If you are interested in reading a few Ayurveda tips for Autumn, check out this great article from Yoganonmous here. I came across it this morning and it definitely validated me in the way I have been feeling this week. Also, you can also check out my good friend April’s first newsletter that discusses the transition into Autumn and Winter and what we can do to ground ourselves and make it an easier shift. Plus, look for some upcoming guest-posts filled with informative holistic health tips and corresponding recipes from my good friend April here on Tasty Yummies.

    How have you been feeling lately? Does the change in the seasons affect your moods?

    Mixed Greens Salad with Apples, Caramelized Leeks and a Maple Dijon Dressing
    [print_this]Mixed Greens Salad with Apples, Caramelized Leeks and Maple Dijon Dressing- Gluten-free + Dairy-free (vegan option)
    Serves 4

    • 6-8 cups of mixed greens of your choice – lots of great greens in season right now
    • 2 local, organic gala apples, cored and cut into slices (I cut each apple into 16 slices)
    • 4 slices of local, pasture-raised applewood smoked bacon (leave off to make vegan)
    • 1 large leek, rinsed very well, slice thinly white and light green parts only*
    • 1-2 tablespoons of olive oil
    • salt and pepper, to taste

    Maple Dijon Dressing
    adapted from this recipe 

    • 1/4 cup olive oil
    • 3 tablespoons apple cider vinegar
    • 2 cloves garlic, minced
    • 3 tablespoons maple syrup
    • 2 tablespoons no-salt added dijon mustard
    • salt and pepper, to taste

    Preheat your oven to 400ºF

    Combine all of the ingredients for the dressing in a small bowl or bottle and whisk (or shake) together well, to combine. Set aside.

    Start by cookin your bacon in the oven (you can also cook it on the stovetop, but I find this way to be much easier and cleaner), line a baking sheet with foil and place your bacon on top. Place into the oven for 12-18 minutes until the bacon is nice and crisp. No need to flip it.

    While the bacon is cooking, start caramelizing your leeks. Heat olive oil in a large skillet over a medium-high heat, once the oil is hot enough add the properly cleaned and thinly sliced leeks to the pan. Give them a good stir or two to coat them all in oil and to break them apart a bit. Turn the heat down if need be at any point if they start to cook too quickly. Gently toss the leeks around in the pan and cook slowly until they are golden browned and caramelized. Just as you would with onions. Take it slow, you don’t want them to burn up quickly, you want a nice slow cook to them. Once they are cooked to your liking, turn off the heat.

    Once the bacon is done lay it on a paper towel lined plate to absorb some of the excess oil. Then cut it up or crumble it into small pieces.

    Toss the greens with a small amount of the dressing. Plate the dressed greens and top each serving with a few apple slices, sprinkle the crumbled bacon over top and top it all with a good spoonful of the caramelized leeks. Drizzle additional dressing overtop all of it.

    Serve immediately.

    * a quick note on cleaning leeks: leeks tend to have a lot of dirt and grit in them. If you aren’t careful when cleaning them, you may think they are totally clean, start cooking with them and find your entire dish has a nasty grittiness to it. This can ruin a dish. After trimming off the ends (called the beards) and the dark green tops (save these for stocks). You can run them under cold water at this point, or even better, you can submerge the leeks in a large pot of cold water. Swirl them around to really remove all the grit and dirt. Drain well and then cut.

    [/print_this]

DISCLAIMER: This website is written and produced for informational and educational purposes only. Statements within this site have not been approved by the FDA. Content should not be considered a substitute for professional medical expertise. The reader assumes full responsibility for consulting a qualified health professional before starting a new diet or health program. Please seek professional help regarding any health conditions or concerns. The writer(s) and publisher(s) of this site are not responsible for adverse reactions, effects, or consequences resulting from the use of any recipes or suggestions herein or procedures undertaken hereafter.