Posts by Beth @ Tasty Yummies

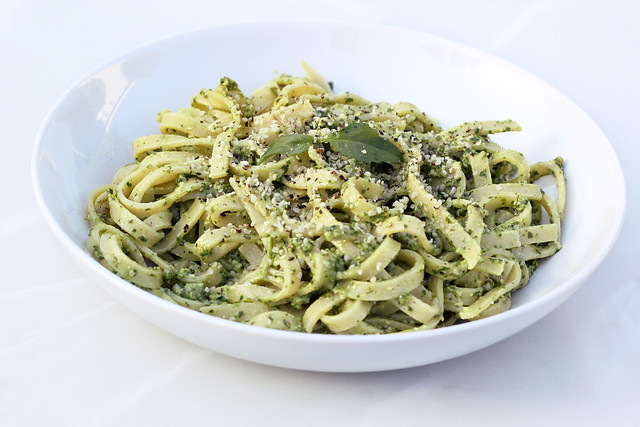
  1. Arugula and Hemp Seed Pesto – (Gluten-free + Vegan w/ Nut-free option)


    Arugula and Hemp Seed Pesto - (Gluten-free, Vegan and Nut-free option) I have severely cut back on my pasta intake the last few months. I am so seriously obsessed with pasta, but since I do try to limit my intake of grains as much as I can, pasta is a great place to start. But in total honesty, it is also the hardest one for me to eat less of. I adore good organic brown rice pasta, I like both Jovial and Tinkyada organic brown rice pastas, I like how light they are and there is something just so comforting about pasta.

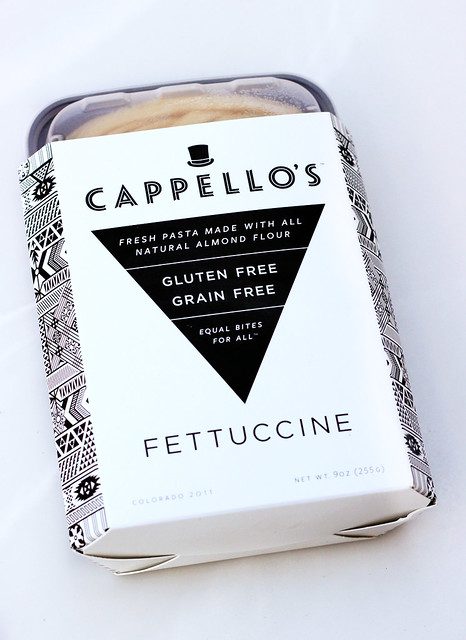
    When Cappello’s offered to send me some of their grain-free pastas to try, I of course jumped at the offer. Pasta that is grain-free and ready in less than 1 minute (not counting the time it takes for the water to boil) – sounded pretty darn good to me.

    Arugula and Hemp Seed Pesto - (Gluten-free, Vegan and Nut-free option)

    Cappello’s sent me some of their fettuccine, gnocchi and lasagna sheets. I made the fettuccine first, to get an idea of how it cooks and tastes. It is really good and similar to a lot of fresh (grain-containing) pastas, though it has been very many years since I have had fresh pasta made with gluten, so I cannot say how similar it is to that specifically. Their pasta is made up mostly of almond flour and eggs. It is firm but properly tender and not at all mushy, which I honestly expected. The pre-portioned container says “two servings”, but I found it to be heavier than the usual brown rice pasta I have gotten used to, I found myself getting full very quickly. Which isn’t always the case with pasta, sometimes I feel like I could eat it until I explode. It didn’t reheat the next day quite as nice as my usual organic rice pasta, but that is to be expected with a fresh pasta. I do find that rice pasta is quite firm after coming out of the fridge as leftovers, that I am not always a fan of since it HAS to be reheated. So there is no cold pasta eating with the rice pasta. This pasta is definitely possible to eat cold and was quite good that way actually. Hubby really liked the Cappello’s pasta as well, but he still prefers rice pasta as his first choice.

    I know it isn’t totally fair to compare this grain-free pasta to rice pasta, since they are quite different, but since I am not 100% grain-free or paleo, I thought this was a fair assessment on my end. However, if you do eat a completely grain-free diet, 100% of the time, and you love your pasta – you would be a total FOOL not to try Cappello’s pastas. It hits the spot and nails that pasta craving right on the head.

    Read the rest of this entry »

  2. Bluth Bites – Frozen Chocolate Covered Bananas {Gluten-free + Vegan}

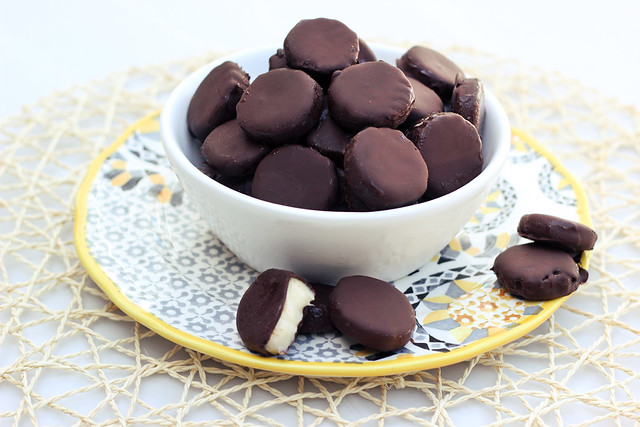
    Bluth Bites - Frozen Chocolate Covered Bananas - Gluten-free + Vegan

    “There’s always money in the banana stand!”

    If you get the fun name of these and the quote above, then I know you are celebrating with me today, too!

    The final season of Arrested Development is on Netflix as of today and I couldn’t be more excited!!! The only dilemma I have with this final season besides this meaning it’s really over, is trying to decide with the entire 15 episode season being available all at once, do I cram them all in, marathon style or space them out, savoring each amazing moment? I may have to stay off all social media until we watch them all, so no one ruins it for me. I hate spoilers.


    Bluth Bites - Frozen Chocolate Covered Bananas - Gluten-free + Vegan


    Arrested Development is one of our all time favorite shows, it is embarrassing how many times we have watched the whole series in it’s entirety and how many random lines my hubby and I quote from it all the time.

    Our favs:

    “It’s an illusion Michael!”

    “Army had half a day.”

    “I’m half machine. I’m a monster.”

    “I just blue myself.” Read the rest of this entry »

  3. Photo Fun Day Friday

    Happy Friday, friends!! Hope you all had a really great week and I hope everyone has an amazing weekend ahead. For my American friends, Happy Memorial Day weekend. We finally got our grill, it showed up today, so we are having a little BBQ here at our house on Monday! Do have anything fun planned for the (long) weekend? 

    Photo Fun Day Friday

    My sweeties on a walk around the lagoon by our house.

    Photo Fun Day Friday

    I am not sure who loves when we babysit Lucy more, us or our cat Jpeg. He just adores Lucy.

    Photo Fun Day Friday

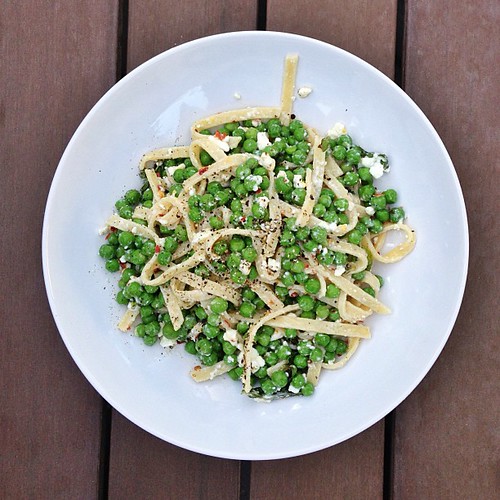
    A quick and simple Spring pasta dish I made for dinner the other night, with peas, feta, mint and lemon zest.

    Photo Fun Day Friday

    Sunset beach bike ride. I am not sure I will ever get over that this is where I live now.

    Read the rest of this entry »

  4. Restricted Diets: Advice For Dining Out

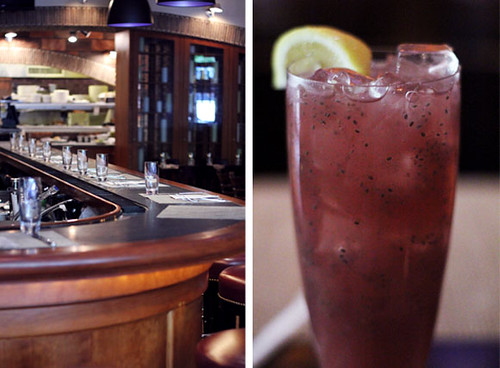
    Restricted Diets: Advice For Dining Out

    This next post in my ongoing Restricted Diet series with the Free People blog BLDG25, covers a topic that people write me requesting help with and advice on, all of the time. Besides eating at parties or events where the menu is out of your control (which I talk about here), dining out is one of THE most challenging situations when you have dietary restrictions. As with most situations, the best thing you can do is plan ahead and do your research.

    Read the rest of this entry »

  5. How-to Make Your Own Apple Cider Vinegar Facial Toner
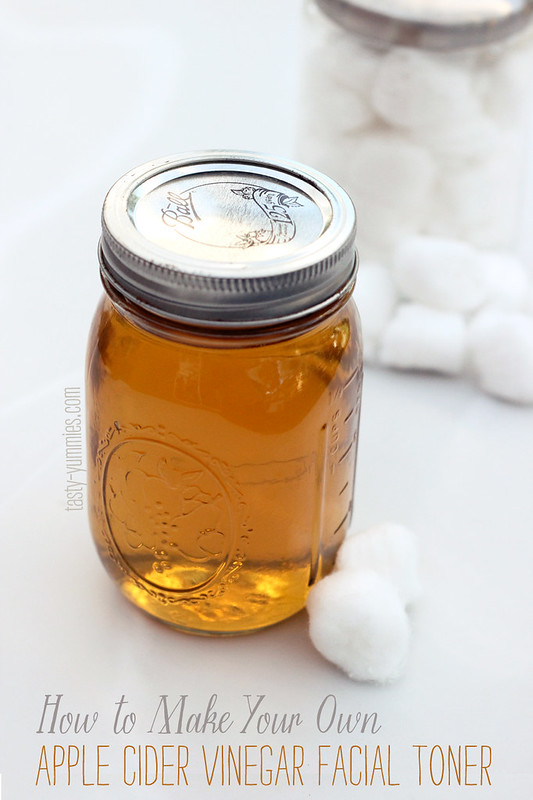
    How to Make Your Own Apple Cider Vinegar Facial Toner
    How to Make Your Own Apple Cider Vinegar Facial Toner:

    I am sure many of you keep apple cider vinegar in your kitchen pantry for a variety of different dishes, vinaigrettes, pickled whatevers and so on. But did you know it is also a great item for keeping in the bathroom medicine cabinet as an amazing all-natural beauty product, too?

    For the past two months I have been using a mixture of apple cider vinegar and water as an all natural toner, every single morning and every single evening after I wash my face. I saw a noticeable change and improvement in my skin in just a weeks time. No joke.

    This simple concoction can help improve your overall complexion by balancing and restoring your skin’s natural pH. Our skin is naturally acidic but when our levels are in balance our skin will live at the perfect level between oily and dry. When you pH levels are out of balance, that is when you break out, when your pores get clogged, you are too oily or too dry, your skin can be itchy or irritated, and the list goes on and on.

    ACV has a pH of 3 and when diluted, the acidity from the toner helps bring your skin’s pH back to its normal levels. By restoring your skin’s balance, this apple cider vinegar toner helps your skin function optimally, warding off bacteria and shedding dead skin cells at the proper rate so your pores do not get clogged and your skin remains healthy.

    I have noticed my skin tone has evened out significantly, my skin is softer and I have less dry and itchy red patches, plus less oiliness in my trouble spots. I no longer can see the tiny pores on my nose that seemed to always be there. I have also definitely noticed less everyday “regular” breakouts and a significant decrease in the amount and severity of my hormonal breakouts each month. I have observed that many of my previous breakouts were seemingly due to clogged pores and no matter how much I washed my face, I would still have that problem, this toner has seriously been the answer I was looking for.

    Read the rest of this entry »

  6. Photo Fun Day Friday (on a Monday)

    I realize it is Monday and I am a few days late on my Photo Fun Day Friday, but with my sister visiting, I wanted to keep all the photos for one big post and I also didn’t want to be a slave to my computer while she was here. We had an amazing time together and we got to show her all around! It was soo much fun, I just wish it didn’t go so fast and I wish I knew when I would be seeing her again! That’s the worst part of moving away from your family 🙁 My parents will be here in just over 3 weeks though, so we get another amazing week of family time coming very soon!

    Photo Fun Day Friday
    Our favorite house guest, Lucy! How cute is she?

    Photo Fun Day Friday
    Our newest art print – Goin’ to the Beach – can you tell we have already been inspired by our surroundings?

    Photo Fun Day Friday
    Our Mad Men inspired print, You’re a Marilyn or a Jackie, recently reprinted and rereleased.

    Photo Fun Day Friday
    Our booth at Unique LA last weekend. Brand new design, constructed completely out of recycled wood pallets.

    Photo Fun Day Friday
    Seri and her favorite Auntie, my sister, Vicky! So so happy she came to see us for almost an entire week! Just wish she didn’t have to go 🙁 Her trip went way too fast.

    Photo Fun Day Friday
    Cocktail on a rooftop in Venice Beach.

    Photo Fun Day Friday
    Look at that view.

    Photo Fun Day Friday
    The skate park in Venice Beach.

    Photo Fun Day Friday
    Sunset over Santa Monica.

    Photo Fun Day Friday
    Vicky on the Santa Monica pier.

    Photo Fun Day Friday
    The old crew back together again!

    Photo Fun Day Friday
    Beach day in Laguna Beach. So beautiful there.

    Photo Fun Day Friday
    Our matching “Seester” tattoos!

    Photo Fun Day Friday
    Hosting a little giveaway over on the Tasty Yummies Facebook page to celebrate 4,000 likes!! Go enter now, I am selecting the winner, at random, tonight.

    Photo Fun Day Friday
    Vicky’s first trip to Disneyland!

    Photo Fun Day Friday
    Space Mountain. Love Summer in the back, ha!
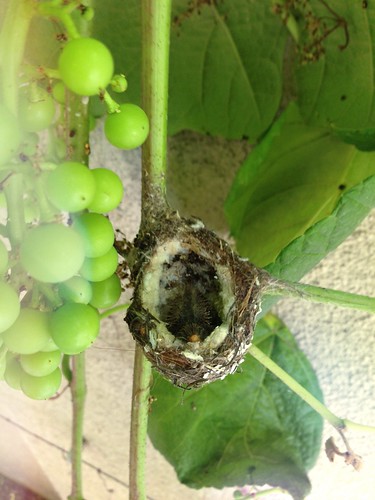
    Photo Fun Day Friday
    An update on our little hummingbird nest that is cozied up in our grape vines. Look at that tiny little beak.

    Photo Fun Day Friday
    Mark looking all dapper over a virgin tiki drink at Don the Beachcomber.

    Photo Fun Day Friday
    Sharing a Scorpion Bowl at Don the Beachcomber on Vicky’s last night!

    Photo Fun Day Friday

    Photo Fun Day Friday
    Long Beach Pride Parade yesterday. What an incredible event. So amazing!

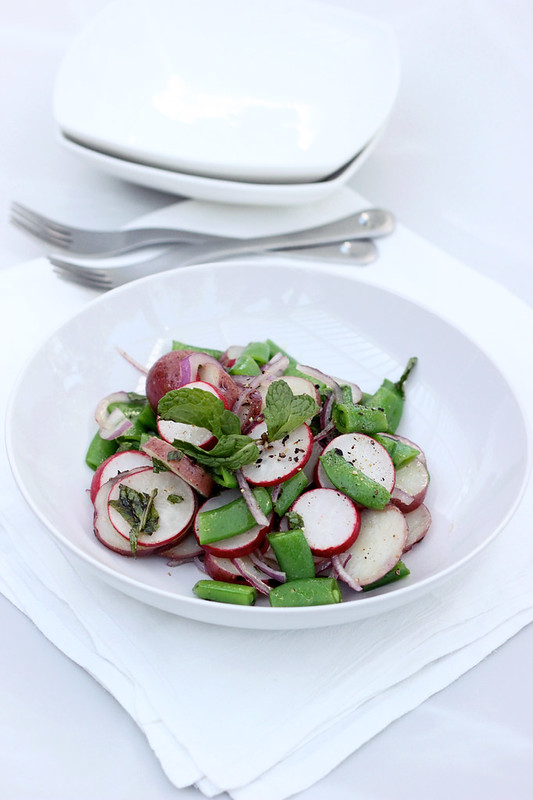
  7. Spring Potato Salad with Sugar Snap Peas and Radishes – Gluten-free + Vegan

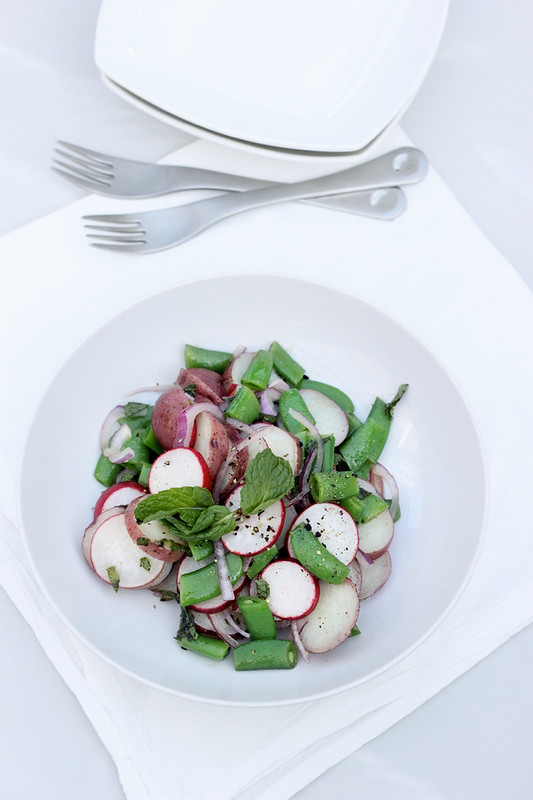
    Spring Potato Salad with Sugar Snap Peas and Radishes - Gluten-free + Vegan

    I know you guys are aware just how much I adore cooking foods inspired by the season and what is most fresh. I don’t have to sell you on that. This salad came from a recent trip to the farmers market where I decided to grab the most delicious, in-season produce I could and just create from there. I had no clue what I was making when I bought everything, I just got it home and started brainstorming.

    Spring Potato Salad with Sugar Snap Peas and Radishes - Gluten-free + Vegan
    This salad is full of flavor, beautiful Spring colors and I love the combination of the tender baby red potatoes with the crunch for the sugar snap peas and the radishes. Plus the light dressing, is such a nice alternative to the usual creamy mayo-based dressings on most potato salads. The mint is the perfect compliment to the salad, finishing it with a bright, fresh flavor.

    Spring Potato Salad with Sugar Snap Peas and Radishes - Gluten-free + Vegan
    This salad is naturally gluten-free and vegan, so it would be perfect as a side dish at a BBQ or picnic when you have folks with restricted diets. It is sure to please all. This post was originally shared on Free People blog BLDG 25.


    Spring Potato Salad with Sugar Snap Peas and Radishes - Gluten-free + Vegan

    Print Pin Rate
    Prep Time: 5 minutes
    Cook Time: 10 minutes
    Total Time: 15 minutes
    Servings: 4 -6

    Ingredients 

    Dressing

    • ¼ cup olive oil
    • 2 tablespoons white wine vinegar
    • 2 tablespoons whole grain dijon mustard
    • 1 clove garlic, minced

    Salad

    • 1 lb baby red potatoes, washed and cut into 1/2-inch slices
    • ½ lb sugar snap peas, trimmed
    • 1 small bunch radishes, 4 to 6, trimmed and sliced thin
    • 1 /2 small red onion, sliced thin
    • 2 tablespoons fresh mint, sliced thin
    • salt and pepper, to taste

    Instructions

    • Whisk the 4 dressing ingredients together in a small bowl to combine. Set aside.
    • Set up an ice bath in a large bowl, by filling it with cold water and ice cubes. Meanwhile bring a medium saucepan of salted water to a rolling boil, add the sugar snap peas and blanch for 1 to 2 minutes, immediately remove the snap peas to the ice bath with a slotted spoon. Leave the pot of water on the stove and over a medium-high heat. Add the potatoes to the same pot and bring the water back to a boil. Cook for about 10 minutes, until the potatoes are just tender.
    • Drain the potatoes and if you want to cool them quicker, run some cold water over them.
    • Once the snap peas and potatoes are cooled and drained (you can pat them dry to make sure they are nice and dry), add them to a large serving bowl with radishes, onion and fresh mint. Mix the dressing and pour over the salad. Toss gently to combine. Salt and pepper, to taste.
    • Serve at room temperature or cold, and enjoy!


  8. 10 Things My Mom Taught Me

     Happy Mother’s Days to all of the moms, grandmas, yia yias, step moms, foster moms, pet moms, etc! Mothers, you guys have one of the toughest jobs on the planet that takes more strength, compassion and patience than most anything else.

    Thanks to my amazing mom for all she has taught me! I am who I am because of her. I love you mom!


    10 Things My Mom Taught Meme and my mommy.


    10 Things My Mom Taught Me

    1) Be who I am. Nobody can make me who or what I am and nobody can take that away from me.

    2) Be thoughtful and considerate of other people’s feelings.

    3) Always trust my gut and go with my instincts. It’s usually right on.

    4) Always see the good in people and celebrate their differences.

    5) Be compassionate and empathetic.

    6) Be honest and speak my truth.

    7) Cherish family and embrace friends like family.

    8) Be strong and confident and stand up for my beliefs.

    9) I am beautiful.

    10) Love and happiness are always worth fighting for.


    What has your mom taught you?

    Happy Mother’s Day!

  9. Photo Fun Day Friday

    Happy Friday Guys! I hope you had a fantastic week. It’s been a fun and busy one over here. We are gearing up for a big show this weekend, Unique LA, which is a huge amazing show featuring all things handmade. If you are in the LA area you have to check it out, it’s an amazing show. We are booth # 258 – Hero Design Studio. We designed a whole new booth for this show, constructed completely out of recycled wood pallets. I cannot wait to see it all constructed and completed.

    On top of getting ready for the show, we are also counting down the days until my sister Vicky arrives here in California for a visit. She gets here Monday and I couldn’t be any more excited!! She is here 6 days and I cannot wait to show her around, take her to Disney and just hang out!

    What do you have planned for your weekend?

    Photo Fun Day Friday

    Had to get a bottle of this for our Kentucky Derby party last Saturday.

    Photo Fun Day Friday

    Jalapeño cornbread mini muffins. I kinda made the recipe up on the fly but here are two other cornbread muffin recipes here on the blog. Cheddar and green onion cornbread and vegan cornbread muffins.

    Photo Fun Day Friday

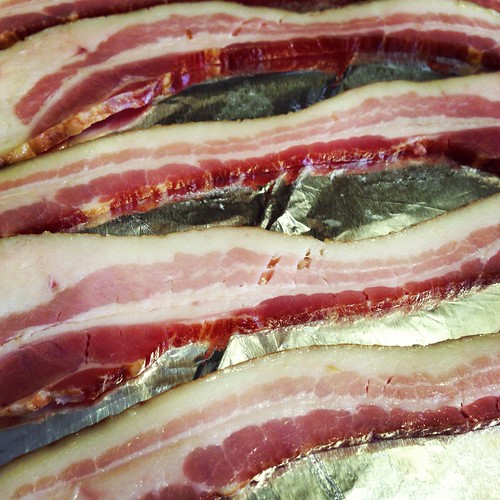
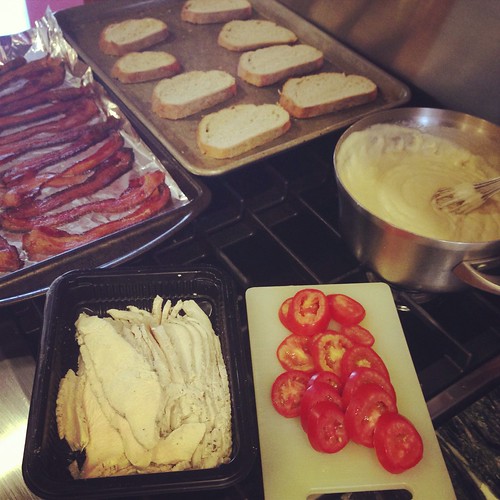
    It is rare that you will spot bacon in my kitchen. It’s almost like spotting a unicorn. I bought some yummy organic applewood smoked bacon that I baked until crispy for the hot browns and it made the kitchen smell amazing.

    Photo Fun Day Friday

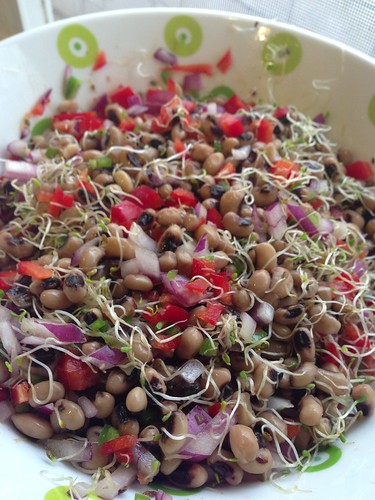
    A black-eyed pea salad inspired by this recipe, an effort to bring something healthy to the Derby menu.

    Photo Fun Day Friday

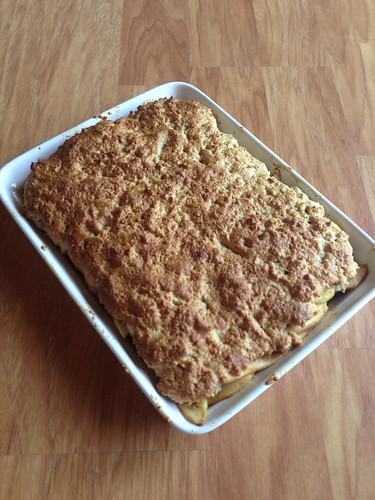
    Grain-free apple cobbler. I used my berry cobbler recipe and subbed out the berries for some yummy granny smith apples.

    Photo Fun Day Friday

    The assembly line for the Hot Brown Sandwiches. I made the sauce gluten-free, just so I could taste it to make sure it was OK, but otherwise I made these ALL for Mark.

    Photo Fun Day Friday

    Look at this beauty! She was sitting there when I was photographing food, posing like this.

    Photo Fun Day Friday

    I rolled over the other morning and woke up to this little face staring back at me from the other side of my pillow.

    Photo Fun Day Friday

     Playing some arm balances in my home yoga practice the other day. This is Eka Pada Koundinyasana I. It isn’t perfect, but I am working on it.

    Photo Fun Day Friday

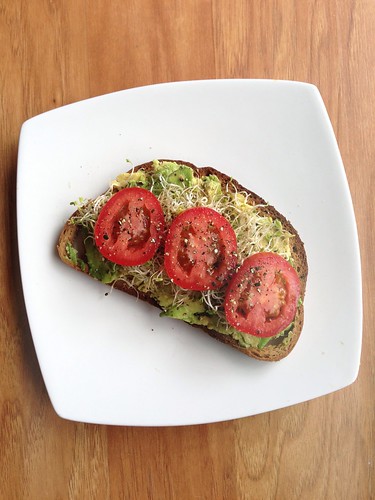
    Toast with avocado, tomato slices and sprouts. The perfect breakfast.

    Photo Fun Day Friday

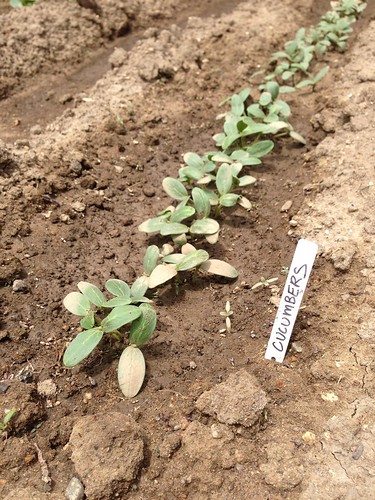
    My cucumbers are growing like crazy. I have a huge row of them. I planted these from seeds just a week and a half before I took this photo. It’s incredible.

    Photo Fun Day Friday

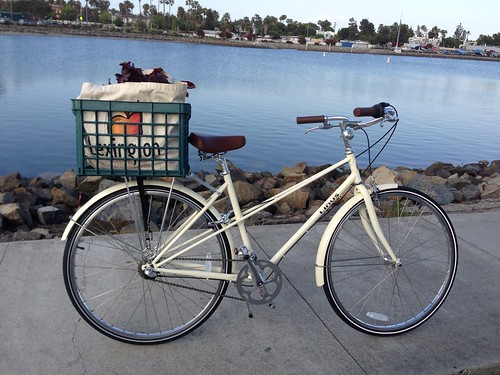
    Since we didn’t have a CSA this week, I took the bike for it’s first trip to the farmers market. Likely the first of many.

    Photo Fun Day Friday

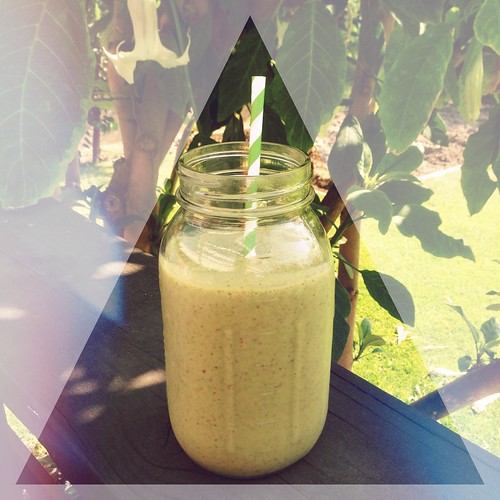
    Yesterday’s post-run smoothie. Recipe can be found on my instagram.

    Afterlight

    Hubby surprised me last night with reservations to Carthay Circle Restaurant at Disneyland. Sunday marks 10 years since our first (blind) day and 6 years since we got married.

    Photo Fun Day FridayDisney is just so darn magical. Gets me every time.


  10. Restricted Diets: How To Be A Gracious Guest & an Accommodating Host

    Restricted Diets: How To Be A Gracious Guest & Host

    As part of my ongoing series with Free People on Restricted Diets, today I am sharing a quick how-to for both host and guest, when dealing with special dietary needs.

    Even if you yourself do not have a restricted diet, chances are you probably know someone who does. Whether by choice or due to food allergies or intolerances, more and more people are becoming aware of foods that don’t serve their bodies and are consequently removing them from their diet. This awareness allows people to live a much happier and healthier life. I am living proof of that!

    Restricted Diets: How To Be A Gracious Guest & Host

    If you choose to host a dinner party at your home, even one as casual as a backyard BBQ, having someone on the guest list with a limited diet can definitely be daunting and intimidating. Sometimes it probably even seems easier to just scratch them off the list and not invite them at all. The simple truth of the matter is, it isn’t easy, especially if you don’t have experience with their special dietary needs or choices. If you are making the choice to host them and accommodate their needs, the best advice I can give is to always ask them any and all questions that you have, so you can be educated on their diet limitations and provide for them, as best possible.

    Those of you with the restricted diets, as a guest, you owe it to your host to let them know of all of your restrictions – especially if they are offering to make food you can eat. Most of all, be as gracious as possible, especially if they are cooking and trying to accommodate you and your needs.

    This post was originally shared on the  Free People Blog, BLDG 25

    How To Be A Gracious Guest & an Accommodating Host

    Restricted Diets: How To Be A Gracious Guest & Host

    Below are my how-to lists for both host and guest, to hopefully help make your next dinner party or BBQ as successful and enjoyable as possible, for all.

    Host:

    Do your homework. Don’t be afraid to ask questions – ask about ALL of their restrictions. Don’t guess and don’t ignore.

    Ask what they CAN eat. Just as important as the things they cannot eat, ask about all of the foods your guest is able to eat. Sometimes this can help open your eyes to all of the possibilities instead of focusing on the restrictions.

    Ask specifically for recommendations or recipes. Ask about dishes that you could make that would be safe for your guest, enjoyed by all and easy for you to prepare.

    If you feel comfortable, ask the guest to bring a dish or dishes to share.

    Search the internet for recipes that fit into their restrictions. There are so many amazing blogs with incredible recipes that everyone can enjoy. Send them over to your guest ahead of time for their approval.

    Select a menu that is simple and enjoyable for all of your guests. There are so many foods that are naturally gluten-free, vegan, etc. Focus on those.

    Ask your guest to help you menu plan, cook and/or go shopping with you. This will insure you are selecting safe ingredients and you won’t put a ton of time into a dish they can’t end up eating.

    Be mindful of cross contamination and watch for hidden ingredients.

    Don’t try to guilt your guest into “just eat this or that”. If they aren’t interested in your cheese dip, even if they are just dairy-free by choice, it’s OK – I am sure your cheese dip is just fine, they probably just don’t want to spend the remainder of the evening in your bathroom. You probably don’t want this either.

    Restricted Diets: How To Be A Gracious Guest & Host

    Guests with Restricted Diets:

    Make sure to call ahead to let the host know of your restrictions. Some hosts may have more experience and awareness with your restrictions than you might realize.

    Kindly offer to bring a dish to share that everyone will enjoy or to bring your own meal entirely. Some people just might be uncomfortable with the daunting task of cooking for special dietary needs. Be prepared for that and don’t be put off.

    Make it clear that you aren’t expecting them to bend over backwards for you. Let them know you are totally willing to bring your own food if that makes them more comfortable.

    Offer your advice if they have any questions. Let them know to contact you with any and all things they are uncertain about.

    Have a snack (or a full meal, if necessary) before you go. If you are staying with someone for a length of time, bring plenty of snacks and foods to have on hand for in between meals or making your own meals.

    Be as gracious as possible, no matter what the circumstances. When there isn’t much for you to eat and the host is feeling guilty, let them know you appreciate their effort, be grateful and appreciative.

    If you are headed to a formal event like a wedding, make note of your restrictions on the reply card if you feel comfortable. If you don’t, eat a decent sized meal before you leave in the event you cannot eat. If you can’t eat anything being served, don’t make a big deal at the event. Most people won’t even notice if you aren’t eating.


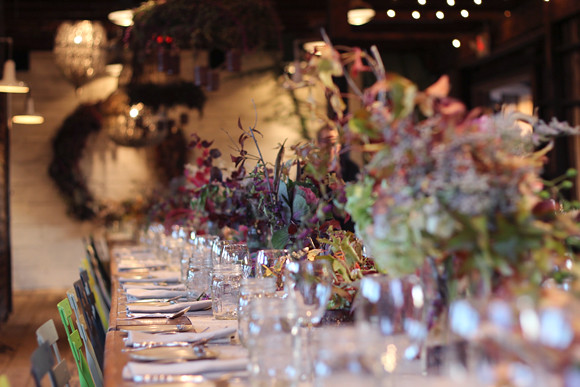
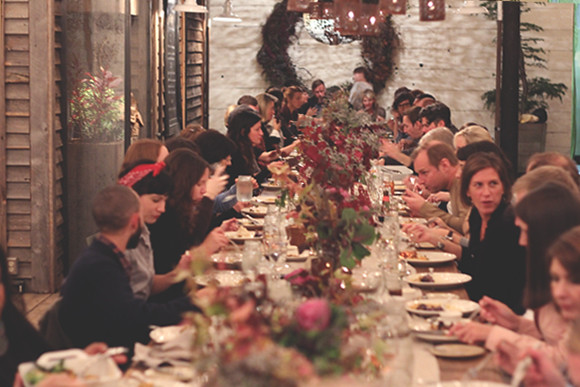
    (dinner party photos courtesy of Free People)

  11. Grain-free Maple Bourbon Pecan Tart – Gluten-free + Dairy-free


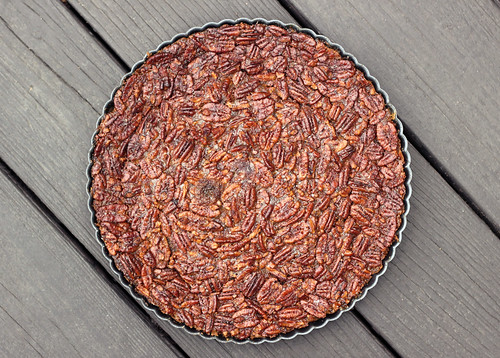
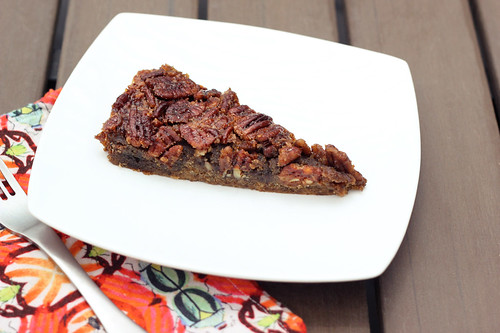
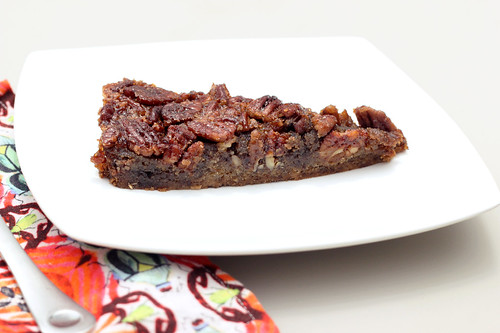
    Grain-free Maple Bourbon Pecan Tart - Gluten-free + Dairy-freeI am going to start off this post by saying that this isn’t the usual über healthy dessert that I am usually touting here on Tasty Yummies. It has a full 2 cups of maple syrup and some additional coconut sugar. So yeh. But the good news is it IS healthier than the usual pecan pie. No butter, no corn syrup, no refined sugar, etc. Could I have made this healthier? Probably, but this was the compromise I came up with since I promised hubby I wouldn’t mess with this classics too much. I actually hadn’t even planned on sharing this recipe, but after I posted a photo on Instagram, people were begging for the recipe.

    I made this for the Kentucky Derby party that we hosted here at our house on Saturday. I promised Mark an afternoon of all of his favorite Southern foods that remind him of Louisville. I promised not to “healthy-up” the recipes. I made mini hot browns (the sandwich made famous at the Brown Hotel in Louisville), pimento cheese dip, southern style deviled eggs, jalapeño cornbread mini muffins, a blackeyed pea salad, apple cobbler (I made this recipe with apples instead of the berries), mint-infused raw sugar simple syrup for Mint Juleps and this Maple Bourbon Pecan Tart. The menu was ALL about Mark and though I couldn’t eat a lot of it, I wanted it to be all yummy and I wanted to bring as much of Mark’s home to him on a day he is super homesick

    Grain-free Maple Bourbon Pecan Tart - Gluten-free + Dairy-freeWhen I promised to make pecan pie, I did specify that I had to make it gluten-free and dairy-free so I could enjoy it and I refused to make it with the usual corn syrup or regular sugar. I wanted a grain-free crust that would compliment but not overpower the tart and I went for as much maple and bourbon flavor as I could get.

    I am so excited with how this turned out. It has a really rich flavor from the maple syrup and the bourbon that is really special. It is luscious, sticky and sweet, without being overly sweet and heavy. Though it isn’t something I will be making often, it is perfect for those special occasions, like a Derby party or the holidays.
    Grain-free Maple Bourbon Pecan Tart - Gluten-free + Dairy-free

    [print_this]Grain-free Maple Bourbon Pecan Tart – Gluten-free + Dairy-free
    Serves 8-10

    Tart Crust

    • 2.5 cups almond flour aka almond meal
    • 3 tablespoons flax seed meal
    • 3 tablespoons maple syrup
    • 1/4 cup coconut oil, melted
    • 1/2 teaspoon baking soda
    • 1/8 teaspoon salt

    Preheat the oven to 375º F. Lightly grease a 9 or 10-inch tart pan. In a large bowl, add all of the crust ingredients and mix very well. I like to get my hands right in there to make certain it is all mixed up. Add the crust mixture to the tart pan and press down firmly into the pan, going up the sides just a tad bit. Bake for 10-15 minutes until golden brown. Remove from the oven and set aside.

    Tart Filling

    • 2 cups pure organic maple syrup, preferably Grade B
    • 3 large local farm fresh eggs, lightly beaten
    • 1/4 cup coconut sugar or firmly packed light or dark brown sugar
    • 1/4 teaspon salt
    • 3 tablespoons coconut oil, melted
    • 3 tablespoons bourbon
    • 1 teaspoon vanilla extract
    • 2 cups organic raw pecan halves or pieces

    Meanwhile in a saucepan over medium-high heat, bring the maple syrup to a boil and boil for 8 to 10 minutes to reduce. Remove from the heat and pour into a heatproof measuring pitcher. The syrup should be reduced to 1 1/2 cups. If necessary, return the syrup to the saucepan and continue to boil until sufficiently reduced. Let cool to room temperature before proceeding.

    In a bowl, stir together the eggs, coconut sugar, reduced maple syrup, the bourbon, salt, coconut oil and vanilla until well mixed. Add the pecans and stir well. Pour into the partially baked pie shell, making sure the pecans are evenly distributed.

    Bake the pie until the center is set and firm to the touch, 25-30 minutes. Transfer to a wire rack and let cool for 1 hour; remove pan sides. Serve slightly warm or at room temperature.[/print_this]

  12. Photo Fun Day Friday

    Happy Friday!! This week flew by for me, how about you? Got anything fun planned for the weekend? Hubby is originally from Louisville, so we are celebrating the Kentucky Derby tomorrow, as we do every year, but this year we can actually host a little party at our new home. We are so excited.

    I plan to make a bunch of food that reminds Mark of home, most of which I cannot eat myself, but I definitely don’t mind one bit. I think Mark actually gets more homesick this time of year than at the holidays. It is such a big deal there. So I plan to make some Hot Brown Sandwiches, a black-eyed pea salad, pimento cheese dip, jalapeño cornbread, deviled eggs, apple cobbler and a bourbon pecan tart and of course mint juleps. Then we are picking up some homemade fried chicken from the market at the corner. Depending on how all the cooking and baking goes I will try to share some of the recipes on here, afterward. But I make no promises!

    Photo Fun Day Friday

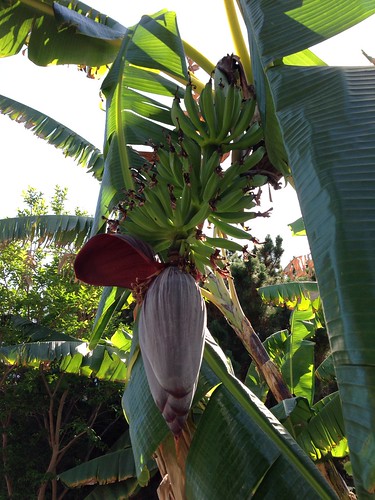
    An update on our banana tree. Look at all those bananas. I cannot wait to eat some.

    Photo Fun Day Friday

    Some of the beautiful roses from our yard.

    Photo Fun Day Friday

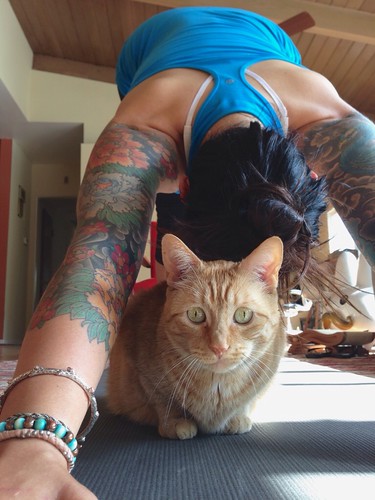
    Having a home yoga practice means sometimes you get a little kitty in your down dog.

    Photo Fun Day Friday

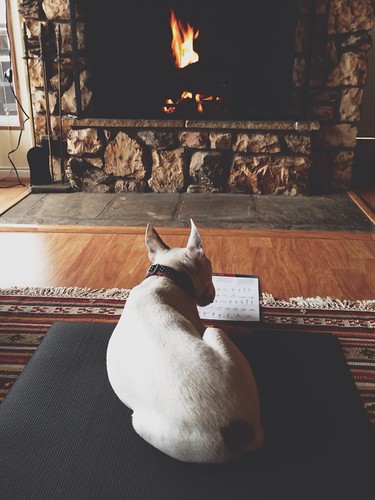
    And sometimes your mat gets taken over by a real dog.

    Photo Fun Day Friday

    Mark was in San Francisco for a few days for work and Seri really missed him. She wouldn’t leave his side when he got home.

    Photo Fun Day Friday

    Tried running on the beach this week since I have been having a little knee pain. It felt really great on my knees and my back.

    Photo Fun Day Friday

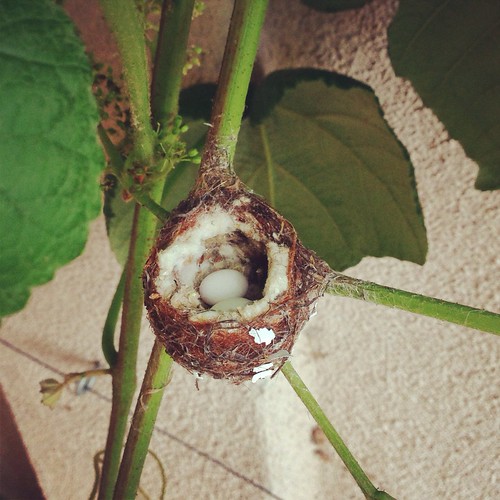
    Discovered the most teeny tiny adorable hummingbird nest, cozied up in our grapevines. It is barely 2″ wide. If that. Incredible.

    Photo Fun Day Friday

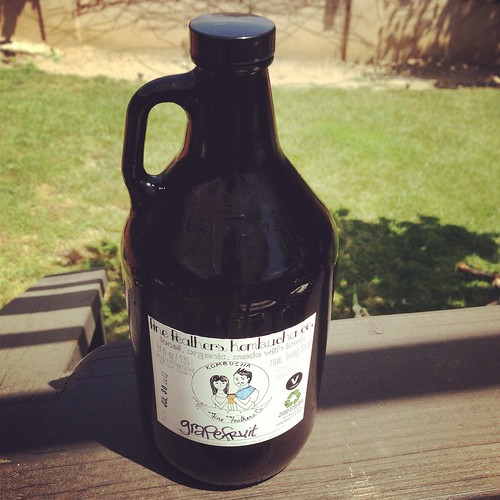
    Had a growler of local organic grapefruit kombucha delivered by bike from local husband and wife company, Fine Feathers Kombucha. I just adore where I live.

    Photo Fun Day Friday

    I *think* I found what I was looking for on yesterday’s run. I KNOW that Seri did. Look how happy she is

    Photo Fun Day Friday

    Went to the doctors yesterday for the first time in over a year. It really is the one place in the whole wide world that can give me anxiety as soon as I walk in. I really don’t like doctors.


  13. Strawberry Coconut Frozen Fruit Pops / Smoothie – Gluten-free, Vegan + Sugar-free

    Strawberry Coconut Frozen Fruit Pops / Smoothie – Gluten-free, Vegan + Sugar-free

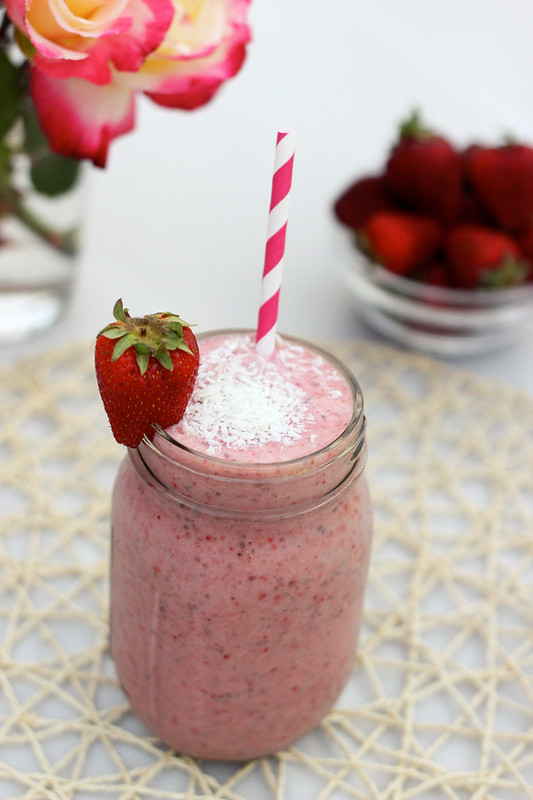
    This week as part of my ongoing Restricted Diet series with Free People, I created a simple Strawberry Coconut Smoothie recipe featuring the beautiful fresh strawberries that are in season here in California right now. I still cannot believe how much earlier in the year they are in season here, they are everywhere and so delicious.

    Strawberry Coconut Frozen Fruit Pops / Smoothie – Gluten-free, Vegan + Sugar-free

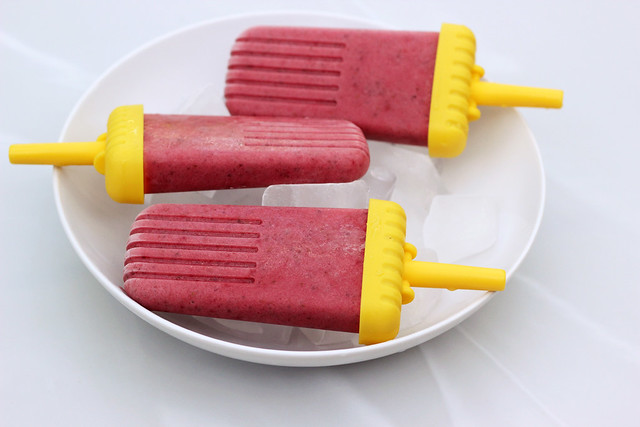
    When I made the smoothie to photograph it, I wasn’t in the least bit hungry so I didn’t want to drink it, but I obviously also didn’t want to just pour it out, so I was thinking of what I could do with the mixture. Then I recalled the popsicle molds I got for Christmas from my mom and dad. Perfect!

    I just poured the mixture in and let it freeze up. Later that night I was ready for a treat! Here’s the original post on Free People highlighting the smoothie, but I couldn’t let these frozen fruit pops go ignored!

    Since there is no sugar or sweetener in these, when they freeze up they aren’t overly sweet. Just the perfect amount sweetness from the bananas and strawberries and just a little tartness, too. If you like things to be a bit sweeter, you can add a little honey or maple syrup, or even try blending 1 or 2 dates into the mixture. Also, depending on how much coconut you add to the mixture, if you decide to, you will see pretty white flecks of coconut in the pops. I didn’t think to add any until it was too late, but next time I certainly will.

    Strawberry Coconut Frozen Fruit Pops / Smoothie – Gluten-free, Vegan + Sugar-free


    [print_this]Strawberry Coconut Frozen Fruit Pops / Smoothie – Gluten-free, Vegan + Sugar-free
    makes 6 frozen pops or 1 large smoothie

    1 cup fresh organic strawberries, hulled
    1 frozen organic banana
    3/4 cup Unsweetened Organic Coconut Milk (light or full fat)*
    1/2 cup ice cold cold water
    1 tablespoon Chia Seeds
    1 teaspoon vanilla extract
    1/4 cup unsweetened shredded coconut, optional

    Add all of the ingredients to your blender and blend until smooth and creamy. Pour into a glass and serve for the smoothie. If you are making the frozen fruit pops – pour the mixture into your popsicle molds and chill for a minimum of 4 hours or until completely solid.

    I use these popsicle molds – Tovolo Groovy Ice Pop Molds

    *Note – Look for a non-BPA containing canned coconut milk, if you can.

    [/print_this]

  14. Gratitude

    21092_541369509235260_12055074_n-1{Photo © Louie Schwartzberg 2013}

    Instead of a recipe today, I decided to share with you something that really changed me. I am not sure why I haven’t shared this sooner.

    I first heard this nearly a year ago during savasana at a power vinyasa yoga class taught by my amazing friend Lyndsey in Rochester, NY. Days before she was to move to Africa and embark on the journey to teach yoga and share her amazingness for 6 months as part of the Africa Yoga Project.  It moved me to tears while laying on my mat, surrounded almost entirely by strangers. It is powerful. In some ways more so even than the super intense, sweaty yoga practice I had just completed minutes before.

    I bookmarked this video on the home screen of my iPhone the very day I heard it. I watch/listen to it a couple times a month. I watched it again today and the message is JUST as clear. It is as powerful and meaningful to me as the very first time I heard it.

    An amazing reminder to be grateful for the precious gift of life and all that each day brings.

    To stay connected.

    Be present.

    I won’t bore you with my words and thoughts, none of them could ever do this justice. But I really wanted to share this. Please take 10 minutes to watch/listen this video. Bookmark it. Cherish it. Share it. I hope you enjoy it as much as I do.

    TEDxSF – Louie Schwartzberg – Gratitude

  15. Grain-free Meyer Lemon Bars

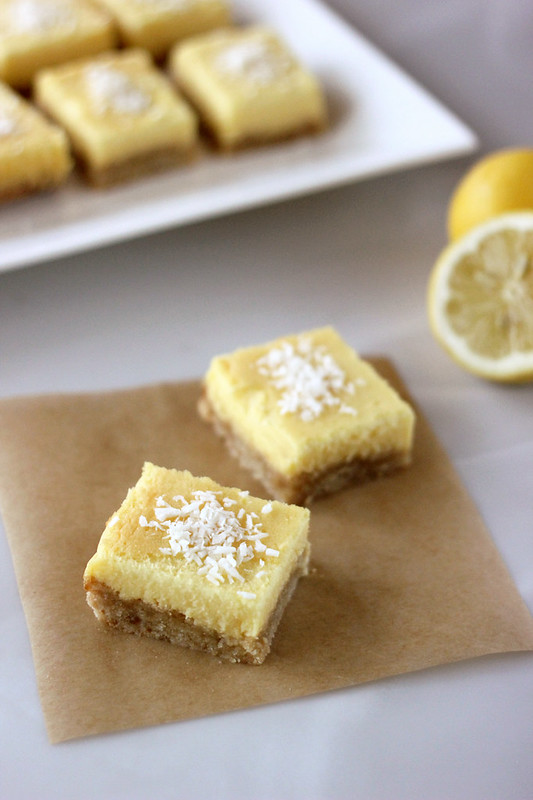
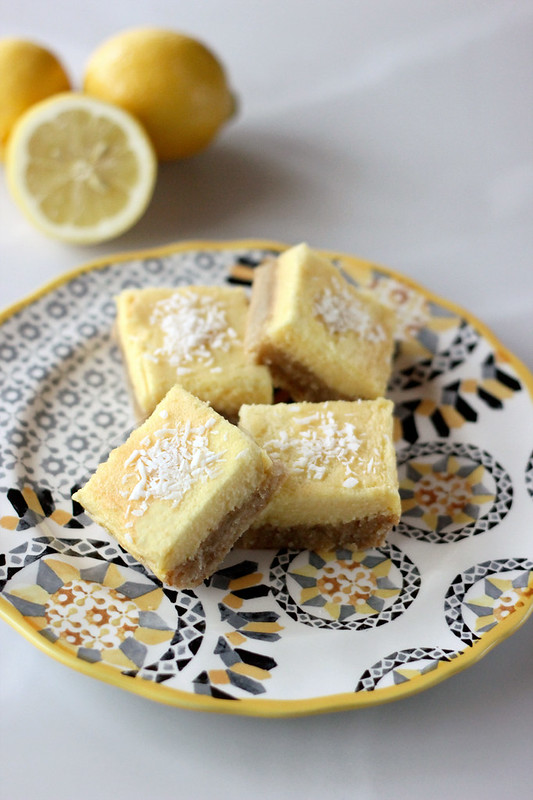
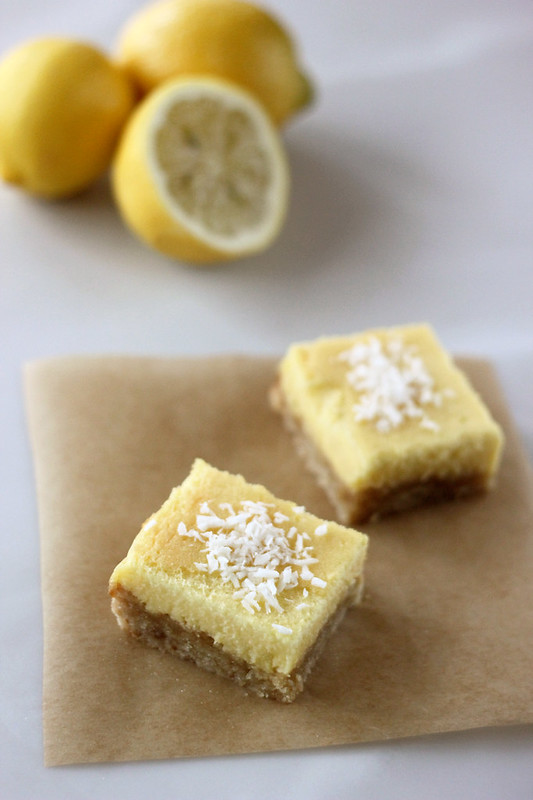
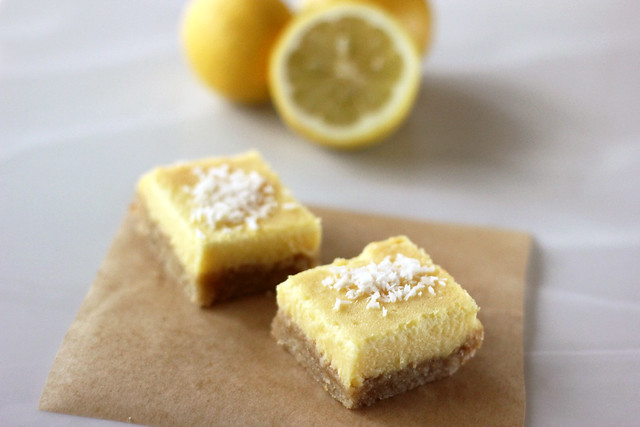
    Meyer Lemon Bars - Gluten-free, Grain-free, Dairy-free + Refined Sugar-free

    Since we’ve moved here to Southern California, just about two months ago, we haven’t had any guests come stay with us just yet. My sister comes two weeks from today and I have literally been counting down the days minutes, then my parents come just one month later! I cannot wait! Last week however, our very good friend Jane, who lives in Colorado, came to see us for the day. She had been in Corona, CA for the week and she was able to borrow a car to drive out to our neck of the woods.

    Although we have quite a few good friends here in Southern California, whom we have known for many years, it was really nice to have our first “family” guest since we’ve moved here. Even if just for a few hours. Jane has been a part of my life since I can remember, she and Mom went to high school together and have remained in contact since. My sisters and I have always jokingly called Jane, “our other Mother”. There hasn’t been a Christmas morning that we didn’t share with Jane, she would always make the trip back to Buffalo from Colorado to spend the holidays with her family and we were always lucky enough to steal her away for a few hours on Christmas morning. Before she had nieces Jane would actually spend Christmas Eve night at our house and we would wake up in the morning and she would make us clean our room before we could go downstairs and attack the tree. Likely buying my parents time to get more sleep, since I am sure they were all up late.

    Meyer Lemon Bars - Gluten-free, Grain-free, Dairy-free + Refined Sugar-free

    Besides my own actual immediate family, I don’t think that we could have another guest here in the first two months that could have made me any happier. Since she was here a short time, I offered to make her lunch. She absolutely adores my family’s Greek Avgolemeno soup, which she loves to tell me Mom that I make better than her. So I of course, made a big pot of that for her visit. I am sure you have heard me mention many times before that this soup always reminds me of home and my family, so it really couldn’t have been more perfect for this visit.

    When Jane arrived she brought me a huge bag FULL of fresh produce from the organic farm on the land where she was staying. So many different varieties of oranges, lemons, a few grapefruits and a few types of citrus that I have never even seen before, plus the most delicious avocados. Besides looking beautiful and tasting amazing, all of the citrus have been making the house smell incredible.

    There were some Meyer lemons in the bag. Those are my absolute favorite. They are just so tasty and subtly sweet, so much so that I hate to waste them just in my morning lemon water or in a juice. I wanted to make something extra special with them. I just wish I could have made these bars and then shared them with Jane.

    Meyer Lemon Bars - Gluten-free, Grain-free, Dairy-free + Refined Sugar-free

    What makes this recipe extra special, besides who/where I got the Meyer lemons from, is that you actually use an entire whole lemon in the filling. Yes the whole fruit. Peel, pith and all. So, it is quite important that you use an organic lemon, or at least one that is unsprayed and free of pesticides or other chemicals.

    You can certainly use a regular lemon in place of the Meyer lemon, but you’ll want to increase the sweetener a bit since it won’t be as sweet as the Meyer lemon is. The filling of this recipe was adapted from David Lebovitz. His recipe utilizes corn starch, a regular lemon, regular sugar and butter, so I tweaked it to make it work for me and to highlight the flavor of the Meyer lemon.

    *If you are vegan, I would be hesitant to recommend any egg replacers in place of the eggs, since there is a fluffiness from the eggs that gives the filling it’s texture. There are many vegan lemon bar recipes that use silken tofu or soaked cashews to created a creamy topping, but since I had a dozen beautiful brown eggs fresh from a local farmer, I decided they would be perfect for this. If anyone does experiment in making this vegan, please do report back, I would love to hear how it turns out.

    Meyer Lemon Bars - Gluten-free, Grain-free, Dairy-free + Refined Sugar-free
    [print_this]Grain-free Meyer Lemon Bars
    {Gluten-free, Grain-free, Dairy-free + Refined Sugar-free}
    One 8-inch Square Pan – Makes 16 squares

    Crust:

    • 1 1/2 cups blanched almond flour, I prefer Honeyville brand
    • 2 tablespoons honey or maple syrup
    • 1/4 cup coconut oil, melted
    • 1/2 teaspoon baking soda
    • 1/8 teaspoon salt

    Lemon Topping:

    • 1 whole organic Meyer lemon, washed (organic or unsprayed)
    • 3 tablespoons honey or maple syrup*
    • 1/3 cup freshly squeezed Meyer lemon juice (approx 2 additional lemons)
    • 4 large farm fresh brown eggs, at room temperature
    • 4 teaspoons arrowroot starch (tapioca starch or corn starch would also work)
    • 1/4 teaspoon salt
    • 3 tablespoons coconut oil, melted (make sure it isn’t too hot when you add it in, you don’t want it to cook the eggs)
    • Unsweetened shredded coconut for topping or the traditional powdered sugar works, too.

    *Please Note – since the sweetness and bitterness on Meyer lemons can vary drastically, you may need to increase your sweetener to account for more tart Meyer lemons. Give the mixture a quick taste before you add the eggs to see if you need to. It should be a bit bitter but not too much so. Obviously the sweetener will have to be increased if you choose regular lemons over Meyer lemons. Additionally, if they are on the tart side, powdered sugar on top can definitely help with that, as well.

    Preheat the oven to 350º F. Line an 8-inch square pan with two pieces of parchment paper, one going in each direction. In a medium bowl, mix all of the crust ingredients together. You may want to get your hands in there to really get it mixed together well. This will be a thick crumbly crust that you will need press onto bottom of pan. Make sure it is even and gets into the corners. Place in oven to pre-bake the crust. Bake for 15-20 minutes or until lightly golden brown. Remove from oven.

    While the crust is baking, cut the whole lemon in half, remove the seeds, and cut the lemon into chunks. Put the chunks of lemon in a food processor or blender along with the honey and additional lemon juice, and let it run until the lemon is completely broken up. Add the eggs, arrowroot powder, salt, and melted coconut oil and blend until almost smooth. (A few tiny bits of lemon pieces are ok and totally encouraged.)

    Once the crust comes out of the oven, lower the temperature of the oven to 300ºF. Pour the lemon topping over the hot crust and bake for 25 minutes or just until the filling is no longer jiggling and is barely set.

    Remove the bars from the oven and let them cool completely. Once totally cool, carefully lift out the bars out grasping the parchment paper. Cut the bars into squares or rectangles. I like to cut into 16 smaller sized squares. They last longer that way. Add shredded coconut or sift powdered sugar over the top just before serving, if desired.

    These bars will keep covered or in an airtight container at room temperature up to three days. The crust will definitely get soggy as they sit, however. You can also freeze the lemon bars for up to one month, letting them come to room temperature before serving. [/print_this]

  16. Photo Fun Day Friday

    In switching to a new hosting company last week, I had to skip out on Photo Fun Day Friday, so there are lots of pics this week! However, I have to tell you about how very excited I am about my new hosting company. I am now working with Pair Networks out of Pittsburgh, PA after a not so desirable run with another company. What really drew me to this company is their commitment to sustainable business practices and their environmental policies. All of pair Networks’ operations, including data centers, support operations, development labs, administrative facilities, and employee commutes & business travel are 100% Carbon Neutral. Additionally, pair Networks is powered by 100% renewable energy.

    I urge you to check out Pair Networks and consider switching your hosting, if you are in the market. Their customer service has been amazing and they respond to all of my questions in a very timely matter, even with the 3 hours time difference. (I actually received a personal response to an email from them on a Friday night at 10pm, their time). They aren’t sponsoring me to say all of this, I am just very happy with their service so far and after being quite unhappy with my last company I know there are a lot of not so great companies in that industry, so I thought I would share.

    OK, on to the photos. I first wanted to share with you, my two brand-new promo photos – aka “head shots” (that sounds so fancy) that you might have noticed here on the site. These were taken by the very talented Luke Copping, in Buffalo NY, shortly before we moved out here to So Cal. It was high time I got some pro photos for the site, for press mentions, etc and it was a really fun excuse to get my makeup done (thanks Shianne at Fawn and Fox) and feel good about myself. We also got some photos taken of Mark and I for Hero Design Studio. So happy to have some great professional photos of us, not from our wedding day! Thanks again, Luke!

    Photo Fun Day Friday

    Photo Fun Day Friday

    Photo Fun Day Friday

    OK now here’s quality you are used to – all the non-pro pics I took over the last two weeks 😉

    Photo Fun Day Friday

    I am in love with all the roses growing in our yard. The fragrance from this particular variety is amazing. Just cut some yesterday to bring into the house and they smell heavenly.

    Photo Fun Day Friday

    Jpeg enjoying his time with his daddy.

    Photo Fun Day Friday

    We are in full festival mode over here. We set up at the Rose Bowl Flea two weekends ago and it was great! Cannot wait to go back.

    Photo Fun Day Friday

    The Hero Booth at the Rose Bowl Flea.

    Photo Fun Day Friday

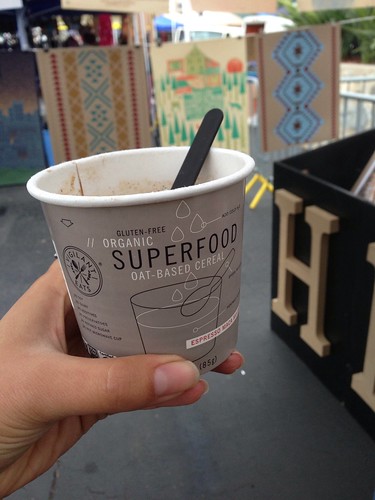
    With a 3:30 am wake up call, I of course brought some Vigilant Eats Superfood Cereal with me to the event and it was perfect. I LOVE that stuff.

    Photo Fun Day Friday

    Me workin’ the booth!

    Photo Fun Day Friday

    After working all weekend, you know we had to take a day off and head to Disneyland. Yay annual passes!!

    Photo Fun Day Friday

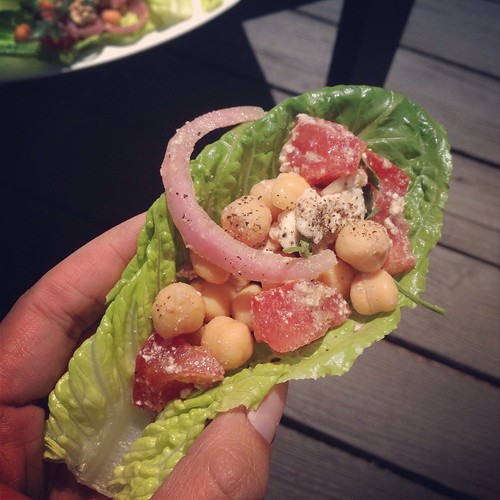
    Lettuce (and other greens) wraps have been my jam lately. I have been putting everything in them.

    Photo Fun Day Friday

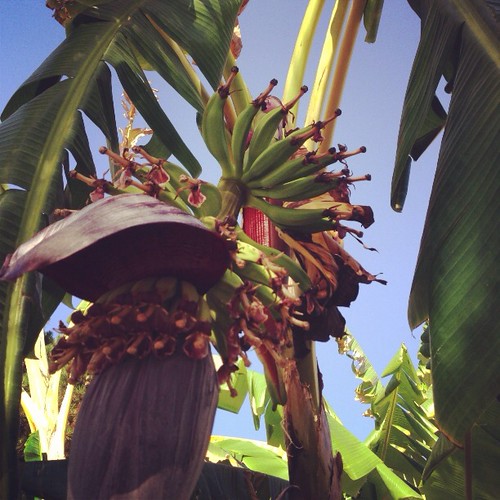
    This is our banana tree!! I cannot even believe I have a banana tree!

    Photo Fun Day Friday

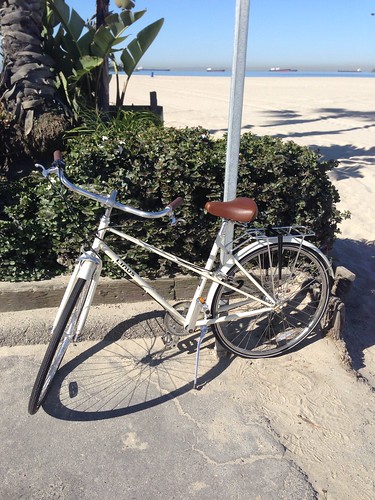
    When we moved to California we sold our second car with plans of buying bikes to replace it. Finally got around to doing that and it has been awesome!! I have been biking everywhere. My favorite has been cycling to the ocean for my morning run, then back home. Such an enjoyable workout.

    Photo Fun Day Friday

    All I have to do is sit for a minute and Seri can find a home on or near me.

    Photo Fun Day Friday

    Photo Fun Day Friday

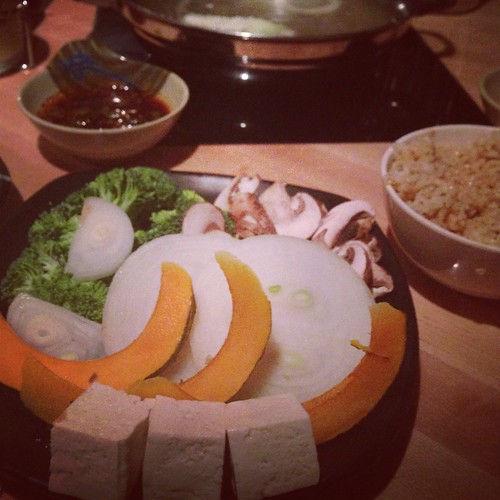
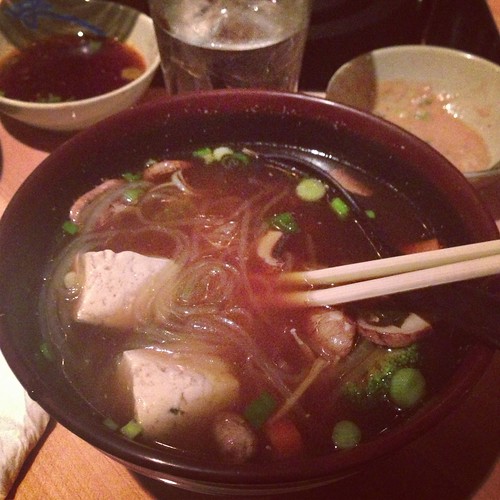
    Went to a Shabu Shabu restaurant here and I am officially obsessed!! Love that it is vegan/gluten-free friendly, too.

    Photo Fun Day Friday

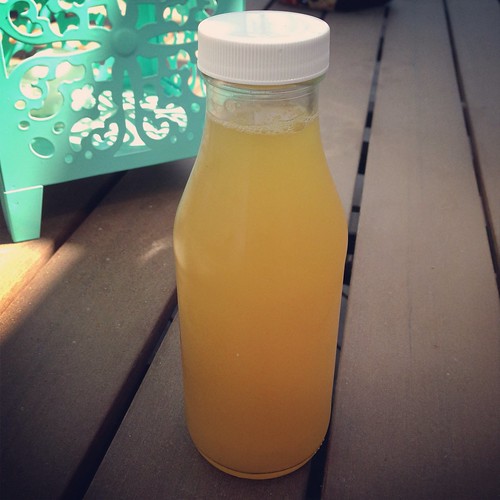
    I am pretty obsessed with this delicious organic kombucha made by husband and wife companyFine Feathers Co., here in Long Beach.  They make all of their deliveries around town on bike!

    Photo Fun Day Friday

    Some mornings this baby makes getting up nearly impossible.

    Photo Fun Day Friday

    I made some loquat simple syrup with some of the many loquats growing on my tree. So delicious in sparkling water.

    Photo Fun Day Friday

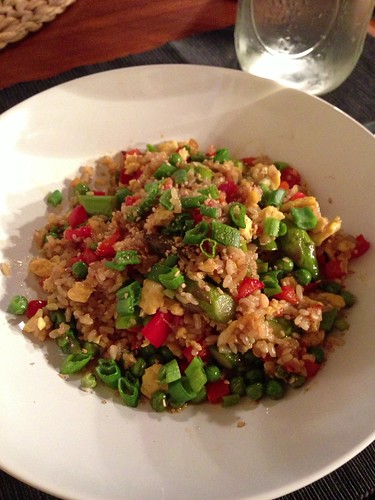
    Veggie fried rice inspired by Jeanette’s Healthy Living.

    Photo Fun Day Friday

    Hubs skateboarding.

    Photo Fun Day Friday

    Even standing on a skateboard terrifies me. Yoga or die! 😉

    Photo Fun Day Friday

    The view on our morning bike ride the other day, Naples Island.

    Photo Fun Day Friday

    Soo very happy to have a family face visit us yesterday! Jane came for a quick visit yesterday, so I made a bit pot of Avgolemeno Soup for her. It’s her favorite.

    Photo Fun Day Friday

    This is what happens when Seri and I go on a walk. She just wants to lay in my lap on the grass and take it all in. She sat here forever just watching everything going on. I love it.

    HAVE A GREAT WEEKEND EVERYONE!

    Got anything fun planned?

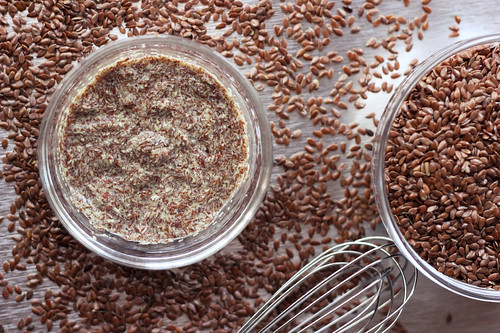
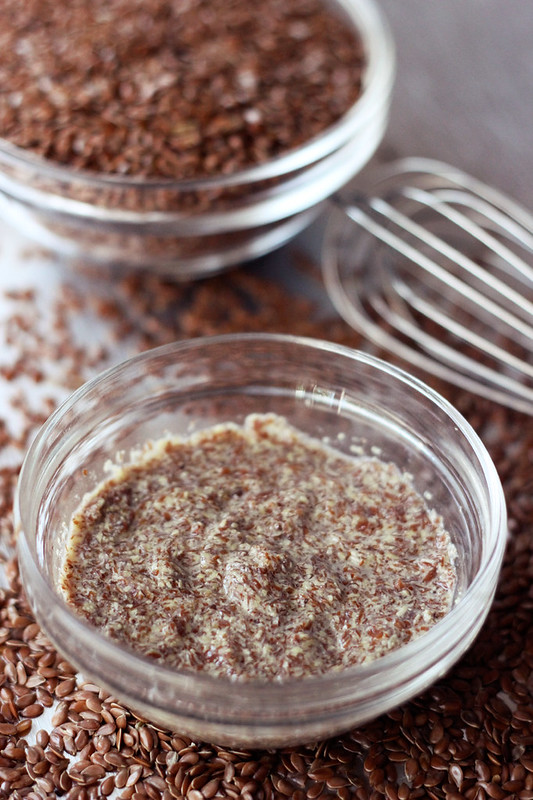
  17. How to Make Flax Eggs

    How to Make Flax Eggs

    I myself am not allergic to eggs, but I don’t always have them on hand and I don’t necessarily always want to use them in a baking recipe. What I love about flax eggs, besides being a great replacement if you cannot eat eggs, is that they are full of wonderful nutritional benefits for anyone who chooses to add them into a recipe, no matter why.
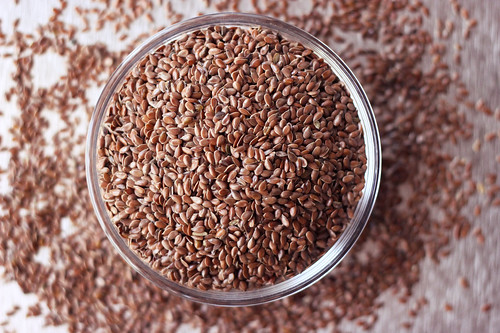
    How to Make Flax Eggs

    Flax “eggs” are an easy substitute in most recipes calling for just one or two eggs. They’re a great option for vegans and those allergic to eggs. However, you don’t have to be vegan or allergic to benefit from this great substitution! Flax seeds are a nutritional powerhouse and sneaking some into baked goods is an simple way to get some of their wonderful nutrients into your diet.

    Flax seed eggs “bind.” They do not add lift or fluff as eggs would in some recipes, say for a sponge cake or a souffle. I have had pretty great luck using flax seed eggs in most baked goods that call for two eggs or less, like breads, muffins, oatmeal cookies or pancakes, plus they are great in homemade veggie burgers. To make flax seed eggs you you just need a grinder like a Magic Bullet or coffee/spice grinder for grinding the raw, whole flax seeds to a meal. You can buy already ground flax seed meal, but it is much more expensive than just doing it yourself and they are far more likely to go rancid, quickly (see notes below).

    Flax seeds are rich sources of the essential fatty acid alpha-linolenic acid (ALA), a precursor to the omega-3 fatty acids. In comparison to regular eggs, flax eggs are packed with nutrition, including B vitamins, vitamin E, and important minerals such as manganese, potassium, calcium and iron. Each one even has two grams of fiber. They have no cholesterol and are very low in sodium. A flax seed egg has half the calories of a large chicken egg and much less fat — no saturated fat and half the total fat of an egg. Besides using flax seeds to make an egg replacement you can also enjoy the health benefits of flax seed by mixing it into your oatmeal or smoothies, it is great as a topping on yogurt or ice cream or added to baked goods like bread or muffins.

    Store your flaxseeds in the refrigerator in a tightly sealed container to maximize their shelf life. Being a polyunsaturated fat, they can go rancid fairly quickly at room temperature.

    How to Make Flax Eggs


    How to Make Flax Eggs

    Yields one “egg”

    • 1 tablespoon flax seed meal
    • 3 tablespoons lukewarm water

    If you are starting with whole flax seed to prepare the flax seed meal, simply grind some flax seeds in a coffee grinder or magic bullet. Measure after grinding.

    Place the flax seed meal in a bowl and add water, stirring/whisking as you go and place in the refrigerator for 10-15 minutes to allow the egg to set. Allow to stand until thick, gelatinous and egg-like. Use in baking as you would one egg. Make in larger batches and store in the refrigerator for up to one week.


    NOTES:

    – If you don’t want the dark color from the brown seeds, look for golden flax seeds.

    – If you do buy pre-ground flax seeds, always store in the fridge or freezer. Flax seeds contain oils that are extremely perishable. When the flax seed is ground, the oil is exposed to oxygen and begins to oxidize almost immediately. This oxidization turns the oils rancid which makes them toxic and causes them to impart a linseed oil aroma and flavor to your food.

    – Ground chia seeds also work in place of the flax seed meal.


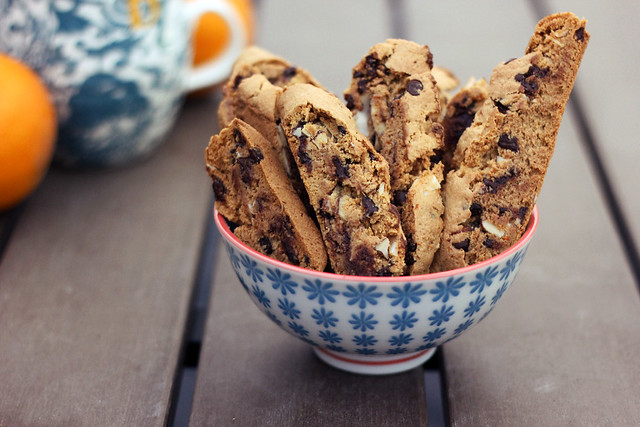
  18. Grain-Free Orange, Almond & Dark Chocolate Biscotti – Gluten-free + Vegan

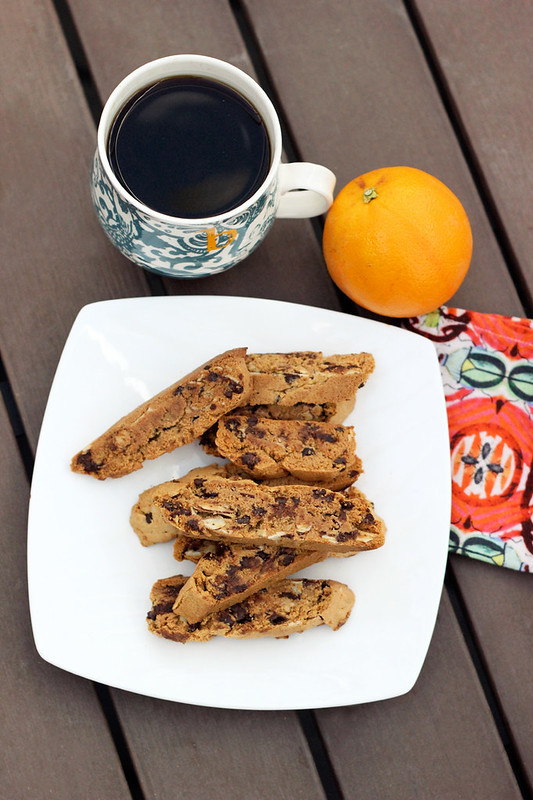
    Grain-Free Orange, Almond & Dark Chocolate Biscotti - Gluten-free + Vegan

    I wrote this recipe up back when we were still in Buffalo staying at my parents house but I never had the time to make them while we were there. Both of my parents and Mark are coffee-aholics. Man do they love their coffee. Me, I could take it or leave it these days. I probably drink 2-3 cups a month, at most. Most times it is part of a super early wake up call for an event or on a long road trip. I love the way coffee tastes, but I don’t always like how it makes me feel. I don’t like the caffeine jitters or the burny, acid bitterness of some cups of joe.

    Grain-Free Orange, Almond & Dark Chocolate Biscotti - Gluten-free + Vegan

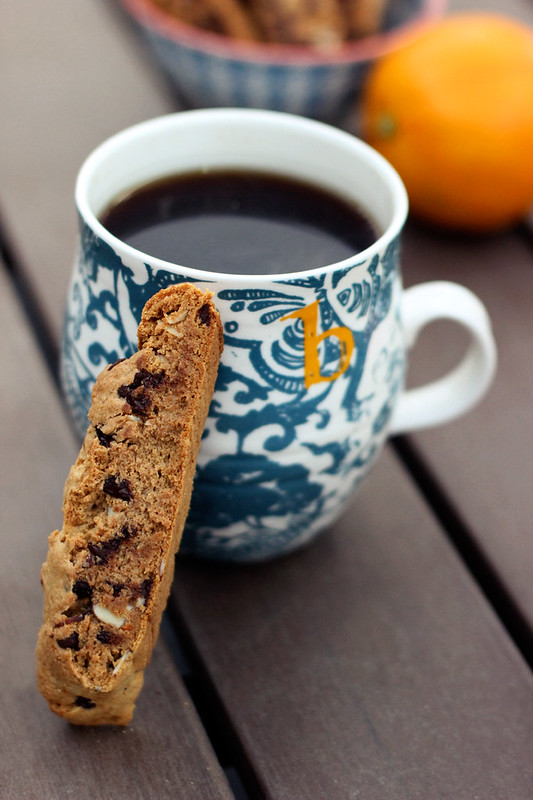
    Mostly I like the smell of coffee and the culture surrounding it. Yeh, I know that’s weird. I love coffee cups and mugs, local coffee shops, french presses, pour over coffee, fancy organic fair trade beans, and yes, I even love cookies meant for dunking in coffee. That is exactly what I think of when I think of biscotti. That crispy, crunchiness is just begging to be dunked into coffee.

    Grain-Free Orange, Almond & Dark Chocolate Biscotti - Gluten-free + Vegan

    All the nights at my parents house when the three of them would fill up their mugs, add their splash of cream, grab a sweet of some kind and then come out to the living room to watch the evening news. I felt kinda left out. Sometimes I would have a cup (then have a terrible time getting to sleep that night), sometimes I would have some tea and other times I opted for another glass of wine! I should have made these cookies when I was staying there, they could have added dunking these yummy cookies to their evening ritual and I would have dunked mine into Mark’s hot cup of java.

    I was inspired to combine orange and dark chocolate in these biscotti because my mom LOVES that flavor combo. So do I. Just the smell alone is so delicious. Looks like I’ll just have to make these for my parents when then come visit in June! (Which by the way, I cannot wait for) I originally wanted to make these with cocoa nibs, but was unable to find any at the stores locally, so I just went with dark chocolate chunks, I cannot wait to get my hands on some cocoa nibs and make these again!

    Do you drink coffee? What is your favorite thing about coffee?

    Grain-Free Orange, Almond & Dark Chocolate Biscotti - Gluten-free + Vegan

    [print_this]Grain-Free Orange, Almond & Dark Chocolate Biscotti – Gluten-free + Vegan
    Makes 12-15 cookies

    • 1 1/2 cups blanched almond flour (tightly packed)
    • 1 tablespoon arrowroot powder (or tapioca starch)
    • 1/2 teaspoon baking soda
    • 1/4 teaspoon salt
    • 1/4 cup maple syrup or honey
    • 1/4 cup sliced almonds or other nut
    • 3 tablespoons freshly squeezed orange juice
    • 2 tablespoons orange zest
    • 1/4 cup dark chocolate chunks, mini chocolate chips or cocoa nibs

    Preheat oven to 350ºF. Line a baking sheet with parchment paper

    In your food processor combine the almond flour, arrowroot powder, salt and baking soda. Process until all of the ingredients are well combined. Then pulse in maple (or honey), orange juice and orange zest until the dough forms a ball. Fold in chopped almonds and chocolate chunks by hand.

    Dampen hands and form the dough into a log approx 10″ long and 2″ wide on the parchment paperlined baking sheet. Bake at 350° for 15-20 minutes, or until lightly browned and firm to the touch. Remove from oven and let cool for 1 hour. Turn the oven to 250º F.

    Once fully cooled cut the log into 1/2-inch slices on the diagonal with a very sharp knife.

    Spread slices out on a baking sheet cut side down and bake at 250° for 10 minutes then turn over and bake another 10 minutes on the other side. Turn off the oven and let them sit inside the oven on the baking sheet until cool.

    Once cooled they should be nice and crispy. Serve with coffee, tea, ice cold almond milk, etc. Also, you’ll want to consider sharing these with friends or you will likely eat the entire batch yourself. In one sitting.

    [/print_this]

  19. Chocolate Chip Coconut Macaroons – Gluten-free + Dairy-free

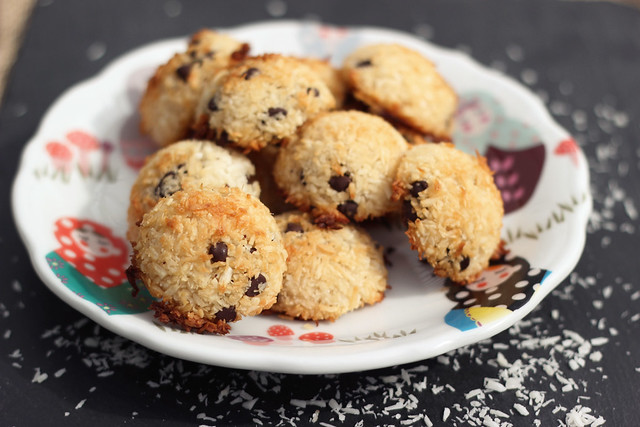
    Chocolate Chip Coconut Macaroons - Gluten-free + Dairy-free

    I have no problem admitting my obsession with coconut. I absolutely adore it. If I see a macaroon at a high-end bakery and they can assure me it is gluten-free, I am on it! Sadly, most times I take a bite and it is sooo overly sweet that it actually ruins it for me, I can rarely finish one of those from a bakery due to the extreme sweetness. I don’t think coconut has to be so overly sweetened. It is so amazing on it’s own. Add some chocolate and forget about it, I lose all control. But you already knew that, didn’t you? I mean really, is my obsession really that obvious?

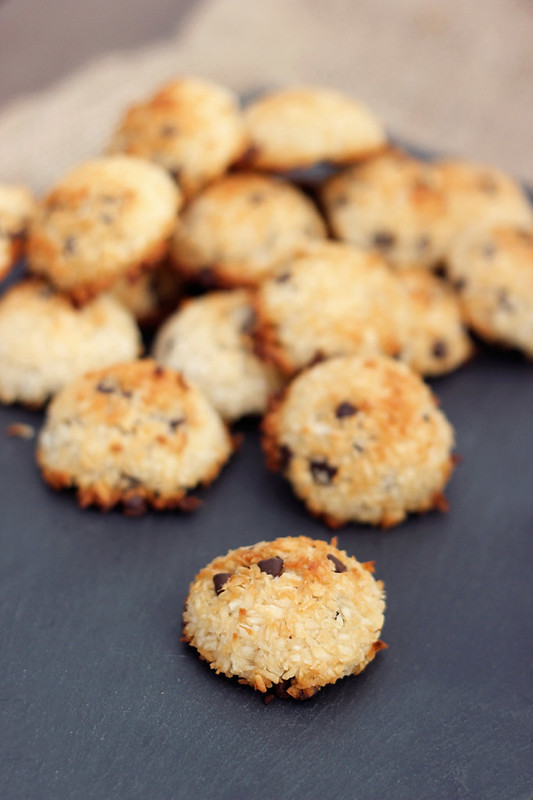
    Chocolate Chip Coconut Macaroons - Gluten-free + Dairy-free

    I decided the best thing to do instead of always being let down and not being able to finish the ones I buy at bakeries, is to create my own macaroon recipe at home that utilized an unrefined sweetener instead of loads of sugar or that gross canned sweetened condensed milk that many recipes call for. Some recipes actually call for sugar, the canned condensed milk which is usually sweetened AND sweetened coconut. UGH. Hurts my teeth just thinking about it.

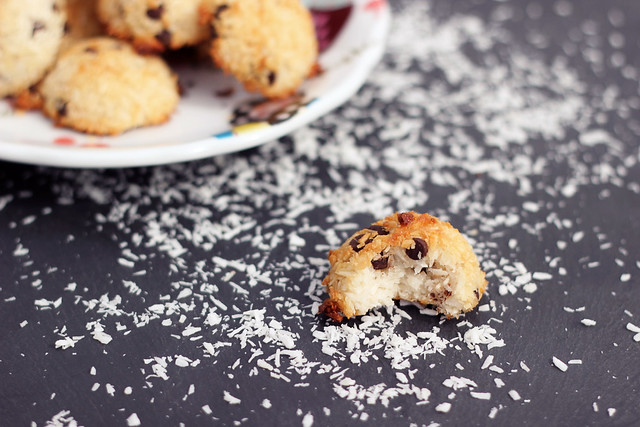
    Chocolate Chip Coconut Macaroons - Gluten-free + Dairy-free

    As much as I love macaroons dipped in melted chocolate, I can sometimes be lazy with melting chocolate. It can be annoying, I hate the mess and really the same flavor combo could be achieved by adding mini chocolate chips instead. Problem solved. If you want these cookies truly refined sugar-free, leave the chocolate chips out or make your own refined sugar free chips.

    Most classic macaroon recipes are made with egg whites, I decided to keep that as part of the recipe, but I have seen many vegan recipes that utilize Ener-G egg replacer in place of the egg whites. I haven’t yet tried this myself, so please report back if you do.

    Chocolate Chip Coconut Macaroons - Gluten-free + Dairy-free

    [print_this]Chocolate Chip Coconut Macaroons – Gluten-free,  Dairy-free, Paleo

    Makes 18-20 cookies

    • 2 cups unsweetened shredded organic coconut
    • 1/4 cup local organic honey* or organic Grade B maple syrup
    • 1 teaspoon vanilla extract (or almond extract)
    • 1/3 cup dairy-free mini chocolate chips
    • 2 large local egg whites
    • pinch of salt

    *If you want to use raw honey, just heat it up before hand over a very low heat, to liquify it.

    Directions:

    Preheat oven to 350º F. Line a baking sheet with parchment paper.

    In a medium bowl mix together everything except the egg whites and salt, making sure the coconut is evenly coated with the honey (or maple syrup). Get your hands in there, that’s what I do!

    In the bowl of your stand mixer, or using an electric mixer, beat the egg whites with a small pinch of salt. Beat for 2-3 minutes until stiff peaks form when you lift the mixer out.

    Gently fold the coconut mixture into the eggs, being careful not to totally destroy the lovely beaten eggs. Let sit in the fridge for 10 minutes.

    Drop batter onto the lined baking sheet, one rounded tablespoonful at a time. I like to really press the batter into the tablespoon, then carefully tap the cookie out of the spoon. It makes for the most perfect shape.

    Bake for 12-15 minutes until golden brown. Let chill for 5 minutes on the baking sheet, then transfer to wire rack to continue cooling completely.

    *To make vegan try using 3 teaspoons Ener-G egg replacer with 4 tablespoons of water and be sure to choose maple syrup over honey. I haven’t tried these yet this way, but there are many recipes online that use the egg replacer instead. Just whisk the egg replacer with the water, add a pinch of salt and add the coconut mixture to it.[/print_this]


    Head on over to the Free People Blog BLDG 25, where I am sharing this recipe as part of my Restricted Diets series. Please leave a comment there if you enjoy the post and feel free to comment here let me know if there are any other classic recipes that you would like recreated to be gluten-free, refined sugar-free, cleaner, etc.

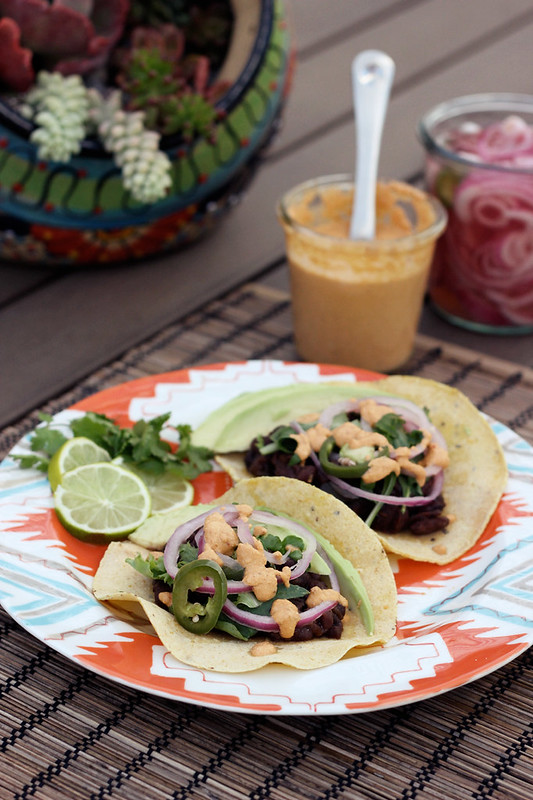
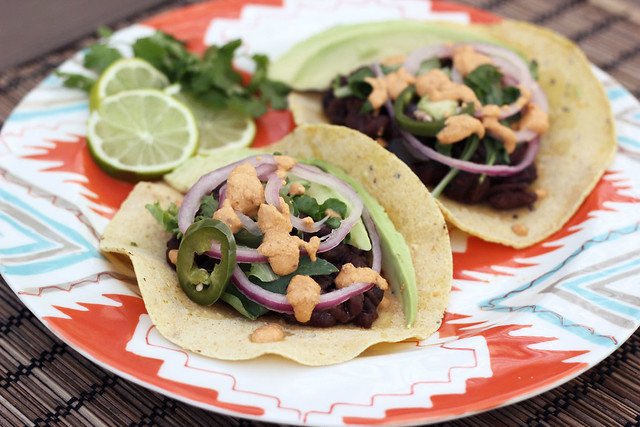
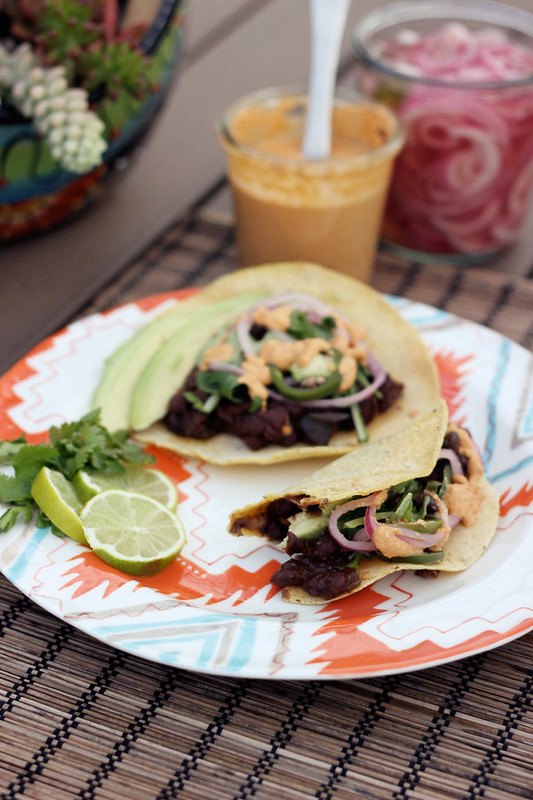
  20. Slow-Cooked Black Bean Tacos with Vegan Chipotle Cream {Gluten-free + Vegan}

    Slow-Cooked Black Bean Tacos with Vegan Chipotle Cream {Gluten-free + Vegan}

    I have always LOVED tacos, but from traveling a ton to Texas and California and even Mexico once or twice, I am well aware of what makes a good taco. Living in Western New York for the past 30+ years meant getting the very best tacos I could on the road and when I was really craving them at home, just making them myself. I have made soo many different tacos, some vegan, like these, some with slow cooked meat from our farmer, some loaded just with grilled veggies, and so on. I am not saying my homemade tacos are THE very best and most authentic, but for the most part they were better than any I could get in Buffalo. (Though Lloyds Taco Truck were damn delicious and the best in WNY outside of my kitchen, for sure!)

    I find the key to authentic tacos (or at least for my taste) is skipping on the loads of cheese and chopped iceberg lettuce like most Americans love. You want good quality ingredients like slow cooked beans or a meat, spiced to perfection. Add some fresh cilantro, a quick homemade pico de gallo or other salsa and add a few other simple but yummy things like quick pickled red onions, (diced onions or green onions are always great to) or maybe a simple chipotle cream. Less is more in a lot of ways.

    OK so now I am living in Southern California, the land of amazing tacos. Why did I make tacos at home, you ask? Almost every week for Taco Tuesday we have tried a different place out, since you can get amazing prices/deals at most places. Last week, we didn’t wanna go out and we still wanted tacos, so this was the next best thing.

    These tacos feature super flavorful slow-cooked black beans, that do their thing ALL day in the crock pot. Load it up in the morning before work and by dinner time it’s all ready for you. You can make the pickled onions and chipotle cream the day before, the morning of when you are loading up the crock pot or just a couple of hours before you serve dinner. I highly suggest making your own corn tortillas whenever possible, they are so simple to make and once you do, you will realize what you have been missing. I  was forced to skip on it this time as I wasn’t able to find non-GMO masa harina around here, so I just bought some pre-made organic non-GMO corn tortillas that were very good and very fresh.

    **BONUS ADDITIONAL MEALS: The great thing about this recipe is that it  makes a decent amount of black beans and other goodies. So make tacos for 4 – 6, or more – or make tacos for 2 one night, then make delicious black bean and brown rice bowls another night. Instead of tortillas start with brown rice in a large bowl, top with the slow cooked black beans, add any other veggies or toppings, top with the pickled red onions and chipotle cream sauce and you have another deliciously incredible meal.

    Slow-Cooked Black Bean Tacos with Vegan Chipotle Cream {Gluten-free + Vegan}

    Slow-Cooked Black Bean Tacos with Vegan Chipotle Cream {Gluten-free + Vegan}

    [print_this]Slow Cooked Black Beans

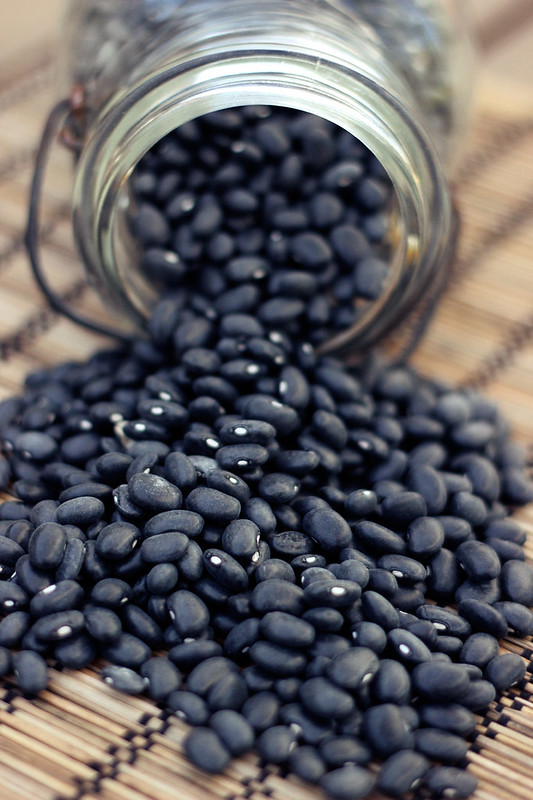
    • 1 lb organic dried black beans – soaked overnight, drained and rinsed*
    • 4 cups water and/or vegetable broth (if you aren’t using canned tomatoes, you may want a bit more water)
    • 1 jalapeño, diced
    • 1-2 dried chipotles, left whole
    • 2 stalks celery, diced
    • 1 red onion, diced
    • 1 green bell pepper, diced
    • 2-3 cloves garlic, minced
    • 1 bay leaf
    • 1 small can diced fire-roasted tomatoes (I like Muir Glen organic) you can also use fresh tomato
    • 2 teaspoons ground cumin
    • 3 teaspoons chili powder
    • 1 teaspoon ground coriander

    Salt to taste at the end of cooking

    Soak the beans overnight. Drain and rinse well.

    Add all of the ingredients to the crock pot. If you aren’t using canned tomatoes, add another 1-2 cups of water. You want to make sure there is enough liquid so the beans don’t scorch or burn.

    Stir well. Cover and cook on low for 8 hours. Salt to taste and the end.

    *If you forgot or didn’t leave time to soak the beans overnight, no problem. Put them in a large pot, and cover completely with water. Bring to a rapid boil for 10 minutes, then turn off stove and cover pot. Let your beans sit for 1 hour, then drain water and put beans into crockpot) [/print_this]

    Slow-Cooked Black Bean Tacos with Vegan Chipotle Cream {Gluten-free + Vegan}

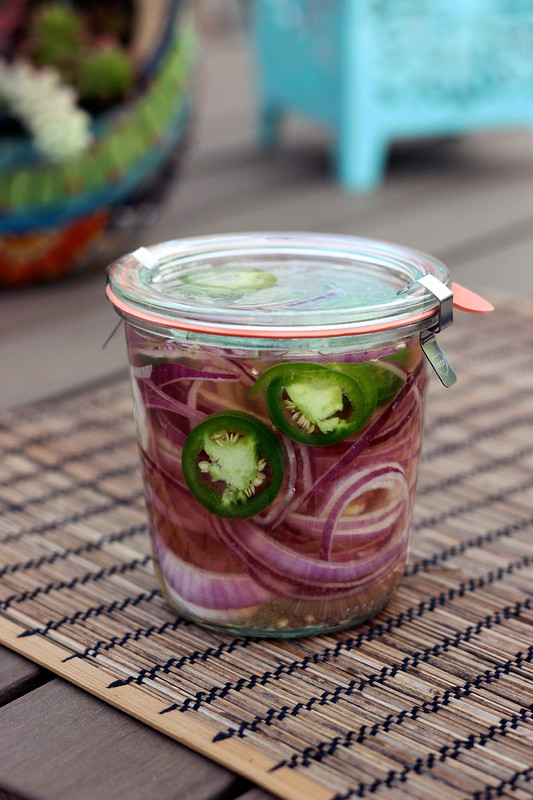
    [print_this]Quick Pickled Red Onions (and Jalapeños)
    These simple pickled onions can be made ahead, it will keep for 2 weeks.

    • 1/3 cup red wine or apple cider vinegar
    • 1 teaspoon raw sugar (if you are totally sugar-free try a splash of maple or other sweetener of your choice)
    • 1 teaspoon kosher salt
    • 1 red onion, thinly sliced
    • 1 jalapeño, cut into rings

    Whisk first 3 ingredients and 1 cup water in a small bowl until sugar and salt dissolve. Place onion and jalapeños in a jar, pour the vinegar mixture over. Let sit at room temperature for at least 1 hour and up to 8 hours. Cover and chill. Drain onions before using or just pull right out of the jar and add them to your tacos. [/print_this]

    Slow-Cooked Black Bean Tacos with Vegan Chipotle Cream {Gluten-free + Vegan}

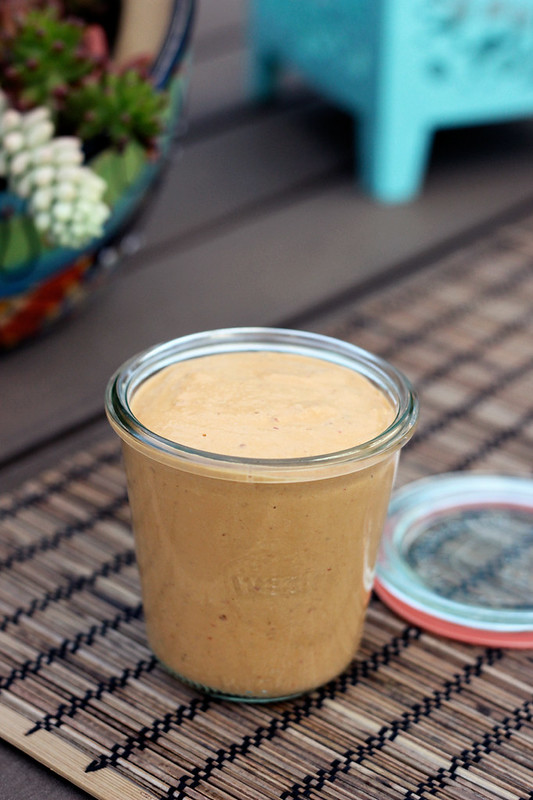
    [print_this]Vegan Chipotle Cream
    This sauce is great on these tacos, but also delicious in place of mayo or other spreads on sandwiches or wraps.

    • 1/2 cup organic raw cashews (soaked for at least an hour), drained then rinsed well
    • 1/4 cup water (you may need more)
    • 2-3 chipotles (the canned kind in adobo sauce)
    • 1 teaspoon of apple cider vinegar
    • 1 large clove garlic
    • squeeze or two of fresh lime
    • salt, to taste

    Add all of the ingredients to your blender. Start on a low speed. You may find you need to add more water to get it moving and to reach your desired consistency. Gradually increase the speed of the blender until the desired creaminess is reached. If you add to much water and it’s too thin, just add a couple more cashews. Pour into a jar, cover and place in the fridge. [/print_this]

    Slow-Cooked Black Bean Tacos with Vegan Chipotle Cream {Gluten-free + Vegan}
    [print_this]Assembling Your Tacos – All The Add-Ons
    These are the other ingredients you will need:

    • Slow Cooked Black Beans (above)
    • Pickled Red Onions and Jalapeños (above)
    • Chipotle Cream Sauce (above)
    • 6-8 Corn Tortillas (more if serving more)
    • Organic baby greens, shredded lettuce or cabbage
    • fresh cilantro
    • lime wedges

    Optional:

    • sliced avocado
    • roasted corn
    • pico de gallo, salsa or fresh tomatoes
    • Tapatio or Sriracha or other hot sauce
    • etc

    Assemble. Heat up your corn tortillas. Add the beans, lettuce, pickled onions and jalapeños, cilantro and drizzle the chipotle cream over top. Serve with a fresh lime wedge.[/print_this]

    Slow-Cooked Black Bean Tacos with Vegan Chipotle Cream {Gluten-free + Vegan}

  21. Photo Fun Day Friday

    After some serious down time on the website yesterday (so sorry if you were unable to get the site to load if you came here) and not being able to log in to the back side of my and post anything for the first half of today, I am so happy to be here and happy to be sharing some photos from the last week.

    We have a busy work filled weekend ahead, but then we are taking a couple days off at the start of next week that we are planning to fill with some fun adventures. What do you have planned for this weekend?

    Photo Fun Day Friday
    This house of ours gets incredible light. It shines in every morning so perfectly right as we are waking up.
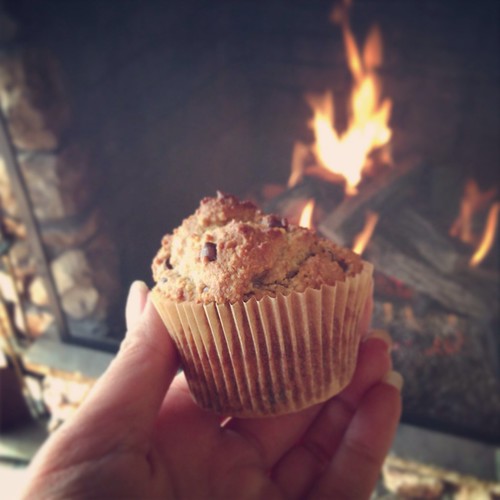
    Photo Fun Day Friday
    Got up early over the weekend so I started a fire and then made some grain-free banana chocolate chip muffins over the weekend using this recipe. Instead of strawberries and basil I added in two mashed ripe bananas (added a bit more almond flour), some cinnamon and some mini dark chocolate chips.
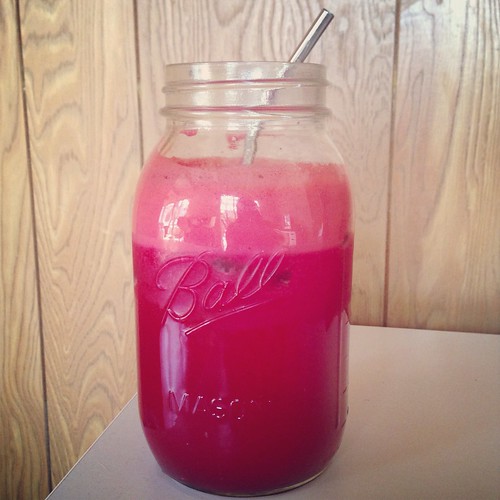
    Photo Fun Day Friday
    How beautiful is this juice? My post run juice Monday morning – orange, beet, carrot, ginger and strawberry. The photo hardly even does it justice.
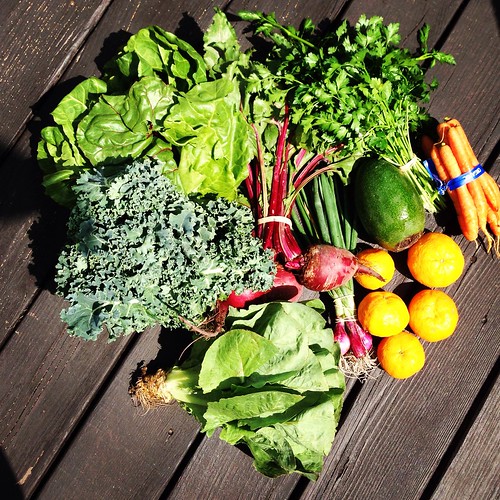
    Photo Fun Day Friday
    I adore this cat.

    Photo Fun Day Friday
    Got our first CSA since moving out here. Until my veggie garden is in full effect, this is the way to go. All this for just $15 and certified organic.

    Photo Fun Day Friday
    I am still totally amazed that this is where I live now. Feels like perpetual vacation.

    Photo Fun Day Friday
    A new donation-based yoga studio opened here in Long Beach, Yogalution Movement and Ayurveda. I’ve been to several of their classes, it’s been great!

    Photo Fun Day Friday
    While obsessively trying to perfect a cookie recipe, I inadvertently didn’t eat or make dinner. So spicy chipotle stove-top popcorn was the answer.

    Photo Fun Day Friday
    I love getting texts from my 3-year old niece, Teagan.

    Photo Fun Day Friday
    In cleaning off some of the photos on my phone, I realized I never shared the two new tattoos I got just before I left Buffalo. First this “Seester” tattoo that both my sister Vicky and I got matching.

    Photo Fun Day Friday
    And of course I needed a little something to represent my hometown! B U F F A L O

    Photo Fun Day Friday
    We went to the opening party last night, for a new business in Santa Ana called Best Wines Online, where our very good friend Patrick is working. Drank wine and spent time with our good friends. Actually got a nice photo of the two of us out of the deal, this was before I splashed red wine on my ivory lace dress. Weee!
DISCLAIMER: This website is written and produced for informational and educational purposes only. Statements within this site have not been approved by the FDA. Content should not be considered a substitute for professional medical expertise. The reader assumes full responsibility for consulting a qualified health professional before starting a new diet or health program. Please seek professional help regarding any health conditions or concerns. The writer(s) and publisher(s) of this site are not responsible for adverse reactions, effects, or consequences resulting from the use of any recipes or suggestions herein or procedures undertaken hereafter.