-
Fig, Vanilla Bean and Cardamom Infused Vodka (Gluten-free, Vegan & Sugar-free)
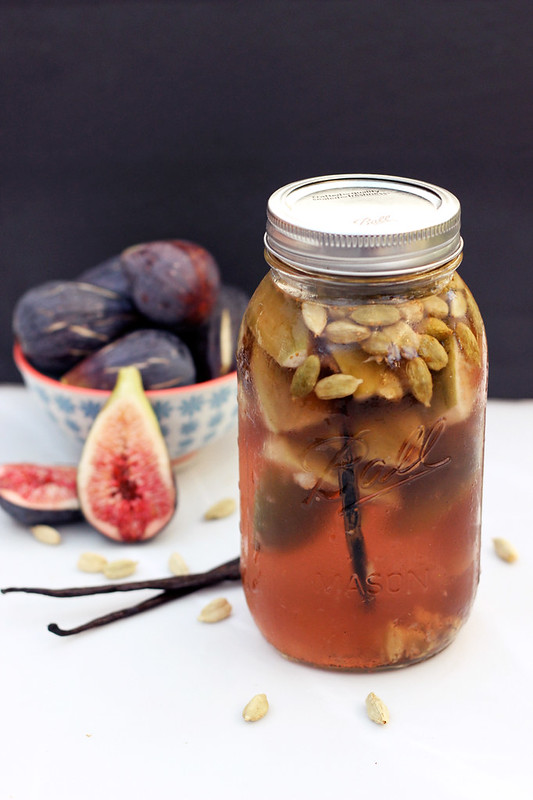
It’s been a while since I have shared a cocktail recipe here on Tasty Yummies. These days I am only really drinking at home when we have people over for dinner or something of that nature, but with this fig tree in our yard, I have been forced to get super creative with all of these figs we are getting.
I even came up with a hashtag #gettingfiggywitit on Instagram, for all my fun fig adventures. Besides all of this yumminess, I have been freezing them for use in smoothies later and I have dehydrated some to also use later and some are getting mailed to my parents. If you can believe it, our tree is still going strong. We are going to have figs for quite some time.
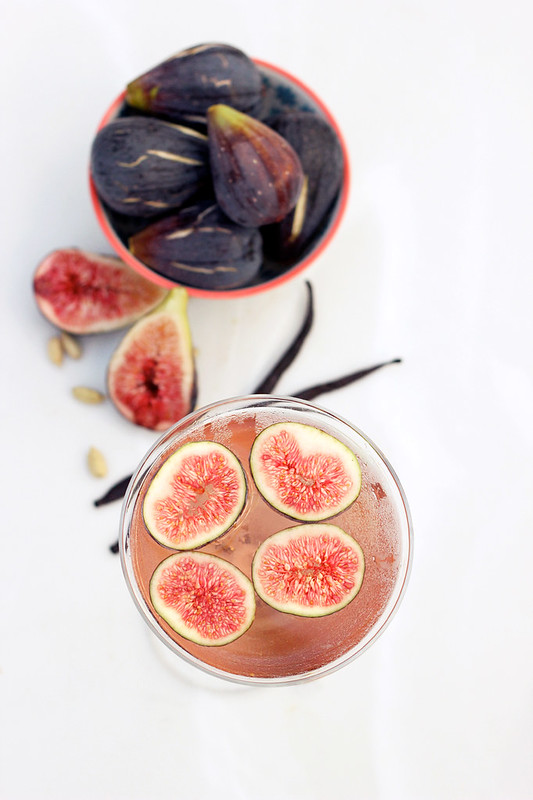
This Fig, Vanilla Bean and Cardamom Infused Vodka is so simple to make, within a week you’ll be making cocktails that will blow your friends away! If you aren’t big on cocktails and the fuss of mixing, this vodka is so good you can enjoy it as is on the rocks or as a simple martini (see the recipe below). Read the rest of this entry »
-
Fig Honey Jam – Gluten-free + Refined Sugar-Free
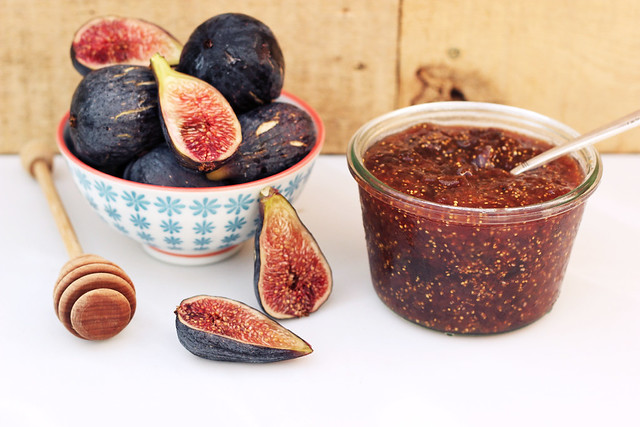
If you follow me on Instagram or Facebook, it is likely that you have seen how figs are overtaking my life right now. Our huge black mission fig tree is producing so much fruit. I love it. I have been getting quite creative with the figs; making pizzas, muffins, cakes, smoothies, adding them to salads and more. Fig season begins as early as June in some areas and it can run as late as October. My tree didn’t really start producing until mid August, but given how much small unripe fruit is on there, I have a feeling that I am going to have figs for quite some time. Yay!
Figs are quite perishable so I have been doing everything I can to use them up as quickly as I can. Stored at room temperature fresh figs keep for about for 1-2 days or 2-3 days in the fridge. Besides what I have been using in recipes, I have been freezing them whole and even dehydrating some so I can enjoy them in the off season, still. Look for lots of fig recipes over the next few weeks, I am loving having so many to play with.
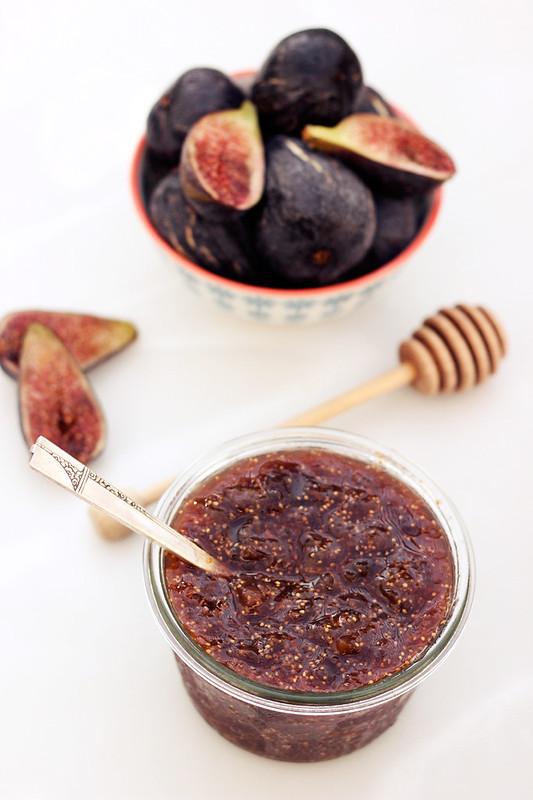
Besides being delicious and so beautiful, figs are a wonderful source of calcium and dietary fiber. Figs have the highest amount of calcium of any fruit. Just 1 cup of figs has as much calcium as a cup of milk. Figs are also a good source of iron, magnesium, potassium, B vitamins, as well as vitamin K. Read the rest of this entry »
-
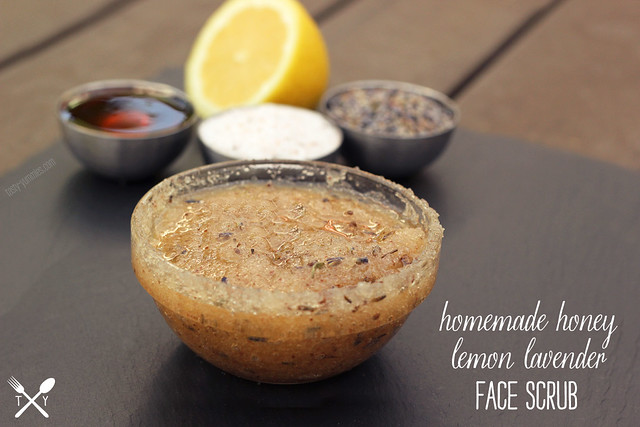
Homemade Honey Lemon Lavender Face Scrub
As I mentioned in my recent post, I have switched to a brand new skin care regimen with Peacock Apothecary that is all natural, handmade to order, all of their products are free of any chemicals and preservatives and locally sourced when possible, etc. Additionally, as part of my routine I am still using my homemade apple cider ginger toner every time I wash and I added in a homemade exfoliant that I use twice a week, at the recommendation of the girls at Peacock Apothecary.
This recipe is something I can put together very quickly and simply. I make up this small batch and keep it in the shower for the week. I have been loving how my skin feels after this gentle scrub, it is smoother than ever and I feel like my skin is as clean as it ever could be. It is super gentle and the scent is so soothing and calming.
Here is my current skin care routine:
Daily in the morning:
Wash with Coconut Milk cleanser from PA,
Tone with homemade apple cider vinegar toner
Moisturize with citrus serum from PADaily in the evening: Wash, toner, serum (same products as above)
Twice a week I use this scrub in the evening (or morning if that works better with my schedule) and at least once a week, more if needed, I make a probiotic mask.
Also, when using my face cleanser, twice a week, in the evening, on opposite days of when I use this face scrub, I use my Clarisonic Mia.
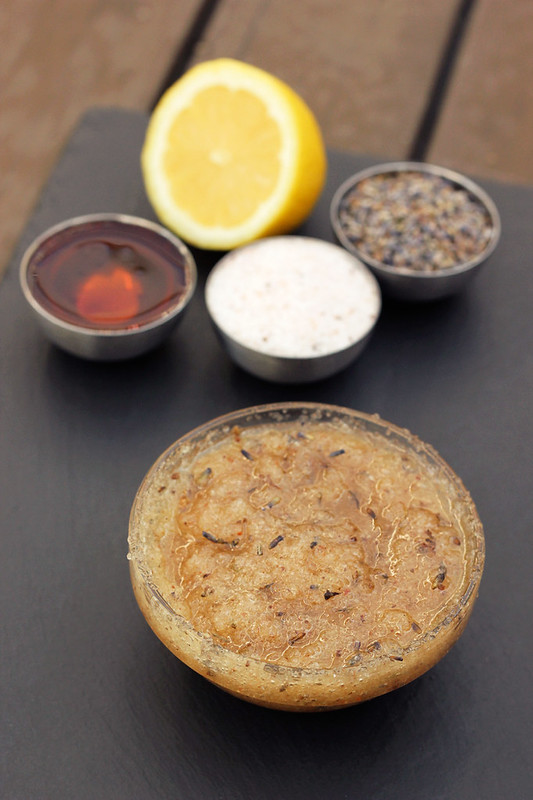
[print_this]Homemade Honey Lemon Lavender Face Scrub
- Juice from 1/2 organic lemon
- 1 tablespoon honey (I used local raw honey, in its liquid state)
- 1/4 cup sea salt (I used pink Himalayan sea salt)
- 2 teaspoons dried lavender
- 15 drops lavender essential oil
Add all of the ingredients to a small bowl, mix well to combine. To use: Mix the ingredients until well blended and massage on a damp face. Rinse well with warm water and finish with a splash of cold. Though the scrub’s nicest when used fresh, you can keep leftovers for up to a week or so.
[/print_this]
-
15 Gluten-Free Breakfast Ideas

As part of my ongoing Restricted Diet Series with Free People, I created a simple list of some of my favorite gluten-free breakfast ideas.
Breakfast seems to be one of the toughest meals for those new to a gluten-free diet. So many people new to the lifestyle contact me to ask my thoughts on the various options, what is available and what is easy. I find breakfast to be quite easy on the contrary, I feel like once you realize all the naturally gluten-free options plus what you can easily recreate yourself, the possibilities are endless!
-
Creamy Chocolate (Avocado) Fudgesicles – Gluten-free, Vegan + Refined Sugar-Free
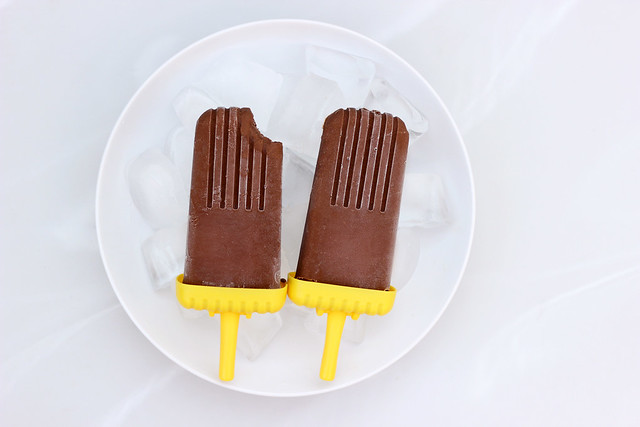
I told you guys I am on a major homemade popsicle kick lately. I have seriously been thinking of popsicle flavors at the most random times. The idea for these came to me when I threw together a quick batch of my avocado chocolate mousse the other day. As I was eating it, I was thinking how simple it was to make and how it could make the perfect rich and creamy fudgesicle. I tweaked the recipe a bit to make it work for freezing and I also decided to use some beautiful organic dates, I got from our farm share this week for sweetening. If you don’t have dates or want to skip them, just add a bit more sweetener to taste. I used a great local raw honey that I had in the pantry, if you wish for these to be vegan you can go with maple syrup, coconut nectar or you could try just using dates, too.
There is one thing I can tell you for sure about this recipe, you will have a really hard time not wanting to just eat ALL of the pudding/popsicle mix as you are filling the molds. It is so sinfully good. Feel free to make less popsicles and eat this as is, as a pudding. It is incredible and it is addicting, you will want to make it all the time.
-
How-to Make Your Own Apple Cider Vinegar Facial Toner
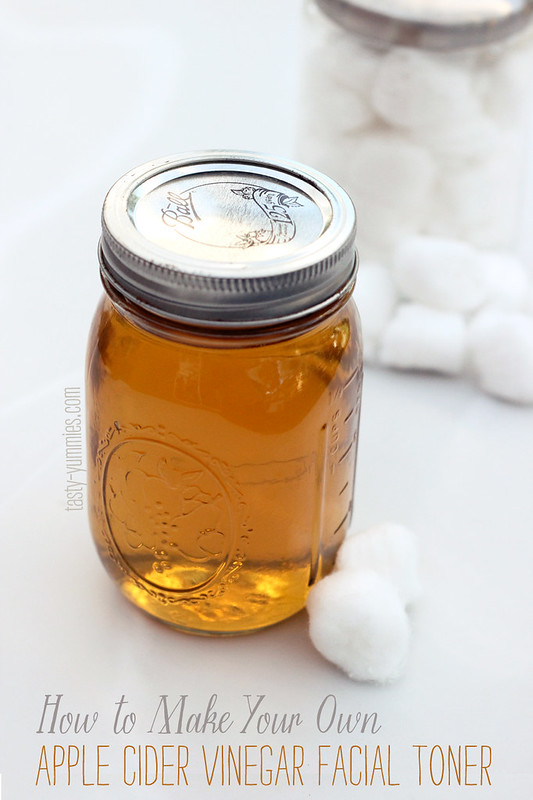
How to Make Your Own Apple Cider Vinegar Facial Toner:I am sure many of you keep apple cider vinegar in your kitchen pantry for a variety of different dishes, vinaigrettes, pickled whatevers and so on. But did you know it is also a great item for keeping in the bathroom medicine cabinet as an amazing all-natural beauty product, too?
For the past two months I have been using a mixture of apple cider vinegar and water as an all natural toner, every single morning and every single evening after I wash my face. I saw a noticeable change and improvement in my skin in just a weeks time. No joke.
This simple concoction can help improve your overall complexion by balancing and restoring your skin’s natural pH. Our skin is naturally acidic but when our levels are in balance our skin will live at the perfect level between oily and dry. When you pH levels are out of balance, that is when you break out, when your pores get clogged, you are too oily or too dry, your skin can be itchy or irritated, and the list goes on and on.
ACV has a pH of 3 and when diluted, the acidity from the toner helps bring your skin’s pH back to its normal levels. By restoring your skin’s balance, this apple cider vinegar toner helps your skin function optimally, warding off bacteria and shedding dead skin cells at the proper rate so your pores do not get clogged and your skin remains healthy.
I have noticed my skin tone has evened out significantly, my skin is softer and I have less dry and itchy red patches, plus less oiliness in my trouble spots. I no longer can see the tiny pores on my nose that seemed to always be there. I have also definitely noticed less everyday “regular” breakouts and a significant decrease in the amount and severity of my hormonal breakouts each month. I have observed that many of my previous breakouts were seemingly due to clogged pores and no matter how much I washed my face, I would still have that problem, this toner has seriously been the answer I was looking for.
-
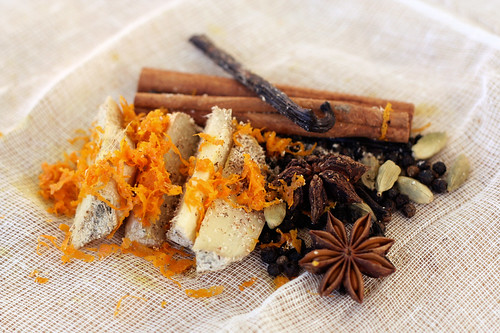
Homemade Chai Concentrate – Gluten-free (Vegan + Sugar-free Options)

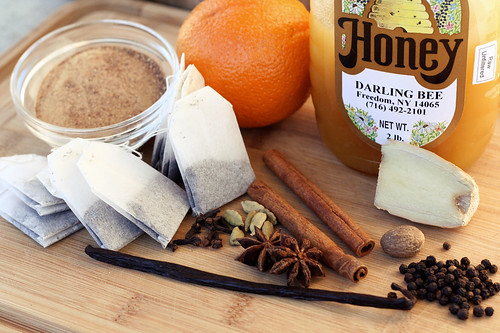
This month for my ongoing monthly series with the Free People blog BLDG25, our theme is giftable recipes. Tasty gifts you can make and give to your loved ones, a holiday party hostess, co-workers, neighbors, etc. What better way to say “Happy Holidays” than with delicious treats, right?
This first recipe is a classic Tasty Yummies recipe, that many of you have likely seen on here before, but it had to be shared again, as it is one of my most popular and it makes a wonderful gift. I myself have made and gifted it to quite a few chai lovers and it was very well received each time.
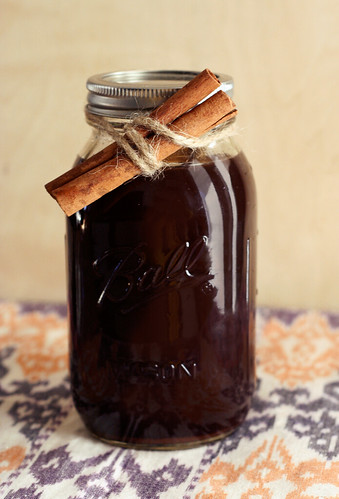
The great thing about this chai concentrate as a gift, is you can either make the finished concentrate and give it in a cute vintage bottle or jar with some cute twine or ribbon and a hand made tag, or if you are worried about giving a refrigerated item, you can out together a cute cheesecloth pouch full of the spices with the tea bags and wrap it all up with twine and print the instructions for the recipient to make their own batch when they are ready.
Head over to the Free People blog to see the full recipe and check back each week through the month of December for other giftable recipes.
-
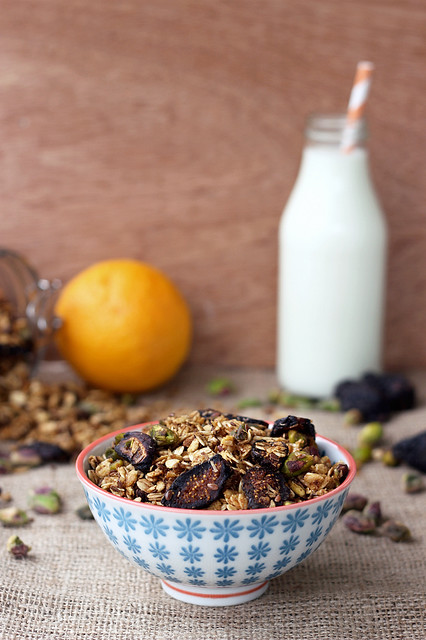
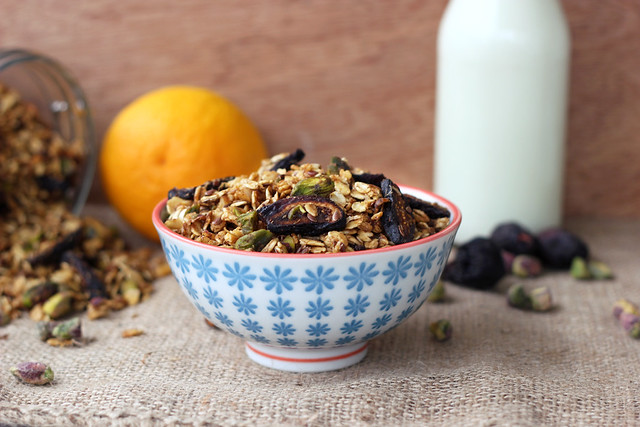
Orange Spice Granola with Black Mission Figs and Pistachios – Gluten-free, Vegan + Refined Sugar-free

This granola was something I quickly created with what I had on hand for our road trip to Chicago a couple of weeks ago. When I shared the photo on Instagram and Facebook, people were asking for the recipe like crazy! So, twist my arm, of course I made it again and this time I actually measured and paid attention to what I added in.
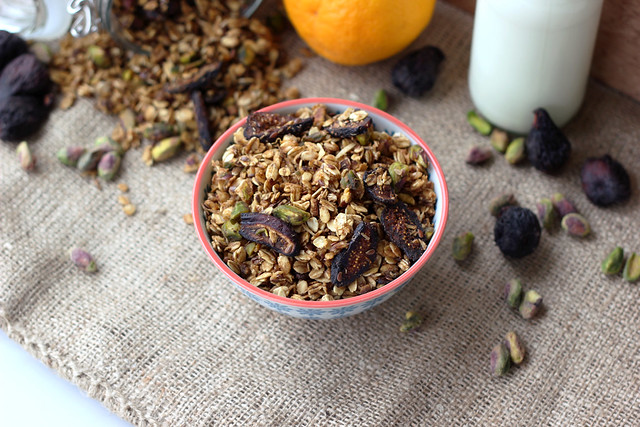
If you are gluten-free and can tolerate (and enjoy) gluten-free oats, you have to make your own granola. It is so simple, so inexpensive and you can always make it just the way you want it. Plus, I really enjoy cleaning up the pantry and making use of all of the random leftover seeds, nuts and dried fruit by just dumping it all into a delicious and creative granola. The bonus is how incredible it makes the house smell, too. Obviously if you aren’t gluten-free, you can just make this with regular rolled oats!
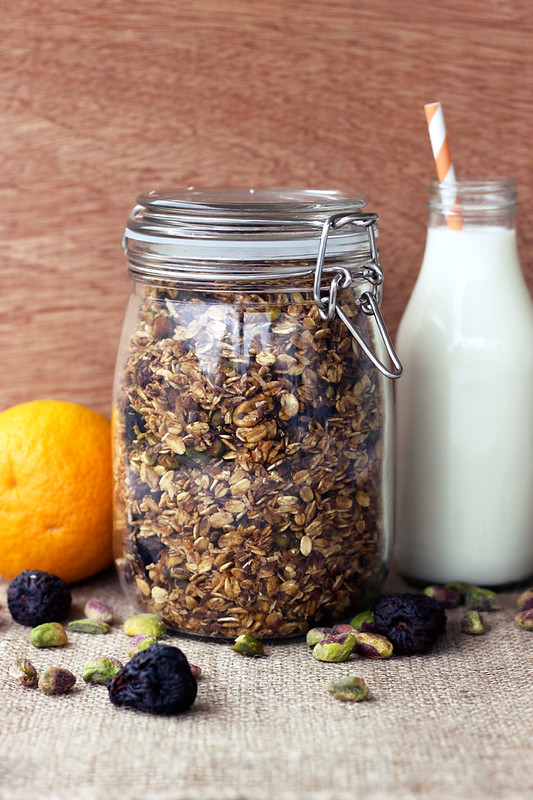
This granola keeps quite well in sealed glass jars or you could also just store it in ziplock bags, etc. It’s great straight-up as cereal with your favorite non-dairy (or dairy) milk with some freshly sliced bananas, sprinkled over ice cream or yogurt, you could also use it as a topping or filling on a baked apple, on top of muffins, etc. Get creative and do yourself a favor and make your own granola ASAP if you never have. You will be obsessed.
[print_this]Orange Spice Granola with Black Mission Figs and Pistachios – Gluten-free, Vegan + Refined Sugar-free
- 4 cups certified gluten-free rolled oats
- 1 cup dried organic Black Mission figs, sliced
- 3/4 cup shelled pistachios (raw or roasted will work)
- 1/2 cup finely shredded unsweetened organic coconut
- 1/4 cup flax seeds
- 1 teaspoon ground cinnamon
- 1/4 teaspoon ground nutmeg
- 1/8 teaspoon ground cloves
- 1 pinch of ground ginger
- Juice from 2 oranges (about 1 cup)
- 1-2 teaspoons orange zest
- 1/4 cup maple syrup (honey or any other liquid sweetener will work, too)
- 1 1/2 teaspoon vanilla extract
- 1 tablespoon blackstrap molasses (optional)
Preheat oven to 300ºF.
Line a large baking sheet with parchment paper. You can also use a roasting pan, which is nice since you can just mix all of the ingredients right in it, without losing things over the edge.Combine all of your dry ingredients: oats, figs, pistachios, flaxseeds and coconut with all of your spices, in a large bowl (or in your roasting pan). Mix well.
In a small bowl stir together all the wet ingredients: orange juice, zest, maple syrup, vanilla and blackstrap molasses.
Pour the wet ingredients over the dry ingredients and stir until well coated. Let sit 5 to 10 minutes.
If you aren’t using a roasting pan, spread the granola from the bowl onto the baking sheet(s) and bake for 30-40 minutes. Toss every 10 minutes or so to provide even toasting.
Let cool completely – it will get crispier as it cools. Keep in airtight container.
[/print_this]
-
Joyful Almond Coconut Chocolate Bites – Vegan + Gluten-free (Refined Sugar-free Option)

This month for my ongoing series with the Free People Blog, BLDG 25, in celebration of Halloween I am sharing a series of healthy sweet treats. I always feel like the sugary stuff haunts me this month with Halloween looming on the calendar, it seems everywhere I turn there is some sweet treat lurking in the darkness.

I really don’t find myself actually craving sweets very often, but boy, this month I do. There are halloween inspired sugary treats everywhere you turn and most all of them are terrible for you, loaded with refined sugars, high fructose corn syrup and other processed junk and fillers.
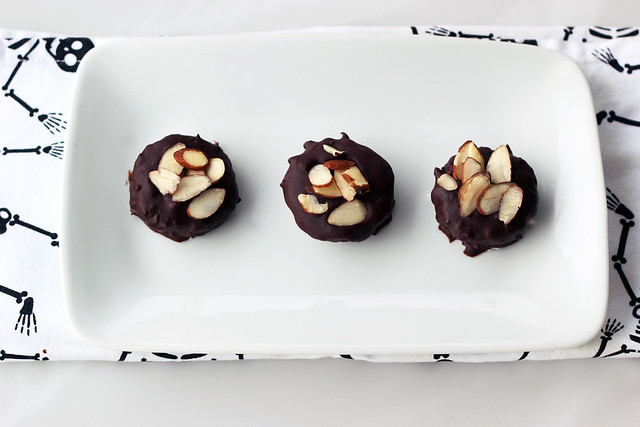
So, why not have your cake and eat it, too? Or candy, or fudge, or whatever! First up in the series, I reimagined a classic candy bar that I have always loved. The combination of coconut, chocolate and almonds is a favorite of mind. It’s a joy to eat, if you catch my drift.
These treats bear a spooky resemblance to the original, but without all the yuckiness that will haunt you later. See, all treats, no tricks! What more can you ask for to kick off Halloween month?
And truly, is there anything better than dark chocolate and coconut together? I think not. A marriage made in heaven!! These Joyful Almond Coconut Chocolate Bites may have been inspired by Almond Joys, but they are so so much better!!


Joyful Almond Coconut Chocolate Bites - Vegan + Gluten-free (Refined Sugar-free Option)
gluten-free, paleo, vegan, dairy-free, egg-free, nut-free option, keto-optionPrint Pin RateServings: 12 treatsIngredients
Coconut Filling:
- 1 ¼ cups unsweetened organic coconut, finely shredded
- ¼ cup melted coconut oil
- 2 tablespoons maple syrup, you could also use honey, a few drops or stevia or liquid monkfruit
- 1 teaspoon vanilla extract
Dark Chocolate Coating*:
- 10 ounces of high quality dark chocolate, 85% dark is my choice*
Optional:
- Plus: approximately 1/3 cup toasted almond slices
Instructions
- Lightly grease a nonstick mini-muffin tin with a little coconut oil and set aside. In a medium-sized mixing bowl, combine all of the coconut filling ingredients and mix together until very well combined. Evenly divide up the filling between the 12 mini-muffin cups, pressing it in very tightly, making sure it is somewhat even. Don’t worry they won’t stick. Place the muffin pan in the freezer make sure it is sitting flat, and freeze until the filling is solid, about 30-45 minutes.
- Take the muffin tin with the frozen coconut mixture out of the freezer, carefully remove each coconut treat out of the pan, running a thin knife around the edge to loosen and pop them out. Place them on a parchment or wax paper lined baking sheet, if you want to place the pan back in the fridge to keep them cool while you melt the chocolate, you can do that.
- Once you are ready to coat the treats with the chocolate you can carefully melt the chocolate using a double boiler setup on the stove top or you can carefully melt it in small increments in the microwave, stirring often. (Definitely use the double boiler if you are making the refined sugar-free version with the bakers chocolate).
- Turn off the heat on the stove and keep the bowl of chocolate over the pan, remove the coconut treats from the fridge. Place one coconut treat on a fork and slowly lower it into the chocolate, spoon additional chocolate over it to fully coat it. Lift the fork out and gently shake to release any of the excess chocolate. Scrape the bottom of the fork along the side of the bowl and place on the lined baking sheet. Sprinkle a few toasted almond slices on top into the chocolate. Repeat until all of the treats are coated in chocolate and have almonds on top. If the chocolate gets too thick, you just turn on the flame and heat slightly to melt it again.
- Put the tray back in the fridge and let them harden for about 45 minutes.
- After these are set, you could store them in the freezer to keep them really cold and totally solid or of course, you can just store them in the fridge or even at room temperature if it isn’t too hot out.
Notes
*NOTE:
You can also use semi-sweet or bittersweet chocolate chips or stevia sweetener dark chocolate or chocolate chips.
Or n place of chocolate chips or dark chocolate, you can instead melt 10 ounces of a good quality 100% unsweetened organic dark chocolate (aka bakers chocolate in bar form) with 1 tablespoon coconut oil in a double broiler and whisking in 1/3 cup maple syrup, honey (or other liquid sweetener of your choice, a few drops of stevia, etc) after it is removed from the heat. You can then add more sweetener to your liking, if needed.This recipe was originally shared on the Free People Blog.
-
Tom Kha Gai (Thai Coconut Soup) Gluten-free + Dairy-free, w/Vegan options

I am really obsessed with Thai food. I actually crave the flavors of Thai food quite often. Honestly, if we could go out for Thai food once a week, I would be totally content. However, we really try to not eat out very often, and I also really prefer to know what exactly is in my food. So, what better way to get what you want, then to just make it yourself. I started looking around at different authentic Thai recipes online and quickly learned to be able to really get the authentic flavors, I would need the proper ingredients. I planned to make Pad Thai and this Tom Kha Gai Soup over the weekend so I had to get all of my ingredients in order to do so. Seeing as a couple of the ingredients I was looking for didn’t exist in my regular circle of grocery shopping, this meant it was time for an adventure. I found there were two different Asian markets on Niagara Street in Downtown Buffalo, conveniently on my way home from yoga, so Saturday morning after my yoga practice, I took my little list and headed over to Niagara Street, feeling very intimidated.
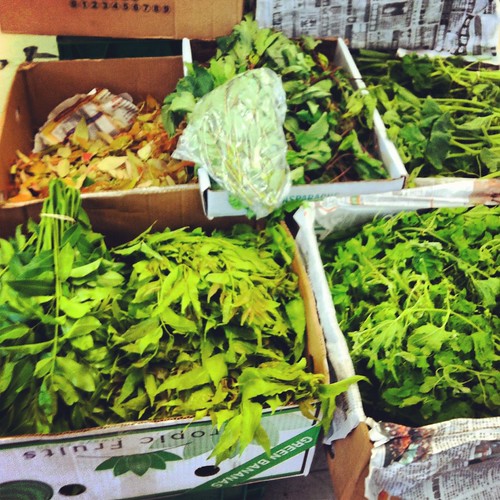

First up, I stopped at A’Chau Oriental Food Market at 833 Niagara St., this is where I was able to grab most of what I needed to make my Pad Thai and Tom Kha Gai Soup, however they were out of fresh kaffir lime leaves. So, after really walking the aisles and grabbing some things not on my list, I headed over to Niagara Asian Market at 937 Niagara Street, where they had fresh kaffir lime leaves and a HUGE basement full of ingredients. In addition to the things I was looking for, I grabbed a few more that caught my eye. I actually picked up a HUGE 4-lb bag of gram flour aka chickpea flour, for just $4.99. I see lots of soccas in my near future! Both markets had so many ingredients I was already familiar with and so many that I had never heard of. They both had unlimited selections of rice noodles, rice flour, tapioca starches, palm sugar etc, available at very inexpensive prices. I could go nuts in those places for sure.
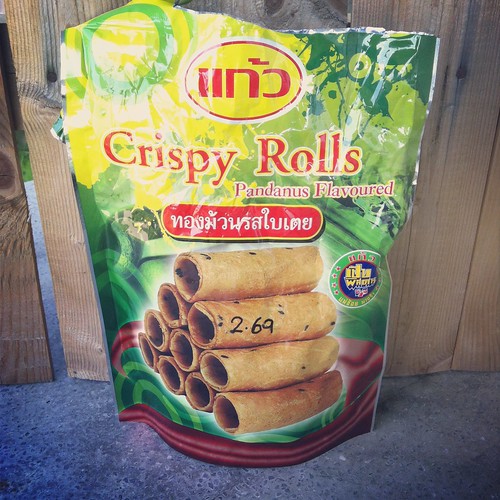
I also grabbed a bag of these Pandanus flavored Crispy Rolls from India, because they caught my eye only having 6 ingredients, coconut milk, tapioca starch, sesame, sugar, salt and pandanus extract. Naturally gluten-free and vegan, what isn’t to like? To be honest, I didn’t (and still don’t) really have a clue what pandanus is, but I didn’t care, I went for it. Some of the best foods and flavors I have discovered that I love are by completely chancing it and trying something totally new. These crispy rolls are super light and crispy, delicious and very satisfying, I love the crunch and the subtle sweetness. Looks like I will be stopping by these Asian markets a lot more than I had planned.
Once I got the few ingredients I couldn’t easily find – specifically the kaffir lime leaves and the galangal root, making this soup was an breeze. I ended up making it for lunch on Sunday! Tom Kah Gai soup has always been one of my favorites. Even when I know I am going to order some type of noodle dish at a Thai restaurant, which is more than enough food, I always feel obligated to order this soup, just because I don’t know when I will have the opportunity again. Now that I know how easy it is to make, I will just make it at home. The flavors in this soup are intense and so wonderful. The bright fresh flavor from the lemongrass is definitely the star of the show, but you get an equal burst of flavor from the keffir lime leaves. It is amazing what a punch those little guys pack! The galangal also brings a pungent flavor very similar to ginger, spicy with a little bit of bite. A little goes a long way with galangal. If you can’t find it easily, ginger will also work great here. Traditionally this soup is made with homemade chicken stock and along with diced or shredded chicken breast. I didn’t have any homemade stock at home so I went with some high quality organic low sodium chicken broth and skipped out on the meat and tofu. I just wanted to enjoy the best part, the delicious broth! To make this soup vegan you could substitute vegetable broth for the chicken and add in tofu or skip it like I did. It won’t be exactly the same flavor profile of traditional Tom Kha Gai soup, but it will still be absolutely delicious.
I am so glad I made the time to make some Thai food at home and explore the Asian markets. Look for my Pad Thai recipe, very soon! I made that Saturday night and both hubby and I were so excited with how it came out that we didn’t take a minute to stop eating so I could take pictures. Mark has already asked me when I will be making it again, so I should have that recipe up soon! Also, if you enjoy Asian foods of any kind (Thai, Chinese, Vietnamese, Japanese, Indian, etc) and you know of an Asian market in your neighborhood, I highly recommend checking it out.
What is your favorite type of Asian food? Do you have a favorite dish? Have you tried making it at home?

[print_this]Tom Kha Gai (Thai Coconut Soup) Gluten-free + Dairy-free, w/Vegan options
serves 44 cups organic free-range low sodium chicken broth (or vegetable broth)
1 15-ounce can full-fat organic coconut milk
1 stalk lemongrass, cut into 1-inch pieces and pounded to really release the flavors
6 kaffir lime leaves
6 thin slices fresh galangal root (or ginger)
1 cup sliced mushrooms
1 small red bell pepper, thinly sliced
1/2 medium red onion, thinly sliced
3 tablespoons fish sauce (or soy sauce)
2 tablespoons fresh lime juice
1/4 teaspoon chili flakes
1 cup firm tofu, diced (optional, you could also add in chicken or shrimp, etc)
1 tomato, diced
1/4 cup thai basil, roughly chopped (optional)
1/4 cup cilantro, roughly choppedBring the chicken broth to a boil in a large saucepan over a medium-high heat, add in the coconut milk, lemongrass, kaffir lime limes, galangal, mushrooms, bell pepper, red onion, fish sauce, lime juice, chili flakes and optional tofu (or meat or shellfish). Simmer for 15 minutes. Add in the diced tomato and stir. Just before serving add in the thai basil and cilantro. Ladle into bowls and serve immediately, topped with additional chopped cilantro, thai basil and maybe some thinly sliced green onions.
[/print_this]
-
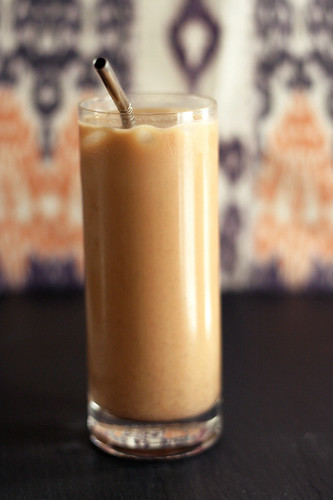
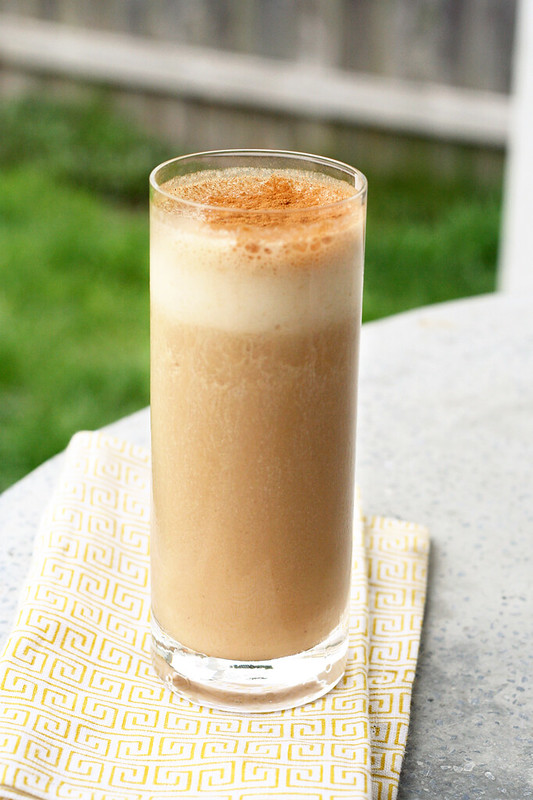
Vanilla Banana Chai Smoothie – Gluten-free + Vegan
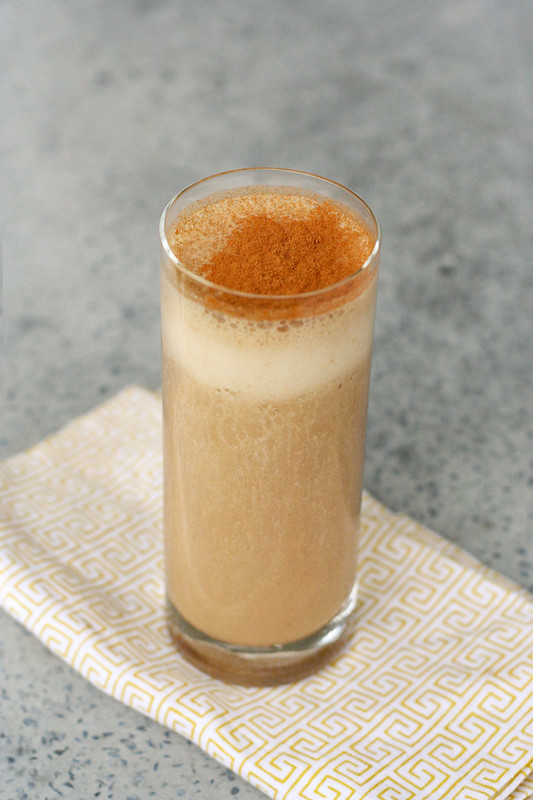
So, this is a short but sweet post. I actually didn’t plan on creating this recipe, it just kinda happened. Hence the single haphazard looking photos! But this was too good not to share. Sunday night I made some homemade raw vanilla almond milk. It had actually been a while since I have made it. I forgot how easy it is and how amazing it tastes. I also made my chai concentrate late last week. When I got home from yoga Monday morning, I was in a bit of a rush to get something into my tummy and to get upstairs to get to work so I thought up the idea of a banana chai smoothie. Once again, like the socca I made last week, I am not sure why I haven’t done this sooner. What a lovely combination of flavors, the rich vanilla flavor, the creaminess from the almond milk and the banana, the subtle nutty flavor and all those delicious spices! YUM!
It has actually been a while since I made almond milk at home. Even though it is super simple, I somehow always talk myself out of it when I am at the store looking at the bulk raw almonds, contemplating it. Somehow it seems easier and quicker to just grab a carton of my favorite organic unsweetened almond milk. Then when I do find the time to make it and take one sip, I remember that it is totally worth it. This time, I also finally made an effort to do something with the leftover almond pulp from making the almond milk. I made some delicious vanilla “sugar” cookies drizzled with chocolate, with just a few additional ingredients besides the almond pulp. Look for that recipe later in the week.
If you don’t have chai concentrate at home, see the note at the bottom of the recipe for a suggested alternative. I think it would work just great.
[print_this]Vanilla Banana Chai Smoothie – Gluten-free + Vegan
serves 1- 1/2 cup chai concentrate*
- 1/2 cup vanilla almond milk
- 1 organic banana
- 1 teaspoon vanilla extract
- 1 handful of ice
- Sweetener of your choice, to taste, if your chai and almond milk aren’t sweetened – a bit of maple syrup or a few drops of liquid stevia would be perfect, you could also add 1 or 2 pitted dates
- 1/8 teaspoon ground cinnamon
- 1/8 teaspoon ground nutmeg
Add everything but the cinnamon and nutmeg to the blender and process until smooth and creamy. Pour into your glass and shake a little cinnamon and nutmeg over top. Serve immediately.
*Note – if you don’t have chai concentrate on hand, you could probably just brew a strong cup of chai using a tea bag. I would suggest just adding about 1/2 cup of boiling water to a mug with your favorite chai tea bag, removing the tea bag after it steeps long enough to be a strong dark cup of tea, then chill it and then add it to the smoothie. Or maybe you are inspired to just go with straight almond milk and add some classic ground chai spices themselves to the smoothie like cinnamon, cardamom, ginger, nutmeg, etc. Play around and let me know if you try any of those either variations.
[/print_this]
-
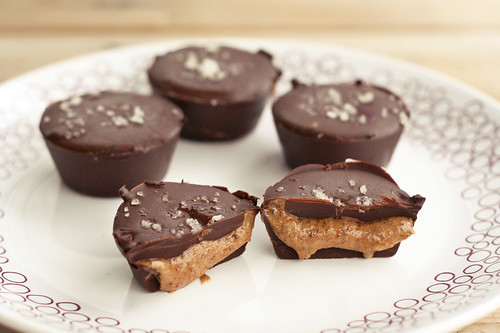
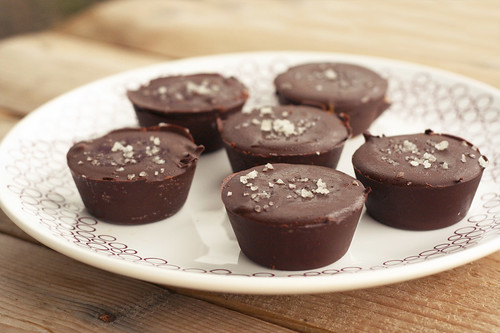
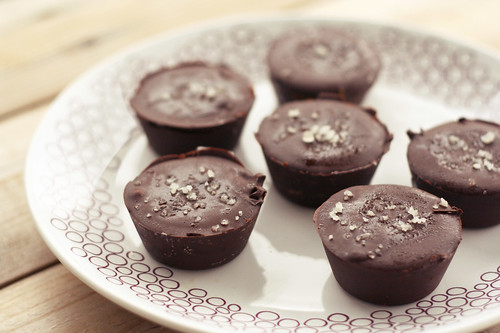
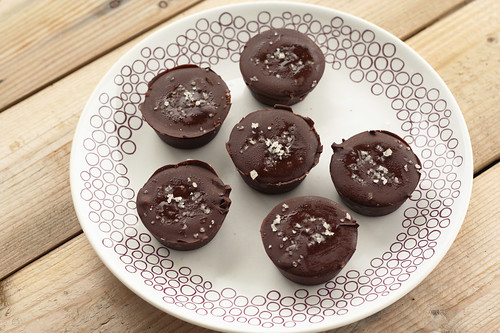
Dark Chocolate, Almond Butter Mini-Cups with Sea Salt – Gluten-free, Vegan + Refined Sugar-free
Ever since I made these dark chocolate coconut treats about a month or so ago, I have been a little obsessed with making simple little chocolate treats at home. On Easter, since we really don’t keep many sweets at home and we didn’t do the Easter basket thing, I was craving chocolate treats and decided to make some dark chocolate peanut butter cups. I didn’t take any photos since they weren’t totally perfect and I also decided I wanted to buy a mini-muffin tin so I could make smaller cups. The full size muffin cups are nice, but it is way more chocolate than what I need. I also thought it would be nice to make them with almond butter instead of peanut butter since I am so obsessed with it. Any nut or seed butter would work here, so play around. You will also see in my notes below that if you don’t wish to sweeten your own dark chocolate, you can simply just melt semi-sweet chocolate chips. I prefer to start with a good quality organic unsweetened dark chocolate something in the range of 70 – 100%, and then sweetened to my own liking since I like my dark chocolate to be subtly sweet. You may find that my measurements are too low and you want more sweetness. Go for it. Or skip sweetening it yourself and buy premade chocolate. Whatever you’d like.


I make these in a non-stick mini-muffin pan, like this one. You could definitely use a candy mold, a full sized muffin tray or maybe even a larger ice-cube tray. If you’d like, you can also line your muffin pan with paper liners. I didn’t happen to have any, so I went without, and very lightly greased my pan with some coconut oil, to be sure they wouldn’t stick. They likely wouldn’t have stuck, but I wanted to be sure of it.
Some of you may be wondering why I included the chia seeds in the almond butter filling or if you could use flax seed meal instead. I decided to include it because besides LOVING chia seeds, I had some leftover ground up chia sees on hand after making these delicious tortilla wraps from The Spunky Coconut, over the weekend. I thought it would help bind together the filling so it wouldn’t be too runny and I also thought it was a nice way to add some of the lovely benefits that chia seeds have to offer. You can read more about all of those lovely benefits here in this post from Lexie’s Kitchen. Feel free to use ground flax seeds instead or to skip it all together. It isn’t a necessity in the recipe.
As far as the sea salt goes, I really adore the flavor combination of dark chocolate with sea salt, so I try to squeeze it into my life whenever humanly possible. It may actually be one of my all time favorite things. If you aren’t a fan of the luscious salty/sweet combo, leave off the salt. You could also press a single almond or some almond slices into each one. Have fun.
What is your favorite flavor combination when it comes to sweets?
[print_this]Dark Chocolate, Almond Butter Mini-Cups with Sea Salt – Gluten-free, Vegan + Refined Sugar-free
makes 12 mini-cupsDark Chocolate Outside:
- 8-9 ounces of dairy-free, dark chocolate – (I used this unsweetened dark chocolate and sweetened it myself, as you can see below. If you use semi-sweet chocolate or chocolate chips you can skip the coconut oil and the sweeteners below.)
(optional if using unsweetened chocolate)
- 1 tablespoon coconut oil
- 3 tablespoons pure maple syrup*
Almond Butter Inside:
- 1/2 cup chilled organic unsalted almond butter (or any other nut butter or seed butter of your choice)
- 1 tablespoon ground chia seeds (you can just grind whole chia seeds in a coffee grinder or Magic Bullet)
- 2 tablespoons pure maple syrup
- a pinch of fine grain sea salt
For Topping:
- 1/2 to 1 teaspoon course grey sea salt (you can also try smoked sea salt)
Using a little coconut oil on some wax paper or a paper towel, very lightly grease a non-stick mini-muffin pan. (the muffin tin may not need to be greased, but since I didn’t use any paper liners, I didn’t want to risk the candies sticking.) You could also use a silicon candy mold. Set the pan aside. Melt the dark chocolate with the coconut oil (or your chocolate chips), either very carefully in a double boiler setup on the stove top or in small increments in the microwave. After the chocolate and coconut oil is melted, whisked together and well combined, remove from the heat (if you melted it on the stove), and add in the maple syrup. Stir well to combine. Give the chocolate topping a little taste to see if you want it any sweeter. Add more syrup, if you wish.
Using about half of the melted chocolate, add a little bit to each cup of your mini-muffin tin. Probably about a teaspoon or so to start. Grabbing either side of the tin, swirl the pan around to start moving the chocolate up the sides of each cup. Try to get it all the way up if you can. You can also use a pastry brush or spoon to push it up the sides, but I find just swirling it around works best. You can also line each cup with a paper mini-muffin liner and just paint the melted chocolate up the sides. Once it is evenly up the sides, you can add a little more chocolate to make sure that the bottom is covered, just don’t add too much, you need to save room for the filling and top.
Place the muffin tin into the freezer to allow the chocolate to set. Meanwhile, start making your filling. Add the almond butter, ground chia seeds, maple syrup and a pinch of sea salt to a small bowl. Mix very well to combine and allow it to sit about 5 to 10 minutes while the chocolate sets up in the freezer.
Once the chocolate has hardened, pull the muffin tin out of the freezer and add about 1 teaspoon of almond butter filling to each cup. Then take the remaining melted chocolate and spread it over top of the almond butter. I find using the back of a spoon is the easiest to give it a nice smooth surface. And if you are adding the sea salt on top, sprinkle a few pieces on top of each cup. Place the muffin tin back into the freezer to allow the chocolate to harden. This will probably only take about 30-minutes, total.
Once hardened, remove the muffin tin from the freezer and carefully pop or slide each chocolate mini-cup from the tin. Should happen very easily. Store these in the fridge or they will get pretty soft and melted.* NOTE about sweeteners: You can use whatever sweetener of your choice and as much as you would like. Traditional sugar will obviously work if that’s your thing, as would honey or other sugar alternatives. Use what you like. Everyone likes their chocolate at different sweetness levels. I prefer mine not too overly sweet. As mentioned above, you could also just melt semi-sweet chocolate chips that are already sweetened and skip adding your own sweetener and coconut oil. Same goes for sweetness in the almond butter filling.
[/print_this]
{this post contains affiliate links}
-
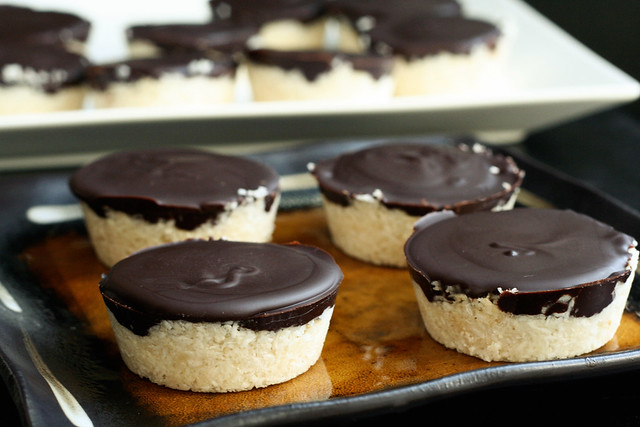
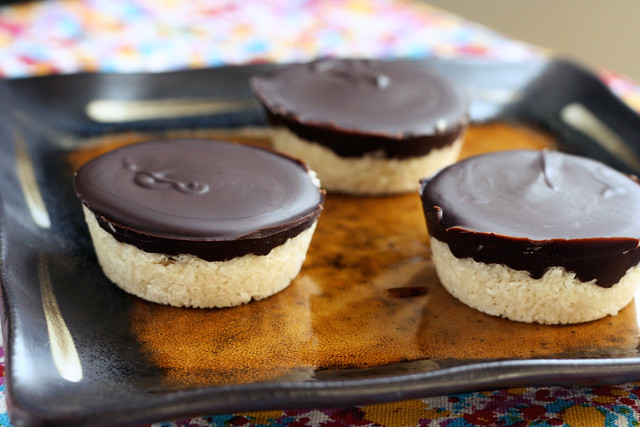
Dark Chocolate Coconut Treats – Vegan, Gluten-free + Refined Sugar-Free
I know I have already mentioned that we are going away at the end of this week for the SXSW Music Festival and Flatstock Rock Poster convention, and that I didn’t know how many recipes I would get up before we go. But I HAD to make time to share this recipe with you guys. I threw this together the other night when I was craving something a little sweet but I wanted something different. I made a small batch as I was almost out of coconut, but I knew I would be making them again VERY soon once I could get more coconut, so I could perfect the recipe and share it with all of you. I do hope to get one more recipe up before I go, then I have a group of lovely bloggers that will be guest posting while I am away. I can’t wait!
I had come across this lovely healthy “Mounds” candy bar inspired treat from Tessa the Domestic Diva and it inspired me to make my own version in the first place. I honestly had forgotten how much I used to love Mounds Bars until I saw her recipe on Kalinda’s weekly Vegetarian, Gluten-free Round Up on Wheat Free Meat Free. The combination of coconut and dark chocolate is perfection and it has always been a favorite of mine, I wish I had started making these sooner.

Like Tessa’s version, I wanted to make a healthy homemade version that wasn’t too sweet and I really wanted to make it with a good quality dark chocolate. I used Dagoba’s Organic Unsweetened Chocolate, which is so delicious, their chocolates are some of my favorites, but you can use whatever your favorite is. And as I mention in the recipe below, if you’d rather just melt some dairy-free semi-sweet chocolate chips to make it even easier, you can do that, too. I just wanted to make these refined sugar free and lightly sweeten it myself. If you taste either the coconut filling or the chocolate topping and find you want it to be sweeter, just add a little more maple syrup or whatever sweetener you are using. You could also add an almond or two at the bottom or top to make it more like an “Almond Joy” instead of a “Mounds Bar”.
I used a regular sized muffin tin to create these little “bars” but you could really use whatever you want, a mini-muffin tin would be really fun, and you’d end up with even more treats. I almost bought one just for this recipe, but hubby told me I am cut off. In his words I “officially have too much kitchen stuff”. Hehe! If you have a candy mold, that would probably also work. This simple dessert treat is so easy to make, it’d be perfect dessert to make and share at a party if you know there will be a vegan or someone with food allergies and everyone else will enjoy it, too.
Even with these not being too crazy sweet, these are wonderfully rich and satisfying, I love that about dark chocolate. You may even want to cut one of these in half and share it and make them last even longer. In an effort to not eat all of these myself, plus with some gentle begging from one of my yoga teachers on Facebook after she saw a photo I put up, I plan to bring some of these to my yoga studio tomorrow morning. This is good, I fear if I keep these around I will eat them up in a day, they are so good.
Something I wanted to mention and almost forgot, I have avoided using maple syrup as a sweetener in recipes for a very long time, since I assumed the maple flavor would be so strong and would over power whatever I was making. I don’t know what gave me that idea, but sometimes the flavor of maple syrup on it’s own or maple flavored foods, can be a bit too much for me. Honestly it is really amazing what a great sweetener it is and you don’t get any of the maple flavor. I am not sure why, but you don’t. Maybe in larger quantities you might, but it is perfect in a recipe like this. Plus, maple syrup has many health benefits, including being known for it’s anti-inflammatory and anti-oxidant properties and being rich in trace minerals manganese and zinc. Of course sugar is still sugar, natural or otherwise, so don’t go consuming syrup or honey or other refined-sugar alternatives in huge quantities, but know that things like honey, maple syrup or coconut nectar are wonderful alternatives and much smarter choices then refined-sugars and synthetic syrups.Thought the bit about the flavor was worth mentioning though, in the event that you, like me, have been avoiding it for that reason.
[print_this]Dark Chocolate Coconut Treats – Vegan, Gluten-free + Refined Sugar-Free
Makes 12 cupsCoconut Filling:
- 2 1/2 cups unsweetened organic coconut, finely shredded
- 1/2 cup melted coconut oil
- 1/4 cup maple syrup (you could use honey, coconut nectar or any other liquid sweetener)
- 1 teaspoon vanilla extract
Chocolate Topping*:
- 6 ounces 100% unsweetened organic dark chocolate (aka bakers chocolate) I used this
- 1 tablespoon coconut oil
- 1/3 cup maple syrup (again any other liquid sweetener would work)
In a large mixing bowl, combine all of the coconut filling ingredients and mix together until well combined. Evenly divide up the filling between the 12 muffin cups, pressing it in very tightly, making sure it is even. Don’t worry they won’t stick. Place the muffin pan in the freezer make sure it is sitting flat, and freeze until hard, about 30 minutes.
While the coconut filling is cooling, melt the dark chocolate with the coconut oil. Either very carefully in a double boiler setup on the stove top or in small increments in the microwave. After the chocolate and coconut oil is melted and whisked together and well combined, remove from the heat (if you melted it on the stove), and add in the maple syrup. Stir well to combine. Give the chocolate topping a little taste to see if you want it any sweeter. Add more syrup, if you wish. Take the muffin tin with the frozen coconut mixture out of the freezer, and divide your chocolate mixture over it, spooning it on top and smoothing the chocolate out to make sure it totally covers the coconut.
Put the muffin tin back into the freezer, and freeze until the chocolate has set, about another 30 minutes or so. To get the treats out of the pan, slide a knife around the outside of the treat and it will very easily pop out.
After these are set, you could store them in the freezer and keep them really cold and solid or just in the fridge. I keep them in the fridge, myself. Just don’t leave them sitting out on the counter as they will get pretty melty.
*NOTE: if you aren’t worried about making this refined sugar free, you could just melt semi-sweet chocolate chips, I was just hoping to avoid the sugar, so I made my own chocolate topping.
[/print_this]
-
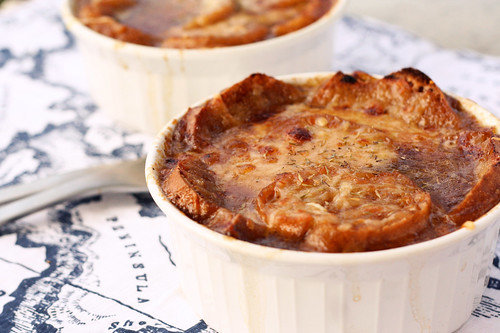
Gluten-Free French Onion Soup
I can admit that writing this recipe and editing the photos on this soup was a bit painful, in more ways than one. I’ll explain why…
For the last two weeks I have been feeling a bit under the weather. No cold or flu showed it’s face but I was just not feeling like myself. In addition to feeling a bit “off”, a few other symptoms arose and I was experiencing sharp and abnormal pains on my right side, near my kidney. It started in the back, then slowly made it’s way to the front to my upper abdomen then found it’s way to my lower right pelvis. I also noticed blood in my urine last Monday.
Being that both of my parents have kidney stones, and I myself was diagnosed with small kidney stones years ago, I decided to make my way to the urologist to rule out any type of infection or the passing of a stone, etc. The stones that I was diagnosed with years ago, were very very small at the time and have caused me no issues at all. Back when I was diagnosed, the doctor explained that it was likely hereditary and with a healthy diet I could keep them that small and probably never have to worry about them. So when I made it to the doctor this time around, they tested for infections and that came up negative but they did say I had a higher than normal level of blood in my urine. I say higher than normal because every time they have ever tested me, I have always had a small amount of blood. They tell me that this is somewhat normal for some people and that it was so microscopic, and normally it wasn’t anything I needed to be concerned with.
At first, based on my symptoms and the blood, they told me I was likely passing a stone or a stone had moved and caused some irritation and inflammation of my kidney, they tried to talk me into a CT scan, which I declined, sent me home with some pain meds and told me to come back in a few days. When I came back everything was about the same, but the pain had traveled to the front almost exclusively and I was now experiencing digestive issues and pain, the pain still very much only on the right side and now very low in my pelvis. I felt bloated, gassy and I was experiencing indigestion, all things I haven’t experienced in years. There have been other not so pleasant side-effects as well, but I will spare you all the details.
So, I began speaking with my good friend, Jane, a chiropractor who very much believes in an all-natural, holistic and homeopathic approach to symptoms, first, then looking at all aspects of your life – like diet, stress, etc. to determine the problem and the causes to the problem. Jane has been a part of my life since I was an infant, she and my mom went to high school together and reconnected after my mom had my older sister and I and was pregnant with my little sister and she was experiencing some health issues. Jane now lives in Colorado, so I explained my symptoms to her through email and she told me to have my Chiropractor here in Buffalo look at my ileocecal valve (which admittedly I had never heard of). I googled it before I even got in to see my chiropractor/yoga teacher Elyssa and many of the symptoms of a grumpy ileocecal valve sounded just like what I was experiencing. The ileocecal valve is situated at the junction of the small intestine (ileum) and the large intestine. Its critical function is to limit the reflux of colonic contents into the ileum.
After a brief examination by Elyssa, she confirmed Jane’s suspicions and I had an explanation – my ileocecal valve was definitely grumpy. The valve is supposed to function on it’s own – opening and closing to release what needs to go to the large intestine from the small, leaving behind what doesn’t need to and shouldn’t go. (You can definitely google and find out even more of the details, I just wanted to keep this brief – a good intro to your ICV can be found here). Our ileocecal valves can get stuck in the open or closed position. Elyssa believes that mine is stuck open. After discussing my diet and trying to determine what may have caused this, Elyssa asked if there had been any major changes in my diet and I told her “no”, I have maintained the same diet that I have for the last nearly 2-years. However, this is when I recalled the cheese that I ate on New Years Eve. I have pretty much completely cut-out dairy milk when I am both baking and cooking, etc and I have cut way way back on cheese. Admittedly and embarrassingly, I consumed a good amount of cheese on New Years Eve with Mark’s family in Kentucky (we were in the South and we did stop at Grandpa’s Cheese Barn in Ohio, afterall). Not really thinking what it could do to my system after not really eating much of it, just thinking about how I rarely eat it anymore and that I would enjoy it just this once. Well the joke is on me. Elyssa explained that because I hadn’t been eating much dairy and more specifically cheese, just eating it this once, it could have just shocked my system, causing my ileocecal valve to freak out!
Now, let me explain to you that I haven’t been to a medical doctor with the exception of a physical in over two years. I have managed to stay fairly healthy minus a cold or stomach bug here and there, which is far better than my health in the past. I am not one to post around on Facebook or Twitter about how I am feeling and complain complain complain instead of taking the necessary actions to improve my health, I try to stay very positive and not dwell since I really think that has an effect on your health and well being. So, the only reason I even chose to share this on here at all – was that first, I thought it to be an interesting diagnosis, one that I never would have imagined. I have always found my digestive tract to be quite sensitive so finding out I have a part of that system, that I didn’t even know existed, not functioning properly, doesn’t really shock me. Secondly, I wanted to explain why you may not see as many posts for the next week or so, or why some of the recipes may be drastically different and toned down. I am definitely going to take it easy with eating, give my system a break and be very mindful of what I consume as I allow my body to heal. In addition to the dairy, I also plan to cut out caffeine, alcohol, sugar and chocolate. I am still not quite sure of everything involved with the ileocecal valve and what has to be done to heal it to make sure it doesn’t happen again. So, I definitely plan to share more with you as I learn more and I will also share the recipes that I am creating as I figure out what to eat to combat this.
The reason that I decided to share this diagnosis with you on this recipe, besides that it was the next recipe that was waiting to be written up, is that the biggest thing that I am removing from my diet, at least for the next few weeks, if not for the long haul, is dairy and more specifically cheese, so you won’t be seeing anything else like this cheesy-topped soup, for a while. I have always seemed to have trouble digesting it, but knowing that it wreaked such havoc on my poor ileocecal valve really has me thinking if I should remove it from my diet altogether. I am definitely not making any rash decisions just yet (gosh, even though I know it’s bad, I really do love cheese), but I do plan to start exploring all of my options and to really investigate all of my diet, once again. I obviously made this soup before we could pinpoint that my troubles were digestion related and I was absolutely craving soup. Had I known that my poor body was pissed at the fact that I consumed so much cheese on NYE – I would have just skipped out on the cheese topping and just had the toast on top. The broth to this French onion soup is soo darn delicious on it’s own, you could honestly enjoy a bowl of this without the melted cheese and be just as content. I promise – I know you think I am crazy, but this soup is that good.
Being that we purchased and shared half of a pasture-raised cow this fall with my parents from Sojourner Farms in Olean, I wanted to use some of the soup bones and beef that we received with our order to make this stock from scratch, I took all the steps to make sure that it was the richest and most flavorful stock I could make. I roasted the bones before I boiled them to make the stock and the results were phenomenal. I have never done this before, but it produced the darkest and most robust beef stock that you could ever imagine. I used this recipe here from Simply Recipes. I enjoyed so many of the different flavors from this soup that I want to attempt it again but next time with a vegetarian or a mushroom stock. I think with the right flavors, possibly roasting the vegetables a bit first and maybe adding in some miso to round out the stock, I could make an equally delicious vegetarian version of this. Stay tuned, I am determined to try it out.
A note – I would have really enjoyed making a French-style gluten free bread for the top of the soup, but I was a bit limited in time, so I bought these beautiful and tasty gluten-free baguettes from Schär. They toasted up absolutely perfectly and retained a nice amount of that crunch even when floating on top of the soup. What a treat to find those at the store. It was a perfect finish to this incredible soup!
[print_this] Gluten-Free French Onion Soup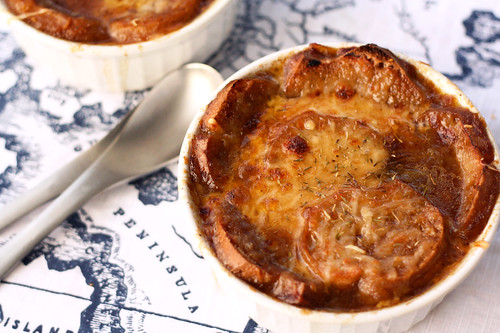
Adapted from Julia Child’s Recipe
Serves 6-85-6 cups yellow onions, thinly sliced (about 1 1/2 to 2 lbs)
1 tablespoon olive oil
2 tablespoons unsalted organic butter (if you wish to skip the butter, you can just add a bit more olive oil)
1/2 teaspoon raw sugar
1 teaspoon kosher salt
3 tablespoons gluten-free all purpose flour (whatever your favorite blend is, I used Bob’s Red Mill)
8 cups (2-quarts) beef stock* (preferably homemade stock made with pasture-raised beef – I used this recipe to make mine with bones from our pasture raised beef from Sojourner Farms in Olean, NY)
1/2 cup wine (dry red or white – I used dry white vermouth since that is what I had and it works wonderfully – do not skip this, it really makes the flavor of the soup)
1 bay leaf
1/4 teaspoon of dried thyme
salt and pepperFor finishing:
12 ounces swiss cheese, grated
4 ounces gruyere cheese, grated
1/2 raw yellow onion
2 -3 tablespoons cognac or brandy (optional – sadly I had neither of these on hand so I skipped it)
8 slices gluten-free French bread (cut about 1 inch thick), toasted until hardPlace heavy bottom stock pot or dutch over a medium-low heat. Add olive oil and butter to the bottom, melt. Add sliced onions and stir until they are evenly coated with the oil and butter. Cover and cook for about 20 minutes until they are very tender and translucent. Remove the cover and add the salt and sugar, mix. Raise the heat to a medium. Continue cooking the onions, stirring frequently, allowing them to caramelize and turn a deep golden brown. They will reduce significantly. This will take about 30 to 40 minutes. Don’t rush this step, you don’t want the onions to burn and the caramelization of the onions is what gives this soup it’s classic flavor.
Once caramelized, reduce heat to medium-low and sprinkle the flour over the onions. Brown the flour for about 2-3 minutes trying not to scorch it. (If the flour does not form a thick paste, you can add a bit more butter here). Stir constantly. Add in the wine, a bay leaf, the thyme and your stock, adding the stock a little bit at a time, scraping the bottom of the pan to get up all of the cooked-on brown bits. Add salt and pepper to taste (don’t add too much salt as the cheese will also add saltiness and you can always add more – you can’t take it away). Continue adding the rest of your stock. Stirring as you add. Simmer for 30 minutes. After simmering for 30 minutes, find the bay leaf and take it out.
You can certainly skip the crusty bread and melted cheese on top, this soup is really THAT good. But if you want to go further and enjoy this soup the way Julia fully intended, then keep reading.
To toast your bread, heat oven to 325º F. Bake the bread in the oven on a cookie sheet for about 15 minutes on each side (30 minutes total) or until golden brown and very hard, being careful not to burn it. Increase the temperature of your oven to 350º F.
To serve – either ladle the soup into individual oven-proof soup bowls or ramekins or one large casserole dish. I personally prefer individual servings. If you are adding raw onions, add that to the soup now and stir. Cover the soup with a single layer of the toasted bread and sprinkle with as much cheese as you’d like, I would say we probably went with about 1/4 cup of total cheese (a blend of the two cheeses). Place the bowls onto a baking sheet and place into a 350º oven for about 20 minutes. Then preheat your broiler and finish the soups under the broiler until the cheese is bubbling and golden brown. Remove from the broiler carefully, let cool for a minute or two and serve immediately.
*mushroom stock would make a great vegetarian substitution
[/print_this] -
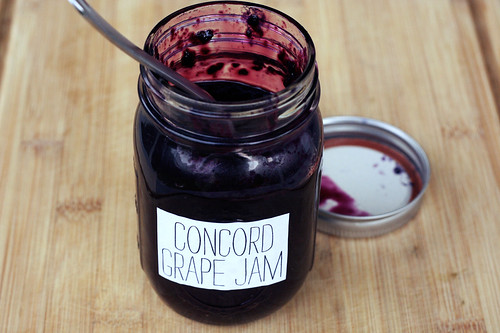
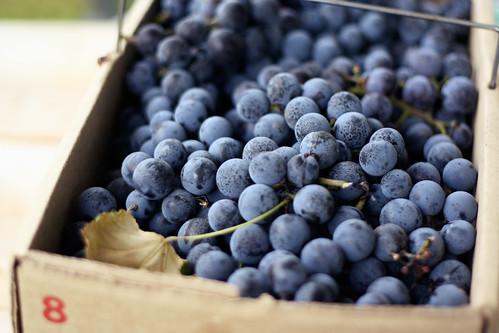
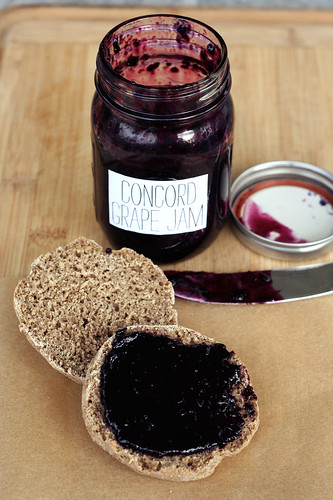
Concord Grape Jam
I got an email a few weeks ago from Farmers & Artisans, an amazing local shop that features produce, dairy and meat from local farms. They were offering 4 and 8 quart baskets of Concord grapes from Blackman Homestead Farm in Lockport. I decided with how much I am in love with my juicer right now, I need to buy the 8 quart basket, so I could experiment with making juice and trying to make jam for the first time. I never buy jam at the store because I hate all the preservatives, but occasionally I will buy a jar from the farmers market. I was a little concerned about the jam making since I had never done it before and I really didn’t have a great way to remove the seeds as I don’t have a food mill. I made jam twice, trying out two different methods to see which would work best. The first way, I added the grapes whole to the food processor, with the sugar and pulsed them a few times to break them down and mash em up. Then I cooked the jam down, allowing it to thicken. Once it seemed like it had cooked down enough and was quite thick, I ran it through a strainer to remove the seeds. The only problem with this method is that not only did it remove the seeds, but it also removed the thick hunks of gooey goodness (the natural pectin) that makes jam what it is. I ended up with more of a Concord Grape sauce or thinner jelly. I tried adding it back to the saucepan to allow it to thicken more, but it just didn’t do it. The jam needed bits of the skins and more of the natural pectin. All was not lost, I have been spooning the first batch of jam over granola and oatmeal, it would also be great drizzled over ice cream or yogurt or in a smoothie.
So, the second time around I decided to separate the skins from the flesh or pulp (and therefore the seeds) of the grapes, one by one. It sounds kinda tedious, and I guess it kinda was, but I didn’t mind, I knew it would be worth it. Then I pulsed the skins with the sugar in the food processor and cooked that down on its own, cooking the pulp down in a second saucepan by itself, mashing every so often to break it down. Once the skins had cooked down quite a bit and really gotten thick and jam-like, I strained the pulp from the other saucepan through the strainer to get as much of the juice and added it to the beautiful skin mixture. It was surprising how easy the whole process was. From what I have read Concord grapes are a slip-skin variety grape so I suppose that is what made that part of the process so much easier than I had anticipated.
You could certainly make a larger batch and go through the hassle of canning and preserving if you wish. I am not versed at all in preserving and honestly am quite intimidated by the whole process. Maybe some day when I have a huge kitchen and tons of storage space I will experiment with it.
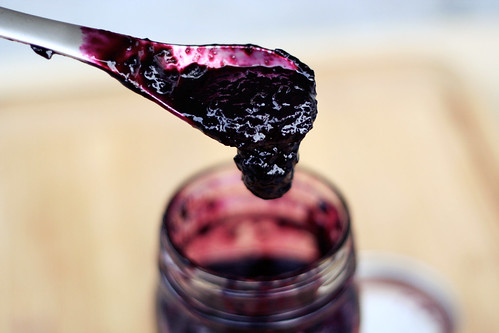
This jam is preservative free and is full of intense grape flavor. It is perfectly sweet and tart. I am sure you could experiment with using honey as a sweetener instead of sugar, I just wanted to go the traditional route for my first time. If I get around to experimenting with honey, I will report back.
Obviously if you have a food mill you can simply process the grapes whole with the sugar, then use your mill to remove the seeds and cook down the mixture in one pan, no need to strain.
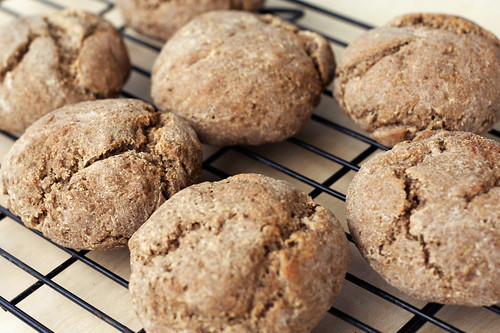
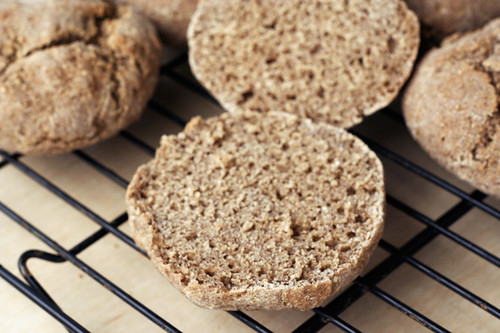
I decided to fully enjoy this jam I needed to make some delicious gluten-free multi-grain rolls. I couldn’t just slop it on any ol’ store-bought bread or roll, it seemed sacrilegious. I used gluten-free girl’s recipe with a few subtle substitutions. I used tapioca starch instead of potato flour and I made my own oat flour since I couldn’t find any that was certified gluten-free. I highly recommend this recipe. These rolls are incredible and I love that the recipe is gum free (no xanthan or guar gum). They are super crusty on the outside and soft and chewy on the inside. These rolls are perfect as is with a little jam, toasted with a veggie burger, etc. The same recipe with make two boules instead of the rolls, if you wish. I thought I was in love with gluten-free girl’s previous bread recipe, but this one blows it out of the water. Try it!
Oh and by the way, I have a very small amount of grapes left – not enough to really do anything major with – so I plan to soak them in vodka to make some tasty Concord grape infused vodka!! Come on, how could it not be good?

Concord Grape Jam
makes about 1 cup
Inspired by Healthy Green Kitchen and a handful of other recipes I came across2 lbs fresh local concord grapes, about 5 1/5 cups or so (if you can find them seedless YAY – I wasn’t that lucky)
2/3 cup organic raw sugar plus 1 tablespoon
juice from 1/2 lemonSeparate the skin from the pulp of each grape, by applying pressure to the grape with your thumb and index finger, shooting the pulp right out. It’s fun and very simple to do.
Process the grape skins with the sugar in your food processor or blender until mostly smooth but still a tad bit chunky. If you want your jam super smooth, process longer. Transfer to a medium saucepan and add the juice of half a lemon. Bring to a boil over medium heat. Watch it carefully and stir often so it doesn’t stick or scorch. Once boiling, reduce the heat and simmer for approximately 25 minutes until it has reduced down and thickened.
Meanwhile in a smaller saucepan cook the grape pulp (insides) and 1 tablespoon of sugar over a medium-high heat, bring to a boil and mash the pulp as it cooks to break the down. Once bowling reduce the heat and allow to simmer as long as your grape skins do. Once the grape skin mixture has thickened, remove the pulp from the heat and strain through a strainer or cheesecloth to remove the seeds. Add the juice that drained out to the grape skin mixture.
Allow the jam to continue cooking another 10 minutes until thick. Taste for sweetness and add more sugar if it isn’t sweet enough for you. This was plenty sweet for me. The jam will continue to thicken as it cools. Trust me. It also thickens a bit more once in the refrigerator, so down cook it down too much.
Allow the jam to cool before pouring it into a well cleaned and tightly sealing jar. This jam will keep in the refrigerator for approximately 1 month.
NOTE: I have to apologize for the lack of process photos with this post, I had intentions of showing step by step photos of the entire process. However, the morning I was making this jam it was very dark and stormy. The lighting in my kitchen was horrible and with the yucky wind and rain, I wasn’t able to tote things out to the back patio as I usually do. If you have any questions regarding the process, please don’t hesitate to ask.
-
Pooch Friendly Ice Cream

This is a little bit different of a post. It is still gluten-free, unprocessed and healthy, but this one isn’t for humans, it’s for our little furry baby, Seri, who turned one yesterday! I decided as a little treat, I had to make her something special to celebrate. In the past I used to bake different goodies for our last dog, Derby, like whole wheat peanut butter treats and one time I even made her a special dog-friendly birthday carrot cake. I decided to do something a little different this time because Seri is on a grain-free diet. Yes, even my dog is gluten-free. Also like me, she doesn’t eat any processed foods. In addition, she eats a fully raw meat diet all of the time. Seri has had some minor itchy-skin/allergy issues in the past, nothing major at all, but enough for us to want to make sure she was eating THE very best. After consulting with a holistic vet and our breeder and some trial and error with different foods and ingredients, we have found the things that work for Seri and those that don’t. We always make sure to avoid anything that could upset her little body, whether it be her daily food, an unnecessary medication or even a little treat. It’s incredible how much unnecessary processed junk is in most dry kibbles and biscuits, even the best brands are loaded with useless fillers and crap that they just don’t need. Just like us, it’s so bad for their health. Dogs are carnivores and they need meat.
Since Seri eats raw bison for breakfast and dinner every day and her treats are usually some other type of dehydrated raw meat, it was really hard to think of something super special for her birthday as a treat. Since I couldn’t really bake any treat from grain, I decided to experiment with ingredients that I knew were safe for her.
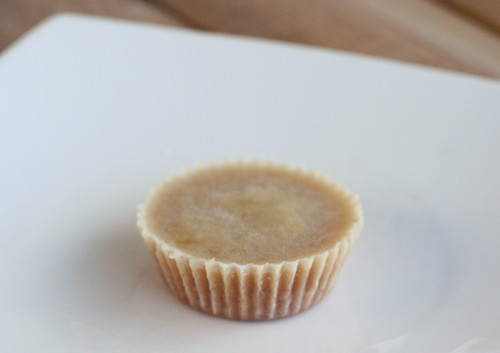
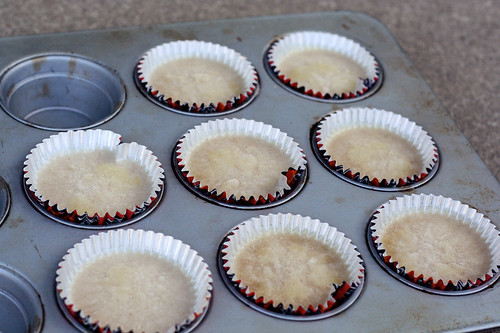
I didn’t want her to get a large portion of whatever special treat I was going to make, so I made small little muffin-cup sized portions, so I could control how much fat she would consume, since we all know what can happen if a dog gets a lot more fat than usual.
Since dog’s are unable to process the lactose in milk, I made the base of the ice cream from almond milk. (If you know your dog has a sensitivity to nuts, or you aren’t sure, you can just go with a simple chicken or beef broth.) I included the coconut oil because in moderation, it is so great for your dog’s health. There have been many studies and countless articles written about the healthy benefits of coconut oil, for both humans and dogs. Additionally, it is great for dogs with allergies and itchy skin. It can also be used topically on any hot spots they may develop. We alternate the coconut oil with salmon oil on Seri’s food each night. If your dog is sensitive to fats, consider skipping the oil or going with a very small amount. Seri goes absolutely nuts for coconut oil, she loves it! That and peanut butter. She rarely gets peanut butter so it was another nice treat for her birthday ice cream.
Seri absolutely loved her birthday ice cream. She couldn’t eat it fast enough! I love now that with having the individual servings, ready in the freezer, whenever I want to give her a little treat, they are ready.
I realize this post may make me seem like a crazy dog person, but in our family, our pets are our life, we would do anything for them and we are willing to make sure they get the very best. I know not everyone is like that, so you may think I am insane. I am pretty ok with that.
Pooch Friendly Ice Cream
makes approximately 8 muffin-sized frozen dog treats2 cups organic unsweetened unflavored almond milk (you can certainly use homemade here, just skip the sugar and vanilla when you make it)
1 tablespoon organic unrefined virgin coconut oil
2 tablespoons organic natural creamy peanut butter
(you could have fun with other dog-safe ingredients like shredded carrots, beef or chicken broth, pieces of their favorite unflavored/unspiced meat, etc)Line a regular sized muffin tin with foil or paper muffin cup liners. Depending on how full you fill them, you can make more or less than this recipe calls for.
Combine all of your ingredients in a large mixing bowl. If the peanut butter was in the refrigerator and is a bit solid, microwave it for about 10-15 seconds to soften it up a bit, to make mixing easier. Using a hand mixer or stand-up mixer, thoroughly combine the three ingredients. Ladle the ice cream mixture into each muffin cup, filling to about 3/4 of the way full. (Again, if you want more, smaller treats, fill them up less or use a mini-muffin tin. If you want less, larger treats, fill them up more.) Place the entire muffin tin in the freezer and allow the mixture to freeze until solid, about 8 hours or so.
When the ice cream treats are frozen solid, you can pop one of out of the tin, peel of the paper muffin cup and give it to your dog. You can remove the remaining treats from the muffin tin and put them in a freezer safe ziplock bag or plastic container.
** Obviously I am not a veterinarian, so please don’t take any of what I am feeding our own dog as a medical advice for your pooch. We just know what works and what doesn’t with Seri. Every dog’s sensitivities are different. If you know your dog cannot have one of these ingredients, go with something else **
-
Homemade Infused Liquor
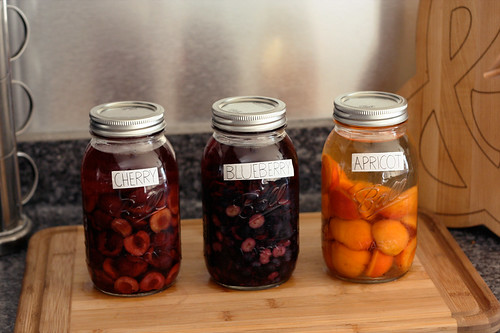
I came across this super easy how-to on the Bon Appétit blog this Spring and I couldn’t wait to start playing around with different flavor combinations. My very first batch was strawberry vodka that I made at the end of June when the strawberries were at their peak ripeness and I couldn’t get over how incredible the flavor was. Since then I have made blueberry, rhubarb, cherry and apricot. In the next week or two I plan to make some cucumber, pepper and basil infused vodkas (separately of course) with the lovely goodies growing my garden. I also want to play around with other liquors like rum and tequila. The sky is really the limit on what you can do.
I have yet to play with other liquors, since vodka tends to be my first pick. Since the vodka itself is fairly tasteless, it can really let the flavor of the ingredient that you are infusing with, shine. Also, FYI, no reason to buy Grey Goose or Ketel one, but don’t buy that cheap crap on the bottom shelf either. I have been buying a nice middle of the road vodka like Svedka or Smirnoff.
I tend to like the fruit infused vodkas with a bit of soda water, a wee bit of simple syrup and a sprig of fresh mint or basil. I keep a jar of homemade raw sugar simple syrup in my fridge at all times which can be made very easily with 1 part sugar to 1 part water, bring sugar and water to a boil in a small saucepan; simmer until the sugar is dissolved, 3 minutes. Remove from the heat and let cool completely.
The strawberry vodka was great with some fresh squeezed lemon juice. Tonight I plan to experiment with an apricot martini of sorts. I cannot wait to make the pepper vodka with the super spicy heirloom Korean peppers growing in our garden, it will be perfect to make delicious homemade bloody marys with. The beet infused vodka that BA suggests is also super intriguing, I think I will have to add that to the list, too.
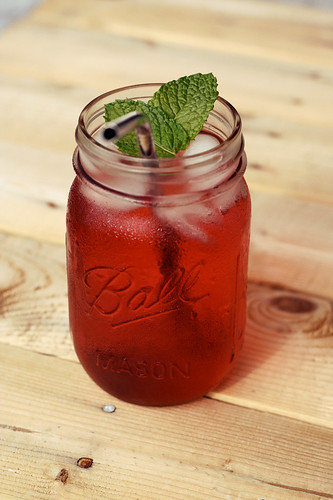
This is a simple cocktail made with my cherry vodka, just a tad bit of my homemade simple syrup, soda water and a fresh sprig of mint. So refreshing!
Step 1: Choose your liquor
Vodka is an obvious choice, but why not use white rum or tequila, brandy or grappa? Don’t go for the really cheap stuff, but don’t splurge either. A middle-of-the-road, neutrally flavored liquor will produce the best infused spirits.Step 2: Choose your produce
Use what’s in season. Go to your local farmers’ market or, better yet, pick berries from your own berry patch, and bring home the most beautiful produce you can find. The super-ripe peach that dribbles juice down your chin is a perfect candidate. Also try raspberries, strawberries, pears, figs, lemons, cherries, blueberries, even beets and chiles, as long as they are ripe, ripe, ripe.Some of Bon Appétit’s favorite fruit-and-spirit combos are:
Apricots + Eau de Vie
Figs + Bourbon
Jalapenos + Tequila
Pineapple + Rum
Beets + VodkaStep 3: Prep your fruit
Wash it well and cut it into pieces. Remove peels and skins plus any part of the fruit that you wouldn’t want to eat: Stems, pits, cores, and seeds should all be tossed into the compost pile. As the liquor infuses, bitter flavors from citrus pith and seeds can leech into the liquor, so you want to avoid that.Step 4: Bottle & Wait
Fill a clean resealable glass jar or bottle with fresh, cleaned fruit. Top off with liquor and screw on the lid. Place in a cool, dark place (like a fridge) until the flavors infuse (anywhere from a week to a month, depending on your taste and the strength of the fruit). Shake the jar every few days. When you’re happy with the flavor of the hooch, strain out fruit* and pour infused spirits into a clean resealable glass jar or bottle; store in the fridge.Step 5: Drink Up
Use your freshly infused spirits in place of plain spirits in your favorite cocktail or serve up on its own as a Martini.One caveat: This process requires a little patience. I generally start one mason jar of infused spirits per week throughout the summer. Depending on the type and ripeness of the fruit, infusions can take 2 to 3 weeks, so plan accordingly if you’re making it for a party (or use a fresh batch as an excuse to party). A pretty jar of rosy strawberry vodka is the perfect hostess gift, and it’s a lot more appealing than neon-green Margarita mix.
* though eating the fruit may be tempting, don’t bother. After the infusing process, the fruit is merely a ghost of its former self. All of the flavor has been sucked out and infused into the liquor so the fruit is left bland, soggy and tasteless.
-
How-to Make Homemade Raw Almond Milk (Vegan)
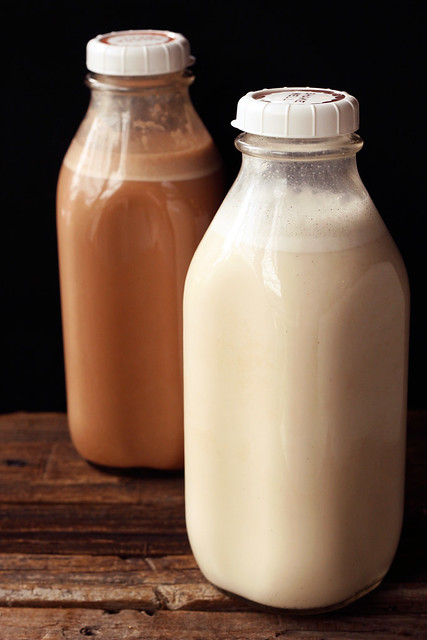
I have been meaning to make homemade almond milk for sometime now. I absolutely love almond milk and tend to buy it often. The thing I really dislike about it (as with most foods from the grocery store) is that a lot of times it has added ingredients that really just don’t seem to need to be in there, even the organic stuff. Though that tends to be the story of most of the food products people buy. It’s all so over-processed and filled with unnatural junk. These are all reasons why I’ve changed my lifestyle and rarely consume store-bought processed foods, I try to make everything I can myself and eat as many fresh foods as possible.
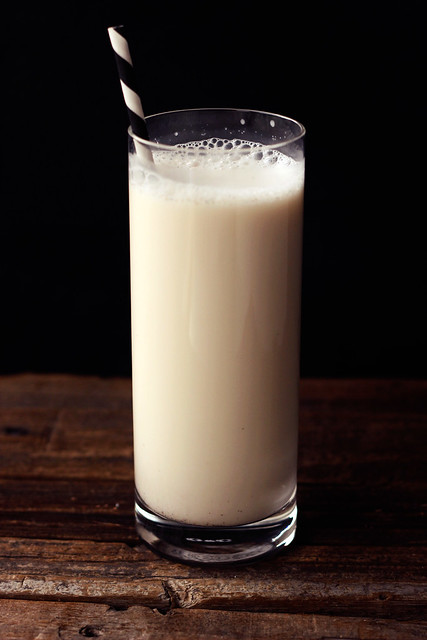
I came across a few really great recipes and finally took the time to experiment and make my own homemade almond milk and now that I have, I will never buy it again. This recipe is simple, fast (besides soaking time) and it requires only a few ingredients. It is creamy, sweet, nutty, rich and full of luscious nutrients, plus it is great for those on dairy-free or raw diets and vegans. It’s great as is, in smoothies, served over your favorite granola or cereal, heated up with chai spices or chocolate, etc.
In addition to all these other great things, it’s also much cheaper than the almond milk you buy at the store and it isn’t loaded with all that scary junk like carrageenan, gums, etc. Bonus if you are into chocolate milk – try adding 1-2 tablespoons of raw cacao powder or unsweetened baking cocoa when blending.

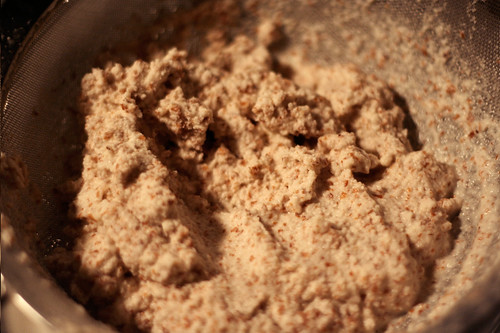
[print_this]How-to Make Homemade Raw Almond Milk
- 1 cup whole raw organic almonds (look for unpasteurized if you can)
- 4-6 cups water (you can use more depending on how light you want it, I used about 5 cups)
- 1 teaspoon vanilla or 1 vanilla bean split open
- 2-4 tablespoons local raw honey* (you could also use maple syrup, dates, stevia or whatever sweetener you prefer)
- A dash of sea salt (I prefer Pink Himalayan Salt)
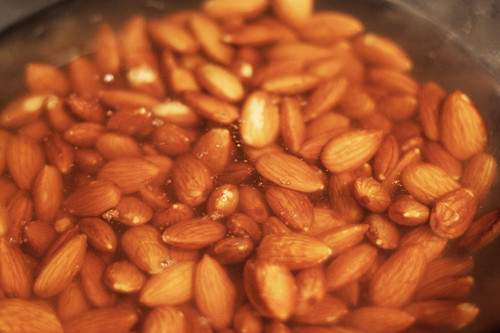
Soak almonds and vanilla bean (if you are using one) for at least 6 hours, preferably overnight.
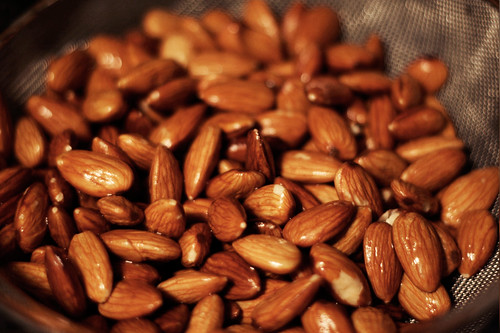
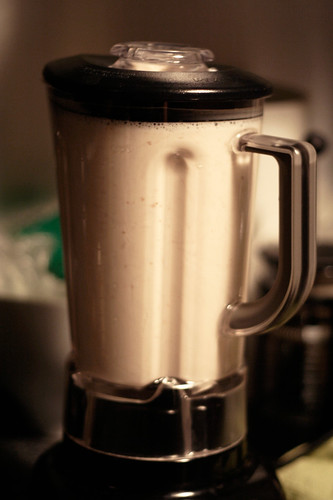
Discard soaking water and rinse almonds and the vanilla bean.Place soaked almonds, the whole soaked vanilla bean chopped up or vanilla extract, honey (or other sweetener), a dash of sea salt and 4-6 cups of water in a blender. Cover and blend on high for 1-2 minutes. It will be milky and have a bit of foam on the top.
Strain milk through a nut bag, doubled up cheesecloth or a fine mesh strainer. You will then be left with almond pulp that can be saved and used for spreads, butter, crackers, cookies, crusts, etc. You can also freeze the almond pulp for later use.
Serve or store in a covered jar or pitcher in the refrigerator, it’ll be good for about 5 days.
Try adding 1 tablespoon of raw cacao powder or unsweetened baking cocoa when blending for delicious chocolate almond milk!!
* You can also leave out the sweetener if you wish to have it be unsweetened
[/print_this]EDIT 9/2013 – I realized I was using far too many almonds than what was needed so I changed the recipe from 2 cups of almonds to 1. Still just as good and way cheaper to make!

-
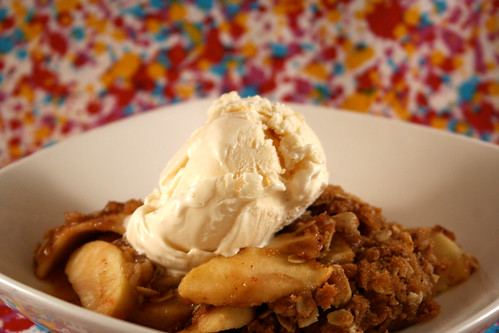
Gluten-Free Apple Crisp
NOTE: I posted an updated version of this recipe – here! The new version is still gluten-free but it is also vegan and refined sugar free!
This is my Mom’s recipe, she is an incredible baker. My Dad does most of the cooking and my mom does all of the baking. Every Fall she whips up a pan of this just for me, with the freshly picked apples from the tree in their yard and it is the best. She made a big pan of it for dessert for the big dinner I made last night. This is what Autumn tastes and smells like! This recipe is super simple, I have made it a couple of times myself, though somehow it is never as good as when my mom makes it.
Gluten-Free Apple Crisp
4 cups of peeled and sliced apples (4 med)
2/3 – 3/4 cup packed brown sugar
1/2 cup gluten-free flour (your favorite all-purpose will work perfectly)
1/2 cup certified gluten-free oats (I like Bob’s Red Mill Gluten Free Rolled Oats)
3/4 tsp ground cinnamon
3/4 tsp ground nutmeg
1/3 cup butter softenedPreheat oven to 375°F.
Grease a square 8″ x 8″ pan. Place apples in pan.
Mix remaining ingredients cutting butter in to make crumbly consistency.
Sprinkle over the apples and bake 30 minutes or until apples are tender and topping is golden brown. Serve warm topped with fresh whip cream or your favorite vanilla ice cream.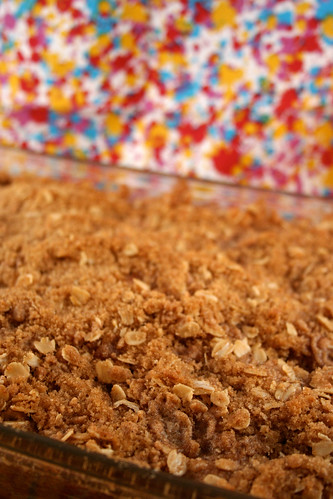
-
Mint Chocolate Chunk Ice Cream
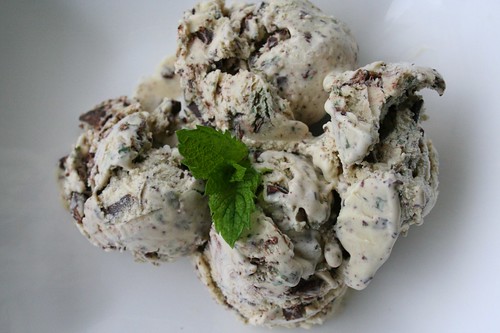
I have never been a huge fan of ice cream, until I tasted fresh homemade ice cream made from scratch with fresh ingredients. It is so insanely delicious and it has so much more flavor than the store-bought stuff. I had been talking about buying the ice cream maker attachment for my Kitchenaid mixer for some time now and finally got around to it last week. I knew before I even bought the attachment what flavor my first batch was gonna be. Mint Chocolate Chunk! We have so much mint growing wild in our yard that I couldn’t wait to snip some off and bring it in to make fresh ice cream. If you can’t get your hands on fresh mint you can use mint extract, but there is no comparing to the fresh mint. So much so that I added chopped fresh mint back in at the end, since I love the little bits of flavor.
Making ice cream from scratch, cooking down and making the custard first definitely is a lot of work, but it is absolutely worth it and is so gratifying in the end. The only thing I wished is that I could have found some place locally to buy fresh milk and cream, instead I bought organic milk and cream from the grocery store. I have searched high and low to find somewhere locally to buy dairy (preferably pasture-fed), but with no results yet, so if you know of a place in the Western New York area, please share.
This ice cream really is to die for. So rich, a small scoop is all you need. I cannot wait to experiment with other flavors.
Mint Chocolate Chunk Ice Cream
yields 1 quart
adapted from Simply Recipes3 cups of fresh mint leaves (not stems), rinsed, drained, packed
extra fresh mint leaves, chopped
1 cup organic whole milk
2 cups organic heavy cream (divided, 1 cup and 1 cup)
2/3 cup organic pure cane sugar
A pinch of salt
6 egg yolks (we prefer brown eggs from local, organic, free-range chickens)
1 teaspoon organic vanilla extract
6 ounces semisweet chocolate or dark chocolate, chopped fine, keep in the freezer until used1. Put the mint leaves in a heavy saucepan with the 1 cup of milk and 1 cup of the cream. Heat until just steaming (do not let boil), remove from heat, cover, and let stand for 30 minutes. Reheat the mixture until steaming, remove from heat and let stand for 15 more minutes.
2.While the mint is infusing in step 1, prepare the remaining cream over an ice bath. Pour the remaining 1 cup of cream into a medium size metal bowl, set in ice water (with lots of ice) over a larger bowl. Set a mesh strainer on top of the bowls. Set aside.
3. Strain the milk cream mixture into a separate bowl, pressing against the mint leaves with a rubber spatula in the sieve to get the most liquid out of them. Return the milk cream mixture to the saucepan. Add sugar and salt to the mixture. Heat until just steaming again, stirring until sugar has dissolved. Remove from heat.
4. Whisk the egg yolks in a medium-sized bowl. Slowly pour the heated milk cream mixture into the egg yolks, whisking constantly so that the egg yolks are tempered by the warm mixture, but not cooked by it. Scrape the warmed egg yolks back into the saucepan.
5. Return the saucepan to the stove, stirring the mixture constantly over medium heat with a wooden spoon, scraping the bottom as you stir, until the mixture thickens and coats the spoon so that you can run your finger across the coating and have the coating not run. This can take about 10 minutes.
6. Pour the custard through the strainer (from step 2) and stir into the cold cream to stop the cooking, add 1 teaspoon of vanilla.
7. Chill the mixture thoroughly in the refrigerator (at least a couple of hours) or stir the mixture in the bowl placed over the ice bath until thoroughly chilled (20 minutes or so). Freeze the mixture in your ice cream maker according to the manufacturer’s instructions.
8. Once the ice cream has been made in the ice cream maker it should be pretty soft. Gently fold in the finely chopped chocolate and chopped fresh mint. Put in an airtight container and place in the freezer for at least an hour, preferably several hours. If it has been frozen for more than a day, you may need to let it sit at room temperature for a few minutes to soften it before serving.