Posts by Beth @ Tasty Yummies

  1. Crock-Pot Stuffed Tomatoes and Peppers – Gluten-free + Dairy-free (w/ Oven Option)

    Crock-Pot Stuffed Tomatoes and Peppers - Gluten-free + Dairy-free (w/ Oven Option)

    This is my version of a dish my parents have been making for as long as I can recall. They always serve it with a big Greek salad on the side as well as kalamata olives and some cut up feta cheese. So good! They bake them in the oven which I really like, but when I made these a week or two ago in the oven with black rice in the stuffing, I of course didn’t account for how long they would take to cook, I am not always the best at that type of longer term dinner planning. I didn’t get them into the oven until nearly 7:30pm, OOPS! We definitely didn’t eat dinner until 9:30pm that night, which I am not necessarily a fan of.

    Crock-Pot Stuffed Tomatoes and Peppers - Gluten-free + Dairy-free (w/ Oven Option)

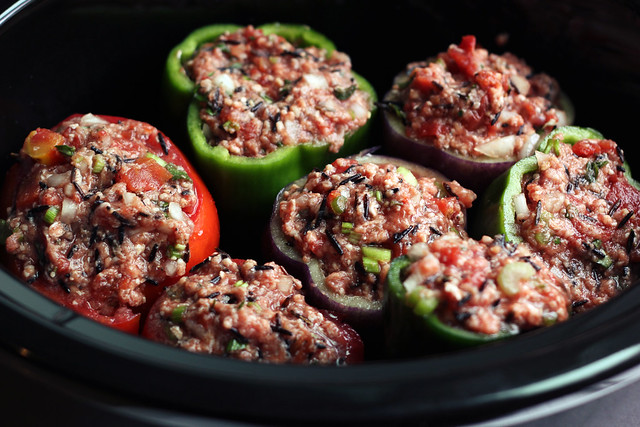
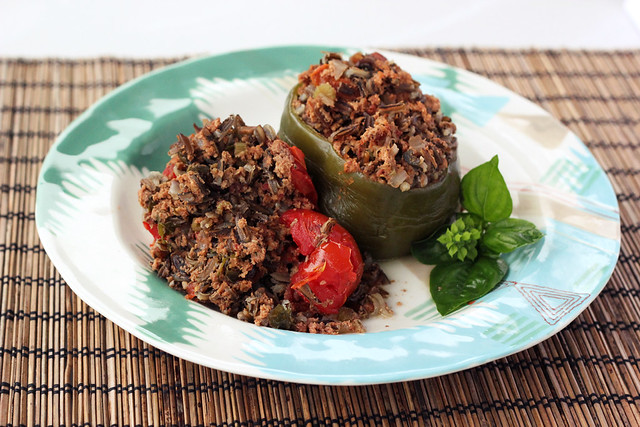
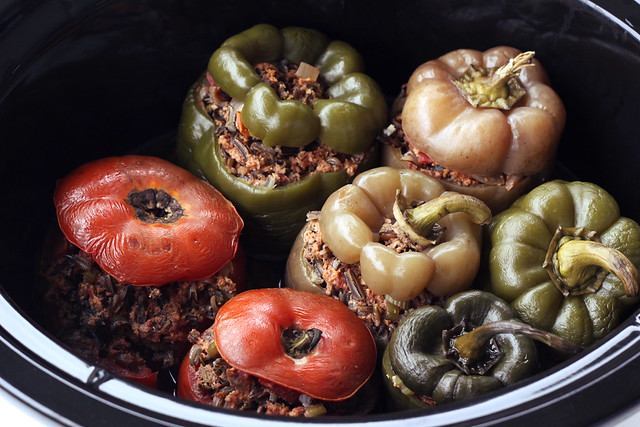
    After that dinner, we got even more peppers and tomatoes the following Saturday in our CSA from Porter Farms, including more of the beautiful purple bell peppers, which are just beautiful. I thought I would try making these again since they are such a great use for the veggies, but this time in the Crock Pot, so they can just cook away all day and be hot and ready for us when we were ready for them. It turned out perfect, the peppers and tomatoes were nicely roasted and tender, but not too soft, the stuffing had a delicious taste and the wild rice had a sweet and nutty bite to it.

    Crock-Pot Stuffed Tomatoes and Peppers - Gluten-free + Dairy-free (w/ Oven Option)

    The thing I like a little bit better about making these in the oven versus the Crock Pot is if you take the foil off for a little bit, you can get a little crispiness to some of the stuffing, but other than that, the Crock Pot version is just as delicious. If you are making this in the oven and you have a bit more room, I also enjoying filling zucchini and eggplant with this stuffing.

    Sadly these are so much more beautiful when they go into the Crock Pot versus when they come out, but I promise what the veggies lack in color, they make up for in taste.

    Crock-Pot Stuffed Tomatoes and Peppers - Gluten-free + Dairy-free (w/ Oven Option)

    [print_this]Crock-Pot Stuffed Tomatoes and Peppers – Gluten-free + Dairy-free
    Serves 4

    • 1 lb raw local pasture-raised ground beef
    • 1/2 cup uncooked wild rice (you can also use brown or white rice, black rice is also quite delicious)
    • 1 28-ounce can of organic diced tomatoes
    • 1 small onion, diced
    • 2 cloves garlic, minced
    • 2 stalks celery, diced
    • 1/4 cup fresh herbs, chopped – I used basil and oregano
    • 1 teaspoon sea salt
    • 1/2 teaspoon freshly ground black pepper
    • 1/4 – 1/3 cup water
    • 6-9 tomatoes and peppers (I only had room for 7 veggies total in my crockpot but I could have filled 1 or 2 more with stuffing)

    In a large bowl, mix all of the stuffing ingredients together (except for the water and the peppers). You can really get your hands in there if you wanna make sure it is well mixed.

    Cut off the tops of the tomatoes and peppers and set aside. Take out the seeds and ribs on the peppers. For the tomatoes, scoop out some of the inside flesh you can add it to the stuffing or put it aside for use in something else. Wash and clean out the peppers and tomatoes, give them a quick dry.
    Stuff each pepper and tomato with a good amount of the ground beef and wild rice mixture
    Nestle the peppers and tomatoes into your crock and put the l tops back on. Pour in water around the bases of the peppers and tomatoes, you want just enough to cover the bottom of the crock pot.

    Cook on low for about 6-8 hours.

    Depending on how tightly you have them packed in there, you’ll need to be a little careful when removing the veggies from your Crock Pot, you don’t want them to bust open and ruin your pretty presentation (like my tomato decided to do). They are definitely tender, the tomatoes especially. Salt and pepper to taste, if need be when serving.

    Oven Option – Preheat the oven to 400º F. Prepare the peppers and tomatoes the exact same way. Add them to a glass baking pan, with just a drizzle of water at their bases. Cover with foil and bake for approximately 2 hours until the rice is fully cooked. [/print_this]

  2. Seri is Two + Grain-Free Dog Treats

    Seri is Two - Grain-free Dog Treats

    Seri is Two - Grain-free Dog Treats

    Seri is Two - Grain-free Dog Treats

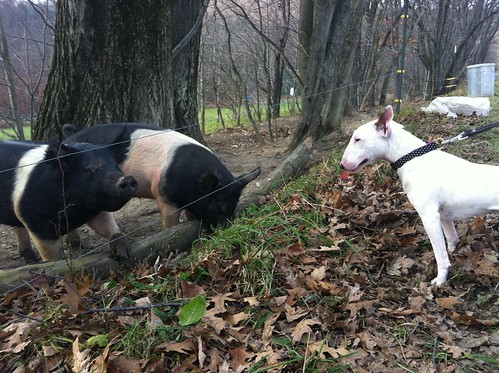
    If you have ever spent more than 5 minutes with me in person or follow me on Instagram, you will know that I am obsessed with my dog, Seri. She is a very, very special girl and I just love her to pieces. I feel so lucky that we found each other.

    Seri is Two!

    Seri is Two!

    Seri came into our lives nearly two years ago at a time that I never thought I would be getting a new dog. It was much sooner than either one of us imagined that we would be doing the puppy thing again! Sadly, our dog Derby had passed away a few months prior, very, very suddenly and unexpectedly at just 6 years old. We were obviously devastated, heartbroken and just plain sick over it. Considering neither of us had the opportunity to even think about another dog, what we wanted to do and when, etc and neither of us had been without a dog in over 15 years, we were totally lost. We didn’t know what to do. Should we rush back into being dog parents again or wait until we had time to really deal with our loss. When would the right time be? How would we know?

    Seri is Two!

    Seri is Two!

    After just 3 weeks of being without a dog and hating the strange quiet of a dog-free household, we knew we were ready to start thinking about the next special furry baby. We spoke with a wonderful woman named Vanessa who breeds beautiful miniature bull terriers with more care than I could have ever imagined possible. Chatting with Vanessa about possibly making one of her dogs a part of your family is far more rigorous than I would have guessed it to be and it made me realize that she takes what she does very seriously and she loves all of her babies, so much. I have such an appreciation for what Vanessa does, she knows that breeding a dog is a privilege not to be taken advantage of and she takes great care to make sure that she upholds the breed’s standards and is doing right by all of the dogs that are a part of her life. We ended up speaking back and forth with her about our loss at great length, we shared with her the emptiness we were feeling and wanting to bring another puppy into our home to love and spoil. We even sent photos and videos of Derby.

    Seri is Two!

    Seri is Two!

    Seri is Two!

    Ironically, Vanessa found out that one of her dogs was pregnant on the very day that Derby passed away. It felt like fate. We patiently waited for the litter to be born to find out if we would be getting a pup and we soon found out that we were in fact getting a sweet little white baby with the tiniest little spot on her bum! We thought long and hard about a name and ultimately decided on Seri (inspired by the word Serigraphy – another word for screen printing). We picked Seri up the day before my birthday and she was so tiny and sweet. We of course fell in love with her instantly. Even still, having lost a dog just 4 months prior it was a scary thing to already have another. I honestly was afraid that I would never bond with her the way I did with Derby. How could I ever love her as much and I definitely didn’t want her to take Derby’s place. I will be honest when I tell you this, as much as I loved her at first sight, I also slightly resented her. I felt like as much as I wanted her and needed her, I also just wish I still had my Derby. Such a weird thing to feel and now it makes me laugh to think about it. I honestly thought we would never love her the same way. I realized that I was right, I don’t love her the same way, I love her in a totally unique and special way, because she is so special and different and the amazing relationship and bond that I have formed with her, is nothing like the one I had with Derby.

    Seri is Two!

    Seri is Two!

    Seri is a very independent dog and for all of the amazing cuddle sessions that we have, she also loves to be on her own, either in one of her crates or wrapped up in a pile of blankets in our bed. She is a very smart dog that learns routines and actions quick. It doesn’t take long for her to pick up on a pattern. Oh and Seri has a serious, serious love for playing ball. If that dog sees a ball she goes nuts. No matter how tired she is or where we are, if we pull out one of her balls, she is ready for it. Seri has this ability to make everyone around her smile and she walks with this bounce in her step that makes me happy every time I see it.

    Seri is Two!

    Seri is Two!

    Seri is Two!

    If you can believe the irony in this, Seri is also on a gluten-free diet. Just a month or two into having her, even with the most expensive organic dry food money could buy, Seri just seemed to have issues with grains. She would be a bit itchy. Vanessa feeds all of her dogs a raw meat diet and takes their food and eating very serious. After speaking with her and a holistic veterinarian we decided to make the switch to a grain-free all raw meat diet. Seri’s skin, coat and all around health immediately responded to the diet and we have never gone back since. When we do give Seri treats she gets dehydrated raw meat or something of the like. Sometimes we will buy treats with coconut oil, peanut butter, fruits and veggies, etc. That dog loves pretty much anything. I decided to combine some of her favorite things and create this treat recipe for her 2nd birthday today.

    Seri is Two!

    Seri is Two!

    I pulled the recipe together as I went along and I was mostly happy with it. The dough was a tad crumbly so the finished treats don’t look perfect, but one of the best things about a dog is their unconditional love and their lack of judgment. Seri is OK with how this look and even more OK with how they taste. Pretty much the best dinner guest, if you ask me. If I had eggs in the house, I probably would have added 1 to this recipe, to help bind the dough, but I realized just as I was making these, that I actually didn’t have any eggs, so I just went without and made it work. Feel free to add whatever your dogs favorites are to the recipe. Seri loves carrots so I just grated up 1 carrot to add in, she also loves kale and cucumbers. A lot of the time if I am making fresh juice, as long as she can have everything in there, I will scrape some of the pulp into her bowl, she loves it.

    Seri is Two!


    Happy Birthday to my sweet and lovely furry baby, Seri!!

    She makes me so so happy every single day and I cannot imagine my life without her!

    Seri is Two - Grain-free Dog Treats

    Seri is Two - Grain-free Dog Treats

    Seri is Two - Grain-free Dog Treats

    Seri is Two - Grain-free Dog Treats


    [print_this]Grain-Free Dog Treats – Gluten-free, Grain-free, Dairy-free, Sugar-free
    Makes about 2 dozen or so, depending on the size

    • 1 cup potato starch, plus a little more for rolling
    • 1 cup almond flour
    • 1 teaspoon baking powder
    • dash of salt
    • 1/4 cup melted coconut oil
    • 1/4 cup natural peanut butter (chunky or creamy)
    • 1/4 cup low-sodium beef stock (you can also use veggie stock or water)
    • 1/4 cup shredded carrots

    Preheat the oven to 350º F and line a rimmed baking sheet with parchment paper. In a large bowl whisk together the potato starch almond flour, baking powder and salt.

    In a medium sized bowl, whisk together the melted coconut oil, peanut butter, stock and carrots. Add the wet ingredients to the dry and stir well to combine. Feel the dough, if it feels like it is too crumbly and needs more moisture, add more broth, if it feels to wet, add more potato starch. Form the dough into a disk and wrap in plastic wrap and place in the freezer for about 15 minutes or so, to chill it.

    Sprinkled your surface and rolling pin with potato starch, and roll out the dough. I did mine in two or three batches. Using whatever cookie cutter you would like cut out the cookies and place on the parchment paper lined baking sheet. Place in the oven and bake until lightly browned and slightly crisp, about 20-25 minutes. Allow to cool.

    I made a bunch of different sized treats for Seri, and I also made one big one to make her a “cake” with, I just iced it with a thin layer of chunky peanut butter and layered it. She loved it. She also  loved the taste of the uncooked dough, too, so she may have eaten some of that while I was rolling out cookies 🙂 [/print_this]

  3. Cantaloupe Mocktini/Martini – Gluten-free, Vegan + Refined Sugar-free

    Cantaloupe Mocktini/Martini

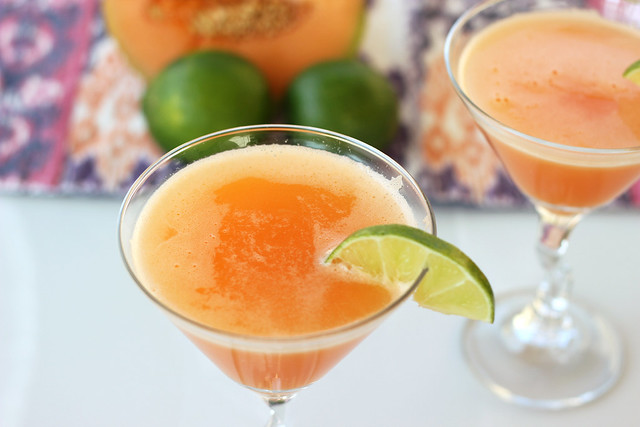
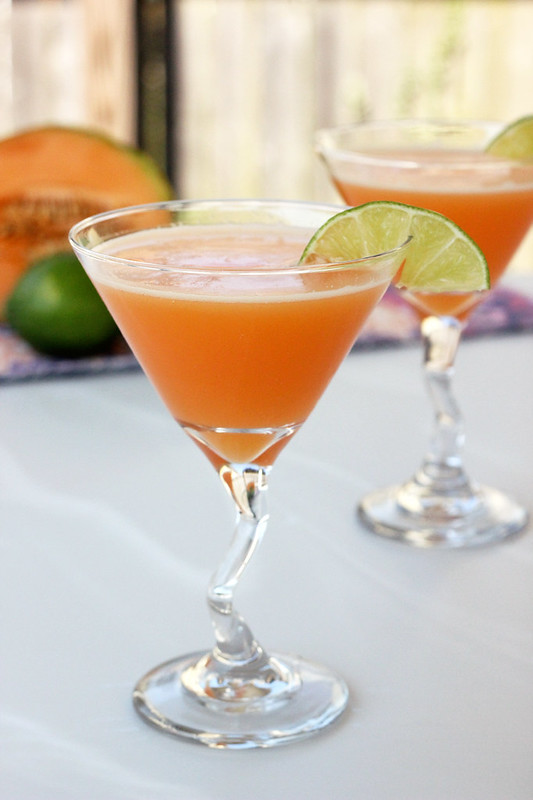
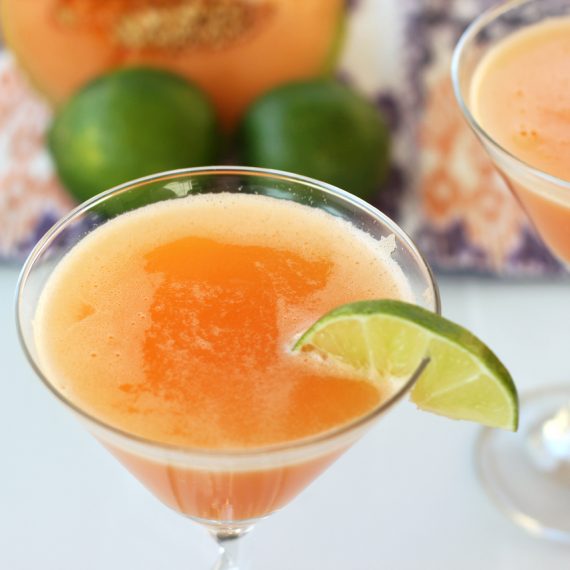
    My fourth post in my ongoing series with Free People is now live. This refreshing mocktini/martini recipe features some of the beautiful and sweet cantaloupe we have been getting from our Porter Farms CSA.

    Cantaloupe Mocktini/Martini

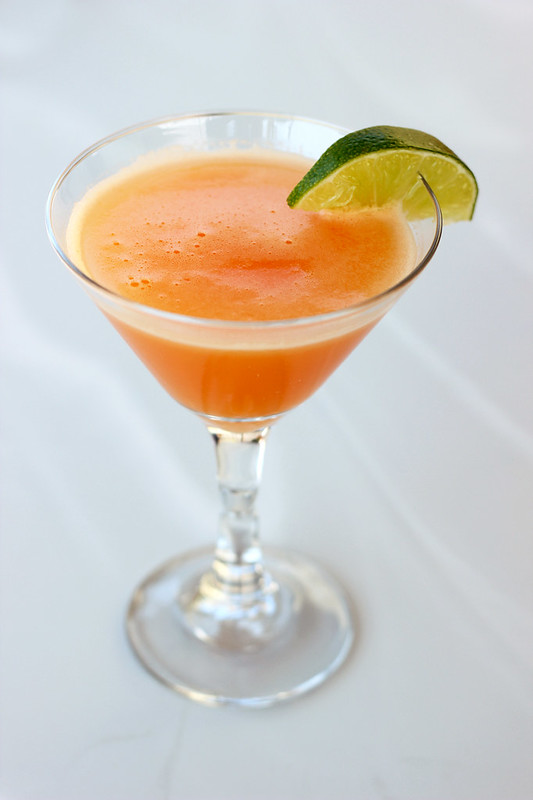
    Sweet, smooth and a little tart – this refreshing cantaloupe mocktini is the perfect way to celebrate the summer coming to an end. And of course, if you are looking for a “spirited” version of this drink, there is an option to make this mocktini into a traditional martini.

    Cantaloupe Mocktini/Martini

    Cantaloupe Mocktini/Martini - Gluten-free, Vegan + Refined Sugar-free

    Print Pin Rate
    Prep Time: 5 minutes
    Total Time: 5 minutes

    Ingredients 

    • 1 small cantaloupe or 1/2 of a medium to large one
    • ½ cup freshly squeezed lime juice
    • 1-2 tablespoons of honey or maple syrup or 7-10 drops of liquid stevia, sweeten to taste with your favorite sweetener, you may need very little depending on how sweet your cantaloupe is
    • Approximately 1 cup sparkling water
    • Ice
    • Optional: To make this a “spirited” martini, add in 4 ounces of vodka and 1 ounce of grand mariner (or triple sec)

    Instructions

    • Scoop the seeds out and cut the flesh of the cantaloupe into small cubes. Add to the food processor or high speed blender with the lime juice and sweetener of your choice (if necessary). Puree until smooth.
    • Pour through a strainer to remove the pulp then fill a cocktail shaker halfway with the cantaloupe juice (you may have to do this in batches depending on the size of your shaker). Add a few ice cubes and shake – this is when you would add your liquor, if you are so inclined.
    • Pour into chilled martini glasses, filling about 2/3 of the way full with the cantaloupe mixture and then top with sparkling water. Give it a swirl and serve with a lime garnish.


  4. Photo Fun Day Friday

    Photo Fun Day Friday

    Photo Fun Day Friday

    Me and my sis, Vicky, celebrating her 30th birthday!!

    Photo Fun Day Friday

    Jpeg, guarding the paper in our print studio

    Photo Fun Day Friday

    Came across this while out driving. I guess in case you want to turn that ‘ol broken necklace into tomorrow’s breakfast.

    Photo Fun Day Friday

    My favorites. My handsome hubby Mark and my niece Teagan!

    Photo Fun Day Friday

    Teagan LOVES tomatoes. She eats them like an apple. Girl after my own hear, I love it.

    Photo Fun Day Friday

    Mark worked super late on his podcast Sunday night, so these two lazy heads slept in.

    Photo Fun Day Friday

    Another beach day with my sis.

    Photo Fun Day Friday

    Our beautiful loafy lady, Indie.

    Photo Fun Day Friday

    Our new hand silkscreen printed “I Love to Cook” 8 x 10 print.

    Photo Fun Day Friday

    Our new hand silkscreen printed “I Love to Bake” 8 x 10 print.
    (these are both part of a new Tasty Yummies inspired line we are working on, more soon)

    Photo Fun Day Friday

    Indie and Jpeg. Mother and son actually having a tender moment together, these do not happen very often!
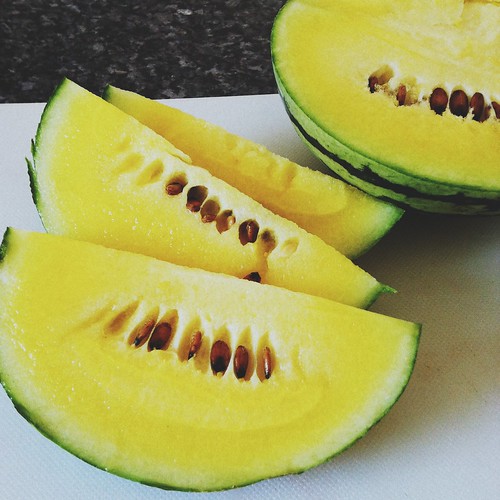
    Photo Fun Day FridayYellow watermelon from Porter Farms. So so delicious!

  5. Featured in Where Women Cook Magazine

    Featured in Where Women Cook Magazine

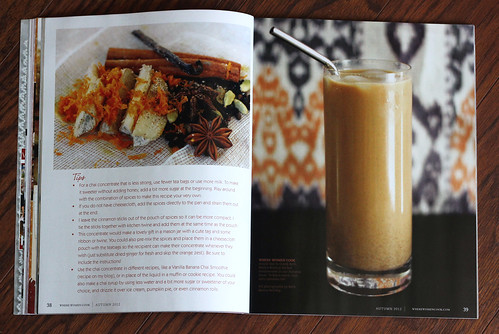
    I am super excited to have my chai concentrate recipe featured in the Fall issue of Where Women Cook Magazine. WHERE WOMEN COOK, a quarterly magazine from the publishers of Where Women Create and Somerset Studio, takes you into the heart of the home — the kitchen.

    WHERE WOMEN COOK is all about the women… some famous, some not; some entrepreneurs, some not; some vegetarian, some not; some in beautiful kitchens, some not; and some who create their own recipes, and some who do not … but all who are passionate about all things food.

    Featured in Where Women Cook Magazine

    Featured in Where Women Cook Magazine

    I am so very honored that they selected my chai concentrate recipe and my photos to be featured as a 4-page spread in their Art Bar section, an ongoing section of the magazine that features fun drink recipes — everything from fancy hot chocolates to cocktails to milkshakes.

    Grab a copy of the fall issue of WHERE WOMEN COOK at your favorite newsstand or sign yourself up for a subscription here.


  6. New NuNaturals Stevia Flavors and Giveaway


    ****** This giveaway is now closed.******

     Congrats to the winners – NicoleCaraSonja and raechel.

    These winners were chosen at random using random.org. Ladies, you will be contacted via email shortly to get your contact info. Thank you to everyone that participated.

    ——————————————————————————————————————————————————————-

    Stevia is one of my favorite alternative healthy sweeteners. It’s a herb from South America that has been used for over a thousand years. It’s 100% natural and has zero calories. Unlike other alternative sweeteners stevia does not impact blood sugar and insulin. NuNaturals Stevia is my favorite brand of liquid stevia for so many different reasons. There are no artificial ingredients and there is no lab altered weirdness. Plus, unlike some brands of Stevia that I have tried, NuNaturals leaves no bitter aftertaste. The key with stevia is to know that a little goes a long way, a few drops in a smoothie, tea, oatmeal, etc. is more than enough. I personally haven’t yet experimented too much with using stevia when baking, but I need to just take the plunge and play.

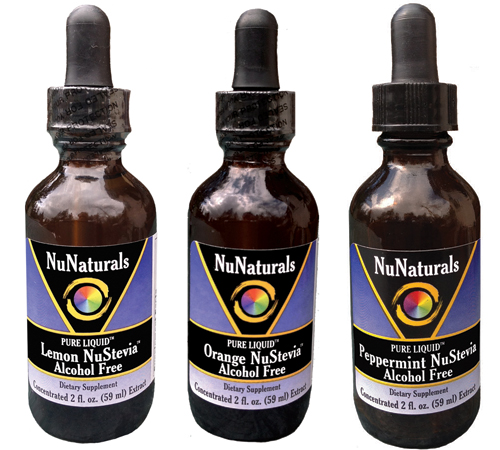
    NuNaturals recently released a line of all-natural flavored stevia liquids that are are far superior than any other flavored stevia products available. Unlike other manufacturers, that use artificial flavors, these new products use all natural, REAL ingredients. NuNaturals was nice enough to send the new flavors for me to try and I have really been having fun with them. The aroma from these when I just opened the box, was incredible. The three new flavors are lemon, orange and peppermint. I plan to share some really fun recipes in the coming weeks with you guys, but some of my favorite ways to use them are, of course, in smoothies, vegan ice cream and they are also great in chia seed puddings. Just a few drops of the lemon and orange flavors are also great in dressings and sauces. A few drops of orange or peppermint in hot cocoa or coffee would be amazing, and the lemon in iced tea or sparkling water, yum! The possibilities are endless and I cannot wait to keep playing around, so look for some new recipes in the coming weeks here on Tasty Yummies.

    I am very excited to be hosting a giveaway of NuNaturals’ newest flavors. NuNaturals is giving four (4) of my lucky readers one bottle each of Pure Liquid Orange NuStevia, Pure Liquid Lemon NuStevia and Pure Liquid Peppermint NuStevia. That’s right, we are giving away 12 bottles of stevia! It’s very simple to enter, too.


    NuStevia Flavors Giveaway

    Enter the contest

    Please leave a *separate comment* below for each entry!
    You can enter up to 4 times


    1) Leave a comment below telling me what you’d use the stevia for.

    For additional entries:

    2) Like both the Tasty Yummies and NuNatural pages on Facebook.
    Then, share the post I put up on the Tasty Yummies page to be included in the giveaway then come back and comment here telling me you liked both pages and that you’ve shared my post.

    3) Tweet about the contest and while you are there follow me on Twitter @herobeth and follow @nunaturals
    You could say something like: “ I just entered to win @nunaturals‘ 3 new all-natural flavored stevia liquids from @herobeth on Tasty Yummies http://wp.me/p23r4t-Dt ″
    Make sure you comment here to let me know you follow both of us and that you posted about the giveaway.

    4) Subscribe to the Tasty Yummies RSS feed in your RSS reader or by email.
    Again, make sure to comment here to let me know that you subscribed.

    Please make sure to leave a comment for each entry and please make sure to comment using a working email address. The giveaway will be open until Wednesday August 29 with the winners announced on Thursday August 30. Winners will be announced here and contacted  via email. Good luck guys!


    NuNaturals


    **** If you cannot wait to see if you are a winner and you want to start shopping at nunaturals.com right away – you guys get 15% off! Enter the DISCOUNT CODE “BLG1212” at the checkout page and you will receive a 15% DISCOUNT on your ENTIRE ORDER. This discount remains EFFECTIVE UNTIL DECEMBER 31, 2012. Plus you will also receive FREE SHIPPING to the CONTINENTAL U.S. on all orders exceeding $35.00 after discounts.****

  7. Grain-Free Zucchini Chocolate Chip Cookies – Gluten-free + Dairy-free with Vegan Option

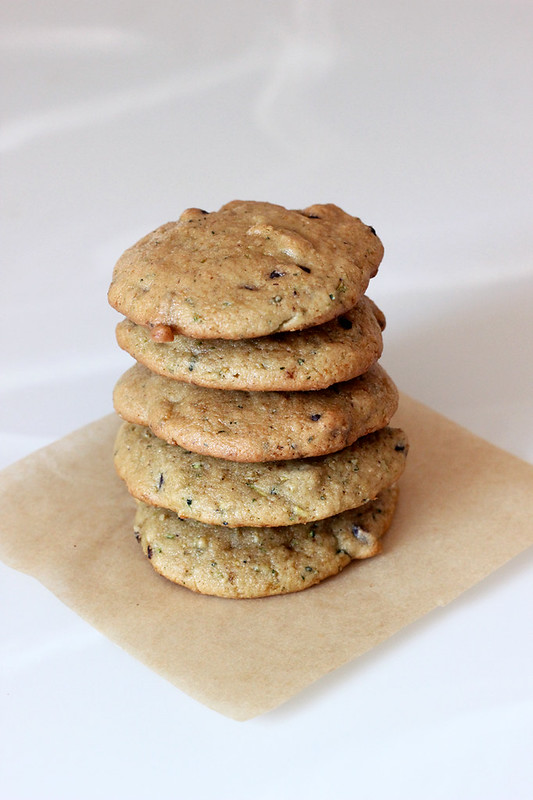
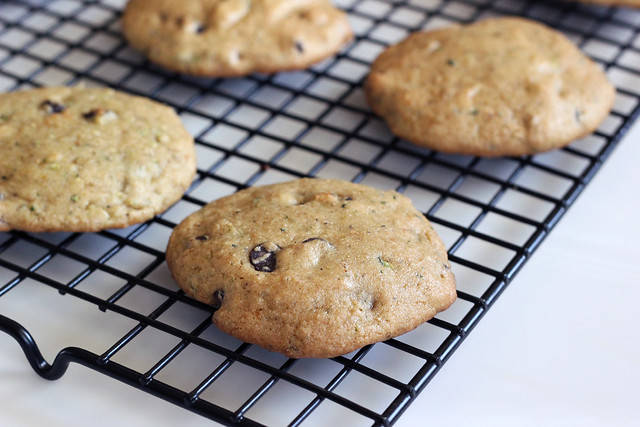
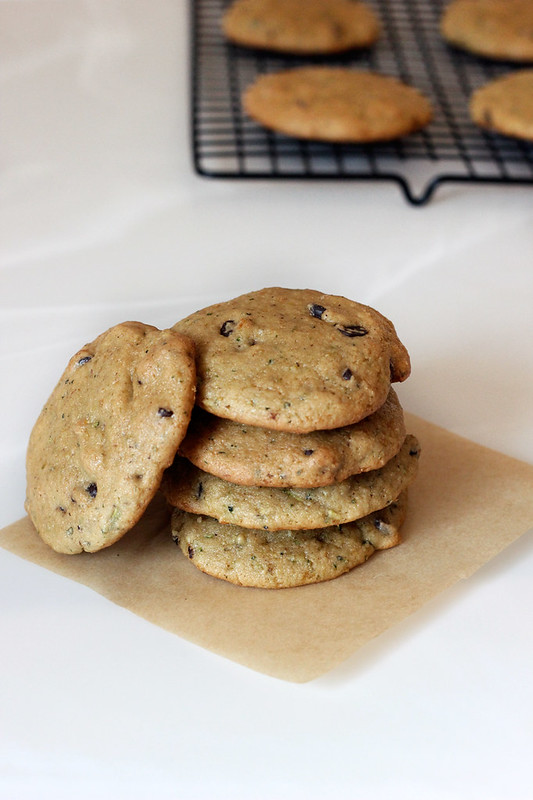
    Grain-Free Zucchini Chocolate Chip Cookies - Gluten-free + Dairy-free with Vegan Option

    I know I tend to usually just talk about food and cooking, sometimes I tell you guys a bit about different things we have going on, but I rarely just sit down and type out what I am feeling. I guess maybe it is for fear that no one actually cares to read it, but sometimes it feels good to just vent. It’s therapeutic. So hopefully no one minds.

    This summer the one word that has been ringing in my mind over and over is “patience”. I have never had a large amount of it, but this summer I have really been learning how to embrace patience and to really go with the flow. My yoga practice has taught me many many things, I think the most important that I have personally taken away is being able to cultivate my breath and to control my emotions with it. To be OK with me and what I have been given, to hold on to what I need and to let go of what I don’t. And to embrace the flow of life. Both on and off the mat these things have all come into play in many aspects of my life. This summer I have really been able to use so much of what I have learned in so many different ways.

    Trying to sell this house and move across the country was a decision we made sometime last summer. We didn’t exactly know our time frame, at the time, but we knew this was the next step for us. Early in 2012 we made the decision that we would get the process moving along and get our house on the market in the summertime to hopefully move by the fall. When you think about selling the home you have lived in for 9 years and leaving all of your family and friends behind, there are so many things to think about, there are so many self-imposed questions that you have to answer and there are even moments of doubt and fear. We thought about it all, we talked it all out, we did the research and we put the hours into readying the house. When the time came in June to list the house, we were insanely excited to get this new phase started. We started talking about what the soonest we would be out there by, and what if the house sold too quick and we didn’t wrap up all the loose ends here. We kept out summer free of our usual festivals, events and travel so we could be available for showings and get this process moving.

    Grain-Free Zucchini Chocolate Chip Cookies - Gluten-free + Dairy-free with Vegan Option

    Obviously our house hasn’t sold yet, we are just 2 months in on having it listed and we are both very optimistic it will sell, but we quickly learned that it is likely going to take some time. More time than we both originally thought. Everyone that has seen our house has had very positive things to say, they are impressed by all of our updates to it and the price hasn’t once come up as an issue, the problem we are dealing with, is that it is a townhouse. Not everyone wants a townhouse. So, we have had a decent amount of showings and no offers, just yet. All of the feedback has been, in a nutshell, that it just wasn’t what the buyers were looking for, so there isn’t anything we can do to “fix” what isn’t right. Nothing is wrong. We just have to wait for this perfect person to come along. I know they will. But we have to wait. I am not great at waiting. I am not great at being out of control. This summer has been the biggest lesson in patience that I quite possibly have ever had. The biggest lesson in going with the flow. I cannot control everything. I cannot make everything happen the way I want it to and when I want it to. I have always known that, but now the universe is really showing it to me. It is testing me.

    In some ways, I think it is good, I have been able to really enjoy the place I have called home for over 32 years, to the absolute fullest. I have been able to really enjoy my family and friends. It has been so nice. If our house sold right away, I may have felt like I wasn’t quite ready to go. I might have wanted more time, I might have regretted leaving.

    Some days trying to be patient and knowing the one thing I am most looking forward to is all out of my control, I feel like I could just scream. It is like counting down the days until Christmas when you are a kid. Only I can’t count down because I don’t know when the big day is coming.

    Ah. Patience.

    Grain-Free Zucchini Chocolate Chip Cookies - Gluten-free + Dairy-free with Vegan Option

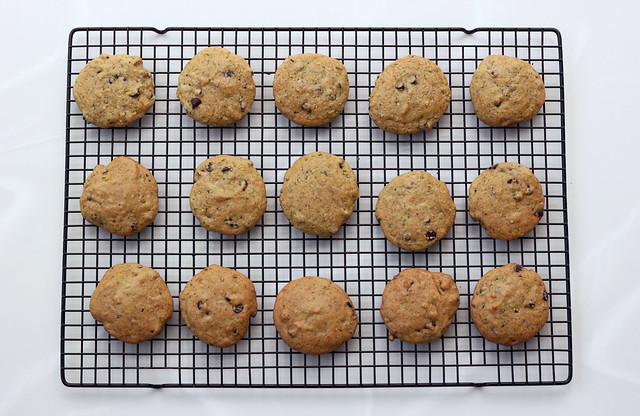
    This cookies have been a bit of a lesson in patience. The first time I made them, I was so optimistic that the recipe I created was perfect. The dough felt the way it should, it tasted perfect. I knew they were right. They were wrong. They were too soggy, they didn’t have enough flavor and the zucchini that I used was a bit to “squashy”. They just weren’t right. I knew I would have to play around with some things in the recipe to get them to match the vision I had in my head. I also had to wait to have the time to bake them again. After tweaking the recipe and finding some time on Sunday night, I made them again. With fingers crossed and some deep breaths, into the oven they went. They came out perfect. Soft, chewy, delicious cookies.

    These could be a regular chocolate chip cookie’s very close sibling. The zucchini flavor is very subtle, almost undetectable. It really just tastes like a different version of a classic chocolate chip cookie. You get the green flecks from the zucchini and if you are like me, the most satisfying thing is that you get to use up at least one or two of the very many zucchini you have on hand. Plus, if you have kids, what a great way to sneak a little bit of veggies in. These cookies are a “soft-batch” type cookie, which I love, with a really nice soft and fluffy chew to them. They aren’t the thin crispy cookies that I know some people like. I also love that they are totally grain-free. I have been having so much fun playing around with recipes that don’t rely on a grain.

    Thanks for letting me vent.

    Grain-Free Zucchini Chocolate Chip Cookies - Gluten-free + Dairy-free with Vegan Option

    [print_this]Grain-Free Zucchini Chocolate Chip Cookies – Gluten-free + Dairy-free with Vegan Option
    Makes approximately 18 – 24 cookies

    • 2 cups blanched almond flour, tightly packed
    • 1/2 cup arrowroot starch (you could also use tapioca starch or potato starch)
    • 1 teaspoon baking soda
    • 1/2 teaspoon sea salt
    • 1/2 cup maple sugar, coconut sugar, raw sugar or other granulated sweetener of your choice
    • 2 tablespoons melted coconut oil (or olive oil, walnut oil, etc)
    • 2 farm fresh brown eggs or 2 flax-seed eggs (2 tablespoons ground flaxseeds mixed with 6 tablespoons water)
    • 1 tablespoon psyllium husk
    • 2 teaspoons vanilla
    • 1 cup shredded zucchini, with all of the excess moisture squeezed out (squeeze it inside of paper towels, a clean kitchen towel, cheese cloth or through a strainer)
    • 3/4 cup dairy-free gluten-free chocolate chips

    Preheat oven to 350ºF. Line a baking sheet with parchment paper.

    In a food processor, combine almond flour, arrowroot starch, salt, baking soda and maple sugar, process until combined. In a small bowl whisk together the melted coconut oil, the eggs, vanilla and psyllium husk. Pour the wet mixture into the food processor with the dry ingredients and pulse into the dough comes together, add in the shredded zucchini and pulse a few times more, then take out the blade and stir in the chocolate chips by hand.

    Scoop dough, one level tablespoon at a time onto a parchment lined baking sheet. Bake in batches, if you need to.
    Bake for 18-20 minutes until the edges are slightly golden brown and they are fully cooked. Cool for a few minutes on the pan, then transfer to a wire rack to cool further. Serve.

    These can be stored in tightly sealed container for a few days either at room temperature or in the fridge, or you can freeze them and take them out at your leisure. [/print_this]

  8. Banana Piña Colada – Gluten-free, Vegan + Refined Sugar-free

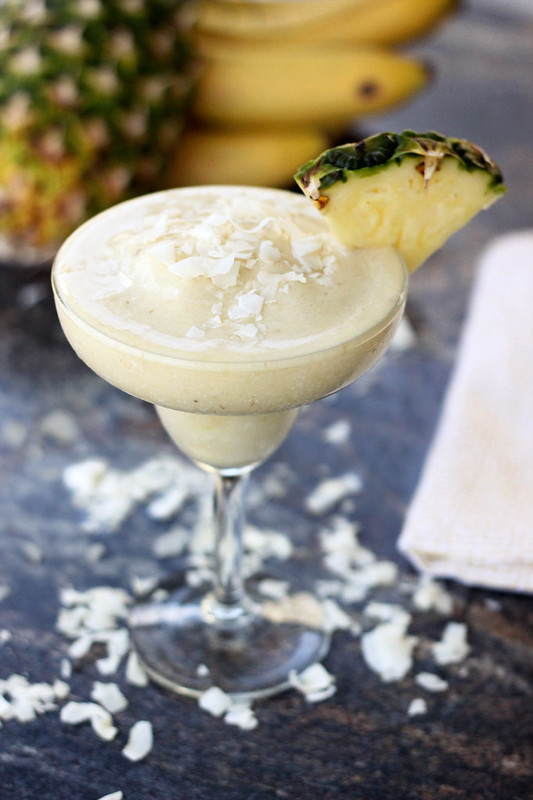
    Banana Piña Colada - Gluten-free, Vegan + Refined Sugar-free

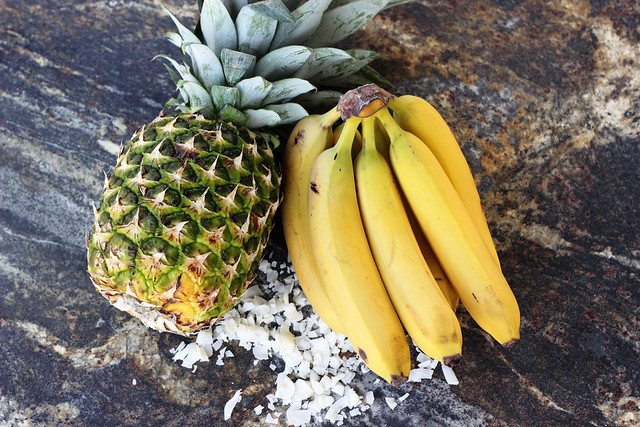
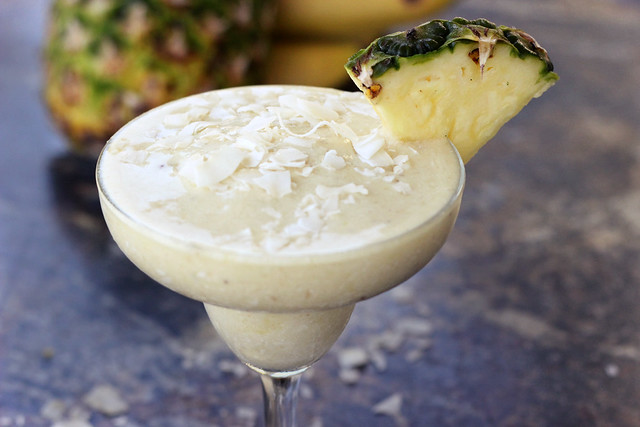
    Coconut and pineapple has to be one of the quintessential flavor combinations of the summer! So what better fruit to add to that delicious mix than bananas? This is an updated lighter version of the classic beach cocktail, a piña colada. Instead of coconut cream, sugary juice or those nasty mixes, this summertime mocktail combines fresh and healthy ingredients for that same creamy and delicious satisfaction without all the garbage.

    Banana Piña Colada - Gluten-free, Vegan + Refined Sugar-free

    The bananas provide plenty of sweetness, so there is no need for any sugar or sweeteners and by freezing both the bananas and the coconut milk, you won’t end up with a watered down drink as the ice slush melts. Obviously, if you wish to make this an alcoholic cocktail, add in a shot or two of your favorite rum at the end and give it another whirl in the blender.

    Banana Piña Colada - Gluten-free, Vegan + Refined Sugar-free

    There is no refined sugar added to this and it is delicious even without the rum. The creamy sweetness from the bananas and the coconut milk provides more than enough sweet, so you don’t have to add any sugar or sweetener at all. And even if you go with the full-fat coconut milk, it is still lighter than the standard coconut cream that is used. If you want it to be even lighter and lower in fat and calories, feel free to use light coconut milk. I personally like the creaminess of full fat coconut milk and since it is a healthy fat, I can totally justify indulging! Plus, the other bonus of this creamy summertime mocktail is that it could also be enjoyed as a delicious and sinful breakfast smoothie. That would be the perfect way to start any day, if you ask me.

    Banana Piña Colada - Gluten-free, Vegan + Refined Sugar-free

    Banana Piña Colada

    Serves 4

    • 2 frozen organic ripe bananas
    • 1 cup fresh pineapple chunks  (frozen will work if you cannot find fresh)
    • 1 cup no sugar added organic pineapple juice
    • 1/2 can organic coconut milk (full fat or light) – frozen into cubes
    • Coconut flakes for garnish
    • Fresh pineapple wedges for garnish

    *Optional – add 4 ounces of your favorite rum to make this an alcoholic cocktail

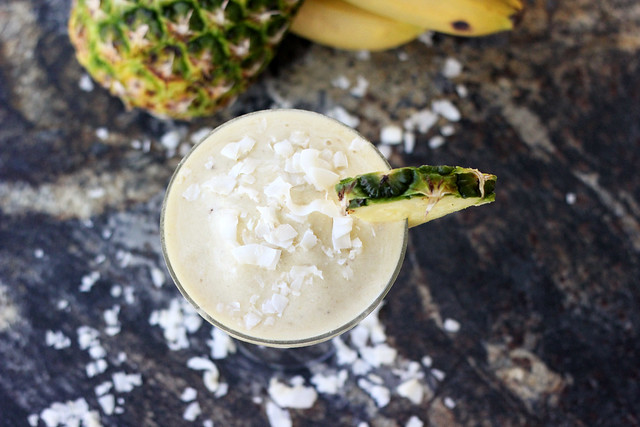
    Add all of the ingredients except the coconut flakes and pineapple wedges to your blender. Blend until smooth and creamy. If you are adding rum, add it after it is creamy and blended, and blend again quickly to mix it in. Pour into 4 glasses, serve each topped with coconut flakes and garnish with a fresh pineapple wedge.


  9. Photo Fun Day Friday

    Can anyone tell me where the last week has gone? It has just flown by. I feel like I just did my last Friday photo post. It has been a busy week over here, lots of social commitments, lots of fun, lots of work. We have a weekend full of stuff, too. The temperatures have started to drop, it is getting darker earlier, the nights are really cool and the stores are just filled with Back to School stuff. I am kinda not ready for the summer to end, personally.

    How has your summer been? Are you ready for it to end or are you enjoying it?

    Photo Fun Day Friday

    A new art print that we printed this week! Available for purchase from our etsy store.

    Photo Fun Day Friday

    A new branding thing I am working on for a new line of Hero x Tasty Yummies prints I will be releasing later this year.

    Photo Fun Day Friday

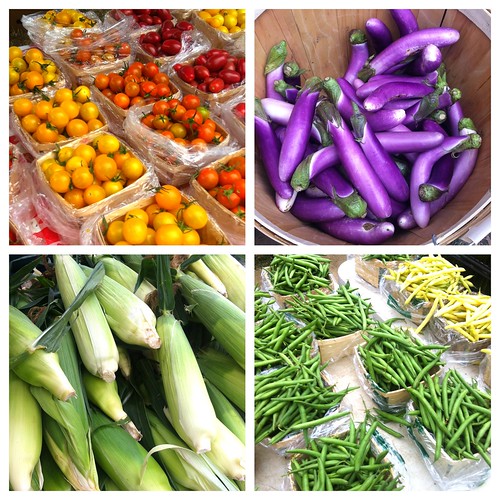
    Beautiful, colorful goodness at the Elmwood Bidwell farmers market.

    Photo Fun Day Friday

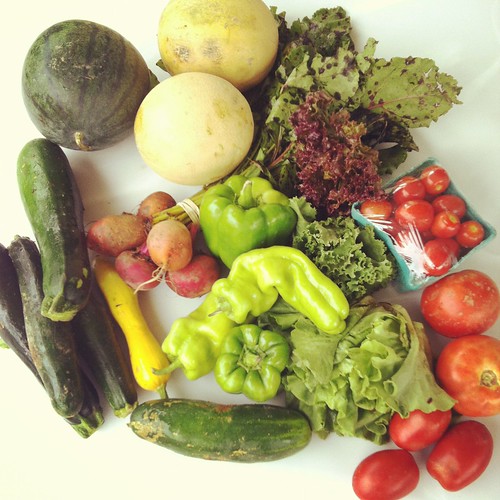
    Last Saturday’s CSA share from Porter Farms.

    Photo Fun Day Friday

    Look at those beautiful rays shining through the clouds, over Lake Erie.

    Photo Fun Day Friday

    Ominous looming storm over the lake.

    Photo Fun Day Friday

    My adorable Seri being silly in the grass.

    Photo Fun Day Friday

    Discovered that our shed is the perfect place to practice my handstands. I love inversions.

    Photo Fun Day Friday

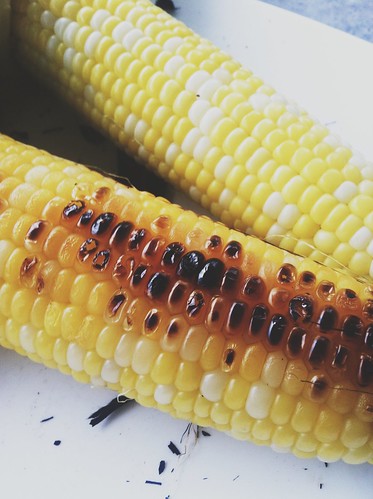
    Delicious, grilled sweet corn from the farmers market. Hands down, THE best corn I have ever eaten.

    Photo Fun Day Friday

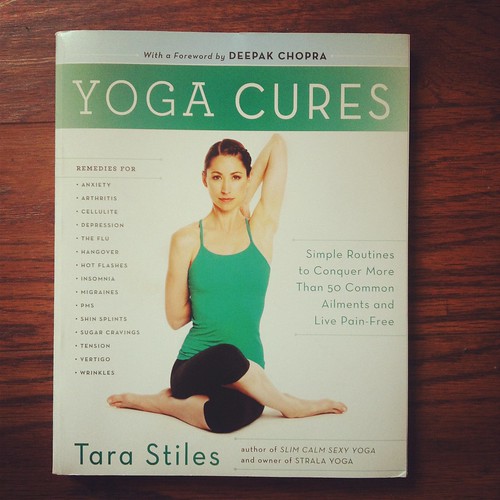
    I have been wanting Tara Stiles’ newest book, Yoga Cures, for a while and I so luckily won it from Brooklyn Fit Chick.

    Photo Fun Day Friday

    Our good friends, Erika and Devin’s, sweet boston terrier, Mrs. Bean.

    Photo Fun Day Friday

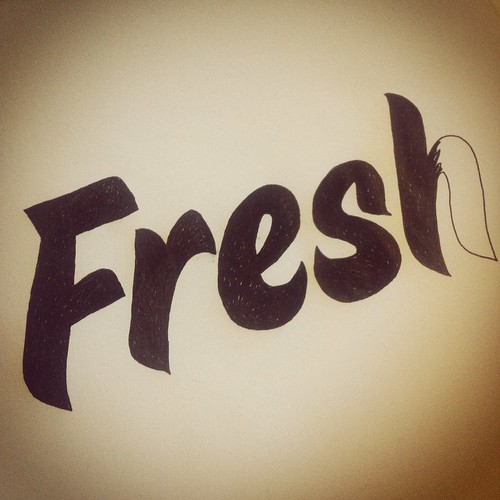
    Hand drawing some type for a new art print.

    Photo Fun Day Friday

    I had the pleasure of babysitting my sweet niece, Teagan on Wednesday. We had so much fun.

    Photo Fun Day Friday

    Me and Teagan flipping off the couch and doing yoga. She’s a natural yogi!

    Photo Fun Day Friday

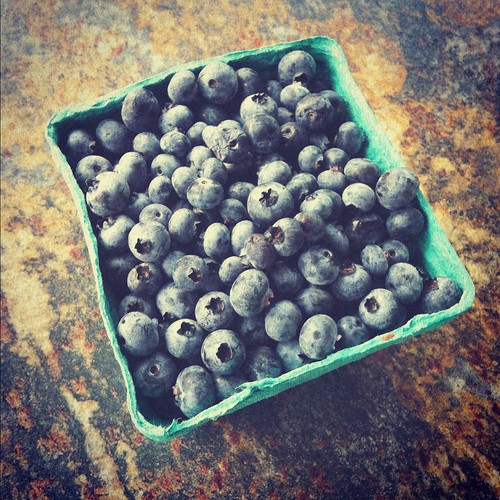
    Savoring the end of blueberry season. Gonna miss them. I made these delicious muffins from Healthful Pursuit, last night.
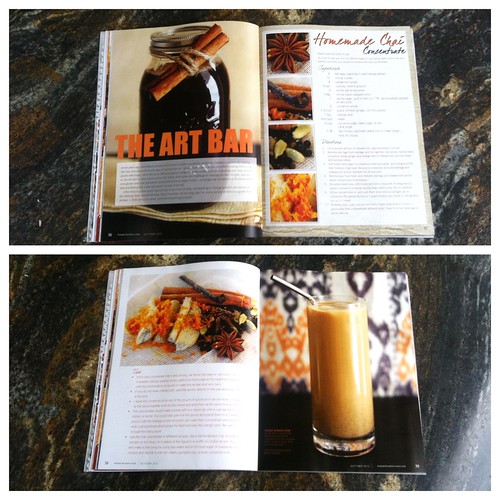
    Photo Fun Day FridayGot an advanced copy of the fall issue of Where Women Cook Magazine in the mail today. I have a 4-page spread featuring my chai concentrate recipe. First time Tasty Yummies has been published in a magazine. I am pretty excited about this.

  10. Pasta with Creamy Roasted Tomato Basil Sauce – Vegan + Gluten-free

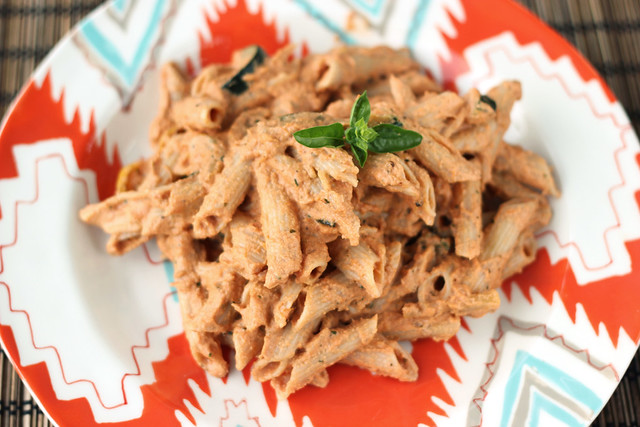
    Pasta with Creamy Roasted Tomato Basil Sauce - Vegan + Gluten-free

    It is finally officially tomato season here and I couldn’t be happier. We have been getting lots of different tomatoes in our weekly CSA share from Porter Farms and they are so incredible that I have mostly just been eating them raw, on salads or otherwise. Though earlier this week I did make some delicious stuffed CSA veggies that turned out amazing. I stuffed tomatoes, green bell peppers, cubanelle peppers and zucchini. I stuffed them all with a delicious mixture made with some of our ground beef from Sojourner Farms, plus some black rice, crushed tomatoes, onion, garlic and basil. It was a simple and totally perfect for the season dish!

    Pasta with Creamy Roasted Tomato Basil Sauce - Vegan + Gluten-free

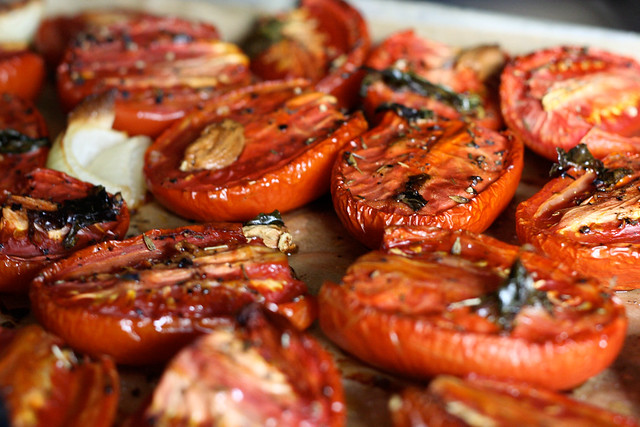
    Each fall when tomato season is winding down, I buy at least 1 or 2 8-quart bushels of roma tomatoes at the farmers market so I can make tons of stuff for the winter and hold on to that yumminess as long as possible. I usually make some chili, tomato sauce and I always slow roast a ton of them to freeze them. This way I can have the delicious fresh from the farm tomato goodness, all through the winter. I knew we were coming up on that time of year again and I had savored the frozen tomatoes from last year so much so that I actually had a bag or two left in the freezer, so I decided to pull a bag out to make this delicious sauce. If you are unfamiliar on how to slow roast tomatoes, please see the note at the end of the recipe. It is so simple and it is a wonderful way to really enjoy their beautiful flavors and juices.

    If you wish to make this sauce and don’t have any fresh (or frozen) roasted tomatoes, feel free to use canned whole roasted tomatoes. Those would work just as well.

    Pasta with Creamy Roasted Tomato Basil Sauce - Vegan + Gluten-free

    Pasta with Creamy Roasted Tomato Basil Sauce - Vegan + Gluten-free

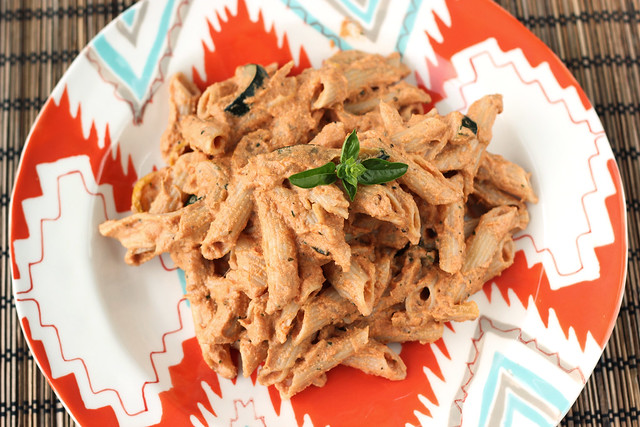
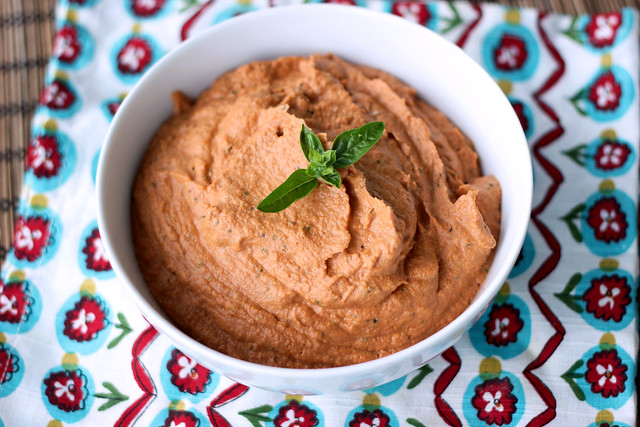
    This sauce is incredibly creamy and rich, you would never believe it is totally vegan, the creaminess from the soaked cashews is really unbelievable. I promise this will fool any dairy-lover who takes a bite. We have an abundance of zucchini and yellow squash from our CSA, so I also quickly sautéed some of slices of both of those and tossed that with the pasta as well. Such a nice compliment and it basically gave us one big well rounded meal in one!

    Pasta with Creamy Roasted Tomato Basil Sauce - Vegan + Gluten-free

    [print_this]Pasta with Creamy Roasted Tomato Basil Sauce – Vegan + Gluten-free

    Serves 6

    • 1 tablespoon olive oil
    • 2 cloves garlic, minced
    • 2-3 cups roasted roma tomatoes*, halved (fresh or canned)
    • 1 cup raw unsalted cashews, soaked overnight or for at least 8 hours
    • water to thin the cashew cream
    • 1/2 cup fresh basil, plus more for garnish
    • salt and pepper to taste

    12 ounces of your favorite pasta – I used Jovial’s Gluten-free Brown Rice Penne Rigate

    In a large saucepan, heat olive oil over a medium high heat. Add in the minced garlic and cook for about 1 minute, add the roasted tomatoes. Allow the tomatoes to simmer for about 10 minutes to heat the tomatoes through (if they aren’t fresh from the oven).

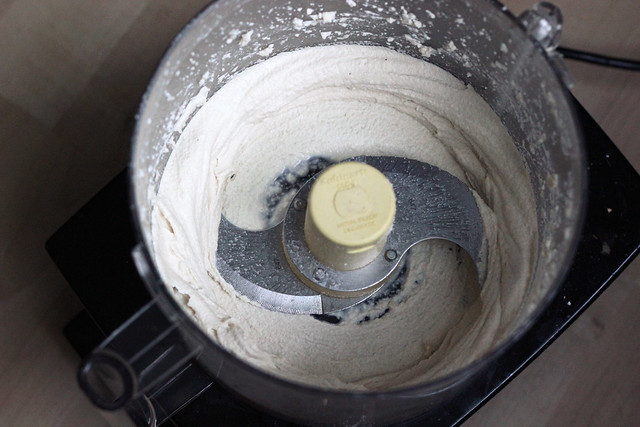
    Meanwhile drain the soaked cashews and add them to the food processor. Puree until it is smooth and creamy, you can add water if you need to (a few tablespoons up to 1/4 cup as necessary).

    Once the tomatoes have simmered for a bit, add them to the cashew cream and puree the mixture until smooth and creamy. Add the basil in, plus salt and pepper to taste. Pulse it a few times to mix.

    Add the sauce back to the pan if it needs to be reheated, otherwise serve tossed with your favorite gluten-free pasta. I usually add a little of the pasta cooking water to the pasta when I add the sauce, to thin the sauce a bit so that it evenly coats all of the pasta. Also, if you wish, you can toss in some veggies like sautéed zucchini. Garnish with a little fresh basil.

    * To slow roast tomatoes, preheat your oven to 325ºF and line a baking sheet with parchment paper. Half lengthwise 1 pound of roma tomatoes (approximately 8-10 tomatoes). Lay them all cut side up on parchment-lined baking sheets. Drizzle olive oil over the tomatoes and sprinkle with sea salt. You can also add onion, garlic, basil or any other herbs you’d like. Roast for 2 hours or until they have softened, wilted and wrinkled are a bit browned. This may take more or less time depending on the size of your tomatoes. Eat immediately or store in refrigerator with extra olive oil drizzled on top, or you can of course freeze them in freezer safe bags. [/print_this]

  11. Grain-free Berry Cobbler – Gluten-free, Vegan + Refined Sugar-free

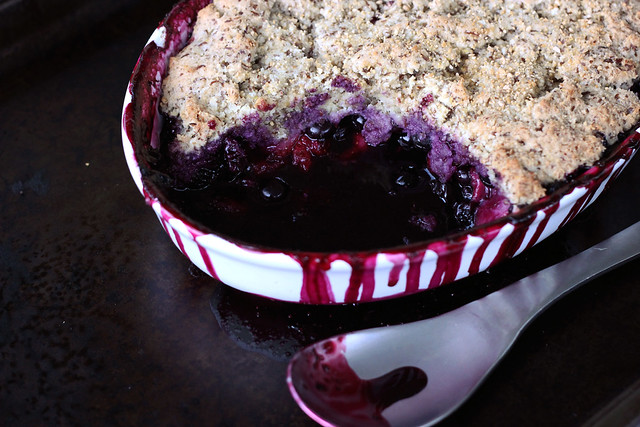
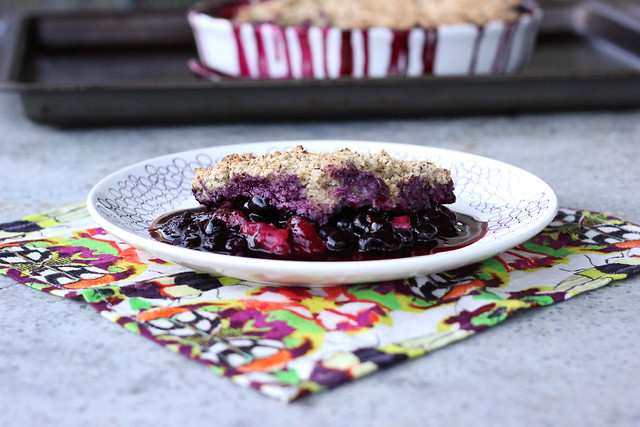
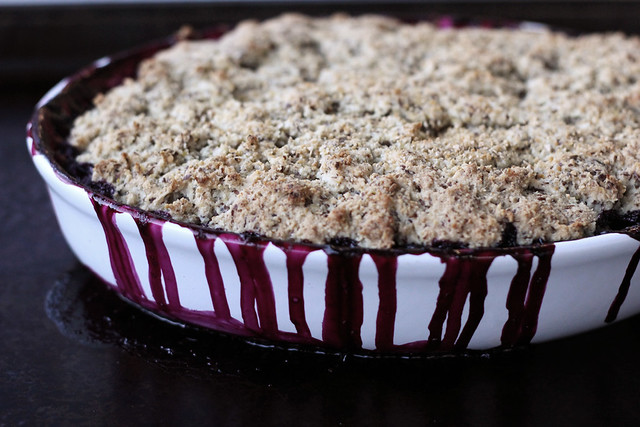
    Grain-free Blueberry Cobbler - Gluten-free, Vegan + Refined Sugar-free

    A week or two ago, I came across this amazing grain-free thick pizza crust recipe from Real Sustenance and it instantly peaked my interest. More and more I am amazed by what almond flour can do and the results you can get when baking with it. It is by far my favorite flour these days.

    When I saw the photos of that crust I couldn’t wait for my order of almond flour from Honeyville to come  in the mail. Oh and what a painful wait it was this time. This wait made me realize I should really stop waiting till I am totally out of almond flour to order more. Once the almond flour arrived it immediately became pizza night at our house and I made a version of my vegan hummus pizza with this new crust recipe. Oh my goodness! Best gluten-free pizza crust I have ever made at home, actually, best gluten-free crust that I have ever had anywhere. It was fluffy, soft and thick, and it has a nice subtle crisp to the outside of it. It was perfect and I couldn’t believe it was totally grain free.

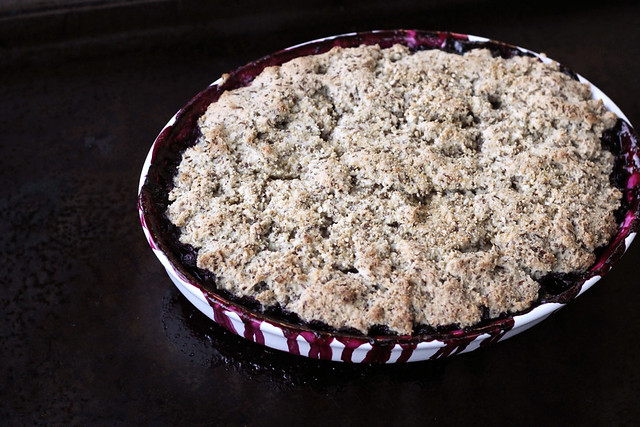
    Grain-free Blueberry Cobbler - Gluten-free, Vegan + Refined Sugar-free
    As soon as I took a bite I couldn’t help but think about what else I could come up with to do with this dough. That is when I realized I needed to adapt the recipe to make a cobbler topping. It was perfect for it. I wanted to play around a bit to make it vegan, so I replaced the eggs with flax-seed eggs and I also used coconut oil instead of olive oil, plus I of course had to add a little sweetness, so I went with my go-to maple syrup. (feel free to use whatever sweetener you prefer, though)

    Grain-free Blueberry Cobbler - Gluten-free, Vegan + Refined Sugar-free

    This cobbler according to my hubby, is THE best cobbler I have ever made and maybe one of the best cobblers he has EVER had anywhere. Then he declared it might just be the best gluten-free dessert I have ever made. Mark hails from the south, so for him to not just eat my cobbler but to rave on and on about it, has to be the best compliment he could give. He is a harsh critic of cobblers and I have seen him push aside sub-par cobblers if they weren’t to his liking. And don’t even get him started on crisps, he doesn’t understand them and wishes they would just be a cobbler.

    The crust on this cobbler is thick and almost biscuit-like but not at all heavy or too dense. The flax seed eggs besides helping to bind also provide little golden flecks of color and texture in the crust that really makes it feel rustic, homemade and healthy, all of which it is. You can make this berry cobbler with any combination of berries that you choose. I had planned to use just blueberries, but I had a small amount of strawberries leftover that I decided to slice up and add in. You could also use blackberries, peaches, apples or whatever your favorite fruit or combination of fruits might be. I cannot wait to go apple picking in the fall and to make an apple spice version of this. Oh and like most cobblers, this one is of course be great served warm with a scoop of your favorite vanilla ice cream or even some whipped coconut cream on top.

    Grain-free Blueberry Cobbler - Gluten-free, Vegan + Refined Sugar-free

    [print_this]Grain-free Berry Cobbler – Gluten-free, Vegan + Refined Sugar-free
    Serves 6-8
    Inspired by this pizza crust recipe

    Berry Filling

    • 3 cups of organic berries – I used a pint of blueberries and 1 cup of fresh strawberries, sliced
    • 2 tablespoons maple syrup (you could also use honey, brown rice syrup, coconut nectar or whatever your favorite sweetener is)
    • 1 tablespoon arrowroot starch
    • 2 tablespoons fresh lemon juice

    Cobbler Crust

    • 2 tablespoons ground flaxseeds plus 6 tablespoons hot water (or two eggs)
    • 1 cup blanched almond flour
      1/2 cup arrowroot starch (you can also use tapioca or potato starch)
    • 1 teaspoon baking powder
    • 1/2 teaspoon salt
    • 1 tablespoon almond milk
    • 1 tablespoon maple syrup (you could also use honey, brown rice syrup, coconut nectar or whatever your favorite sweetener is)
    • 2 teaspoons melted coconut oil
    • 1 tablespoon psyllium husk
    • 1/2 teaspoon fresh lemon juice

    Preheat the oven to 425º F. Grease an 8″ square pan (or something similarly sized) with some coconut oil.

    In a medium sized bowl mix the berries with 2 tablespoons maple syrup, lemon juice and 1 tablespoon arrowroot starch, set aside.
    In a small bowl whisk together the 2 tablespoons of ground flaxseeds with 6 tablespoons of hot water, set aside to let it thicken.

    In a large bowl whisk together the almond flour, arrowroot, baking powder and salt. In a second smaller bowl whisk together the flaxseed eggs, almond milk, maple syrup, coconut oil, psyllium husk and lemon juice. Add the liquid mixture to the dry and mix until well combined.

    Add the berry mixture to the greased pan and drop spoonfuls of the dough to the top. Spread it out evenly with your hands or a greased spatula. You can leave it as rustic biscuit-like rounds or spread it to one even dough topping, like I did.

    Place the pan onto a rimmed baking sheet to catch any berry juice that will run out. Bake for 30 minutes until the cobbler topping is golden brown and cooked through and the juices start to bubble up over the crust. Remove from oven, cool slightly, and serve.
    [/print_this]

  12. Blackberry Lavender Lemonade – Gluten-free, Vegan + Refined Sugar-free

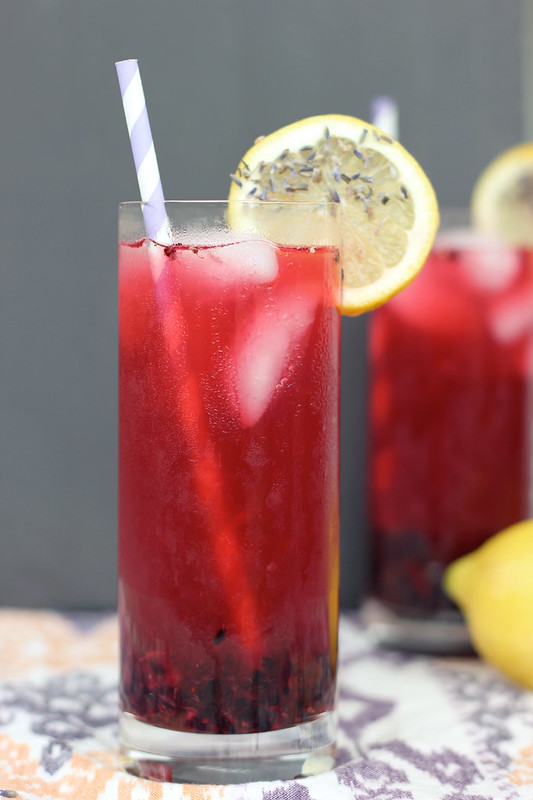
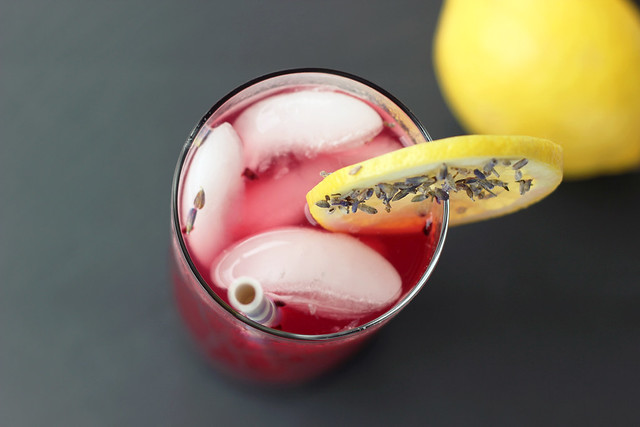
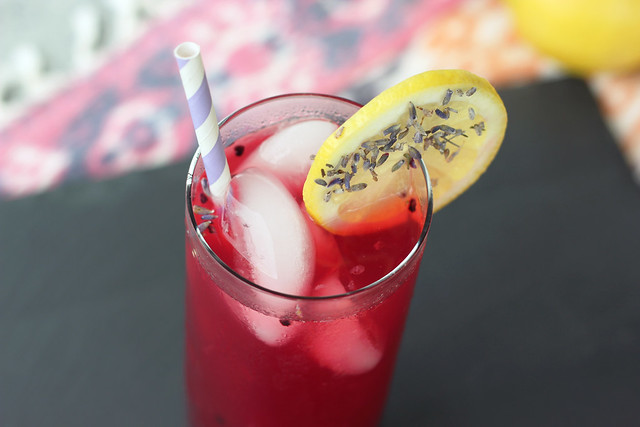
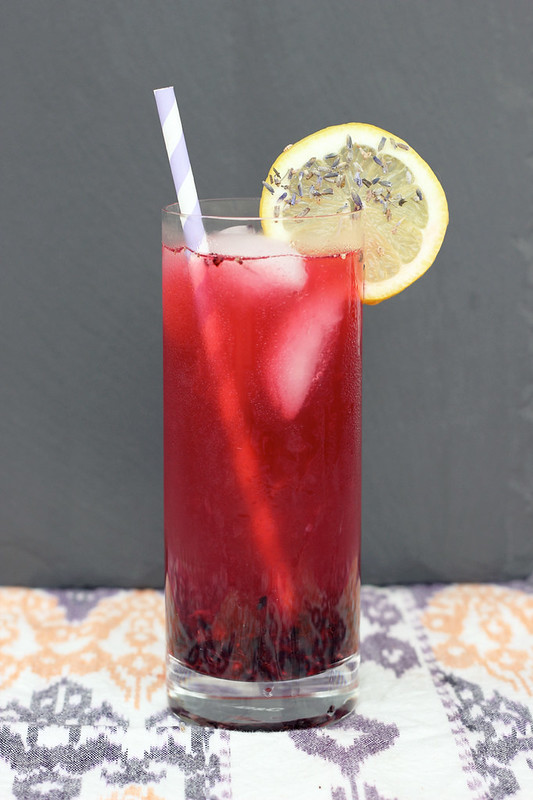
    Blackberry Lavender Lemonade - Gluten-free, Vegan + Refined Sugar-free

    I have really been enjoying playing around with different seasonal flavor combinations for the series of cocktail recipes that I have been sharing over on the Free People blog BLDG 25. This is my second post in my 5-part Summer Mocktail series for Free People.

    I have been letting what I find at the market determine the drinks, instead of the other way around. I had been thinking up some type of twist on the standard “Arnold Palmer” of tea and lemonade, which we love over here. I wanted it to be brighter, more colorful and featuring a seasonal fruit. When I saw the blackberries I instantly knew that was the way to go. Not only will this quench the thirstiest of thirsts, but it is such a beautiful and bright color, to boot!

    Blackberry Lavender Lemonade - Gluten-free, Vegan + Refined Sugar-free

    The delicate aromatics from the lavender, paired with the pleasant tartness from the lemons and the blackberries is absolute perfection and sure to please anyone on a hot summer day. I decided to use my go-to sweeteners for this since I prefer to not use refined sugar, but you can feel free to substitute whatever sugar or sugar-alternative you desire. I also go light on the sweetness since I prefer my lemonade drinks to be on the tart side. Make sure to taste and sweeten to your own liking. If you are looking to make this into an alcoholic beverage, simply add in 1 shot of your favorite vodka, stir and enjoy!


    Blackberry Lavender Lemonade - Gluten-free, Vegan + Refined Sugar-free

    [print_this]Blackberry Lavender Lemonade
    serves 4-6

    • 1/2 cup dried culinary lavender
    • 5 cups water
    • 1/4 – 1/2 cup maple syrup (raw honey, agave or raw sugar will also work)
    • 1 cup freshly squeeze lemon juice (about 6-8 lemons)
    • 4-6 teaspoons maple sugar (you can also use raw sugar or any other sugar of your choice)
    • 6 ounces fresh blackberries
    • ice

    Bring 5 cups of water to a boil in a medium saucepan over high heat, stir in the lavender and reduce the heat. Partially cover and simmer for 10-15 minutes. Strain the lavender tea over a strainer or through cheesecloth, pressing down to get out as much liquid as you can, discard the lavender. Pour the liquid into a large pitcher. Stir in maple syrup, honey or whatever sweetener you are using, until it has dissolved. I prefer my lemonade on the tart side so I only used 1/4 cup of maple syrup, but feel free to use as much as you would like. Let cool. Once cooled, add the lemon juice to the pitcher and give it a good stir. Taste to see if it needs more sweetener or if you want to add some water to dilute it a little.

    To serve, place 5 to 8 blackberries and 1 teaspoon of sugar in each glass. Muddle. Pour the lemonade mixture over to fill the glass about 2/3 of the way full, give it a stir, then top with ice. Garnish with lemon slices pressed into some dried lavender, or add a fresh sprig of lavender if you have it.

    *For an alcoholic cocktail, add in a shot of vodka [/print_this]

    Blackberry Lavender Lemonade - Gluten-free, Vegan + Refined Sugar-free

    This recipe was originally shared on the Free People blog. Check out my first post in the series here.


  13. Photo Fun Day Friday

    I absolutely LOVE the summer. I love the extra hours of light, how much we get to see everyone we know since there is an event or party every time you turn around, I love all the outdoor activities I can get myself into, and the list goes on and on. However, I don’t know about you guys, but by August, I start to get a little tired. In Buffalo so much of the year is cold and dreary, ok let’s be honest we can actually have snow on the ground for nearly 4 or 5 months straight, so by the time summer comes we are all craving some time out, we are longing to sit on patios, float in pools, sail on boats, picnic, hike, you name it.

    With the extreme heat this summer coupled with the very busy schedule of cramming it all in, this week I hit a wall where I feel a bit overwhelmed and I needed to slow it down a bit. I tried to not make too many plans during this week since we had/have a handful of very jam packed busy weekends. We have had a insane number of weddings, showers, birthday parties, picnics, etc and it seems that August is shaping up to be the busiest of them all. Though with all of that being said, I have really been enjoying every minute of it and with our pending move across the country (whenever we sell the house) I am cherishing each moment and every celebration. Soon those will all be so far away and I know I will be missing it all greatly. Here is a little glimpse of the last two magical, fun filled weeks.

    Photo Fun Day Friday
    Me and my late, YiaYia (Greek for Grandma) – a cherished photo that is on display in our bedroom that I look at every morning when I wake up.

    Photo Fun Day Friday
    Our little mini-booth set up at the Buffalo BookFest at the Western New York Book Arts Collaborative.
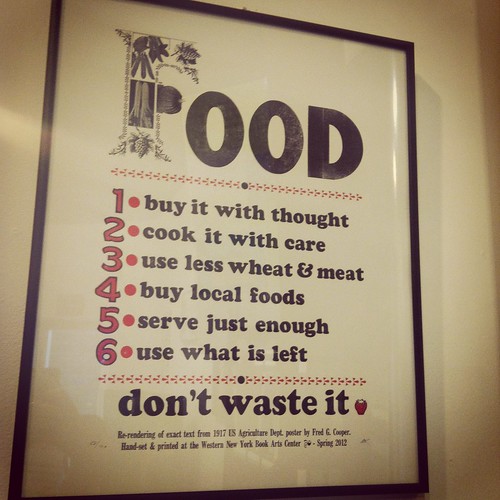
    Photo Fun Day Friday
    A print I picked while at the WNYBAC. I have been in love with this print for some time now. It is a reproduction of a WWI era print produced by the US Department of Agriculture. I love how every word of it still rings true today. I cannot wait to hang this in our new place.

    Photo Fun Day Friday
    A bachelorette sailing trip for our good friend Erika.
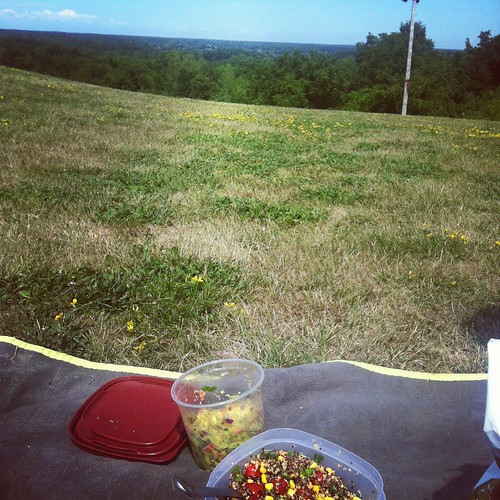
    Photo Fun Day Friday
    The bride-to-be, Erika.

    Photo Fun Day Friday
    A little picnic before going hiking at Bond Lake Park with Mark and Seri. I made guacamole and a simple Mexican-inspired quinoa salad.

    Photo Fun Day Friday
    Seri enjoying the view at Bond Lake.

    Photo Fun Day Friday
    Pooped from the hike.

    Photo Fun Day Friday
    An impromptu beach trip with my little sis, Vicky.

    Photo Fun Day Friday
    Jpeg decided to make my mousepad his napping spot for a few hours one day.

    Photo Fun Day Friday
    We finally made it to the movies to see the Dark Knight Rises. So good. Have you seen it?

    Photo Fun Day Friday
    I have a serious obsession/collection of 1950’s/60’s cookbooks. I love all of the illustrations. These are by the great Charley Harper for Betty Crocker’s Dinner for Two Cookbook.

    Photo Fun Day Friday
    Story time with my beautiful niece Teagan.
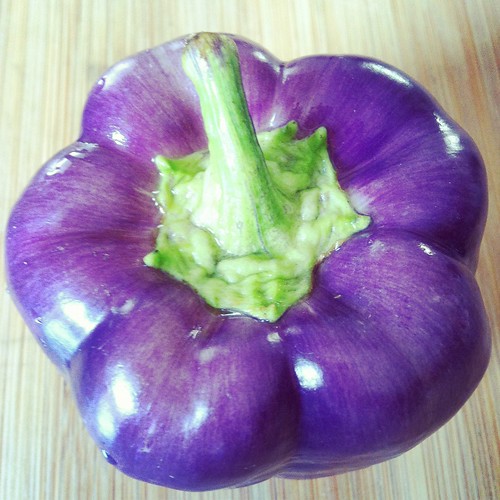
    Photo Fun Day Friday
    A purple bell pepper from our Porter Farms CSA share.

    Photo Fun Day Friday
    It hit 98º this past Sunday so we invited ourselves to my Aunt and Uncle’s house and spent the day in the pool. Best thing ever!

    Photo Fun Day Friday
    My mom’s amazing Pyrex that she received as a wedding shower gift. I call it vintage, she doesn’t like that word though 🙂
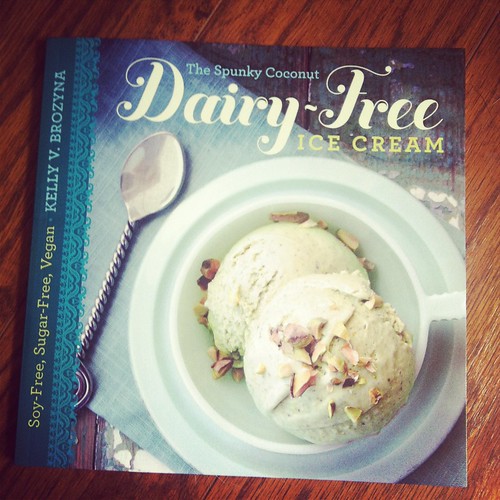
    Photo Fun Day Friday
    Kelly from the Spunky Coconut so nicely sent me a copy of her new cook book and I am obsessed. Just made a batch of chocolate ice cream inspired by her’s last night. AMAZING! You need this cookbook.

    Photo Fun Day Friday
    We reprinted our popular “I Believe in Magic” silkscreened art print this week.
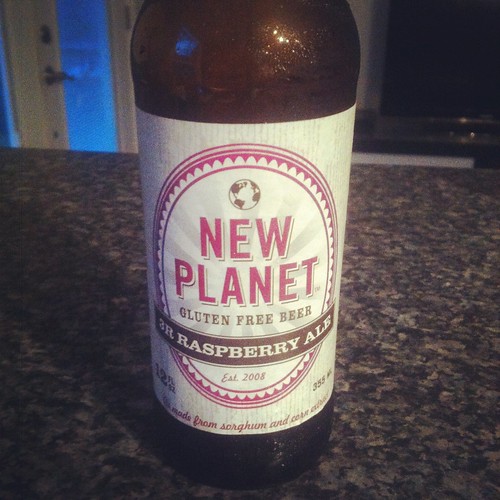
    Photo Fun Day Friday
    A new gluten-free beer that I came across at Wegmans this week. I am now obsessed. So deliciously different.
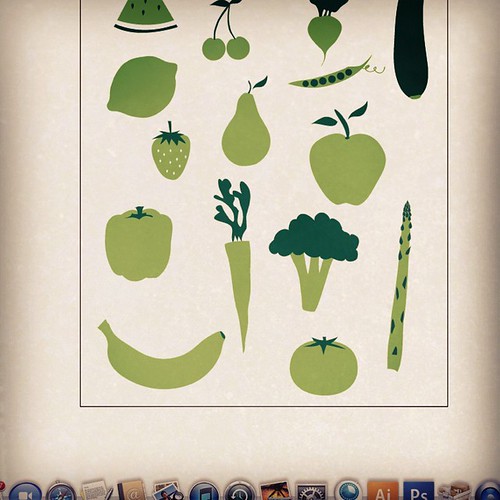
    Photo Fun Day Friday
    A little sneak at the screen of my computer this week. Fun little project that combines my two loves of design and healthy eating. Can’t wait to share more with you guys!

  14. Crispy Baked Beet Chips – Gluten-free + Vegan

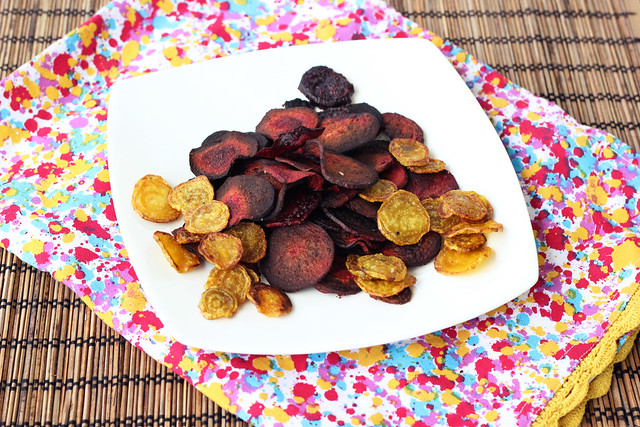
    Crispy Baked Beet Chips - Gluten-free + Vegan

    See, I told you that I would use up the beets from our CSA share. I wanted to do something fun and different with the beets, since I usually just juice or grill them. My husband, Mark, absolutely HATES beets, he despises them and won’t try them no matter how good I tell them they are. He thinks they are gross and taste like ‘ground’ or ‘dirt’!

    Well, I can officially say – I have WON the beet war in our house! I got Mark to eat beets and he actually liked them. I didn’t even have to sneak them into something else. I just said “here, just try this beet chip, don’t be a jerk”. He tried it and he liked it, then he had another and then a few more. Then he proclaimed “I have never,ever liked beets before, ever, but these I actually like!” S U C C E S S !

    Crispy Baked Beet Chips - Gluten-free + Vegan

    Crispy Baked Beet Chips - Gluten-free + Vegan

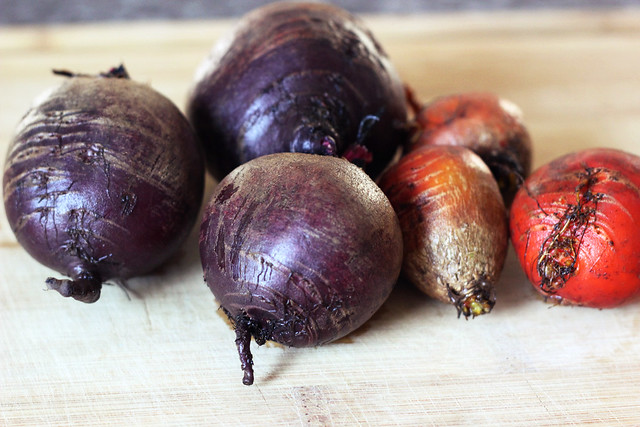
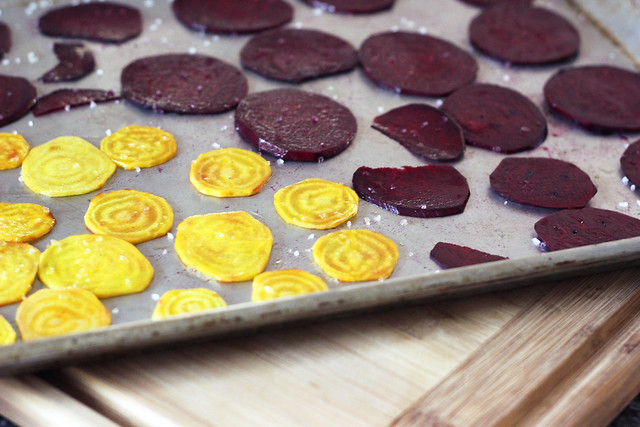
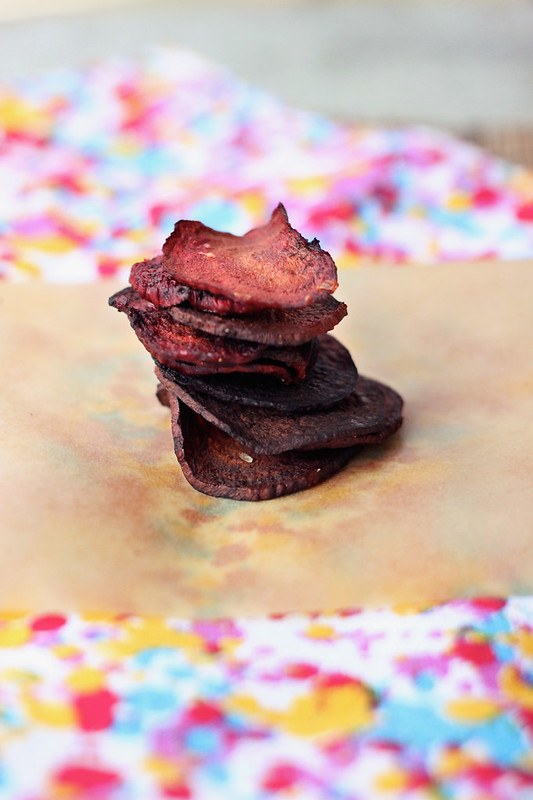
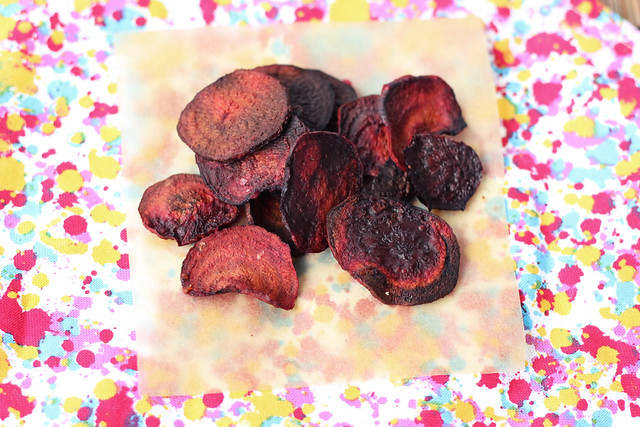
    These beet chips are super easy to make and you can keep them simple with just a little sea salt, or you can add some fun things like onion powder, or rosemary or any other spices or herbs you desire. I used a mix of both golden beets and red beets that we got in our CSA share from Porter Farms. Once you peel the feels and slice them, you will not believe the vibrant bright colors. They are almost too pretty to eat. Almost. These chips are so crispy and satisfying that you won’t be able to eat just one or even a couple. I made this batch and had planned to eat a few for a mid-afternoon snack and then save the rest for an evening snack. That didn’t work. At all. We ate them all.

    As far as storing goes, these chips will likely lose a bit of their crisp when you store them, so as with most crispy baked foods, best to eat these up right away when they are their crispiest. Darn.

    Besides being super delicious and so vibrantly beautiful, if you need even more reasons to eat beets here are a few of their wonderful benefits, beets are a unique source of phytonutrients called betalains. The betalains found in beets have been shown to provide antioxidant, anti-inflammatory, and detoxification support. If that isn’t enough, the combination of antioxidant and anti-inflammatory molecules in beets makes this food a highly-likely candidate for risk reduction of many cancer types. Oh and don’t forget the fiber! Beet fiber (along with carrot fiber) are two specific types of food fiber that may provide special health benefits, particularly with respect to health of our digestive tract (including prevention of colon cancer) and our cardiovascular system. More info about the wonderful benefits of beets can be found here.

    Crispy Baked Beet Chips - Gluten-free + Vegan

    Crispy Baked Beet Chips - Gluten-free + Vegan

    [print_this]Crispy Baked Beet Chips – Gluten-free + Vegan

    • 3-4 medium beets (or 6-8 small beets), peeled and sliced thinly about 1/16 – 1/8 inch – using a mandoline slicer is the best and easiest way to do this
    • 1 tablespoon olive oil
    • Sea salt to taste
    • Feel free to add any additional seasonings  that you wish *

    Preheat oven to 350º F.  Toss beets slices with oil in a medium sized bowl until they are all well coated and lay them flat in a single-layer on a rimmed baking sheet (bake in multiple batches, if necessary).  Bake for 20-30 minutes, until chips are crispy. Check after about 15 minutes since the time will vary based on thickness of chips and how dark your baking pan is, mine took about 30 minutes since my baking pan was really light in color. The second batch I made was on a much darker baking pan and they cooked up much quicker. Sprinkle a little sea salt over top when you take them out. Transfer to a wire rack and they will crisp up a bit more as they cool.

    * Play around with adding in different spices and herbs. I made one batch with some fresh rosemary, another with some onion powder and then just a plain batch, all were very good.

    [/print_this]

  15. Refrigerator Garlic Dill Pickles – Gluten-free, Vegan + Refined Sugar-free

    Refrigerator Garlic Dill Pickles - Gluten-free, Vegan + Refined Sugar-free

    If you have ever been to a restaurant with my husband Mark and I, for a quick bite at a diner, or any type of place that serves sandwiches or burgers, we have a bit of a ritual. Since I am obviously rarely able to order a sandwich at a restaurant, but Mark obviously can and does quite often, we have a little rule where the pickle on his plate is always saved for me. He likes pickles, but he knows how much I love them, so he will gladly gobble up his turkey club and then hand the delicious briney pickle spear or round over to me. Even when I haven’t noticed that he even had a pickle, let alone save it for me, there it is, at the end, waiting for me. What a great hubby I have – he totally supports my obsessive LOVE of pickles!!

    I also have been known to order a side order of pickles if a restaurant is known for having delicious ones. There is a place near Austin, Texas that everyone loves to go to for BBQ, it’s called the Salt Lick. They have delicious food, but since I am not a huge meat eater, I usually get a small order of smoked turkey with all the fixins’ and a huge side of pickles. I usually make a small dent in the food and then eat the pickles until I can’t eat them anymore. I have been to Disneyland in California twice now, and thanks to my friend Summer, getting one of the large dill pickles from one of the fresh food carts there is part of the whole experience. They are so delicious and they are best when eaten very slowly, to savor each and every bite. I seriously could eat pickles until my tongue hurts from all the vinegar. They are the best. But not all pickles are created equal. It is very rare that I buy pickles from the grocery store and just eat them at home, they are never quite good enough. A couple of weeks ago, I bought a jar of pickles from a girl at the farmers market and they were incredible. It was then that I realized that I should really just be making my own at home, especially now that cucumbers are in season.

    Most summers I usually make a batch or two of pickled peppers with the different hot peppers we grow in our garden, but since I didn’t plant any this year, I am not sure I will be doing it. But when I saw the delicious local gherkin cucumbers at the market a few weeks ago, I knew I HAD to buy some and make refrigerator garlic dill pickles. How could I not?

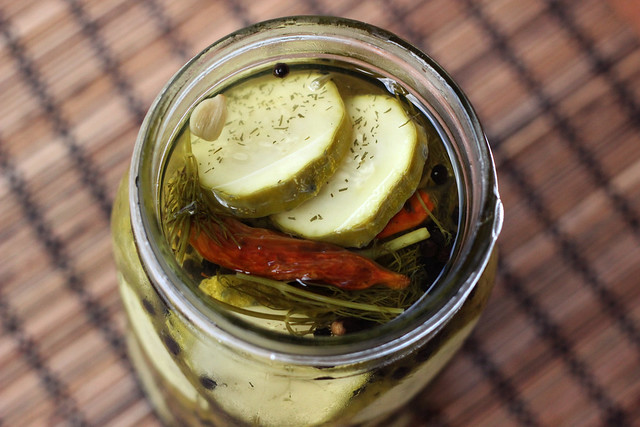
    Refrigerator Garlic Dill Pickles - Gluten-free, Vegan + Refined Sugar-free

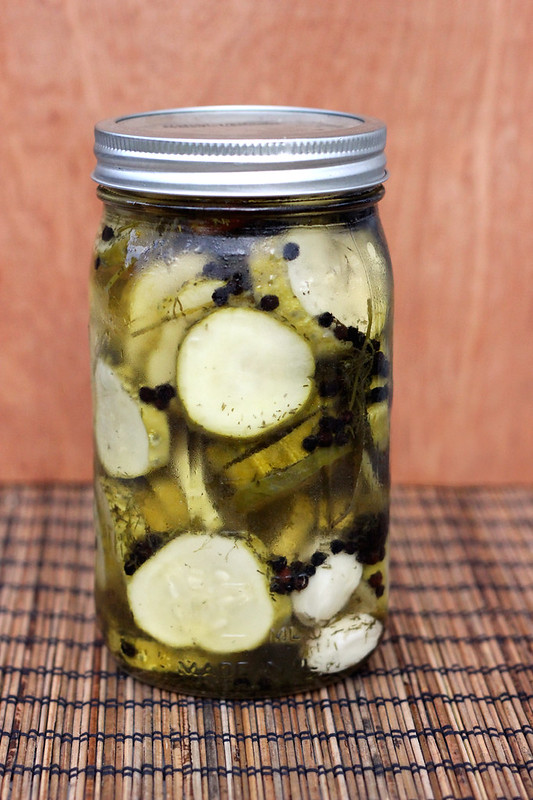
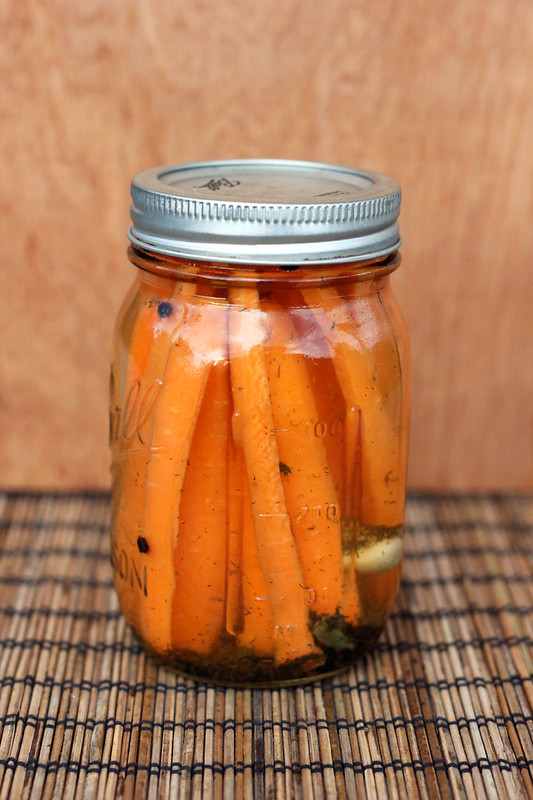
    You can play around with the spices in this recipe, too. I added my usual favorites and also tossed in a couple of dried super spicy thai peppers that I had dried out from our garden last year. They brought a very subtle spicy heat, that I really loved. You can omit the peppers all together or add a teaspoon or so of dried red pepper flakes if you don’t have whole dried pepper. Plus, you can use this same brine to pickle other things like peppers, cauliflower or carrots, which I did, since I had some leftover brine. The carrots were amazing and I think I may have eaten them between two sittings.

    OK, so who else is obsessed with pickles? I know I am not alone in my love.

    Refrigerator Garlic Dill Pickles - Gluten-free, Vegan + Refined Sugar-free
    [print_this]Refrigerator Garlic Dill Pickles – Gluten-free, Vegan + Refined Sugar-free
    Makes a couple of jars (depends on the size of your cucumbers and your jars, etc)

    • 2 pounds local gherkin cucumbers (you can also use any other small firm cucumber of your choice)
    • 2 1/2 cups water
    • 2 1/2 cups white distilled vinegar
    • 3 tablespoons raw cane sugar or other sweetener of your choice
    • 3 tablespoons coarse kosher salt
    • 2 bay leaves
    • 2 tablespoons whole coriander seeds
    • 4 cloves garlic, peeled
    • 2 tablespoons black peppercorns
    • a couple of sprigs of fresh dill (or a couple of teaspoons of dried dill)
    • Optional spicy add-ins: 1 or 2 spicy dried peppers, red pepper flakes or you can add some sliced jalapeños in with the cucumbers.

    Clean the cucumbers very well and slice them as thin as you would like them, I would say I cut mine to about 1/4″ thick rounds. You could also cut them into spears or leave them whole depending on their size. Place them in a large glass preserving jar or two smaller jars.

    In a non-reactive saucepan, bring the other ingredients to a boil, then reduce the heat and simmer for five minutes.

    Remove from heat and pour the brine over the cucumbers. Place the lid on the jar and let cool. Once cool, refrigerate. You can start enjoying them the next day, but obviously they are better after a couple of days. They’ll keep for about 2 months in the fridge.

    * This brine is great on lots of other veggies, like carrots, cauliflower, peppers, etc. You can also add onion slices to the jar with the cucumbers, if you wish. Play with the recipe and make it your own.

    [/print_this]

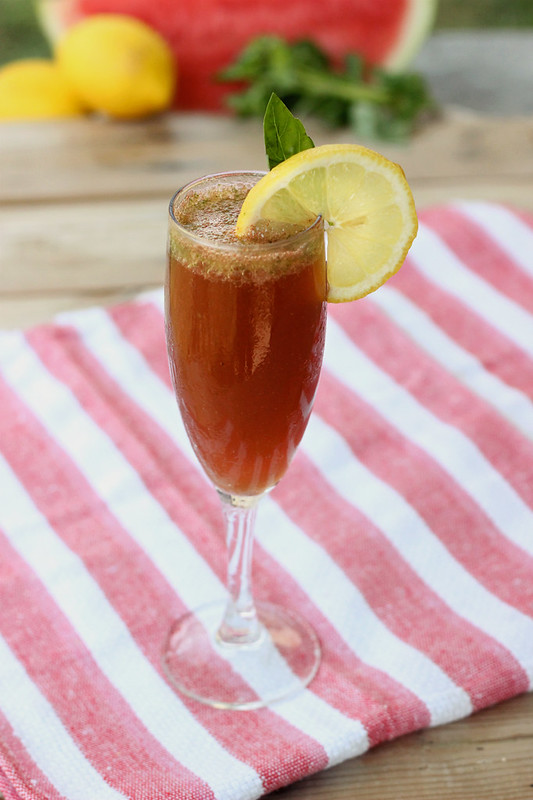
  16. Basil Watermelon Refresher – Gluten-free, Vegan + Refined Sugar-free

    IMG_2625Basil Watermelon Refresher - Gluten-free, Vegan + Refined Sugar-free

    I am sure based on the sweat dripping down your brow (and likely other places) right now, we are all fully aware that not only are we at the peak of the summer, but it is a super duper hot-ass summer, at that! With record highs, excessive humidity and a lack of rain, it has been crazy unbearable in our parts and I know that is the case for most other areas in the US.

    Basil Watermelon Refresher - Gluten-free, Vegan + Refined Sugar-free
    What else is there to do when it is crazy, stupid hot, then to have a refreshing beverage? And no, it doesn’t necessarily have to be an alcoholic beverage, “mocktails” (non-alcoholic cocktails) are just as refreshing, if not more, plus you can save on those empty calories. I am always playing around with different drink recipes over here and since I eat a very clean diet, I try to keep my alcohol consumption to a minimum at home. I feel so much better without it.

    I was elated when Free People asked me back as a guest-poster to share a series of non-alcoholic cocktail recipes with their readers through the month of August. Each week I will be sharing a different summertime inspired beverage that is safe for the whole family and is sure to refresh you on the hottest of days. And don’t worry, there will also always be a note on how to make each drink alcoholic, if you wish.

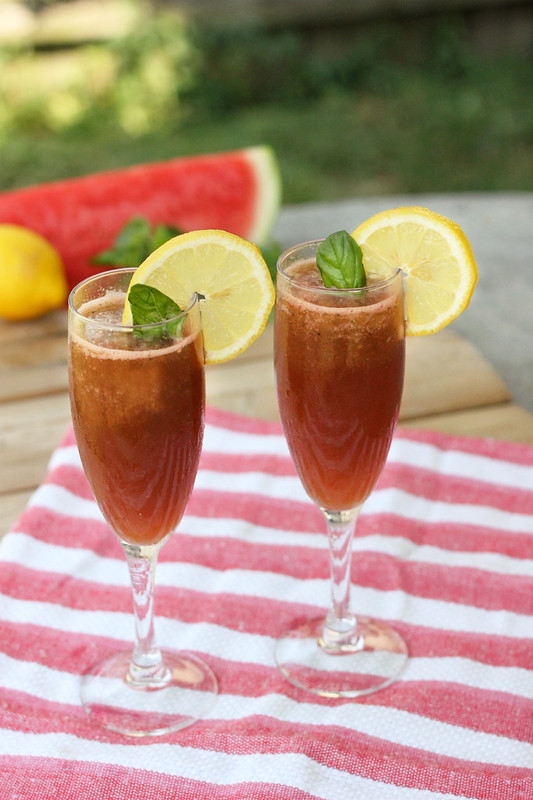
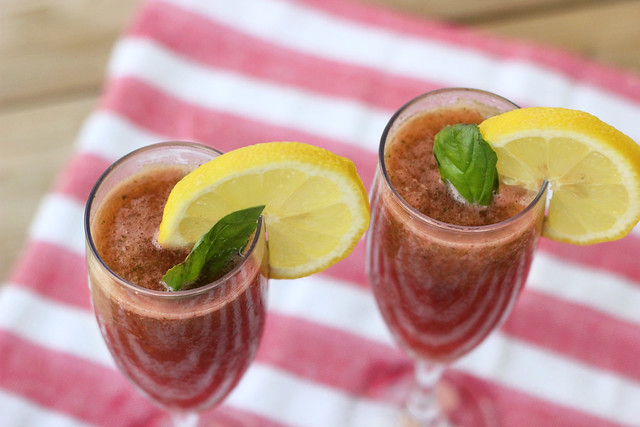
    The first recipe I am sharing is Basil Watermelon Refresher. This drink is bursting with refreshing summer flavors. Frozen watermelon and lemon pair together for a sweet and tart treat for your mouth with a surprisingly subtle, sweet and almost spicy punch from the basil. Top the slushy mixture off with sparkling water for a fizzy kick or if you are looking for a kick of a different kind, you replace the sparkling water with Prosecco, a delicious and refreshing dry sparkling white wine.

    Basil Watermelon Refresher - Gluten-free, Vegan + Refined Sugar-free

    Head on over to the Free People Blog, BLDG 25, for the full recipe and stay tuned for more “mocktail” recipes in this series that I will be sharing each week throughout August.

  17. Summer Harvest Frittata – Gluten-free + Dairy-free

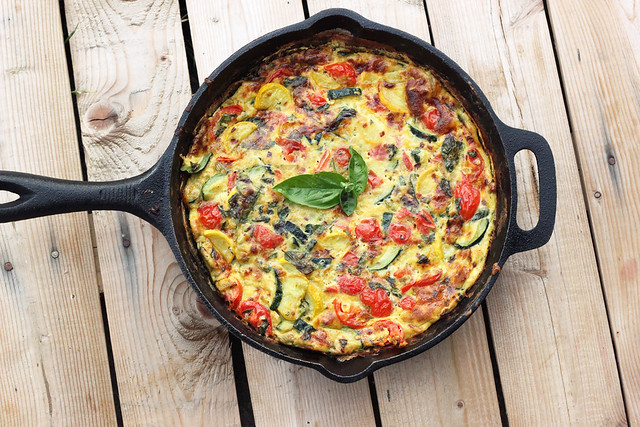
    Summer Harvest Frittata - Gluten-free + Dairy-free<

    I am seriously in love with my CSA from Porter Farms. It is so cost effective, the produce is all organic (and obviously local) and each week there are new surprised in the bag that I get excited about playing with.

    Summer Harvest Frittata - Gluten-free + Dairy-free

    I am sure most of you do know, but if you don’t know what a CSA is, here is a quick description from the Porter Farms website:

    CSA stands for “community-supported agriculture”. The idea behind it is simple: individuals share the costs, risks and bounty of growing food in an environmentally-friendly fashion. The concept first appeared in the U.S. in the early 80’s, when people sought higher quality foods available from local sources.

    The meaning of “community-supported agriculture” as it relates to the mission of our program here at Porter Farms is as follows: CSA participants, through their membership, help pay for seeds, compost, irrigation supplies, equipment maintenance, fuel, labor, etc. In return, the farm provides, to the best of its ability, 22 weeks of fresh, certified organic produce throughout the growing season.

    Community supported agriculture is a grassroots movement that reconnects the local community with its food source, the local farmer. This alternative to the grocery store and big chains couldn’t fit more perfectly into my lifestyle and my mindset. My only complaint about CSAs is that I didn’t join one sooner! This most definitely will be a yearly thing for us.

    Summer Harvest Frittata - Gluten-free + Dairy-free

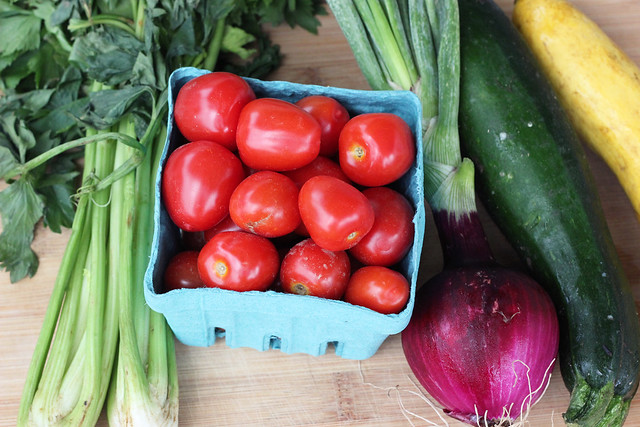
    Each week I try to get creative with the offerings in my bag, playing around with new recipes, getting inspired. This week we received zucchini, yellow squash, cucumbers, celery, red and golden beets, tomato berries and red onions with their tops. So many things that I love! I wanted to play around with a dish that would really highlight as many of the ingredients as I could. I did pretty well, the only two that didn’t make it into this dish were the beets and the cucumbers and don’t worry I have big plans for both of those.

    Summer Harvest Frittata - Gluten-free + Dairy-free

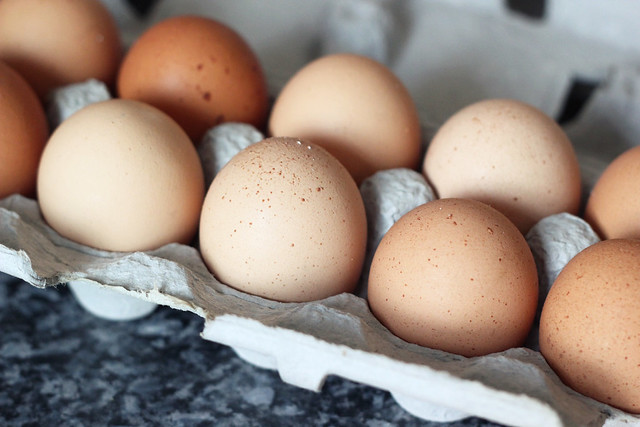
    In addition to the CSA, each Saturday morning, I always pick up a dozen (or two) brown eggs from Painted Meadows Farm at the Elmwood Bidwell Farmers Market. I am telling you, until you have had eggs fresh from a farm (or maybe you have my ultimate dream and you have your own chicken in the yard), you have no clue what you are missing. The taste isn’t even comparable, the yolks are a shade of yellowy, orange you wouldn’t believe. Now I am spoiled, it’s the only kind of eggs I want to eat.

    Summer Harvest Frittata - Gluten-free + Dairy-free<

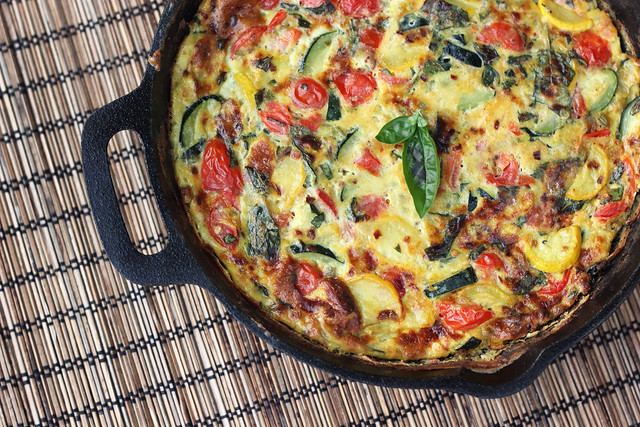
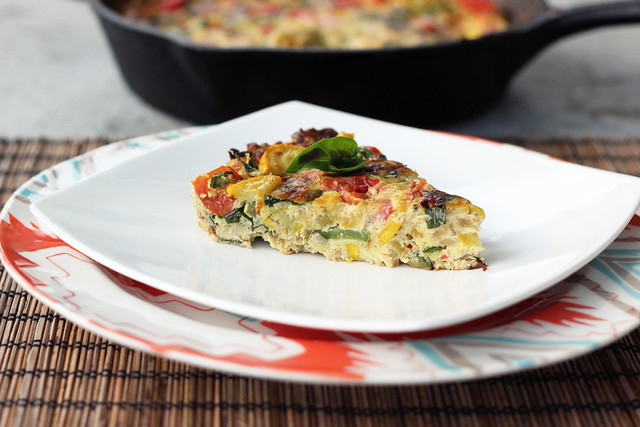
    In looking over our pantry and refrigerator and all of these lovely, seasonal ingredients, I had the perfect thought for a light summertime dinner – a Summer Harvest Frittata. What a great way to highlight all the wonderful items in season right now.This recipe is quite versatile so feel free to play around with it and add or take away anything you’d like or have on hand from your own CSA, farmers market or your garden. I added a bunch of fresh basil since it is growing abundantly and beautifully in our yard, but the flavor profile can easily change to whatever fresh herb or spice you have readily available. This frittata was perfectly satisfying for dinner with a small salad on the side, but it would also be great for breakfast, brunch or heck even lunch, you can eat it all day!

    Summer Harvest Frittata - Gluten-free + Dairy-free

    [print_this]Summer Harvest Frittata – Gluten-free + Dairy-free
    Serves 6-8

    • 6-8 large local farm fresh brown eggs (more eggs will give you a fluffier thicker frittata, less eggs and it will be thinner)
    • 1/8 teaspoon red pepper flakes (optional)
    • 1/4 cup fresh basil, roughly chopped
    • 1 tablespoon olive oil
    • 1/2 cup celery, chopped
    • 1 small red onion, chopped
    • 2 cloves garlic, minced
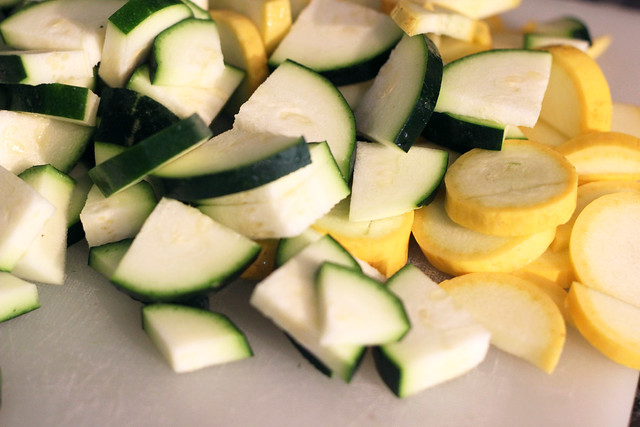
    • 1 medium zucchini, cut in half-length wise, then cut in half again (if it is large enough) and sliced
    • 1 medium yellow squash, cut in half length wise, then cut in half again (if it is large enough) and sliced
    • 1 cup grape tomatoes, halved or quartered depending on what size they are
    • Salt and pepper to taste

    Preheat the oven to 400ºF.

    In a medium bowl, whisk the eggs with a small pinch of salt, red pepper flakes and basil. Set aside.
    In a 8 to 9 inch oven-safe, cast iron skillet, heat olive oil over a medium-high heat, make sure you get the olive oil all up the sides using a brush or some wax paper, etc. (you can also use an oven-safe nonstick skillet). Add the onion and celery, with a dash of sea salt, sauté about 3-5 minutes until the onion is translucent. Add the garlic and sauté another 2 minutes, being careful not to burn it. Add the zucchini and squash, toss around and sauté about 8-10 minutes, until they are tender. Add the tomatoes and cook for another 2-3 minutes until the tomatoes start to soften and get tender. If there is any water sitting in the pan from the veggies, pour it off. Salt and pepper to taste.

    Turn down the heat a bit. Add the egg mixture to the skillet by pouring over the veggies and giving it all a really quick stir to combine. Cook over a medium-low heat for about 5 minutes or until the eggs are just set and there isn’t a lot of liquid running around the pan. To do this, run a spatula underneath the sides of the frittata and tilt the pan so the uncooked eggs run to the underside and cook.

    Place the skillet in the center of your preheated oven. Allow to bake for 13-15 minutes, until it is golden brown, well set and puffy. Remove from oven with oven mitts and let cool for several minutes, cut into wedges and serve.

    [/print_this]

  18. Gold Label Virgin Coconut Oil Giveaway

    ********* The giveaway is now closed! Thank you so much to everyone that entered and congrats to Eve our randomly selected winner! *********
    Eve I will be emailing you to let you know you have won and to get your mailing address.
    If you are interested in purchasing your own jar of Gold Label Virgin Coconut Oil from Tropical Traditions website, you can start shopping here.


    Banana Blueberry Coconut Smoothie  - Vegan + Gluten-free

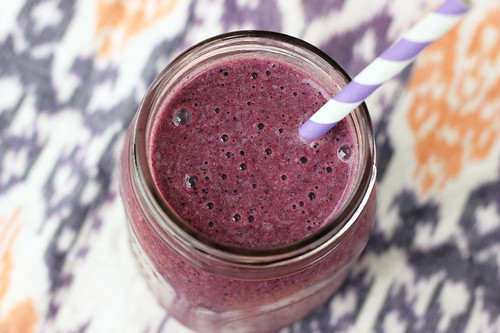
    As I mentioned a little while back, I recently received a sample of Gold Label Coconut Oil from Tropical Traditions and I have really been enjoying making things with it. One of my favorites has been this Banana Blueberry Coconut Smoothie, that I featured recently. Sometimes I make a similar smoothie but instead of blueberries, I add in a tablespoon or two of unsweetened organic baking cocoa. Wow, what a delicious and sinful treat.

    Blueberry Rosemary Multi-grain Galette

    Another recipe that I made recently that really used coconut oil in a different way was this Blueberry Rosemary Multi-Grain Galette, instead of butter or a butter alternative, I use frozen coconut oil to give the crust of this galette the perfect texture, it is so easy and perfect if you are dairy-free or vegan.


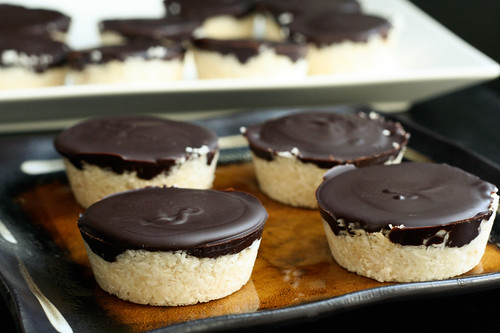
    Dark Chocolate Coconut Treats - Vegan, Gluten-free + Refined Sugar-Free

    And of course, the most popular recipe here on Tasty Yummies that really features coconut oil are my Dark Chocolate Coconut Treats, which can easily be made in a regular sized or mini-sized muffin tin. These may just be my favorite use for coconut oil.

    A quick search for coconut oil here on Tasty Yummies will quickly show you just how often I use coconut oil and it will get you tons of great recipes to play around with and to be inspired by. In addition to being great to cook with, I also from time to time use coconut oil on my skin and hair (and the same goes for the dog), since it makes a really great natural moisturizer. The coconut oil that I received from Tropical Traditions really stands out for me among the different brands I have used, it has a great subtle flavor and it is very high quality. I find the coconut oil from Tropical Traditions tastes cleaner and more pure than any other brand I have tried. I cannot wait to continue making yummy things with it. A lot of you already know the great benefits that coconut oil provides and as much as I would love to go into that on here, the FDA does not want us to discuss the health benefits of coconut oil on a page where it is being sold or given away, so here is the best website to read about the health benefits of coconut oil.

    Since, I am really enjoying the Gold Label Virgin Coconut Oil from Tropical Traditions so much, I am hosting a giveaway for a 1 quart (32 ounces) jar. Read below to see how you can enter to win.

    Gold Label Virgin Coconut Oil - 32 oz.Win 1 quart of Gold Label Virgin Coconut Oil!

    Tropical Traditions is America’s source for coconut oil. Their Gold Label Virgin Coconut Oil is hand crafted in small batches by family producers, and it is the highest quality coconut oil they offer. You can read more about how virgin coconut oil is different from other coconut oils on their website: What is Virgin Coconut Oil?

    You can also watch the video they produced about Gold Label Virgin Coconut Oil:

    Tropical Traditions also carries other varieties of affordable high quality coconut oil. Visit their website to check on current sales, to learn about the many uses of coconut oil, and to read about all the advantages of buying coconut oil online.

    Disclaimer: Tropical Traditions provided me with a free sample of this product to review, and I was under no obligation to review it if I so chose. Nor was I under any obligation to write a positive review or sponsor a product giveaway in return for the free product.

     Enter the contest

    Please leave a *separate comment* below for each entry!
    You can enter up to 4 times

    1) In order to be entered into the giveaway, you *must* sign up for the Tropical Traditions newsletter here.
    Please comment below to let me know that you have done so (with a working email address) to enter yourself in the giveaway *

    Additional entries will be accepted for the following:

     2) Like both the Tasty Yummies and Tropical Traditions pages on Facebook.
    Share the post I put up on the Tasty Yummies page to be included in the giveaway then come back and comment here telling me you liked both pages, that you’ve shared my post
    and why you’d like to win the quart-size sample of coconut oil.

    3) Tweet about the contest and while you are there follow me on Twitter @herobeth and follow @troptraditions and/or @ttspecialdeals
    You could say something like: “I just entered to win @troptraditions Gold Label Virgin Coconut Oil from @herobeth on Tasty Yummies  http://wp.me/p23r4t-B7″
    Make sure you comment here to let me know that you posted about the giveaway.

    4) Subscribe to the Tasty Yummies RSS feed in your RSS reader or by email
     Again, make sure to comment here to let me know that you subscribed.

    Please note – this giveaway is only open to the US and Canada.

    Again, please make sure you leave a *separate comment* below for each entry,
    if you don’t comment you will not be entered!

    The giveaway will be open until the end of the day Wednesday, August 8.
    Winner will be selected at random and announced on Thursday, August 9. 1 winner will be selected and notified through email and this post.

    Please note: If you order by clicking on any of my links and have never ordered from Tropical Traditions in the past, you will receive a free book on Virgin Coconut Oil, and I will receive a discount coupon for referring you.

  19. Mint Chocolate Chip Smoothie – Gluten-free + Vegan

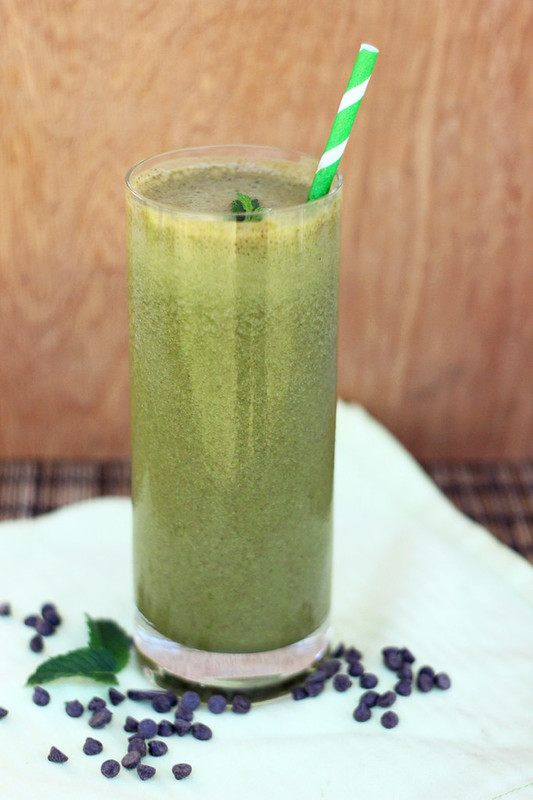
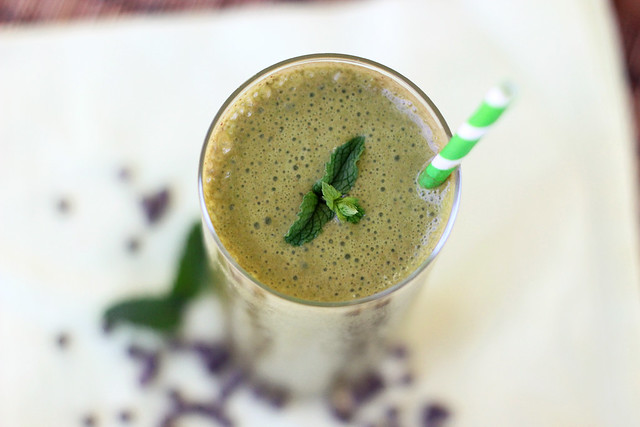
    Mint Chocolate Chip Smoothie - Gluten-free + Vegan

    With the abundance of fresh mint in the yard, I decided I had to find a smoothie to make that would really highlight the mint. And what goes best with fresh mint? OK, that isn’t really a serious question, we all know the answer… it’s chocolate.

    I created a quick and very easy mint chocolate chip smoothie that you would swear cannot be good for you, until you hear there is a full 2 cups of baby spinach in there. If Mark hadn’t walked into the kitchen while I was making it, I know I could have totally convinced him it was some type of junk food. But when he tasted it and I asked him what he thought, his reply was “this is so amazing, but I saw you put something green in there, what was it?”. He couldn’t believe that is was baby spinach. There is no weird texture or taste, at all.

    The spinach brings a beautiful shade of green to the drink, but besides a serving or two of your daily veggies, it also supplies you with many wonderful benefits like Vitamins K, A and C. Plus spinach is a great natural anti-inflammatory. Additionally, spinach is found to have a new category of health-supportive nutrients called glycoclycerolipids, studies are now showing glycoglycerolipids from spinach can help protect the lining of the digestive tract from damage — especially damage related to unwanted inflammation. Read more about the benefits of spinach here.

    This smoothie is creamy with a really nice fresh mint flavor and the little flecks of chocolate are perfect. If you don’t want to blend the chocolate chips in or you don’t want the little bit of sugar from them, instead just blend in a tablespoon or two of good quality unsweetened baking cocoa or even shavings of a good quality unsweetened chocolate. I didn’t have any unsweetened chocolate on hand or I would have went with that.

    This would be a great smoothie to serve the kids (or your hubby) to sneak in a ton of veggies.

    Mint Chocolate Chip Smoothie - Gluten-free + Vegan

    [print_this]Mint Chocolate Chip Smoothie – Gluten-free + Vegan
    serves 1

    • 1 cup organic unsweetened vanilla almond milk (or other non-dairy milk of your choice)
    • 1 frozen organic banana (if it isn’t frozen, just add a bit more ice in at the end)
    • 2 cups tightly packed organic baby spinach
    • 1/3 cup tightly packed fresh mint leaves
    • 1 tablespoon ground chia seeds (optional)
    • 2 Medjool dates (or any other sweetener of your choice like maple syrup or maple sugar, honey, liquid stevia, etc)
    • 1/4 – 1/3 cup dairy-free, gluten-free mini chocolate chips
    • small handful of ice cubes

    Add all of the ingredients except the chocolate chips and the ice to your blender and blend until very smooth and creamy, blend for about 3 minutes. Then add in the ice and blend until there are no large chunks, then add the chocolate chips and give it a few pulses to break them up a bit. Serve immediately. Toss a few chocolate chips or some chocolate shavings on top with a sprig of fresh mint, if you wish.

    [/print_this]

  20. Chilled Carrot Ginger Coconut Soup – Gluten-free + Vegan

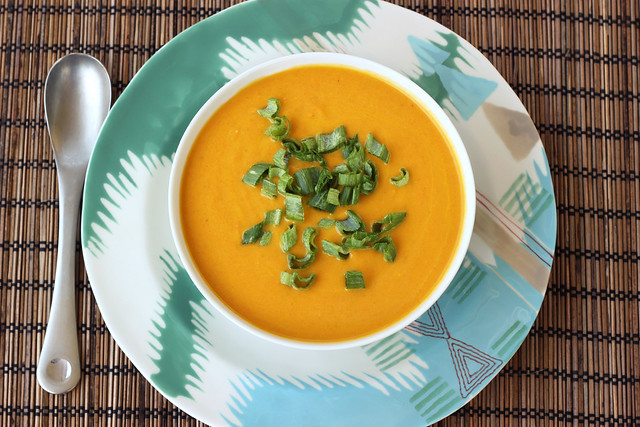
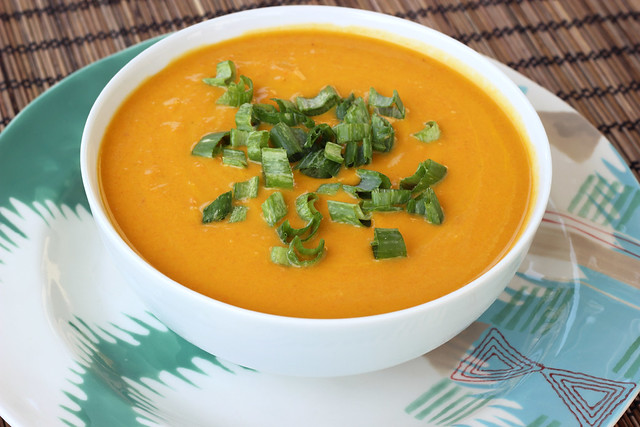
    Chilled Carrot Ginger Coconut Soup - Vegan + Gluten-free

    I am very excited to be sharing another recipe with the Free People Blog, BLDG 25. Today’s recipe is a simple but totally impressive chilled soup that is perfect for all of these hot weather days we’ve all been having.

    When it is as hot as it has been, I find it hard to want to start up the stove or oven and then do all the prep work in a hot kitchen. Then, once I am really good and sweaty, that’s when dinner is ready. Nothing like eating a hot meal and feeling like you want to just pass out or jump in a pool.

    The great thing about this chilled carrot soup is you can do the prep work the night before or early in the morning when the kitchen and the rest of your house still has a chill to it from the overnight cool down. You make the soup quick, puree it and then put it in the fridge until you are ready to eat. It makes a wonderful dinner or lunch with a simple side salad, or it would be wonderful as an appetizer.

    But, if you are like my hubby, Mark, and chilled soups totally skeeve you out, you can enjoy this soup warm, room temperature or hot. Trust me, I may have taken many spoonfuls of it, while it was cooling and it was just as incredible.

    This recipe was originally shared on the Free People blog.

    Chilled Carrot Ginger Coconut Soup - Vegan + Gluten-free
    [print_this]Chilled Carrot Ginger Coconut Soup – Vegan + Gluten-Free
    serves 4-6

    • 1 tablespoon olive oil
    • 1 onion, chopped
    • 3 tablespoons finely chopped ginger
    • 3 cloves garlic, minced
    • 1 lb. organic carrots, peeled and chopped into 1-inch pieces
    • 4 cups organic low sodium vegetable broth
    • 1/2 teaspoon sea salt
    • 1-2 teaspoons yellow curry powder (optional)
    • 1/4 teaspoon red pepper flakes (optional)
    • 1 cup full fat organic coconut milk

    Heat olive oil in a large saucepan over a medium/high heat. Add in the onions and ginger, sauté for 4-5 minutes until the onions are beginning to get translucent and both the onions and ginger are fragrant. Add the garlic and sauté for another minute. Then pour in the broth, add in the carrots, salt, curry powder and red pepper flakes.

    Bring to a boil, then turn the heat down and cover the pan and allow to simmer for 25-30 minutes until the carrots are nicely tender. Remove the pan from the heat (or just turn off) and allow the soup to cool, uncovered, for about 15-20 minutes.

    Purée with an immersion blender or in batches using a regular blender or food processor*, until smooth. Return the puree to pot over a low heat. Pour in the coconut milk, stirring well to combine. Once combined, remove it from the heat and serve hot, or store it in the refrigerator and serve chilled, which is what I did. Top each bowl with some thinly sliced green onions.

    *When puréeing hot soup in a blender or food processor, do so in small batches, filling the blender pitcher only about halfway. Put the lid on, but remove that small cap in the lid (if you have it) and hold the lid down tight with a towel, otherwise the steam will cause the lid to explode off, spewing hot liquid everywhere. This has never happened to me, but it can, so be careful. [/print_this]

    While you are over there check out some of my other recipes: Roasted Balsamic Strawberry Mini-Tarts with Whipped Coconut Cream – Gluten-free + Vegan, No-Bake Banana Cream Pie – Gluten-free + Vegan, Blueberry Lavender Vanilla Ice Cream – Vegan, Gluten-free, Refined Sugar-free

  21. Photo Fun Day Friday

    Photo Fun Day Friday
    A simple avocodo salad with cherry tomatoes, yellow bell pepper, fresh cilantro and lime juice.
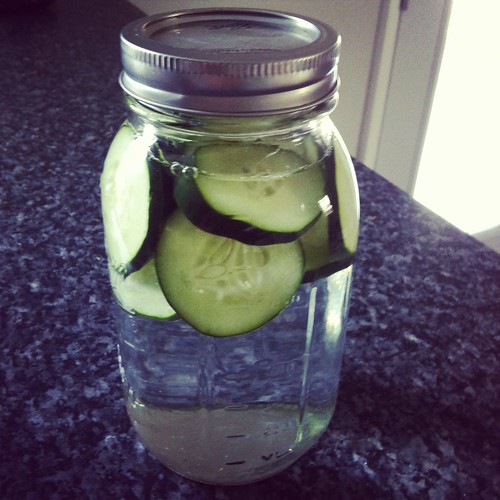
    Photo Fun Day Friday
    Catching dreams.

    Photo Fun Day Friday
    Cucumber water. My summertime obsession.
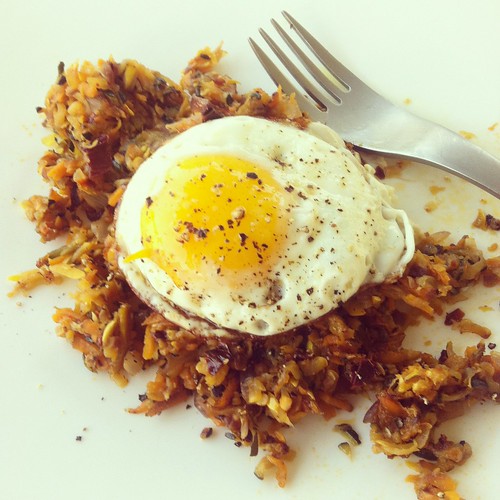
    Photo Fun Day Friday
    A quick breakfast hash with zucchini, yellow squash and sweet potato. And of course, I put an egg on it.
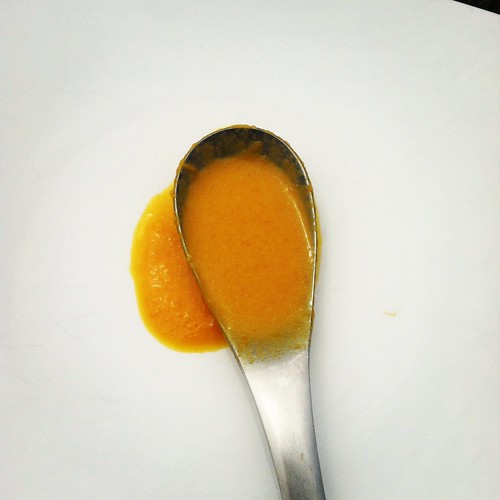
    Photo Fun Day Friday
    A little sneak at a new recipe I worked on over the weekend, sharing it on the Free People blog this Sunday. Look for the post directing you to the recipe.

    Photo Fun Day Friday
    My sweet niece, Teagan (and her adorable bum).

    Photo Fun Day Friday
    Seri, keeping watch for the neighborhood groundhog.

    Photo Fun Day Friday
    A detail from one of our silkscreened test prints.
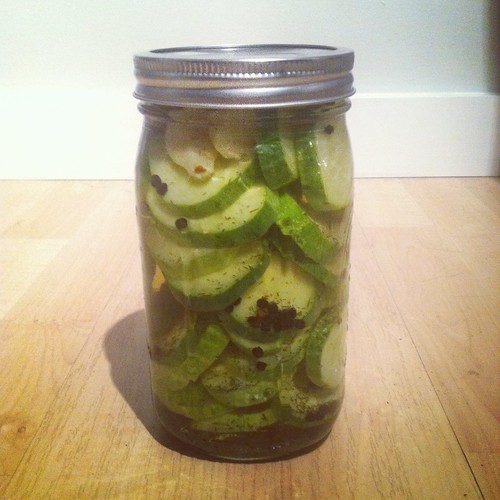
    Photo Fun Day Friday
    Jar of homemade refrigerator garlic dill pickles. Recipe coming soon.
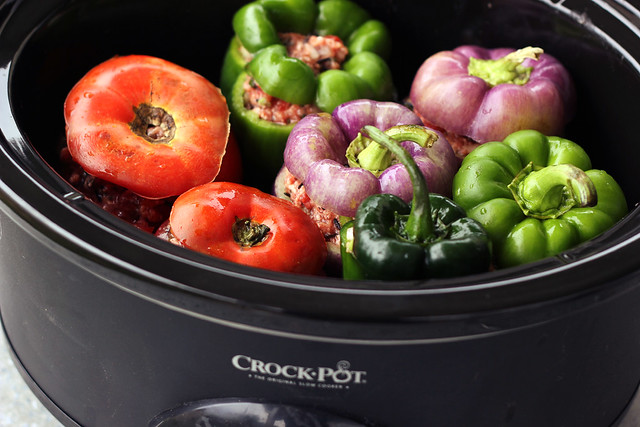
    Photo Fun Day Friday
    Seri, pooped after the park yesterday.
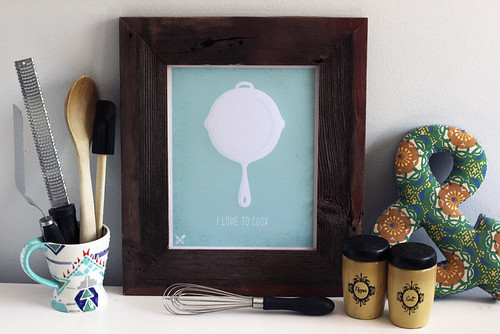
DISCLAIMER: This website is written and produced for informational and educational purposes only. Statements within this site have not been approved by the FDA. Content should not be considered a substitute for professional medical expertise. The reader assumes full responsibility for consulting a qualified health professional before starting a new diet or health program. Please seek professional help regarding any health conditions or concerns. The writer(s) and publisher(s) of this site are not responsible for adverse reactions, effects, or consequences resulting from the use of any recipes or suggestions herein or procedures undertaken hereafter.