-
Vegan Pumpkin Pie Martini – Gluten-free and Refined Sugar-free
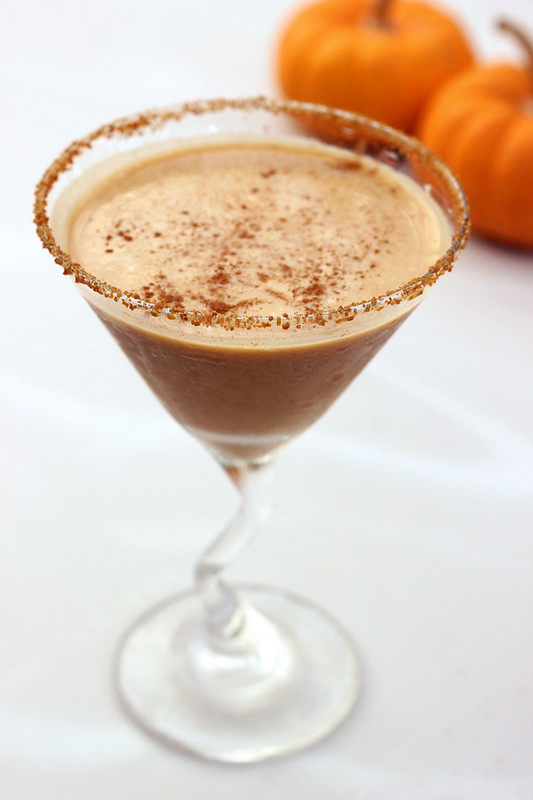
I will keep this one short, yesterday’s post was enough words to read for the next week. Phew! What can I say, sometimes I just have stuff I wanna chat about. Thanks so much for being here to read it and all the rest of my ramblings!
I originally was only going to be sharing this recipe with my email list. An exclusive content kinda thing. But, I just can’t keep this from you guys and I am a little bit of a sucker. Many of you asked if you could still get the recipe even if you aren’t on my mailing list so I decided rules are meant to be broken, even if they are your own.
Too many people hate emails lists and I kinda don’t blame you. My inbox is a hot mess most days. If you are a busy person and you have a lot of stuff coming and going from your email everyday, adding one more could just be the tipping point. I don’t ever want to annoy you, my friends. So, for those of you that don’t want to mess with emails, I didn’t want you guys to feel left out. I don’t like holding out on you guys and this one is way too yummy to not be shared with the masses. So here ya go – enjoy this, share it and make it part of your holidays this year.
-
Vegan Pumpkin Spice Almond Butter Fudge (Gluten-Free)

Phew this has been a busy couple of weeks here on Tasty Yummies. I hope you guys have enjoying all of the new stuff and I am not overwhelming you with pumpkin already. I have obviously been inspired by the start of the new season!
I love coming up with fun new ways to enjoy pumpkin this time of year. Who wants to get stuck in a pumpkin rut? Not me! There are plenty of muffins, cookies, smoothies, lattes, etc – so a simple no-cook pumpkin almond butter fudge recipe seemed like a fun new way to enjoy pumpkin.
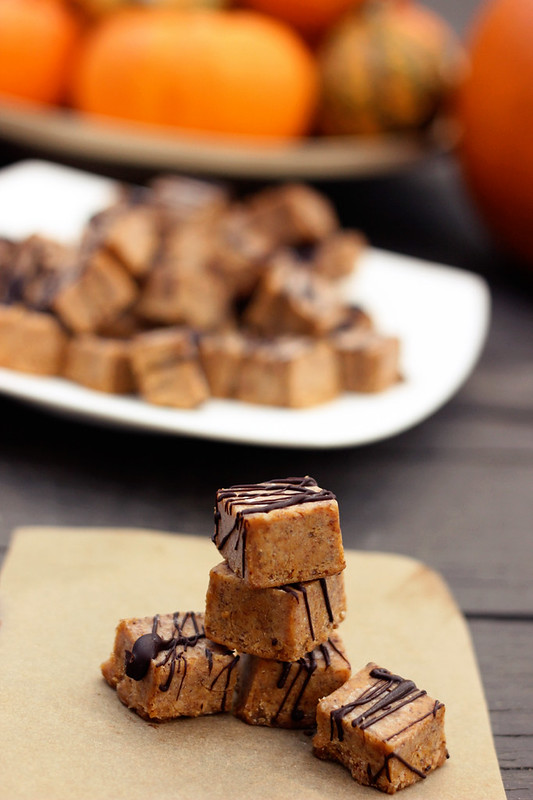
This sweet treat is super simple to make, grain-free, refined sugar-free (depending on the chocolate you use on top), vegan, etc. If you can’t have nuts, consider trying sunflower seed butter in place of the almond butter. Read the rest of this entry »
-
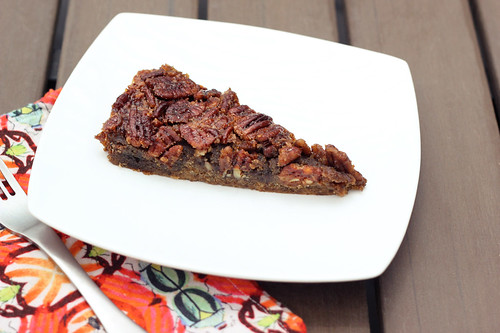
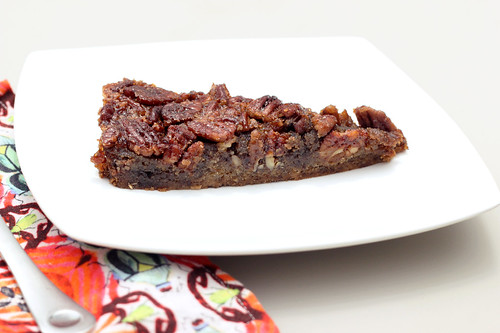
Grain-free Maple Bourbon Pecan Tart – Gluten-free + Dairy-free
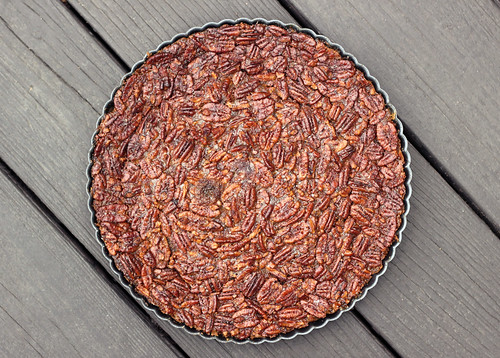 I am going to start off this post by saying that this isn’t the usual über healthy dessert that I am usually touting here on Tasty Yummies. It has a full 2 cups of maple syrup and some additional coconut sugar. So yeh. But the good news is it IS healthier than the usual pecan pie. No butter, no corn syrup, no refined sugar, etc. Could I have made this healthier? Probably, but this was the compromise I came up with since I promised hubby I wouldn’t mess with this classics too much. I actually hadn’t even planned on sharing this recipe, but after I posted a photo on Instagram, people were begging for the recipe.
I made this for the Kentucky Derby party that we hosted here at our house on Saturday. I promised Mark an afternoon of all of his favorite Southern foods that remind him of Louisville. I promised not to “healthy-up” the recipes. I made mini hot browns (the sandwich made famous at the Brown Hotel in Louisville), pimento cheese dip, southern style deviled eggs, jalapeño cornbread mini muffins, a blackeyed pea salad, apple cobbler (I made this recipe with apples instead of the berries), mint-infused raw sugar simple syrup for Mint Juleps and this Maple Bourbon Pecan Tart. The menu was ALL about Mark and though I couldn’t eat a lot of it, I wanted it to be all yummy and I wanted to bring as much of Mark’s home to him on a day he is super homesick
 When I promised to make pecan pie, I did specify that I had to make it gluten-free and dairy-free so I could enjoy it and I refused to make it with the usual corn syrup or regular sugar. I wanted a grain-free crust that would compliment but not overpower the tart and I went for as much maple and bourbon flavor as I could get.
I am so excited with how this turned out. It has a really rich flavor from the maple syrup and the bourbon that is really special. It is luscious, sticky and sweet, without being overly sweet and heavy. Though it isn’t something I will be making often, it is perfect for those special occasions, like a Derby party or the holidays.
[print_this]Grain-free Maple Bourbon Pecan Tart – Gluten-free + Dairy-free
Serves 8-10Tart Crust
- 2.5 cups almond flour aka almond meal
- 3 tablespoons flax seed meal
- 3 tablespoons maple syrup
- 1/4 cup coconut oil, melted
- 1/2 teaspoon baking soda
- 1/8 teaspoon salt
Preheat the oven to 375º F. Lightly grease a 9 or 10-inch tart pan. In a large bowl, add all of the crust ingredients and mix very well. I like to get my hands right in there to make certain it is all mixed up. Add the crust mixture to the tart pan and press down firmly into the pan, going up the sides just a tad bit. Bake for 10-15 minutes until golden brown. Remove from the oven and set aside.
Tart Filling
- 2 cups pure organic maple syrup, preferably Grade B
- 3 large local farm fresh eggs, lightly beaten
- 1/4 cup coconut sugar or firmly packed light or dark brown sugar
- 1/4 teaspon salt
- 3 tablespoons coconut oil, melted
- 3 tablespoons bourbon
- 1 teaspoon vanilla extract
- 2 cups organic raw pecan halves or pieces
Meanwhile in a saucepan over medium-high heat, bring the maple syrup to a boil and boil for 8 to 10 minutes to reduce. Remove from the heat and pour into a heatproof measuring pitcher. The syrup should be reduced to 1 1/2 cups. If necessary, return the syrup to the saucepan and continue to boil until sufficiently reduced. Let cool to room temperature before proceeding.
In a bowl, stir together the eggs, coconut sugar, reduced maple syrup, the bourbon, salt, coconut oil and vanilla until well mixed. Add the pecans and stir well. Pour into the partially baked pie shell, making sure the pecans are evenly distributed.
Bake the pie until the center is set and firm to the touch, 25-30 minutes. Transfer to a wire rack and let cool for 1 hour; remove pan sides. Serve slightly warm or at room temperature.[/print_this]
-
Photo Fun Day Friday
Hope everyone is in the full swing of the holidays and loving and cherishing every moment of it! I have been! It has been an emotional few weeks over here. The emotions have been caused by a variety of different reasons – like this being our last holidays living in this home and in Buffalo for that matter. Of course the sad tragedy of last Friday and the loss of all of those sweet innocent babies hit me just as hard as I know it hit most everyone else. On top of all of this, our family has been dealing with a terrible accident that landed a family member in the hospital the Friday prior, he is in serious condition but very lucky to be alive. Please send if you would, your positive thoughts, prayers, healing vibes, etc. his way, he could certainly use them in his long road to recovery ahead.
It has been a lot of happiness and sadness for a short time, but it has all made me appreciate the magic of life and love that much more! Life is fragile, every moment a blessing and the only way I know how to embrace that is to live each day to it’s fullest, grateful for all that I have. I hope you are all doing the same, hugging your loved ones a little tighter this holiday season and counting your blessings whenever possible. Love and light to you all!
As you will see in the photos, this week has been spent full embracing the holidays, shipping out the last minute orders for Hero, shipping gifts to out of town friends and family, packing boxes and squeezing in as much family and friend time as humanly possible!
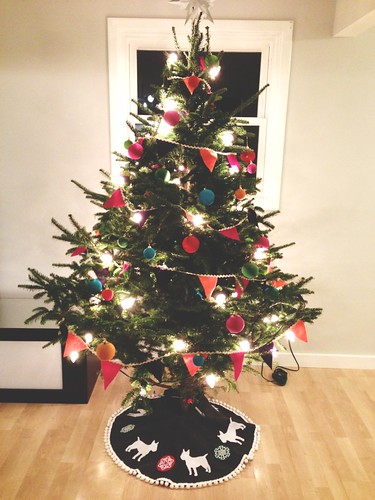
Our Christmas tree got an update with this custom made (and hand sewed) bull terrier tree skirt made by our friend, Joanne.
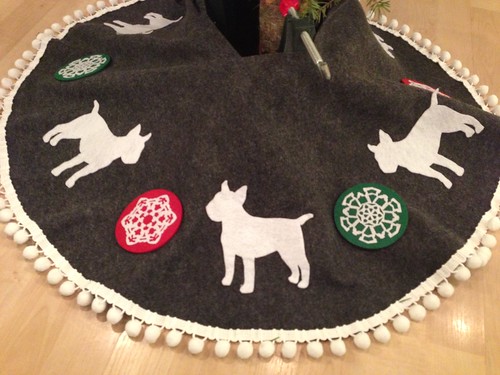
Here’s a close-up of it! So what, we are a little obsessed with our dog!
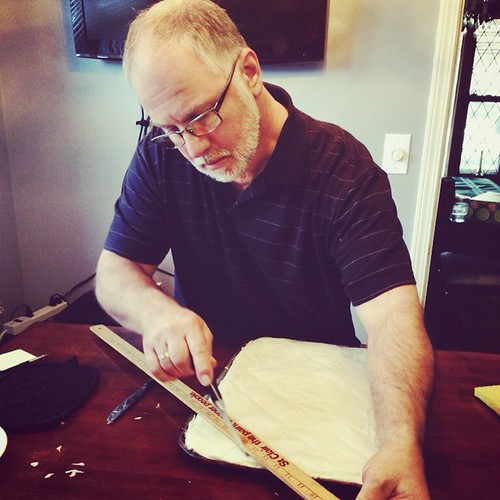
Got together with the family on Sunday and made TONS of baklava using my late Yia Yia’s recipe. I may not be able to eat it but it makes for great holiday gifts for friends!
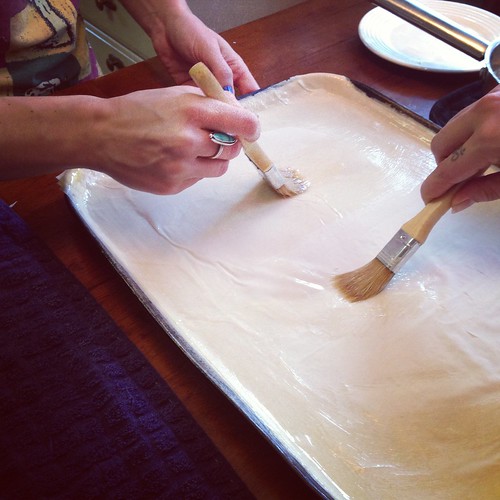
It is a pretty labor intensive process. You place each layer of phyllo dough, one at a time, and brush with butter. There are 15 layers, then nuts and spices, 10 layers, more nuts, then 15 more layers. Layer by layer, sheet by sheet! I love making it and hanging out with my family, even without the satisfaction of ever taking a bite!
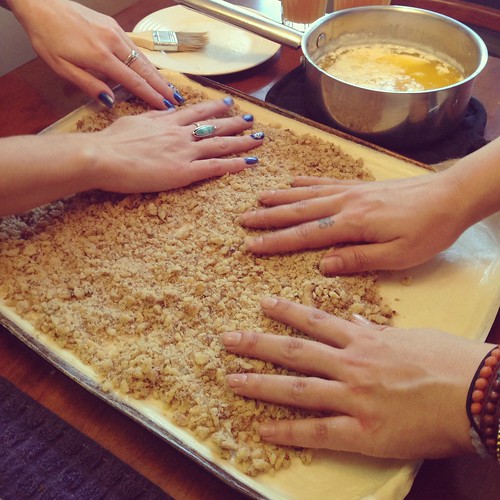
Me and my sister Vicky, spreading the nuts layer.
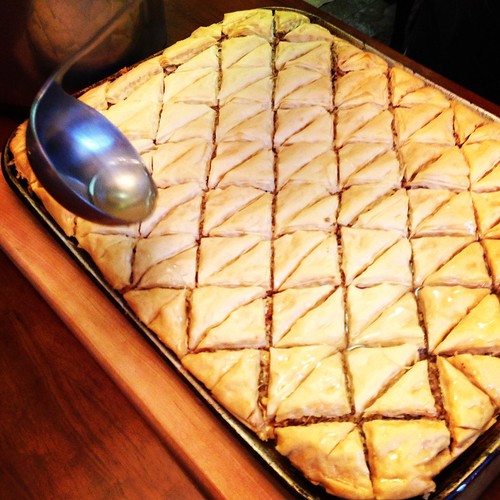
Pouring the syrup over top of one of the finished trays. Smells soooo good!


I started my Christmas wrapping earlier in the week! It may be my favorite part of the holiday and the gift giving.
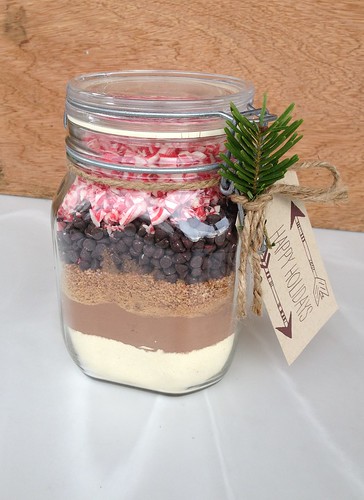
My final giftable recipe for my series this month with Free People. Look for the recipe on Sunday.
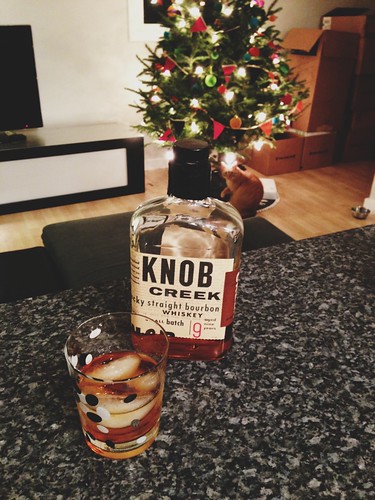
Took a break last night from packing and organizing for the move to relax! My relaxation involved a roast chicken from our farmer, a glass of bourbon and Christmas music.
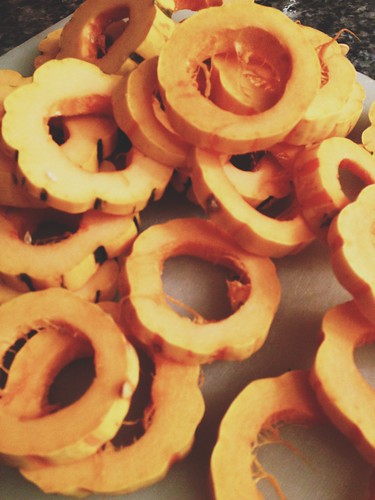
I cut up some of the delicata squash leftover from our CSA with porter farms. I tossed it with some olive oil, maple syrup and spices and added it to the chicken in the last 35 minutes.
-
Photo Fun Day Friday
Well here it is, another double Photo Fun Friday post. Two weeks worth of photos, since life has been a bit hectic and we were away last Friday! See my last post that explains all of the busy and crazy in my life right now. A funny thing I realized in looking at these photos from the last two weeks, I feel like I have eaten out at more restaurants in the last month than likely the whole year, with all the traveling, birthdays and trying to squeeze in hang time with friends.
It has been a really fun two weeks, a great way to finish off the year! We were in Chicago two weekends ago and then Pittsburgh this past weekend. That is it for our traveling for 2012 and now we are home for the holidays! Yay! Hope you enjoy all of the photos (there’s a lot of them), and I hope you are enjoying your holiday season. We will be at the Western New York Book Arts Center this weekend, this afternoon and all day tomorrow, for the Last Minute Panic Holiday Marketplace! Come on by if you are local, we will be selling our prints, greeting cards and other goodies. I will be there on and off, since I also need to be at home packing 😉
Do you have any fun plans this weekend?

The big tree in Downtown Chicago and the Christmas windows at Macy’s.

Billy and Mark at their live Adventures in Design podcast show at Schubas in Chicago.

Our booth at the Chicago Renegade Holiday Craft Market
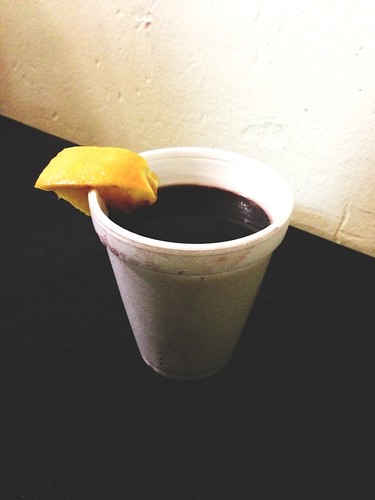
Hot mulled wine…mmmm.

The sweet little Stella Maxine.

My favorites!!! Margaux and Stella. I hate how far Chicago will be from Southern California 🙁

Super amazing jellyfish installation at Renegade Craft Fair.
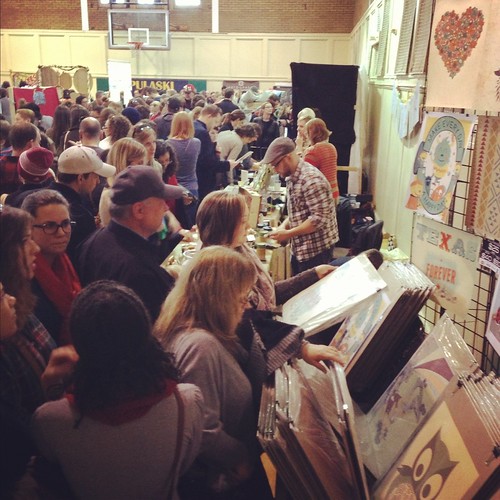
The crowds were crazy this year.
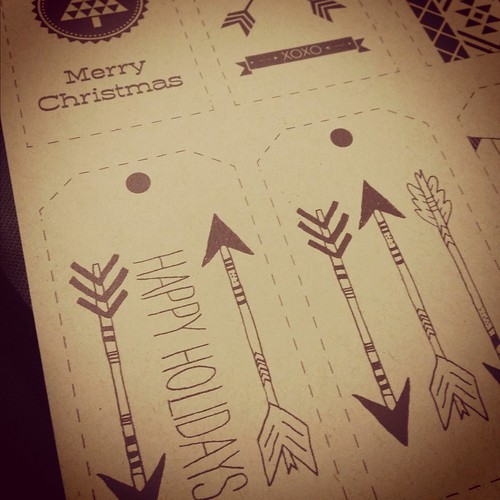
Some of my handprinted gift tags.
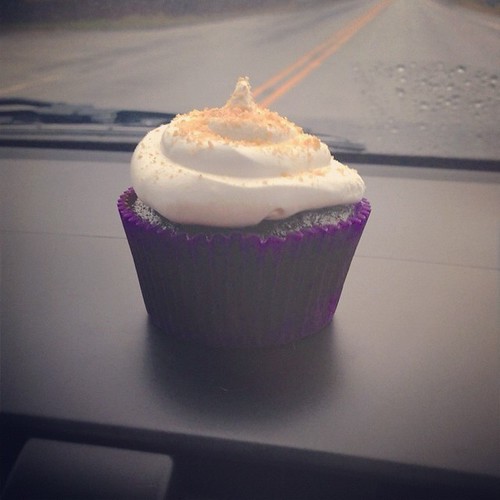
One of Margaux’s beautiful baked creations. She made these delicious looking s’mores cupcakes for Mark’s birthday. I couldn’t eat one, but I sure appreciated how yummy they looked and the smile they put on my hubby’s face 🙂

Printed t-shirts for my yoga studio, East Meets West, with their new logo I designed.

A hot Tom & Jerry, a warm fire, Christmas music and lots of great friends. Pretty amazing stuff right there!

Making truffles is messy business, but boy is it worth it.

Those holiday cups at Starbucks sure make me happy!

The beet salad I had at Habitat in Pittsburgh was so good it was gone before I could take a pic 🙂 If you are in Pittsburgh, check that restaurant out. Great seasonal, local farm to table food with a special gluten-free menu. They even have gluten-free bread for sandwiches at lunch.

Christmas tree in Market Square Pittsburgh.

The view from the convention center in Pittsburgh where we were set up for the Handmade Arcade last weekend.
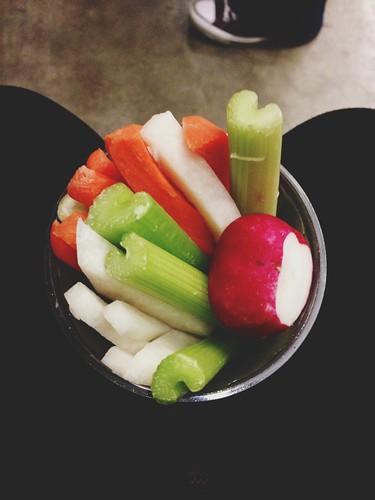
It was this or french fries for me at the convention center. Yay for will power. (But oooh were those fries calling my name.)

We celebrated Mark’s birthday on Sunday with family, friends and some down home soul food from Gigi’s restaurant on the East Side. (I had take-out pho from Pho 99 Fast Food)

One more friends dinner for Tom and Jerrys. This time at the Buffalo classic, Schwabls.
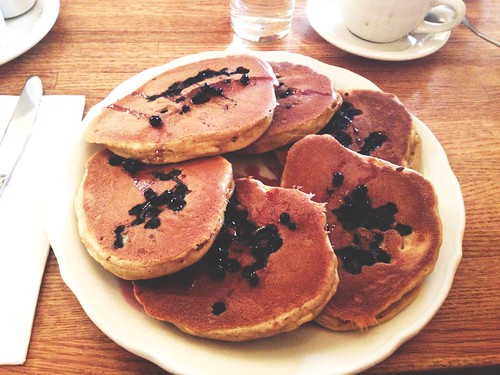
Gluten-free blueberry pancakes from the Original Pancake House. The perfect fuel for a day of Christmas shopping and planning a HUGE move.
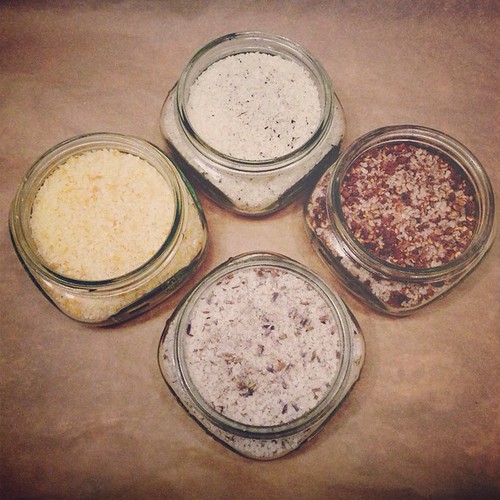
Flavored finishing sea salts. Look for the recipes on Sunday.
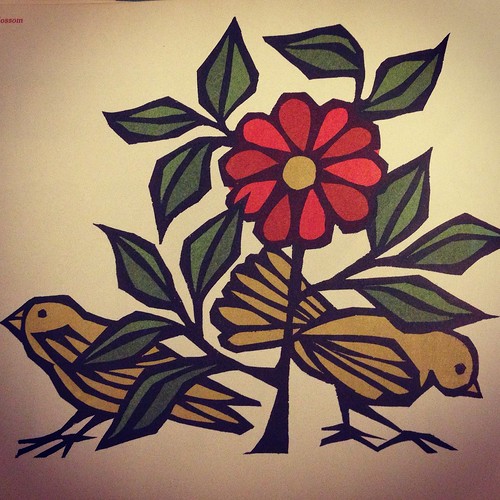
Amazing illustration from a vintage children’s book in our collection.
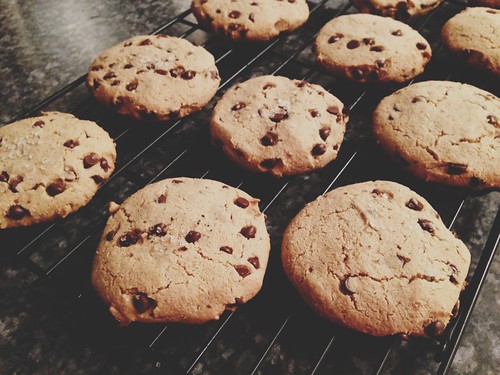
I finally made time to bake last night. I made these amazing grain-free chocolate chip cookies from Against All Grain and topped them with some vanilla sea salt.

Our cat Indie, being silly last night while laying on Mark’s lap.
-
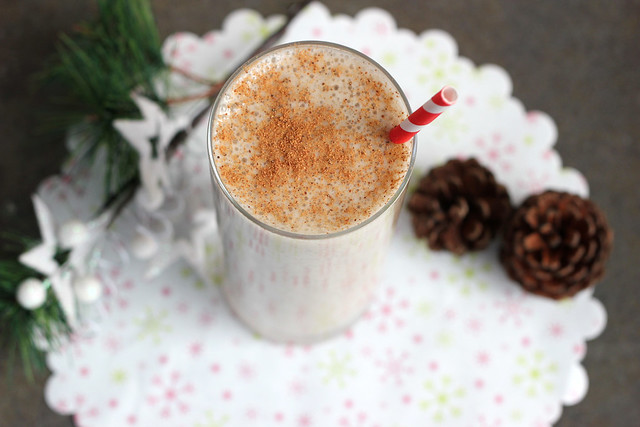
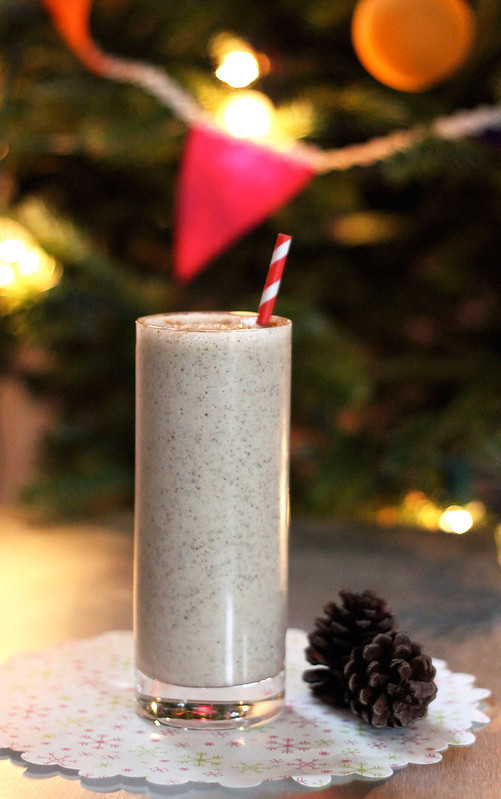
Banana Nog Smoothie – Gluten-free + Vegan
It is likely you have noticed how quiet things have been around here on Tasty Yummies. We have been traveling up a storm over here this holiday season to different events and fairs all over the east coast. In the last month we have been to Washington DC, Baltimore, Philadelphia, Brooklyn, Chicago and Pittsburgh. As of this past weekend, are finally done traveling for the year! At the start of the crazy month of travel, in mid-November, we got an offer on our house. YAY!!! Closing is scheduled for early January. I honestly cannot believe it’s all really happening.
So, besides being overwhelmed with all of the travel and the holidays, we are in the midst of selling our house and figuring out packing up all of our personal and business related belongings to relocate to California in early 2013. I don’t consider myself a stressful person or a worrier in the least, but I have to say, we haven’t even really begun packing up boxes and all of that real stuff, and I am kinda already freaking a little bit. Hubby, of course, continuously reassures me it is all fine and everything will all get done, but I cannot quiet the constant voice in my head reading the long list of the many things that need to get done before closing (and having to be totally moved out) next month, a month from yesterday to be exact. I have surprisingly only moved once in my adult life and that was from living at home with my parents to buying my first home at 23, 9 years ago. So, I am just a bit overwhelmed.
As you can imagine, between the travels, running the business, preparing for the move and dealing with all the holiday fun of shopping and such, there just hasn’t been much leftover time for me to play in the kitchen. That is the only bummer about all of it. Obviously as with most painful things in life, it is temporary. This time will pass and be over before I know it. Doesn’t make it all any easier though.
I have been eating well and cooking every single chance I get, but the time to create new recipes, set up photo shoots, edit photos, etc – just doesn’t seem to be there right now and I have tried to do my best to accept that, as much as I am not exactly happy about it. I will obviously be sharing recipes whenever I can, I am not totally disappearing, I just wanted to explain the quiet and lack of recipes. Oh and I have some really fun end of the year stuff planned for the end of the month here on the blog, so stay tuned for that.

In the meantime, I created this tasty smoothie this morning after yoga. By the way, another quick side note yoga has been my saving grace this past month. That is one thing that I have made sure to find as many free moments for right now. I need it. It has helped keep me grounded (mostly) and has allowed me to quiet my mind, even if only temporarily, in a way that nothing else can. I am so grateful for my practice every day, but especially in times like this. OK, back to the tasty smoothie…. I wanted to create something that really had some holiday flare to it. I am a Christmas junkie and I have been trying to take in and cherish every single moment of it this year. I like to squeeze in the holiday cheer wherever I can. So, what better way than with the classic flavors of egg nog, in a healthy and hearty smoothie. I actually had planned on using canned coconut milk since I have plentyin the pantry but I had some So Delicious Coconut Milk Nog in the fridge (which I am admittedly addicted to) so I thought that would really bring on the extra nog flavor. Obviously this would be equally as delicious with just coconut plain milk. Feel free to sweeten and spice to your liking. Since I used the nog and my banana was nice and sweet, I didn’t add any sweetener and I went with the below measurements for spices, you may want more though, depending on how strong a flavor you are looking for. This smoothie would of course also be delicious with a shot (or two) of your favorite spirit if you really want to celebrate!
[print_this]Banana Nog Smoothie
makes 1 large serving or 2 smaller servings- 1 cup organic coconut milk – the canned kind (or for even more flavor, opt for your favorite vegan eggnog, instead)
- 1/2 cup unsweetened organic vanilla almond milk (or other non-dairy milk)
- 1 frozen banana
- 1/2 teaspoon ground nutmeg
- 1/4 teaspoon cinnamon
- pinch of cloves
- 1 teaspoon vanilla extract
- 1 tablespoon chia seeds
- 1 small handful ice cubes
Optional – 1 tablespoon maple syrup, honey or other sweetener if it isn’t sweet enough for you)
Add all of the ingredients to your blender and blend on a high speed until thick and creamy. Give it a quick taste and adjust any seasonings or sweetness to your liking. Sprinkle a little nutmeg and/or cinnamon on top. Serve right away. [/print_this]
-
Dark Chocolate Peppermint Truffles – Gluten-free + Vegan

What better gift to give than the gift of chocolate, right? These dark chocolate peppermint truffles are sure to leave a smile on any chocoholic’s face. Especially when they find out you made these just for them.

These truffles are simple to make and they are naturally both gluten-free and vegan. Additionally, they are low in sugar and very simple to make. A few ingredients, a few minutes at the stove and that’s about it. You can even play around with the recipe and leave out the peppermint and roll them into other goodies, like chopped nuts, coconut, melted chocolate or chocolate bits, etc. Make this recipe your own and customize it for whomever will be receiving it.

[print_this]Dark Chocolate Peppermint Truffles – Gluten-Free + Vegan
makes about 24+ truffles (depending on their size)- 1/2 cup full-fat coconut milk (the canned kind)
- 2 tablespoons coconut oil
- 10 ounces high quality vegan dark chocolate (70% cocoa) – chopped
- 1 teaspoon vanilla extract
- 1/2 teaspoon peppermint extract
- dash of sea salt
- 1/4 cup cocoa powder
In a double boiler, heat coconut oil and coconut milk over a low/medium heat, whisking until just melted and well incorporated. Add the chocolate, stirring continuously, not allowing it to heat too quickly. Just as soon as it is melted, remove from the heat and stir very well to make sure it is all well incorporated. Add in the vanilla and peppermint extracts and salt.
Pour into a 8″ baking dish or a pie pan and refrigerate until the mixture is mostly set , but still pliable. Using a 1″ melon baller or a tablespoon, scoop out the chocolate and roll into balls using your hands, set them on a parchment paper lined cookie sheet. Once all have been rolled, place the sheet into the refrigerator for about 10-15 minutes, up to overnight.
Place the cocoa power onto a small plate and roll the balls in the cocoa powder to coat, you can also put the cocoa powder in your hands and roll them around that way. Store the finished truffles in the refrigerator.
These truffles will keep up to two weeks in an airtight container in the refrigerator. Allow to come to room temperature for about 15 minutes, just before serving.
[/print_this]
This recipe was originally shared on Free People blog BLDG 25
-
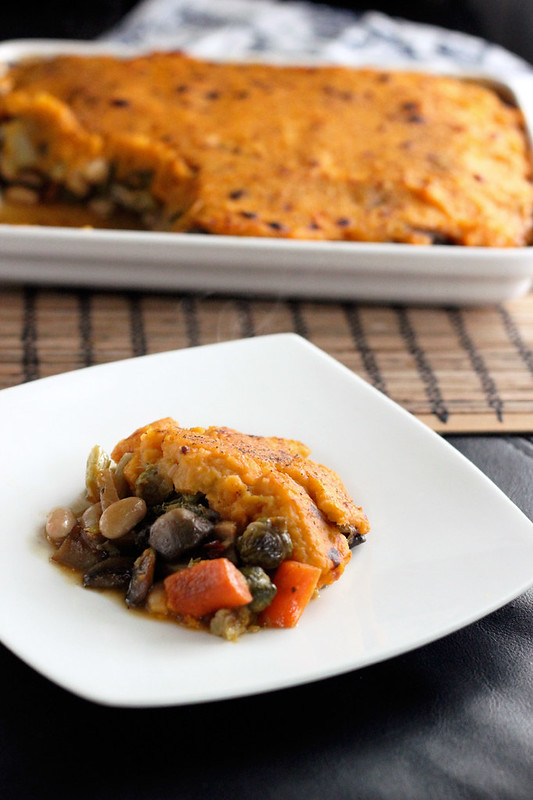
Roasted Veggie Shepherd’s Pie with Sweet Potato Topping – Vegan + Gluten-free
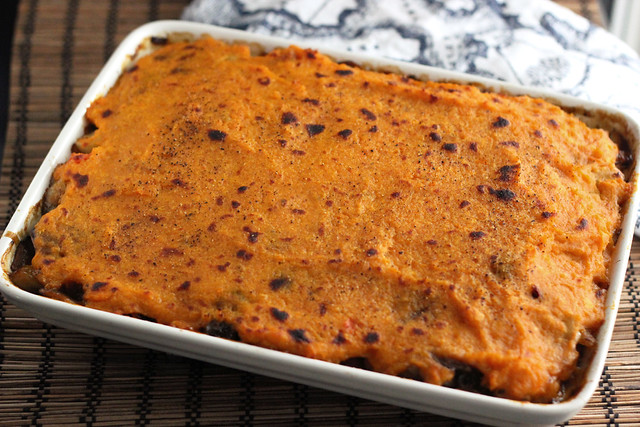
I am so excited that it’s comfort-food season!! As much as I adore the fresh local produce and cool and light dishes of the summer, there is something about the hearty, hot and comforting foods of the winter that are so enticing. A good comfort food meal will leave you feeling like you just got the biggest, warmest hug from your favorite loved one! Even better when it can be healthy comfort food! What’s your favorite comfort food?
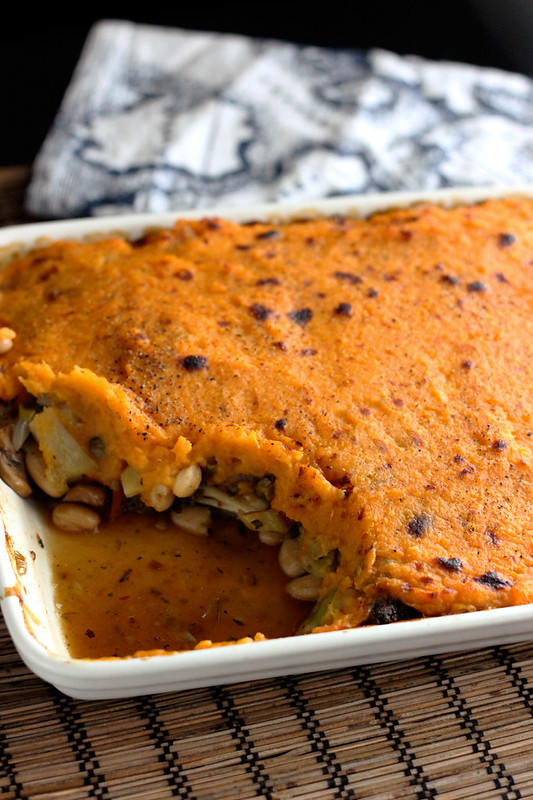
Although this isn’t technically a one-pot meal, since it requires some prep, it is in theory and in it’s final state. I love a meal where it’s all inclusive. One big scoop and you are all set. Plus, a meal like this is perfect for leftovers. For some reason, I find meals like this even better as leftovers, I am not sure if it’s because I didn’t spend all the time prepping just before, or if it just really allows the flavors to come together to their fullest.
Please keep in mind, I used what vegetables I had on hand and what I would like best for the filling, but feel free to have some fun and add in whatever you’d like. Other wonderful add-ins for the filling would be squash, cauliflower, corn, green beans, asparagus, peas, lentils, beets, turnips, meat or tofu, etc, etc. The possibilities are endless. You could make this many times, each a totally different way. Another thing to note, you don’t have to roast your vegetables if you don’t want to. You could simply sautee them in a large pan on the stove top, I just personally love the flavor of roasted vegetables. I didn’t exactly accurately measure, so use my measurements below as a guide, but don’t get too hung up on the specifics, there really is no wrong way.
[print_this]Roasted Veggie Shepherd’s Pie with Sweet Potato Topping – Vegan + Gluten-free
Serves 4-6Filling:
(please keep in mind you can really use whatever veggies you would like and prefer, this is just what I had on hand.)- 2 tablespoons olive oil
- 1 small head broccoli, cut into small florets
- 1-2 cups pearl onions, peeled and halved, if need be (I used fresh, not frozen)
- 1 small bulb of kohlrabi, peeled and sliced
- 2 cups brussels sprouts, halved
- 1 leeks, rinsed very well, slice thinly white and light green parts only
- 2-3 carrots, peeled and cut into 1 1/2 inch pieces
- 2 celery stalks, diced
- 1/2 cup sun dried tomatoes, thinly slices
- 1 15 ounce can of organic white beans
- 8 ounces cremini mushrooms, sliced
- 2 cloves garlic, minced
- Fresh or dried herbs, to your liking – I used both fresh rosemary and fresh thyme
- salt and pepper, to taste
Sauce:
- 1 1/2 cups vegetable stock (or other stock like chicken or mushroom, etc)
- 2 tablespoons tapioca starch (potato or corn starch would also work)
- salt and pepper, to taste
- 1 teaspoon herbes de Provence
Sweet Potato Topping:
- 4 medium organic sweet potatoes, peeled and diced
- 1 large clove garlic, minced
- 2 tablespoons oil or butter (olive oil, coconut oil, butter, vegan butter, ghee, etc)
- splash of non-dairy milk (I used a bit of coconut milk)
- salt and pepper, to taste
Preheat the oven to 425ºF.
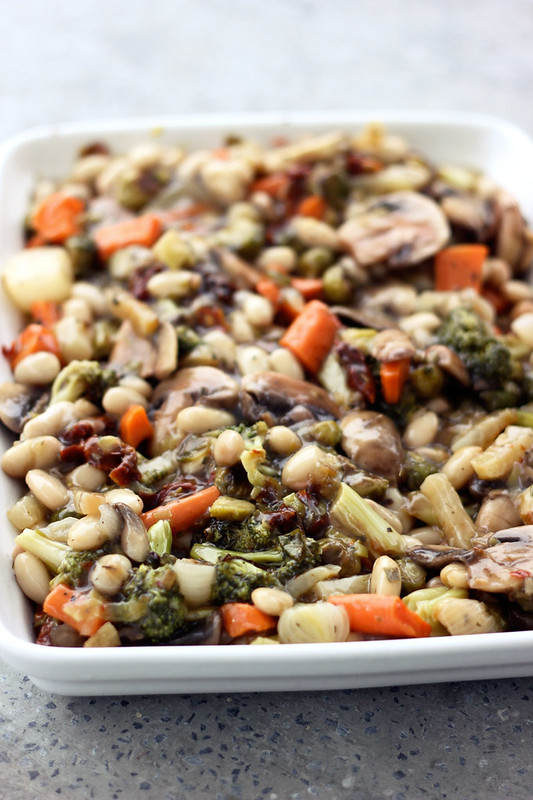
Toss all of your vegetables, leaving out the white beans, mushrooms and sun dried tomatoes, together with olive oil, fresh herbs, salt and pepper in a roasting pan. Place in the oven and roast for about 20 to 25 minutes, until the veggies are slightly tender and beginning to brown. While the veggies are roasting, quickly sautee the mushrooms with a small drizzle of olive oil over a medium high heat. Take the roasted vegetables out when they are ready and toss in the white beans, sauteed mushrooms and sun dried tomatoes.
Lower the oven temperature to 375ºF.
In a small saucepan heat the stock for your broth plus your herbs, over a medium-high heat, once simmering, carefully whisk in your starch to thicken. To avoid lumps, sprinkle it in lightly a little at a time or add some stock to a small bowl with the starch in and whisk quickly to fully incorporate. Once the veggies are done and all together, pour the sauce over, don’t add it all at once, you may not want it all, depending on how many veggies you have.
Pour the filling evenly into a very lightly greased glass baking pan and set aside. Meanwhile boil the sweet potatoes with the garlic in a medium saucepan full of water over a high heat. Once boiling, continue simmering for about 10-12 minutes until the sweet potatoes are nice and tender. Quickly drain the potatoes and then add back to the pot, add your oil or butter (or vegan butter) and mash with a potato masher, a hand mixer, etc. until smooth and creamy. Add a splash a non-dairy milk if you need a bit more liquid or to give just a hint of creaminess. Salt and pepper to taste.
Smooth the mashed sweet potatoes over the filling, using a spatula to spread evenly. Place in the 375ºF oven and bake for 30 – 35 minutes until the filling is bubbling. If you wish to get a bit of crispy brown goodness on top, place your shepherd’s pie under the broiler for a few minutes.
Let cool for a few minutes then serve while hot.
[/print_this]
-
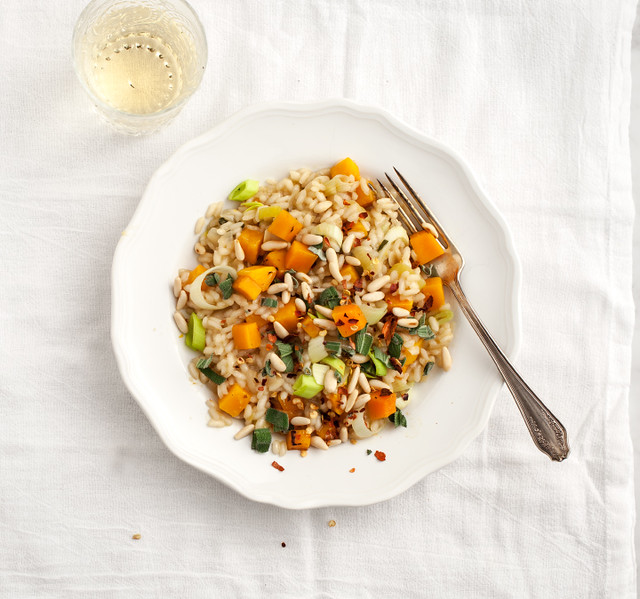
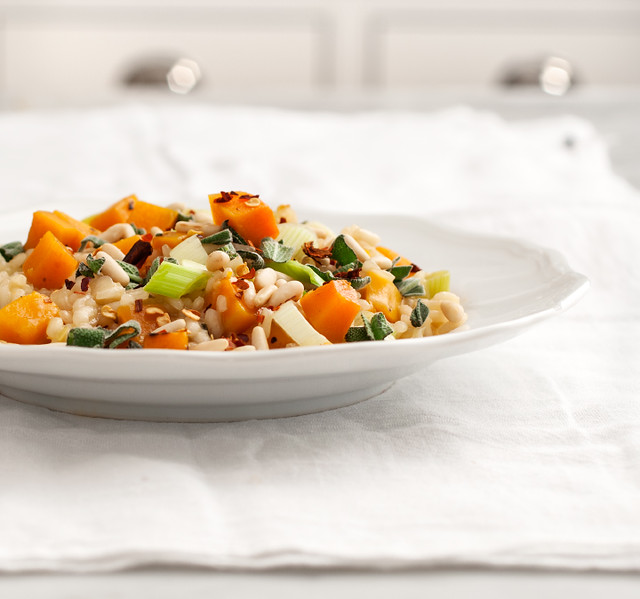
Butternut Squash Risotto – Gluten-free + Vegan
Last, but certainly not least, in our Very Tasty Thanksgiving series we have a beautiful dish from Jeanine of Love and Lemons. I absolutely LOVE everything about Jeanine’s site, from the photography and design, to of course, all of the incredible recipes. Jeanine and her husband Jack work together on the site to create some of the most beautiful looking photos and styling you will ever see, always swoon worthy. Jeanine isn’t exclusively gluten-free or vegan, but many of her recipes naturally are, and she always celebrates what is seasonal and fresh, so it is a great resource no matter what your eating restrictions are.
We know this recipe is coming in just a day before Thanksgiving and many of you have your meals totally planned and shopped for, but not all of you are in America and celebrating Thanksgiving and some of you may also just want a simple, yet still very delicious and seasonal alternative to the turkey and all the sides. Besides being a great possible side at your holiday feast, this risotto would also make the perfect meal for the day after Thanksgiving when you want something beautiful, seasonal and delicious and light.
I hope everyone enjoyed this series and thank you again for following along and hopefully you got some great inspiration for your own Thanksgiving feasts. Thank you again so much to all of the lovely guest bloggers who joined me, sharing their recipes and tips. Much love to everyone and Happy Thanksgiving to those of you that celebrate. I hope your day is filled with lost of love and of course, super tasty food.
• • • • • • • • • • • • • • • • • • • • • • • • • • • • • • • • • • • • • • • • • • • • • • • • • • • • • • • • • • • • • •
I’m so happy to participate in Beth’s Very Tasty Thanksgiving! I’m up last, but I’m so excited to make the other recipes that have gone up before mine – they all look so delicious!
Now that it’s the day before Thanksgiving, I’m sure most of you have finished planning and shopping for the big meal. You’ve moved onto either preparing your feast, or are en route to your Thanksgiving destination.
I’m sharing a recipe that I made one Thanksgiving when my husband and I decided to stay home and celebrate, just the two of us. It was one of the nicest, stress-free holidays we’ve ever had. We avoided the grocery store rush by going to Whole Foods that very afternoon (the best time to go, btw, the store is empty). I made this butternut squash risotto with leeks, sage and rosemary… it was the essence of Thanksgiving, without having spent all day cooking. A perfect meal for 2.
[print_this]Butternut Squash Risotto – Gluten-free + Vegan
serves 2 with leftovers.INGREDIENTS:
butternut squash:
- 1 tablespoon olive oil
- 1 cup butternut squash cubes (about 1 cm)
- salt, pepper
- 1/4 cup veggie broth
risotto:
- 2 tablespoons olive oil
- 1/2 chopped onion
- 2 cloves of garlic, minced
- 1 large leek, sliced (white and light green parts only)
- 1/2 cup white wine
- 1 cup organic arborio rice
- 3 cups veggie broth
- 1-2 tablespoons earth balance butter
- 1/4 cup finely chopped sage
- 1 teaspoon finely chopped rosemary
- 1/4 cup toasted pine nuts (optional)
- a few pinches of red pepper flakes
- salt, pepper
METHOD:
butternut squash:
First, start your butternut squash. Heat oil in a medium skillet over medium heat. Add butternut squash cubes, salt and pepper. Cook until they start to brown, gently flipping, to get color on the other sides… about 5 minutes. Before they start to brown too much, add the veggie broth and stir. Reduce heat to low. Heat until they are tender and cooked through. Approx 20 minutes, depending on the heat of your stove. If the broth cooks down before they are done, add some more (or some water) to keep them from burning to the bottom of the pan.
risotto:
When the squash are at least half done, start your risotto. Heat oil in a large skillet over medium heat. Add the onion and half the leeks, and a bit of salt and pepper. Cook until the onion is translucent (but not browning), about 8 minutes. Add the rice, mix it together with the onions so the dry rice toasts a little bit. (about 1 minute). Add the wine, scrape up anything that’s sticking to the pan, and let the wine simmer down for another minute.Add broth 1 ladle at a time, stirring continuously. Each time the liquid cooks down, add another ladle full. Before you add the last ladle of broth, add the butternut squash, the remainder of the leeks, rosemary and sage, a pat of (vegan) butter. Stir to combine. Taste and adjust seasonings. Serve immediately. Top with pine nuts and a pinch of red pepper flakes.
* alternatively, you can add your butternut squash cubes to your risotto pan right after the onions… as you cook your risotto they will melt apart into the risotto rather than remain cube shaped. Both ways are equally delicious.[/print_this]
Jeanine is the creator of Love and Lemons, a food blog that is a collaboration with her husband Jack. After years of running a graphic design business, she has turned her creativity toward her passion for all things food… by cooking, styling, and sharing seasonal (mostly) vegetarian recipes.
Visit Jeanine’s blog Love and Lemons
You can also follow Jeanine on:
Twitter: @lovelemonsfood
Facebook: facebook.com/lovelemonsfood
Pinterest: @loveandlemons
Instagram: @loveandlemons -
How to Thrive Through the Holidays – {Guest Post by Well: Integrative Health & Healing}
I am so excited for today’s post from my very good friend, April. April and I have been friends for a very long time, I think we met some time when I was in college, through our mutual friends Kris and Tim. Although April and I never get together as often as we’d both like, we are so fortunate that whenever we do have time for each other, we can always pick right up where we left off and the conversation is so amazing, time just falls away. I always walk away feeling so warm and cozy. Last year when I “threw my back out”, I drove out to Lewiston to see April to get some energy healing and quantum touch work done from her. It was incredible, something I had never experienced before and I felt instant relief. It is amazing what love and energy can do for our bodies on a variety of levels. Even in just 5 minutes spent with April you will feel her intuitive healing energy and nature. Beyond all of the usual friend conversations, we can always get together and talk about food and our believes. I really hope you enjoy this great post from April and look for more like it in the future, as well. April and I have been discussing at length, having her create an ongoing series of health coaching guest posts, so please leave your feedback below so we know there is an interest. Enjoy!
• • • • • • • • • • • • • • • • • • • • • • • • • • • • • • • • • • • • • • • • • • • • • • • • • • • • • • • • • • • • • •
It’s an honor to be featured on Tasty Yummies today! Beth and I have been friends for a long time and we share a love of clean, healthy eating and cooking. I admire what she’s done with her blog and often find myself referring clients to it for ideas and recipes. To give you a little background about me, I am have been working as an Energy Healing Facilitator for the past five years am also a Holistic Health Coach. I truly believe that we all have an immeasurable healing ability within us and it is my goal to guide people to harness this capacity to create abundant health so that they can Thrive in their lives. By using energy and food along with aligning other factors in our life such as career, relationships, spirituality and exercise we are able to tap into our true selves and live lives we love.
As the holidays approach and the seasons change they bring a barrage of mixed emotions, responsibilities, excitement and our body, mind and spirit respond accordingly. I’d like to offer a bit of a toolkit for the season to navigate these changes and make the most of these special times and stick to your health goals too!
With all of the parties approaching, we often look forward to indulging. Be sure to make veggies the star of your plate and respect your body’s subtle messages. It’s ok to indulge a bit but try to steer free of the overeat/guilt/repeat cycle that many of us seem to experience, especially at the holidays.
For some of you there is fear or worry about what to eat at parties if you have a food sensitivity. If this is the case, be sure to bring something to share that you know you can eat! Believe it or not, people show up to Thanksgiving at our house every year excited about roasted Brussels Sprouts!! (Brussels sprouts and other cruciferous vegetables contain unique phytochemicals that detoxify and strengthen immunity.)
Along with the excitement comes stress. Pay attention to where you feel or hold stress in your body. Do you hold your breath? Are your shoulders tight? Are you up worrying at night? Observe. Simple breathing exercises can help to calm your nervous system and release stress. Try breathing in to the count of 5 or 6 and then exhaling for the same count. Repeat for 5 minutes or more. Visualize white light coming through the crown of your head emanating from within. Use a mantra. Feel gratitude. These added practices help you to tap into more subtle energy and raise your vibration (i.e. energy level).
I recently read an Anne Lamott quote that referred to a man who “built a cathedral inside himself”. By creating such a sanctuary within, using breath, awareness, stillness to access this place – we will have a space to return to when stress levels rise.
Stress and season change can also take a toll on our immune system.
Here are some of my staples for the season:At the onset of a cold or if you are experiencing ear pain:
Garlic Ear oil (or Wally’s Ear oil) – heat a few tbsp of extra virgin olive oil in a small pan. Add one garlic clove and warm until it sizzles, turn off heat. Remove garlic and store oil in a small glass bottle with a dropper. Apply 3 drops, warm to ears, preferably at night.Add turmeric to your food! It builds immunity, has amazing antioxidant capacity and helps to reduce inflammation, to name a few!
Try Turmeric Tea:
• Bring four cups of water to a boil.
• Add one teaspoon of ground turmeric and reduce to a simmer for 10 minutes.Strain the tea through a fine sieve into a cup, add honey and/or lemon to taste (borrowed from www.drweil.com)
Indian ginseng – Ashwaghanda – strengthens immune system
Oil of Wild Oregano – a powerful natural antibiotic.
A good probiotic – strengthens gastrointestinal tract and increases immunity.
Drink warm water with lemon and/or ginger. This helps to drain your lymphatic system, detoxify and ginger strengthens immunity and digestion.
Finally, listen to your body. Your intuition is always subtly guiding you toward balance and wholeness. Trust your hunches, listen to your cravings. Rest, journal, celebrate, be thankful.
I’d love to hear from you! Please let me know your thoughts or if I can support you in your health goals!
* Please note that April Martino/Well Integrative Health & Healing do not replace the advice of a physician or other medical professional recommends checking with your physician before following the above suggestions or changing any medication or making dramatic lifestyle changes. April is a Certified Holistic Health Coach and has been trained to offer dietary and lifestyle modifications to improve health.

You can find April on her website and on Facebook, where you can contact her for Holistic Health Coaching, speaking engagements, etc.
-
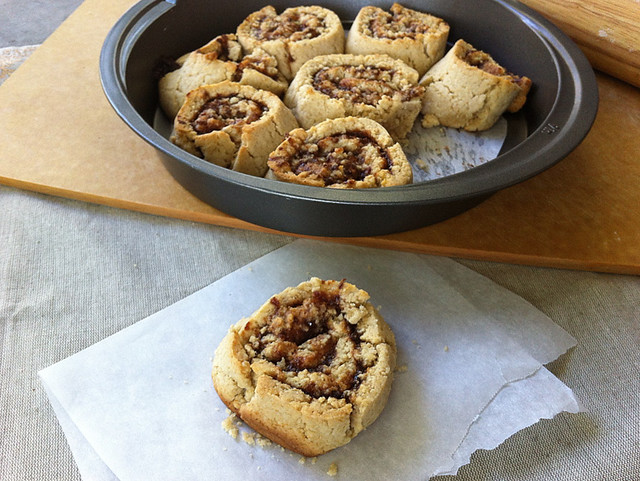
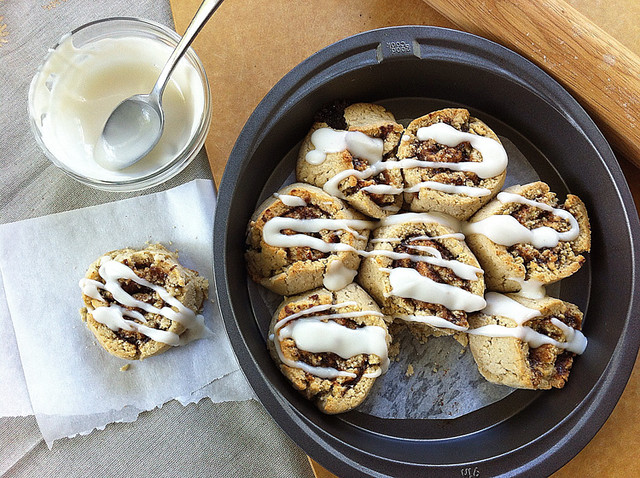
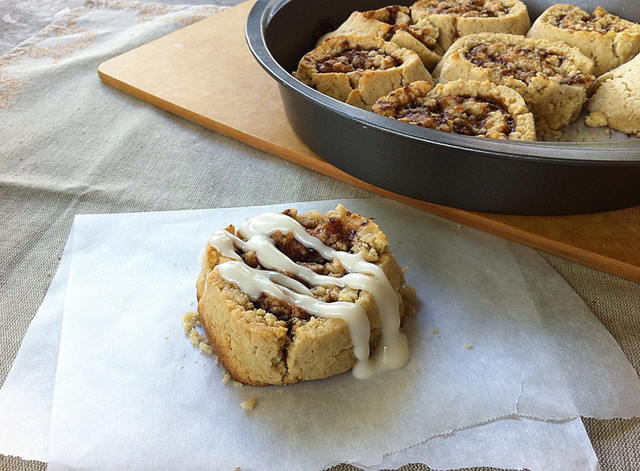
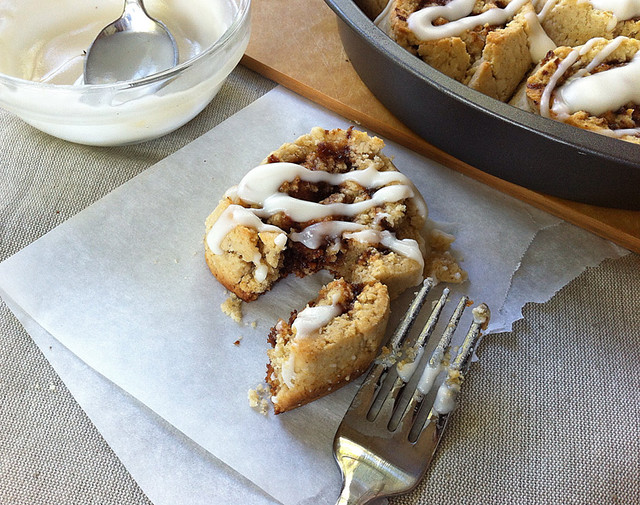
Pumpkin Cinnamon Rolls – Gluten-free + Vegan {Guest Post by Almonds & Avocados)
Some of you may already know her blog, but I am so excited today to introduce Rachel from Almonds & Avocados to those of you that haven’t yet had the pleasure. I came to find Rachel’s site through her comments here on Tasty Yummies. She is always so complimentary and genuinely excited about the food I am making which I of course
egotisticallyenjoy :). Once I started paging through her site looking at all of her amazing recipes, the feeling was definitely mutual. Rachel and I have very similar philosophies in regards to a restricted diet, like me, Rachel feels like with the restrictions came even more possibilities and she felt she was free to explore so many more foods and ingredients that she had never tried. I am constantly grateful myself for that very reason, having limitations has allowed me the freedom to try things out of the ordinary and I love it. I love that Rachel’s recipes reflect that very excitement and interest. Today Rachel is sharing a recipe for Pumpkin Cinnamon Rolls. Again like Rachel, cinnamon rolls are a holiday tradition with my family too, my mom makes a batch every Christmas morning! Enjoy this wonderful recipe.• • • • • • • • • • • • • • • • • • • • • • • • • • • • • • • • • • • • • • • • • • • • • • • • • • • • • • • • • • • • • •
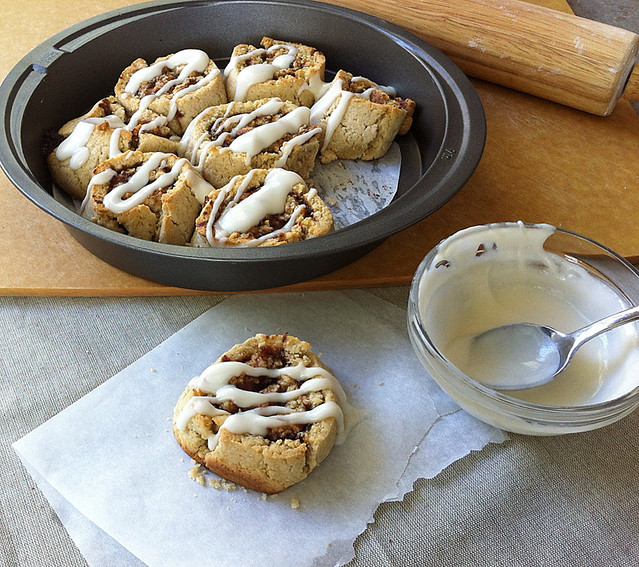
I LOVE the holiday season. In fact, this is by far my favorite time of year! So when Beth approached me to do a guest post for her Thanksgiving series while she’s away, I jumped at the chance! Because I’ve been a huge fan of Tasty Yummies for a long time, I’m unbelievably flattered to have this opportunity and I decided early on that I wanted to contribute something extra special. With that in mind, I opted to finally take on my personal challenge to come up with a gluten-free, vegan, and refined-sugar-free version of one of my all-time favorite foods: cinnamon rolls!
Like most families during the holidays, my family had (and still has) many traditions that make Thanksgiving special. For example, my mom and dad would always prepare an amazing breakfast for my brother and me on Thanksgiving morning. Usually, we were so full after our early feast that we would completely skip over lunch and just snack between breakfast and dinner (the main event). Then one year my brother and I came up with a plan: we would eat an insanely gigantic breakfast in order to stretch out our bellies and then not eat again until Thanksgiving dinner was served so that our stomachs would be empty and able to hold more. Our game plan was in no way based on anything scientific, but to us it sounded totally logical.
So from that point on, Thanksgiving breakfast became nearly as important as Thanksgiving dinner. And because I’m obsessed with breakfast foods, I instantly fell in love with this particular tradition. To make the meal even more indulgent, our breakfast (like dinner) always ended with dessert, and always in the form of sweet, succulent cinnamon rolls. I just remember eating countless cinnamon rolls on Thanksgiving morning and then falling into a sugar-induced coma on the couch afterward with a big smile on my face.
However, as I grew older, my food allergies and sensitivities worsened and I was no longer able to enjoy many of my favorite foods. Even though cinnamon rolls are amazing—I like to think of them as God’s gift to breakfast—they’re not particularly good for those with food allergies, sensitivities, or special diets (dairy, gluten, and sugar, oh my!). And although I believe that the holidays are a time to indulge, I also want to be able to enjoy my food without feeling uncomfortable and unwell for the rest of the day. That’s why I’m thrilled to share my recipe for Pumpkin Cinnamon Rolls with you! These bad boys don’t contain any dairy, eggs, gluten, or refined sugar, which means you won’t waste any time on the holiday dealing with an upset tummy!
Just a warning: these are not your typical pull-apart cinnamon rolls. They’re more biscuit-like and a bit crumbly (as you can see from the pictures), and I’ll admit, they’re not exactly beautiful. However, it’s not the looks that are important here, it’s the flavor, and these guys are delicious!! Even after making three batches in two days (to get the recipe right) and eating nearly twenty cinnamon rolls (I wasn’t about to let the first two batches go to waste!), I could still make and eat these every single day. With Thanksgiving right around the corner though, I think I’ll wait to enjoy this special treat on that oh-so special day. I hope you enjoy these rolls as much as I do! And maybe they can become a tradition at your home, too .
[print_this]Pumpkin Cinnamon Rolls – Gluten-free + Vegan
Makes approximately 8 rollsIngredients:
For the rolls:
- 1 cup almond flour
- ½ cup sorghum flour
- ½ cup tapioca flour
- 2 tsp. baking powder
- ½ tsp. salt
- ¼ cup coconut oil (room temperature, not melted)
- ¼ cup pumpkin puree (or applesauce)
- 2 Tbs. maple syrup
- ½ Tbs. vanilla extract
For the filling:
- 2/3 cup raisins
- ¼ cup maple syrup
- 2 tsp. cinnamon
- pinch of sea salt
For the icing:
- 3 Tbs. coconut butter
- 2 Tbs. almond milk (or other non-dairy milk)
- ¼ tsp. vanilla extract
- 10 drops liquid stevia
Instructions:
Preheat your oven to 350 degrees F.
Line a 9-inch round cake pan with parchment paper. Also, spread a large sheet of parchment across a flat surface.
Combine the dry ingredients (almond flour through salt) together in a large mixing bowl.
Combine the wet ingredients (coconut oil through vanilla extract) in a separate bowl and whisk together. Be sure to use room temperature coconut oil and not melted, which will make the dough too wet.
Add the wet ingredients to the dry and use a wooden spoon or spatula to combine everything until dough is formed.
Sprinkle some flour on your large sheet of parchment paper and on a rolling pin to prevent the dough from sticking. Roll the dough out into a large square or rectangle, between ¼ and ½-inch thick.
To make the filling, add all of the ingredients to your food processor and blend until the mixture is somewhat smooth. Pour the mixture on the dough and use your finger to spread the filling evenly, leaving about an inch of uncovered dough on the edges closest to and furthest from you.
Now it’s time to roll the dough! Lift up the edge of the parchment paper that’s closest to you and gently tuck the dough in as you go, which will help to create a tighter roll in the beginning. Continue slowly lifting the parchment paper, using it to guide the dough as you roll. Be sure to do this slowly and carefully!
Once your done rolling the dough, use a sharp knife to gently slice the dough into 2-inch-thick rolls. If your dough seems too soft, place it in the fridge for a few minutes first. Once sliced, place the rolls cut-side down in your parchment-lined cake pan, leaving some space between each roll.
Bake in the preheated oven for approx. 15 minutes. Watch the rolls carefully and remove from the oven when they begin to brown a bit on the edges. When ready, remove from the oven and allow the rolls to cool for at least 5 minutes. I know this is hard, but the longer you wait, the more they’ll hold together.
While waiting on the rolls, prepare your icing. Melt the coconut butter in a double broiler or in a small bowl placed in hot (not boiling) water. Once the coconut butter has melted, add the almond milk, vanilla extract, and stevia and whisk everything together until smooth and pourable.
When the rolls are ready, drizzle the icing on top, serve, and enjoy!
*Note: If you don’t have a problem with gums, you can add ½ tsp. xantham or guar gum to the dry ingredients when making the rolls to help bind the dough. Unfortunately, these gums have always caused me digestive problems so I try to avoid them.
*These rolls are also delicious as leftovers (if they last that long). I stored my leftovers in the fridge and baked them the next day at 350 degrees for ten minutes.[/print_this]
My name is Rachel and I’m the lady behind Almonds & Avocados. I live in Dallas and recently returned to school so that I can become an Elementary school teacher! Although I’m passionate about teaching, I’m also extremely passionate about healthy living. Every second of free time is either spent with my boys—my hubs and stepson—or playing around in the kitchen and coming up with healthy, fresh, gluten-free, and vegan recipes.
Visit Rachel’s blog Almonds & Avocados
You can also follow Rachel on:
Twitter: @Angel53535
Pinterest: @angel53535 -
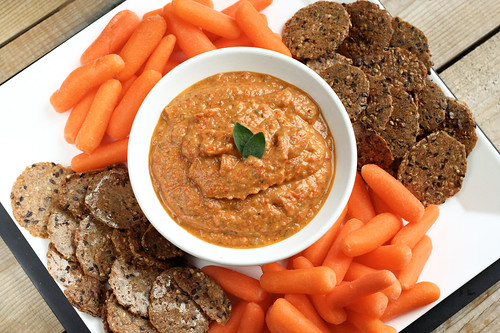
Eggplant and Roasted Red Pepper Dip (gluten-free and vegan)

As I mentioned in my last post, for my Creamy Dairy-Free Spinach Dip, I have really been enjoying cooking and baking without dairy. In addition to cooking without processed foods and gluten, it has been a fun and rewarding challenge. However, it is definitely one thing to just be cooking at home for myself and my hubby, but coming up with some fun and unique snacks to share with other people that can eat both gluten and dairy, can be a bit harder. I never ever want someone that is eating my food to feel like they are eating a weirdo diet food or some sort of concoction that only someone that hasn’t had gluten in over 7 years, would love.
When coming up with snack ideas for our little Super Bowl get together, I wanted something everyone could love that was light but still satisfying and with my dips I really wanted to challenge myself to create creamy but without the dairy. In the past, I definitely would have enjoyed some of the healthy snacks that others or likely myself made, but then, of course, indulging a bit in the inevitable cheese that would be there in some capacity. Using the excuse of a holiday or special occasion to eat more cheese than normal sounds all well and good, until you have a terrible cheese-induced tummy-ache later because you have all but cut out dairy in your every day life.
So I came across a version of this recipe on my Pinterest travels and it looked super creamy and delicious, I decided to add in the roasted red peppers because they pack some incredible flavors that I thought would pair very well with the eggplant! The original recipe was just the eggplant and it had a bit more olive oil, the photo I saw with the recipe made it look so insanely creamy, I couldn’t believe there wasn’t any dairy in it. So after making this my way, I am actually looking forward to trying this dip again, the original way, to see which I prefer.
This dip is smooth and creamy and has a bright, almost tart flavor from the roasted red pepper. I really love how the peppery spice from the oregano works with all of the different elements. Feel free to play around with different spices and/or herbs to get this to the flavors you love. The original recipe called for thyme, you could also add in some red pepper flakes or other spices that you love.
I served this dip with a bunch of fresh raw veggies like baby carrots, celery, radishes, bell peppers, etc as well as some crackers. This dip would also make a great spread to put on sandwiches, eggs, even on top of a salad, pasta, etc.
[print_this]Eggplant and Roasted Red Pepper Dip (gluten-free and vegan)
Adapted from Body+Soul Magazine, July/August 2010
Serves 103 medium eggplant (about 4 pounds), halved the long way
4 cloves garlic, peeled and very thinly sliced lengthwise
1 tablespoon plus 2 teaspoons extra-virgin olive oil
Kosher salt
1 cup roasted red peppers, roughly chopped (roast the peppers yourself or jarred will work too)
1 tablespoon fresh oregano (roughly chopped)
2 tablespoons fresh lemon juice
Freshly ground pepperPreheat the oven to 400º F. Arrange the eggplant cut side up on a baking sheet. Make slits in eggplant and insert garlic . Drizzle with 2 tablespoons oil. Season with 1/2 teaspoon salt. Bake until tender, about 1 hour. Remove from oven; let stand until cool, about 20 minutes.
Scoop the flesh of the eggplant into a food processor. Add roasted red peppers, oregano, 1 tablespoon oil, and lemon juice. Puree until smooth. Pulse to combine with salt and pepper, to taste. Will keep refrigerated up to 3 days. Serve with crackers, fresh vegetables or crostini.
[/print_this]
-
Double Fudge Candy Cane Cupcakes – Gluten-free, Dairy-free

I know Christmas has come and gone now, but I still wanted to share these delicious cupcakes with you. I made these for Christmas Eve dinner and they were a huge hit, my 2-year old niece took one bite of the one I was about to eat and ran off with it before I even took a bite! They are super fluffy and moist with a perfect balance of chocolate gooey-ness inside and a bright peppermint burst from the peppermint extract inside and the candy cane bits on top. I told you I have been on a chocolate peppermint kick! I adapted Elana’s Almond Fudge Cupcake recipe from her cupcake cookbook, substituting peppermint extract for the almond extract. I really wanted a strong peppermint flavor so I kept it at the 1 tablespoon, but I actually think it could use a bit less (use your judgement). I cannot get over how incredible and simple Elana’s cupcake recipes are, in terms of flours and starches, these delicious treats only had almond flour and coconut flour, that’s it – no gums, no starches, no oil or butter, it is so simple. I, once again, also used Elana’s vegan chocolate frosting recipe from her cookbook, because I absolutely love how simple it is to make and I almost always have everything on hand to just whip it up quickly. If you are gluten-free and you don’t own Elana’s Gluten-free Cupcakes cookbook, you need to get it ASAP!
I want to note that I have almost completely stopped baking with agave nectar since I learned a few months ago that even though it is an unrefined vegan sugar-alternative, naturally coming from a cactus plant and having a low-glycemic index, it has been discovered it is very high in fructose and it’s affects on the body are very similar to that of high-fructose corn syrup. Yes it is true that sugar is sugar no matter what the source and I know everyone has their own opinions on all sugars and sugar alternatives and it is also true that no sugar is truly good for you, per se. I just personally try to limit my sugar intake (no matter what the source) and be smart when I do use sugar and sugar alternatives, choosing things that I know work for me, like dates or bananas to sweeten things like smoothies, cookies and muffins, naturally whenever possible or choosing coconut sugar, honey or maple syrup when those won’t work in baking, etc. There are times when a recipe is best made with sugar and I will obviously go that route and in this particular recipe since I was adapting a recipe from Elana’s Pantry, who uses agave nectar quite often, I decided rather than experimenting, to just keep the recipe as is in that way and use the remaining agave I had in the pantry from before. I figured it was best to keep the recipe with it’s original ratios, to avoid a Christmas eve cupcake failure. Leanne from Healthful Pursuit has a wonderful video here about healthy alternative sweeteners.
The holiday celebrations continue for us until New Years Day, so I hope to be making other goodies in the next few days. We have dinner with the family tonight, a big Greek feast with souvlaki and avgolemono soup, I am not doing any of the cooking or baking for tonight, but we are heading down to Kentucky later this week to visit with Mark’s family and celebrate Christmas and New Years there, so I plan to make some healthy treats for us all to munch on then.
I hope everyone had a wonderful Christmas Day, hanukkah or whatever you celebrate! Did you make any special treats for the holidays? Are your holiday celebrations continuing this entire week, like ours?
[print_this]Double Fudge Candy Cane Cupcakes – Gluten-free, Dairy-free
makes 12 cupcakes
Adapted from Elana Amsterdam’s Almond Fudge Cupcake recipe from “Gluten-Free Cupcakes – 50 Irresistible Recipes Made with Almond and Coconut Flour”1 cup blanched almond flour
2 tablespoons coconut flour
2 tablespoons unsweetened cocoa powder
1/4 teaspoon sea salt
1 teaspoon baking soda
4 large farm-fresh brown eggs
1/2 cup honey (maple syrup or agave nectar
1 tablespoon peppermint extract (use less here if you want the peppermint flavor to be subtle)
1/2 cup dairy-free mini dark chocolate chips (73% cacao)
1/4 cup crushed candy canes (corn syrup free, if you can find them)Preheat the oven to 350ºF. Line 12 muffin cups with paper liners.
In a large bowl, combine the almond flour, coconut flour, cocoa powder, salt and baking soda. Set aside.
In a medium bowl, whisk together the eggs, agave nectar, and peppermint extract. Blend the wet ingredients into the almond flour mixture with a handheld mixer until thoroughly combined, then stir in the mini chocolate chops.
Scoop 1/4 cup of the batter into each prepared muffin cup.
Bake for 20 to 25 minutes, until a toothpick inserted into the center a cupcake comes out with just a few moist crumbs on it. Let the cupcakes cook in the pan for 1 hour, then frost (see below recipe), sprinkle with candy cane bits and serve.
Chocolate Frosting
6 ounces dark chocolate chips (73% cacao) (about 1 heaping cup)
1/2 cup Spectrum all-vegetable shortening (I use Spectrum sustainable organic palm oil shortening)
1/4 cup raw honey (maple syrup or agave nectar)
1 tablespoon vanilla extract
2 tablespoon water
Pinch of sea saltHeat the chocolate in a medium saucepan over a very low heat, melt until it is smooth. (You can also melt them in the microwave in a medium glass microwave-safe bowl). Allow the pan or bowl to rest on the counter for 5 to 10 minutes to cool the chocolate to room temperature.
With a handheld mixer, blend in the shortening, then blend in the agave nectar, vanilla extract, water and salt until smooth. Place the saucepan in the refrigerator for 3 to 8 minutes, until the frosting is spreadable.
If the frosting gets too stiff to work with, reheat the pan very briefly over a low heat and stir until it is softened. If the frosting is too runny, place it back in the refrigerator until it firms up.
Use the frosting immediately or store in a glass Mason jar in the refrigerator for up to 3 days.
[/print_this] -
Chocolate Cherry Fudge Bites – Vegan, Gluten-free, Sugar Free, Corn Free
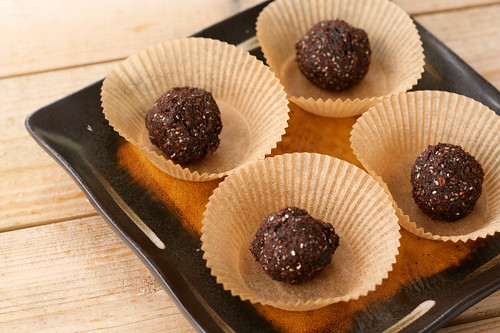

I don’t usually put all those health terms in a recipe title, since I fear that it may scare some people off. Although on the other hand, I worry that if I skip out on adding them, sometimes people looking for healthy recipes, may just pass over something called “Chocolate Cherry Fudge Bites”, assuming that it is loaded with fats and sugars. These little fudge balls are super simple to make and they are so tasty. It is hard to believe there is no sugar in these. They have such an amazing chocolatey fudge flavor with a little bit a chewy tartness from the bing cherries and a little crispy crunch from the chia seeds.
You could use this same recipe and instead of the dried bing cherries add in peanut butter and/or chocolate chips for a peanut butter fudge bite. You could add in candy cane pieces and peppermint extract. You could also leave out the cocoa use oats instead of the nuts and add in raisins for little oatmeal raisin cookie bites (which I have made before and I love). The possibilities are endless. Once you make these once you will know what the consistency of the dough needs to be for the next time you are experimenting. I love having these on hand to satisfy my sweet craving without the guilt. Not only do you not have to feel guilty about eating these, you can feel like you are doing yourself a favor – we all know the many benefits of chocolate, more specifically cocoa in it raw state, such as decreased blood pressure, improvement in blood vessel health and cholesterol levels, plus it is believed that the phenylethylamine in cocoa has mood boosting effects. The dates used to sweeten these fudge bites are a great source of dietary fiber and they are an energy powerhouse. Dates are low in calories and they are fat and cholesterol free, they are a great source of B-complex vitamins and they are one of the best natural sources of potassium.
So come on, don’t you just wanna reach for dessert when you hear all of that? Trust me, make these and you will always want to have them on hand to satisfy your sweets cravings. They do the job and then some.
Are you getting ready for the holiday? What do you have to make this week still? In addition to working all week, I am hoping to have time to finish up all of my craft projects that I took on for gifts, plus finish all of my shopping and then I have to get started on my wrapping – one of my favorite parts. I am hoping that I can squeeze a little cooking and baking in there too, somewhere.
[print_this]Chocolate Cherry Fudge Bites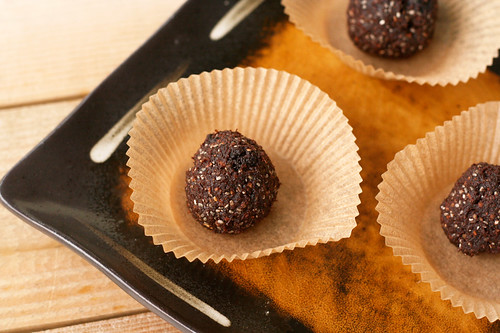
Makes approximately 16 balls3/4 cup medjool dates, pitted
4-5 tablespoons water
2 teaspoons vanilla extract
4 Tablespoons unsweetened cocoa powder
1/2 cup raw organic almonds
1 1/2 tablespoons chia seeds
1/4 tsp sea salt
1/2 cup dried organic bing cherries (other dried cherries will also work here)In food processor puree the dates, water and vanilla until a sticky paste/ball forms. Pulse in cocoa powder, almonds, chia seeds and salt until solid dough forms. Stir in the dried cherries. With small scoop, form mixture into 16 tablespoon-sized balls.
Refrigerate for 30-60 minutes to set.You can dip the balls in melted chocolate, roll them in seeds, nuts, coconut or cocoa, etc. – if you wish. See above for other fudge and cookie bite ideas. Have fun.
[/print_this] -
No Bake Pecan Pie Bars – Gluten-free, Raw and Vegan

I have become obsessed with Medjool dates and I am still just as amazed now as I was the first time I baked with them. It is incredible how sweet they are. I have made quite a few simple raw “cookie” balls in the processor with just oats and/or nuts, some dates and other goodies like chocolate chips or peanut butter. They are so simple and a totally healthy way to get your sweets-fix. I need to start taking photos of those and sharing them with you. You will love them.
A few months back while shopping at the Lexington CoOp here in Buffalo, I ran across something called a “Raw Pecan Pie Bar” (I forget the name of the company that made it) – it was raw and sweetened only with dates and also had sprouted pecans and sprouted something else (can’t remember, again). It immediately peaked my interest, so I picked one up. It was quite tasty, but I couldn’t help but think I could make it even better. Plus, at $3.50 for a single small bar, I knew I could make it cheaper.
I had been looking at different recipes online for date bars as a base for my recipe and ultimately settled on Oh She Glow’s blog, once again. I liked how simple her recipe was and that it included everything that I love! I made a few additions and changed it up a bit to make it similar to a pecan pie. I am so excited about how these turned out. Oh and one quick thing to mention about these bars, because they aren’t loaded with sugar, you could even have this as a breakfast bar. I cannot believe it is sugar-free, egg-free, dairy-free, gluten-free and it’s even raw! If someone rattled off all of those things to me, with the words “pecan pie” – I would likely laugh in their face. You have to trust me though, these are so amazing. Even my southern-boy pecan pie loving hubby liked him, though he took one bite and said “man, these are good, a big ‘ol scoop of vanilla ice cream over top would really make this.” haha some things will never ever change.
I tend to actually have cravings for sweets around this time of year, which is crazy since I really don’t crave sweets that often. I think it could be the fact that everywhere you look there are holiday cookies and sweets just laying out, begging to be eaten. I am trying really hard to stick with my usual way of eating through the holidays this year, so I don’t step on the scale after the holidays to find I put on 5-lbs. I am planning to make a handful of alternative holiday sweets over the next couple of weeks, so I can still partake in the festive eating, but in a healthy way. I am also making sure when and if I do partake in some not-so healthy holiday eating – that I remember that everything in moderation is OK, a taste here won’t kill me and I would much rather have a little and know when to stop then to feel like I am missing out on something I really want.
Do you try to eat healthy during the holidays or do you just forego all healthy eating rules during the holidays?

No Bake Pecan Pie Bars – Gluten-free, Raw and Vegan
Adapted from Oh She Glows
Makes 9 large squares or more if cut smallerCrust:
1 1/2 cups whole raw almonds (you could also do 3/4 cup almonds and 3/4 cup shredded unsweetened coconut)
1 1/2 cups gluten-free rolled oats (if you aren’t gluten-free just use regular rolled oats)
1/2 tsp kosher salt
10 Medjool dates, pitted and roughly chopped (about 1 cup)
1/4 cup coconut oil
1/4 teaspoon vanilla extractDate and Pecan Topping:
25 Medjool dates, pitted and roughly chopped (about 2 1/2 cups)
1/4 – 1/2 cup water
1 teaspoon vanilla
1 cup roughly chopped raw pecansLine an 8″ x 8″ pan with two pieces of parchment paper going opposite ways. In a food processor, process the almonds, salt, and oats until a fine crumble forms. Add in the chopped dates and process until crumbly again. It your coconut oil is solid, melt it quick and add to the mixture with vanilla and process until sticky and a bit doughy. If your dough seems a bit dry, you can add a bit more oil, mind was fine as is. Remove from processor and press the dough very firmly and evenly into the pan to form your crust.
Clean the food processor real quick and process the dates with water (adding a little at a time so it doesn’t get too runny) and vanilla until a thick paste forms, it should be mostly smooth and creamy. You may need more or less water, depending on how soft your dates are. You will have to stop and scrape down the sides of the bowl often. You can add a tiny bit more water if needed, but you want the paste quite thick. Scoop out the date mixture onto the crust and gently spread with the back of a wet spatula until even.
Sprinkle the chopped pecans evenly across of it and gently press down with fingers. Refrigerate in the fridge until firm for at least 1 hour, preferably overnight. Cut into squares and serve. Store in the fridge or freezer.
-
It’s The Most Wonderful Time…


Happy December everyone! I guess that title should really say – “It’s The Most Busy Time….”
Well as you may have guessed, the shortage of posts on here this week is due to the craziness of my life right now, once again. We are getting all geared up for the holidays both at home and with the business. I am a total holiday junkie, I love it all! I get insanely excited about the music and listen to it as much as possible, I wake up to it, I drive to and from yoga with it on the radio and I listen to it sporadically throughout my work day, at my desk! I cannot wait to really get into the thick of my gift shopping and we got the tree up this past Saturday after driving out to the country to cut it down. Last night I even took a break from all the work and I sewed some colorful felt bunting for our tree.
Honestly, if I had my choice, I would take the entire month of December off, not because I don’t enjoy my work, but more so I can just take it all in and savor every moment of the holiday magic. If I could, I would just go to yoga every morning and make Christmas gifts for everyone all afternoon listening to music and watching old Christmas movies and in the evening I would sit around in the dark with just the lights from the tree sparkling, drinking some delicious nog probably with a little rum in it, if I am being honest!
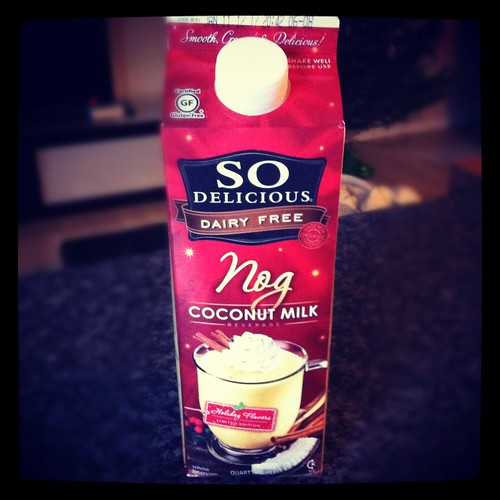
Speaking of nog, is anyone else as obsessed with So Delicious’ Coconut Milk Nog as I am? I cannot get over how amazing it is and I rarely get excited about things like this. Seriously, if you can find it, buy it and try it. It is only 90 calories per 1/2 cup and it is just as thick and delicious as the dairy version. I swear no one paid me to say this, I am just honestly obsessed with it. I wonder if I can make my own?
Anyhow, unfortunately for me, the month of December cannot all be Christmas songs, nog and crafting – our month is full of events, travel, lots of end of the year client work and tons and tons of shipping. SHIPPING!!! We just shipped off a huge order of our posters that we had with Urban Outfitters that was taking up every inch of our lives (yay – those will be in stores soon), plus 100 posters to Andrew Bird for his show in Minneapolis and we are shipping web orders from our site and etsy daily! I am certainly not complaining, I love it all and I am insanely grateful, but I am having to stay up late each night just so I can take in as much of the holiday spirit as I can, before it’s gone.

We are leaving bright and early tomorrow morning for Chicago for the Renegade Craft Holiday Sale, it runs Saturday and Sunday from 11am – 6pm. If you are in the Chicago area, you should come check it out, it’s an amazing event filled with hundred of vendors, all selling their handmade goods. It’s a wonderful way to support small independent businesses while buying unique holiday gifts. I get a ton of my own Christmas shopping done there with the other vendors, there is so much amazing stuff. The Hero booth is #65 on the first floor in gym #2. We will have a ton of posters and prints, greeting cards, pillows and more. Come see us!
Hopefully after we get home on Monday from Chicago, I will have a bit more time for cooking and baking. This week we were living off of our Thanksgiving turkey, I made an incredible gluten-free turkey pot pie and a creamy turkey, brown rice and sage soup. Sadly I will not be posting about either of these, as I did very little measuring so I have no clue how I would even write up the recipe and I made no time for photos. I guess I will just have to make them both again so I can share with you. Honestly though, the pot pie was so amazing I am definitely going to be making a vegetarian version with lots of yummy vegetables very soon, so keep an eye out for that. And also be on the lookout for some holiday cookie recipes when I get home and hopefully some other stuff, too. Hope everyone is enjoying the start of the holiday season and happy December to you all! See ya next week 🙂
-
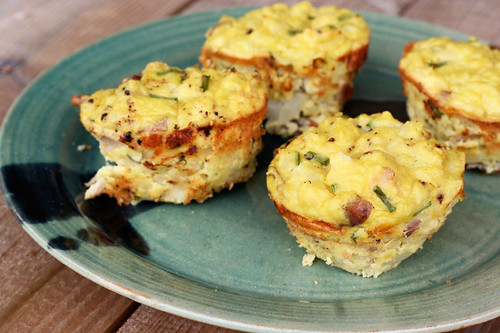
Smashed Potato Puffs
I didn’t get a chance to get on here Thanksgiving Day to wish you all a Happy Day, like I had planned but I was cooking away in the kitchen and watching the parade, the dog show and football! I hope all of my American readers had an incredible day surrounded by people they love most and filled with delicious and tasty fresh foods made with so much love and care. If you aren’t in the US – I hope you have a beautiful Thursday, still!
Our day was perfect, I spent the day cooking in my kitchen and relaxing with hubby, we really needed a day like that, then we headed to my parents to see a ton of family for dessert. It is going to be an insane few weeks coming up so I was very happy to have the perfect balance of a quiet and calm day, with a bit of the usual holiday fare with the extended family.
Of course the best part of making a big feast for 2, is that we have a ton of leftovers. This is so perfect since we are leaving on Friday of this coming week to head to Chicago – so finding time to cook is probably going to be tough. Besides just reheating things, I plan to come up with all kinds of fun and creative ways to eat up the leftovers. This morning I saw a post on the Kitchn with this very topic – lots of great and delicious ways to eat up those leftovers! One of the hardest things to just simply reheat are the mashed potatoes, they are never as creamy and delicious as they are that night! You could certainly make a shepherd’s pie with them or potato pancakes of some sort, which I had planned on doing until I saw this post. The Kitchn had this delicious recipe for Mashed Potato Puffs that caught my eye instantly. Their puffs included ham and cheese, though this was a bit too rich for me after the two days of eating that I just had, so I skipped the cheese and ham and just added a small amount of turkey and some fresh chives from my garden. If you had a vegetarian Thanksgiving, these would still be equally as delicious without any meat at all. These adorable little puffs were super simple to put together and ready in 20 minutes. We had ours for breakfast and we put the leftovers in the fridge for either a side dish or another breakfast. They were puffy, had a slight crisp on the outside and were perfectly soft and creamy inside. I almost always make my mashed potatoes as garlic smashed potatoes, which I add a smidge of Nancy’s Organic Cultured Cream Cheese to for a little bit of creamy and tart flavor. I make my smashed potatoes with red potatoes, leaving the skins on – so my puffs were a bit more rustic and chunky than the original recipe, which I really liked. They can stick a bit when coming out of the muffin tin, at least they did for me, so make sure you grease your tin, even if it is non-stick. I personally didn’t care about that little bit of sticking – they were delicious regardless.
Well we’re off to the country to cut down our Christmas tree today and then to walk around beautiful Elicottville to really get even more into the Christmas mood! I cannot wait!
Tomorrow I plan to make a gluten-free turkey pot pie with some of the leftovers and I am going to cook down the bones to make a turkey stock for soup. What are you making with your leftovers?

Smashed Potato Puffs
makes between 12 and 24 puffs, depending the size of the pan used
Adapted from The Kitchn2 cups leftover smashed (or mashed) potatoes
3 large farm fresh brown eggs, beaten
1/4 cup minced fresh chives
1/4 cup shredded leftover turkey (optional)
Salt and freshly ground pepper, to tasteHeat the oven to 400°F and lightly grease the cups of a regular muffin tin or a mini-muffin tin.
Whisk together the smashed potatoes, eggs, chives, and turkey. Taste and season, if necessary, with salt and pepper.
Put a spoonful of the mixture in each muffin cup. Bake for 20-25 minutes, or until the potato cups are set, browned on top, and hot through and through. Serve immediately. -
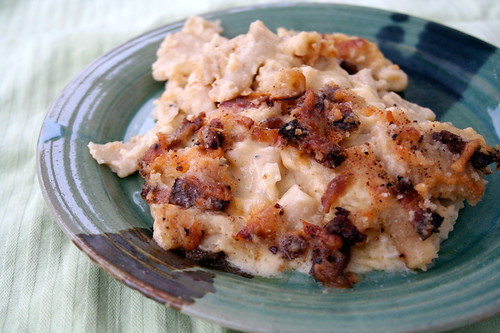
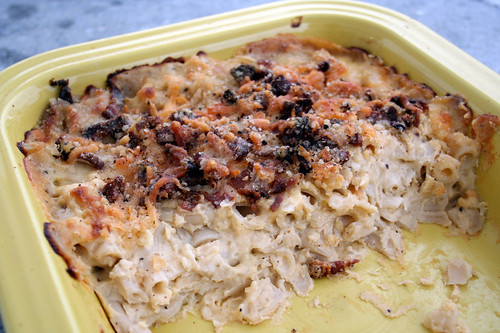
Gluten-free Mac & Cheese with Bacon
For me this time of year was always about indulgence, eating, drinking and then more eating. Since I have changed the way I eat, I have cut back on all major indulging. It serves no purpose and both the guilt and the gross heavy, toxic feelings you have afterward, aren’t worth it. All that being said, sometimes you need something rich and decadent. This is about as indulgent as it gets for me these days! Homemade mac and cheese!
I have never cared for most mac and cheese until I started making my own gluten-free version, I found most to be way to heavy and dense. Made with a good quality organic brown rice pasta, organic butter and milk, high quality cheeses (organic if you can find them) and smoked pasture-fed bacon from our wonderful farmer, there is little that can compare. Though this is a bit extreme compared to what I normally eat, there is no reason you can’t enjoy things like this from time to time. The key to everything in life is moderation. I learned that after many years of extreme diets and extreme rules. Should I eat mac and cheese every week or even every month for that matter? Absolutely not. But, I make it a point to make this once or twice a year, I enjoy it so much more and I look forward to it. If made totally from scratch with high quality, organic and fresh ingredients, I believe eating things like this, once in a while, is still better than loading yourself up with those disgusting processed diet foods all the time! I am sure of that. I am able to maintain my 30 lb weight loss and still enjoy decadent things like this from time to time. This is what life is all about, don’t deprive yourself.
Originally I hadn’t planned to add the bacon as this was meant to be a side dish to a delicious roast chicken. However, when I went to pull the chicken out of the fridge, it was still very frozen so I decided we would just eat the mac and cheese as our main course with a bit of bacon on top and a side of sautéed spinach with garlic, and save the chicken for the next night. And we could still enjoy the leftovers later in the week as sides to other meals or for lunch. Bacon is another indulgent item that I don’t partake in very often, but since we bought our 1/2 pig from Sojourner Farms, I find myself cooking with it more than I ever have in my life. I think bacon is wonderful as an accent in dishes and in moderation. It has such a wonderful flavor and that crunch is perfect on top of a homemade mac and cheese like this. Obviously if you aren’t a meat eater or don’t care for meat on your mac and cheese, the bacon can be left off on this. That being said, if you are a meat eater, you can experiment with ham or prosciutto instead. Also, you can certainly play around with different cheeses, I have found that cheddar and Manchego are my favorite, but you can really use any combination that you like.
Gluten-free Mac & Cheese with Bacon
Serves 6-81 pound organic gluten-free brown rice pasta
1 stick (1/4 cup) organic unsalted butter
1/2 cup white rice flour
4 cups organic 2% milk
1 onion, peeled and chopped
Pinch or two of fresh nutmeg
1/2 teaspoon kosher salt
1/2 teaspoon cracked black pepper
1 1/2 cups sharp cheddar cheese, grated
1 cup Manchego cheese, grated (you can use 2 1/2 cups of any cheese or cheeses you like)
1/2 cup gluten-free bread crumbs
3 slices of farm fresh smoked bacon (pasture-raised), cooked until nicely brown, crumbled or roughly choppedPreheat oven to 425º F.
Boil, rinse & drain pasta according to directions, cooking until al dente.
Melt butter in a large saucepan over a medium-high heat, add chopped onion, cook until tender about 7-10 minutes. Add rice flour, stir to form roux. Slowly add milk while stirring, heat until warm and thick. Add nutmeg, salt and pepper to taste.
Add 2 cups of your cheese combination, stir until melted. Set aside the other 1/2 cup. Add your pasta to the cheese and milk mixture, stir until well coated.
Pour the pasta and cheese mixture into a 9″ x 13″ pan, sprinkle with the remaining cheese, bacon and breadcrumbs. Add some fresh ground nutmeg. Bake for 20 minutes until bubbly and golden brown.
-
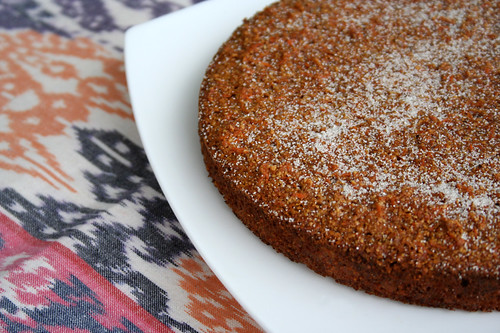
Flourless Carrot Cake
I am very behind on posting recipes right now. I still have recipes from Thanksgiving dinner, that I have yet to post. We are in the thick of one of our busiest times of the year. Our store is busy for the holidays, our web sales have been killer, we have two pretty big jobs on the books and we have been traveling to many different holiday events selling our stuff. On top of all of this, a week and a half ago, Buffalo got slammed with a really nasty snow storm that dumped about 3 feet of snow at our house in a very short amount of time. Our street wasn’t plowed for days and we were stranded at home. This all wasn’t so bad, except my husband Mark was supposed to be in Chicago selling our wares at the Renegade Craft Fair Holiday Sale. And worst of all, our fridge and pantry were pretty bare, I had planned to shop that coming weekend. So, I couldn’t even make the best of the situation by baking and cooking. Needless to say, I have been craving to have a few days to just relax, sip on a cocktail or two and just cook!
I came across this recipe just days before Thanksgiving and I had still been looking for the perfect dessert option to bring to my parent’s house. I made a huge feast at our house beforehand for just Mark and I, complete with a pastured turkey from our farm and tons of healthy and gluten-free dishes. Admittedly, I had my hands full and didn’t get the best pictures, so I am unsure on how many of the dishes I will be able to feature this year (I still have to go through all the photos), but that just means I may have to recreate them again some time soon, so I can get them on here. Darn.
This cake was the perfect light finish to a day full of eating and it was so incredibly easy to make. I loved that it was naturally gluten-free and didn’t have many ingredients at all. It had a lovely spice to it, reminiscent of pumpkin pie filling and the flavor from the almonds was so great. It’s like this recipe was created just for me on the day.
Make sure to grate the carrots on the fine holes of your grater, or they’ll be too crunchy. For best results, wrap the cake tightly in plastic after it cools and serve it the next day. It will keep for five days in the refrigerator if wrapped airtight.
Flourless Carrot Cake
Adapted from Recipes for Health by Martha Rose Shulman, New York Times
serves 10-121 1/2 cups (1/2 pound) unsalted toasted almonds
1/4 cup organic dark brown sugar
1 1/2 teaspoons baking powder
1/8 teaspoon salt
1 teaspoon cinnamon
1/2 teaspoon freshly grated nutmeg
2 teaspoons grated lemon zest
4 large farm fresh eggs
1/3 cup organic raw sugar
1 teaspoon vanilla extract
2 cups finely grated organic carrots (about 10 ounces)
a bit of raw sugar for dustingHeat the oven to 350 degrees with a rack in the middle. Oil a 9-inch springform pan, and line it with parchment. Lightly oil the parchment.
Combine the almonds and the brown sugar in a food processor fitted with the steel blade. Blend until the almonds are finely ground. Add the baking powder, salt, cinnamon, nutmeg and lemon zest, and pulse together.
Beat the eggs until thick in the bowl of a standing mixer fitted with the whisk attachment, or with an electric beater. Add the organic raw sugar, and continue to beat until the mixture is thick and forms a ribbon when lifted from the bowl with a spatula. Beat in the vanilla. Add the almond mixture and the carrots in three alternating additions, and slowly beat or fold in each time.
Scrape the batter into the prepared cake pan. Place in the oven, and bake one hour until firm to the touch and beginning to pull away from the pan. A toothpick inserted into the center of the cake should come out clean. Remove from the heat, and allow to cool on a rack for 10 minutes. Run a knife around the edges of the pan, and carefully remove the spring form ring. Allow the cake to cool completely, sprinkle lightly with raw sugar, then wrap tightly in plastic.
I realized in all the excitement of my first Thanksgiving dinner and sharing this dessert with the family, I never took a photo of the cake sliced, so I am doing something I never do and including a photo from the original recipe. The photo is what sold me on the recipe, so I figure it only fitting you get to enjoy it (and drool over it), as well.

©Andrew Scrivani for The New York Times


