-
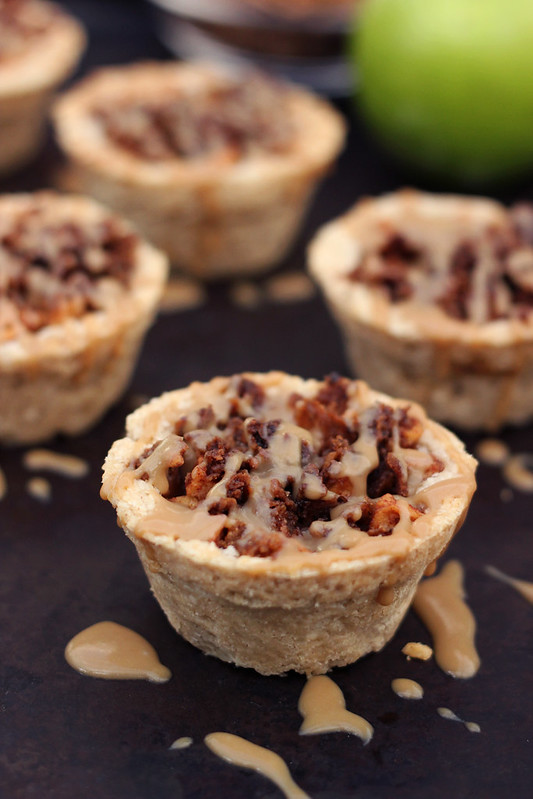
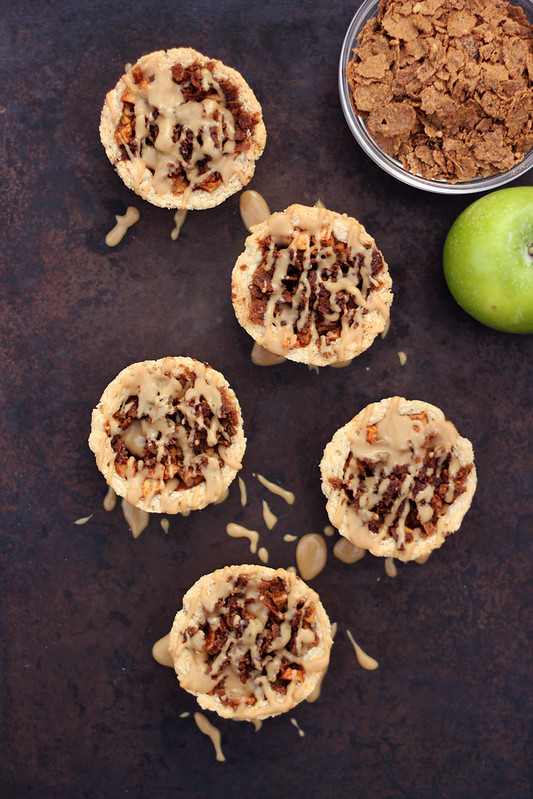
Mini Caramel Apple Pies with Cinnamon Streusel {gluten-free, vegan}
In case you haven’t noticed, I have a thing for mini stuff! Why make a single large-sized pie, when you can have 12 tiny ones? I am not sure where or when this love affair began, but I constantly find myself opting for littler things over the traditional size. (spoiler alert: I have another mini dessert coming to the website later this week)
When Attune Foods contacted me to develop a holiday-worthy dessert recipe using one of their Erewhon Supergrain cereals, I was excited for the challenge of recreating a classic sweet treat, like apple pie. I opted for mini apple pies with a deliciously simple crust and filling, a crunchy spiced streusel topping made with the buckwheat hemp cereal, all topped with a drizzle of my very easy-to-make vegan caramel sauce.
 <
< -
Vegan Pumpkin Pie Martini – Gluten-free and Refined Sugar-free
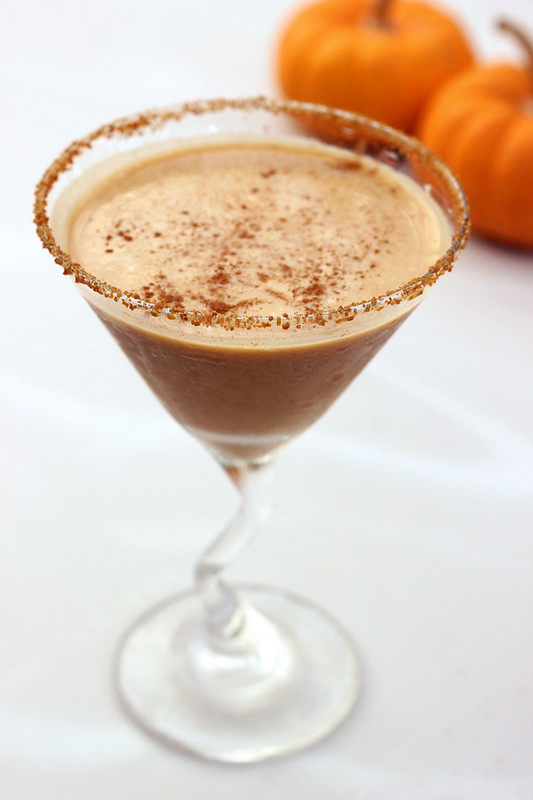
I will keep this one short, yesterday’s post was enough words to read for the next week. Phew! What can I say, sometimes I just have stuff I wanna chat about. Thanks so much for being here to read it and all the rest of my ramblings!
I originally was only going to be sharing this recipe with my email list. An exclusive content kinda thing. But, I just can’t keep this from you guys and I am a little bit of a sucker. Many of you asked if you could still get the recipe even if you aren’t on my mailing list so I decided rules are meant to be broken, even if they are your own.
Too many people hate emails lists and I kinda don’t blame you. My inbox is a hot mess most days. If you are a busy person and you have a lot of stuff coming and going from your email everyday, adding one more could just be the tipping point. I don’t ever want to annoy you, my friends. So, for those of you that don’t want to mess with emails, I didn’t want you guys to feel left out. I don’t like holding out on you guys and this one is way too yummy to not be shared with the masses. So here ya go – enjoy this, share it and make it part of your holidays this year.
-
No-Bake Vegan “Cheesecake” – Gluten-free + Refined Sugar-free

This week I thought it was appropriate to share a fun patriotic-inspired treat that you could take to any BBQ or picnic on the 4th! Not only is this dessert festive, but it is super simple to make, doesn’t require you to ever heat up the oven and it is sure to please everyone — restricted diets or not.
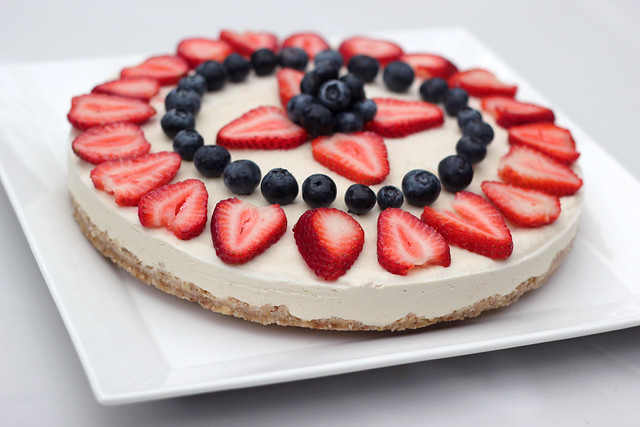
Since I cut most dairy from diet last year, there are a few things I miss from time to time. A rich and creamy cheesecake is certainly one of them. This “cheesecake” has a smooth and creamy flavor, with a bright tanginess you would find in most traditional cheesecakes. The crust is super simple and compliments the filling perfectly. The best part about this crust is, besides being raw, is how super versatile it can, you can use whatever nuts you have, I went with 1 cup raw macadamia nuts and 1/2 cup raw almonds. Plus it would be great for many other pie recipes, too. Read the rest of this entry »
-
Vegan Candy Cane Hot Cocoa Mix (Gluten-free)
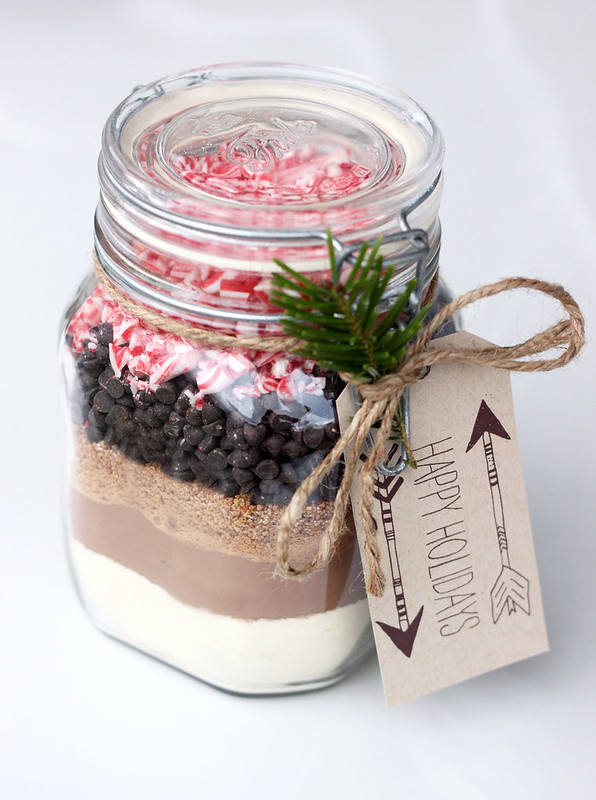
There a some flavor combinations that for me are the classic quintessential tastes of the holiday season. The combination of chocolate and peppermint this is definitely one of those. For my final giftable recipe this month in my series with Free People, I thought a handmade gift that was not only pretty, but tasted amazing would be the best way to end things. Hot cocoa is not just for kids, but also for the kids at heart.
Layer the delicious ingredients for this homemade candy cane hot chocolate in a jar and add some fun decorative touches like a fresh clipping of evergreen, wrap fabric over the lid, tie twine or ribbon and add a pretty tag. It not only looks beautiful, but it is so tasty, too! The bonus is this hot cocoa mix is vegan and gluten-free and depending on the ingredients you use, low in refined sugars, as well.
On it’s own or with a nice mug to compliment it, this simple DIY gift is sure to put a smile on anyone’s face! It’s a great hostess gift, it’d perfect for the secret santa giveaway, or just a thoughtful handmade gift for the chocolate loving vegan in your life. This simple ratio of ingredients can also be used to make a small batch for yourself, anytime you’d like!

[print_this]Vegan Candy Cane Hot Cocoa Mix
Fills a 1 quart jar, makes 12 servings- 1 cup powdered non-dairy milk, such as soy or rice (or powdered dairy milk, if you aren’t vegan)
- 1 cup unsweetened cocoa powder (be sure it is vegan)
- 3/4 cup coconut sugar (or raw cane sugar)*
- 1/2 teaspoon fine sea salt
- 1/2 cup miniature semi-sweet vegan chocolate chips
- 1/2 cup crushed vegan peppermint candy (these particular candy canes are great – no GMOs, no HFCS, no artificial dyes, etc )
Optional:
- 1/2 cup vegan mini marshmallows
- A few additional mini or full-sized candy canes
Layer the powdered non-dairy milk, cocoa powder, coconut sugar, salt, chocolate chips, and peppermint candy. If you’d like, you can add mini marshmallows to the top of the jar, if there is room or attach a plastic bag full to the jar. On the back of the gift tag, write:
“Mix all of the ingredients together in a large bowl. For each serving, place 1/4 to 1/3 cup cocoa mix in a mug and stir in 1 cup boiling water or non-dairy milk. Mix keeps in airtight container at room temperature for up to six months.”
OR
If you wish to leave the powdered milk out, shake all of the remaining ingredients together (you may want to increase the ingredients by 25-50% to fill up the jar without the powdered non-dairy milk). Once fully mixed, add it to the jar and layer marshmallows on top, if there is room. Change the directions on the gift tag to read:
“For each serving, heat 8 ounces of your favorite non-dairy milk in a small saucepan over medium heat until hot (alternatively, microwave 2-1/2 minutes at full power). Whisk in 1/4 to 1/3 cup hot chocolate mix. Mix keeps in airtight container at room temperature for up to six months.”
*Consider making a homemade vanilla sugar first, using my recipe for vanilla sea salt, replacing the salt with sugar. Use an equal amount of the vanilla sugar instead of plain sugar in in this recipe and it takes it to a whole new level!!
**Note: if your container is a different size, just keep the ratio of ingredients constant.**[/print_this]
This recipe originally appeared on the Free People blog BLDG 25.
-
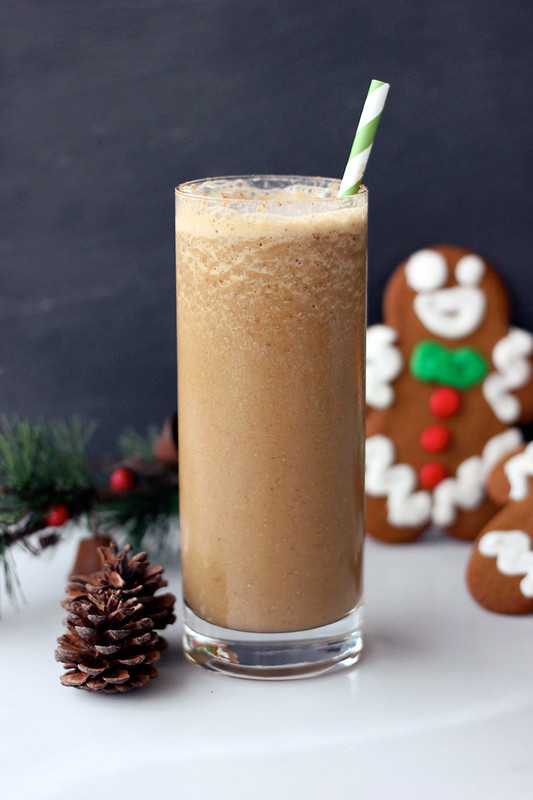
Gingerbread Smoothie – Gluten-free + Vegan

With the lack of time to play in the kitchen right now, I am certainly feeling the loss of certain seasonal flavors and tastes that are quintessential holiday treats for me. So, I have been getting creative when the time allows and enjoying the flavors of the season, however I can.
I had dreams of creating grain-free gingerbread cookies this year, but there just hasn’t been the time to experiment and play, so instead I created a simple and super tasty gingerbread smoothie to celebrate all of those same flavors, but without all of the mixing, cutting out and baking! It turned out great. The aroma from this simple treat alone is enough to satisfy that holiday hankering for those cute little cut out dudes.
Plus, you get to really enjoy some health benefits with this smoothie. Blackstrap molasses is just one type of molasses, the dark liquid byproduct of the process of refining sugar cane into table sugar. Blackstrap is my molasses as choice because of the variety of great nutritional benefits that comes with it. Blackstrap molasses is a sweetener that is actually good for you. Unlike refined white sugar and corn syrup, which are stripped of virtually all nutrients except simple carbohydrates, or artificial sweeteners like saccharine or aspartame, which not only provide no useful nutrients but have been shown to cause health problems in sensitive individuals, blackstrap molasses is a healthful sweetener that contains significant amounts of a variety of minerals that promote your health. Blackstrap molasses has a low glycemic index. Plus, because of its high iron content, many use blackstrap molasses to holistically overcome anemia. Blackstrap molasses is also a great source for calcium and magnesium. Potassium is another mineral abundant in blackstrap molasses, and the list goes on and on.
If you find the bittersweet flavor from the molasses to be a bit pungent, (which can often times happen to those who have taste buds conditioned for years by sugar and artificial sweeteners) or find it lacking as a sweetener, add a bit of additional sweetener of your choice, maple syrup, honey, etc. I personally felt like it didn’t need to be any sweeter. It was just perfect.
I also couldn’t help but think about how delicious this smoothie would be with a shot of some spiced rum or a good bourbon. Is it bad that’s where my mind goes right now?
If you are looking for a couple other creative gingerbread recipes, check out my recipes for Gingerbread Granola (gluten-free + vegan) and Pumpkin Gingerbread Muffins with Dried Cranberries (gluten-free + vegan).
Have you been enjoying the flavors of the season? What’s your favorite holiday treat?
[print_this]Gingerbread Smoothie
serves 1- 1 frozen banana
- 1 cup unsweetened organic vanilla almond milk (or other non-dairy milk)
- 1 tablespoon unsulphured blackstrap molasses
- 1 teaspoon vanilla extract
- 1 tablespoon flax-seed meal (or ground chia seeds)
- 1/2 teaspoon ground cinnamon
- 1/2 teaspoon ground ginger (grated fresh ginger would be extra nice)
- pinch of ground nutmeg
- pinch of ground cloves
- dash of all spice
- 1 small handful of ice
*additional sweetener, if needed
Add all of the ingredients to the blender and process until smooth and creamy. Pour into your glass, top with a little freshly grated nutmeg (or regular ol ground nutmeg will work too). Serve immediately.
[/print_this]
-
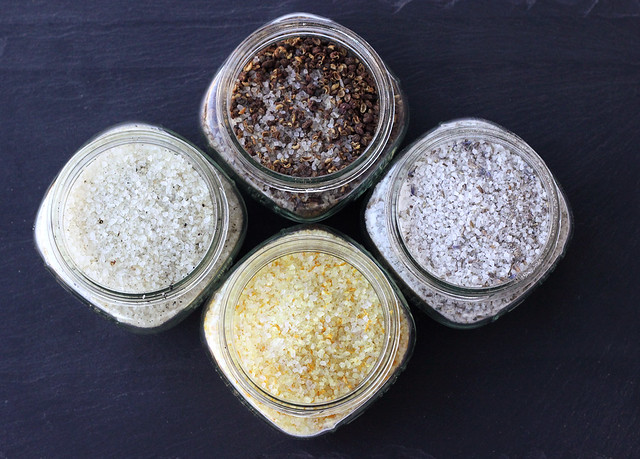
Flavored Finishing Sea Salts
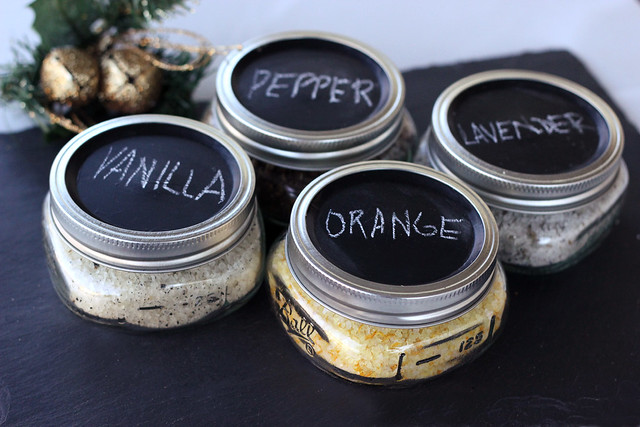
Next in my ongoing series with for Free People of Giftable Recipes, is a simple adaptable recipe/DIY for homade finishing sea salts. These would make the perfect gift for any food-lover (dare I say, foodie, I kinda hate that word). You can really have fun with the flavoring on these, creating your own to suit the tastes of the recipient. Or change it up and make flavored sugars, too.
Plus, you can really have fun with the packaging on these. Package in cute jars, wrap paper or fabric around the lid, finish with ribbons or twine and make fun handmade tags or labels, to really personalize the gift. I kept it simple and just painted the lids with chalkboard paint so I could write what was inside. I plan to actually give these as gifts this year, so I will make some fun personalized gift labels for whoever these end up going to.
Flavored Finishing Sea Salts
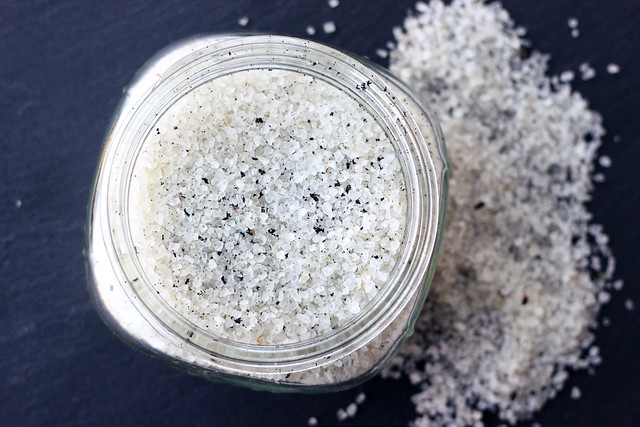
Vanilla Sea Salt
This smooth and aromatic salt would be great to rim drinks, for the top of truffles, caramels, cookies and other sweet treats, and don’t let it fool you, it would be great with savory items as well.
1/2 cup sea salt
2 vanilla beans, split lengthwise and scraped, seeds reserved
Remove beans from vanilla pod and mix thoroughly with sea salt. Package in an airtight container of your choice.
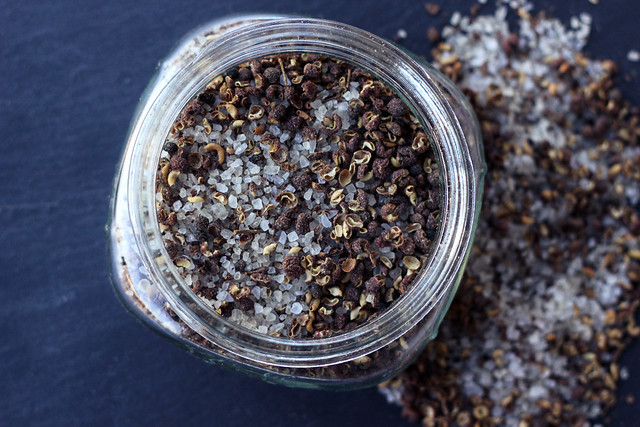
Sezchuan Peppercorn Sea Salt
This spicy salt has a kick plus a nice earthy rustic flavor and it would be great on grilled veggies, meat and seafood, popcorn, homemade chips, veggie burgers, stir-fries, etc.
1/4 cup Sezchuan peppercorns (aka Sichuan peppercorns) or any other peppercorn of your choice
1/4 cup sea salt
Dry roast the peppercorns over a medium/high heat in a dry skillet on the stove top for 3 to 5 minutes. Let cool then add to processor (a spice grinder or mortar and pestle would also work) and grind to the size of the sea salt, add the salt to incorporate, pulse a few more times. Package in an airtight container of your choice.
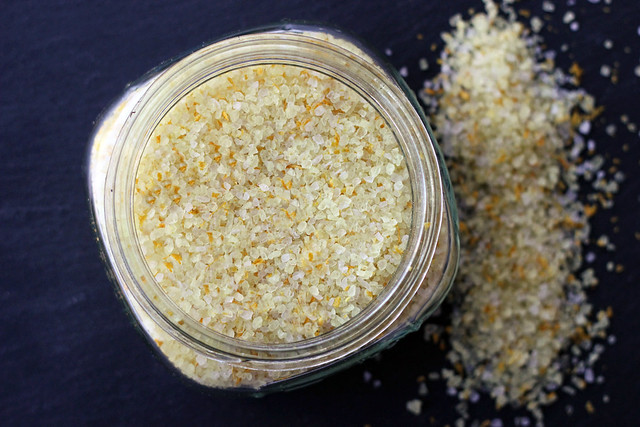
Citrus Sea Salt
This bright and fresh flavored salt would be great on vegetables, grilled or roasted chicken or seafood, shellfish, steamed rice, chocolates, cookies etc.
1/2 cup sea salt
1 tablespoon fresh citrus zest from well scrubbed fruit such as lime, orange, lemon, grapefruit or any combination of those (I used Organic Navel Oranges)
Mix together the zest and the salt, making sure there are no large clumps of the zest. Spread out evenly on a parchment paper lined baking sheet. Allow the citrus zest dry out in the oven at 200ºF for about 60 minutes. Once cooled, package in airtight container of your choice.
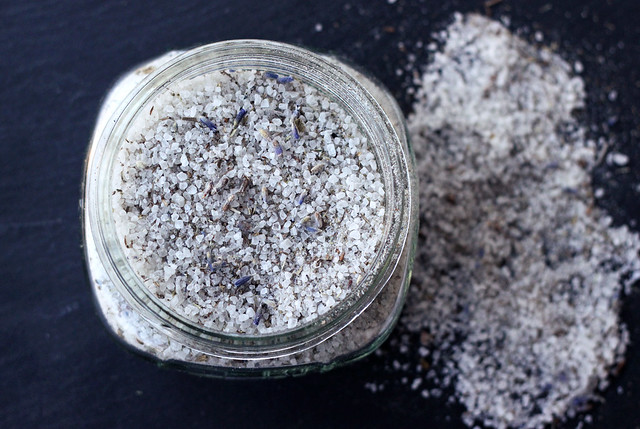
Lavender Sea Salt
This fragrant and flavorful salt would be great on sweet treats like truffles, chocolates, ice cream, shortbread cookies, scones, etc. Also try it in savory dishes like roasted squash, herbed flatbreads or with grilled chicken , lamb or salmon, etc.
1/4 cup dried lavender (make sure it is culinary grade lavender)
1/2 cup sea salt
Add the dried lavender to your food processor (a spice grinder or mortar and pestle would also work) to quickly chop the lavender, then add the sea salt, whir it together a bit, then package in an airtight container of your choice.
These recipes were originally shared on the Free People Blog BLDG 25. Share your thoughts below on how you would use these particular sea salts or what flavors you would try making yourself?
-
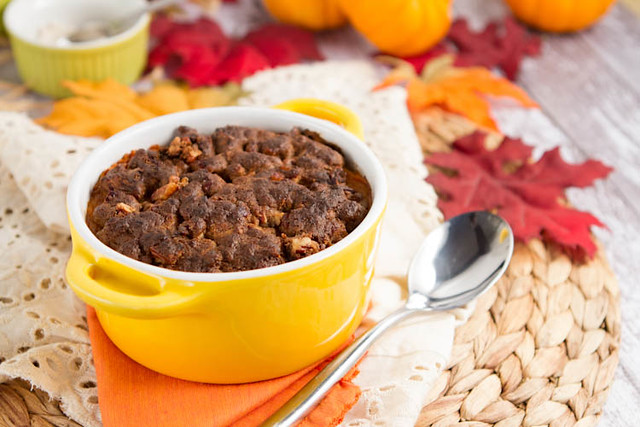
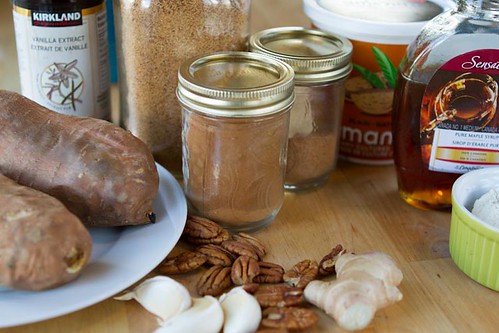
Garlic Maple Sweet Potato Casserole – Vegan + Gluten-free {Guest Post by Healthful Pursuit)

Today’s post in our Thanksgiving series comes from one of my favorites! I am sure most of you are familiar by now with Leanne from Healthful Pursuit (she and I have guest posted on each other’s sites on several occasions). If you aren’t yet, you are definitely missing out. Leanne shares not only some of the most delicious looking gluten-free recipes you will every see, but all of Leanne’s recipes celebrate the best in what food has to offer us! Being a Holistic Nutritionist, Leanne’s has a passion and commitment to not just her recipes and her photos, but to sharing with her readers all of the insightful and useful knowledge that she has about food and eating. Not only is Leanne sharing an incredible recipe for Garlic Maple Sweet Potato Casserole with us today, but as usual, her super helpful and beautiful step-by-step photos accompany the recipe to make it that much more enticing and accessible. Enjoy.
• • • • • • • • • • • • • • • • • • • • • • • • • • • • • • • • • • • • • • • • • • • • • • • • • • • • • • • • • • • • • •
How’s everyone doing today? My name’s Leanne and I blog over at Healthful Pursuit, a wholesome living blog dedicated to allergen-free living, holistic nutrition and intuitive eating. I’m super pumped to be sharing a new healthy Thanksgiving recipe with you!
Recently; as in yesterday, a bunch of friends, clients, readers, family members and I were on a two week cleanse to clean up our dietary habits and prepare our bodies for Winter. Knowing full well that we’d all be finishing a cleanse when I was contributing to Beth’s Thanksgiving roundup, I planned to prepare a recipe for us today that was as cleanse-friendly as possible, while still being more than acceptable to be prepared for any Thanksgiving feast.
Instead of the sugar-laden sweet potato casserole that we’re all used to, I’m coming at you guys with a clean-eating sweet potato casserole that’s so ridiculously good that you wont miss the marshmallows, corn syrup or brown sugar.
There’s nothing I hate more than a Thanksgiving food comma and this recipe will not contribute to a drowsy Thanksgiving evening, that’s for sure.
[print_this]Garlic Maple Sweet Potato Casserole (Vegan + Gluten-free)
Serves 4
Casserole ingredients:
- 2 medium sweet potatoes
- 3 tablespoons dairy-free yogurt
- 2 garlic cloves, minced
- 2 teaspoons maple syrup
- 1/4 teaspoon chopped fresh ginger
- 1/4 teaspoon sea salt
Topping ingredients:
- 2 tablespoons chopped raw pecans
- 1 tablespoon palm sugar
- 1 1/2 tablespoons sorghum flour
- 1 1/2 teaspoons extra-virgin olive oil
- 1 teaspoon maple syrup
- 1/2 teaspoon gluten-free pure vanilla extract
- 1/4 teaspoon ground cinnamon
- 1/8 teaspoon ground nutmeg
Begin by roasting 2 medium sweet potatoes. To do this, preheat your oven to 375F and place the sweet potatoes in the oven. Simple as that. Leave to cook for about 30-40 minutes, until potatoes are tender. To test, you can poke with a fork or butter knife. Once complete, remove from the oven and allow to cool for a couple of minutes.
Reset oven to 350F and lightly oil a 4-cup casserole dish. Set aside.
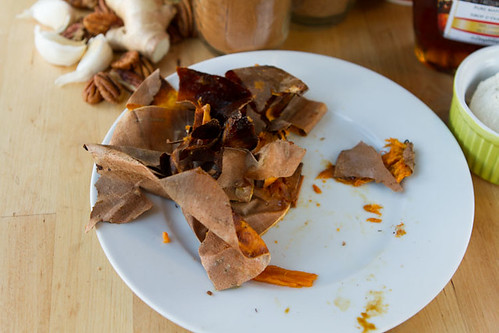
Remove the skin from the sweet potatoes.
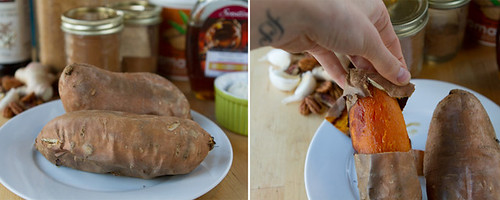
Keep the skin for later, it makes a fabulous snack with a sprinkle of sea salt. Trust me, it’s delicious!
Place the peeled sweet potatoes in a medium sized bowl, add the remaining casserole ingredients and mash with a potato masher until fully incorporated.
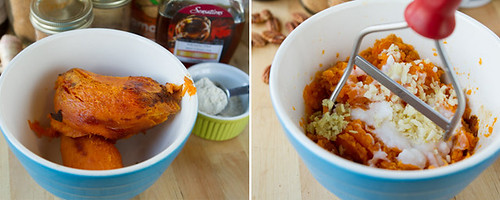
Spoon mixture into the prepared casserole dish and flatten with the end of a spoon. Set aside.
Combine topping mixture in a small bowl.
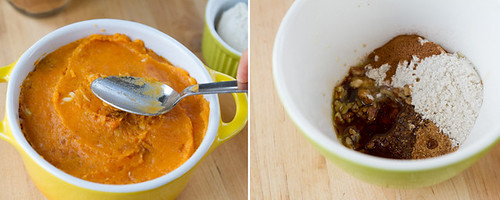
Stir to combine, then drop over top of the sweet potato mix.
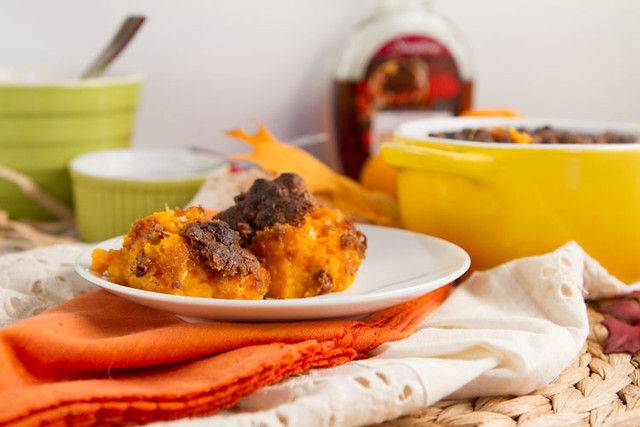
Place in the preheated oven for 40-45 minutes until the top is golden.
Remove from the oven and allow to cool for about 10-15 minutes before consuming. [/print_this]

If you’re like me and you’re in Canada, this could easily pass as an everyday meal too. Pair with a chicken breast, maybe a bit of steamed veggies and you’re rockin’ it, regardless if Thanksgiving has come and gone already.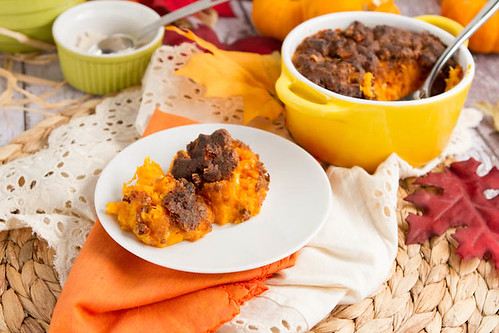
Thanks for having me over today, Beth! I hope you all have a great Thanksgiving filled with love, good food, and fabulous company.

Leanne is a Holistic Nutritionist and writer for her wholesome living blog healthfulpursuit.com where she shares her passion for eating intuitively, and creating gluten-free and often allergen-free recipes.Visit Leanne’s blog Healthful Pursuit
You can also follow Leanne on:
Twitter: @be_healthful
Instagram: @healthfulpursuit
Facebook: facebook.com/healthfulpursuit
Pinterest: @be_healthful -
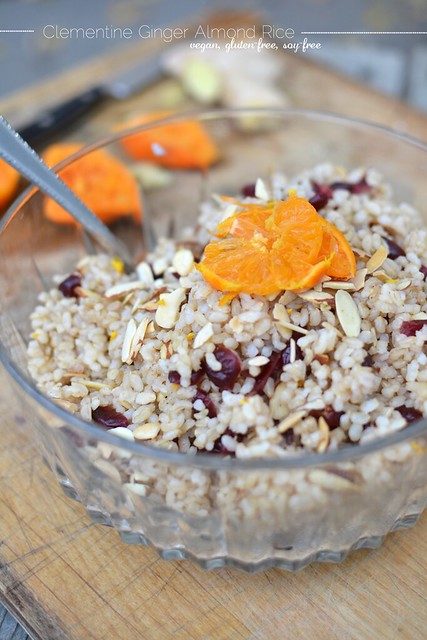
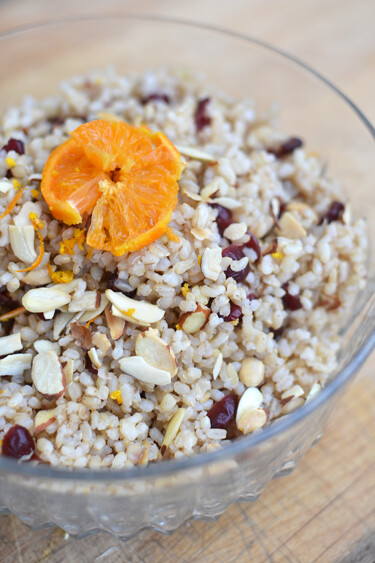
Clementine Ginger Almond Rice – Vegan, Gluten-free + Soy-free {Guest Post by Bring Joy}
Next up in our Thanksgiving series is a post from the very sweet and lovely Janae from bring joy. I found Janae’s blog not too long ago and I can’t even recall right now how I stumbled upon it. I was immediately excited as all of Janae’s recipes are both gluten-free and vegan AND she also has four kids. I find cooking something both my myself and my husband will equally enjoy, to be a challenging feat at times, the fact that Janae creates such beautiful meals and is feeding so many mouths at the same time is so impressive and admirable! Janae’s photos always make me want to reach through the screen and take a quick bite and on top of all of this, her posts are always so real, honest and from the heart, which I very much appreciate. Today Janae is sharing her recipe for Clementine Ginger Almond Rice with us. Enjoy.
• • • • • • • • • • • • • • • • • • • • • • • • • • • • • • • • • • • • • • • • • • • • • • • • • • • • • • • • • • • • • •
Growing up, Thanksgiving was a somewhat chaotic affair since I have six brothers & sisters. As you might imagine, things were loud. Things were never dull.
Now that I have four kids of my own, loud & chaotic Thanksgivings prevail, only difference is, now my Thanksgivings are meat & dairy-free (& gluten-free).
For many vegans, grain meats, such as tofurky or seitan are an vegetarian-friendly alternative to turkey. However, as a gluten-free vegan these grain meats aren’t an option. Which makes it even more important for me to have a variety of dishes to choose from that offer plenty of satisfying texture & flavor.

I’ve been vegan for going on 7 years now (gluten-free for almost a year), & this makes it my 7th meat-free Thanksgiving. In my pre-vegan days I was always more of a side-dish eater anyway, & taking out the turkey from the meal just makes room for traditional delicious side dishes, like this one, to take prominence.
This dish is a bit more sweet than savory, but there’s no added sugars, only the sweetness that comes from the cranberries & clementine juice.
[print_this]Clementine Ginger Almond Rice – vegan, gluten-free, soy-free
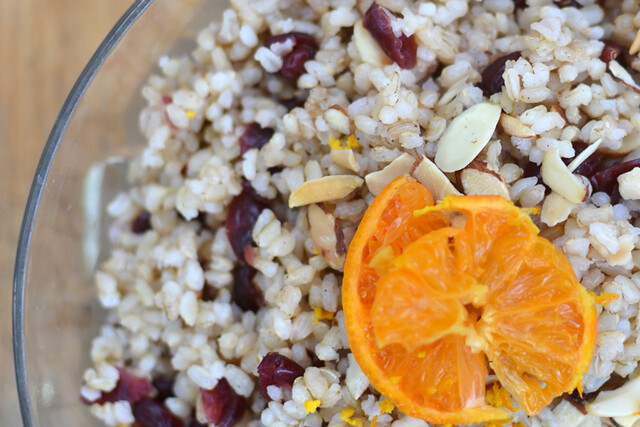
Serves 8This rice has a subtle mixture of several flavors. Infused with ginger, clementine, & a hint of cinnamon, the cranberries add texture & sweetness while the toasted almonds add a nutty crunch. A relatively easy dish to throw together, this rice compliments other Thanksgiving-themed dishes. I’m thinking squash would pair especially well.
Toasting the rice & almonds brings out the nutty flavors of both foods, adding another layer of flavor & depth to this humble dish. When you makes this for Thanksgiving dinner, your relatives may very well take one look at it & think, “oh, rice.” But once they have a bite, they’ll realize it’s much more flavor-packed than assumed.
{My kids actually ate this for breakfast one morning, topped with soy milk. My son said it “tastes like cake!” I suppose the subtle sweetness of the rice combined with the sweet nature of soy milk made for a cake-like experience.}
- 2 c. organic short-grain brown rice
- 3 1/2 c. water
- 1/4 tsp. cinnamon
- good pinch of salt
- 2 strips of peeled, fresh ginger (about 1 inch)
- juice of 2 clementines
- peel of 1 clementine, grated
- 1/2 c. sliced almonds
- 3/4 c. dried cranberries
- 1/2 tsp. grated fresh ginger
1. In a large cast-iron skillet on medium-high heat, toast brown rice. Stir periodically for 4-5 minutes, or until brown rice becomes aromatic & is visibly toasted (lower heat to avoid burning if your pan gets too hot).
2. Add water, cinnamon, salt, & ginger. Turn heat up to high & get water to a boil. Cover rice & turn heat down to medium-low. Cook for 50 minutes (& don’t go peeking under that lid–but you already knew that, didn’t you?).
3. While rice is cooking, boil 2 cups water. Place dried cranberries in a small bowl. Once water has reached a boil, pour water over cranberries & cover. Let sit for 20-30 minutes (or until cranberries are reconstituted). Drain excess water.
4. You’ll also want to toast your almonds. It’s super easy, don’t worry. Preheat your oven to 300 F. Spread almonds on baking sheet. Bake for 3-5 minutes (be careful not to burn). Remove from oven & let cool.
5. Grate ginger, & peel of one clementine (or grate peels of both clementines).
6. Once rice is cooked, remove from heat, fluff with a fork & let sit for 5 minutes.
7. Place rice in medium bowl & add cranberries, almonds, grated ginger, clementine peel & juice. Toss gently. Garnish with clementine slices. [/print_this]

Janae Wise is an Air Force wife, mother of 4 & is passionate about sharing with others ways in which to bring more joy to living. She is also a vegan & gluten-free recipe developer, writer, & yoga teacher/fitness instructor.
She is the founder of bring joy, where she shares her love for creating wholesome, fresh & simple food. Janae also writes about insights into family & home life, as well as occasionally shares fitness tips & videos. You can read more about Janae, here, & more about her family, here.
You can also find bring joy on facebook, twitter, & pinterest.
-
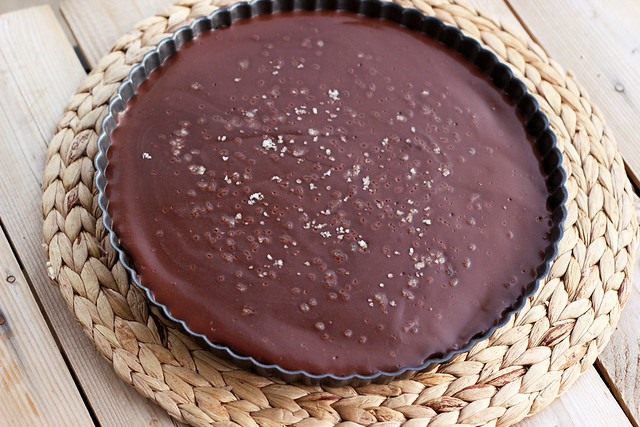
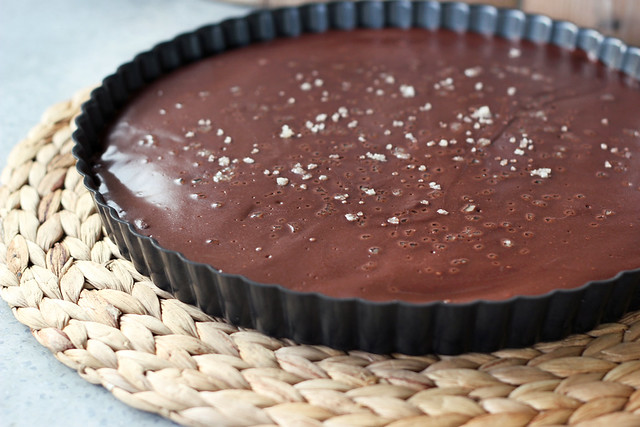
Salted Chocolate Tart – Gluten-free, Grain-free + Vegan
When you are craving something very specific and you want it just how you envision it in your own head, there is nothing left to do but to just figure out how to make it yourself.
I had been wanting a delicious but not too rich simple chocolate dessert, with just a touch of saltiness. There is nothing better than a good quality chocolate treat and tad bit of good quality sea salt. Yum, one of my very favorite things. I decided to just write up a recipe first, that I thought would work and just play it by ear, adding things as I went if I thought it needed it and then hope for the best. I find this to be one of the best ways to cook and bake and I am pleasantly surprised at how often it actually works out.
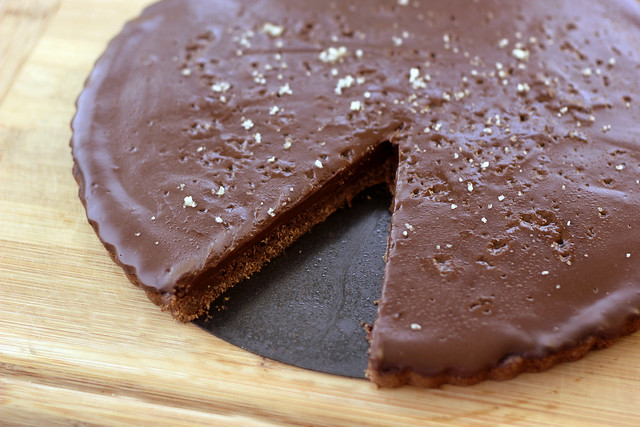
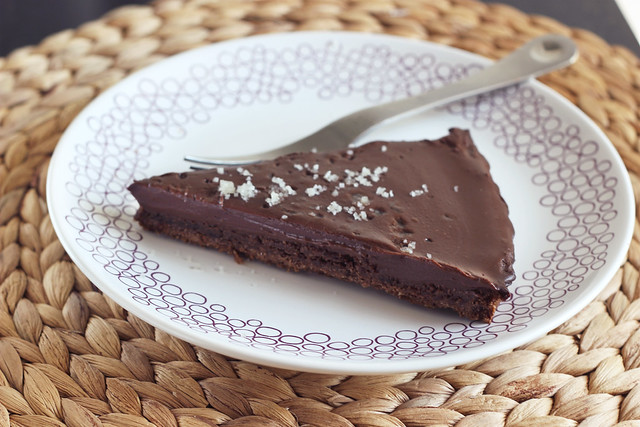
This tart was super simple to make and it was exactly what I was looking for. A slightly crunchy and nutty crust that needs the littlest bit of baking and a super creamy and velvety filling that is the perfect amount of richness, without going overboard and crossing into the world overly heavy and too rich. One of my biggest complaints of so many desserts. The sea salt on top is so perfect, both in how it looks on top of the glossy chocolate and the delicious treat that it provides your taste buds.
I ended up melting some dairy-free semi-sweet mini chocolate chips (from Enjoy Life) that I had on hand in my pantry, but you can also just use your favorite bittersweet chocolate, coarsely chopped for melting. If you want to make this refined sugar free, you could also try melting unsweetened bakers chocolate, and sweeten it to your liking with whatever you choose, such as stevia, maple syrup, palm sugar, etc.
I am super excited at how simple the crust was on this tart, I definitely plan to make some really fun tarts this spring and summer with this recipe
[print_this]Salted Chocolate Tart – Gluten-free, Grain-free + Vegan
serves 8 to 10Crust
- 2 cups almond flour, aka almond meal
- 2 tablespoons flax seed meal
- 2 tablespoons maple syrup
- 2 tablespoons cocoa powder
- 2 tablespoons coconut oil, melted
- 1/4 teaspoon baking soda
- 1/8 teaspoon salt
Filling
- 10 ounces non-dairy bittersweet chocolate, coarsely chopped (or dairy-free mini semi-sweet chocolate chips)
- 1 1/2 cups unsweetened non-dairy milk (I used a blend of coconut and almond milk)
- 1 tablespoon arrowroot starch (You could also use tapioca starch or corn starch)
- 2 tablespoons coconut oil
- 1 teaspoon vanilla extract
- High quality sea salt for topping (see below note)
Preheat oven to 350º. Lightly grease a 9 or 10-inch tart pan. In a large bowl, add all of the crust ingredients and mix very well. Add the crust mixture to the tart pan and press down firmly into the pan, going up the sides just a tad bit. Bake for 15-20 minutes until golden brown.
Meanwhile, place the chocolate into a glass bowl and set aside. In a small saucepan, add the non-dairy milk and arrowroot starch and whisk very well to combine and remove any lumps. Over a medium-high heat, heat until it just barely starts to boil. Remove from the heat and add in the coconut oil and stir well to melt the coconut oil (if it wasn’t already) and to combine well. Pour the milk mixture over the chocolate and let sit a few minutes until the chocolate is melting, add in the vanilla extract, then stir very well for a few minutes, until the mixture is smooth, glassy and creamy.
Pour the chocolate mixture into the prepared crust and allow it to cool completely. Cover with plastic wrap and place in the refrigerator for at least 4 hours or until fully set. Pop the ring from the tart pan off, sprinkle with a small amount of high quality sea salt, cut into slices and serve chilled.
NOTE: Sprinkle the sea salt on just before serving. If you sprinkle the salt on before the tart has fully set, it will start to dissolve into the surface, I had sprinkled a small amount on after it had chilled a bit, but before it was fully set, since I didn’t really think about that happening. It did start to dissolve a bit, so I just sprinkled just a tad a bit more on top before serving and for taking photos.
[/print_this] -
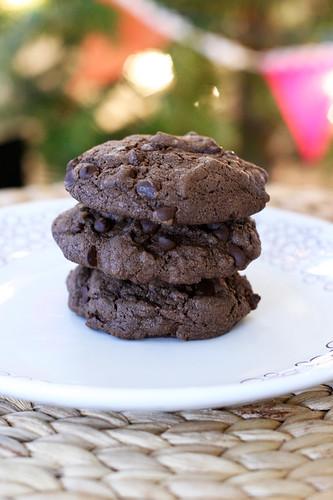
Double Chocolate Peppermint Cookies – Gluten-free and Dairy-free

You didn’t actually think I could make it through the holidays without making some kind of regular ‘ol Christmas cookies, did you? I have been loving playing around with some non-traditional healthier recipes, but last night my hubby was begging and pleading for a classic Christmas cookie while we were watching Love Actually. So, I decided to see what I could come up with on a whim. I of course had to make them gluten-free so I could enjoy them and I also wanted to make them dairy free. I have been loving the combination of chocolate and mint lately, it is such a classic holiday flavor combination, and I have been planning to make some cupcakes with that flavor combo, (I still hope to) but I decided to go that route with these cookies, too.
The original recipe that I used as a reference for ratios, called for 2 sticks of butter and 2 cups of sugar. That just seemed so excessive to me and I also really wanted to use coconut oil instead of the butter, so I made some changes, put it all together and crossed my fingers. I think if I wasn’t already taking a gamble with the recipe, I would have also tried to make them egg free, but I didn’t want to rock the boat. These cookies turned out so amazing, they have a little crisp to the outside and were perfectly gooey and chocolatey on the inside, just how I like my cookies. I love the peppermint flavor in these so much, I actually debated adding some crushed candy canes to the cookies too, for some pop of holiday color, but I decided against it, I didn’t want these to be “too much”. I wanted them to be subtly sweet and understated but still festive.
What kinds of Holiday cookies have you made this season?
If I don’t get back on here before the holidays, I want to wish you all a very Merry Christmas, Happy Hanukkah or whatever holiday you celebrate. I hope you enjoy this magical time – surrounded by family and friends and of course, lots of tasty and healthy foods! Lots of love!! xoxoxo
[print_this]Double Chocolate Peppermint Cookies – Gluten-free and Dairy-free
makes about 2 dozen cookies
adapted from this recipe
320 grams (about 2 1/2 cups) of your favorite Gluten-free All Purpose Flour Blend (gum-free) – I made Shauna’s gluten-free AP flour mix a while back for pie, and I had some leftover so I used that
1 teaspoon fine sea salt
1 teaspoon baking soda
2 teaspoons baking powder
1/2 cup organic extra virgin coconut oil, solidified not liquid
1 cup (about 225 grams) organic raw sugar
2 large farm fresh brown eggs, beaten (you can try Ener-G Egg Replacer here to make this vegan, just make sure your chocolate chips are also dairy free)
2 teaspoons vanilla extract
2 teaspoons peppermint extract
1/2 cup unsweetened organic cocoa
1 cup mini dairy-free chocolate chipsPreheat oven to 375º F. In a large mixing bowl mix together gluten-free flour, salt, baking soda and baking powder, set aside. In the bowl of your standing mixer or large bowl with hand mixer, mix together coconut oil, raw sugar, eggs (or egg replacer), vanilla, peppermint extract and cocoa at a low speed, until well blended. Gradually stir flour mixture into butter mixture and mix on low speed until combined. Fold in chocolate chips with a spatula.
Drop dough (tablespoon-sized) onto parchment paper lined or non-stick baking sheets and bake about 15 minutes. Cool on a wire baking rack. [/print_this]
-
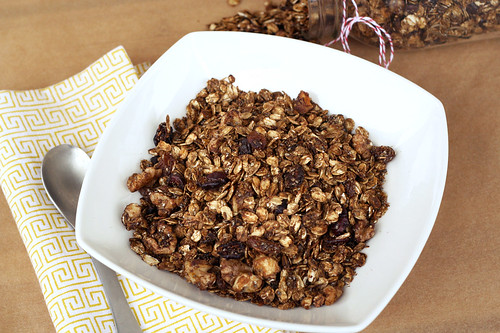
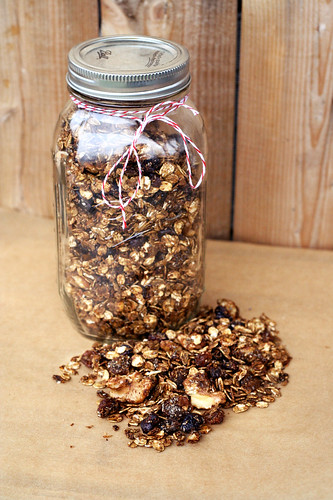
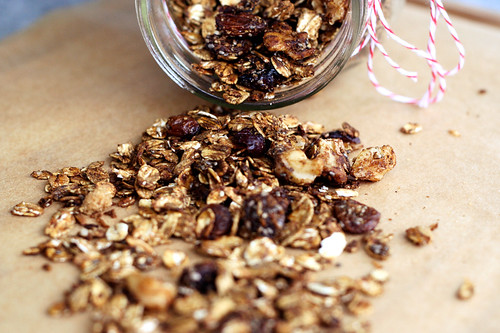
Gluten-free Gingerbread Granola {Vegan}

We are back from our very short trip to Chicago, we got back late Monday night. It was a whirlwind of a trip, but it was super fun and totally successful on the business front. The holiday market was jammed packed with people and everyone was in such a festive holiday mood. I love that about this time of year.
When we are in Chicago we stay with good friends and it is so enjoyable and relaxing. We are so lucky to have so many amazing friends across the country that open their homes to us. It makes it feel like we took a trip to see and stay with family instead of the alternative of it feeling like the (somewhat) stressful work filled trip that it actually is. I really wish I had more time before we left for this trip to make cute little homemade gifts like this granola for our friends that we stayed with as a “thank you”. This granola would make a wonderful holiday gift for the cereal lover on your list and it would also be the perfect gift for the host or hostess that invites you by for a holiday party. This granola in a simple canning jar wrapped up with some sweet ribbon or twine with a little tag, it really doesn’t get any better. I wish I could also capture and bottle up the smell in the house after baking this and wrap that in a bow and give it to everyone I know. It was that good.
The only bad thing about coming home after traveling, is that the fridge is usually so empty when we return. I try to be smart and plan ahead so we don’t leave town with a ton of fresh produce or leftovers in the fridge, etc. But that also means that when we come home there is very little fresh food to eat and I need to find the time to get to the market. We are pretty busy with work right now, so I haven’t had the extra time to get groceries just yet, so we have been just making do with what we have on hand right now. I have been craving some holiday-inspired goodies, like crazy, so, I decided a fun and healthy way to get some holiday flavor in my life, is to make this gingerbread granola. It made the house smell amazing and it is a great breakfast and snack option. It would also be good sprinkled on top of greek yogurt or ice cream. I’ve been enjoying this granola for breakfast with a few glugs of almond milk or coconut milk (not the canned kind, the beverage kind from So Delicious).
I had blackstrap molasses on hand, so I used that, but feel free to use regular light or dark molasses if that is what you have. Since blackstrap molasses can have a bit of a bittersweet taste, I also added an additional 1/4 cup of coconut sugar. You could leave this off or substitute brown sugar or honey here if you are looking for a bit more sweetness, like I was. Blackstrap molasses is not only a healthier choice for a sweetener, it actually has some health benefits, which is a lot more than more sweeteners can say for themselves. Blackstrap molasses is high in iron and a variety of other minerals.
Is it bad that I want to wrap this granola up and give it to everyone on my list? It’s that good.
Do you plan to make homemade gifts food or otherwise for anyone on your list?
Gingerbread Granola
This made enough to fill two 1-quart canning jars4 cups old-fashioned rolled oats (if you are gluten intolerant, be sure these are certified gluten-free oats. I use Bob’s Red Mill)
1 teaspoon cinnamon
1 teaspoon of ground ginger
1/4 teaspoon ground nutmeg
1/4 teaspoon ground cloves
1/2 cup chia seeds (flax seeds would also be nice)
1/2 cup unsweetened shredded coconut
3/4 cup walnuts, roughly chopped (or pecans, almonds, etc)
1/2 cup golden raisins
1/2 cup dried cranberries
1 teaspoon kosher salt
1/3 cup blackstrap molasses (light or dark molasses will also work)
1/4 cup coconut sugar (optional, you can also use brown sugar)
2 teaspoons vanillaPreheat oven to 325ºF. Line large baking sheet with parchment paper. You can also use a roasting pan, which is nice since you can just mix all of the ingredients right in it, without losing things over the edge.
Combine all of your dry ingredients, oats, seeds, nuts, dried fruit etc., in a large bowl (or in your roasting pan). Add in your spices and salt. Mix well.
Pour the molasses and vanilla over the dry ingredients and stir until well coated. Let sit 5 to 10 minutes. Give the mixture a little taste and add the coconut sugar (or brown sugar) if it’s too bitter for you.If you aren’t using a roasting pan, spread the granola on the baking sheet and bake for 30-40 minutes. Toss every 10 minutes or so to provide even toasting.
Let cool completely – it will get crispier as it cools. Keep in airtight container.
-
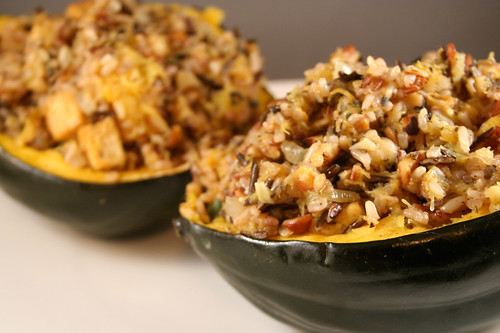
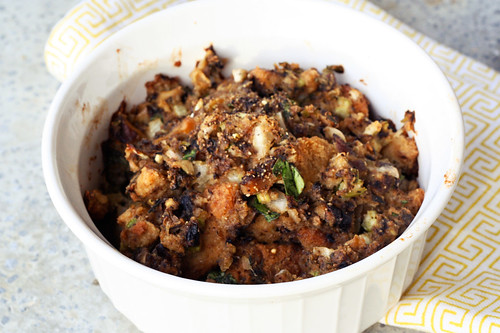
Gluten-Free Mushroom Stuffing (Vegetarian)

When I found out I was going to be a part of Book of Yum’s Gluten-free Vegetarian Thanksgiving Event – I was so excited. This is the first time I have had the pleasure of participating in something like this, but I have wanted to ever since I started my blog a year and a half ago. This one felt like the perfect place for me. Although I am not exactly a traditional vegetarian, I consider myself to be a “conscientious omnivore”, meaning I only eat meat that I feel good about eating that comes from a local farmer where it is raised humanely, free to roam, eat pasture and not be filled with hormones or antibiotics. We get all of our meat from Sojourner Farms in Olean, NY. This is the ONLY meat we ever have in our home and I feel like it is the right choice for us. We probably only eat meat anywhere from once a week to once a month at home, depending on what we have on hand and what we feel like. The rest of the time we eat completely vegetarian. I really love cooking vegetarian and find that eating a mostly vegetarian diet plus eating a small amount of local pasture-raised meat to have really changed my health immensely. I also feel like for me, it is a wonderful way for me to take a stand against the factory farming industry.
Sea, from Book of Yum, really wanted this event to not only make the transition into the first holiday season for newly diagnosed gluten-free folks to not seem so daunting, but to also highlight all of the wonderful options for those who are, or are cooking for those who are gluten-free and/or vegetarian (or vegan). Many of us find ourselves bringing our own food since many times the hosts are so terrified and paralyzed by what to cook, plus it alleviates the stress we have on wondering what we are even going to eat when we show up at someone else’s house. I love all of the wonderful recipes that have been featured so far, it’s such a great collection of classic dishes and new unique Thanksgiving options.
This year, like last, hubby and I are making the healthy and gluten-free Thanksgiving meal that we want and eating early in the day. After I get up and go to an early morning yoga class, while hubby takes our dog, Seri, to the park, we’ll spend the day cooking together, watching the parade and football and a enjoying a relaxing day at together at home without any work. After we are done eating, we will head over to my parent’s where they are having nearly 30 people for dinner (!) and we’ll join them for dessert, a cocktail or two and it will be the perfect way to have it all.
We took a nice long drive out to the country yesterday to pick up our Thanksgiving turkey from our farmer, Pierre, at Sojourner Farm in Olean. Since we will be having a turkey for our Thanksgiving dinner, I wanted to plan the rest of the meal without any meat. I was really excited to take on the challenge of making a meat free stuffing this year. So making it ahead of time for Book of Yum’s event was even more exciting since it was a test run of this recipe, for me. In the past I have sought out some type of healthy sausage to make my mom’s famous stuffing recipe that I had to have, but it always feels so redundant and unnecessary to have a side dish with meat in it, alongside the turkey. I really don’t need or want that much meat in one meal.
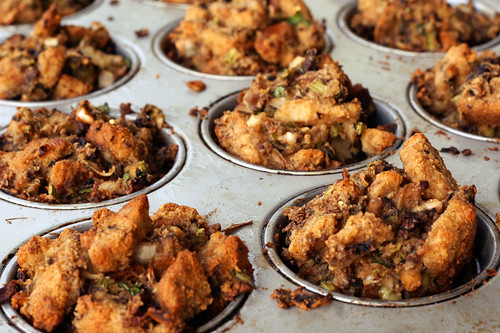
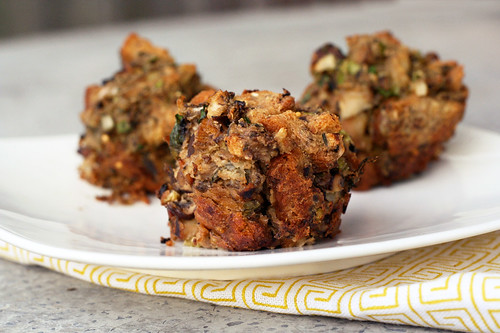
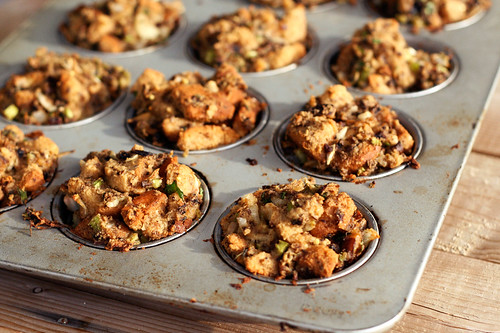
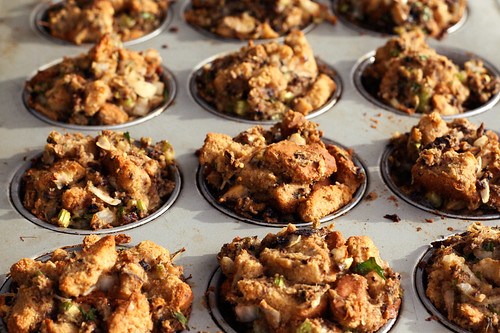
I decided on making mushrooms the stars of the stuffing this year. This delicious side dish is so full of rustic and earthy flavor, the mushrooms have a nice chewiness to them and the beautiful fresh thyme pulled it all together so nicely. Additionally, as you can see by the above photos, I also decided to experiment with making little individual stuffing “muffins”, if you will. I dreamt this up as a way to make sure that everyone gets lots of the crispy goodness that makes stuffing so darn delicious. Come on, admit it, you’ve gotten into with a family member on Thanksgiving over who get’s the edges. In our house, my hubby usually gets the crispy edges on anything that has them, by default. If you don’t care about the crispies (as my husband calls it) or don’t want to mess with a muffin tin, this will perfectly fit into a 9″ x 13″ baking pan. I ended up having a little bit leftover after filling the 12 muffin cups, that I put into a very small glass casserole dish. I didn’t want to call this recipe “Stuffing Muffins”, as I feared it would turn people off, since it does sound pretty disgusting, really. Even if you don’t try the stuffing “muffin” approach for this Thanksgiving, you have to try it soon, it is so worth it and I honestly cannot believe I didn’t think of it sooner.
This stuffing does have two eggs in it, so if you are vegan you could experiment with an egg replacer such as Ener-G or making your own flax-seed egg replacer (To replace one egg: 1 tablespoon ground flaxseeds plus 3 tablespoons hot water. Stir together until thick and gelatinous.) I have never made my stuffing vegan, but I am sure it would work perfectly. Please let me know if you try it out. Additionally, you will obviously have to make sure the bread you use is vegan.
Besides being very excited about how this recipe turned out, I am also very excited that I get to have stuffing twice in a week’s time, that isn’t a bad deal at all. Stuffing is one of my favorite things about Thanksgiving dinner, I don’t think I have it any other time during the year, so it always feels so special. Between that and the mashed potatoes, those are two things that will NEVER be missing from my Thanksgiving menu. For my husband, Mark, I always have to make him a single-serving of his Momo’s famous sweet potato casserole, complete with an ungodly amount of butter, brown sugar and yes, it is even topped with marshmallows. It’s not for me, but I can totally appreciate how it won’t be Thanksgiving for Mark without it, so I will always make it for him.
What dish will always be a part of your Thanksgiving dinner?
Gluten-Free Mushroom Stuffing (Vegetarian)
serves 6-81 loaf of gluten-free bread, dried and roughly torn into small pieces (I used a loaf of Rudi’s all natural gluten-free multigrain bread, you can use your favorite bread)
1 – 1 1/2 cups mushroom broth, vegetable broth or water
1 medium onion, finely chopped or grated
2 stalks celery, finely chopped
8 ounces fresh cremini mushrooms, roughly chopped
1 cup wild mushrooms, fresh or reconstituted from dried, roughly chopped
1 1/2 tablespoons fresh thyme, finely chopped
1 tablespoon fresh Italian parsley, roughly chopped
2 large farm fresh brown eggs
2 tablespoons olive oil
1/2 teaspoon kosher salt
1/4 – 1/2 teaspoon freshly ground black pepperPreheat oven to 350ºF. Crumble or tear the dried bread into small pieces and place into a 9″ x 13″ glass baking pan. Wet the bread with enough broth or water so it starts to get soft, but you don’t want it insanely soggy, either. If you add too much liquid, just pour it out. Mix with eggs, mushrooms, onions, celery, herbs, olive oil and salt and pepper. Don’t be afraid to get your hands dirty, roll your sleeves up and just get your hands in there to mix it all up, it’s the only way to do it. Once everything is evenly mixed in you can either leave it in the baking pan and bake it as is or start scooping with your hands, an ice cream scoop or a large spoon into a greased non-stick muffin pan. (I greased mine with a very small amount of vegetable shortening). If it doesn’t all fit into the muffin pan, scoop the remainder into a small glass casserole dish.
Place the glass pan or the muffin tin into the oven and bake for 45 minutes to an hour until the top(s) are browned and crispy. Let the stuffing “muffins” cool slightly before attempting to pop them out of the muffin tin and don’t worry if they don’t come out like a perfect muffin shape, most of mine didn’t, some even fell apart a little. Don’t worry, it’s stuffing, its rustic and it isn’t about the shape and look of them, it is all about the crispies!
Enjoy.
NOTE: since I didn’t want to dry my bread overnight or for a day or so, I placed the sliced loaf in a single layer on a baking pan in the oven at 200º for about an hour to dry it out.
-
Life Right Now and the Looming Thanksgiving Menu!
Hey everyone – just wanted to give you an update on life right now and also check in with you all before Thanksgiving. We were in New York City at the end of last week for the opening of a gallery show of our work in Brooklyn, we attended Creative Mornings in D.U.M.B.O. with swissmiss and Jessi Harrington and we had another meeting with our clients at the Metropolitan Museum of Art regarding a new project in a few weeks. It was a very busy and very inspiring trip to the city, as usual. I love going there.
In addition to our usual stop for dinner at Risotteria in Greewich Village, my favorite gluten-free restaurant in the city, I also accidentally stumbled upon Fabiane’s Cafe and Pastry shop on Bedford Ave and N. 5th St. in Williamsburg, on our way out-of-town. We stopped to grab a quick morning bite plus some coffee and tea. I assumed that the best I could get would be some type of egg dish, so I ordered at the counter what turned out to be a delicious organic baked egg dish with smoked salmon and potato and went to sit down. Once I sat down at our table, I looked up and saw a HUGE gluten-free menu that I didn’t see while standing at the counter, the menu included gluten-free waffles, french toast and so much more. I didn’t change my meal, but I changed my side of toast to be gluten-free and started eyeing up the pastry case for a road-trip treat, which was also loaded with beautiful gluten-free goodies. Besides all of the breakfast and pastry options, Fabiane will also make any of their sandwiches with gluten-free bread. I couldn’t believe I had never heard of this place before. They make all of the baked goods right there and each and everything was absolutely delicious. The toast was some of the most delicious gluten-free bread I had every tried. I, of course, had to snag a gluten-free banana chocolate chip muffin from the pastry case for the car ride, because I didn’t think I could sit 6 hours in the car and not salivate thinking about all of the sweets I had just seen.
One final gluten-free friendly restaurant recommendation, if you find yourself in Brooklyn, is Caracas, a Venezuelan Arepas bar in Williamsburg that I have fallen in love with. We’ve been there a handful of times this year. Caracas is very knowledgable about gluten intolerances and arepas are naturally gluten-free, so I can indulge guilt-free, enjoying each and every bite with confidence. In addition to arepas, they also have a bunch of other traditional authentic Venezuelan treats like empanadas, tostones, etc and they have a wonderful cocktail menu, the dark and stormy is my favorite!
As usual, I am always happy for a trip to the city, to get that rush of inspiration, the surge of creativity and just an overall feeling of being alive. There really is nothing like it. I love the people, the food and the hustle. Of course, I also love coming home to my own kitchen, my healthy food and my own bed. I definitely realize for as much as I like the pace of New York, I also really appreciate the serene quiet of my life and more importantly I love having a kitchen that allows me to create huge meals. I think if I were to ever move to NYC, sucking it up and having a tiny kitchen may be the biggest sacrifice and toughest challenge for me. When we got home Saturday afternoon, we just made do with what we had in the pantry and then I woke up yesterday morning and headed to the grocery store to stock up for the week. Last night I made a big pot of my tortilla soup and a new version of my apple crisp. I cannot wait to share both of those recipes with you guys. I plan to make lots of other fun dishes this week, but I also need to start thinking about my Thanksgiving menu for next week. I am working on a plan for what I am going to serve and hopefully making a few dishes ahead of time, so I can share them with you all.
I wanted to ask you guys if there are any dishes that you wanted recipes for before your Thanksgiving? If it is your first gluten-free holiday, it can seem a bit overwhelming and I’d like to help however I can. There are hundreds or probably thousands of recipes online for anything you can think of for your Thanksgiving dinner, made gluten-free. Is there something specific you are looking for? Need some suggestions for healthy dessert options or a way to make your mom’s famous stuffing gluten-free? My mom’s stuffing is the one things I was devastated about no longer being able to eat. It actually saddened me. I have managed to be able to enjoy it every single Thanksgiving since I found out I was gluten intolerant, so believe me when I say, if there is a dish you love I am sure it is possible to make it gluten-free!
What are your favorite Thanksgiving dishes? What is the one dish that you cannot go without on Thanksgiving? Do you try to make your Thanksgiving healthy or do you allow yourself a day of indulging on all the things you never have?
Here are a few of my favorite fall dishes that would be great for any Thanksgiving feast. Look for more this week and next and please let me know if there are any other recipes that you’d like to see.
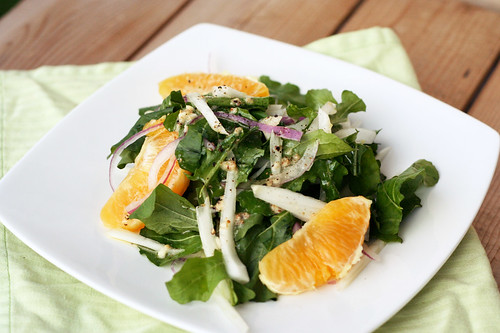
Arugula, Fennel and Orange Salad

Gluten-free Vegan Apple Cobbler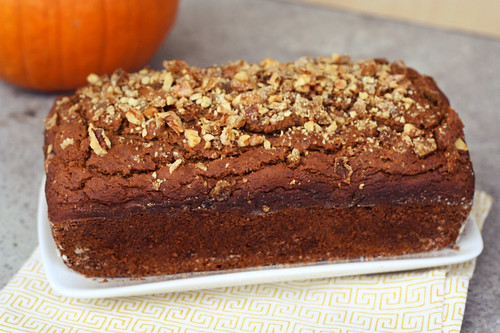
Gluten-Free Pumpkin Spice Bread with Crystallized Ginger and Walnuts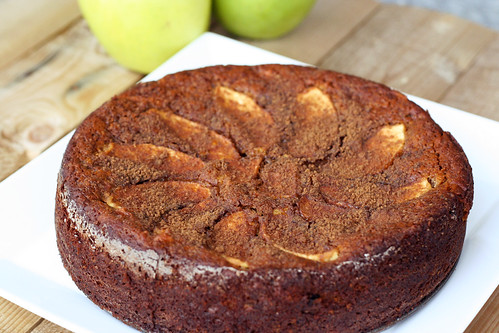
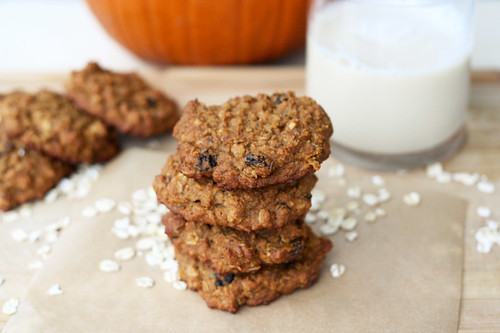
Chewy Pumpkin Oatmeal Raisin Cookies (Gluten-Free)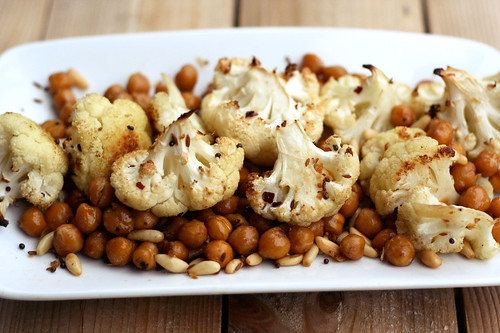
Spicy Roasted Cauliflower and Chickpeas with Pine Nuts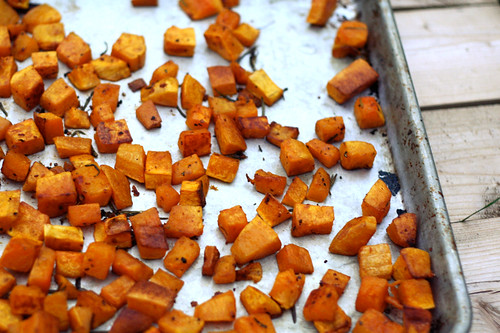
Rosemary Roasted Butternut Squash
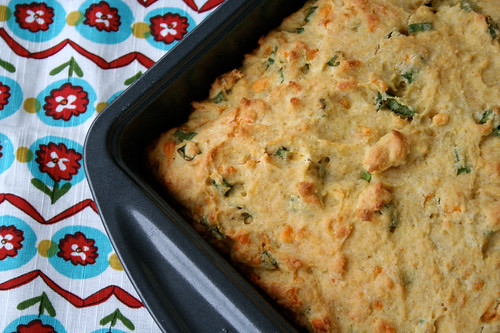
Gluten-Free Cheddar and Green Onion Cornbread
Sautéed Shredded Brussels Sprouts with Toasted Walnuts and Dried Currants
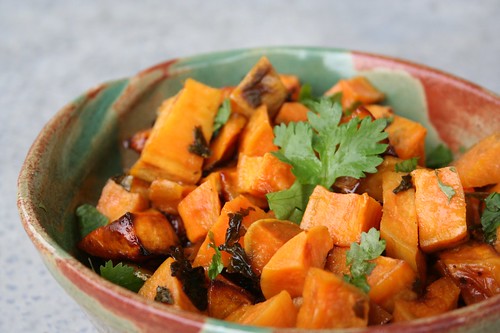
Cilantro Lime Sweet Potatoes with Honey