-
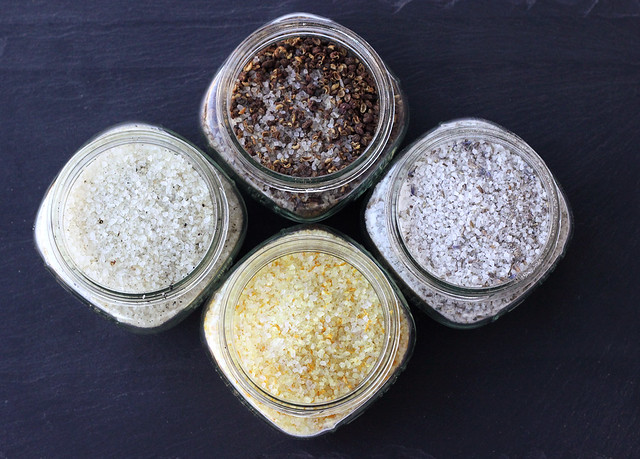
Flavored Finishing Sea Salts
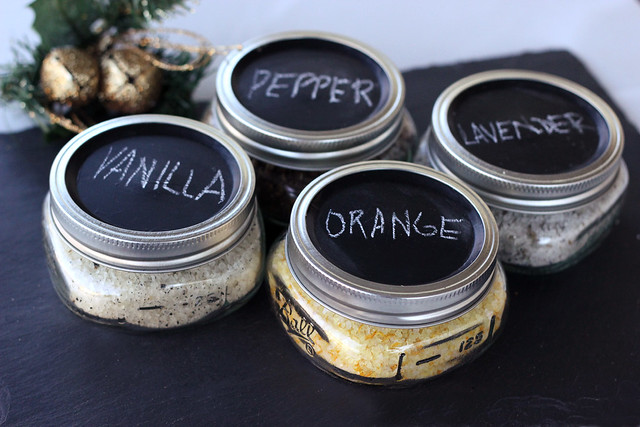
Next in my ongoing series with for Free People of Giftable Recipes, is a simple adaptable recipe/DIY for homade finishing sea salts. These would make the perfect gift for any food-lover (dare I say, foodie, I kinda hate that word). You can really have fun with the flavoring on these, creating your own to suit the tastes of the recipient. Or change it up and make flavored sugars, too.
Plus, you can really have fun with the packaging on these. Package in cute jars, wrap paper or fabric around the lid, finish with ribbons or twine and make fun handmade tags or labels, to really personalize the gift. I kept it simple and just painted the lids with chalkboard paint so I could write what was inside. I plan to actually give these as gifts this year, so I will make some fun personalized gift labels for whoever these end up going to.
Flavored Finishing Sea Salts
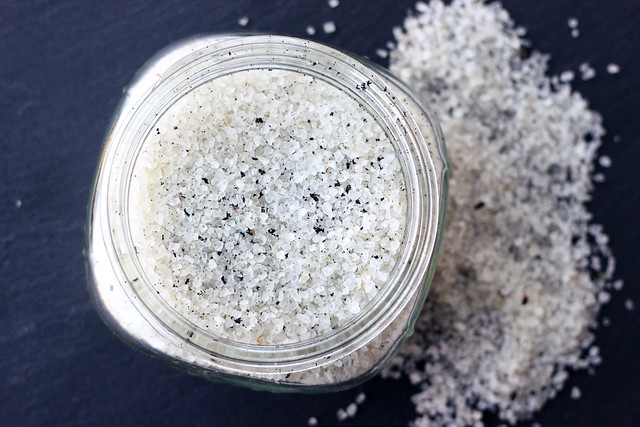
Vanilla Sea Salt
This smooth and aromatic salt would be great to rim drinks, for the top of truffles, caramels, cookies and other sweet treats, and don’t let it fool you, it would be great with savory items as well.
1/2 cup sea salt
2 vanilla beans, split lengthwise and scraped, seeds reserved
Remove beans from vanilla pod and mix thoroughly with sea salt. Package in an airtight container of your choice.
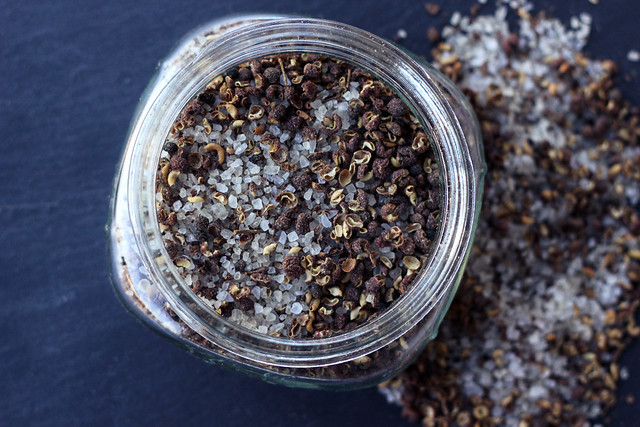
Sezchuan Peppercorn Sea Salt
This spicy salt has a kick plus a nice earthy rustic flavor and it would be great on grilled veggies, meat and seafood, popcorn, homemade chips, veggie burgers, stir-fries, etc.
1/4 cup Sezchuan peppercorns (aka Sichuan peppercorns) or any other peppercorn of your choice
1/4 cup sea salt
Dry roast the peppercorns over a medium/high heat in a dry skillet on the stove top for 3 to 5 minutes. Let cool then add to processor (a spice grinder or mortar and pestle would also work) and grind to the size of the sea salt, add the salt to incorporate, pulse a few more times. Package in an airtight container of your choice.
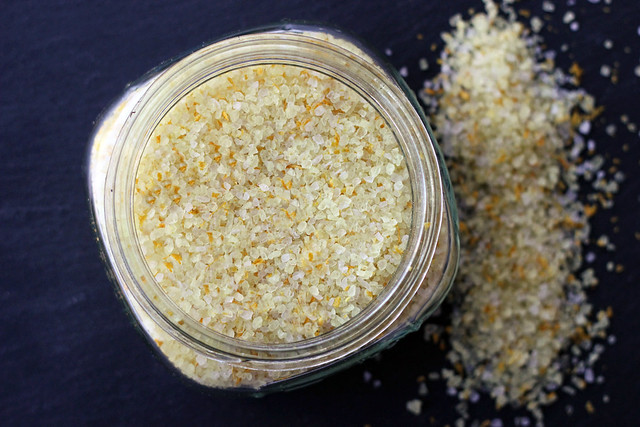
Citrus Sea Salt
This bright and fresh flavored salt would be great on vegetables, grilled or roasted chicken or seafood, shellfish, steamed rice, chocolates, cookies etc.
1/2 cup sea salt
1 tablespoon fresh citrus zest from well scrubbed fruit such as lime, orange, lemon, grapefruit or any combination of those (I used Organic Navel Oranges)
Mix together the zest and the salt, making sure there are no large clumps of the zest. Spread out evenly on a parchment paper lined baking sheet. Allow the citrus zest dry out in the oven at 200ºF for about 60 minutes. Once cooled, package in airtight container of your choice.
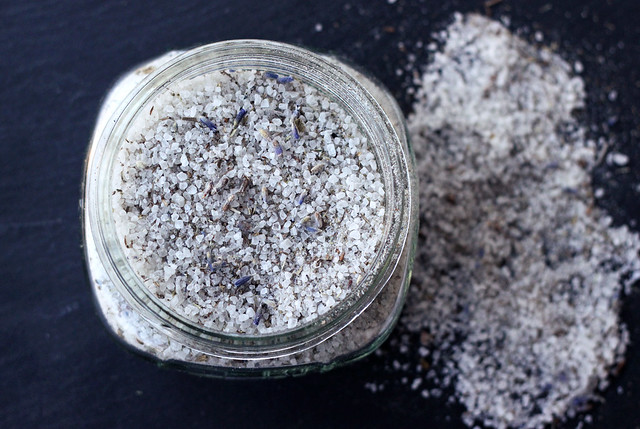
Lavender Sea Salt
This fragrant and flavorful salt would be great on sweet treats like truffles, chocolates, ice cream, shortbread cookies, scones, etc. Also try it in savory dishes like roasted squash, herbed flatbreads or with grilled chicken , lamb or salmon, etc.
1/4 cup dried lavender (make sure it is culinary grade lavender)
1/2 cup sea salt
Add the dried lavender to your food processor (a spice grinder or mortar and pestle would also work) to quickly chop the lavender, then add the sea salt, whir it together a bit, then package in an airtight container of your choice.
These recipes were originally shared on the Free People Blog BLDG 25. Share your thoughts below on how you would use these particular sea salts or what flavors you would try making yourself?
-
Homemade Chai Concentrate – Gluten-free (Vegan + Sugar-free Options)

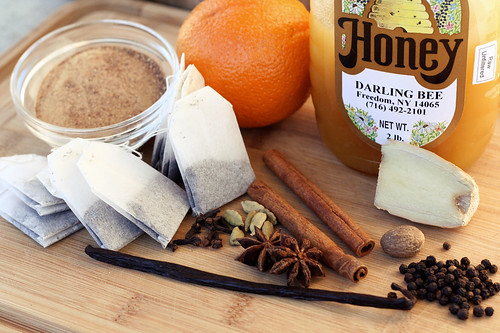
This month for my ongoing monthly series with the Free People blog BLDG25, our theme is giftable recipes. Tasty gifts you can make and give to your loved ones, a holiday party hostess, co-workers, neighbors, etc. What better way to say “Happy Holidays” than with delicious treats, right?
This first recipe is a classic Tasty Yummies recipe, that many of you have likely seen on here before, but it had to be shared again, as it is one of my most popular and it makes a wonderful gift. I myself have made and gifted it to quite a few chai lovers and it was very well received each time.
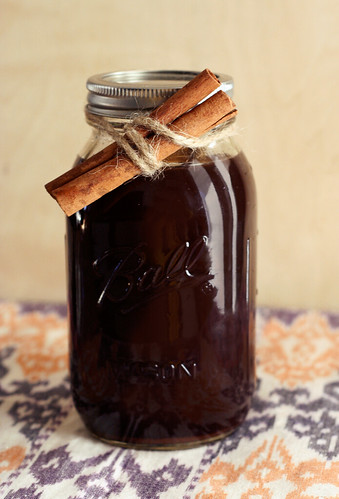
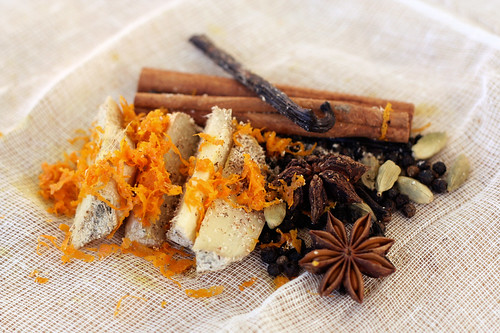
The great thing about this chai concentrate as a gift, is you can either make the finished concentrate and give it in a cute vintage bottle or jar with some cute twine or ribbon and a hand made tag, or if you are worried about giving a refrigerated item, you can out together a cute cheesecloth pouch full of the spices with the tea bags and wrap it all up with twine and print the instructions for the recipient to make their own batch when they are ready.
Head over to the Free People blog to see the full recipe and check back each week through the month of December for other giftable recipes.
-
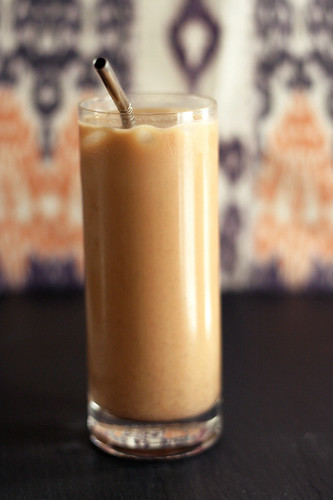
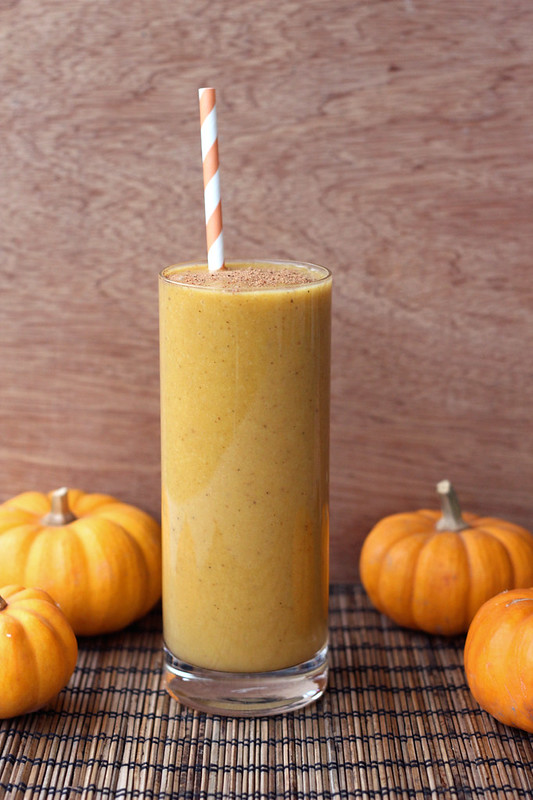
Butternut Squash Chai Smoothie – Gluten-free, Vegan + Sugar-free
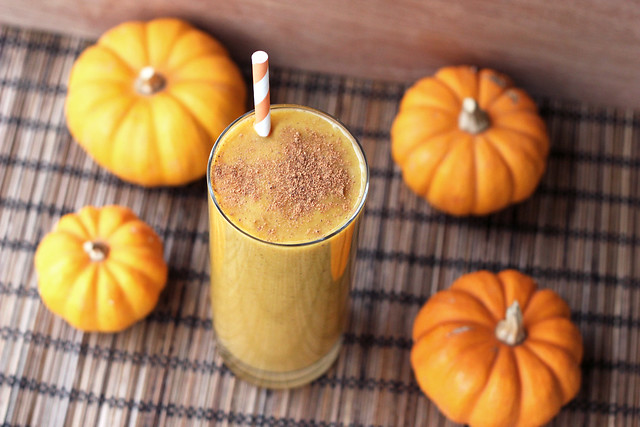
For my final recipe as part of my vegetarian Thanksgiving series this month with Free People, it just didn’t seem right to share another side dish for the feast or a sweet dessert, I thought it appropriate to share a recipe that is not only healthy and delicious, but also one that uses up some of the leftovers from the big day.
This smoothie is simple to make, perfectly sweet without any refined sugar and it has the most beautiful autumn-inspired hue. The spices are just perfect and you can feel free to adjust accordingly to your own taste. Plus, this smoothie makes the perfect quick and easy breakfast as you are heading out the door to Christmas shop for the day!
If you don’t have any leftover butternut squash puree, feel free to just sub in some unsweetened pumpkin puree. Canned or fresh will work.
Hope everyone had a great Thanksgiving surrounded by the people they love and delicious foods! My day was absolutely perfect!!
This recipe was originally shared on the Free People Blog BLDG 25.
[print_this]Butternut Squash Chai Smoothie – Gluten-free + Vegan
makes 1 large serving or two smaller servings- 1 1/2 cups unsweetened non-dairy milk (I used 1 cup of almond milk and 1/2 cup of coconut milk)
- 1 cup butternut squash purée (or pumpkin)
- 4 Medjool dates, pitted (soaked if they are very dry)
- 1 tablespoon ground flaxseed
- 1/2 teaspoon ground cinnamon
- 1/4 teaspoon ground cardamom
- 1/4 teaspoon ground nutmeg
- 1/4 teaspoon ground ginger
- Pinch ground cloves
- Pinch of ground pepper
- 1 teaspoon vanilla extract
- A couple of ice cubes
Add everything to your blender, blend until smooth and creamy. Serve topped with a sprinkle of cinnamon and/or nutmeg, and enjoy![/print_this]
-
Raw Butternut Squash and Kale Salad – Gluten-free + Vegan

Today I am sharing a recipe as part of both our Very Tasty Thanksgiving series as well as my ongoing vegetarian Thanksgiving series I am doing with Free People this month. This colorful raw squash and kale salad is so simple to make, full of delicious seasonal flavors and doesn’t require any cooking or baking, which is a huge bonus on Thanksgiving, when the oven and stove are in high demand. Enjoy.
• • • • • • • • • • • • • • • • • • • • • • • • • • • • • • • • • • • • • • • • • • • • • • • • • • • • • • • • • • • • • •
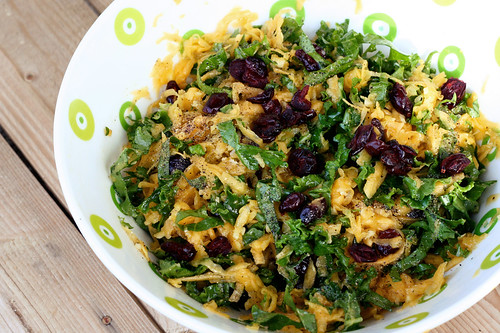
I shared this recipe previously when I made it last year for Thanksgiving. It was such a hit, so easy to make, I couldn’t let it get passed by this year. Anything raw and this healthy should be celebrated on a day of indulgences.
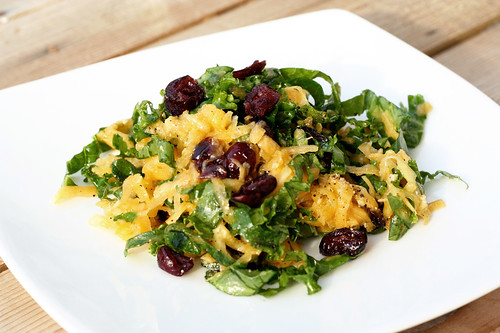
This vibrant and bright salad is crunchy, sweet and so satisfying. It would be a welcome side dish at any Thanksgiving feast and it is a wonderfully unique option for everyone, especially for those who are gluten-free, vegan and/or vegetarian. Plus, I personally love the idea of any Thanksgiving sides that aren’t heavy and carb loaded and more importantly, that don’t require the use of the oven that is always far too crowded on Thanksgiving. Head over to the Free People blog BLDG 25 now to get both recipes. -
Vegan/Gluten-Free Cornbread Muffins & Stuffing
Today I am sharing a recipe as part of both our Very Tasty Thanksgiving series as well as my ongoing vegetarian Thanksgiving series I am doing with Free People this month. These simple vegan and gluten-free cornbread muffins are sure to please just about everyone as your feast, especially if you have a southern-hailing hubby, like I do. Plus, I include a recipe for a simple cornbread stuffing you can make with the muffins. So either double the recipe, or use the leftovers and enjoy!
• • • • • • • • • • • • • • • • • • • • • • • • • • • • • • • • • • • • • • • • • • • • • • • • • • • • • • • • • • • • • •
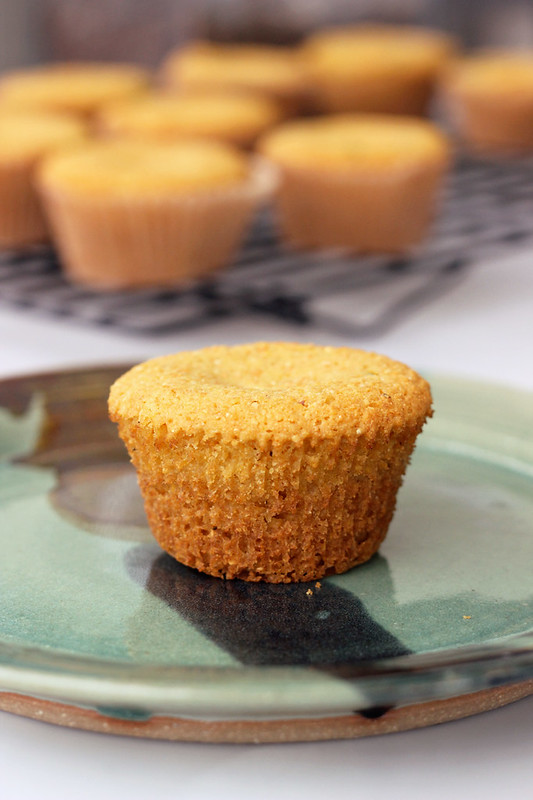
These corn bread muffins are simple, easy to make and you can have some fun with extra add-ins like jalapeños (or other peppers), shredded cheddar (or vegan cheese), corn, etc. I added some diced poblano peppers from our CSA share and they were great. They gave a subtle hint of spice and a nice pop of color.
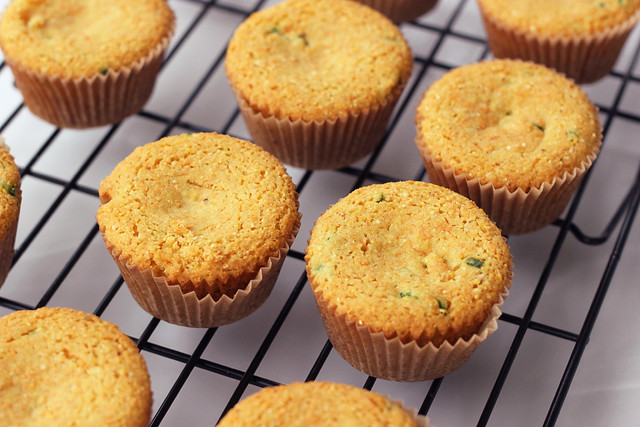
Because these Gluten-Free Cornbread Muffins don’t contain different flours and starches, just a finely ground corn meal, they tended towards being a more crumbly cornbread, which I like. I enjoy the flavor and texture of the corn meal. They were certainly delicious and they held together, but be prepared for some crumbs on your lap. The crumbly muffins gave me the idea to create an easy-to-make stuffing recipe with the leftovers and it turned out great! In addition to eating as is or making stuffing, they would be great crumbled over top of chili, stew or soup.
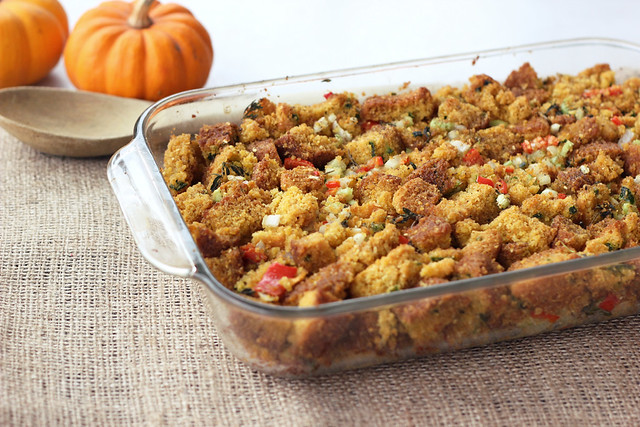
I basically just added some onions, celery, peppers, some herbs, etc – and it was perfect. There was a nice crisp from the toasted cornbread and the veggies and it was so full of flavor. I’ve even served this in the morning by reheating it in a cast iron skillet and serving a fried egg over top and a little hot sauce. Head over to the Free People blog BLDG 25 now to get both recipes.
-
Seasonal Shopping: Fresh Fruit & Veggies to Buy in November!
I am not sure how, but November is now upon us. So many of the beautiful, colorful leaves have fallen from the trees, there is a crisp coolness to the air that reminds us that winter isn’t too far off (OK, well that’s the case over here in Western New York anyhow), I know you Southern Californians have been dealing with a super HOT fall! I am still getting myself used to the idea of that for when we eventually get there.
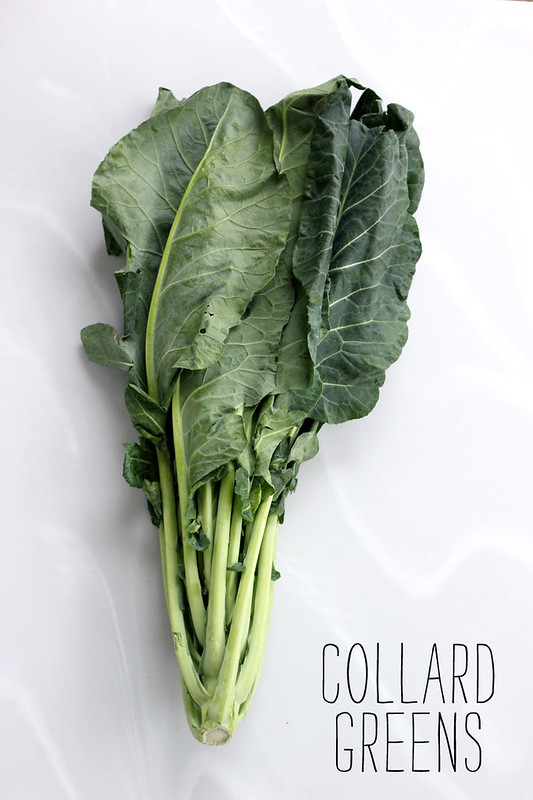
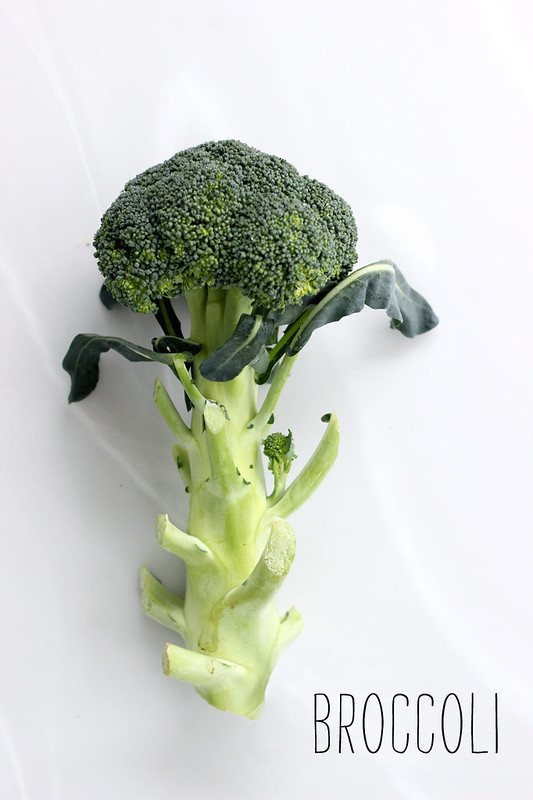
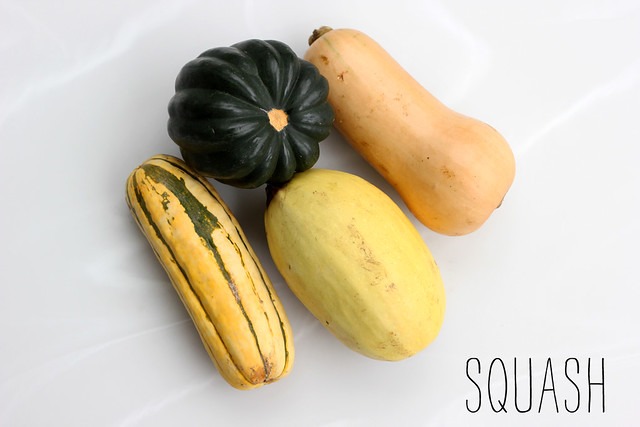
Considering how cold it actually has been, it is always so surprising to me how much produce is still growing around here and just how delicious and tasty it all is! We are loaded up on squashes and peppers from our CSA, I think I could be set for the winter just on those two, but we’ve been getting so many other delicious fresh goodies too, like kohlrabi, collards, broccoli, beets, turnips, and so much more! It’s a really fun time for fresh produce.
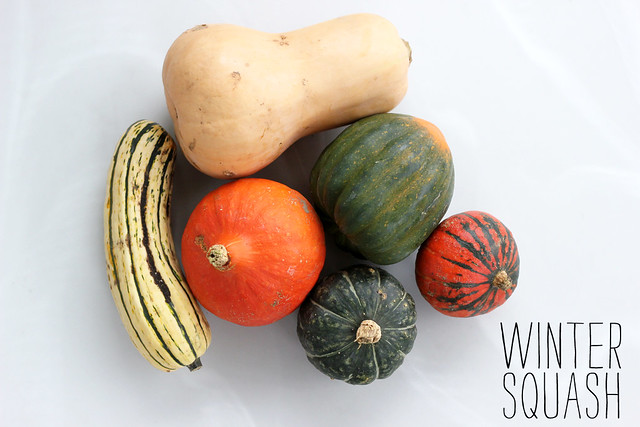
I still think the squash is my absolute favorite thing this time of year, how about you?

Seasonal Shopping: Fresh Fruit & Veggies to Buy in November!
Broccoli
Winter Squash
Collard Greens
Turnips
Parsnips
Brussels Sprouts
Cranberries
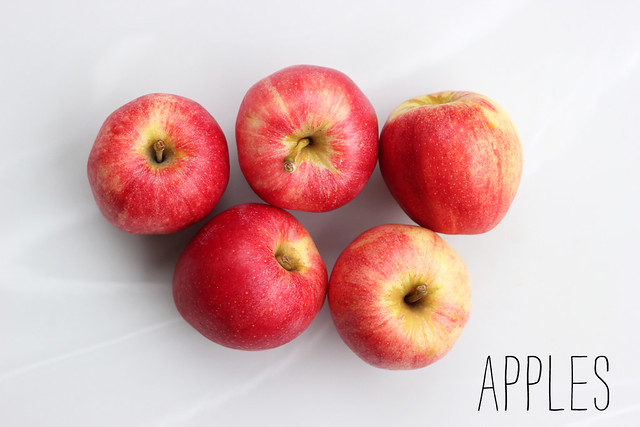
Apples
Arugula
Garlic
Kale
Onions
Potatoes
Carrots
Radishes
Beets
-
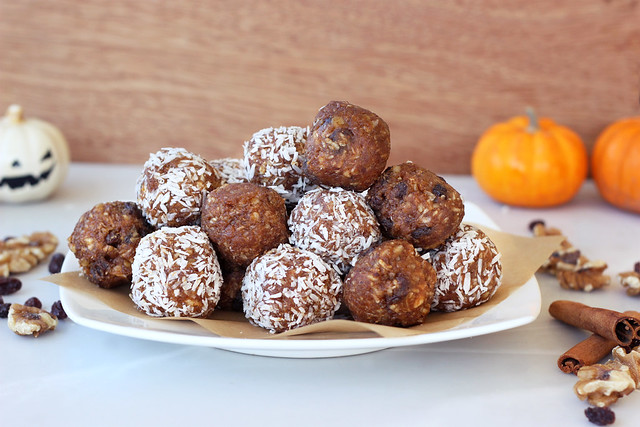
No-Bake Pumpkin Spice Cookie Balls (Gluten-free, Vegan + Sugar-free)
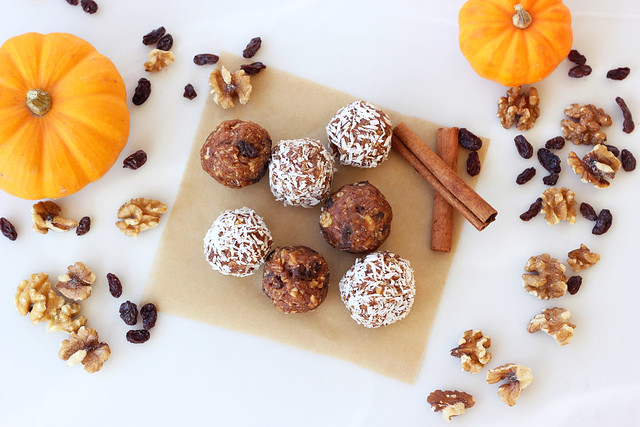
My final recipe in my healthy Halloween series with Free People this month is for a simple, quick no-bake cookie ball, that is full of delicious fall flavors. Instead of the cut-out cookies and donuts and wayyy too much Halloween candy, why not snack on these? Gluten-free, vegan and sugar-free these no-bake treats will still wow your socks off.
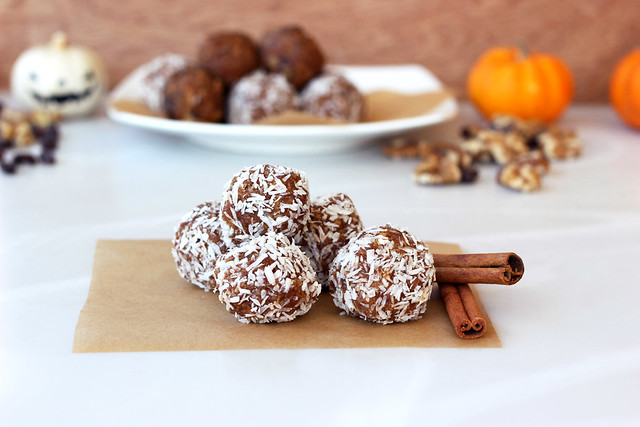
The spicy pumpkin flavor is perfect for this time of year and the whole recipe can be put together from start to finish in about 15 minutes. Plus, you can have fun with these and add in your own favorite extras like coconut, raisins, additional nuts, chocolate chips, powdered sugar or maybe even a drizzle of caramel sauce.
This recipe was originally shared on the Free People Blog, BLDG 25
[print_this]No-Bake Pumpkin Spice Cookie Balls (Gluten-free, Vegan + Sugar-free)
Makes approximately 18 balls
- 8 Medjool Dates, pitted
- 1/4 cup creamy almond butter
- 2 tablespoons pumpkin purée (canned or fresh, if you use fresh be sure to drain as much water out as you can)
- 1 teaspoon ground cinnamon
- 1/2 teaspoon ground nutmeg
- 1/4 teaspoon ground ginger
- Dash of ground cloves
- Pinch of salt
- 1 teaspoon vanilla extract
- 3/4 cup raw walnuts
- 1/2 cup unsweetened shredded coconut plus more for rolling
Optional Add-ins:
- raisins (I used raisins in half of the recipe, about 1/4 cup)
- additional coconut for rolling
- additional chopped walnuts for rolling
- mini chocolate chips
Add just the pitted dates to the food processor and process for a minute or two until a thick paste forms – if they are quite dry, you may need to add a teaspoon or two of water to get it moving. If they are pureed and form a large ball in the food processor, don’t worry too much, the other ingredients will thin it out. Next, add the almond butter, pumpkin puree, the spices, salt and the vanilla extract. Process for a minute or two again until thick and creamy. Add in the nuts and coconut and pulse a few times until the nuts are chopped and it all comes together into a thick dough. Try to roll a little in your hand, if it is holding together it is ready, if it is too crumbly try adding more almond butter and/or pumpkin. If it is too creamy and sticky, add more nuts and coconut. If you are adding raisins, just fold them in by hand with a spoon or spatula.
Take the blade out of the processor and roll the dough into balls, about 1 1/2-inches in diameter. Roll into shredded coconut, if you wish. You should end up with approximately 18 cookie balls. You can eat them right away, or place them in the fridge for a bit to firm up (which is what I prefer).
[/print_this] -
Vegan Caramel Apple Dipping Sauce (Gluten-free)
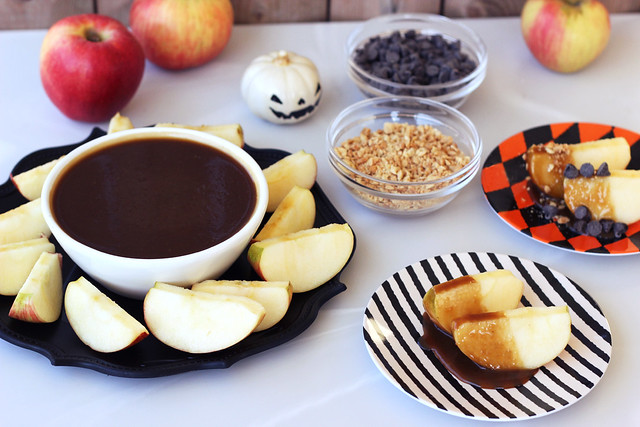
I am so very excited to share this recipe with you guys. I had so much fun creating it and even more fun eating it! In theory, caramel apples always sound amazing, but in reality they are always a sticky mess, hard to eat, and so sugary they actually hurt my teeth. I have learned to just pass on by and only dream of their caramel goodness. Until now. I finally decided to re-imagine a caramel recipe without heavy cream or butter, but I also wanted the sweetness to come from somewhere other than refined overly processed white sugar.
I am really excited with how this came out.
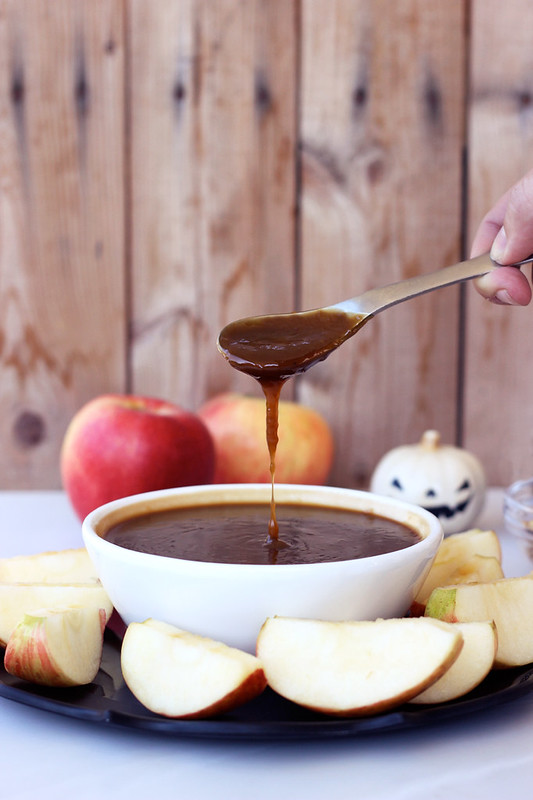
It has a beautiful dark hue from the coconut sugar and it is thick and luscious and perfectly creamy, and the right amount of sweetness without feeling yourself getting a cavity as you are eating it.

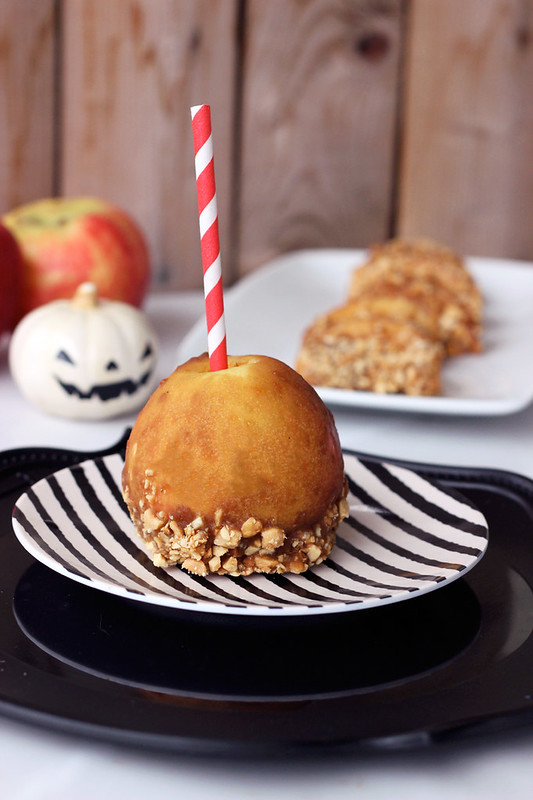
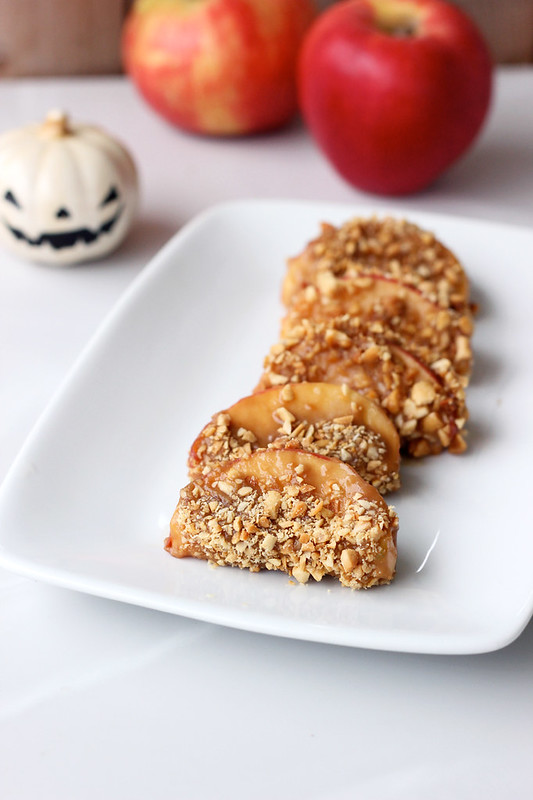
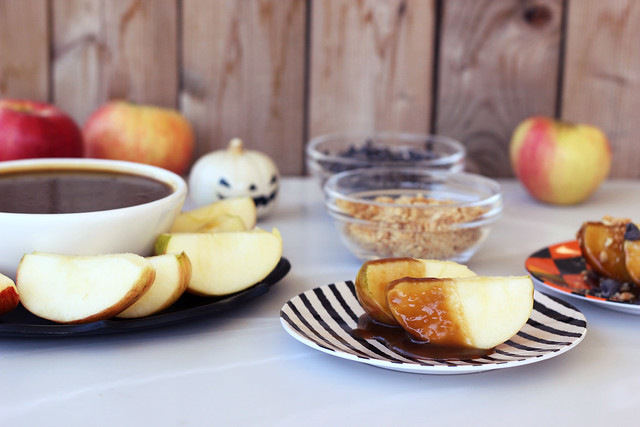
This caramel is great as both a dipping sauce for fresh apples (or whatever else you would like) that can be served while it is still a little warm or totally chilled, or you can let it fully chill, get nice and thick and actually coat whole or sliced apples in it, then coat them in nuts, chocolate, sprinkles or whatever you’d like.
Obviously, just because this caramel sauce is healthier than the original, it doesn’t mean you should sit down and eat a bowl of it in one sitting, though you easily could. Sugar is still sugar, but at least with this refined sugar-free, vegan version you can have a bit less guilt while you indulge.
[print_this]Vegan Caramel Apple Dipping Sauce (gluten-free)
makes about 2 cups
- 1 cup organic coconut sugar
- 2 tablespoons maple syrup
- 1 tablespoon water
- 1/4 cup coconut oil, melted
- salt
- 1 cup full-fat organic coconut milk, the canned kind
- 1 tablespoon vanilla
- 1tablespoon arrowroot starch (corn starch or tapioca starch would also work)
In a medium saucepan over a medium heat, mix together the coconut sugar, maple syrup, coconut oil and water, stirring often and well until the sugar has dissolved and it is smooth and creamy. Bring it up to a slight simmer, add a dash or two or salt and the coconut milk, whisking and bring back up to a simmer.
Once it has been simmering for about 5 minutes, add in the vanilla and the arrowroot starch. I find that slowly adding the arrowroot starch while whisking (by sprinkling it in), versus just a big dump, keeps the lumps to a minimum. Lower the heat and whisk until the arrowroot starch has dissolved and the sauce is nice and thick. Remove from the heat.
It is great served warm or cool as a dipping sauce for apples (or whatever else you might like to dip in it). Serve with chopped nuts or chocolate on the side as well.
Or you can let the sauce cool fully and it will get a little thicker and then you can roll whole apples or apple slices in it, cover with chopped nuts or chocolate pieces and place in the fridge to chill and harden up a bit.
[/print_this]
-
Joyful Almond Coconut Chocolate Bites – Vegan + Gluten-free (Refined Sugar-free Option)

This month for my ongoing series with the Free People Blog, BLDG 25, in celebration of Halloween I am sharing a series of healthy sweet treats. I always feel like the sugary stuff haunts me this month with Halloween looming on the calendar, it seems everywhere I turn there is some sweet treat lurking in the darkness.

I really don’t find myself actually craving sweets very often, but boy, this month I do. There are halloween inspired sugary treats everywhere you turn and most all of them are terrible for you, loaded with refined sugars, high fructose corn syrup and other processed junk and fillers.
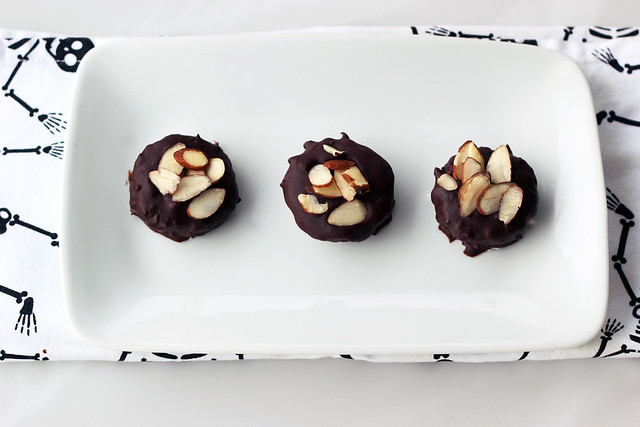
So, why not have your cake and eat it, too? Or candy, or fudge, or whatever! First up in the series, I reimagined a classic candy bar that I have always loved. The combination of coconut, chocolate and almonds is a favorite of mind. It’s a joy to eat, if you catch my drift.
These treats bear a spooky resemblance to the original, but without all the yuckiness that will haunt you later. See, all treats, no tricks! What more can you ask for to kick off Halloween month?
And truly, is there anything better than dark chocolate and coconut together? I think not. A marriage made in heaven!! These Joyful Almond Coconut Chocolate Bites may have been inspired by Almond Joys, but they are so so much better!!


Joyful Almond Coconut Chocolate Bites - Vegan + Gluten-free (Refined Sugar-free Option)
gluten-free, paleo, vegan, dairy-free, egg-free, nut-free option, keto-optionPrint Pin RateServings: 12 treatsIngredients
Coconut Filling:
- 1 ¼ cups unsweetened organic coconut, finely shredded
- ¼ cup melted coconut oil
- 2 tablespoons maple syrup, you could also use honey, a few drops or stevia or liquid monkfruit
- 1 teaspoon vanilla extract
Dark Chocolate Coating*:
- 10 ounces of high quality dark chocolate, 85% dark is my choice*
Optional:
- Plus: approximately 1/3 cup toasted almond slices
Instructions
- Lightly grease a nonstick mini-muffin tin with a little coconut oil and set aside. In a medium-sized mixing bowl, combine all of the coconut filling ingredients and mix together until very well combined. Evenly divide up the filling between the 12 mini-muffin cups, pressing it in very tightly, making sure it is somewhat even. Don’t worry they won’t stick. Place the muffin pan in the freezer make sure it is sitting flat, and freeze until the filling is solid, about 30-45 minutes.
- Take the muffin tin with the frozen coconut mixture out of the freezer, carefully remove each coconut treat out of the pan, running a thin knife around the edge to loosen and pop them out. Place them on a parchment or wax paper lined baking sheet, if you want to place the pan back in the fridge to keep them cool while you melt the chocolate, you can do that.
- Once you are ready to coat the treats with the chocolate you can carefully melt the chocolate using a double boiler setup on the stove top or you can carefully melt it in small increments in the microwave, stirring often. (Definitely use the double boiler if you are making the refined sugar-free version with the bakers chocolate).
- Turn off the heat on the stove and keep the bowl of chocolate over the pan, remove the coconut treats from the fridge. Place one coconut treat on a fork and slowly lower it into the chocolate, spoon additional chocolate over it to fully coat it. Lift the fork out and gently shake to release any of the excess chocolate. Scrape the bottom of the fork along the side of the bowl and place on the lined baking sheet. Sprinkle a few toasted almond slices on top into the chocolate. Repeat until all of the treats are coated in chocolate and have almonds on top. If the chocolate gets too thick, you just turn on the flame and heat slightly to melt it again.
- Put the tray back in the fridge and let them harden for about 45 minutes.
- After these are set, you could store them in the freezer to keep them really cold and totally solid or of course, you can just store them in the fridge or even at room temperature if it isn’t too hot out.
Notes
*NOTE:
You can also use semi-sweet or bittersweet chocolate chips or stevia sweetener dark chocolate or chocolate chips.
Or n place of chocolate chips or dark chocolate, you can instead melt 10 ounces of a good quality 100% unsweetened organic dark chocolate (aka bakers chocolate in bar form) with 1 tablespoon coconut oil in a double broiler and whisking in 1/3 cup maple syrup, honey (or other liquid sweetener of your choice, a few drops of stevia, etc) after it is removed from the heat. You can then add more sweetener to your liking, if needed.This recipe was originally shared on the Free People Blog.
-
Seasonal Shopping: Fresh Fruit & Veggies to Buy in October!
With the start of October comes a new shopping list of in-season vegetables and fruit. It may feel like with summer coming to an end and the cold weather looming, that produce would be limited and unexciting, but for my money October is one of the most plentiful months for fresh local produce here in NY state. With the much-welcomed cooler nights and mornings, we are seeing more greens again, if we are lucking there might be some peppers and tomatoes still lurking around, plus of course we have all of the squash, the apples, etc. So many fresh and tasty treats to get creative with. Look for a recipe here on Tasty Yummies later today that features some of this beautiful produce.
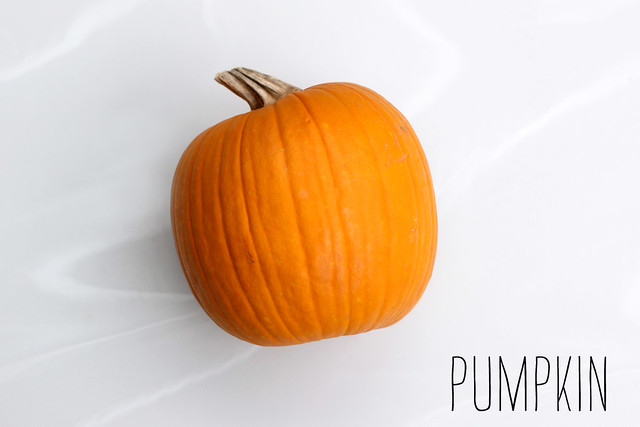
What is your favorite October produce? I think for me it is a tie between apples and pumpkins.
October Shopping List:
Pumpkins
Squash
Apples
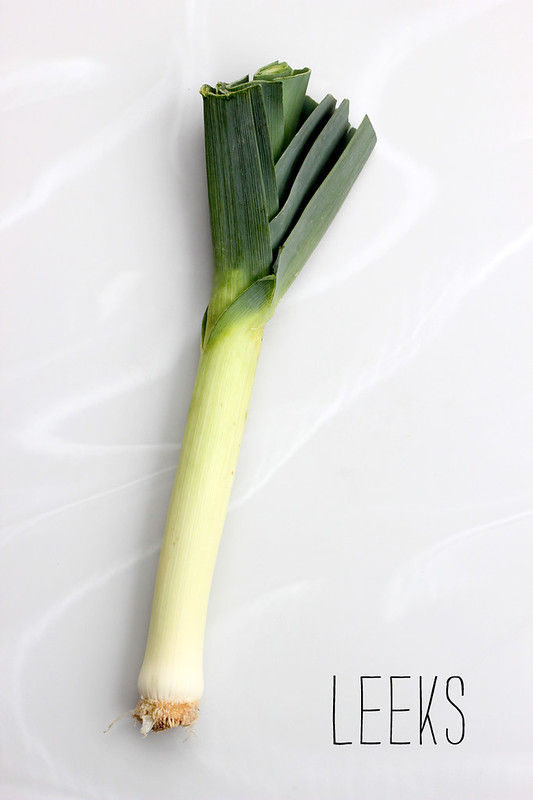
Leeks
Swiss chard
Rutabaga
Concord grapes
Figs
Beets
Broccoli
Pears
Cabbage
Potatoes
Bok choy
Spinach
Turnips
-
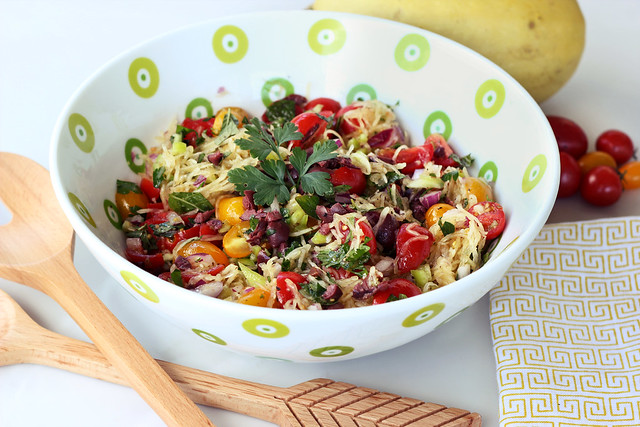
Mediterranean Spaghetti Squash Salad – Gluten-free + Vegan
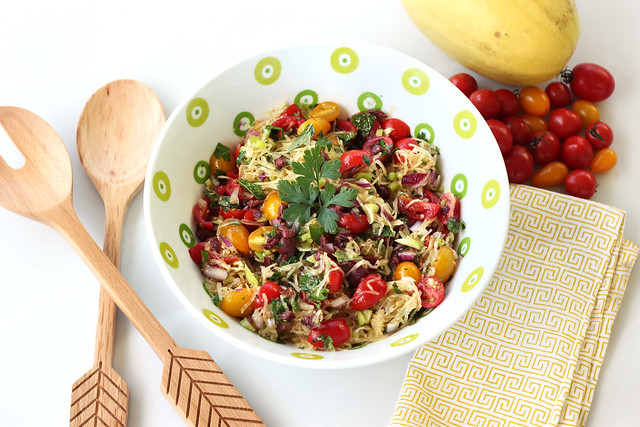
With the start of fall I am fulling embracing all things fall-food related, pumpkin, squash, apples, etc. For my next post in my September series of recipes on the Free People blog BLDG 25, I am sharing a beautifully vibrant salad full of some of my favorite Mediterranean flavors. This spaghetti squash salad is so simple and so delightful, it is hard to believe that the entire thing is basically just veggies. If you haven’t yet experimented with a spaghetti squash, get on that ASAP, especially while they are in season.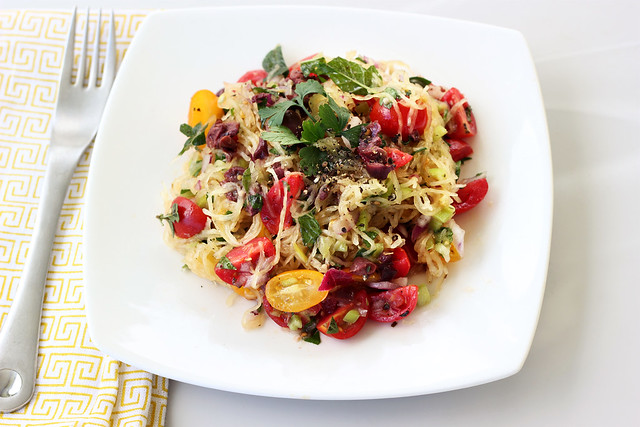
While the beautiful colors outside are starting to show themselves and summer has all but faded away, this salad is a wonderful celebration of all of it. Embracing the last bit of summer with fresh local tomatoes and of course, the fall with the delicious and versatile spaghetti squash. This salad is great vegan or if you aren’t vegan or dairy-free, it is wonderful with a small bit of crumbled goat cheese feta over top.
This recipe was originally shared on the Free People blog, BLDG 25.
[print_this]Mediterranean Spaghetti Squash Salad – Gluten-free + Vegan
serves 4-6
- 1 medium-sized spaghetti squash
- 2 cups grape tomatoes, halved or quartered
- 1 small red onion, diced
- 1 banana pepper (or bell pepper), diced
- 1/2 cup kalamata olives (or black olives), chopped
- 1/4 cup fresh herbs, roughly chopped – I used a blend of oregano, mint and parsley
- 4 oz feta cheese (optional)
Dressing:
- 1/4 cup olive oil
- 1/4 cup red wine vinegar
- 2 cloves garlic, minced
- 1 teaspoon dried oregano
- 1/2 teaspoon sea salt
- 1 teaspoon raw sugar or other sweetener
Preheat the oven to 375ºF. Using a skewer or the tip of a knife, puncture a handful of holes all over the squash, on all sides, to keep it from bursting while baking.
Place the whole squash in a glass pan and bake for 1 hour, until the flesh is soft. Allow to cool until you can easily handle it and slice in half lengthwise. Remove the seeds and fibrous strings from the center of the cooked spaghetti squash. Using a fork around the edge of the spaghetti squash, gently scrape to shred the pulp into strands. It will happen very easily. Place the spaghetti squash in a large serving bowl, and place in the fridge to cool.
Meanwhile, whisk together the dressing ingredients in a small bowl and set aside.
Once the squash has cooled to about room temperature or colder (I just make the squash the night before, place it in the fridge to cool overnight and toss the salad together the next day), add all of the other ingredients to the squash and toss well to combine. Pour the dressing over the salad and gently toss to combine.
Serve topped with additional fresh herbs and some crumbled feta cheese, if you wish! [/print_this]
-
Seasonal Shopping: Fresh Fruit & Veggies to Buy in September!
As part of my ongoing guest posts with Free People, each month I will be sharing a seasonal shopping list of produce that is at it’s best for you to create deliciously inspired meals with. Although the onset of September reminds us that summer is winding down, it is one of the best months for delicious local, fresh produce, in my opinion! So many delicious things that have been flourishing and growing all summer long just waiting to be ripe and ready for the picking before the cool weather sets in.
Here is a list of some of my favorite produce that is in season right now!
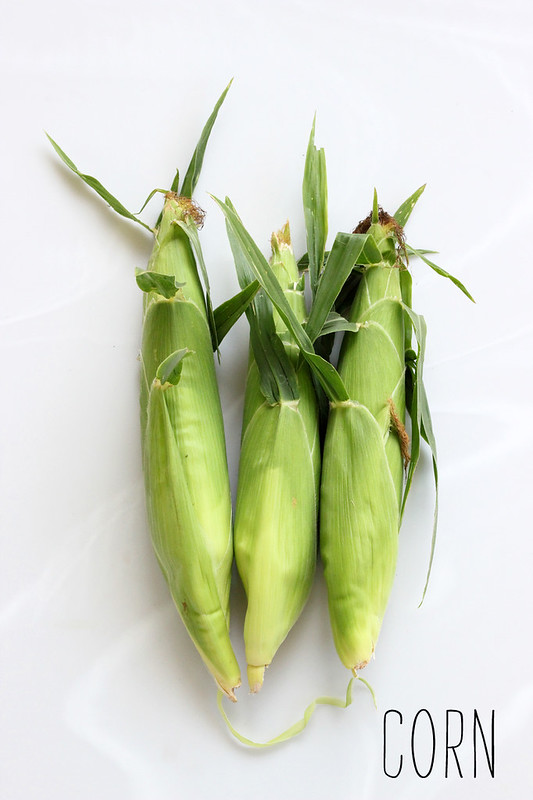
Shopping List:Corn
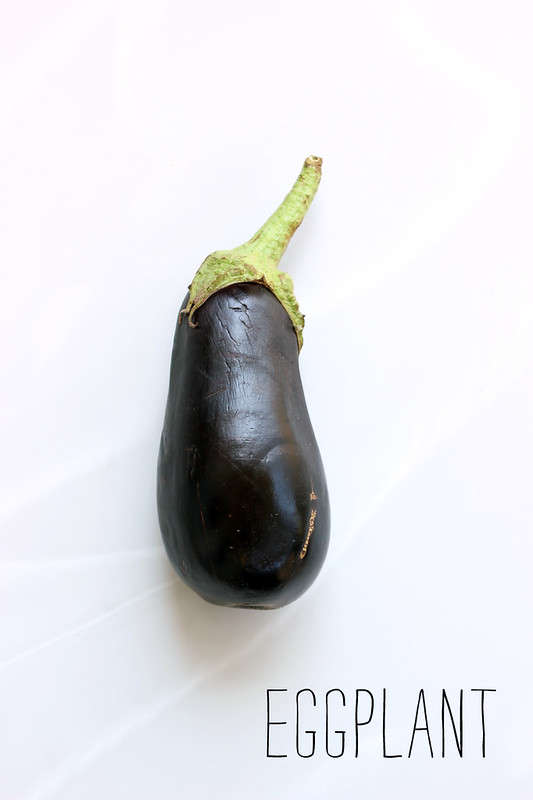
Eggplant
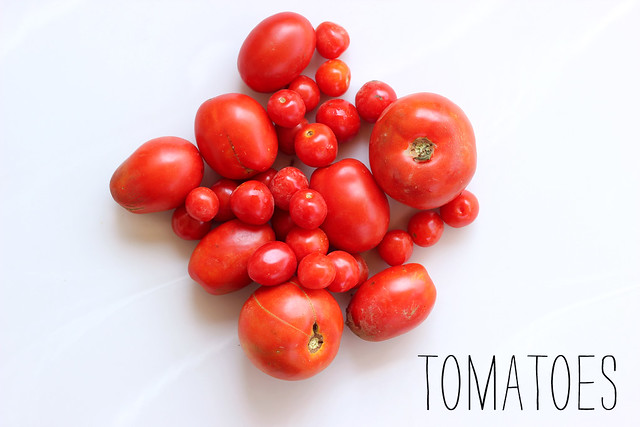
Tomatoes
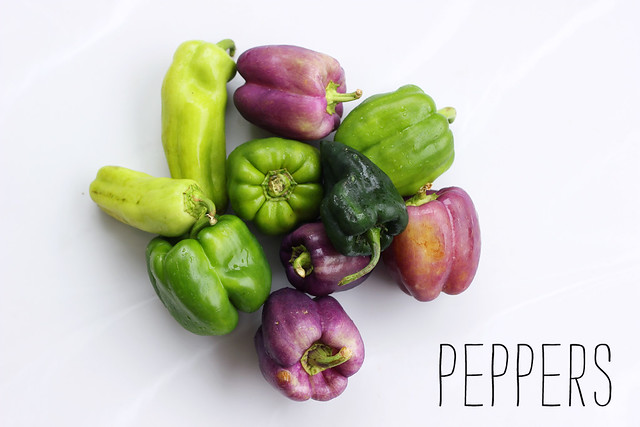
Peppers
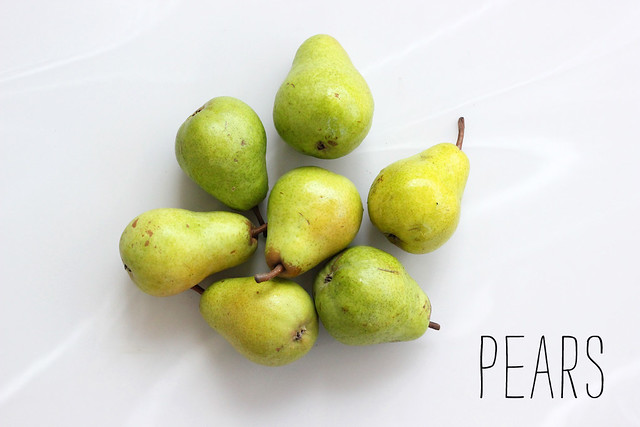
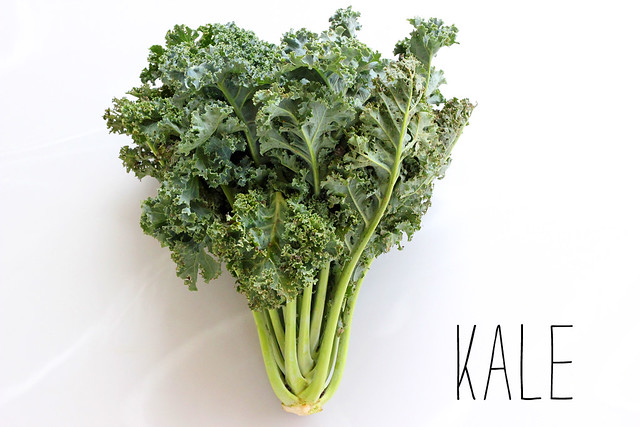
Kale
Pears
Basil
Parsley
Beets
Grapes
Summer Squash
Green Beans
Spinach
Celery
Onions
Turnips
-
Death Of A Matador – Mocktail/Cocktail

This is my final recipe in the 5-part series of summertime cocktails I created for Free People. It has been such a delight creating all of these fun and unique drinks that are equally as delicious without any alcohol. It has also been a fun creative challenge to use ingredients differently than my usual cooking and baking. And of course as with all of my recipes, all of the mocktails that I shared are without any mixes, refined sugar or other processed ingredients, celebrating what is in season now, whenever possible! I hope all of you have enjoyed the drinks as much as I have enjoyed making them.
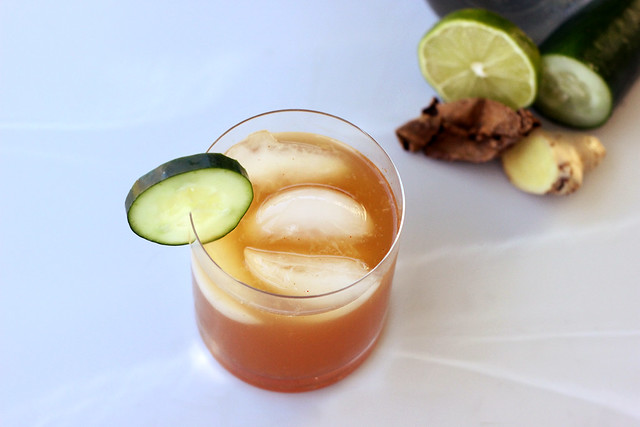
For this final drink I collaborated with my good friend, Brian Kruglak, for a unique mocktail to end things in style. This drink is a unique blend of so many of my favorite flavors, chipotle, ginger, cucumber, lime and if you are going for a spirited version, chipotle infused blanco tequila. It is refreshing with a little surprise and smoky kick, it really cannot get much better than that.
To read more about this drink that Brian calls, Death of a Matador, and for the full recipe – check out my post on Free People blog. Thanks again to Free People for having me this month, look for me again next month with an all new series of recipes!
Check out the other posts in my summertime mocktail series with Free People: Basil Watermelon Refresher, Blackberry Lavender Lemonade, Banana Piña Colada and Cantaloupe Mocktini/Martini.
-
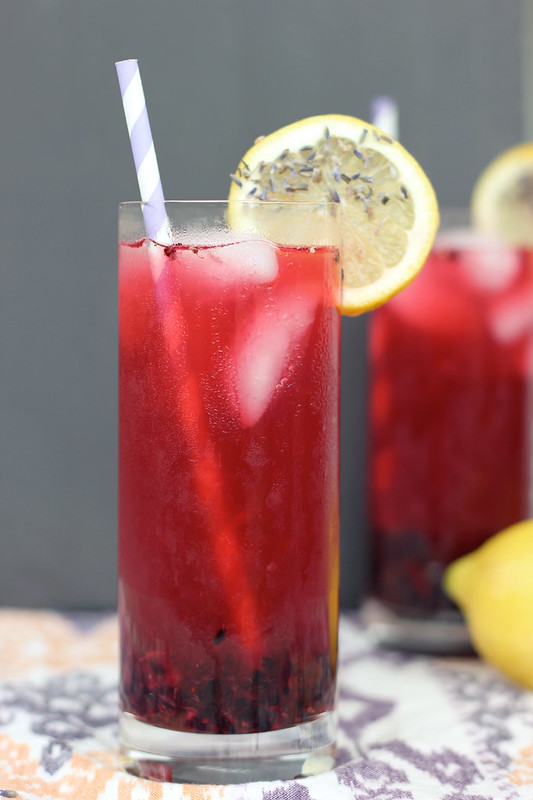
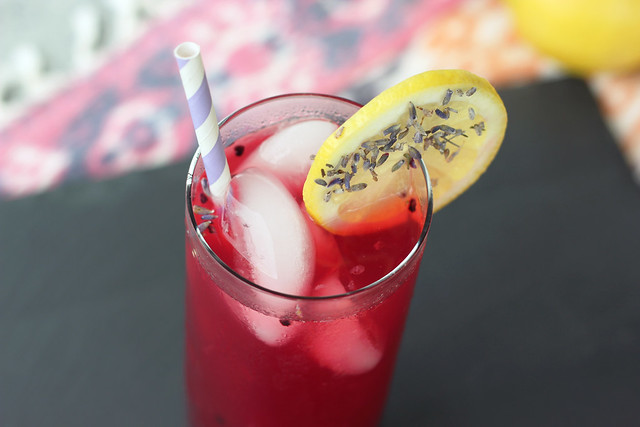
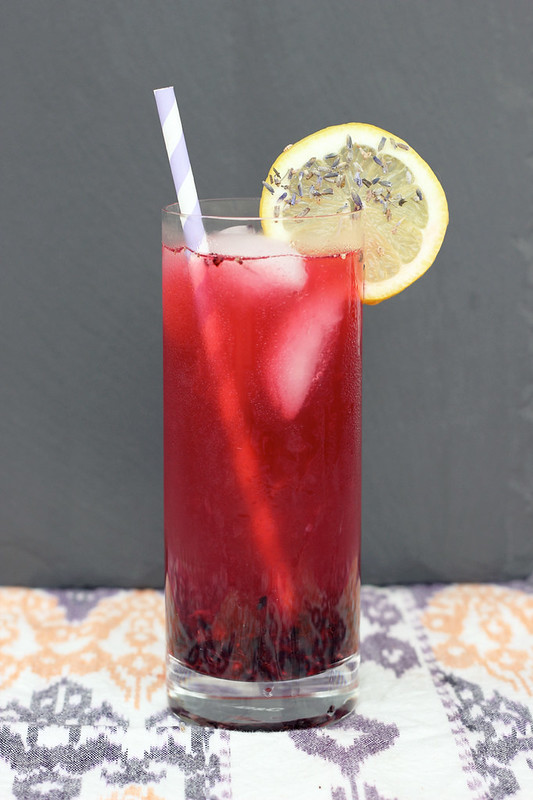
Blackberry Lavender Lemonade – Gluten-free, Vegan + Refined Sugar-free
I have really been enjoying playing around with different seasonal flavor combinations for the series of cocktail recipes that I have been sharing over on the Free People blog BLDG 25. This is my second post in my 5-part Summer Mocktail series for Free People.
I have been letting what I find at the market determine the drinks, instead of the other way around. I had been thinking up some type of twist on the standard “Arnold Palmer” of tea and lemonade, which we love over here. I wanted it to be brighter, more colorful and featuring a seasonal fruit. When I saw the blackberries I instantly knew that was the way to go. Not only will this quench the thirstiest of thirsts, but it is such a beautiful and bright color, to boot!

The delicate aromatics from the lavender, paired with the pleasant tartness from the lemons and the blackberries is absolute perfection and sure to please anyone on a hot summer day. I decided to use my go-to sweeteners for this since I prefer to not use refined sugar, but you can feel free to substitute whatever sugar or sugar-alternative you desire. I also go light on the sweetness since I prefer my lemonade drinks to be on the tart side. Make sure to taste and sweeten to your own liking. If you are looking to make this into an alcoholic beverage, simply add in 1 shot of your favorite vodka, stir and enjoy!
[print_this]Blackberry Lavender Lemonade
serves 4-6- 1/2 cup dried culinary lavender
- 5 cups water
- 1/4 – 1/2 cup maple syrup (raw honey, agave or raw sugar will also work)
- 1 cup freshly squeeze lemon juice (about 6-8 lemons)
- 4-6 teaspoons maple sugar (you can also use raw sugar or any other sugar of your choice)
- 6 ounces fresh blackberries
- ice
Bring 5 cups of water to a boil in a medium saucepan over high heat, stir in the lavender and reduce the heat. Partially cover and simmer for 10-15 minutes. Strain the lavender tea over a strainer or through cheesecloth, pressing down to get out as much liquid as you can, discard the lavender. Pour the liquid into a large pitcher. Stir in maple syrup, honey or whatever sweetener you are using, until it has dissolved. I prefer my lemonade on the tart side so I only used 1/4 cup of maple syrup, but feel free to use as much as you would like. Let cool. Once cooled, add the lemon juice to the pitcher and give it a good stir. Taste to see if it needs more sweetener or if you want to add some water to dilute it a little.
To serve, place 5 to 8 blackberries and 1 teaspoon of sugar in each glass. Muddle. Pour the lemonade mixture over to fill the glass about 2/3 of the way full, give it a stir, then top with ice. Garnish with lemon slices pressed into some dried lavender, or add a fresh sprig of lavender if you have it.
*For an alcoholic cocktail, add in a shot of vodka [/print_this]
This recipe was originally shared on the Free People blog. Check out my first post in the series here.
-
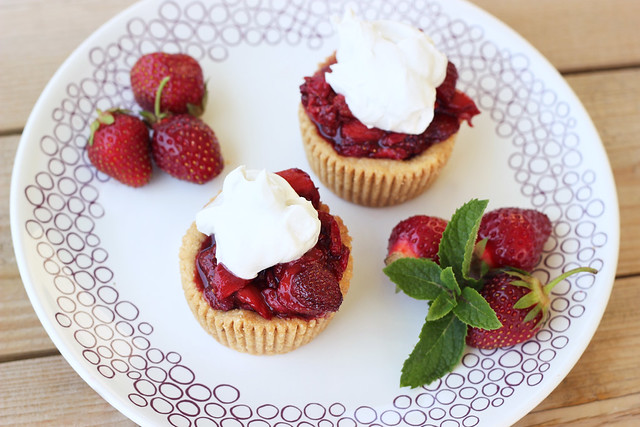
Roasted Balsamic Strawberry Mini-Tarts with Whipped Coconut Cream – Gluten-free + Vegan
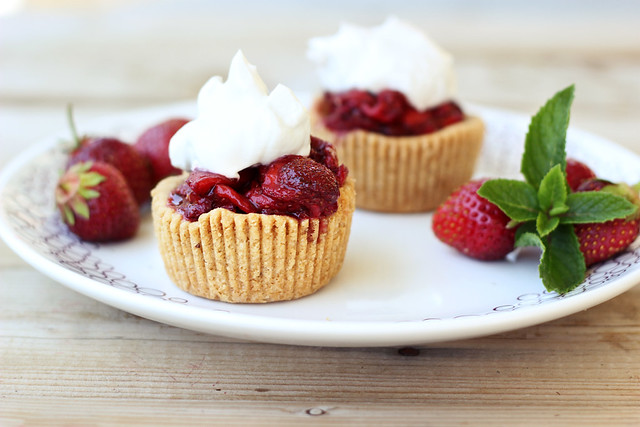
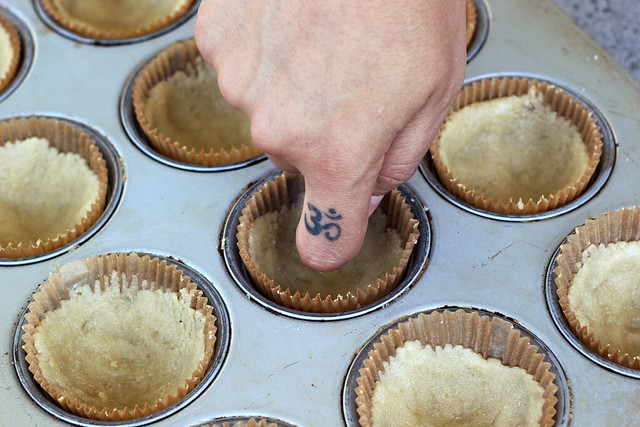
I am so elated over the outcome of this super fun, kickoff to summer-time recipe. It was one of those things I dreamt up (and loosely wrote up) while sitting at my computer working and when it finally came time to make it, I crossed my fingers and dove right in. I had to make a few subtle corrections from my original notes to make the tart shells work perfectly, but other than that, it all came together so perfectly. On the first batch, I didn’t use the paper muffin cup liners and the tart shells didn’t want to come out in one piece, even with greasing the pan, but add in the paper liners, and it was simple as can be!
This recipe is insanely simple to make, please don’t let the three-part recipe throw you off. Just remember to refrigerate your coconut milk the night before for the whipped “cream”. The dough for the tart shells takes just minutes to make, you need only one bowl and you can literally just use your hands to mix it, that’s what I do. It takes just a couple of minutes to get it evenly divided and pressed into the muffin cup and while the mini tart shells bake, you can cut up the strawberries and allow them to sit for a small bit in the balsamic/maple sugar mixture. Once they are done baking, you can chill the tart shells while you roast the strawberries, meanwhile you can whip up your coconut cream and when the strawberries are done, you can serve it all up. It can all be done in less than an hour, probably more like 45 minutes and it is so simple, you won’t believe it. If you want to make it even quicker and skip out on the heat from the oven, serve the strawberries fresh. With or without the balsamic vinegar. No matter which way you make it, this recipe will impress the pants off any one at a party, especially those that are gluten intolerant and vegan. They truly won’t believe that it is safe to eat. It is that good.
My favorite thing about this recipe is that although it is gluten-free and vegan, no one would never know it. Mark kept eating bite after bite telling me, that this was seriously one of the best things I had ever made. ‘Pastry shop grade’ – he even said. Quite the compliment. Beyond the shells being totally grain-free, and everything being refined sugar-free, it is hard to believe the fluffy, creamy whipped “cream” is dairy free. I honestly need to have a can of full-fat organic coconut milk on hand at all times, so I can always make some whipped “cream”. The other great thing about this recipe is how versatile it is. It can go through the summer with you as different fruits come into season. I cannot wait to make it in the fall with some baked spiced apple slices. YUM!
I am happy to once again be posting over at Free People’s blog, BLDG 25 where this week they are celebrating all things ‘Americana’. When they asked me to share a recipe that went along with that trend, I kept thinking of all of the wonderful summertime picnics, BBQs and beach trips. I wanted something simple and tasty, but full of beautiful, bright summertime flavors! Although nothing says summertime in America better than ice cream, berry pies and strawberry shortcakes, if you are the gluten-free and/or vegan at the party, that doesn’t always leave much for you. So, I decided to marry the idea of a berry pie with strawberry shortcakes to create these adorable little mini-tarts!
This recipe was originally shared on Free People’s Blog, BLDG 25.
[print_this]Roasted Balsamic Strawberry Mini-Tarts with Whipped Coconut Cream – Gluten-free + Vegan
makes 12Grain-free Mini Tart Shells
- 2 cups blanched almond flour
- 2 tablespoons maple syrup
- 1/4 cup coconut oil, melted
- 1/2 teaspoon baking soda
- 1/8 teaspoon salt
Preheat oven to 350ºF. Line 12 cups in a muffin tin with paper liners (you could also use greased mini tart pans). In a large bowl, add all of the crust ingredients and mix very well. Really get your hands in there to get it all together and work it into a nice dough. Add the crust mixture to the muffin cups and press down firmly into the cup using your knuckles, going up the sides a tad bit. Bake for 15-20 minutes until golden brown. Allow to cool in the pan for about 10 minutes, then place the pan in the refrigerator until you are ready to serve.
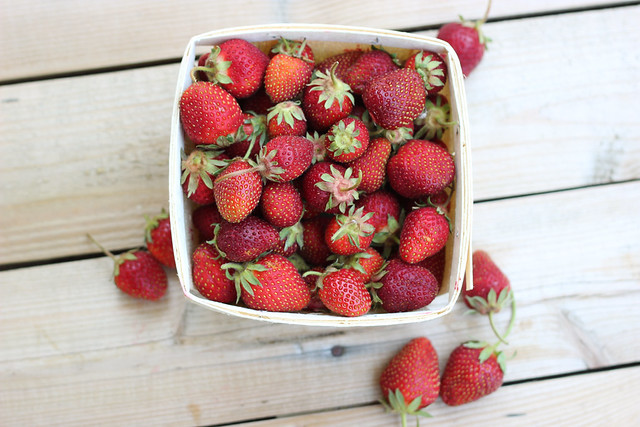
Roasted Balsamic Strawberries
- 2 pints baskets of strawberries, hulled and sliced (it’ll look like a lot of berries, but they cook down a lot)
- 3 tablespoons balsamic vinegar
- 3 tablespoons maple sugar (or palm/coconut sugar, raw sugar, etc)
Raise the oven to 400º F. Toss the strawberries with the balsamic vinegar and maple sugar. Allow to sit for a few minutes while your oven preheats. Pour all of the strawberries and their juices onto a parchment paper lined baking sheet or any other overproof dish or pan. Roast for about 10 to 12 minutes until the strawberries are hot but not too overly mushy. You can separate the berries and pour off some of the juices if you want to use it for drizzling, or you can just keep it all together. I kept some of the juice aside to add to some sparkling water for a refreshing drink.
Whipped Coconut Cream
- 2 cans organic full fat coconut milk, refrigerated overnight
- 1 tablespoon maple syrup (use more or less or none at all, or whatever your favorite sweetener is)
- 2 teaspoons vanilla
Make sure that your cans of coconut milk are well chilled. I recommend leaving item in the fridge overnight. Open the cans of coconut milk carefully, keeping them level. There will be a firm, waxy layer of coconut cream that solidified on top. Carefully scoop this off into a chilled glass bowl. Keep the leftover coconut water, it is great for smoothies.
Using a mixer, whip the coconut cream for 3 to 5 minutes until it becomes light and fluffy, with soft peaks. Mix in your maple syrup and vanilla, if you are using. Place the whipped coconut cream back into the fridge until you are ready to use. This may be more than what you need for all 12 tarts, but that’s ok, it keeps for several days, covered in the fridge.
ASSEMBLING THE TARTS:
Remove the paper liner off of the tart shells. Top each of the tart shells with a spoonful of the roasted balsamic strawberries and a dollop of whipped coconut cream. Serve immediately. [/print_this]


