These grain-free make ahead breakfast burritos are the perfect grab-n-go breakfast choice for your busy and full mornings. Stay satiated satisfied and fueled for your busy days ahead. These breakfast burritos get packed with protein, fat, complex carbs and you can even add veggies.. Make a double batch of these Make Ahead Grain-free Breakfast Burritos for a healthy, easy, freezer-friendly, meal-prep breakfast that you can enjoy all week long. These are gluten-free, grain-free and can easily be made paleo and Whole30 compliant
Breakfast burritos are a time saver. I feel like everyone has the occasional morning where you’re running late and need to get out the door but know that you need a nourishing and satiating meal in you to power you through the day. These freezer-friendly / meal prep breakfast burritos are the perfect solution. This recipe is a great for meal prep as well as stocking up your freezer with quick nutrient-dense meals when you’re busy or don’t feel like cooking. The best part about this recipe is that you can use whatever ingredients that you like or family prefers.
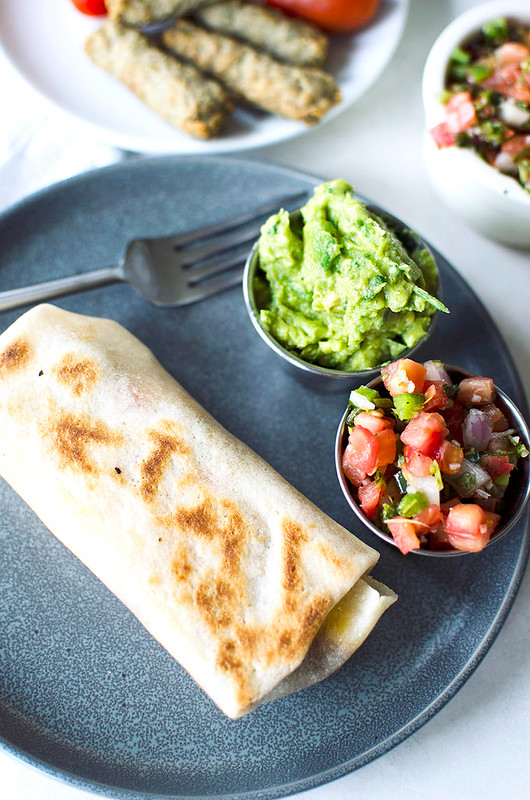
Like many of our recipes, this one is open to any substitutions that you need to make. Gluten free is our main priority. We used burrito sized grain-free cassava flour tortillas, we like Siete Foods. While you can use any type of tortilla that you have on-hand or prefer, but we do recommend using burrito size tortillas if possible. It is very difficult to make a burrito with a six-inch tortilla.

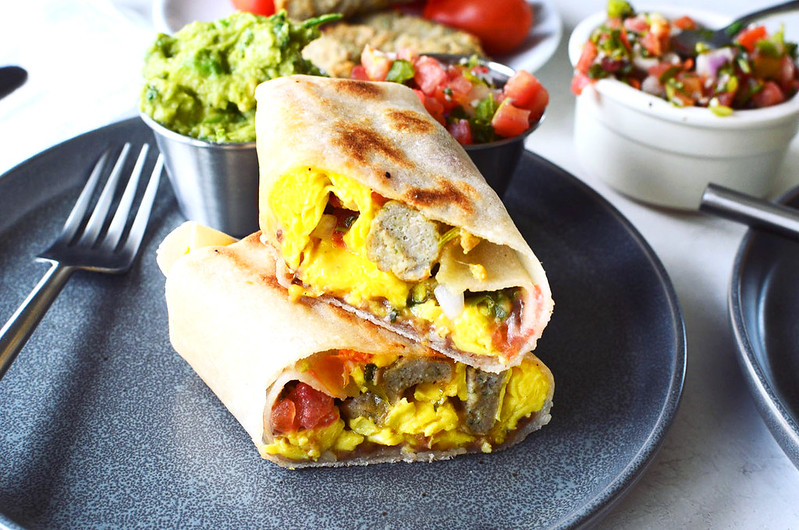
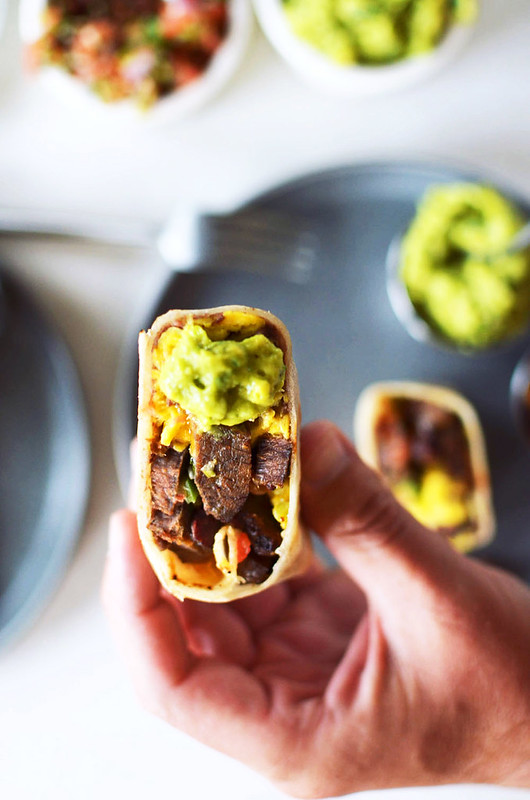
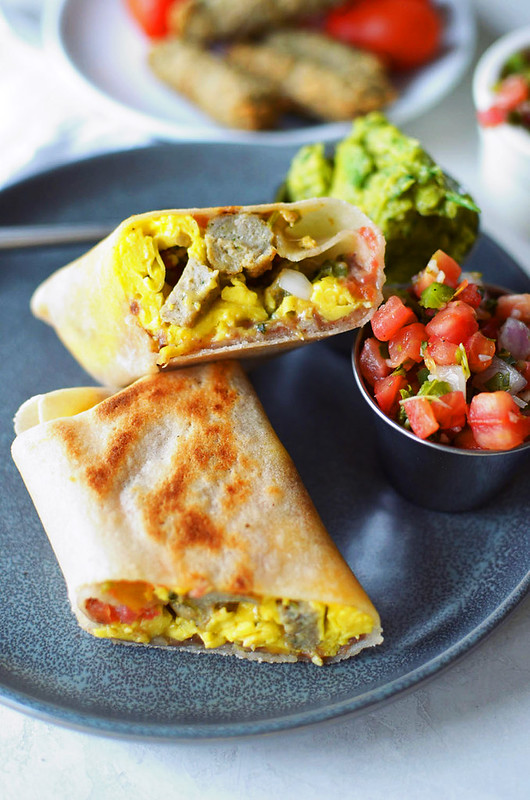
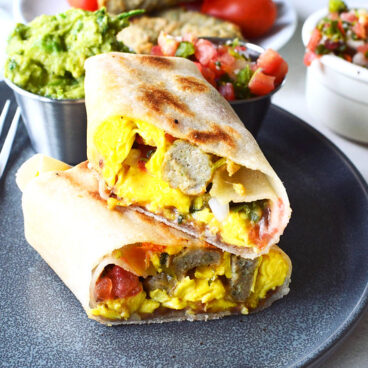
For the filling, you can use what you have on hand or substitute to fit your nutritional needs. We used organic refried beans, scrambled local eggs, chicken sausage, salsa, and Mexican cheese.
We used an organic no sugar added chicken sausage for half and smoked brisket (recipe coming soon) for the other half, but you can use any brand/flavor that you like. We heat them and chop them into small pieces. Then we scramble our eggs. Having all your ingredients lined up really helps to speed up the process of the burrito prep.
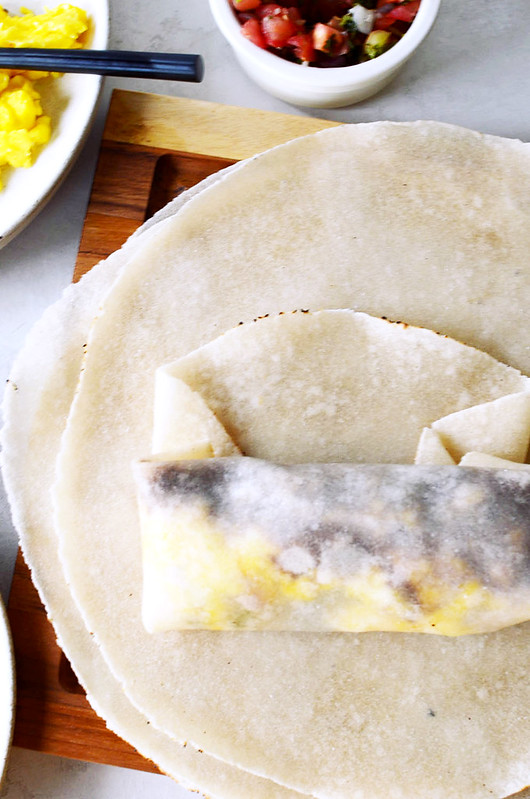
If using almond flour or cassava flour tortillas it is very important that you heat them prior to filling and rolling them. If you don’t, I can almost guarantee that they will rip and tear. I heat mine in a large skillet about 1-2 minutes on low on each side. Seems a bit extra but trust me it’s worth it. I heat all six tortillas them create my assembly line.
I place about a tablespoon of beans and spread them on one side of the tortilla. Next, I add about one to two eggs, scrambled, 1-2 tablespoons of the chopped chicken sausage, or other protein. Add as much salsa and cheese that you like. If there are any other filling ingredients that you want added now is the time to put them in. You want to be careful that you don’t overfill the burrito, you need to be able to roll it and seal it closed.


Rolling Your Breakfast Burritos:
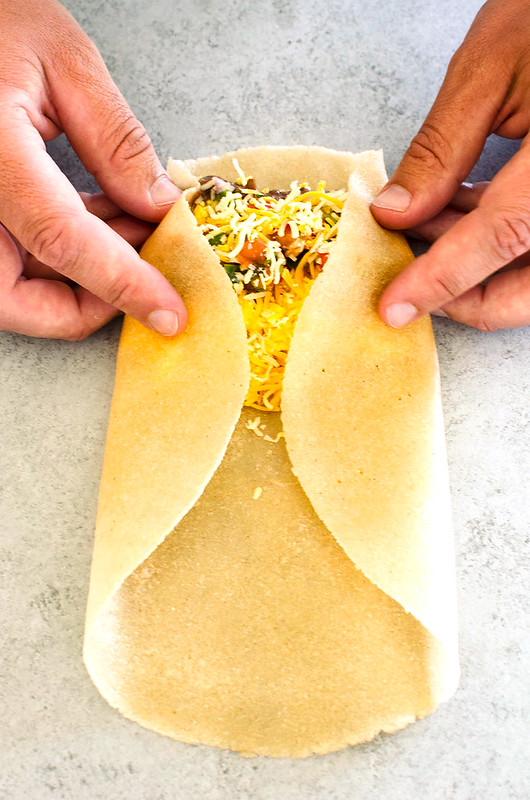
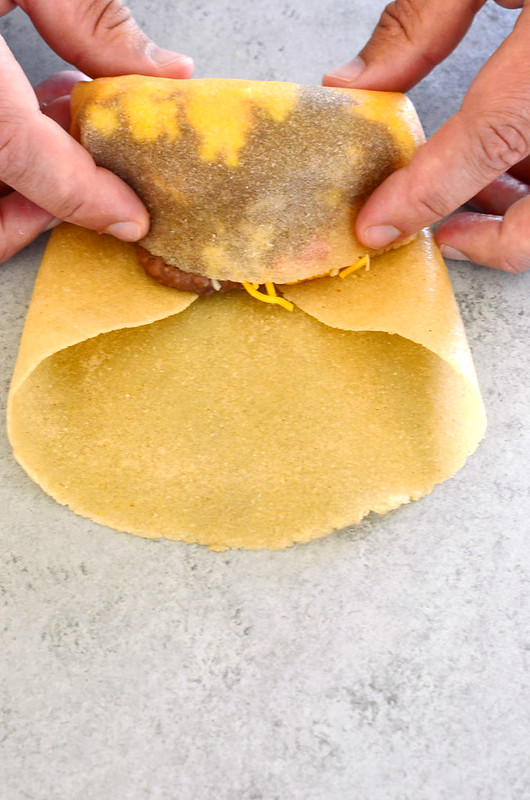
On the side that you put the fillings, lift that end, and start rolling it towards the center. Then fold in the two sides then continue rolling the long part of the burrito. You want to keep the flap at the end on the bottom so the burrito stays closed.
Heating Your Breakfast Burritos:
Heat your pan to medium/low heat. A non-stick pan or a well-seasoned cast iron works, best. You don’t want it to stick. Place the burrito flap side down in the pan. Heat 1-2 minutes to seal the burrito closed. If you are making these to eat right away, flip the burrito over to heat and crisp the other side. Allow to cool 1-2 minutes before eating. Alternatively, you can place your breakfast burrito on a sheet pan, sealed sign down and place it under the broiler for 3 to 5 minutes until lightly golden brown, be sure you are watching it carefully.
Freezing Your Breakfast Burritos:
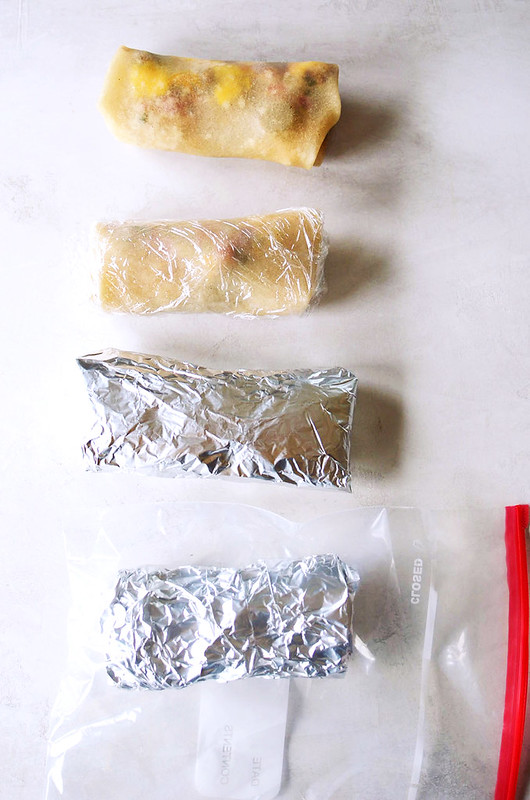
If you are prepping these for the freezer, after sealing all of them in the pan allow to cool completely. Roll tightly in plastic wrap, then aluminum foil and place in a freezer bag for 1-2 months.
How to Reheat Your Burritos:
When reheating from frozen, place a damp paper towel lightly over the burrito and heat in the microwave for 1 minute and 30 seconds to 2 minutes. If heating in the oven, preheat to 350ºF, wrap burrito in aluminum foil and heat for 25-35 minutes.
When heating from thawed, microwave for 60 seconds or heat in the oven for 15-20 minutes. For both options, you can always place under the broiler at the end to get lightly golden brown.

These burritos are great eaten right away as well as a freezer prep meal. One of the main reasons that I love making these is that I know the quality of ingredients that are in them. Having gluten free tortillas, pastured eggs and high-quality cheese and beans make these a top pick for a freezer meal for me. These are especially great if you have a picky eater in the house. You can prep a batch with ingredients that they approve of and label a bag with their name, so you have an easy go to meal for them. These burritos aren’t just for breakfast, you can eat them for lunch or dinner if you’re in the mood for a burrito or don’t feel like cooking. There are lots of possibilities for ingredients and flavors. Use what you love and you can also get creative with leftovers.

Options for Your Breakfast Burritos:
- eggs
- breakfast sausage (links or ground) or chorizo sausage
- bacon
- leftover carnitas, brisket, shredded beef or chicken, etc
- roasted potatoes
- cooked hash browns
- cooked rice
- beans (refried or cooked whole beans with the liquid drained)
- greens or other veggies you want to toss in
- cheese of your choice
- onions – red, white or green
- salsa or pico de gallo
- sour cream or crema
- avocado or guacamole
- cilantro
- hot sauce

Grain-free Make Ahead Breakfast Burritos - Freezer-friendly, meal-prep
Ingredients
- 6 burrito sized tortillas, we use Siete Foods grain-free burrito tortillas
- 8 large eggs, beaten
- 8-12 oz breakfast sausage, bacon or other protein of choice
- ½ cup refried beans, optional
- ½ cup salsa
- ¼ - ½ cup cheese of choice, optional
- options to serve with: salsa, guacamole, sour cream, cilantro
Instructions
- Heat the tortillas in the microwave or in a dry pan on the stovetop, heating makes sure that the tortillas are pliable and won't break when rolling.
- Heat a large well-seasoned cast iron or non-stick pan over medium-high heat. Add the sausage (or bacon) and cook, stirring frequently, until browned, 4 to 5 minutes. Remove the meat with slotted spoon, leave any drippings in the pan, add the eggs to the same pan, scramble and cook until just cooked through. Transfer the eggs to a plate or bowl.
- Assemble all of your burrito ingredients.
- Place tortilla on a flat surface
- Spread about 1 tablespoon of beans and spread towards one side of the tortilla.
- Layer about 1-1.5 eggs and 1 tablespoon of chopped sausage per burrito
- Sprinkle some salsa and cheese.
- Add any other ingredients that you'd like.
- Do not overfill the tortilla or you risk it ripping
- Take the side of the tortilla that you put the ingredients. Start rolling that inward.
- At the same time, fold in the two sides over the filling and continue to roll, keeping the filling inside the middle.
- Continue rolling the longer part of the burrito and if possible, keep the flap on the bottom to help it stay closed.
- Heat a dry non-stick pan over a medium-low heat.
- Place the burrito flap side down and heat it for 1-2 minutes to seal it closed.
- If eating right away, you can flip the burrito to the opposite side cook for another 1-2 minutes to get a nice crisp. Alternatively can also place your burritos seal side down on a sheet pan and place under the broiler for 3-5 minutes until golden brown.
- Serve warm.
- If freezing your batch, allow the burritos to fully coo after sealing. Wrap TIGHTLY in plastic wrap, then aluminum foil and place in a freezer safe bag. Label them and store in freezer 1-2 months. To reheat place a damp paper towel on top of the burrito and heat for 1 minute and 30 seconds. Depending on the amount of filling you may need to add an additional 30-60 seconds.