Posts by Beth @ Tasty Yummies

  1. Gluten-Free French Onion Soup

    Gluten-Free French Onion Soup

    I can admit that writing this recipe and editing the photos on this soup was a bit painful, in more ways than one. I’ll explain why…

    For the last two weeks I have been feeling a bit under the weather. No cold or flu showed it’s face but I was just not feeling like myself. In addition to feeling a bit “off”, a few other symptoms arose and I was experiencing sharp and abnormal pains on my right side, near my kidney. It started in the back, then slowly made it’s way to the front to my upper abdomen then found it’s way to my lower right pelvis. I also noticed blood in my urine last Monday.

    Being that both of my parents have kidney stones, and I myself was diagnosed with small kidney stones years ago, I decided to make my way to the urologist to rule out any type of infection or the passing of a stone, etc. The stones that I was diagnosed with years ago, were very very small at the time and have caused me no issues at all. Back when I was diagnosed, the doctor explained that it was likely hereditary and with a healthy diet I could keep them that small and probably never have to worry about them. So when I made it to the doctor this time around, they tested for infections and that came up negative but they did say I had a higher than normal level of blood in my urine. I say higher than normal because every time they have ever tested me, I have always had a small amount of blood. They tell me that this is somewhat normal for some people and that it was so microscopic, and normally it wasn’t anything I needed to be concerned with.

    At first, based on my symptoms and the blood, they told me I was likely passing a stone or a stone had moved and caused some irritation and inflammation of my kidney, they tried to talk me into a CT scan, which I declined, sent me home with some pain meds and told me to come back in a few days. When I came back everything was about the same, but the pain had traveled to the front almost exclusively and I was now experiencing digestive issues and pain, the pain still very much only on the right side and now very low in my pelvis. I felt bloated, gassy and I was experiencing indigestion, all things I haven’t experienced in years. There have been other not so pleasant side-effects as well, but I will spare you all the details.

    So, I began speaking with my good friend, Jane, a chiropractor who very much believes in an all-natural, holistic and homeopathic approach to symptoms, first, then looking at all aspects of your life – like diet, stress, etc. to determine the problem and the causes to the problem. Jane has been a part of my life since I was an infant, she and my mom went to high school together and reconnected after my mom had my older sister and I and was pregnant with my little sister and she was experiencing some health issues. Jane now lives in Colorado, so I explained my symptoms to her through email and she told me to have my Chiropractor here in Buffalo look at my ileocecal valve (which admittedly I had never heard of). I googled it before I even got in to see my chiropractor/yoga teacher Elyssa and many of the symptoms of a grumpy ileocecal valve sounded just like what I was experiencing. The ileocecal valve is situated at the junction of the small intestine (ileum) and the large intestine. Its critical function is to limit the reflux of colonic contents into the ileum.

    After a brief examination by Elyssa, she confirmed Jane’s suspicions and I had an explanation – my ileocecal valve was definitely grumpy. The valve is supposed to function on it’s own – opening and closing to release what needs to go to the large intestine from the small, leaving behind what doesn’t need to and shouldn’t go. (You can definitely google and find out even more of the details, I just wanted to keep this brief – a good intro to your ICV can be found here). Our ileocecal valves can get stuck in the open or closed position. Elyssa believes that mine is stuck open. After discussing my diet and trying to determine what may have caused this, Elyssa asked if there had been any major changes in my diet and I told her “no”, I have maintained the same diet that I have for the last nearly 2-years. However, this is when I recalled the cheese that I ate on New Years Eve. I have pretty much completely cut-out dairy milk when I am both baking and cooking, etc and I have cut way way back on cheese. Admittedly and embarrassingly, I consumed a good amount of cheese on New Years Eve with Mark’s family in Kentucky (we were in the South and we did stop at Grandpa’s Cheese Barn in Ohio, afterall). Not really thinking what it could do to my system after not really eating much of it, just thinking about how I rarely eat it anymore and that I would enjoy it just this once. Well the joke is on me. Elyssa explained that because I hadn’t been eating much dairy and more specifically cheese, just eating it this once, it could have just shocked my system, causing my ileocecal valve to freak out!

    Now, let me explain to you that I haven’t been to a medical doctor with the exception of a physical in over two years. I have managed to stay fairly healthy minus a cold or stomach bug here and there, which is far better than my health in the past. I am not one to post around on Facebook or Twitter about how I am feeling and complain complain complain instead of taking the necessary actions to improve my health, I try to stay very positive and not dwell since I really think that has an effect on your health and well being. So, the only reason I even chose to share this on here at all – was that first, I thought it to be an interesting diagnosis, one that I never would have imagined. I have always found my digestive tract to be quite sensitive so finding out I have a part of that system, that I didn’t even know existed, not functioning properly, doesn’t really shock me. Secondly, I wanted to explain why you may not see as many posts for the next week or so, or why some of the recipes may be drastically different and toned down. I am definitely going to take it easy with eating, give my system a break and be very mindful of what I consume as I allow my body to heal. In addition to the dairy, I also plan to cut out caffeine, alcohol, sugar and chocolate. I am still not quite sure of everything involved with the ileocecal valve and what has to be done to heal it to make sure it doesn’t happen again. So, I definitely plan to share more with you as I learn more and I will also share the recipes that I am creating as I figure out what to eat to combat this.

    The reason that I decided to share this diagnosis with you on this recipe, besides that it was the next recipe that was waiting to be written up, is that the biggest thing that I am removing from my diet, at least for the next few weeks, if not for the long haul, is dairy and more specifically cheese, so you won’t be seeing anything else like this cheesy-topped soup, for a while. I have always seemed to have trouble digesting it, but knowing that it wreaked such havoc on my poor ileocecal valve really has me thinking if I should remove it from my diet altogether. I am definitely not making any rash decisions just yet (gosh, even though I know it’s bad, I really do love cheese), but I do plan to start exploring all of my options and to really investigate all of my diet, once again. I obviously made this soup before we could pinpoint that my troubles were digestion related and I was absolutely craving soup. Had I known that my poor body was pissed at the fact that I consumed so much cheese on NYE – I would have just skipped out on the cheese topping and just had the toast on top. The broth to this French onion soup is soo darn delicious on it’s own, you could honestly enjoy a bowl of this without the melted cheese and be just as content. I promise – I know you think I am crazy, but this soup is that good.

    Being that we purchased and shared half of a pasture-raised cow this fall with my parents from Sojourner Farms in Olean, I wanted to use some of the soup bones and beef that we received with our order to make this stock from scratch, I took all the steps to make sure that it was the richest and most flavorful stock I could make. I roasted the bones before I boiled them to make the stock and the results were phenomenal. I have never done this before, but it produced the darkest and most robust beef stock that you could ever imagine. I used this recipe here from Simply Recipes. I enjoyed so many of the different flavors from this soup that I want to attempt it again but next time with a vegetarian or a mushroom stock. I think with the right flavors, possibly roasting the vegetables a bit first and maybe adding in some miso to round out the stock, I could make an equally delicious vegetarian version of this. Stay tuned, I am determined to try it out.

    A note – I would have really enjoyed making a French-style gluten free bread for the top of the soup, but I was a bit limited in time, so I bought these beautiful and tasty gluten-free baguettes from Schär. They toasted up absolutely perfectly and retained a nice amount of that crunch even when floating on top of the soup. What a treat to find those at the store. It was a perfect finish to this incredible soup!

    Gluten-Free French Onion Soup

    [print_this] Gluten-Free French Onion Soup
    Adapted from Julia Child’s Recipe
    Serves 6-8

    5-6 cups yellow onions, thinly sliced (about 1 1/2 to 2 lbs)
    1 tablespoon olive oil
    2 tablespoons unsalted organic butter (if you wish to skip the butter, you can just add a bit more olive oil)
    1/2 teaspoon raw sugar
    1 teaspoon kosher salt
    3 tablespoons gluten-free all purpose flour (whatever your favorite blend is, I used Bob’s Red Mill)
    8 cups (2-quarts) beef stock* (preferably homemade stock made with pasture-raised beef – I used this recipe to make mine with bones from our pasture raised beef from Sojourner Farms in Olean, NY)
    1/2 cup wine (dry red or white – I used dry white vermouth since that is what I had and it works wonderfully – do not skip this, it really makes the flavor of the soup)
    1 bay leaf
    1/4 teaspoon of dried thyme
    salt and pepper

    For finishing:
    12 ounces swiss cheese, grated
    4 ounces gruyere cheese, grated
    1/2 raw yellow onion
    2 -3 tablespoons cognac or brandy (optional – sadly I had neither of these on hand so I skipped it)
    8 slices gluten-free French bread (cut about 1 inch thick), toasted until hard

    Place heavy bottom stock pot or dutch over a medium-low heat. Add olive oil and butter to the bottom, melt. Add sliced onions and stir until they are evenly coated with the oil and butter. Cover and cook for about 20 minutes until they are very tender and translucent. Remove the cover and add the salt and sugar, mix. Raise the heat to a medium. Continue cooking the onions, stirring frequently, allowing them to caramelize and turn a deep golden brown. They will reduce significantly. This will take about 30 to 40 minutes. Don’t rush this step, you don’t want the onions to burn and the caramelization of the onions is what gives this soup it’s classic flavor.

    Once caramelized, reduce heat to medium-low and sprinkle the flour over the onions. Brown the flour for about 2-3 minutes trying not to scorch it. (If the flour does not form a thick paste, you can add a bit more butter here). Stir constantly. Add in the wine, a bay leaf, the thyme and your stock, adding the stock a little bit at a time, scraping the bottom of the pan to get up all of the cooked-on brown bits. Add salt and pepper to taste (don’t add too much salt as the cheese will also add saltiness and you can always add more – you can’t take it away). Continue adding the rest of your stock. Stirring as you add. Simmer for 30 minutes. After simmering for 30 minutes, find the bay leaf and take it out.

    You can certainly skip the crusty bread and melted cheese on top, this soup is really THAT good. But if you want to go further and enjoy this soup the way Julia fully intended, then keep reading.

    To toast your bread, heat oven to 325º F. Bake the bread in the oven on a cookie sheet for about 15 minutes on each side (30 minutes total) or until golden brown and very hard, being careful not to burn it. Increase the temperature of your oven to 350º F.

    To serve – either ladle the soup into individual oven-proof soup bowls or ramekins or one large casserole dish. I personally prefer individual servings. If you are adding raw onions, add that to the soup now and stir. Cover the soup with a single layer of the toasted bread and sprinkle with as much cheese as you’d like, I would say we probably went with about 1/4 cup of total cheese (a blend of the two cheeses). Place the bowls onto a baking sheet and place into a 350º oven for about 20 minutes. Then preheat your broiler and finish the soups under the broiler until the cheese is bubbling and golden brown. Remove from the broiler carefully, let cool for a minute or two and serve immediately.

    *mushroom stock would make a great vegetarian substitution

    [/print_this]
  2. Overnight Cinnamon Raisin Chia Pudding (vegan, gluten-free, raw)

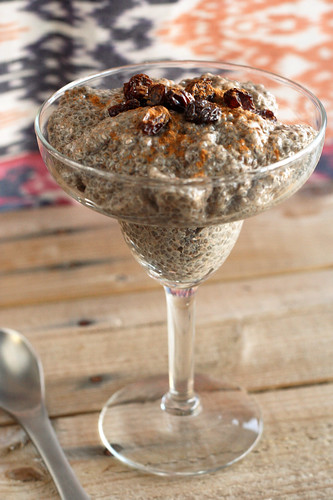
    Overnight Cinnamon Raisin Chia Pudding (vegan, gluten-free, raw)

    I have seen many recipes for chia pudding on my internet travels, some seem to be thicker than others, but they have all looked delicious to me. I have been meaning to make this for some time. I have seen chia puddings made with all types of milk, including coconut, I’ve come across many many different toppings and “extras” including chocolate chia puddings made with cocoa. This Berries and Cream version from Leanne at Healthful Pursuit looks super duper creamy, containing less chia seeds and adding in coconut milk. I plan to make something very similar to this soon, myself, I really love how creamy it looks.

    I decided on a thicker version for this first time, with similar flavors to my dad’s famous Greek style rice pudding, that I love so much and have mentioned on here before. Since, I wanted it to be a bit thicker of a pudding – I used a ratio that I found on Whole Food’s website, of seeds to milk. I do plan to make another version of this later this week, with less seeds and with coconut milk, similar to the one I posted from HP, but I had been dreaming of this thick rice-pudding like version for a while now. I will plan to post the next one I make as well, so I can compare to this. In fact, I plan to be making lots more chia pudding, so look out!

    When soaked overnight chia seeds turn into a simple pudding, similar in consistency to tapioca (which I love). This pudding was thick and creamy, and it had a little bitty crunch from the seeds. I drizzled a bit of honey overtop of this to add a subtle sweetness, you could also add stevia, coconut sugar or any other sweetener you desire. You probably could also just use sweetened non-milk, I just never have that in the house. I am super surprised at how filling this pudding is, I was worried I would be hungry in an hour or two, and I wasn’t. For me that is when I know I have found a breakfast winner! In addition to breakfast, this pudding would be great for dessert or even a little afternoon snack.

    If you haven’t yet had chia seeds, you must try them. I like them in muffins, granola, breads, smoothies, etc. Chia seeds are a super food that provides a variety of wonderful health benefits. It a nutshell – by adding just 2 tablespoons of chia seeds to your daily diet it will give you approximately 7 grams of fiber, 4 grams of protein, 205 milligrams of calcium, and a whopping 5 grams of omega-3! The benefits are far too many to list here, so I will direct you to this simple to read list, Top 10 Benefits of Eating Chia Seeds. And yes, these are the are the same chia seeds made famous by the Chia Pets. Ch ch ch chia! Chia seeds can be found at most healthfood stores, normally where you would find the flaxseeds.

    Obviously you can play around with your toppings and flavors of this pudding, skipping the cinnamon and adding your own spices, going with fresh berries instead of dried fruit, adding nuts, cocoa or topping with shaved fresh coconut, etc.

    Overnight Cinnamon Raisin Chia Pudding (vegan, gluten-free, raw)

    [print_this]Overnight Cinnamon Raisin Chia Pudding (vegan, gluten-free, raw)
    Serves 2 to 4 (depending on serving size)

    2/3 cup chia seeds
    2 cups unsweetened organic non-dairy milk like almond or rice milk (I bet coconut milk beverage would also be great)
    1 teaspoon ground cinnamon
    1/2 teaspoon pure vanilla extract
    1/4 cup raisins
    Coconut sugar, stevia, honey, maple syrup, or any other sweetener of your choice, to taste (optional)

    Combine chia seeds, almond milk, cinnamon and vanilla in a glass bowl, stir well to combine. Cover with plastic wrap or lid. Or add those ingredients to a glass mason jar with a lid, tighten and shake well to combine (this is what I did). Refrigerate overnight. Stir well before serving, spoon into bowls and top with raisins, a dash of cinnamon and a little sweetener, if you wish.

    [/print_this]

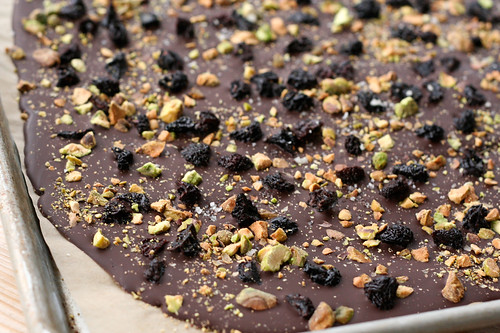
  3. Dark Chocolate Bark with Pistachios, Dried Bing Cherries and Grey Sea Salt

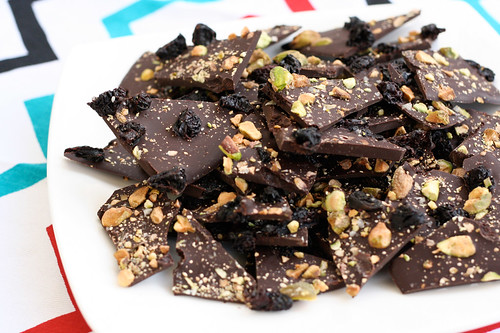
    Dark Chocolate Bark with Pistachios, Dried Bing Cherries and Grey Sea Salt (gluten-free and vegan)

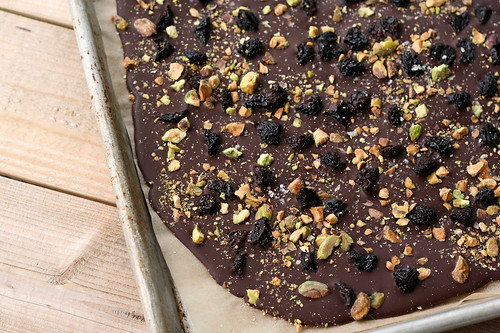
    Dark Chocolate Bark with Pistachios, Dried Bing Cherries and Grey Sea Salt (gluten-free and vegan)

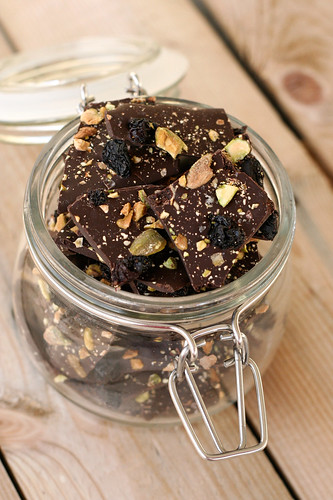
    I know everybody is over the whole holiday sweets and things and onto cleansing and detoxing, the gym and new year’s resolutions, sugar-free and fun-free – but this recipe is too good not to share. Really it’s hardly a recipe, it’s so simple to throw together in about 5-minutes to take to a party, or to wrap up in a nice jar as a hostess gift. I made this for quite a few different holiday get togethers this year and it was always well received. I even made it for a party that we rushed out the door for, where I had to shower, get dressed and be out the door in less than 45-minutes after coming home from Christmas shipping. I walked into the house, melted the chocolate in the microwave and tossed the goodies on top and threw it in the fridge to cool while I got ready. It was that simple and it was ready to go when we were.

    The other nice thing about this no-bake sweet treat is that it’s good for just about everyone. If you make sure to buy dairy-free dark chocolate it is perfect for those with dairy intolerances, it’s great for vegans and of course for us gluten-free folk. You can also mix it up and play around with different combinations of toppings. You can try different nuts, dried fruits, shredded coconut, candied ginger, chile flakes, citrus zest, etc. Oooh – how good would broken up pieces of gluten-free pretzels be on top? Yum. You can also play around with swirling in peanut butter or melted white chocolate and making a pretty design. Or you could add mint extract and/or broken up candy canes for some real holiday flair. You could add cinnamon or toasted brown rice cereal…the possibilities are endless. I want to make this for every single get-together I go to, now.

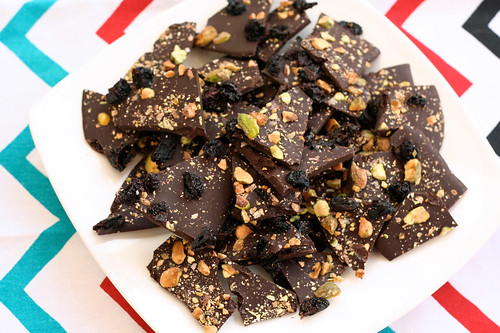
    Dark Chocolate Bark with Pistachios, Dried Bing Cherries and Grey Sea Salt (gluten-free and vegan)

    Dark Chocolate Bark with Pistachios, Dried Bing Cherries and Grey Sea Salt (gluten-free and vegan)

    Believe it or not, for a dessert – this dark chocolate bark is a pretty healthy option, too. With dark chocolate a little goes a long way, so you will definitely eat less. Plus, dark chocolate is low in sugar and it’s chock full of antioxidants including theobromine, which combats inflammation and is good for your blood pressure and additionally dark chocolate is known to be mood enhancing.  The pistachios offer a wide variety of health benefits such as being high in dietary fiber, they are cholesterol-free and are loaded with various other antioxidants and minerals. Dried cherries are also high in fiber and minerals. So, go ahead and treat yourself guilt-free, even after the holidays, while reading over your list of 2012 new year’s resolutions.

    Not quite ready for the sweets in 2012 yet?  If nothing else, remember this simple recipe idea for a great homemade gift-giving option.

    What was your go-to dish or sweet this holiday season? 


    Dark Chocolate Bark with Pistachios, Dried Bing Cherries and Grey Sea Salt (gluten-free and vegan)
    [print_this] Dark Chocolate Bark with Pistachios Dried Bing Cherries and Grey Sea Salt
    Serves 10 to 12

    12 ounces dark chocolate (70% cacao) – make sure it is non-dairy if you wish for this to be vegan – I use Endangered Species Organic Dark Chocolate
    1/2 cup organic dried bing cherries, roughly chopped
    1/2 cup roasted, shelled pistachios, roughly chopped
    1/4 teaspoon grey sea salt (Fleur de sel)

    Line the bottom of baking sheet with parchment paper leaving a small overhang. (I drizzle a small amount of oil on the pan first so the parchment paper will stay put and not wrinkle).

    Melt the chocolate in a double boiler over hot water. Or in a microwave on low in 30-second bursts. Stir often with a rubber spatula so it melts evenly.

    Pour the chocolate onto the baking sheet and smooth with a spatula into an even layer. Sprinkle with pistachios, cherries and sea salt (or whatever toppings you choose). Chill in the refrigerator until completely set, about 20-30 minutes.

    Peel off the parchment paper and break into irregular pieces. Store in an airtight container in the refrigerator for up to two weeks.

    [/print_this]


  4. The Top 11 Recipes of 2011

    Instead of reflecting on 2011, I really should be downstairs putting away Christmas decorations, taking down the tree and putting away gifts. But, I have been sitting here at my desk working on illustrations for a pending deadline with a client and I feel like am fighting off some type of after-holiday sickness, so I am feeling a bit sluggish and tired. I have total faith that I am going to kick this thing in the butt before it ever gets me sick, so here’s hoping! For the last two days I’ve been loading up on supplements, green tea, water and rest when I can get it, and I have been living on a steady diet of hot soups, which I have no complaints about. I love soup! If you have any natural remedies for fighting off sickness, send them my way! I am determined to not let this through.

    I’ll get to the tree and those Christmas decorations and I plan to get some new recipes up later this week, including this year’s holiday get-together favorite, Vegan Dark Chocolate Bark with Bing Cherries, Pistachios and Grey Sea Salt. But for now, I will continue attacking all of this work and the threatening sickness that I refuse to let through and I will keep reflecting on the year behind me and all that lies in front of me.

    I rarely set any sort of personal New Years Resolutions, but I always promise myself that in the year ahead I will try to be the best possible me, yet! I don’t make any strict dietary guidelines (I have enough that are part of my every day choices, as it is), I don’t force myself to do things I don’t really want to, I just make a plan to continue being as happy and positive as I possibly can and to always make the right choices for me! I really try to enjoy every moment of my life and to cherish what I have, each and every day. At some point of every single day, I take a moment to express my gratitude for all that goodness in my life. It feels so good! Sometimes I catch myself saying “I am so very lucky for :blank: in my life” (ie, an amazing husband, a great job, a fun life, a great family, etc) and I then remind myself that it isn’t luck that allows me to have all of these wonderful things. Life is hard, relationships take work and love, and it takes energy to wake up every morning and see all the positive in my life. But it is all worth it! I would be lying if I didn’t say there are trying moments, there are days when things are hard, that I wanna say “why me?”, but I always tell myself that ‘it could always be worse’ and that ‘every experience is what you make of it’. I choose to wake up every day and see the bright side of things. No one makes me do that, I do it so I can have a better quality of life and it works! I am blessed to have all that I have, but I also know that I am even more blessed to be able to stay positive every day, so I can see it all for what it is and enjoy each and every moment I am alive.

    There are two links I came across in the last couple of days that I really wanted to share with you guys – both come from Southern California yoga and climbing clothing company, prAna’s, blog. The first is a list of “12 Things Happy People Do Differently“. This article really hit home for me as most of the items on this list are things that I already make a part of my every day living. There are a few that I don’t always remember, that serve as great reminders to me, as I try to be the best version of me, that I can be! Everyone deserves to have the feeling of complete and utter happiness in their every day lives, there really is nothing like it! Happiness starts within and no one can give it to you, you can only give that gift to yourself. Read this and live this!

    The second link, as if that first wasn’t inspiring enough, is a Handbook for Life 2012. This wonderful and encouraging list of reminders to be the best possible you this upcoming year, actually leaves me speechless! There isn’t much to say that isn’t said there. I plan to print this list out and keep a copy where I can see it every day, plus keep a digital version on my iPhone. Read this and embrace it all, that is all that I can say!

    OK enough of the gushy, mushy feel-good positive stuff – let’s talk yummies! Here are the top 11 recipes from Tasty Yummies in 2011!

    11) Blueberry Muffins with Almond Flour (gluten-free)

    Gluten-Free Blueberry Muffins with Almond Flour


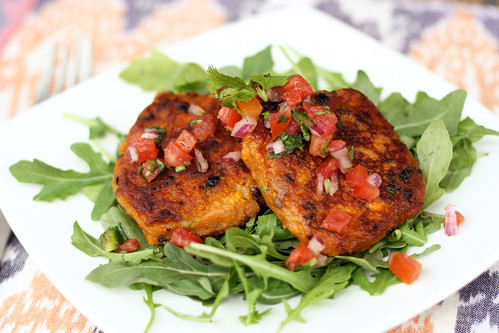
    10) Sweet Potato and Black Bean Patties (Gluten-free and Vegan)

    Sweet Potato & Black Bean Patties


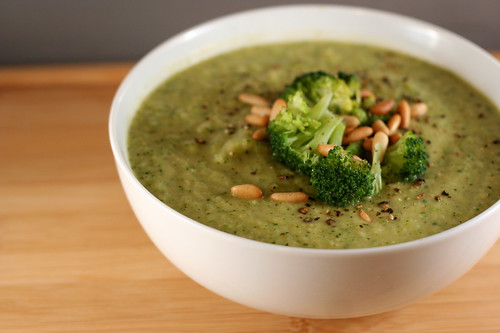
    9) Creamy Broccoli Soup (Gluten-free and Vegan)

    Creamy Broccoli Soup (Vegan)


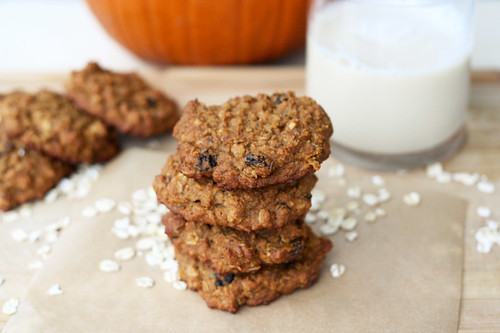
    8 ) Chewy Pumpkin Oatmeal Raisin Cookies (Gluten-Free with vegan options)

    Chewy Pumpkin Oatmeal Raisin Cookies (Gluten-Free)


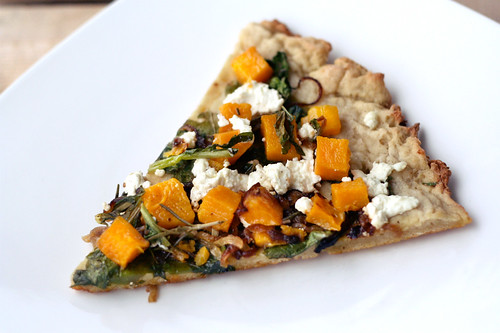
    7) Butternut Squash, Arugula and Goat Cheese Pizza -(gluten-free)

    Butternut Squash, Arugula and Goat Cheese Pizza


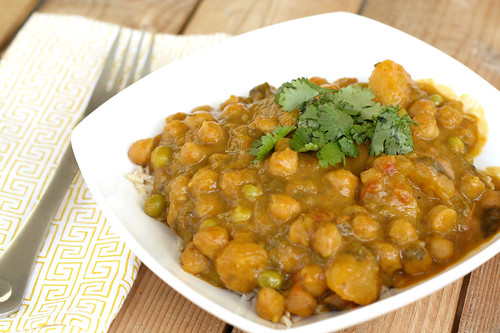
    6) Butternut Squash & Chickpea Coconut Curry (Crock Pot Recipe – gluten-free and vegan)

    Butternut Squash & Chickpea Coconut Curry (Crock Pot Recipe)


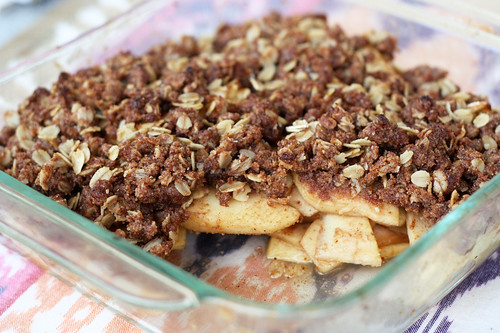
    5) Apple Crisp (Gluten-Free and Vegan)

    Apple Crisp (Gluten-Free and Vegan)


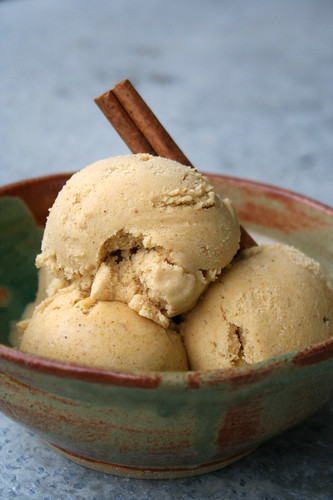
    4) Vegan Pumpkin Spice Ice Cream (gluten-free)

    Vegan Pumpkin Spice Ice Cream

     
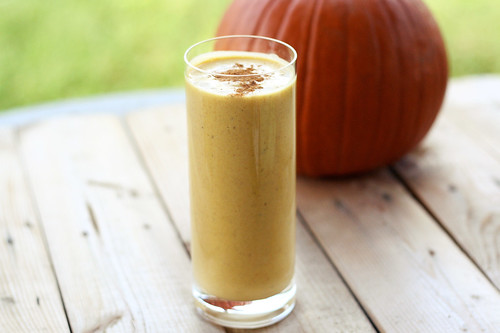
    3) Vegan Pumpkin Pie Smoothie (gluten-free)

    Vegan Pumpkin Pie Smoothie


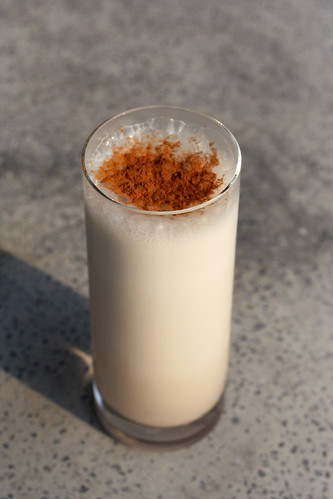
    2) Horchata (gluten-free and vegan)

    Horchata


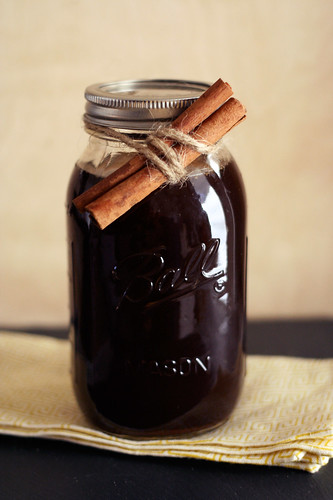
    1) Homemade Chai Concentrate – (gluten-free and vegan)

    Homemade Chai Tea Concentrate


    Do you have a favorite Tasty Yummies recipe from 2011? What do you want to see more of on Tasty Yummies in 2012?

    What are your goals and/or resolutions for 2012?

  5. 2011: A Year in Travel!

    I know I am a few days late on my wishes, but we were away from home in Kentucky visiting with my husband Mark’s family for the New Year! Happy New Year to you ALL!! I rang in 2012 with my hubby, Mark, our pooch, Seri, and all of Mark’s family! We celebrated Christmas and the New Year in one shot and it was really fun. We got to spend some quality time with Mark’s rowdy and amazing Momo (Grandmother), Mark got his fried chicken, we exchanged gifts, ate a ton of cheese from Grandpa’s Cheesebarn in Ohio, (a guilty pleasure stop we love to make on the drive down there) and I even made my tortilla soup for Mark’s Dad and girlfriend, Cindy, on New Year’s Day! It was a fun trip indeed.

    Ringin' in the New Year with my Sweets - December 2011

    Mark's Momo - December 2011

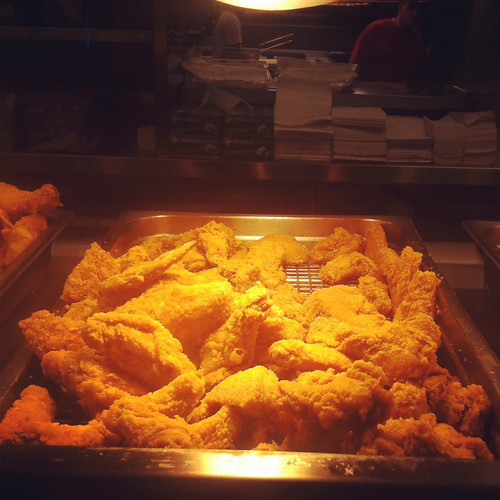
    Fried Chicken in Kentucky - December 2011


    2011 was an absolute amazing, whirl wind of a year for us. At the start of the year, with all of the traveling and the client projects we had on the horizon, we decided to close our boutique of nearly 5 years, a decision that didn’t come easy, but one we haven’t regretted once since making it. 2011 brought many more trips and travel than any other year before, so it is hard to look back on the year and not think about a trip of some sort, whether for pleasure or business. Being based in Buffalo, traveling has become an important part of both our business and our sanity. I thought about sitting down and writing about everything that has happened this year with me, both personally and professionally, and I realized how much that actually was. 2011 was a crazy, hectic and amazing year for us. So, I decided after thinking about all the travel I did this year, and how much of my memories of 2011 involved our trips, to actually sit down and write it all out. A little year in travel review, if you will. It actually makes my head spin that we were on the road as much as we were this past year, but it was fun to go through all the photos and relive all the amazing places we were blessed enough to visit in 2011!

    So without further ado, here it is, 2011 a year on the road – what I was doing when I wasn’t designing, printing, cooking, baking or at yoga.


    In January we took a trip down to Kentucky to celebrate our niece, Kendall’s, 6th birthday and to visit with Mark’s family. This is a trip we have taken for the past few years, a nice way to see them all without the craziness of the holidays. Plus, it has always been fun to make a special visit centered around Kendall, since we don’t get to see her as much as we’d like to.

    Kendall's 6th Birthday Kentucky - January 2011


    In February, I took a fun and relaxing trip with my Mom to Loveland, Colorado to spend time with our good friend, Jane. This is the second year in a row that I have made this trip. It is so incredibly beautiful out there. The words “breathtaking” and “refreshing”, hardly do it justice. I loved starting my year out with that trip and spending some quality time with my mom.

    Rocky Mountain National Park Colorado - February 2011
    Me and my Mom - Hiking in Rocky Mountain National Park, Colorado - February 2011

    Jane and Mom, Hiking in Rocky Mountain National Park, Colorado - February 2011


    March marked our yearly drive down to Austin for the SXSW Music Festival and Flatstock, the rock poster convention and of course lotsa BBQ eatin’ and hanging with our super good friends from all over the country! This trip is always a fun one since Mark and I get to spend so much time together on the drive and the weather in Austin is always so beautiful and needed, especially after a long winter of snow and cold temperatures in Buffalo.

    Us on the long road trip from Buffalo, NY to Austin, TX - March 2011

    Our booth at Flatstock Rock Poster Convention at SXSW Austin - March 2011


    April, just days after we closed our store to the public for good, we drove to New York City for what became the first of many trips to the city last year! We had work in the opening gallery show at Tara McPherson’s new Boutique Gallery, Cotton Candy Machine, in Brooklyn and our first meeting with our clients at the Metropolitan Museum of Art in Manhattan. This first visit of the year was also the first of many times that Mark and I took over our good friends, Mike and Karen’s, Brooklyn apartment in 2011! They have been absolutely amazing to us, allowing us to crash on their air mattress, making all of our trips out to the city, affordable (well really, making them possible at all). Besides being incredibly talented designers, they are amazing hosts and we are so thankful to have them as friends!

    Packing up the boutique - April 2011

    Lovely welcome message from Two Arms!

    Our pieces among many others at the Cotton Candy Machine Gallery Boutique, Brooklyn - April 2011

    Us on the Brooklyn Bridge - April 2011

    Crossing the Brooklyn Bridge


    Towards the middle of April we also drove to the State University of New York at Fredonia where we spoke to students there about Hero, our history, our process and everything design, illustration and printmaking related. We then continued our drive down to Pittsburgh to stay with our friend’s Allison and Craig and participate in Handmade Arcade.

    Our setup at the University of NY in Fredonia - April 2011

    Our booth at the Handmade Arcade Pittsburgh - April 2011


    In May, Mark and I took our yearly trip to South Padre Island off the coast of Texas in the Gulf of Mexico to celebrate our 4-year wedding anniversary and to just slow it all down! That is my favorite trip we take, every year! We rent a house on the beach and do nothing for a week straight. Even though Mark and I spend every single day together, this trip feels so special since our time is uninterrupted and it’s just all about us. We sit on the beach, we take naps, I drink tequila, Mark eats fried seafood – neither one of us could be any happier than when we are there (well maybe we’d be a little happier if we could take the dog with us, but that’s it).

    Us relaxing in South Padre - May 2011

    Us on the beach in South Padre - May 2011


    At the end of May we took another trip to NYC for the first job we did with the Met, a poster for an acoustic performance by Glen Hansard of the band, The Swell Season, who performed in the Temple of Dendur at the Met in conjunction with their Guitar Heroes exhibit. What an incredible and humbling experience that was, I still cannot believe that the Met is one of our clients!

    Glen Hansard sound checking in the Temple of Dendur at the Met NYC - May 2011

    Glen Hansard Live in the Temple of Dendur at the Met NYC - May 2011

    Us at Washington Square Park - May 2011


    In June, we traveled back to NYC once again, this time for the Renegade Craft Fair in Brooklyn. We love this event, it is outside in a park in the middle of Brooklyn and the patrons are some of the nicest we come across in all of our travels. We also got to ride the East River Ferry on it’s inaugural day, what beautiful views! Are you getting tired reading this? Can you believe all of this happened in just half of a year? I get tired just reading it all.

    View from the East Rive Ferry NYC - June 2011

    Our booth at the Renegade Craft Fair Brooklyn - June 2011

    View from the rooftop of the Met - June 2011


    In July, we flew to San Francisco for the Renegade Craft Fair, where we stayed with our friends Matt and Maria and we really had a great time, we even took a day off to drive up to Napa and Sonoma. After the craft fair was over in San Fran we drove down the coast on Highway 1 to make our way to Los Angeles. We spent the night at a lodge in Big Sur on our way down and that was when I really fell in love with California! We continued the drive down to Los Angeles and stayed with our good friends Pat and Summer in Long Beach and participated in the Renegade Craft Fair L.A. We of course took a day off in between it all to go to Disneyland, which was absolute magic! After spending a few days in Long Beach, we fell in love with all of it! You will probably be hearing a lot more about it as we plan a move there in 2012!!!! YES!!! I said move! OK more on that in another post when I have more to tell. After our trip out west we actually had a full 4-weeks off without any major travel, which seemed unbelievable and quite nice!

    San Francisco, California - July 2011

    Drinking wine in Sonoma, California - July 2011

    A view from Highway 1, California - July 2011

    Me in front of the elephant seals. Highway 1 Piedras Blancas Light, California - July 2011

    Us with Mickey Mouse at Disneyland California - July 2011
    But the travel must go on…in August, we went back to NYC again for another event with the Met that we were commissioned to do a poster for, this time it was St. Vincent live on the rooftop of the Met! (OK, so it actually got rained out and she played live in the Temple of Dendur, but it was amazing none the less). Another wonderful event that had the two of us pinching ourselves that we actually get to work with the Met.

    St. Vincent sound checking in the Temple of Dendur at The Met NYC - August 2011

    Us at the St. Vincent show in the Temple of Dendur at The Met - August 2011

    In September, we drove out to Chicago for the Renegade Craft Fair, where we stayed with our friends Margaux and Jason and their adorable son Desmond. We spent time with our friends, I drank too much champagne with our booth neighbors at the fair and we drove home! At the end of the month, we went back to NYC again for the Met’s Oktoberfest event at the Cloisters, that we again were commissioned to do a poster for. It was an amazing event, I just wish I could have drank the beers and eaten the pretzels, ha! I had never been to the Cloisters before, it was so beautiful out there. It is hard to believe that you are still in Manhattan with those views. If you haven’t made it to the Cloisters on one of your trips to the city, make it a point to head up there. You won’t regret it.

    Our booth at the Renegade Craft Fair Chicago, September 2011

    The Cloisters, NYC September 2011


    October seemed a bit quiet after the crazy summer we had, but we did have a short trip to Birmingham, Alabama where a client of ours is based. They flew us out to see the city, meet with investors and just take in all that Birmingham is, so that we could be inspired for the project we were working on together with them. I was pleasantly surprised at what a forward-thinking and progressive city Birmingham is. The movement and excitement there is so inspiring and refreshing. The weather was perfection, too. So that didn’t hurt.

    Birmingham, Alabama - October 2011


    November, we headed back to New York for one last very short trip. We had a gallery show of our work at Cotton Candy Machine in Brooklyn, so we made it out for the opening, has some short but quality hang time with clients and friends, we marched in a rainbow parade with other creative folk and then turned right back around and came home to attack all of the work we had to complete.

    Our work at the Cotton Candy Machine in Brooklyn, November 2011

    Me at the Rainbow Parade in NYC - November 2011


    The first weekend in December, we took a road trip to Chicago for the Renegade Craft Fair Holiday Sale, stayed with our friends Billy and Anne, and we got to spend some nice holiday time with our good friends that live there. We even took time to check out the most decorated house I have ever seen in person! For the rest of December, we busted our butts on work, shipping orders and we celebrated Christmas, enjoyed family and then took our trip to Kentucky this past weekend!

    Our booth at the Renegade Craft Fair Holiday Sale in Chicago - December 2011

    Amazing Christmas House in Chicago - December 2011


    So yeh, that is our 2011 year in travel – it actually amazes me that we accomplished all of that traveling, some pretty huge projects and so much more. I am so proud of everything that happened in 2011 and even more so, I am so incredibly inspired and excited for all that lies ahead in 2012! It proves to be another year of amazingness! I mentioned above that we plan to move out west in 2012 and that is definitely happening, we just don’t know when, yet. We have to finish up some small things on our house here and get it up on the market. When it goes, so do we! So it could be a few weeks, it could be a few months! We have no idea. The anticipation of the move and all the unknown that lies ahead has me so full of enthusiasm. My heart and mind are full with the possibilities of what will be and I am so ready for a new chapter and unkown adventures.

    I plan to do the obligatory top 10 recipes of 2011 post, I have another recipe to share from the holidays and I plan to post some cleansing new years recipes, but I really wanted to share our year of traveling with you guys. I tend to forget to make time to post about all the amazing things I get to experience in my life. I should make more time to share that with you. 2011 was the most magical and memorable year that I can remember, yet. I feel so blessed to be able to live a life full of so much happiness and positive experiences. I am also so thankful to all of you that find time in your very busy lives to read this blog, this year really made Tasty Yummies feel real to me. Looking at the amount of visits I get, reading your comments and hearing about you making my recipes, really means the world to me. I am very much looking forward to 2012 and all that it brings both in my kitchen and the rest of my life and I plan to share more of all of that on here, when I can.

    What was the most memorable part of your 2011?

    I hope you all had an incredible 2011 that you celebrated surrounded by the one(s) you love most! Here’s to an incredible, tasty and inspiring 2012 – filled with many more magical moments!

    xoxo

  6. Pumpkin Gingerbread Muffins with Dried Cranberries {Gluten-free, Vegan}

    Pumpkin Gingerbread Muffins with Dried Cranberries - Gluten-free, Vegan

    We’re leaving bright and early, hopefully before the sun rises, tomorrow morning for Kentucky to visit my husband’s family. We’re gonna celebrate Christmas a little late, ring in the new year and enjoy the last of the holidays. It’s about 8 or 9 hours to drive there, possibly longer with having the pooch with us, but it’s not too bad. I usually try to pack some healthy snacks and foods both for the drive and for when we get there.

    So, this morning I baked a small pie pumpkin to purée to make these muffins, I toasted the seeds with a super spicy pepper blend and I also made dark chocolate bark with dried bing cherries, pistachios and grey sea salt (recipe soon).

    I had to change my pumpkin muffin recipe a bit as I was nearly out of almond flour, so I turned to Gluten Free Goddess‘s pumpkin muffin for some changes and additions to my original recipe. I used the last of some coconut milk I had and since I wanted to skip the regular sugar, I decided use coconut sugar and some blackstrap molasses. The minute I smelled the molasses with the spices it gave me the idea to add additional flavors to create a “gingerbread” type muffin.

    The gingerbread flavors went so well with the pumpkin and these turned out great, they are so moist and tender. These will be great for the drive and wonderful for breakfasts when we get there. Since hubby likes to cram in as much Southern junk and comfort food as he can while we’re down there, I’m usually on my own for food. I’m ok with it, I even encourage it, since he’s such a trooper all the time here at home and he usually only gets this food once a year. But, this does mean I am on my own while we are down there. I usually pack snacks and food to cook for myself while everyone else is having fried chicken and pizza from their favorite local joint.

    I am making my tortilla soup for everyone on New Years night, and I’m super excited for them to try it for the first time.

    What do you have planned for New Year’s Eve?

    I hope everyone has a peaceful, safe and blessed New Years celebration, surrounded by loved ones. I am so excited for all the lies ahead in 2012. It promises to be a year full of wonderful adventures, big changes and so much more. We are planning a big move and we already have some super amazing projects lined up. I am so full of anticipation for the journey ahead. I am not sure I have ever looked forward to a new year, as much as this upcoming one.

    [print_this]Pumpkin Gingerbread Muffins with Dried Cranberries – Gluten-free, Vegan
    Adapted from my own pumpkin muffin recipe and Gluten-free Goddess’ recipe

    1 cup sorghum flour
    3/4 cup almond flour
    1/3 cup organic coconut flour
    1/2 cup tapioca starch
    1 1/2 teaspoons baking powder
    1 teaspoon baking soda
    1/2 teaspoon sea salt
    1/2 teaspoon xanthan gum
    1 teaspoon ground cinnamon
    1 teaspoon ground ginger
    1/2 teaspoon nutmeg
    1/4 teaspoon ground cloves
    1/4 cup blackstrap molasses
    3/4 cup coconut sugar
    1 1/3 cups fresh pumpkin puree (canned organic puree would also work)
    1/4 cup light olive oil
    2 large pasture-raised eggs, beaten (or 1 tablespoon Ener-G Egg Replacer whisked with 1/4 cup warm water)
    1 teaspoon vanilla extract
    1/3 cup coconut milk (or almond milk)
    1/2 cup dried cranberries (you could also add raisins, dried cherries, nuts or chocolate chips here, instead or in addition to)

    Preheat oven to 375º F. Line a standard muffin tin with paper liners.

    In a large mixing bowl whisk together all of the dry ingredients (up to and including the cloves). In a medium mixing bowl, whisk together the wet ingredients (up to and including the milk). Add the wet ingredients to the dry and mix very well by hand or with a stand mixer or hand mixer to incorporate the ingredients. The batter should be very smooth and not clumpy. Fold the cranberries into the batter by hand.

    Divide the batter evenly among the muffin cups. Bake in the center of the preheated oven for 20 to 25 minutes until golden and firm to the touch. A wooden pick inserted into the center should emerge clean.

    Cool the muffin pan on a wire rack for five minutes. Gently pop the muffins out to continue cooling on the rack (don’t cool them longer than 5 minutes in the hot pan- they’ll definitely get soggy). Enjoy a muffin after they have cooled 10 minutes.

    Freeze any leftover muffins in tightly sealed freezer bags and pop one out for a quick and easy breakfast.[/print_this]

  7. Double Fudge Candy Cane Cupcakes – Gluten-free, Dairy-free

    Double Chocolate Chip Candy Cane Cupcakes - Gluten-free and Dairy-Free

    I know Christmas has come and gone now, but I still wanted to share these delicious cupcakes with you. I made these for Christmas Eve dinner and they were a huge hit, my 2-year old niece took one bite of the one I was about to eat and ran off with it before I even took a bite! They are super fluffy and moist with a perfect balance of chocolate gooey-ness inside and a bright peppermint burst from the peppermint extract inside and the candy cane bits on top. I told you I have been on a chocolate peppermint kick! I adapted Elana’s Almond Fudge Cupcake recipe from her cupcake cookbook, substituting peppermint extract for the almond extract. I really wanted a strong peppermint flavor so I kept it at the 1 tablespoon, but I actually think it could use a bit less (use your judgement). I cannot get over how incredible and simple Elana’s cupcake recipes are, in terms of flours and starches, these delicious treats only had almond flour and coconut flour, that’s it – no gums, no starches, no oil or butter, it is so simple. I, once again, also used Elana’s vegan chocolate frosting recipe from her cookbook, because I absolutely love how simple it is to make and I almost always have everything on hand to just whip it up quickly. If you are gluten-free and you don’t own Elana’s Gluten-free Cupcakes cookbook, you need to get it ASAP!

    I want to note that I have almost completely stopped baking with agave nectar since I learned a few months ago that even though it is an unrefined vegan sugar-alternative, naturally coming from a cactus plant and having a low-glycemic index, it has been discovered it is very high in fructose and it’s affects on the body are very similar to that of high-fructose corn syrup. Yes it is true that sugar is sugar no matter what the source and I know everyone has their own opinions on all sugars and sugar alternatives and it is also true that no sugar is truly good for you, per se. I just personally try to limit my sugar intake (no matter what the source) and be smart when I do use sugar and sugar alternatives, choosing things that I know work for me, like dates or bananas to sweeten things like smoothies, cookies and muffins, naturally whenever possible or choosing coconut sugar, honey or maple syrup when those won’t work in baking, etc. There are times when a recipe is best made with sugar and I will obviously go that route and in this particular recipe since I was adapting a recipe from Elana’s Pantry, who uses agave nectar quite often, I decided rather than experimenting, to just keep the recipe as is in that way and use the remaining agave I had in the pantry from before. I figured it was best to keep the recipe with it’s original ratios, to avoid a Christmas eve cupcake failure. Leanne from Healthful Pursuit has a wonderful video here about healthy alternative sweeteners.

    The holiday celebrations continue for us until New Years Day, so I hope to be making other goodies in the next few days. We have dinner with the family tonight, a big Greek feast with souvlaki and avgolemono soup, I am not doing any of the cooking or baking for tonight, but we are heading down to Kentucky later this week to visit with Mark’s family and celebrate Christmas and New Years there, so I plan to make some healthy treats for us all to munch on then.

    I hope everyone had a wonderful Christmas Day, hanukkah or whatever you celebrate! Did you make any special treats for the holidays? Are your holiday celebrations continuing this entire week, like ours?


    Double Chocolate Chip Candy Cane Cupcakes - Gluten-free and Dairy-Free

    [print_this]Double Fudge Candy Cane Cupcakes – Gluten-free, Dairy-free
    makes 12 cupcakes
    Adapted from Elana Amsterdam’s Almond Fudge Cupcake recipe from “Gluten-Free Cupcakes – 50 Irresistible Recipes Made with Almond and Coconut Flour”

    1 cup blanched almond flour
    2 tablespoons coconut flour
    2 tablespoons unsweetened cocoa powder
    1/4 teaspoon sea salt
    1 teaspoon baking soda
    4 large farm-fresh brown eggs
    1/2 cup honey (maple syrup or agave nectar
    1 tablespoon peppermint extract (use less here if you want the peppermint flavor to be subtle)
    1/2 cup dairy-free mini dark chocolate chips (73% cacao)
    1/4 cup crushed candy canes (corn syrup free, if you can find them)

    Preheat the oven to 350ºF. Line 12 muffin cups with paper liners.

    In a large bowl, combine the almond flour, coconut flour, cocoa powder, salt and baking soda. Set aside.

    In a medium bowl, whisk together the eggs, agave nectar, and peppermint extract. Blend the wet ingredients into the almond flour mixture with a handheld mixer until thoroughly combined, then stir in the mini chocolate chops.

    Scoop 1/4 cup of the batter into each prepared muffin cup.

    Bake for 20 to 25 minutes, until a toothpick inserted into the center a cupcake comes out with just a few moist crumbs on it. Let the cupcakes cook in the pan for 1 hour, then frost (see below recipe), sprinkle with candy cane bits and serve.

    Chocolate Frosting

    6 ounces dark chocolate chips (73% cacao) (about 1 heaping cup)
    1/2 cup Spectrum all-vegetable shortening (I use Spectrum sustainable organic palm oil shortening)
    1/4 cup raw honey (maple syrup or agave nectar)
    1 tablespoon vanilla extract
    2 tablespoon water
    Pinch of sea salt

    Heat the chocolate in a medium saucepan over a very low heat, melt until it is smooth. (You can also melt them in the microwave in a medium glass microwave-safe bowl). Allow the pan or bowl to rest on the counter for 5 to 10 minutes to cool the chocolate to room temperature.

    With a handheld mixer, blend in the shortening, then blend in the agave nectar, vanilla extract, water and salt until smooth. Place the saucepan in the refrigerator for 3 to 8 minutes, until the frosting is spreadable.

    If the frosting gets too stiff to work with, reheat the pan very briefly over a low heat and stir until it is softened. If the frosting is too runny, place it back in the refrigerator until it firms up.

    Use the frosting immediately or store in a glass Mason jar in the refrigerator for up to 3 days.

    [/print_this]
  8. Double Chocolate Peppermint Cookies – Gluten-free and Dairy-free

    Double Chocolate Peppermint Cookies - Gluten-free and Dairy-free

    You didn’t actually think I could make it through the holidays without making some kind of regular ‘ol Christmas cookies, did you? I have been loving playing around with some non-traditional healthier recipes, but last night my hubby was begging and pleading for a classic Christmas cookie while we were watching Love Actually. So, I decided to see what I could come up with on a whim. I of course had to make them gluten-free so I could enjoy them and I also wanted to make them dairy free. I have been loving the combination of chocolate and mint lately, it is such a classic holiday flavor combination, and I have been planning to make some cupcakes with that flavor combo,  (I still hope to) but I decided to go that route with these cookies, too.

    The original recipe that I used as a reference for ratios, called for 2 sticks of butter and 2 cups of sugar. That just seemed so excessive to me and I also really wanted to use coconut oil instead of the butter, so I made some changes, put it all together and crossed my fingers. I think if I wasn’t already taking a gamble with the recipe, I would have also tried to make them egg free, but I didn’t want to rock the boat. These cookies turned out so amazing, they have a little crisp to the outside and were perfectly gooey and chocolatey on the inside, just how I like my cookies. I love the peppermint flavor in these so much, I actually debated adding some crushed candy canes to the cookies too, for some pop of holiday color, but I decided against it, I didn’t want these to be “too much”. I wanted them to be subtly sweet and understated but still festive.

    What kinds of Holiday cookies have you made this season?

    If I don’t get back on here before the holidays, I want to wish you all a very Merry Christmas, Happy Hanukkah or whatever holiday you celebrate. I hope you enjoy this magical time – surrounded by family and friends and of course, lots of tasty and healthy foods! Lots of love!! xoxoxo

    Double Chocolate Peppermint Cookies - Gluten-free and Dairy-free


    [print_this]Double Chocolate Peppermint Cookies – Gluten-free and Dairy-free

    makes about 2 dozen cookies

    adapted from this recipe

    320 grams (about 2 1/2 cups) of your favorite Gluten-free All Purpose Flour Blend (gum-free) – I made Shauna’s gluten-free AP flour mix a while back for pie, and I had some leftover so I used that
    1 teaspoon fine sea salt
    1 teaspoon baking soda
    2 teaspoons baking powder
    1/2 cup organic extra virgin coconut oil, solidified not liquid
    1 cup (about 225 grams) organic raw sugar
    2 large farm fresh brown eggs, beaten (you can try Ener-G Egg Replacer here to make this vegan, just make sure your chocolate chips are also dairy free)
    2 teaspoons vanilla extract
    2 teaspoons peppermint extract
    1/2 cup unsweetened organic cocoa
    1 cup mini dairy-free chocolate chips

    Preheat oven to 375º F. In a large mixing bowl mix together gluten-free flour, salt, baking soda and baking powder, set aside. In the bowl of your standing mixer or large bowl with hand mixer, mix together coconut oil, raw sugar, eggs (or egg replacer), vanilla, peppermint extract and cocoa at a low speed, until well blended. Gradually stir flour mixture into butter mixture and mix on low speed until combined. Fold in chocolate chips with a spatula.

    Drop dough (tablespoon-sized) onto parchment paper lined or non-stick baking sheets and bake about 15 minutes. Cool on a wire baking rack. [/print_this]

  9. Chocolate Cherry Fudge Bites – Vegan, Gluten-free, Sugar Free, Corn Free

    Chocolate Cherry Fudge Bites - Vegan, Gluten-free, Raw and Sugar Free

    Chocolate Cherry Fudge Bites - Vegan, Gluten-free, Raw and Sugar Free

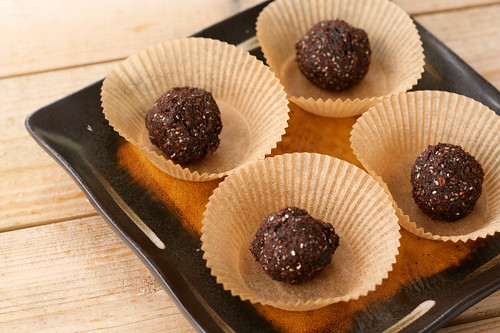
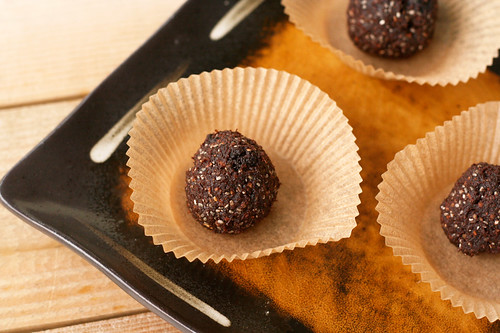
    I don’t usually put all those health terms in a recipe title, since I fear that it may scare some people off. Although on the other hand, I worry that if I skip out on adding them, sometimes people looking for healthy recipes, may just pass over something called “Chocolate Cherry Fudge Bites”, assuming that it is loaded with fats and sugars. These little fudge balls are super simple to make and they are so tasty. It is hard to believe there is no sugar in these. They have such an amazing chocolatey fudge flavor with a little bit a chewy tartness from the bing cherries and a little crispy crunch from the chia seeds.

    You could use this same recipe and instead of the dried bing cherries add in peanut butter and/or chocolate chips for a peanut butter fudge bite. You could add in candy cane pieces and peppermint extract. You could also leave out the cocoa use oats instead of the nuts and add in raisins for little oatmeal raisin cookie bites (which I have made before and I love). The possibilities are endless. Once you make these once you will know what the consistency of the dough needs to be for the next time you are experimenting. I love having these on hand to satisfy my sweet craving without the guilt. Not only do you not have to feel guilty about eating these, you can feel like you are doing yourself a favor – we all know the many benefits of chocolate, more specifically cocoa in it raw state, such as decreased blood pressure, improvement in blood vessel health and cholesterol levels, plus it is believed that the phenylethylamine in cocoa has mood boosting effects. The dates used to sweeten these fudge bites are a great source of dietary fiber and they are an energy powerhouse. Dates are low in calories and they are fat and cholesterol free, they are a great source of B-complex vitamins and they are one of the best natural sources of potassium.

    So come on, don’t you just wanna reach for dessert when you hear all of that? Trust me, make these and you will always want to have them on hand to satisfy your sweets cravings. They do the job and then some.

    Are you getting ready for the holiday? What do you have to make this week still? In addition to working all week, I am hoping to have time to finish up all of my craft projects that I took on for gifts, plus finish all of my shopping and then I have to get started on my wrapping – one of my favorite parts. I am hoping that I can squeeze a little cooking and baking in there too, somewhere.

    Chocolate Cherry Fudge Bites - Vegan, Gluten-free, Raw and Sugar Free

    [print_this]Chocolate Cherry Fudge Bites
    Makes approximately 16 balls

    3/4 cup medjool dates, pitted
    4-5 tablespoons water
    2 teaspoons vanilla extract
    4 Tablespoons unsweetened cocoa powder
    1/2 cup raw organic almonds
    1 1/2 tablespoons chia seeds
    1/4 tsp sea salt
    1/2 cup dried organic bing cherries (other dried cherries will also work here)

    In food processor puree the dates, water and vanilla until a sticky paste/ball forms. Pulse in cocoa powder, almonds, chia seeds and salt until solid dough forms. Stir in the dried cherries. With small scoop, form mixture into 16 tablespoon-sized balls.
    Refrigerate for 30-60 minutes to set.

    You can dip the balls in melted chocolate, roll them in seeds, nuts, coconut or cocoa, etc. – if you wish. See above for other fudge and cookie bite ideas. Have fun.


    [/print_this]
  10. Rice-Pudding Balls

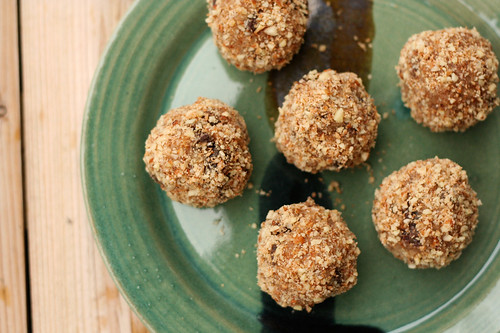
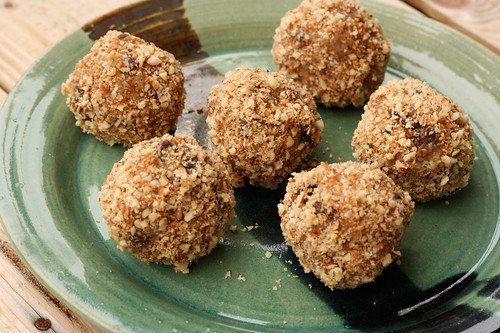
    Rice-Pudding Balls

    Well now that I got my blog all snug and nestled in on it’s own little server, it’s back to making the yummies! I am still on a kick of making different alternative Christmas sweets, so here is another one for the list. I have so many different recipe ideas in my head right now, I just need the time to make them all. I also am going to need to start sharing these sweets, so I don’t eat them all up myself.

    I came across this recipe a while back and I couldn’t wait to try out a version of it with coconut milk instead of regular milk and coconut sugar instead of brown sugar. I am sure the recipe would be great with both of these, but I wanted to make it my way. I am sure this would be great with almond milk, too. If you are vegan, you can try making it using maple syrup or brown rice syrup instead of the honey.

    My dad makes the BEST classic Greek-style rice-pudding (Rizogalo) that you will ever eat. I haven’t had it in a while and I have been craving it, so when I saw this recipe, I knew I could make some updated to the spices and flavors and make it very similar to my dad’s classic pudding. Since my dad’s original rice pudding isn’t the healthiest dessert in the world with milk, egg yolks and sugar in it, I figured these could possibly come a close second and would definitely do the trick of satisfying my craving. They definitely did just that, they are creamy little bites with so much flavor. I love a lot of cinnamon in my rice pudding, so I went with a full teaspoon, you can go with less if you wish, along with a small pinch of nutmeg. The crunchy almond and coconut “crust” is a super nice touch that I feel like should be on top of every serving of rice pudding from now on.

    Look for recipes for cherry chocolate fudge balls later this week as well as some salty pistachio dark chocolate bark! I have also been dreaming of mint chocolate brownies. What is it about this time of year? I just want anything and everything sweet!

    What sweets are you making this holiday season?  

    Rice Pudding Balls

    [print_this]

    Rice-Pudding Balls
    Adapted from Body and Soul Magazine, 2008
    makes anywhere from 12-24 balls, depending on the size you make them

    2 cups unsweetened coconut milk (I used So Delicious Unsweetened Coconut Milk Beverage)
    1/4 cup coconut sugar (or brown sugar)
    2 tablespoons honey (if vegan, try maple syrup or brown rice syrup here)
    1/4 teaspoon ground cardamom
    1 teaspoon ground cinnamon
    a pinch of nutmeg
    Salt
    1/2 cup arborio rice
    1/2 teaspoon vanilla
    1/2 cup raisins
    1/2 cup unsweetened flaked coconut
    1/2 cup raw whole almonds

    Preheat oven to 375 degrees. In a large saucepan, combine coconut milk, coconut sugar, honey, cardamom, cinnamon and nutmeg with a pinch of salt; bring to a boil over medium-high heat. Add in the rice and stir. Partially cover, reduce heat to low, and simmer, stirring occasionally, until rice is tender, 30 to 35 minutes.

    Transfer rice to a bowl and stir in vanilla and raisins. Cover with plastic, and refrigerate until cold, at least 2 hours.

    Spread coconut and almonds on a rimmed baking sheet and bake, tossing occasionally, until the coconut is golden brown, 4 to 6 minutes; set aside to cool. Grind nuts and coconut in a food processor until very finely ground; set aside.

    Using level tablespoons, form rice mixture into balls (you should get about 24) and roll in the almond/coconut mixture. Place on a rimmed baking sheet or a couple of plates and refrigerate until firm, at least 1 hour or covered, up to 2 days.[/print_this]

  11. The New Tasty Yummies!

    So – I successfully made the switch from a WordPress hosted blog to my blog being self hosted! Yay – for Tasty Yummies growing up! You are now looking at the newly updated and in progress Tasty Yummies! Everything is the same as always, many of you won’t experience any changes, except the newer look – but if you happen to have the old WordPress specific link (which rarely was used, as I had the Tasty-Yummies.com address over-ridding it) – it will no longer be updated. Please make sure that if for some reason you had the WordPress link (tastyyummies.wordpress.com) stored as your bookmark, that you change it to www.tasty-yummies.com. Most of you should already have that as your bookmark, as that was the main URL of the site all along.

    Additionally, if you previously signed up to receive emails on the homepage of Tasty Yummies or to follow the blog through your WordPress dashboard – you will have to resign up to receive emails over here to the right >>>>>, you can also grab the RSS feed from there as well.

    There will likely be some bugs as I get everything figured out, so please be patient with me and please check back often for new features and other goodies. I plan to make it easier to search the recipe archives, print recipes from within the posts, and more.

    If you are having any problems or issues with the new site, please let me know. I hope to be updating and changing more and more things as the weeks go on, so look for the site to be a bit more user-friendly, easier to search, better organized, etc. Thanks so much for taking the time to read Tasty Yummies, it truly means the world to me to know that people are not only reading this blog, cooking from it and even coming back for more! It puts a smile on many face daily! Thank you!

  12. Maybe Some Down Time… *UPDATE*

    Just wanted to let you know there may be a bit of an interruption on my blog as I am attempting to migrate to my own server finally. It is proving to be a bit more difficult than I had expected, so in the mean time just use this link directly http://tastyyummies.wordpress.com instead of www.tasty-yummies.com. Hopefully very soon tasty-yummies.com will be on it’s own server and prettier than ever and easier to navigate and all that good stuff.

    So just bear with me in the meantime, in case the site goes down. Thanks.


    *UPDATE*

    Moving to my own server was successful!! YAY! (it just took me the better part of an entire afternoon to get it all figured out, but I did it!) Now you just need to bear with me as I make Tasty-Yummies.com pretty again and make it as functional as possible. If you have any suggestions, thoughts or feedback – I welcome it with open arms. I am super excited to make this site as functional as possible! Thanks for your patience in this transition. xo – Beth

  13. No Bake Pecan Pie Bars – Gluten-free, Raw and Vegan

    No Bake Pecan Pie Bars - Gluten-free, Raw and Vegan

    I have become obsessed with Medjool dates and I am still just as amazed now as I was the first time I baked with them. It is incredible how sweet they are. I have made quite a few simple raw “cookie” balls in the processor with just oats and/or nuts, some dates and other goodies like chocolate chips or peanut butter. They are so simple and a totally healthy way to get your sweets-fix. I need to start taking photos of those and sharing them with you. You will love them.

    A few months back while shopping at the Lexington CoOp here in Buffalo, I ran across something called a “Raw Pecan Pie Bar” (I forget the name of the company that made it) – it was raw and sweetened only with dates and also had sprouted pecans and sprouted something else (can’t remember, again). It immediately peaked my interest, so I picked one up. It was quite tasty, but I couldn’t help but think I could make it even better. Plus, at $3.50 for a single small bar, I knew I could make it cheaper.

    I had been looking at different recipes online for date bars as a base for my recipe and ultimately settled on Oh She Glow’s blog, once again. I liked how simple her recipe was and that it included everything that I love! I made a few additions and changed it up a bit to make it similar to a pecan pie. I am so excited about how these turned out. Oh and one quick thing to mention about these bars, because they aren’t loaded with sugar, you could even have this as a breakfast bar. I cannot believe it is sugar-free, egg-free, dairy-free, gluten-free and it’s even raw! If someone rattled off all of those things to me, with the words “pecan pie” – I would likely laugh in their face. You have to trust me though, these are so amazing. Even my southern-boy pecan pie loving hubby liked him, though he took one bite and said “man, these are good, a big ‘ol scoop of vanilla ice cream over top would really make this.” haha some things will never ever change.

    I tend to actually have cravings for sweets around this time of year, which is crazy since I really don’t crave sweets that often. I think it could be the fact that everywhere you look there are holiday cookies and sweets just laying out, begging to be eaten. I am trying really hard to stick with my usual way of eating through the holidays this year, so I don’t step on the scale after the holidays to find I put on 5-lbs. I am planning to make a handful of alternative holiday sweets over the next couple of weeks, so I can still partake in the festive eating, but in a healthy way. I am also making sure when and if I do partake in some not-so healthy holiday eating – that I remember that everything in moderation is OK, a taste here won’t kill me and I would much rather have a little and know when to stop then to feel like I am missing out on something I really want.

    Do you try to eat healthy during the holidays or do you just forego all healthy eating rules during the holidays?

    No Bake Pecan Pie Bars - Gluten-free, Raw and Vegan

    No Bake Pecan Pie Bars – Gluten-free, Raw and Vegan

    Adapted from Oh She Glows
    Makes 9 large squares or more if cut smaller

    Crust:

    1 1/2 cups whole raw almonds (you could also do 3/4 cup almonds and 3/4 cup shredded unsweetened coconut)
    1 1/2 cups gluten-free rolled oats (if you aren’t gluten-free just use regular rolled oats)
    1/2 tsp kosher salt
    10 Medjool dates, pitted and roughly chopped (about 1 cup)
    1/4 cup coconut oil
    1/4 teaspoon vanilla extract

    Date and Pecan Topping:

    25 Medjool dates, pitted and roughly chopped (about 2 1/2 cups)
    1/4 – 1/2 cup water
    1 teaspoon vanilla
    1 cup roughly chopped raw pecans

    Line an 8″ x 8″ pan with two pieces of parchment paper going opposite ways. In a food processor, process the almonds, salt, and oats until a fine crumble forms. Add in the chopped dates and process until crumbly again. It your coconut oil is solid, melt it quick and add to the mixture with vanilla and process until sticky and a bit doughy. If your dough seems a bit dry, you can add a bit more oil, mind was fine as is. Remove from processor and press the dough very firmly and evenly into the pan to form your crust.

    Clean the food processor real quick and process the dates with water (adding a little at a time so it doesn’t get too runny) and vanilla until a thick paste forms, it should be mostly smooth and creamy. You may need more or less water, depending on how soft your dates are. You will have to stop and scrape down the sides of the bowl often. You can add a tiny bit more water if needed, but you want the paste quite thick. Scoop out the date mixture onto the crust and gently spread with the back of a wet spatula until even.

    Sprinkle the chopped pecans evenly across of it and gently press down with fingers. Refrigerate in the fridge until firm for at least 1 hour, preferably overnight. Cut into squares and serve. Store in the fridge or freezer.

  14. Gluten-free Gingerbread Granola {Vegan}

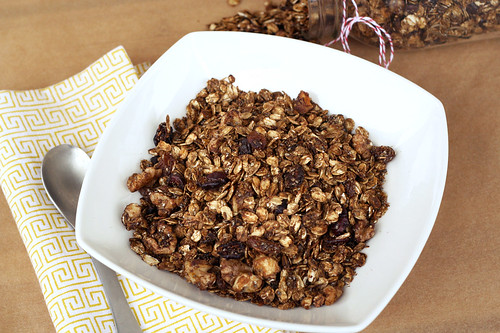
    Gingerbread Granola

    Gingerbread Granola

    We are back from our very short trip to Chicago, we got back late Monday night. It was a whirlwind of a trip, but it was super fun and totally successful on the business front. The holiday market was jammed packed with people and everyone was in such a festive holiday mood. I love that about this time of year.

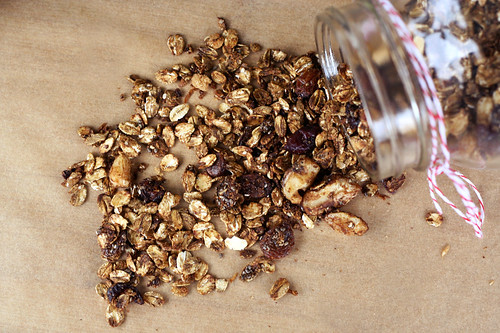
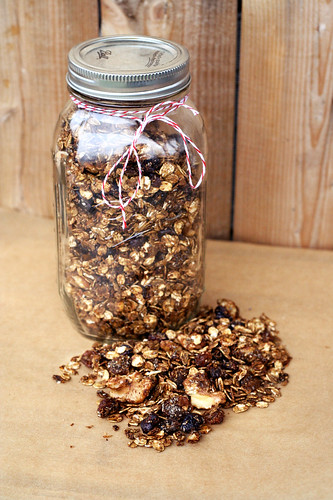
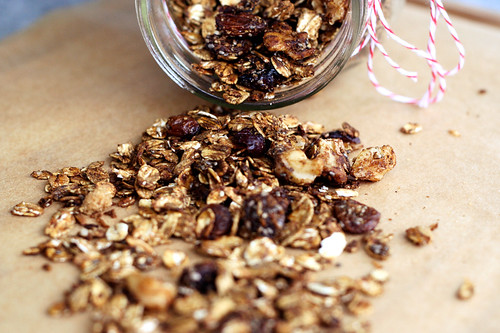
    When we are in Chicago we stay with good friends and it is so enjoyable and relaxing. We are so lucky to have so many amazing friends across the country that open their homes to us. It makes it feel like we took a trip to see and stay with family instead of the alternative of it feeling like the (somewhat) stressful work filled trip that it actually is. I really wish I had more time before we left for this trip to make cute little homemade gifts like this granola for our friends that we stayed with as a “thank you”. This granola would make a wonderful holiday gift for the cereal lover on your list and it would also be the perfect gift for the host or hostess that invites you by for a holiday party. This granola in a simple canning jar wrapped up with some sweet ribbon or twine with a little tag, it really doesn’t get any better. I wish I could also capture and bottle up the smell in the house after baking this and wrap that in a bow and give it to everyone I know. It was that good.

    The only bad thing about coming home after traveling, is that the fridge is usually so empty when we return. I try to be smart and plan ahead so we don’t leave town with a ton of fresh produce or leftovers in the fridge, etc. But that also means that when we come home there is very little fresh food to eat and I need to find the time to get to the market. We are pretty busy with work right now, so I haven’t had the extra time to get groceries just yet, so we have been just making do with what we have on hand right now. I have been craving some holiday-inspired goodies, like crazy, so, I decided a fun and healthy way to get some holiday flavor in my life, is to make this gingerbread granola. It made the house smell amazing and it is a great breakfast and snack option. It would also be good sprinkled on top of greek yogurt or ice cream. I’ve been enjoying this granola for breakfast with a few glugs of almond milk or coconut milk (not the canned kind, the beverage kind from So Delicious).

    I had blackstrap molasses on hand, so I used that, but feel free to use regular light or dark molasses if that is what you have. Since blackstrap molasses can have a bit of a bittersweet taste, I also added an additional 1/4 cup of coconut sugar. You could leave this off or substitute brown sugar or honey here if you are looking for a bit more sweetness, like I was. Blackstrap molasses is not only a healthier choice for a sweetener, it actually has some health benefits, which is a lot more than more sweeteners can say for themselves. Blackstrap molasses is high in iron and a variety of other minerals.

    Is it bad that I want to wrap this granola up and give it to everyone on my list? It’s that good.

    Do you plan to make homemade gifts food or otherwise for anyone on your list?

    Gingerbread Granola


    Gingerbread Granola

    Gingerbread Granola

    This made enough to fill two 1-quart canning jars

    4 cups old-fashioned rolled oats (if you are gluten intolerant, be sure these are certified gluten-free oats. I use Bob’s Red Mill)
    1 teaspoon cinnamon
    1 teaspoon of ground ginger
    1/4 teaspoon ground nutmeg
    1/4 teaspoon ground cloves
    1/2 cup chia seeds (flax seeds would also be nice)
    1/2 cup unsweetened shredded coconut
    3/4 cup walnuts, roughly chopped (or pecans, almonds, etc)
    1/2 cup golden raisins
    1/2 cup dried cranberries
    1 teaspoon kosher salt
    1/3 cup blackstrap molasses (light or dark molasses will also work)
    1/4 cup coconut sugar (optional, you can also use brown sugar)
    2 teaspoons vanilla

    Preheat oven to 325ºF.
 Line large baking sheet with parchment paper. You can also use a roasting pan, which is nice since you can just mix all of the ingredients right in it, without losing things over the edge.
    Combine all of your dry ingredients, oats, seeds, nuts, dried fruit etc., in a large bowl (or in your roasting pan). Add in your spices and salt. Mix well.
    Pour the molasses and vanilla over the dry ingredients and stir until well coated. Let sit 5 to 10 minutes. Give the mixture a little taste and add the coconut sugar (or brown sugar) if it’s too bitter for you.

    If you aren’t using a roasting pan, spread the granola on the baking sheet and bake for 30-40 minutes. Toss every 10 minutes or so to provide even toasting.

    Let cool completely – it will get crispier as it cools. Keep in airtight container.

  15. It’s The Most Wonderful Time…

    It's The Most Wonderful Time...

    It's The Most Wonderful Time...


    Happy December everyone! I guess that title should really say – “It’s The Most Busy Time….”

    Well as you may have guessed, the shortage of posts on here this week is due to the craziness of my life right now, once again. We are getting all geared up for the holidays both at home and with the business. I am a total holiday junkie, I love it all! I get insanely excited about the music and listen to it as much as possible, I wake up to it, I drive to and from yoga with it on the radio and I listen to it sporadically throughout my work day, at my desk! I cannot wait to really get into the thick of my gift shopping and we got the tree up this past Saturday after driving out to the country to cut it down. Last night I even took a break from all the work and I sewed some colorful felt bunting for our tree.

    Honestly, if I had my choice, I would take the entire month of December off, not because I don’t enjoy my work, but more so I can just take it all in and savor every moment of the holiday magic. If I could, I would just go to yoga every morning and make Christmas gifts for everyone all afternoon listening to music and watching old Christmas movies and in the evening I would sit around in the dark with just the lights from the tree sparkling, drinking some delicious nog probably with a little rum in it, if I am being honest!
    It's The Most Wonderful Time...
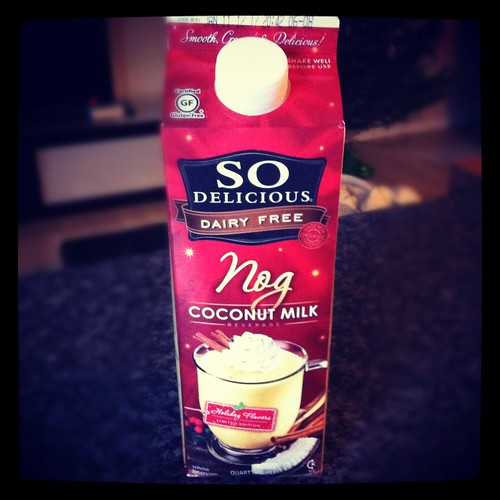
    Speaking of nog, is anyone else as obsessed with So Delicious’ Coconut Milk Nog as I am? I cannot get over how amazing it is and I rarely get excited about things like this. Seriously, if you can find it, buy it and try it. It is only 90 calories per 1/2 cup and it is just as thick and delicious as the dairy version. I swear no one paid me to say this, I am just honestly obsessed with it. I wonder if I can make my own?

    It's The Most Wonderful Time...

    Anyhow, unfortunately for me, the month of December cannot all be Christmas songs, nog and crafting – our month is full of events, travel, lots of end of the year client work and tons and tons of shipping. SHIPPING!!! We just shipped off a huge order of our posters that we had with Urban Outfitters that was taking up every inch of our lives (yay – those will be in stores soon), plus 100 posters to Andrew Bird for his show in Minneapolis and we are shipping web orders from our site and etsy daily! I am certainly not complaining, I love it all and I am insanely grateful, but I am having to stay up late each night just so I can take in as much of the holiday spirit as I can, before it’s gone.
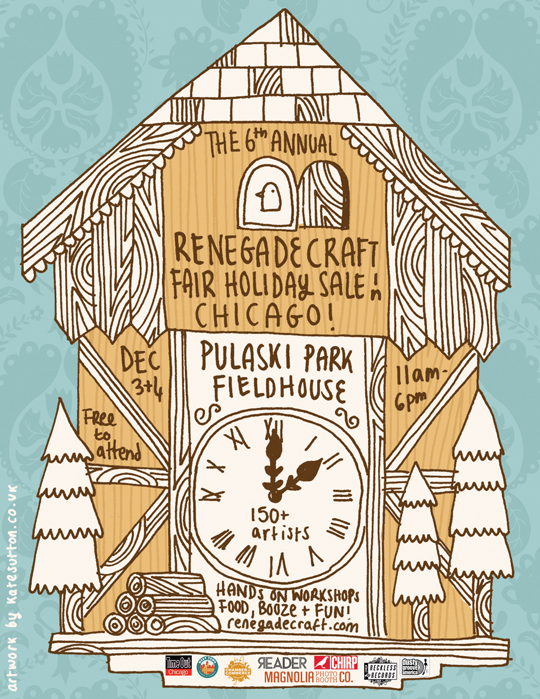
    We are leaving bright and early tomorrow morning for Chicago for the Renegade Craft Holiday Sale, it runs Saturday and Sunday from 11am – 6pm. If you are in the Chicago area, you should come check it out, it’s an amazing event filled with hundred of vendors, all selling their handmade goods. It’s a wonderful way to support small independent businesses while buying unique holiday gifts. I get a ton of my own Christmas shopping done there with the other vendors, there is so much amazing stuff. The Hero booth is #65 on the first floor in gym #2. We will have a ton of posters and prints, greeting cards, pillows and more. Come see us!

    Hopefully after we get home on Monday from Chicago, I will have a bit more time for cooking and baking. This week we were living off of our Thanksgiving turkey, I made an incredible gluten-free turkey pot pie and a creamy turkey, brown rice and sage soup. Sadly I will not be posting about either of these, as I did very little measuring so I have no clue how I would even write up the recipe and I made no time for photos. I guess I will just have to make them both again so I can share with you. Honestly though, the pot pie was so amazing I am definitely going to be making a vegetarian version with lots of yummy vegetables very soon, so keep an eye out for that. And also be on the lookout for some holiday cookie recipes when I get home and hopefully some other stuff, too. Hope everyone is enjoying the start of the holiday season and happy December to you all! See ya next week 🙂
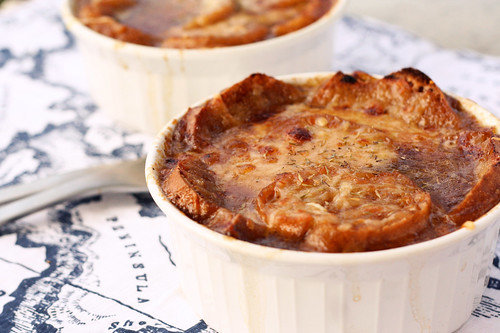
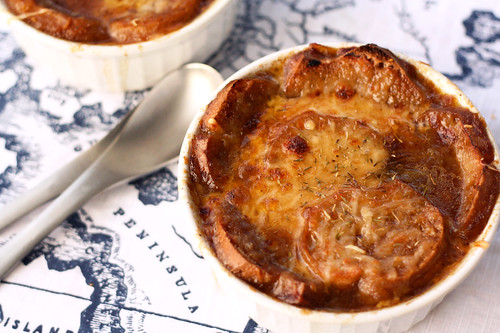
  16. Smashed Potato Puffs

    IMG_7267

    I didn’t get a chance to get on here Thanksgiving Day to wish you all a Happy Day, like I had planned but I was cooking away in the kitchen and watching the parade, the dog show and football! I hope all of my American readers had an incredible day surrounded by people they love most and filled with delicious and tasty fresh foods made with so much love and care. If you aren’t in the US – I hope you have a beautiful Thursday, still!

    Our day was perfect, I spent the day cooking in my kitchen and relaxing with hubby, we really needed a day like that, then we headed to my parents to see a ton of family for dessert. It is going to be an insane few weeks coming up so I was very happy to have the perfect balance of a quiet and calm day, with a bit of the usual holiday fare with the extended family.

    Of course the best part of making a big feast for 2, is that we have a ton of leftovers. This is so perfect since we are leaving on Friday of this coming week to head to Chicago – so finding time to cook is probably going to be tough. Besides just reheating things, I plan to come up with all kinds of fun and creative ways to eat up the leftovers. This morning I saw a post on the Kitchn with this very topic – lots of great and delicious ways to eat up those leftovers! One of the hardest things to just simply reheat are the mashed potatoes, they are never as creamy and delicious as they are that night! You could certainly make a shepherd’s pie with them or potato pancakes of some sort, which I had planned on doing until I saw this post. The Kitchn had this delicious recipe for Mashed Potato Puffs that caught my eye instantly. Their puffs included ham and cheese, though this was a bit too rich for me after the two days of eating that I just had, so I skipped the cheese and ham and just added a small amount of turkey and some fresh chives from my garden. If you had a vegetarian Thanksgiving, these would still be equally as delicious without any meat at all. These adorable little puffs were super simple to put together and ready in 20 minutes. We had ours for breakfast and we put the leftovers in the fridge for either a side dish or another breakfast. They were puffy, had a slight crisp on the outside and were perfectly soft and creamy inside. I almost always make my mashed potatoes as garlic smashed potatoes, which I add a smidge of Nancy’s Organic Cultured Cream Cheese to for a little bit of creamy and tart flavor. I make my smashed potatoes with red potatoes, leaving the skins on – so my puffs were a bit more rustic and chunky than the original recipe, which I really liked. They can stick a bit when coming out of the muffin tin, at least they did for me, so make sure you grease your tin, even if it is non-stick. I personally didn’t care about that little bit of sticking – they were delicious regardless.

    Well we’re off to the country to cut down our Christmas tree today and then to walk around beautiful Elicottville to really get even more into the Christmas mood! I cannot wait!

    Tomorrow I plan to make a gluten-free turkey pot pie with some of the leftovers and I am going to cook down the bones to make a turkey stock for soup. What are you making with your leftovers?

    IMG_7247

    Smashed Potato Puffs
    makes between 12 and 24 puffs, depending the size of the pan used
    Adapted from The Kitchn

    2 cups leftover smashed (or mashed) potatoes
    3 large farm fresh brown eggs, beaten
    1/4 cup minced fresh chives
    1/4 cup shredded leftover turkey (optional)
    Salt and freshly ground pepper, to taste

    Heat the oven to 400°F and lightly grease the cups of a regular muffin tin or a mini-muffin tin.
    Whisk together the smashed potatoes, eggs, chives, and turkey. Taste and season, if necessary, with salt and pepper.
    Put a spoonful of the mixture in each muffin cup. Bake for 20-25 minutes, or until the potato cups are set, browned on top, and hot through and through. Serve immediately.

  17. Raw Butternut Squash and Kale Salad


    Raw Butternut Squash and Kale Salad


    I was so excited to be participating in A Book of Yum’s Gluten-free Vegetarian Thanksgiving Event, that I of course couldn’t decide on just one recipe, so I made two! I wanted to re-imagine a classic side dish like stuffing, but I also really wanted to bring something completely new and unique to the table (pun intended). I came across a recipe in Edible Buffalo’s Fall 2011 issue a few weeks ago that I cut out and set aside, since it really intrigued me. It was a raw butternut squash salad – I had never thought about eating squash raw, but I honestly couldn’t wait to try it. In thinking about the recipe and really wanting there to be a rainbow of beautiful fall colors, I decided to change it up add some fresh local kale and dried cranberries instead of golden raisins. I also had some a fresh organic navel orange that I had zested earlier in the day to make another batch of my Chai concentrate and I thought the juice from that would be the perfect complement to all of the flavors going on in this salad.

    This beautiful salad is crunchy, sweet and bright. It would be a welcome side dish at any Thanksgiving feast and it is a wonderfully unique option everyone, especially for those who are gluten-free, vegan and/or vegetarian. Plus, I personally love the idea of any Thanksgiving sides that aren’t heavy and carb loaded and more importantly, that don’t require the use of the oven that is always far too crowded on Thanksgiving.

    Raw Butternut Squash and Kale Salad


    Raw Butternut Squash and Kale Salad
    Serves 4-6

    1 butternut squash (about 1 pound), peeled, seeded and grated by hand or with a food processor
    1 cup kale, washed and stems removed, cut into very thin strips
    1/2 cup dried cranberries
    1/4 cup olive oil
    1 tablespoon rice vinegar
    1 tablespoon fresh orange juice
    2 tablespoons fresh ginger, minced
    Salt and freshly ground black pepper, to taste

    Combine all ingredients, toss and adjust seasonings to taste. Refrigerate, covered, for an hour before serving.

  18. Gluten-Free Mushroom Stuffing (Vegetarian)

    Gluten-Free Mushroom Stuffing (Vegetarian)

    Gluten-Free Mushroom Stuffing Muffins (Vegetarian)


    When I found out I was going to be a part of Book of Yum’s Gluten-free Vegetarian Thanksgiving Event – I was so excited. This is the first time I have had the pleasure of participating in something like this, but I have wanted to ever since I started my blog a year and a half ago. This one felt like the perfect place for me. Although I am not exactly a traditional vegetarian, I consider myself to be a “conscientious omnivore”, meaning I only eat meat that I feel good about eating that comes from a local farmer where it is raised humanely, free to roam, eat pasture and not be filled with hormones or antibiotics.  We get all of our meat from Sojourner Farms in Olean, NY. This is the ONLY meat we ever have in our home and I feel like it is the right choice for us. We probably only eat meat anywhere from once a week to once a month at home, depending on what we have on hand and what we feel like. The rest of the time we eat completely vegetarian. I really love cooking vegetarian and find that eating a mostly vegetarian diet plus eating a small amount of local pasture-raised meat to have really changed my health immensely. I also feel like for me, it is a wonderful way for me to take a stand against the factory farming industry.

    Sea, from Book of Yum, really wanted this event to not only make the transition into the first holiday season for newly diagnosed gluten-free folks to not seem so daunting, but to also highlight all of the wonderful options for those who are, or are cooking for those who are gluten-free and/or vegetarian (or vegan). Many of us find ourselves bringing our own food since many times the hosts are so terrified and paralyzed by what to cook, plus it alleviates the stress we have on wondering what we are even going to eat when we show up at someone else’s house. I love all of the wonderful recipes that have been featured so far, it’s such a great collection of classic dishes and new unique Thanksgiving options.

    This year, like last, hubby and I are making the healthy and gluten-free Thanksgiving meal that we want and eating early in the day. After I get up and go to an early morning yoga class, while hubby takes our dog, Seri, to the park, we’ll spend the day cooking together, watching the parade and football and a enjoying a relaxing day at together at home without any work. After we are done eating, we will head over to my parent’s where they are having nearly 30 people for dinner (!) and we’ll join them for dessert, a cocktail or two and it will be the perfect way to have it all.

    We took a nice long drive out to the country yesterday to pick up our Thanksgiving turkey from our farmer, Pierre, at Sojourner Farm in Olean. Since we will be having a turkey for our Thanksgiving dinner, I wanted to plan the rest of the meal without any meat. I was really excited to take on the challenge of making a meat free stuffing this year. So making it ahead of time for Book of Yum’s event was even more exciting since it was a test run of this recipe, for me. In the past I have sought out some type of healthy sausage to make my mom’s famous stuffing recipe that I had to have, but it always feels so redundant and unnecessary to have a side dish with meat in it, alongside the turkey. I really don’t need or want that much meat in one meal.

    Gluten-Free Mushroom Stuffing Muffins (Vegetarian)

    I decided on making mushrooms the stars of the stuffing this year. This delicious side dish is so full of rustic and earthy flavor, the mushrooms have a nice chewiness to them and the beautiful fresh thyme pulled it all together so nicely. Additionally, as you can see by the above photos, I also decided to experiment with making little individual stuffing “muffins”, if you will. I dreamt this up as a way to make sure that everyone gets lots of the crispy goodness that makes stuffing so darn delicious. Come on, admit it, you’ve gotten into with a family member on Thanksgiving over who get’s the edges. In our house, my hubby usually gets the crispy edges on anything that has them, by default. If you don’t care about the crispies (as my husband calls it) or don’t want to mess with a muffin tin, this will perfectly fit into a 9″ x 13″ baking pan. I ended up having a little bit leftover after filling the 12 muffin cups, that I put into a very small glass casserole dish. I didn’t want to call this recipe “Stuffing Muffins”, as I feared it would turn people off, since it does sound pretty disgusting, really. Even if you don’t try the stuffing “muffin” approach for this Thanksgiving, you have to try it soon, it is so worth it and I honestly cannot believe I didn’t think of it sooner.

    This stuffing does have two eggs in it, so if you are vegan you could experiment with an egg replacer such as Ener-G or making your own flax-seed egg replacer (To replace one egg: 1 tablespoon ground flaxseeds plus 3 tablespoons hot water. Stir together until thick and gelatinous.) I have never made my stuffing vegan, but I am sure it would work perfectly. Please let me know if you try it out. Additionally, you will obviously have to make sure the bread you use is vegan.

    Besides being very excited about how this recipe turned out, I am also very excited that I get to have stuffing twice in a week’s time, that isn’t a bad deal at all. Stuffing is one of my favorite things about Thanksgiving dinner, I don’t think I have it any other time during the year, so it always feels so special. Between that and the mashed potatoes, those are two things that will NEVER be missing from my Thanksgiving menu. For my husband, Mark, I always have to make him a single-serving of his Momo’s famous sweet potato casserole, complete with an ungodly amount of butter, brown sugar and yes, it is even topped with marshmallows. It’s not for me, but I can totally appreciate how it won’t be Thanksgiving for Mark without it, so I will always make it for him.

    What dish will always be a part of your Thanksgiving dinner?

    Gluten-Free Mushroom Stuffing Muffins (Vegetarian)

    Gluten-Free Mushroom Stuffing Muffins (Vegetarian)
    Gluten-Free Mushroom Stuffing (Vegetarian)
    serves 6-8

    1 loaf of gluten-free bread, dried and roughly torn into small pieces (I used a loaf of Rudi’s all natural gluten-free multigrain bread, you can use your favorite bread)
    1 – 1 1/2 cups mushroom broth, vegetable broth or water
    1 medium onion, finely chopped or grated
    2 stalks celery, finely chopped
    8 ounces fresh cremini mushrooms, roughly chopped
    1 cup wild mushrooms, fresh or reconstituted from dried, roughly chopped
    1 1/2 tablespoons fresh thyme, finely chopped
    1 tablespoon fresh Italian parsley, roughly chopped
    2 large farm fresh brown eggs
    2 tablespoons olive oil
    1/2 teaspoon kosher salt
    1/4 – 1/2 teaspoon freshly ground black pepper

    Preheat oven to 350ºF. Crumble or tear the dried bread into small pieces and place into a 9″ x 13″ glass baking pan. Wet the bread with enough broth or water so it starts to get soft, but you don’t want it insanely soggy, either. If you add too much liquid, just pour it out. Mix with eggs, mushrooms, onions, celery, herbs, olive oil and salt and pepper. Don’t be afraid to get your hands dirty, roll your sleeves up and just get your hands in there to mix it all up, it’s the only way to do it. Once everything is evenly mixed in you can either leave it in the baking pan and bake it as is or start scooping with your hands, an ice cream scoop or a large spoon into a greased non-stick muffin pan. (I greased mine with a very small amount of vegetable shortening). If it doesn’t all fit into the muffin pan, scoop the remainder into a small glass casserole dish.

    Place the glass pan or the muffin tin into the oven and bake for 45 minutes to an hour until the top(s) are browned and crispy. Let the stuffing “muffins” cool slightly before attempting to pop them out of the muffin tin and don’t worry if they don’t come out like a perfect muffin shape, most of mine didn’t, some even fell apart a little. Don’t worry, it’s stuffing, its rustic and it isn’t about the shape and look of them, it is all about the crispies!

    Enjoy.

    NOTE: since I didn’t want to dry my bread overnight or for a day or so, I placed the sliced loaf in a single layer on a baking pan in the oven at 200º for about an hour to dry it out.

  19. Butternut Squash Enchiladas with Tomatillo Sauce

    Butternut Squash Enchiladas with Tomatillo Sauce

    Butternut Squash Enchiladas with Tomatillo Sauce

    Having a creative job means that sometimes you just can’t work. I know that sounds like an excuse, but when you are supposed to be creating something and you just don’t have any ideas, it’s quite hard to “work”. I am very lucky that we now work from home, so some days when that “creative block” happens – if I can’t find some silly administrative task like updating our webstore, shooting photos of new products or responding to emails, I can just walk away from my computer and get into any number of different things that are completely unrelated to work, like taking the dog for a walk, heading to a yoga class, watching TV, reading a book or magazine and my most favorite distraction from work… cooking! This week I have been feeling a bit stressed and the ideas just haven’t been flowing as freely. It has been a bit frustrating to say the least. We have a ton of work on the books right now, so it is no time to screw around or to just stare at a blank sketch pad. Wednesday, I decided rather than sitting at my desk with my sketchpad, that I would make our dinner early, so we could enjoy it for lunch and I could take photos when it was freshly cooked instead of trying to shoot them without daylight or shooting the leftovers the next day!

    Beautiful and fresh tomatillos for the Butternut Squash Enchiladas with Tomatillo Sauce

    Roasted butternut squash for the Butternut Squash Enchiladas with Tomatillo Sauce

    Tomatillo's cooking down for the sauce for my Butternut Squash Enchiladas with Tomatillo Sauce

    So, I got up at my usual 7am and started prepping the squash and the tomatillos for the sauce. Then I went upstairs for a few hours, it was the perfect boost that I needed and I started working on a poster design that I was stuck on and I made some major headway! It felt great. When lunchtime came, I scooted downstairs, preheated the oven, heated up the sauce and started assembling the enchiladas. I popped them in the oven and went back upstairs to work for a bit. When the buzzer rang, I ran down, took some photos and served my husband and our assistant the best lunch we’ve had since we moved the business home. It was actually really fun to eat a bigger meal in the middle of the day. It felt like the right time to eat that way.

    These enchiladas, besides being a burst of beautiful colors, are so full of delicious and bright flavors. The squash has a bit of a rustic nuttiness, the tomatillo has a bright almost citrus flavor to it, with a little bit of heat from the lemon drop peppers I added. I thought about adding black beans inside of the enchiladas, but ended up deciding against it since I thought they would just be bursting open. I think even though it would taste incredible, it would be too many things inside with the big hunks of squash. But I will likely make them that way at some point. I used a simple traditional Mexican crumbly white cheese called queso fresca, it was the perfect compliment and didn’t make the dish too heavy and gooey cheesy, which can be a bit too much for me, sometimes. They were delicious topped with a fresh squeeze of lime juice, fresh green onions and cilantro and a little dollop of organic low-fat sour cream. If you are vegan, you could definitely leave out the cheese or substitute Daiya for the queso fresco. Or if you can’t find queso fresco, you could go with a small amount of good quality sharp cheddar cheese.

    I have made homemade tortillas in the past when making enchiladas and it is most definitely worth it, but since I didn’t really have an unlimited amount of time to make these, I decided to go with a high quality corn tortilla from the store. The key to making enchiladas keep their shape, is to steam the tortillas first, otherwise they will break apart a bit. I know this and I steamed mine, but I think they should have been steamed a bit more, some definitely fell apart just a tad when I rolled them up. I decided to just go with it, since I knew it would all taste the same, but some would just fall apart when I served them. Of course, the two that I decided to take a photo of did just that when I served them, but I kinda liked how rustic they looked and I love how you could see the color from the squash exploding out. So I said, screw perfection and just went with it! Life isn’t perfect, I’m not perfect and my enchiladas aren’t perfect – and I am OK with ALL of it! I embrace it.

    Butternut Squash Enchiladas with Tomatillo Sauce

    Butternut Squash Enchiladas with Tomatillo Sauce
    Yesterday afternoon I had another one of those moments where I hit a creative road-block, for some reason this one hit me harder than ever. I actually felt sad over it and I let it beat me, a bit. I was working on a project that is seemingly very simple and should have an easy solution, but I was struggling. It broke me! I cried. I decided to take a step away “virtually” and move over to another project and then to editing the photos for this post. It definitely helped and today I am looking at it again with fresh eyes and I am ready to tackle it again. So I wanna hear from you….

    What do you do when you hit a creative roadblock?
    Do you find cooking and baking to be a good escape from everyday life and your work or does it stress you out too much?
    I’d love to hear your thoughts on how you get through when you are feeling stumped with a problem, creatively or otherwise. Share away!

    Butternut Squash Enchiladas with Tomatillo Sauce

    Butternut Squash Enchiladas with Tomatillo Sauce

    Butternut Squash Enchiladas with Tomatillo Sauce
    serves 6

    Tomatillo Sauce
    1 1/2 pounds of fresh whole tomatillos, husked and rinsed
    2 hot chiles of your choice, stems removed (I used dried lemon drop peppers from my garden) – you can skip this or just use one if you want it less spicy
    enough water to cover the tomatillos
    3 whole cloves garlic, peeled
    1 handful of fresh cilantro (about 1/4 cup)
    1/2 teaspoon kosher salt

    Add your tomatillos and chiles to a large saucepan and cover with water. Bring to a boil over a medium-high heat, then reduce the heat and allow to simmer for approximately 5-7 minutes until the tomatillos are soft but still whole. If they aren’t all totally soft, no worries, still remove them from the heat and drain. Add the tomatillos and chiles to a food processor and add 2 cloves of garlic, fresh cilantro and salt, puree all the ingredients together and set the sauce aside.

    Butternut Squash Enchiladas

    1 – 2lb butternut squash, peeled, seeded and diced into 1-inch cubes
    1 tablespoon plus 1 teaspoon extra virgin olive oil
    1 red bell pepper, diced
    1 yellow onion, diced
    1 large garlic clove, minced
    6-8 ounces queso fresco, crumbled (you can skip the cheese or use Daiya to make this vegan) – reserve approximately 1/4 cup for the topping
    12 corn tortillas

    fresh lime wedges
    fresh cilantro, roughly chopped
    fresh green onions, thinly sliced
    organic sour cream

    Preheat the oven to 400º, place the squash cubes on a rimmed baking sheet toss with 1 tablespoon of the olive oil and place into the oven to roast for 30-40 minutes until tender and lightly browned. Set aside when done.

    While the squash is baking, add the onion, garlic, red bell pepper and a dash of salt to the teaspoon of olive oil in a medium pan over a medium-high heat, sauté. Cook for 5-8 minutes until the onion is translucent and both the onion and pepper are tender. Remove the vegetables from the pan and set aside in a bowl.

    Use the same pan from the onion and pepper mixture to heat up your tomatillo sauce. Bring it to a simmer over a medium-heat and allow it to heat through and slightly thicken. Just about 5 minutes.

    Once the squash is done, you are ready to start assembling your enchiladas.

    Start by spooning a small amount of the tomatillo sauce into the bottom of a 9 x 13 inch baking dish (I used an 8.5 x 11 pan and it was a bit crowded, but it worked) – just enough to cover the bottom with a very thin layer.

    You will need to steam the corn tortillas so that they don’t break when rolled. Moisten two paper towels, working in batches of 3 or 4 tortillas at a time, wrap the tortillas in the damp paper towels and microwave them for approximately 30-45 seconds. Once microwaved, dip each tortilla into the tomatillo sauce, one at a time, making sure both sides get coated in the sauce. Scoop a small amount of butternut squash cubes (probably about 2 tablespoons), the onion and pepper mixture and cheese, keeping in mind how much to use so that you can roll the enchiladas shut and also so you have enough to fill 11 more. Place the enchilada, seam side down, in the baking dish. Repeat until you’ve made as many enchiladas as you want or have filling for (this recipe made 12, with a small amount of squash and pepper mixture leftover).

    Spoon the remaining tomatillo sauce overtop all of the enchiladas and top with the remaining 1/4 cup of queso fresco.

    Place the pan in the oven and bake for 30-40 minutes until the cheese is slightly melted, golden brown and everything is bubbling. Pull it out of the oven, sprinkle a bit of fresh cilantro on top to make it even prettier and allow it to cool for 5 minutes. Serve your enchiladas warm with fresh cilantro, fresh green onions and a squeeze of fresh lime juice, you can also add a dollop of organic sour cream, if you wish.

  20. Tortilla Soup

    Tortilla Soup

    I have been making this soup for years and have shared my recipe with so many people, I was shocked that I hadn’t yet posted in on here. It is one of my favorite soups, it is so simple to make and it’s loaded with so many of my favorite flavors. You could probably easily make it with vegetable broth and just double up on the vegetables and it would still be delicious. I always find this is a great way to use one of the whole chickens we get from the farm since it really makes the soup the best and the more chicken in the soup, the better it is, in my opinion.

    Also, if you don’t feel like making the broth from scratch, you can use a good quality organic low sodium chicken broth or stock and pick up a quality simply spiced rotisserie chicken from the market. Just remove any fat and skin from the chicken, take the meat off the bones and shred or dice it, adding it to the soup near the end. It’s that simple.

    You could certainly make your own corn tortillas from scratch for the tortilla strips, which I do most times and it is super simple, or you could just buy a package of good quality corn tortillas from the grocery store or a local Mexican market.

    The fun thing about this soup, as with many, is the measurements of your ingredients can be really loose and to taste to your preferences. I almost NEVER measure when making a soup like this, I just taste it along the way and add more of things as I see fit, so definitely keep that in mind when making this for yourself. Use my measurements as a guide, but please taste along the way. If you don’t like super spicy, you can leave out the jalapeños, but I would really suggest keeping in the chipotles when making the stock and definitely in the soup, that smokey flavor really makes this soup what it is, in my opinion. If you can’t find dried chipotles, you can use the canned ones in adobo sauce and if you are worried about the spiciness, just skip adding a chipotle pepper all together and simply add a tablespoon of the adobo sauce.

    You can also have fun with the toppings on this soup, besides the necessary tortilla strips, I usually like a good squeeze of lime juice, a little cubed avocado, some fresh cilantro and green onions. It’s also good with a little sprinkle of shredded sharp cheddar and if you like sour cream, it is good with a little dollop of that, too.

    As usual, when I make this for the two of us, I make the full amount and we just live off of it for a week, it’s great for lunches or on those nights when I am too busy to cook. This time of year, I almost always have some type of soup or stew in the fridge that I made a couple of days prior, it is a must for me in the cooler weather.

    Tortilla Soup
    Serves 8-10

    Chicken Stock
    (this soup tastes the best with homemade stock, but if you are in a rush, you can still make it delicious by using boxed organic low sodium chicken broth and adding in the meat from an already cooked rotisserie chicken you bought from the store)

    2-3 quarts water
    1 whole organic chicken, about 4lbs (rinsed and giblets removed for the dog)
    1 whole red onion, peeled and quartered
    2 dried chipotles, halved
    2 garlic cloves
    1 bell pepper, seeded and quartered

    In a large stockpot, (use the strainer that fits in your stock pot if you have one) combine all of the ingredients making sure to use enough water to cover your chicken and bring to a gentle boil over a high heat. Reduce the heat and simmer, covered, for 2 1/2 hours, adding more water if necessary to keep the chicken and vegetables covered. Skim the surface occasionally to remove any foam or impurities that forms on the surface. The longer you cook the stock, the stronger the flavor will be, but 2 1/2 hours was more than adequate and the stock had a fantastic flavor to it.

    Remove the meat and bones and reserve any meat on the bones that can be separated and added back to the soup. If you didn’t use the strainer in the pot when making the stock, strain the stock to remove all the vegetables and other bits and add the broth back to the pot. Throw out the bones and vegetables. Use the stock immediately or let the stock cool completely, and refrigerate overnight. Skim any fat that forms on the surface. Keep refrigerated in airtight containers until ready to use, up to 3 days, or freeze for up to 2 months. Since I was using the stock immediately, I skimmed any visible fat off the top, made sure that it was strained of everything, and kept it on a low heat while I prepped everything for the soup. You will probably end up with about 48-64 ounces of stock when making it homemade (give or take). Use all of it for the tortilla soup.

    Tortilla Soup

    6 to 8 cups of low sodium organic chicken broth or stock (I make my stock from scratch with one of our whole chickens from the farm, see above)
    2 tablespoons olive oil
    1 large white onion, diced
    2 cloves of garlic, minced
    2 dry chipotles, roughly chopped
    2 to 3 bell peppers (you can use any combo you like, red, yellow, green, whatever), diced
    1 (or 2) jalapeños, minced (optional, depending on how much spice you like, you’ll get a little from the chipotle)
    2 teaspoons sea salt plus more to taste
    2 teaspoons ground chili powder or to taste (you can add more as it cooks)
    1 teaspoon ground cumin or to taste (you can add more as it cooks)
    1/2 teaspoon ground coriander or to taste (you can add more as it cooks)
    1 large can of organic diced tomatoes
    The meat from the chicken you made your stock from or the meat from 1 small pre-cooked rotisserie chicken or 2 chicken breasts, already cooked – skin and fat removed, shredded or diced
    1 or 2 limes

    For Topping:
    8 or more corn tortillas, cut into thin strips
    lime wedges
    fresh cilantro, roughly chopped
    fresh green onions, thinly sliced
    avocado
    sour cream
    shredded cheddar

    Saute onion, garlic and all your peppers with the olive oil. Cook till slightly soft, but I like to leave a little bit of the crunch there. Add chili powder, cumin and salt, stir. Add broth and canned tomatoes and bring to boil. If you made your stock from scratch and its already in a large pot, just cook up the vegetables in a pan and add to the broth. Bring to a simmer and continue to add seasonings to taste, depending on how spicy you like it. Cook for about 20-30 mins or so to really allow all of the flavors to come together.

    Meanwhile, slice 8 or more corn tortillas into thin strips, put on a cookie sheet, drizzle with 1 teaspoon or so of olive oil and lightly salt. Bake at 375 degrees until desired crispiness. (about 10-15 mins) Put aside.

    Dice and shred the chicken and add to the soup, simmer until chicken is heated through. Add a few bunches of cilantro and the juice of one to two limes stir and serve.

    Serve soup topped with tortilla strips, diced avocado, fresh cilantro, green onions and a few squeezes of lime. You can also top with shredded cheddar, hot sauce, sour cream or whatever else you might like.

  21. Apple Crisp (Gluten-Free and Vegan)

    Apple Crisp (Gluten-Free and Vegan)

    I absolutely love my mom’s apple crisp, it is one of my favorite things about fall! I have been making my own gluten-free version for a while now and it is so delicious. After I made the vegan apple cobbler two weeks ago with palm oil shortening instead of butter, I decided I wanted to make an updated and healthier version of the apple crisp, too. I’ve actually been calling it Apple Crisp 2.0, but I didn’t think that would make for a good title or dish name. This apple crisp is as healthy as dessert can get in my opinion – it is gluten-free, vegan, refined sugar-free, dairy free, egg free and corn free. Besides using organic all natural palm oil shortening in place of butter in recipes to make them vegan, I have also really fallen in love with baking with coconut oil. When solid, it makes a great replacement for butter in many baking recipes that call for cutting it in. The benefits of coconut oil are numerous and can be attributed to the presence of lauric acid, capric acid and caprylic acid, and its properties such as antimicrobial, antioxidant, antifungal, antibacterial, soothing, etc. It is great for your skin and hair when used topically and has been found to have anti-aging, regenerative effects. We even use it topically on and feed it to our dog, Seri, when she has itchy skin. She LOVES the way it tastes.

    I was also excited to play with date sugar and maple syrup in this recipe instead of refined white or brown sugar. It turned out so perfectly sweet. Date sugar is totally unprocessed, unrefined and raw. It naturally contains fiber and is loaded with vitamins and minerals like calcium, iron, magnesium, phosphorus, zinc, iron, copper, manganese, and selenium. Because date sugar doesn’t melt the way sugar does, I knew I wouldn’t get that delicious syrup with the apples that I usually get with the brown sugar, so that is how I decided to add in the maple syrup. It was such a small amount, you can barely distinguish any maple flavoring, if any at all. Other options  instead of the maple syrup would be rice syrup or molasses or if you aren’t vegan, you could also use honey. I am so excited about how this apple crisp turned out. It has so much flavor and I actually think it is better than any apple crisp I have made in the past.

    You could serve this with your favorite vegan (or not vegan) ice cream or whipped topping. Something that I saw a while back on Healthful Pursuit that I have been meaning to try is coconut whip, which I think would be perfect on top of this recipe. I may just need to make that happen this week.

    Apple Crisp (Gluten-Free and Vegan)

    Apple Crisp (Gluten-Free and Vegan)

    Gluten-free Apple Crisp (Vegan)
    serves 6

    Filling:

    • 4 cups of peeled and sliced apples (4 med)
    • 2 teaspoon fresh lemon juice
    • 1 tablespoon maple syrup
    • 1 teaspoon vanilla
    • 1/4 teaspoon ground cinnamon
    • 1/4 teaspoon ground nutmeg

    Topping:

    • 1/2 cup blanched almond flour
    • 1/2 cup certified gluten-free oats (I like Bob’s Red Mill Gluten Free Rolled Oats)
    • 1 tsp ground cinnamon
    • 1 tsp ground nutmeg
    • 1/3 cup date sugar, coconut sugar or other granulated sugar of your choice
    • 1 1/2 tablespoons maple syrup (1 for the topping and 1/2 to drizzle over the top)
    • 1/3 cup coconut oil (make sure it is somewhat solid and not liquid)

    Preheat oven to 375°F.
    Place apples in an 8-inch square pan, pour lemon juice over. Add 1 tablespoon of maple syrup, spices and vanilla, toss around to combine.

    Mix almond flour, oats, spices, date sugar and maple syrup together in a medium sized mixing bowl.  Cut in coconut oil in to make crumbly consistency.

    Sprinkle over the apples, drizzle remaining 1/2 tablespoon of maple syrup over top and bake 30-40 minutes or until apples are tender and topping is golden brown. Serve warm.

DISCLAIMER: This website is written and produced for informational and educational purposes only. Statements within this site have not been approved by the FDA. Content should not be considered a substitute for professional medical expertise. The reader assumes full responsibility for consulting a qualified health professional before starting a new diet or health program. Please seek professional help regarding any health conditions or concerns. The writer(s) and publisher(s) of this site are not responsible for adverse reactions, effects, or consequences resulting from the use of any recipes or suggestions herein or procedures undertaken hereafter.