-
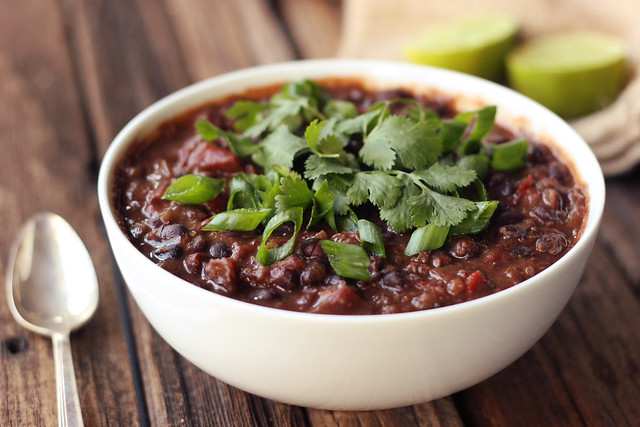
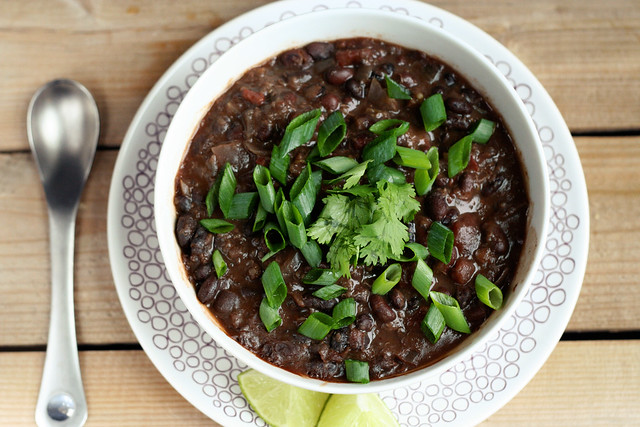
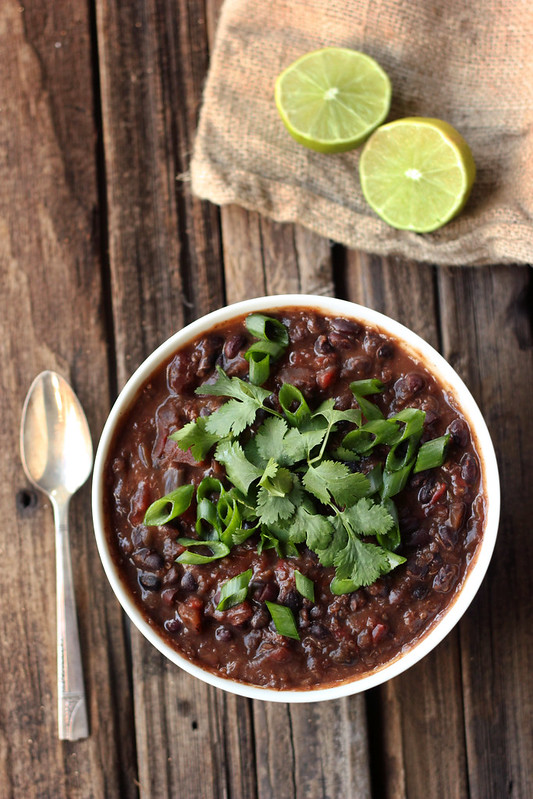
Chipotle Black Bean and Quinoa Crock-Pot Stew – Vegan + Gluten-free
This post will be quick and easy, just like this recipe. Which is exactly what I need right now with everything going on. I made this the other night in an effort to make something hearty, healthy and satisfying without having to spend at least an hour in the kitchen. Since we are getting ready to hit the road this weekend for SXSW in Austin, every minute counts. This is where cooking dinner in a crock-pot comes in. No matter how busy I am though, I insist on eating as healthy as I can, especially at times like this. It is when you need nutritious goodies and healthy energy the most!
This stew was super easy to toss together and it made the house smell amazing all day long while it cooked. Plus, we’ve been enjoying the leftovers ever since. You can have fun with the toppings on this or keep it as simple as you’d like. Additionally, if you want to saute the veggies first, you can do that too, but I like keeping my crock-pot cooking as easy and quick as I can. After all, that is the entire point of it, in my opinion anyway.
This recipe is similar to my crock pot black bean soup, but I thought leaving the beans whole and adding in the quinoa and diced tomatoes would make it more stew-like and a fun change. The quinoa was a subtle addition but it was nice. I think I could actually get away with adding in 1 full cup, but I didn’t want the quinoa to steal the show! The bonus, this stew is naturally vegan and gluten-free. Feel free to play around with the spices making it to your liking, maybe adding in some cumin or leaving out the cinnamon, etc. Make it your own.
Do you have a favorite crock-pot meal? What do you like most about cooking in a crock-pot or slow-cooker?
[print_this]Chipotle Black Bean and Quinoa Crock-Pot Stew – Vegan + Gluten-free
serves 6-8- 1-2 dried chipotle peppers
- 1lb of dried organic black beans, rinsed and picked over, soaked overnight
- 3/4 cup uncooked quinoa, rinsed and picked over
- 1 28-ounce can organic diced tomatoes
- 1 red onion, diced
- 3 cloves garlic, minced
- 1 green bell pepper, chopped
- 1 red bell pepper, chopped
- 1 dried cinnamon stick
- 2 teaspoons chile powder
- 1 teaspoon coriander powder
- 1/4 cup fresh cilantro
- 7 cups water
- sea salt and pepper, to taste
for topping:
- cilantro
- green onions, thinly sliced
- lime wedges
- avocado
Load all of the ingredients, except the salt, into your slow-cooker, stir to combine. If you wish to saute the onion, garlic and bell pepper first, you can, but I like to make crock-pot cooking as simple and quick as possible. Cook on high for 4 to 6 hours, or on low for 8 to 10 hours, until the black beans are tender. The time to cook the beans can vary based on the strength of your slow cooker and also the freshness of your beans. Add the salt at the very end, as it will affect how the beans cook, if you add it at the beginning.
Remove the chipotles (if you don’t want a mouthful of a whole spicy pepper) and the cinnamon stick before serving. Ladle into bowls and serve topped with fresh cilantro, green onions, a squeeze of fresh lime juice, diced avocado, sour cream, hot sauce, tortilla chips, etc.
PLEASE NOTE:
It seems due to the varying cooking power and strengths of crock pots and other slow cookers, unfortunately the cooking time for the dried beans can vary significantly. For some, this time works great and for others the beans are still crunchy even after 12 hours. If your crock pot is older or is known for not being very strong, I would suggest soaking a bit longer and/or pre-cooking the beans first, before putting them in the crock pot. This time has always worked for me and my crock pot and I have made this recipe many many times. Sadly without being able to test it on other slow cookers, I have know way of knowing how much that time can vary.
Older beans can take longer to cook, so that is also something to keep in mind.
[/print_this]
-
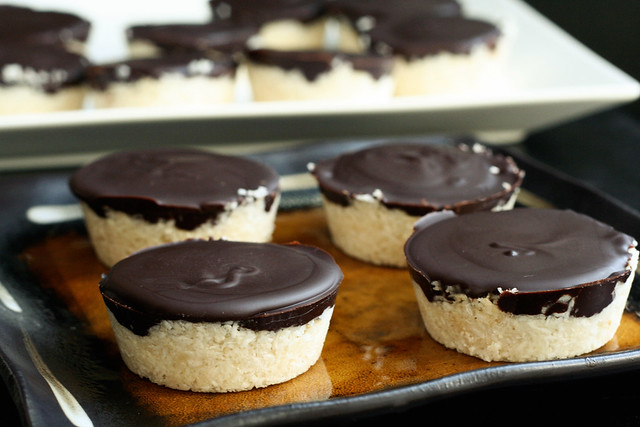
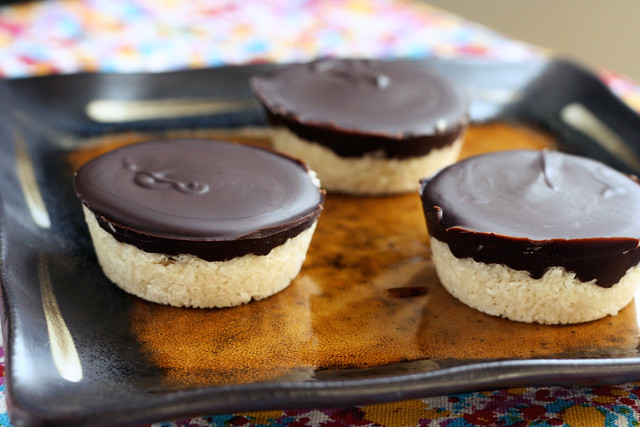
Dark Chocolate Coconut Treats – Vegan, Gluten-free + Refined Sugar-Free
I know I have already mentioned that we are going away at the end of this week for the SXSW Music Festival and Flatstock Rock Poster convention, and that I didn’t know how many recipes I would get up before we go. But I HAD to make time to share this recipe with you guys. I threw this together the other night when I was craving something a little sweet but I wanted something different. I made a small batch as I was almost out of coconut, but I knew I would be making them again VERY soon once I could get more coconut, so I could perfect the recipe and share it with all of you. I do hope to get one more recipe up before I go, then I have a group of lovely bloggers that will be guest posting while I am away. I can’t wait!
I had come across this lovely healthy “Mounds” candy bar inspired treat from Tessa the Domestic Diva and it inspired me to make my own version in the first place. I honestly had forgotten how much I used to love Mounds Bars until I saw her recipe on Kalinda’s weekly Vegetarian, Gluten-free Round Up on Wheat Free Meat Free. The combination of coconut and dark chocolate is perfection and it has always been a favorite of mine, I wish I had started making these sooner.
Like Tessa’s version, I wanted to make a healthy homemade version that wasn’t too sweet and I really wanted to make it with a good quality dark chocolate. I used Dagoba’s Organic Unsweetened Chocolate, which is so delicious, their chocolates are some of my favorites, but you can use whatever your favorite is. And as I mention in the recipe below, if you’d rather just melt some dairy-free semi-sweet chocolate chips to make it even easier, you can do that, too. I just wanted to make these refined sugar free and lightly sweeten it myself. If you taste either the coconut filling or the chocolate topping and find you want it to be sweeter, just add a little more maple syrup or whatever sweetener you are using. You could also add an almond or two at the bottom or top to make it more like an “Almond Joy” instead of a “Mounds Bar”.
I used a regular sized muffin tin to create these little “bars” but you could really use whatever you want, a mini-muffin tin would be really fun, and you’d end up with even more treats. I almost bought one just for this recipe, but hubby told me I am cut off. In his words I “officially have too much kitchen stuff”. Hehe! If you have a candy mold, that would probably also work. This simple dessert treat is so easy to make, it’d be perfect dessert to make and share at a party if you know there will be a vegan or someone with food allergies and everyone else will enjoy it, too.
Even with these not being too crazy sweet, these are wonderfully rich and satisfying, I love that about dark chocolate. You may even want to cut one of these in half and share it and make them last even longer. In an effort to not eat all of these myself, plus with some gentle begging from one of my yoga teachers on Facebook after she saw a photo I put up, I plan to bring some of these to my yoga studio tomorrow morning. This is good, I fear if I keep these around I will eat them up in a day, they are so good.
Something I wanted to mention and almost forgot, I have avoided using maple syrup as a sweetener in recipes for a very long time, since I assumed the maple flavor would be so strong and would over power whatever I was making. I don’t know what gave me that idea, but sometimes the flavor of maple syrup on it’s own or maple flavored foods, can be a bit too much for me. Honestly it is really amazing what a great sweetener it is and you don’t get any of the maple flavor. I am not sure why, but you don’t. Maybe in larger quantities you might, but it is perfect in a recipe like this. Plus, maple syrup has many health benefits, including being known for it’s anti-inflammatory and anti-oxidant properties and being rich in trace minerals manganese and zinc. Of course sugar is still sugar, natural or otherwise, so don’t go consuming syrup or honey or other refined-sugar alternatives in huge quantities, but know that things like honey, maple syrup or coconut nectar are wonderful alternatives and much smarter choices then refined-sugars and synthetic syrups.Thought the bit about the flavor was worth mentioning though, in the event that you, like me, have been avoiding it for that reason.
[print_this]Dark Chocolate Coconut Treats – Vegan, Gluten-free + Refined Sugar-Free
Makes 12 cupsCoconut Filling:
- 2 1/2 cups unsweetened organic coconut, finely shredded
- 1/2 cup melted coconut oil
- 1/4 cup maple syrup (you could use honey, coconut nectar or any other liquid sweetener)
- 1 teaspoon vanilla extract
Chocolate Topping*:
- 6 ounces 100% unsweetened organic dark chocolate (aka bakers chocolate) I used this
- 1 tablespoon coconut oil
- 1/3 cup maple syrup (again any other liquid sweetener would work)
In a large mixing bowl, combine all of the coconut filling ingredients and mix together until well combined. Evenly divide up the filling between the 12 muffin cups, pressing it in very tightly, making sure it is even. Don’t worry they won’t stick. Place the muffin pan in the freezer make sure it is sitting flat, and freeze until hard, about 30 minutes.
While the coconut filling is cooling, melt the dark chocolate with the coconut oil. Either very carefully in a double boiler setup on the stove top or in small increments in the microwave. After the chocolate and coconut oil is melted and whisked together and well combined, remove from the heat (if you melted it on the stove), and add in the maple syrup. Stir well to combine. Give the chocolate topping a little taste to see if you want it any sweeter. Add more syrup, if you wish. Take the muffin tin with the frozen coconut mixture out of the freezer, and divide your chocolate mixture over it, spooning it on top and smoothing the chocolate out to make sure it totally covers the coconut.
Put the muffin tin back into the freezer, and freeze until the chocolate has set, about another 30 minutes or so. To get the treats out of the pan, slide a knife around the outside of the treat and it will very easily pop out.
After these are set, you could store them in the freezer and keep them really cold and solid or just in the fridge. I keep them in the fridge, myself. Just don’t leave them sitting out on the counter as they will get pretty melty.
*NOTE: if you aren’t worried about making this refined sugar free, you could just melt semi-sweet chocolate chips, I was just hoping to avoid the sugar, so I made my own chocolate topping.
[/print_this]
-
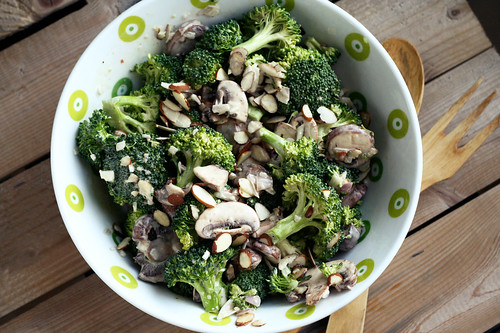
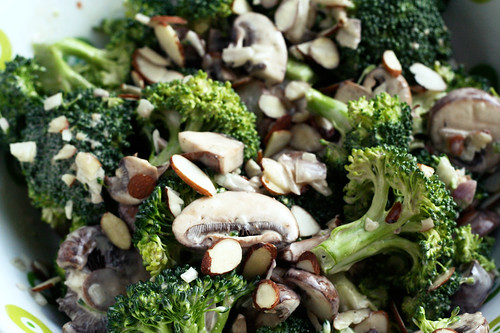
Creamy Vegan Broccoli Salad with Mushrooms and Almonds
Hey guys – I apologize for the lack of recipes right now, but I have had my head buried in work while we get ready for SXSW and the Flatstock Rock Poster Convention in Austin, Texas. We leave next Saturday for the long and fun road trip down there and we will be on the road for a total of 11 days. Many of you probably recall me talking about it last year at this time, it is such an enjoyable excursion that comes at the perfect time of year for us. We get to see so many of our wonderful and talented friends from all over the world, we eat lots of delicious Mexican food, plus some of the best BBQ food you will ever have, oh and we get to sell all of our handmade goods and wares to music fans from all over the world for 4 days! Plus, did I meantion it is usually somewhere in the 80s, with the sun shining every day. Ahhh, see it couldn’t come at a better time, it is the perfect break at the end of a dreary, grey and cold Buffalo winter. The only thing I dislike about this trip is how much time I am away from my own kitchen, the comforts of my own homemade foods and my daily yoga practice. In an effort to circumvent the lack of these daily comforts, I plan to pack a cooler full of my homemade Kombucha and some tasty snacks for the road trip down and I will most definitely have my yoga mat rolled up in a corner of the car somewhere so I can squeeze in some practice and meditation each day of the trip.
I plan to get a couple more recipes up here before I leave and if I can pull it together, I plan to get some guest posts together from some of my favorite bloggers! It is funny, this is the first trip I have taken that I am actually feeling weird about the lack of posting on here while I am away. I think because I am finally getting a really decent amount of visits each day, I don’t want people to get bummed when they stop by and nothing new has been added. Yup, my blogging obsession is officially official, I don’t wanna leave Tasty Yummies the way I don’t wanna leave my pets! haha
Anyhow, this recipe is one that I have been sitting on for a few days and I finally made time tonight to get the photos edited and the recipe fully written up. This salad is my take on a salad I had recently at local food shop/deli/cafe, Globe Market. They are located on Elmwood, literally right at the front door of my yoga studio, East Meets West Yoga. Though I rarely grab food after yoga, since I just head home and eat something light, I stopped in there one day after yoga, about two weeks ago to grab a quick gluten-free hummus and veggie sandwich before heading to a meeting. When he found out I was stopping there, Mark asked me to grab a serving or two of one of their delicious-looking side salads, for him to eat alongside sandwiches at lunch at home during the week. I opted for a creamy raw broccoli salad with red onions, bacon and almonds. That sounded just up his alley, healthy enough with some naughty stuff, too. Mark loved it, but truthfully I ate most of it. I couldn’t help it, it was so tasty, it was perfectly simple. It wasn’t even the bacon that got me, it was the delicious dressing and the combination of all of the ingredients.
So, I decided that it was a simple enough salad that I could make my own version at home, but with a Tasty Yummies twist. I wanted to make it vegan. I was determined to make it just as delicious without the bacon and with a delicious egg-free and dairy-free creamy dresssing. So I bought some Grapeseed Veganaise from Follow Your Heart, to make the dressing creamy and I went from there. I was honestly surprised that I pulled it off and was even happier with my own version that the bacon containing version from Globe. I decided to use shallots instead of red onions for a bit milder of a flavor and I added in some mushroom slices that I had on hand. This salad has been the perfect side dish with so many different lunches and dinner. I made sure to make a large enough batch that we could eat it throughout the week.
If you aren’t crazy about totally raw broccoli, feel free to blanch or steam yours for about 3-5 minutes. I love raw broccoli, myself, though I should probably consider steaming it to take down on the :ahem: gassy after-effects (sorry TMI, but it’s the truth)!
If you aren’t vegan, you can use your favorite mayonnaise and you could even consider adding in some crispy bacon crumbles. It really is quite complimentary.
[print_this]Creamy Vegan Broccoli Salad with Mushrooms and Almonds
Serves 6-8Dressing
1/2 cup grapeseed oil veganaise (or other vegan mayo)
2 tablespoons apple cider vinegar
1 tablespoon coconut sugar (you could also use brown sugar, maple syrup, honey or any other sweetener of your choice)
1 tbsp gluten-free unsalted whole grain mustard
kosher salt and freshly ground black pepper, to taste
1 clove garlic, mincedSalad
Approximately 8 cups of broccoli florets (about 2 pounds of florets)
2 shallots, chopped
9 ounces mushrooms, sliced
1/2 cup sliced toasted almondsIn a small bowl, whisk together all of the dressing ingredients, until well combined and smooth. Set aside.
Place the broccoli in a large serving bowl, toss with the shallots, mushrooms and almonds. Pour the dressing over the salad and toss well to combine. Serve.
This salad can be stored covered in the fridge for up to 3 days. Toss well before serving. You can serve this room temperature or cooled.
[/print_this]
-
Red Curry Peanut Sauce + Vegetable Stir Fry (gluten-free + vegetarian with vegan option)
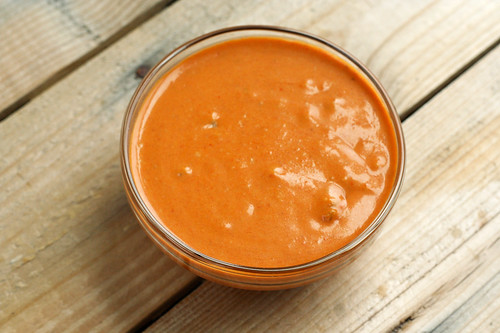
I have made a version of this sauce a couple times now, once a few weeks ago when I served delicious Thai inspired meatballs to dip into it, I have tossed it with rice noodles for a quick and flavorful meal and this time I made it specifically for a stir fry. This sauce is so full of flavor and very simple to make. It is naturally gluten-free and vegetarian, easily made vegan by skipping the fish sauce and adding in gluten-free soy sauce instead.
In a stir fry that is jam packed with your favorite vegetables, it is perfection. I love how robust the flavors of red curry is, there is a strong taste of lemongrass and chiles with a hint of ginger. If you have never tried it, you need to. It has a bit of heat to it, but it isn’t too strong, if you don’t like spicy, start with just a tablespoon of curry paste in the sauce and go from there. I always go with 2-3 tablespoons myself, since we both love spicy food.
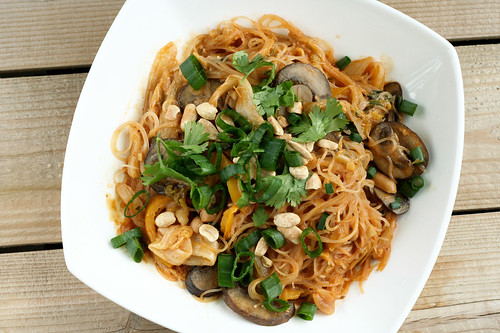
I included my recipe for this particular stir fry, to give you an idea on how to serve it, but the vegetables can really be whatever you want them to be. I happened to pick up a beautiful large head of napa cabbage since I had been craving something like that, but you could also use bok choy, broccoli, carrots, snow peas, etc. Make it to your liking and have fun with it. I just wish I had a bit more color in my vegetables, but I used the red bell pepper I had meant to use for this in another recipe earlier in the week, so I used the yellow instead. As you can see in the photo below, the peppers, cabbage and noodles all blend together in color, but I can promise that the flavors are all distinct and complimentary of each other. I just have this funny thing about having tons of colors in my stir fries, must be a graphic designer thing. It is one of my favorite things about them.
What are your favorite vegetables to use in a stir fry?
Since I always end up making more sauce than what I need, I store it in a glass mason jar with a tight lid for up to a week. This sauce make a great dipping sauce or could be served over steamed broccoli, rice or rice noodles for a quick and easy bite.
[print_this]Red Curry Peanut Sauce (gluten-free + vegetarian with vegan option)
makes about 2 cups1 – 13.5 ounce can unsweetened light organic coconut milk
2 tablespoons red curry paste
1 tablespoon gluten-free fish sauce*
1 tablespoon coconut sugar (you could also use brown sugar or raw sugar)
1/3 cup natural chunky peanut butter (creamy will work, too)In a small saucepan, combine coconut milk, coconut sugar, curry paste, and fish sauce. Whisk to combine. Bring to a gentle boil over medium heat for 3-5 minutes. Add peanut butter and cook over a low heat, whisking, until peanut butter is well blended.
* NOTE: to make this sauce vegan, leave out the fish sauce or replace with a gluten-free soy sauce
[/print_this][print_this]Red Curry Peanut Vegetable Stir Fry
Use your favorite stir-fry ingredients. This is just to show you how I served mine
serves 42 teaspoons sesame or peanut oil
1 head of napa cabbage, about 1lb, cleaned and sliced thin
1 bell pepper (I used yellow, red would work as well), sliced thin
1 clove garlic clove, minced
1 stalk lemongrass, finely chopped
1/2 inch piece ginger, minced
8 oz sliced mushrooms
large handful of cilantro, roughly chopped
green onions, sliced thin
1/4 cup roasted peanuts, roughly chopped
6 ounces thin rice noodles, cooked according to package directions and drainedHeat the oil in a wok or large saute pan over medium-high heat. Add the garlic, lemongrass and ginger, saute, stirring, for 2-3 minutes. Add the cabbage and bell pepper and cook until the cabbage is just starting to wilt, about 5-8 minutes. Add in the mushrooms and continue to stir fry until they are cooked. Add in some cilantro and green onions to your taste, toss around to combine. Lower the heat and add about 1 cup of the red curry peanut sauce (you can add more or less, depending on how saucy you want it). Toss to coat all of the vegetables in the sauce. And remove from heat. Add the rice noodles to a large bowl and pour the stir fried vegetables and sauce over top. Toss gently to combine. Serve immediately with a sprinkle of fresh cilantro, green onions and chopped peanuts. You can also drizzle a little more sauce overtop if you want it saucier.
NOTE: This sauce can be used in any stir fry of your choice, use whatever vegetables you would like. This was just what I had on hand.
[/print_this] -
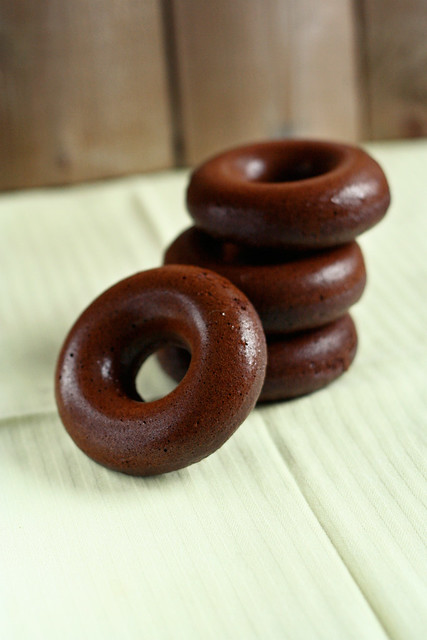
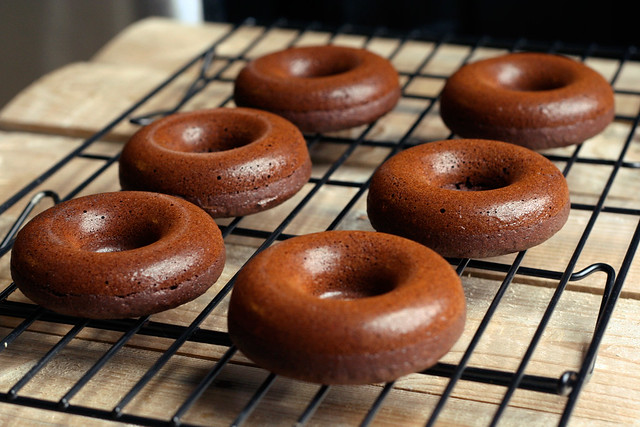
Gluten-Free + Dairy-Free Chocolate Donuts
This past weekend was a busy one for us, we had our first-ever Pop-Up shop at Modern Nostalgia, a women’s boutique here in Buffalo. It went really well, it was a ton of fun and we were very happy with how it all came together. However, after working from home for the last 10 or so months, I forgot how exhausting retail can be, talking with people all day, being on your feet, etc.
Since our pop-up shop ran from Thursday night until Saturday night, it was three days that we were away from our computers and our client work and three days I was away from the kitchen. That’s a lot for me when I am in town and not on the road somewhere. So, Friday morning when we woke up, I decided to whip up another batch of these donuts that I had made once before, and both Mark and I loved. The first time I made them they came out delicious, but I didn’t realize that you are supposed to only fill the slots in your donut pan about 3/4 of the way full, so they were more like muffins with holes through the middle. They batter rose so much it just closed off the hole on top. I was a little bummed out, but they were so delicious we happily gobbled them up, knowing that I would just have to make them again really soon. Darn!
The first time I made these donuts I simply melted about 1/3 cup of dairy-free chocolate chips in the microwave in a shallow bowl and when the donuts were cooled I just swirled them around in it and that was it. The second time I made these (the ones in the photos) I tried to get fancy and make a chocolate glaze with cocoa powder, honey and coconut oil. It turned out OK but it just didn’t have a strong enough chocolate flavor, it tasted more like honey, so I didn’t even bother with sharing the measurements because I think that going with straight melted chocolate is much better.
You could also come up with your own chocolate glaze or a peanut butter glaze, you could add little mini chocolate chips to the batter or sprinkle them on top of the glaze before it sets. Same with cocoa nibs or peanuts, sprinkles, etc. Have fun. I kept it simple this time, but now that I have this donut pan, you can be sure you will be seeing lots more fun donut recipes on Tasty Yummies.
[print_this]Gluten-Free + Dairy-Free Chocolate Donuts
makes approximately 8-10 donuts – this is the pan I use- 1/2 cup blanched almond flour
- 1/2 cup buckwheat flour
- 1/2 teaspoon baking soda
- 3 tablespoons cocoa powder
- 1/4 teaspoon of salt
- 3 large farm fresh brown eggs
- 1/4 cup coconut oil, melted (you could also use grapeseed oil or melted butter)
- 1 tablespoon of vanilla
- 1/2 cup of honey (or other liquid sweetener)
For dipping:
Approximately 1/3 cup of melted dairy-free gluten-free chocolate chips (I like Enjoy Life or Sunspire brands)Preheat the oven to 350º F. Lightly grease your donut pan with just a bit of coconut oil, vegetable shortening, etc.
In a large mixing bowl, combine the flours, baking soda, cocoa powder and salt, stir until well blended. In a medium sized bowl, whisk together the eggs, coconut oil, vanilla and honey.
Add the wet ingredients to the dry mixture and mix very well by hand or with a mixer. Make sure it is well combined. I find that piping the batter into the pan is easiest. I just fill a gallon-sized freezer bag with the batter and seal it off, then I cut a very small hole at one of the corners and use it like a piping bag, it makes it so easy to fill the donut pan. You could also carefully spoon the mixture into the pan. Fill your donut pan about 3/4 of the way full.
Bake for about 15-18 minutes, or until a toothpick comes out clean. Once cooled, dip into melted chocolate, peanut butter, sprinkle with toppings or just eat plain!
Note: If you are using a donut maker rather than a donut pan, follow the directions that come with your machine for cook times. [/print_this]
-
Gluten-Free + Vegan Carrot Cake Muffins
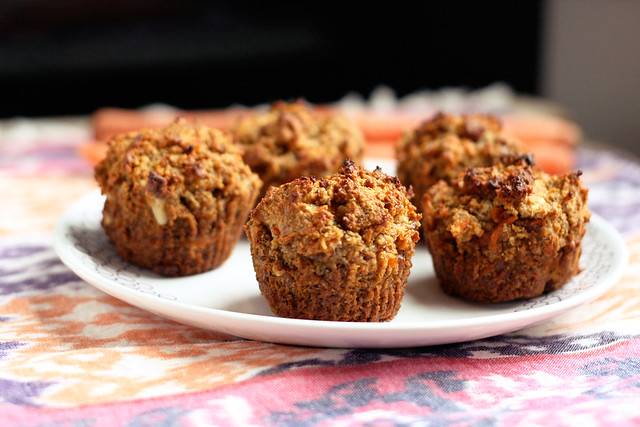
These delicious little treats were the second batch of muffins I made after the first batch ended up too soggy. They were very tasty, but I think that the carrot shreds have more water content than I gave them credit for, so the second time around I decided to add in some finely shredded coconut, since coconut is known to soak up moisture in recipes. You could also give coconut flour a try, but I am not sure if you would want the full 1/2 cup. Experiment.
The coconut flavor is subtle but it really compliments the rest of the flavors in this muffin quite nicely. The walnuts and golden raisins are both optional, but I would say unless you hate them, you should add them in. Their addition to this muffin reminds me of a slice of traditional carrot cake. These muffins are subtly sweet so they would be perfect for breakfast, dessert or even a little snack. Hubby was of course begging for some sort of cream cheese frosting.
I love how rustic these muffins ended up looking after baking, that is why I ended up taking off the papers before I photographed them. The outside of each muffin had such a beautiful toasted, golden brown hue with specs of the shreds of carrots shining through.
Normally when I am writing up a recipe or editing photos, I still have leftovers in the kitchen, so after I am done staring at the photos forever and craving another taste of whatever it is, I head downstairs and grab a little bite. Sadly, I made these muffins about 10 days ago, but we’ve been so busy getting ready for our pop-up shop this past weekend that I haven’t had a moment to edit the photos and write this up. So, now I think I am going to have to make another batch of these ASAP, I want them that badly.
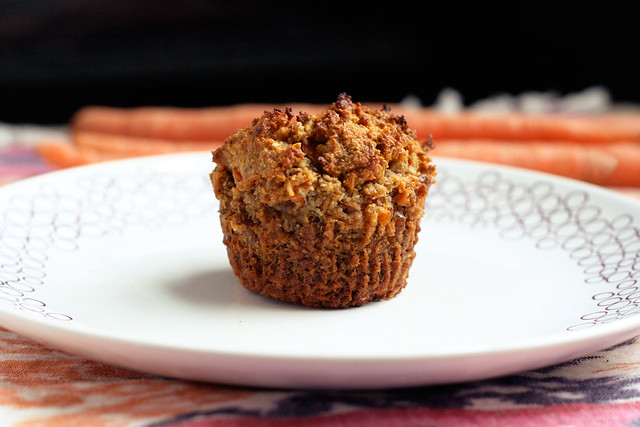
[print_this]Gluten-Free + Vegan Carrot Cake Muffins
Makes approximately 6 large muffins2 flaxseed eggs (or you could also just use two large eggs):
2 tablespoons ground flaxseed
6 tablespoons hot water2 cups blanched almond flour*
1/2 cup unsweetened finely shredded coconut
1 teaspoon baking soda
1/2 teaspoon sea salt
1/2 teaspoon nutmeg
1/2 teaspoon cinnamon
1/4 cup maple syrup (or honey)
1/4 cup olive oil (melted coconut oil or melted ghee)
1 teaspoon vanilla extract
1 cup shredded carrot
1/4 cup walnuts, roughly chopped (optional)
1/4 cup golden raisins (optional)Preheat oven to 350˚F. Line a muffin tin with paper liners.
In a small bowl, whisk together the ground flaxseeds and water, set aside and allow to get thick and gelatinous.
In a large bowl, whisk together the almond flour, baking soda, salt, nutmeg and cinnamon. Add in the shredded coconut, stir to combine.
In a separate bowl, combine the maple syrup (or honey), vanilla, oil and flax seed eggs and whisk until well combined.
Add the dry mixture to the wet, stirring until combined. Carefully fold in the carrots, walnuts and raisins.
Spoon the batter into the muffin tin, filling each cup to the top if you want a nice muffin dome. Bake for approximately 25 minutes or until the tops are golden brown and a toothpick inserted into the center comes out clean. Cool the muffin pan on a wire rack for five minutes. Gently pop the muffins out to continue cooling on the rack (don’t cool them longer than 5 minutes in the hot pan they’ll definitely get soggy). Enjoy a muffin after they have cooled 10 minutes, you know you want to.
I find storing muffins covered tightly in the refrigerator or freezer to be the best, especially in the heat of summer. Just pop one out as you want it, heat slightly in the microwave if you want to take the chill off and go.
*NOTE: Something I have learned from baking on my own and from reading Elana’s Pantry, is that not all almond flour (or meal) is created equal. Bob’s Red Mill makes an almond flour, though easy to find, that doesn’t seem to react quite the same as other almond flours. It doesn’t seem to rise as much and it just seems to leave recipes flat. On Elana’s recommendation I now buy Honeyville brand almond flour in a 5-lb bag from their website. [/print_this]
-
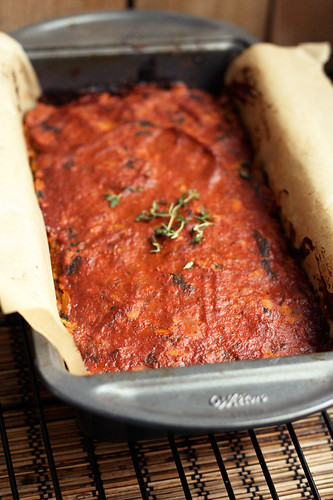
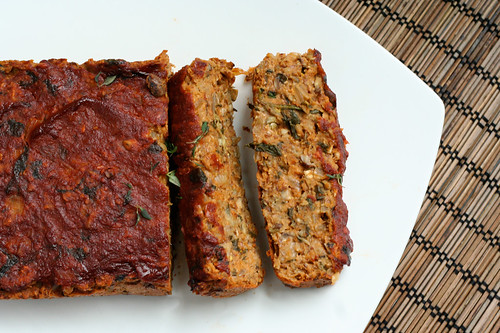
Gluten-free + Vegan Lentil “Meat” Loaf
Hey guys, sorry it was a bit quiet on here last week, we were getting ready for and working our (Hero Design Studio) Pop-Up Shop over the weekend. It went super well and I can’t wait to share some photos from the event with you guys. I am a bit behind on recipe posting from being so busy last week, so look for lots of new recipes this week!
I am super duper excited to not only share this new recipe with you, but to also be the guest blogger at Healthful Pursuit today! If any of you follow me on Twitter, Instagram or Facebook, you will probably remember my extreme excitement about 2-weeks ago when I finally got this Lentil “Meat” Loaf recipe right. I had messed around with a few different versions, but no matter how delicious my loaves tasted, they just didn’t want to stay together, they ended up being a crumbly, sloppy mess on the plate when I would serve them. I finally got it figured out and I couldn’t wait to share it with anyone who would listen, it’s that good.
When Leanne, from Healthful Pursuit, contacted me to share a recipe on her blog with her readers while she is on an incredible trip to India, I was in the middle of experimenting with this recipe, so I knew this was the one to share. Plus, knowing it would be out there in front of even more people, it gave me an even more incentive to try to get it right and perfect.
Leanne’s blog has always been one of my favorites, I found her through her comments on my blog about a year ago and I was always so inspired by what she was making in her own kitchen. In addition to having a similar approach to health and well-being as I do, as a Holistic Nutritionist, Leanne, also has a wealth of knowledge when it comes to foods, eating and our health. Finding Healthful Pursuit brought a wonderful new breath to my cooking and has affirmed all of my decisions about food. I promise after just one visit to HP, you too will be adding it to your bookmarks.
This Lentil “Meat” Loaf pretty much sums up so many of my feelings for food. It is healthy, comforting, satisfying and you won’t feel like you are missing out on a thing when you eat it. It is hearty without being heavy and it is packed full of foods that are great for you. In addition to all of that, the most important thing to me is that it stayed together when I sliced it and it looks beautiful, instead of a lumpy pile on the plate 🙂
This lentil loaf is almost a little meaty and is sure to satisfy even the meatiest of meat-lovers in your family, I promise. My hubby, Mark, LOVED it. He even made up a song for it. Reheat a slice or two of this loaf up in a cast iron skillet to get it a little toasted on the outside and toss it on your favorite gluten-free (or not) bread, with a little more BBQ sauce and some pickled red onions for a delicious “meat” loaf sandwich. The perfect hearty and healthy lunch.
In addition to the loaf, I also made a delicious and spicy vegan BBQ sauce to go on top. You could certainly use your favorite store bought BBQ sauce, but I urge you to try making your own, even if just one time. It is much easier than you think, you can skip all the gross refined sugar or corn-syrup laced store brands and you can tweak the ingredients to have a taste that is all your own. My BBQ sauce is a tad bit spicy (you can make it as spicy as you’d like), a little tangy and just a tad bit sweet. I love it.
This recipe was originally shared on Healthful Pursuit.
[print_this]Gluten-Free and Vegan Lentil “Meat” Loaf
Makes about 8 slices2 tablespoons ground flax seeds
6 tablespoons boiling water
2 cups cooked green lentils, cooled and split into 1 1/2 cups and 1/2 cup
1 cup mushrooms, diced
2 cups fresh baby spinach, roughly chopped
1 tablespoon olive oil
1 onion, diced
1 clove garlic, minced
1 tablespoon fresh thyme, roughly chopped
1 cup gluten-free rolled oats, split in half
1/2 cup almond flour
3/4 cup spicy vegan BBQ sauce (see below)Preheat the oven to 375º. Add the ground flax seeds to a small bowl, pour the boiling hot water over and stir to combine well. Set aside and allow it to thicken and cool.
Heat the olive oil in a large saucepan over a medium heat, add the onion and garlic and sauté for 5-8 minutes until the onions are tender. Add in the mushrooms and cook another 3 to 5 minutes until the mushrooms are tender, add in the thyme and spinach and cook until the spinach is wilted, about 2 minutes. Add in 1/2 cup of the BBQ sauce, stir to combine and turn off the heat, add salt and pepper to taste, if it needs it.
Process 1 1/2 cups of the cooked lentils and1/2 cup of the oats in the food processor until smooth (some whole bits may remain, that’s ok). Spoon the mixture into a large bowl, add in the remaining lentils and oats, plus the flax “egg”, almond flour and vegetable mixture. Stir really well to combine. Then get your hands in there, just like you would with a regular meat loaf or meatballs, and make sure it is mixed and mashed together really well.
Spoon the mixture into a parchment paper lined 9″ x 5″ loaf pan, (leave a bit of the parchment paper hanging over so you can easily lift the loaf out when it is cooked). Using your hands, you really want to press it in good. Brush on the remaining 1/4 cup of BBQ sauce over the top.
Bake uncovered for 35 to 40 minutes at 375º. Cool in the pan for about 5, pull the loaf out by grabbing the sides of the parchment paper and lifting up and allow it to cool for another 5 to 10 minutes on a cooking rack. Slice and serve.[/print_this]
[print_this]Spicy Vegan BBQ Sauce
Makes about 1 quart of sauce1 tablespoon olive oil
1 large onion, diced
3-4 garlic cloves minced
1 teaspoon celery seed
24-ounce jar of strained (or crushed) tomatoes (or a 28-ounce can)
7-ounce jar of tomato paste (or a 6-ounce can)
2 tablespoons Sriracha (if you don’t like spicy, you can skip this, add less or use just a pinch of two of red pepper flakes instead)
1/4 cup cider vinegar
1/4 cup whole grain mustard
1/4 cup maple syrup
1/4 cup blackstrap molasses
2 teaspoons liquid smokeHeat olive oil in a medium saucepan over a medium heat. Add the onion sauté for about 5 minutes, until the onion is slightly tender, add the garlic and saute for another minute or two. Add in the remaining ingredients and stir well to combine, reduce the heat to a medium-low and allow to simmer for 20 to 30 minutes, stirring often. Taste the sauce and make sure you don’t want more of anything, you may want it more sweet, spicy, sour, salty. I like my BBQ sauce tangy and smoky, so I added another 1/4 cup of vinegar and another teaspoon of liquid smoke. Remove from the heat, allow to cool for a few minutes, then puree until smooth in the food processor or blender.[/print_this]
-
Tasty Yummies at Buffalo Web Foodies
I am very excited to have been asked to be a featured panelist at Buffalo Web Foodies, a panel that is being presented by the Social Media Club Buffalo, next Wednesday, 2/22! Join us as we discuss how the internet has impacted our roles in the local food scene and much more! Hope to see you there.
More information about the event:If there’s one thing Buffalonians get really excited about, it’s food.That’s why they knew that hosting a Buffalo Web Foodies event would work. The people in this town love eating food, talking about food, cooking food, writing about food, sharing food, and even Tweeting about food.More and more local restaurateurs are starting to use social media to promote their businesses, though not always successfully. Social Media Club (SMC) Buffalo wants to help them to perfect those efforts. Local food blogs have been popping up in the area as well, be they about preparing and photographing food at home, or reviewing food and local restaurants. There are plenty of players in the local food and restaurant scene who don’t use online resources at all. Social Media Club Buffalo hopes to teach them how they can use the Internet to augment what they’re already doing to grow their business and reach.The Buffalo Web Foodies event will feature a panel of experts who will discuss how the internet has impacted their roles in the local food scene. SMC had a hard time narrowing down potential panelists, and hope that anyone who was not invited to be on the panel will attend the event and participate by interacting with the panelists and the audience. In the end, the group selected 4 individuals to be on their well-rounded panel:
- Christa Seychew – Food editor at Buffalo Spree, Producer of Nickel City Chef series, and overall expert on local Buffalo food scene.
- Donnie Burtless – Creator of BuffaloEats, one of the area’s premier restaurant review websites.
- Beth Manos Brickey – Creator of Tasty-Yummies, a popular blog featuring mouth-watering recipes and beautiful food photography.
- Deborah Clark – Owner of Delish Cooking School and Pastry shop, and advocate for social media use.
Anyone with an interest in the local food scene or learning more about using online media is encouraged to attend the event. People are invited to submit their questions ahead of time via the event page on Facebook, or on Twitter using the hashtag #BUFfoodies.
Also on hand to feed the hungry attendees will be food trucks The Whole Hog and Roaming Buffalo. Yelp! is sponsoring the event, and will be providing some goodies for all attendees.
Event Details:
- Weds Feb 22. 6pm – 8:30pm
- Food trucks will start serving at 6, panel begins at 6:30.
- Artisan Kitchens and Baths
- Tickets: Free for paid SMC members, only $8 for non-members.
- Tickets available online at http://buffalofoodies.eventbrite.com/
To learn more about SMC Buffalo, please visit http://socialmediaclub.org/chapter/buffalo or follow them on Twitter at @SMCB
-
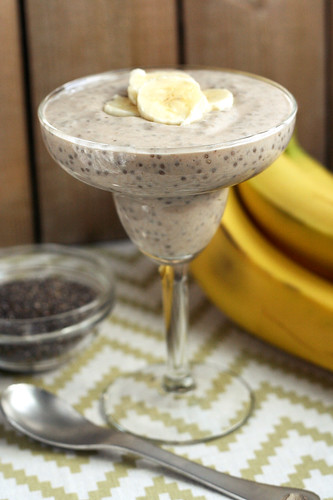
Banana Cream Chia Pudding (gluten-free, vegan, refined sugar-free)
This creamy and delicious pudding turned out way better than I ever dreamt it could, I love when that happens. This was another one of those kitchen creations that had me doing the “yum yum dance”. You know exactly what I am talking about, you take a bite before you even sit down, and with the spoon or fork still in your mouth, your hips and butt start swaying and without thinking, you start some version of a song where the only lyrics are “yum”, “mmmmm” and/or “ooooh”. I swear this is something we are born with, I have seen babies under a year do this dance. It’s the best!
I have been working on a recipe for a healthy gluten-free and vegan banana coconut cream pie and I had to take a detour when I thought of this tasty breakfast treat. Fear not though, the pie recipe is still in the works and I cannot wait to play around with it.
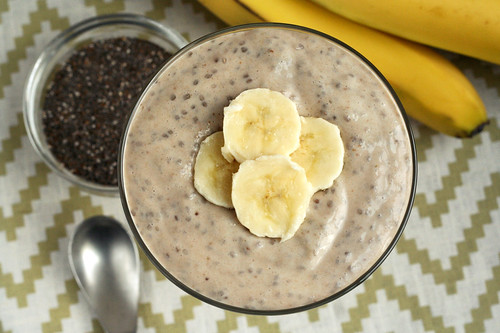
I had a serving of this for an after-yoga breakfast treat this morning and it kept me full for many hours, I love that. This perfectly and naturally sweetened pudding would also be great for a dessert or mid-day snack when you are craving something a little sweet. It’s amazing how wonderfully sweet this is without adding any sugar or sweetener besides the dates. I love that! The creaminess from the coconut milk, almond milk and bananas are all so amazing that most people wouldn’t believe there isn’t any dairy in this. It’s treats like this that keeps me from being intimidated about removing dairy from my diet. I would never miss dairy if I had this pudding once or twice a week.
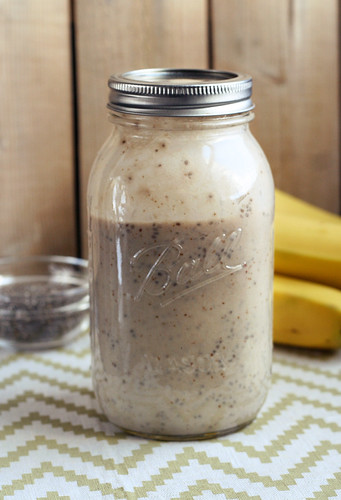
This week has been a bit crazy and stressful and it’s only Thursday. Hubby had to take a quick and unexpected flight home to Kentucky to be with his Grandmother who is very ill. We have been working many evenings, so we’ve been eating a lot of quick dinners and we’ve been eating up leftovers, so I am starting to get that urge to cook and bake since it’s been a couple of days. We have a weekend full of work ahead of us, but I need to find time to attempt this banana coconut cream pie that I have created in my head. After making this pudding I am starting to think that ground-up chia seeds may be the perfect ingredient to make my pie filling thick and luscious. Hmmm… I can’t wait to get to experimenting.
How has your week been going? Have you had time to make meals this week? Do you have any cooking and baking plans for the weekend?
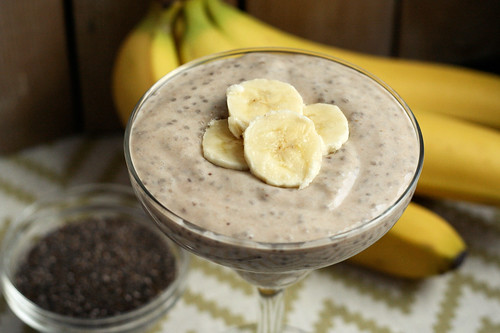
[print_this]Banana Cream Chia Pudding (gluten-free, vegan, sugar-free)
serves 2-4 – makes approximately 3 cups1 cup lite coconut milk (the canned kind)
1 cup unsweetened almond milk
2 bananas
2 teaspoons vanilla
3 medjool dates, pits removed
2 tablespoons chia seedsPuree everything but the chia seeds in a blender until smooth, combined and thick. You may see a few little bits of the dates still, it’s OK. Pour the mixture into a glass bowl or a mason jar, stir in the chia seeds. Make sure to stir well to combine. Cover the bowl or put the lid on the jar. Keep in the refrigerator overnight or for at least 4 hours.
Spoon or pour into bowls, top with fresh banana slices or banana chips, if you wish. Serve.[/print_this]
-
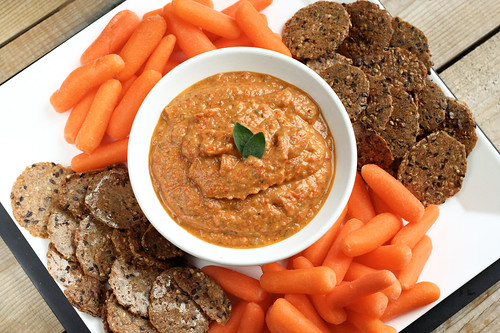
Eggplant and Roasted Red Pepper Dip (gluten-free and vegan)
As I mentioned in my last post, for my Creamy Dairy-Free Spinach Dip, I have really been enjoying cooking and baking without dairy. In addition to cooking without processed foods and gluten, it has been a fun and rewarding challenge. However, it is definitely one thing to just be cooking at home for myself and my hubby, but coming up with some fun and unique snacks to share with other people that can eat both gluten and dairy, can be a bit harder. I never ever want someone that is eating my food to feel like they are eating a weirdo diet food or some sort of concoction that only someone that hasn’t had gluten in over 7 years, would love.
When coming up with snack ideas for our little Super Bowl get together, I wanted something everyone could love that was light but still satisfying and with my dips I really wanted to challenge myself to create creamy but without the dairy. In the past, I definitely would have enjoyed some of the healthy snacks that others or likely myself made, but then, of course, indulging a bit in the inevitable cheese that would be there in some capacity. Using the excuse of a holiday or special occasion to eat more cheese than normal sounds all well and good, until you have a terrible cheese-induced tummy-ache later because you have all but cut out dairy in your every day life.
So I came across a version of this recipe on my Pinterest travels and it looked super creamy and delicious, I decided to add in the roasted red peppers because they pack some incredible flavors that I thought would pair very well with the eggplant! The original recipe was just the eggplant and it had a bit more olive oil, the photo I saw with the recipe made it look so insanely creamy, I couldn’t believe there wasn’t any dairy in it. So after making this my way, I am actually looking forward to trying this dip again, the original way, to see which I prefer.
This dip is smooth and creamy and has a bright, almost tart flavor from the roasted red pepper. I really love how the peppery spice from the oregano works with all of the different elements. Feel free to play around with different spices and/or herbs to get this to the flavors you love. The original recipe called for thyme, you could also add in some red pepper flakes or other spices that you love.
I served this dip with a bunch of fresh raw veggies like baby carrots, celery, radishes, bell peppers, etc as well as some crackers. This dip would also make a great spread to put on sandwiches, eggs, even on top of a salad, pasta, etc.
[print_this]Eggplant and Roasted Red Pepper Dip (gluten-free and vegan)
Adapted from Body+Soul Magazine, July/August 2010
Serves 103 medium eggplant (about 4 pounds), halved the long way
4 cloves garlic, peeled and very thinly sliced lengthwise
1 tablespoon plus 2 teaspoons extra-virgin olive oil
Kosher salt
1 cup roasted red peppers, roughly chopped (roast the peppers yourself or jarred will work too)
1 tablespoon fresh oregano (roughly chopped)
2 tablespoons fresh lemon juice
Freshly ground pepperPreheat the oven to 400º F. Arrange the eggplant cut side up on a baking sheet. Make slits in eggplant and insert garlic . Drizzle with 2 tablespoons oil. Season with 1/2 teaspoon salt. Bake until tender, about 1 hour. Remove from oven; let stand until cool, about 20 minutes.
Scoop the flesh of the eggplant into a food processor. Add roasted red peppers, oregano, 1 tablespoon oil, and lemon juice. Puree until smooth. Pulse to combine with salt and pepper, to taste. Will keep refrigerated up to 3 days. Serve with crackers, fresh vegetables or crostini.
[/print_this]
-
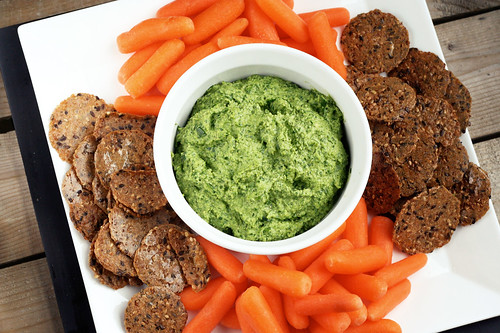
Creamy Dairy-Free Spinach Dip (vegan, gluten-free)
I am having a lot of fun making different dishes and snacks dairy-free. For the most part, as with my gluten-free or even vegan cooking, I have just been cooking around it, enjoying things that are naturally such, I don’t usually make tons of substitutions with weird processed things like fake cheeses or fake meats, etc. Even though I think that some dairy-free cheeses (like Daiya) might be nice for the occasional special treat if I really feel like I am missing out or want some cheese, I usually just get really creeped out by how much weird stuff are those types of foods. Many times you read the package and you don’t even know what the ingredients are, you can’t pronounce them, etc.
I was craving a delicious Italian-style pasta dish the other night, so I made gluten-free penne with a creamy roasted tomato and basil sauce. No cheese or dairy! The creaminess came from soaked cashews and I added in a little nutritional yeast for the nutty/cheesy flavor it brings. It was so perfectly delicious and it really hit the spot. I didn’t miss the dairy one bit. There is always the option of using nut milks instead of dairy milk in recipes, which I have been doing for a long time when making, but it doesn’t always give you that super creamy cheese-like texture when cooking, so that is where raw nuts have been coming in handy for me.
I did some serious cooking, baking and making over this weekend. I made my first ever batch of Kombucha, which I cannot wait to try, I love that stuff. I also made gluten-free, dairy-free refined sugar-free chocolate donuts for breakfast yesterday in my new donut pan (recipe coming soon) and all of my Super Bowl treats. We watched the Super Bowl last night at my parents’ with my family and some friends, so I decided to experiment a little with my Super Bowl snacks, making things that not only I would eat, but that would still appeal to everyone else. So, I made three different things: this creamy spinach dip, a creamy eggplant and roasted red pepper dip and Thai Meatballs (made from some grass-fed beef from our local farmer) with a red curry peanut sauce. I will be posting the eggplant dip likely tomorrow so look for that. As for the meatballs, I basically just altered this recipe to be gluten-free and I used some of our lean grass-fed ground beef from the half cow that we shared with my parents. I was really excited to find a meatball recipe that wouldn’t need any cheese of some sort, since I was initially playing with the idea of making regular Italian style meatballs. They were so delicious! I really recommend that recipe.
I served the two dips with tons of fresh cut raw veggies, regular whole grain crackers and some Mary’s Gone Crackers Black Pepper Crackers for me. Both the dips were enjoyed by everyone and the meatballs FLEW off the plate. This particular dip is so creamy, you would swear it had ricotta cheese in it. It has a nice flavor from the garlic and the nutritional yeast brings an almost “cheesy” taste. Nutritional yeast is low in sodium and it is one of the few non-animal sources of B-12, it is rich in folic acid and many other nutrients and amino acids. This is not your typical yeast and is free of the Candida Albicans strain, making it safe for those concerned with candida. Per ounce nutritional yeast packs in 14 grams of protein and 7 grams of fiber.
I’ll be honest, I did a lot more gabbing and snack-eating then football watching last night. We did manage to keep quiet through the half-time show, which I thought was just so-so. I love old-school Madonna and was excited to hear some of the old hits but that is about it. I was a bit let down, it didn’t do it for me. Though I did make it a point to listen to all of her old albums today on Spotify to make up for it!
Did you watch the Super Bowl? What did you think of the half-time show? What foods did you make or eat?
[print_this]Creamy Dairy-Free Spinach Dip (vegan, raw, gluten-free)
1 cup raw unsalted cashews, soaked for 1 to 3 hours and drained
2 cloves garlic
1 tablespoon nutritional yeast
1-2 tablespoons of water
4 cups baby spinach (split to 3 cups and 1 cup, roughly chop the 1 cup)
1/4 teaspoon kosher saltAdd the cashews, garlic and nutritional yeast to the food processor, puree until thick, creamy and smooth. You can add a tablespoon or two of water to the mixture as needed to make it more creamy. Add 3 cups of the spinach and continue pureeing until smooth. Fold in the remaining chopped spinach and stir by hand to combine. Pour the creamy spinach mixture into a serving dish and serve with fresh cut raw veggies, tortilla chips, crackers, toasted bread, etc.
[/print_this]
-
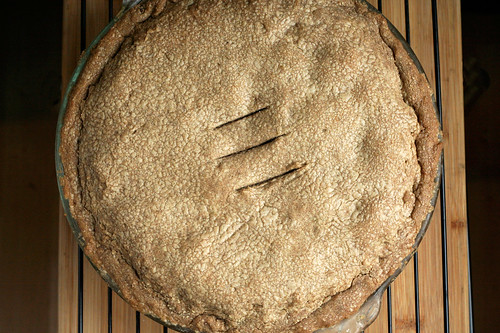
Gluten-free & Vegan Vegetable Pot Pie
I am super excited to share this recipe with you. I know it seems complicated and like a lot of steps, but it really isn’t that bad. If you want to buy a store bought pie crust or mix, and just make this filling, I say go for it. If you aren’t gluten-free and you wanna make this filling, just sub in your regular flour. Just looking for vegetarian not vegan, use butter and regular milk. But whatever you do, make time to make this pot pie. It is so delicious!
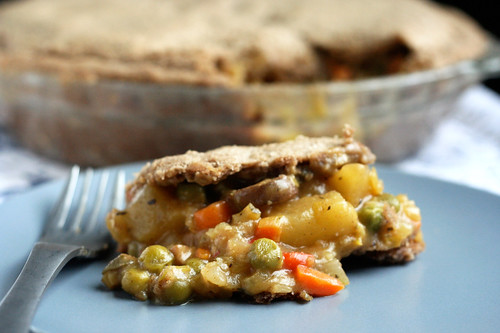
I have really come to love baking and even though I am not quite at the point with my baking where I can completely, on my own, create a complicated recipe yet, like a vegan gluten-free pie crust, I still really love doing it. Having a beautiful and perfect recipe for a pie crust from a true pro like Shauna (Gluten-free Girl), is seriously a blessing. It is a great jumping off point for recipes like this one and I am truly grateful for people like her that can find the perfect ratios, keep their cool while experimenting and destroying things and come up with the perfect pie crust! It is so damn admirable.
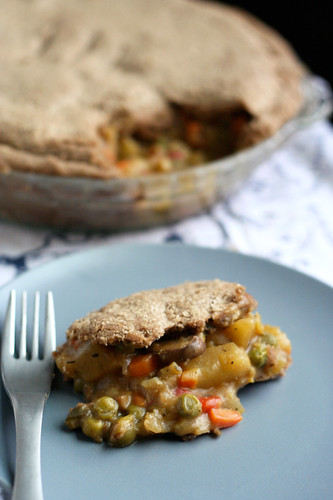
I keep my own gluten-free whole-grain flour blend on hand (that I make using Gluten Free Girl’s suggestions on flours, starches and ratios) in a large quantity for use in lots of different recipes. I used Shauna’s pie recipe after Thanksgiving to make a turkey pot pie and I made it exactly as the recipe calls for, with the same flour blend that she uses and with butter. It turned out perfectly. Since I have since cut out dairy, I was very excited to try it all again but making the pie dough vegan and using a whole-grain blend of flours instead. The crust was definitely a bit flakier with the butter than the vegan butter sticks, but I have to say I am extremely excited and impressed with both the crust on this pie and the delicious vegan filling. The pie crust was tender and it had a beautiful tasty crisp and even a slight flakiness to it. The filling is thick, hearty and even a bit creamy. It amazed even me that there wasn’t a bit of dairy in this whole pie. Since it has been nearly 3 weeks since I have had any dairy, I kept feeling like I was doing something wrong when I was eating this. But I made the entire thing myself, not a drop of dairy in the whole thing. Considering my meat and cheese loving hubby, Mark, not only at this, but went back for seconds – I knew I had struck gold!
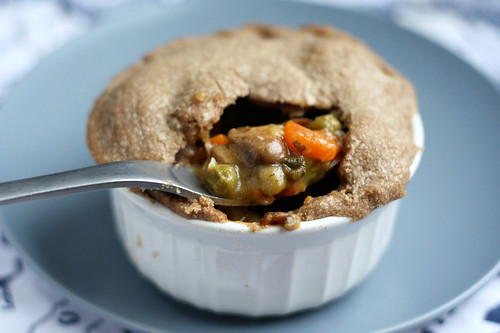
When making the large pie, I was afraid to overload it with too much filling, so I had a little bit leftover after putting the top crust on (though I realized after I should have just mounded it all in there), I also ended up with the smallest piece of extra pie dough since I had over rolled it just a tad, so I made the tiniest little mini-pot pie in a ramekin. I was actually really excited that it worked out this way, since I wanted to see how it would turn out if I made mini pot pies instead. It was perfect! The only thing I would change for the next time is to load all of the filling in, even though it seems like a lot. The filling does cook down a bit, so there is more room there than you think. I just had visions of veggie filling overflowing all over my own and ruining the pretty picture-perfect pie I had made.
You can have some fun with your pot pie fillings and add or take away any of your favorite or not so favorite ingredients. Turnips or parsnips would be good, asparagus or butternut squash, chives instead of sage. Play with your ingredients depending on what is in season. You could add some tofu. Have fun with this!
[print_this]Gluten-free & Vegan Vegetable Pot Pie
serves 6-8This pot pie has a top and bottom crust, which is how my husband requires his pot pies! If you wish to only have a top crust or if you wish to make smaller pot pies in ramekins with just top crusts, make sure to halve the pie dough recipe.
Gluten-Free Vegan Whole-Grain Pie Dough:
Adapted from Gluten-free Girl350 grams all-purpose gluten-free whole-grain flour (or your favorite gluten-free AP flour) – I used Shauna’s ratio and flour suggestion list to make my own whole-grain flour mix. My blend included a combination of almond flour, buckwheat, teff, sorghum, arrowroot and potato starch.
1/2 teaspoon kosher salt
226 grams (2 sticks) Earth Balance Vegan Buttery Sticks (you can use two regular sticks of butter if you aren’t vegan)
1/2 cup ice-cold water, plus a few splashes moreGluten-Free Vegan Veggie Pot Pie Filling:
1 tablespoon olive oil
1 medium onion, diced
1 leek, white and green parts only, diced
1 clove garlic, minced
3 carrots, peeled and diced into 1/2-inch pieces
2 stalks celery, diced into 1/2-inch pieces
1 red bell pepper, diced into 1/2-inch pieces
1 sweet potato, diced into 1-inch cubes
1/2 cup dry white wine
1/2 cup gluten-free flour
2 cups vegetable broth (mushroom stock would also be good)
1 cup non-dairy milk (almond, cashew, coconut, etc)
1 cup frozen peas
1 tablespoon fresh sage, roughly choppedCut the buttery sticks into one-inch cubes. Place them on a plate in the freezer for 15 minutes.
Put the flour and salt into a large food processor. Pulse them together a few times until the flour is fluffy and aerated. Add the butter cubes. Pulse ten times. Your flour mixture should now look sandy, with some butter chunks still visible.
Pour in the ½ cup of ice-cold water. Pulse five times. Look at the dough. If it still looks a bit dry, add a splash more water, not exceeding another ¼ cup. The finished dough should like curds of dry cottage cheese. Do not add anymore water.
Forming the dough into a disk. Dump the dough onto a clean, cool surface. I work on a piece of parchment paper on the counter top. Gently gather all the dough together in your hands. Working quickly, take half the dough, make it into a ball, then flatten it into a plump disk, about 2 inches tall. Wrap it in plastic wrap and let it rest in the refrigerator for 30 minutes. Do the same with the remaining dough.
While the dough is chilling you can make your pot pie filling. Heat 1/2 of the olive oil in a large saucepan over a medium-high heat. Add in the carrots, celery, onion, garlic, bell pepper, sweet potato and leek. Stir frequently and allow to cook for 5 minutes. Add in the white wine and turn the heat down to medium-low, cover and allow the vegetables to simmer and steam for about 15-minutes, stirring frequently. Meanwhile heat a medium pan over a medium-high heat and add the remaining olive oil. Add in the mushroom and saute until they are browned and tender, about 10 minutes.
Add the mushrooms to the other vegetables and sprinkle the flour over the vegetables, stir to evenly distribute and add the vegetable broth, sage and frozen peas. Stir to combine and break up the flour clumps, it should immediately start to thicken. Add in the non-dairy milk. Stir. You can add more broth if the mixture gets too thick. Allow to simmer on low for another 5 minutes, to cook the peas, then turn off the heat.
Once the filling is done, set it aside to cool slightly.
You are now ready to assemble your pot pie. Take the pie dough disks out of the refrigerator and let them sit out for 15 minutes or so, so they are still slightly chilly – but a wee bit closer to room temperature and preheat the oven to 425°. (Honestly, this time around I forgot to let the dough sit and it rolled out just perfectly.)
For rolling out the dough you can either work on a floured countertop, a floured marble pastry board, or two pieces of parchment paper (I go this route and I still add a tad bit of flour). I would love to one day make my pies with a marble pastry board!
Gluten-free dough is definitely stickier than regular gluten dough. Be sure to use plenty of gluten-free flour on your surface when rolling it out. When I use two pieces of parchment paper, I lightly dust a bit of flour down on each side of the dough before I place it between the sheets of parchment paper. Shauna recommends very, very lightly oiling the parchment paper, to try to prevent sticking. (I have never done it this way)
could try really hard to explain in detail exactly how to do these next steps, or I could quote Shauna’s beautiful and incredibly descriptive words on rolling out the dough and prepping it to place in the pie pan. Honestly I wrote this part out in my own words so many times and it just never sounded as good as how Shauna put it. Somehow she makes rolling out a pie dough sound like a graceful dance. Seriously, you’ll see what I mean…
“Pat down the disk and put the rolling pin on it. Now, imagine that the dough is the face of a clock. Roll out once at 12 o’clock. Then, lift the pin and roll at 12:10. Moving in “ten-minute” increments, roll out the pie dough to slightly larger than your pie pan. Be patient. Think of this as meditation. Roll out the dough evenly.
Now, if you have worked with the parchment paper, lift the top paper, put the pie pan on top of the dough, and flip it over. Carefully, strip away the parchment paper. Go slowly. Voila! Pat the dough down into the pan.
Now, if some of the pie dough has stuck onto the parchment, do not despair. Simply peel it off and pat into the rest of the pie dough. With a gluten dough, this might make a crust tough. Guess what here? No gluten! No problem. Pat away.
(If you have used the marble board or countertop, roll the dough onto your rolling pin and transfer to the pie pan. Again, if it sticks, no worries.)
Crimping the edges. Crimp the edges of the pie pan by working with floured fingers. I press from the inside of the pie pan with my thumb and first finger on the left hand, then press between those with the first finger of my right hand from the outside. (That’s a lot of words. Try to visualize it. This will make sense.) This is one of my favorite activities in the world. Go slowly and enjoy it.
Fill the pie with the filling. Pat it down.
Roll out the remaining dough the same way. Lay it onto the pie gently, like you’re putting a blanket on a sleeping child. And if the dough sticks and breaks, just pat the pieces together. (That’s what happened with both the finished pies you see here. They didn’t suffer.) Tuck the edges into the crust.”
I will be honest, crimping the edges of a pie crust just isn’t my thing, not because I don’t like it or think it is pretty, I just find myself getting frustrated and wanting to just get it in the oven and then eat it. I guess I just go with the rustic look. I make sure all the edges are sealed and tucked in and go with that! Maybe some day I will have the patience and the eye for pretty pastry techniques.
It is now time to bake the pot pie! YAY! Cut a few slits into the top crust. Place a sheet pan on the bottom rack of the oven, under the rack where the pie pan will be, to catch any potential drip overs. Place the pie pan into the oven and bake for 15 minutes at 425ºF, then turn the temperature down to 375°F. Bake until the juices are bubbling out of the pie (this may or may not actually happen depending on how juicy or thick your pot pie filling is) and the crust is browned, about 45 to 55 minutes.
Allow the pot pie to cool 10 to 15 minutes before serving. Enjoy!
Please note, instead of one large pot pie with a top and bottom crust, you could certainly halve the dough recipe and make mini-pot pies in 6 – 10 ounce oven-safe ramekins. Just cut the dough into 6 rounds that are slightly larger than the circumference of the ramekins. Lay the dough onto the filling and bake the same way. I had a little extra filling and some extra pie dough, so I made one this way to try it out. It was perfect and super adorable.[/print_this]
-
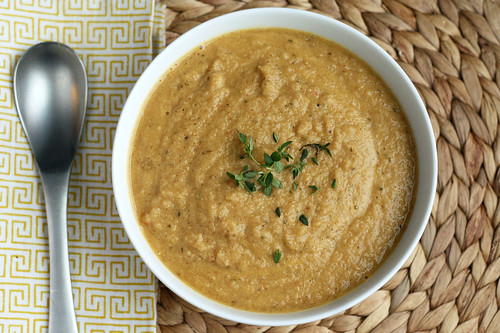
Creamy Roasted Garlic and Cauliflower Soup (Gluten-free and Vegan)
Is anyone else as obsessed with soup as I am this time of year? I could eat it every single day. There is something so comforting about soup. Even though we have had a mild winter, no matter what, every day that it has been the slightest bit cold, I have craved some type of soup or stew.
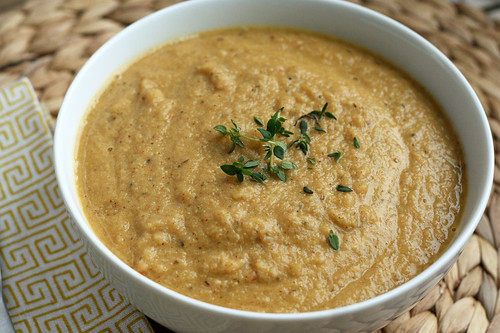
Lately I have really been enjoying these simple to make creamy, but vegan pureed soups. Hearty, filling and so good for you! This soup might actually be my new favorite. It has so much delicious robust and deep flavor from the roasted cauliflower and garlic, with just a hint of heat from the red pepper flakes. It is creamy but still light and the depth of flavor is just incredible. What is even more incredible is how few ingredients it takes and how quick it is to make. I threw this together yesterday after lunch to be ready for dinner, and it was so quick and easy.
What is your favorite soup right now?
[print_this]Creamy Roasted Garlic and Cauliflower Soup
serves 41 large head (or 2 small) cauliflower (about 2 to 2 1/5 lbs) cut into 1-inch florets
3 tablespoons olive oil
1 whole head of garlic
1 medium onion, diced
4 cups veggie broth
1 1/2 teaspoons Herbes de Provence
a pinch of red pepper flakes (optional)
sea salt and black pepper
fresh thymePreheat oven to 425ºF
Peel away the outer layers of the garlic bulb skin, leaving the individual cloves intact and the bulb still whole. Cut off about 1/4 inch from the top of the cloves. Place the head of garlic in a small piece of foil, drizzle with a small amount of olive oil (just a teaspoon or two). Wrap the foil around the garlic head tightly.Toss the cauliflower with 2 tablespoons of olive oil on a baking sheet or in a roasting pan. Add the pan of cauliflower to the top rack in your oven and the garlic head wrapped in foil, on the bottom rack. Bake both for about 30-40 minutes. You can gently toss the cauliflower around, once or twice in that time.
You want the cauliflower to be a golden to dark brown color and the garlic head to be very fragrant and soft to the touch. Allow the garlic to cool so you can touch it. With your hands or a small knife, squeeze each of the roasted garlic cloves out of their skins into a small bowl, It should look like a thick paste. Set the cauliflower and garlic aside.
In a medium saucepan, heat the remaining olive oil over a medium-high heat and add the diced onion. Cook until soft and translucent, about 5-8 minutes. Add the cauliflower, roasted garlic, stock, Herbes de Provence and red pepper flakes. Allow to simmer for about 30 minutes, until the cauliflower is tender.
Purée with an immersion blender or in batches using a regular blender or food processor*, until smooth. Return puree to pot, bring to a simmer, salt and pepper to taste. Thin soup with more broth if desired. Ladle soup into bowls. Sprinkle with a pinch of fresh thyme.
* When puréeing hot soup in a blender or food processor, do so in small batches, filling the blender pitcher only about halfway. Put the lid on, but remove that small cap in the lid (if you have it) and hold the lid down tight with a towel, otherwise the steam will cause the lid to explode off, spewing hot liquid everywhere. This has never happened to me, but it can, so be careful.
[/print_this]
-
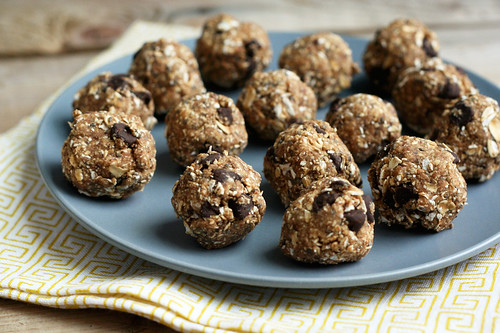
No-Bake Oatmeal Chia Chocolate Chip Cookie Balls (Vegan and Gluten-free)
So yeh, that name is definitely a mouthful, but I promise you, it is a very tasty mouthful! I have been craving a little something sweet for the last day or two, but for the last two weeks I have been laying off sugar, caffeine, dairy and all that stuff, attempting to give my digestion a bit of a break.
Today marks two weeks, I have no more pains, I feel less bloated, I am full of energy and I have dropped about 10lbs! I am attributing most of this to removing dairy from my diet, since that is what I believe to have caused the upset in the first place. So for now, I am continuing on this path of no dairy! I am actually quite excited about this discovery and revelation, I think my body has probably been trying to tell me this for sometime now. I really wasn’t consuming much dairy before all of this, but probably when I did have even the littlest amount, it was just too much for me. Ironically this month also marks the 7-year anniversary since I went gluten-free, so I suppose it is fitting that I make another huge dietary change. Why not, right?
So I decided as a little treat to myself to celebrate the two weeks and my new discovery and as a treat to my amazing hubby, Mark, who has been a trooper though all of this, we needed a healthy mid-day energy-boosting sweet. Who wouldn’t love that?
Since I have avoided chocolate for the last two weeks to give my tummy a break (caffeine is a stimulant and can be a bit rough on an already upset digestive tract), I wanted just the littlest taste today! I didn’t wanna go hog wild and get myself sick, so I thought adding them to a cookie ball like this, in the smallest amount possible, would be perfect. I have made many versions of these cookie balls, but I rarely measure and I usually just make do with what ingredients I have in the pantry and go with what I am craving. Since I knew I wanted to feature this recipe, I decided to measure this time. However, I still find that with a recipe like this, it is best to eye-ball it and go with texture. Some dates can be a bit drier than others, so you may have to soak yours first or add some water to get the consistency just right. I added about 2 tablespoons of water to my dough since I didn’t soak mine, but I could tell when the texture was just right for rolling. If you are ever unsure, just take a glob of the dough in your hands and feel it. You will know if it is too crumbly and dry or if it is too wet and goopy. Adjust your ingredients accordingly.
I added in chia seeds this time, but you could certainly leave them out if you don’t have them or don’t want them. I like the crunchiness that they bring and I also love that chia is a power-food known for being high in fiber and great for digestion. Chia seeds also increase your energy levels, so these cookie bites are the perfect afternoon pick me up. I love that these little treats are naturally vegan and sugar-free, they are gluten-free if you make sure to use gluten-free rolled oats and they are the perfect treat to get you through the middle of the day! Have fun with this recipe, I have made these with raisins or dried cranberries before, you can add banana and peanut butter, cocoa power, nuts, coconut, etc. These have become my go to treat when I want something sweet but I don’t want sugar and other junk.
What is your favorite mid-day snack?

[print_this]No-Bake Oatmeal Chia Chocolate Chip Cookie Balls (Vegan and Gluten-free)
makes about 15 cookie balls1/3 cup Medjool dates, pitted and roughly chopped (about 5 dates – soak if they are very dry)
1 teaspoon vanilla extract
1 1/4 cups gluten-free rolled oats (you can use regular rolled oats if you aren’t gluten intolerant)
1 tablespoon chia seeds
1 – 2 tablespoons water (you could need more, you could need less, just go by how your dough feels)
1/4 cup dairy-free chocolate chipsAdd the medjool dates and vanilla to a food processor or high powered blender (like a Vitamix). Process until a thick paste forms, you may want to add some water here if it is too dry. You will also want to take a spatula and scrape down the edges. Add in 1 cup of the rolled oats and the chia seeds, process until the oats are no longer whole and it all comes together into a thick dough. Again, add water if it is super dry (just don’t add too much water). Add in the remaining 1/4 cup of oats and the chocolate chips and pulse just a few times to bring it all together. Take a small amount of the dough into your hands to make sure it will roll and stay together. If the dough is crumbling a bit, add more water, if it is too goopy and wet, add more oats.
Taking 1 tablespoon of the dough at a time, roll the dough, in the palm of your hands, into about 15 balls. Set on a plate and place it into the fridge for about 15 minutes to all them to chill. Then enjoy!
[/print_this]
This recipe is featured in the Allergy Friendly Lunchbox Love.
-
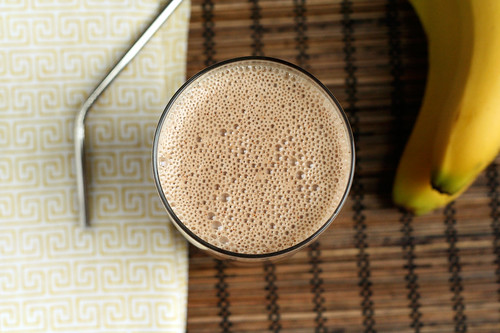
Banana, Almond & Carob Smoothie
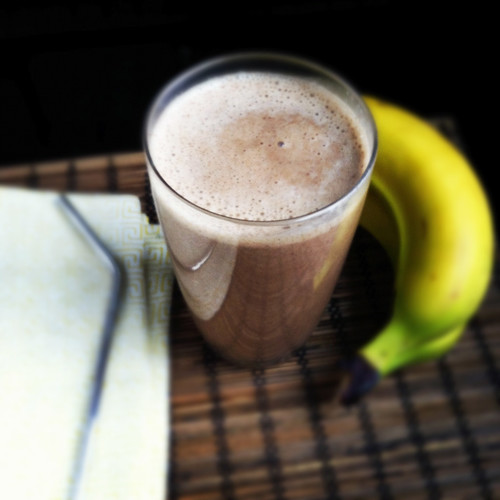 The straight-on photo I took of this smoothie, with my good SLR camera, came out terrible and out of focus, so Instagram to the rescue! YAY!
My smoothie and juice obsession continues. My latest discovery is carob powder. Since I have been avoiding caffeine and sugar for the last two weeks, I haven’t had any chocolate, which has actually been totally fine. But given the time of month that it is right now (ahem, ladies – you know what I am talking about) my slight cravings for chocolate were definitely present this week. I didn’t wanna give in, but I was looking for something that would satisfy me without the caffeine and sugar. I ran across some carob powder while shopping last week at the grocery store and I grabbed it, excited to experiment. I know it can be used in place of cocoa in many recipes, so I figured it would be fun to try out in things like smoothies and maybe even some raw “cookie” balls and stuff. It has some similarities to chocolate, beyond the way that it looks, but it also has quite a few differences, too. Ounce for ounce carob has about the same amount of calories and fat as cocoa, but carob has about 3-times as much calcium as cocoa. It has its own unique flavor that is somewhere between cocoa and carmel, it is a bit sweeter than cocoa on it’s own. It is quite tasty and it definitely helped me curb that want for chocolate. Carob is a tropical pod that contains a sweet, edible pulp and inedible seeds. After drying, the pulp is roasted and ground into a powder that resembles cocoa powder in appearance.
In addition to it’s lovely taste and being caffeine-free, carob has a myriad of health benefits. Carob can help regulate the digestion process (YAY – BONUS!), while serving as a natural anti-allergic, antiseptic, and anti-bacterial agent. Additionally, carob provides powerful anti-viral benefits that supply the body with essential antioxidants. It can lower cholesterol levels in the blood and it is great for treatment of diarrhea. Carob is also rich in phosphor and calcium. For this reason, it is used in the fight against osteoporosis.
I have used it in a couple different smoothies this week, this one being my favorite, and I also made a hot carob drink with the carob powder, almond milk, honey and vanilla. I am still working on that recipe, but once I make it again and can photo it, I plan to share it with you. It was quite delicious and nice that I could enjoy a hot drink besides herbal tea in the evening and not be concerned about caffeine keeping me awake. The flavor at first was a bit of a shock since my brain expected it to taste more like a hot cocoa, since it looked just like it, but once I got past the visual trickery, I really really enjoyed it.
This smoothie is a nice way to bring some very lovely flavors together. It is reminiscent of the classic flavors of chocolate, peanut butter and banana but with a fun and different twist. I made a similar version today leaving out the almond butter and replacing the almond milk with full fat coconut milk and adding an additional teaspoon of carob power and topped with a sprinkle of unsweetened coconut, it was so delicious.
[print_this]Banana, Almond & Carob Smoothie
Serves 11 banana (you can freeze it and skip the ice if you want)
1 1/2 cups unsweetened organic vanilla almond milk
2 tablespoons unsalted, unsweetened organic almond butter
1 tablespoon of carob powder
1 tablespoon raw honey, or however much you want/need to sweeten it (you could also use dates, maple syrup, brown rice syrup etc to sweeten)
1 handful of iceAdd all the ingredients to your blender and process until smooth! [/print_this]
-
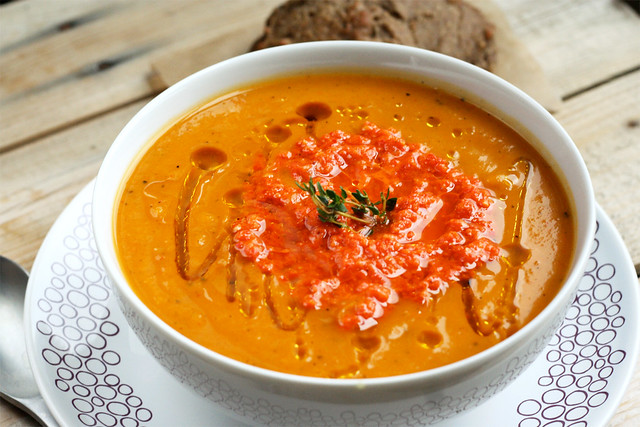
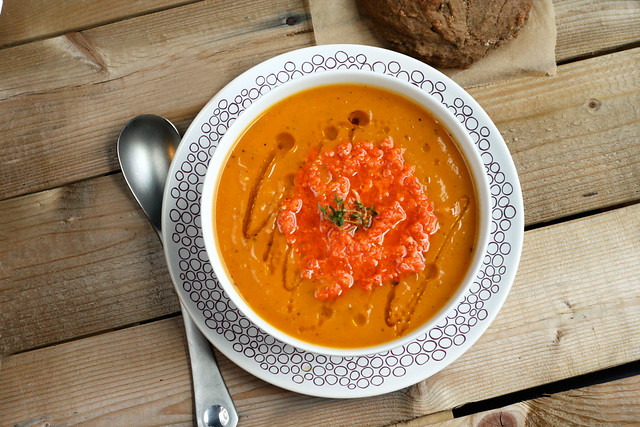
Butternut Squash and Roasted Red Pepper Soup (Vegan and Gluten-free)
I am super excited about how this soup turned out. This soup actually made me realize what a dork I am about good healthy food. It actually makes me stupid excited and I wanna dance around my kitchen! I love when you have an idea in your mind for a dish, you start experimenting, tasting and playing around and it just all falls perfectly into place. That happened with this soup. In fact, it actually came out better than I had imagined it would.
I topped this soup with a roasted red pepper puree that was inspired by a recipe I came across from Bon Appetit magazine in 2003 and I also drizzled some roasted butternut squash seed oil over top. I realize this oil is a very specialized product, and many of you may not have access to it, so you could certainly just use a good quality extra virgin olive oil, or just skip it altogether. The butternut squash seed oil that I have is from a company based in the Finger Lakes region of NY called Stony Brook Oils, I picked it up at Farmers and Artisans here in Buffalo. You can visit Stony Brook’s web site to get a listing of all of the stores you can buy their various squash seed oils at or you can even buy them online. Honestly, if you ever get a chance to try a pumpkin or a squash seed oil, do it. The flavors are incredible. It brings a unique nutty and roasted flavor to so many different dishes. I have never tasted anything like it.
I happened to be able to get my hands on some beautiful red bell peppers that I roasted on my stove top to use in this soup and for the puree on top. If the red peppers at your market aren’t looking so hot, just go with jarred roasted red peppers, they will work perfectly fine, too.
This naturally gluten-free and vegan soup is bursting with flavors and it is so beautiful and colorful. The roasted red peppers in the soup compliment the nutty flavor of the squash and the spicy, garlicky puree on top is a nice burst of bright flavor with a hint of spiciness. The puree was so delicious that I have been using it as a spread on sandwiches and on top of freshly steamed vegetables, etc. I feel like I always need to have a batch of this stuff on hand.
[print_this]Butternut Squash and Roasted Red Pepper Soup
serves 6-81 tablespoon olive oil
1 large butternut squash (about 2 to 2 1/2 lbs), peeled, seeded and cubed
1 large onion, diced
2 celery stalks, diced
2 cloves of garlic, minced
2 roasted red peppers, diced (here is a great page of different options on how you can roast your own red peppers at home, I roasted mine on my stove top)
1 tablespoon fresh thyme, roughly chopped
1/4 teaspoon of crushed red pepper flakes
1 teaspoon kosher salt
7 cups low sodium vegetable brothbutternut squash seed oil (or olive oil) for drizzling
Heat oil in heavy large pot over medium-high heat. Add onions, celery and butternut squash and sauté until the onions and celery are tender, about 10 minutes. Add garlic and roasted red peppers; stir 1-2 minutes. Add thyme, red pepper flakes, salt and vegetable broth; bring to boil. Reduce heat; cover and simmer until squash is soft, about 45 minutes.
Purée with an immersion blender or in batches using a regular blender or food processor*, until smooth. Return puree to pot. Thin soup with more broth if desired. Ladle soup into bowls. Top each bowl with 1 tablespoon of the roasted red pepper purée and a light drizzle of butternut squash seed oil. Sprinkle with a pinch of fresh thyme.
* When puréeing hot soup in a blender or food processor, do so in small batches, filling the blender pitcher only about halfway. Put the lid on, but remove that small cap in the lid (if you have it) and hold the lid down tight with a towel, otherwise the steam will cause the lid to explode off, spewing hot liquid everywhere. This has never happened to me, but it can, so be careful.
[/print_this]
[print_this]Roasted Red Pepper Puree
via Bon Appetit Magazine, November 20032 roasted red peppers (approximately 1 cup)
2-3 garlic cloves
1/2 tablespoon olive oil
1/4 teaspoon crushed red pepper flakesPuree all ingredients in processor until smooth. Season with salt and pepper.
[/print_this]
-
Carrot, Pear, Raspberry, Cucumber Juice
This is gonna be a quick post – I am a bit behind on recipes and my day is full of client work and other projects, but I really wanted to share this juice recipe with you. I have to admit, I was a bit at a loss for a clever and cute name for this juice, so I went with the obvious. I kept wanting to find a way to combine the words “berry” and “brightness” but I just didn’t have it in me this time.
At any rate, this juice is FULL of flavor. It is incredible bright and perfectly tart, with the right about of sweetness. It sounds like and will look like a lot of berries, but sadly they don’t produce a ton of juice, which is why I rarely buy berries for juicing. But even in small amounts they bring a really wonderful tart flavor to juice and the color from the raspberries are just so beautiful. I found this fun fact about raspberries that I thought was interesting “Raspberries possess almost 50% higher antioxidant activity than strawberries, three times that of kiwis, and ten times the antioxidant activity of tomatoes”. Raspberries are low in calories and they are a wonderful source of dietary fiber. Raspberries are also an excellent source of Vitamin C.
I always love adding cucumbers to my juices since one cucumber offers up so much juice and I really love the flavor from it. Cucumbers are almost 96% water, that is naturally distilled, which makes it superior to ordinary water. The skin contains a high percentage of vitamin A, so should not be peeled off. Read on about the many other benefits from adding cucumbers to your juice.
Pears are an excellent source of water-soluble fiber. The high vitamin C and copper content in a pear act as good anti-oxidants that protect cells from damages by free radicals. You can read more about the health benefits of juicing with pears, here.
I’ve already sung the praises of the carrot, in this juice recipe. The main point about carrots are they are one of the most healing foods. Carotenes, the famous ingredient in carrots, is an anti-oxidant that has powerful healing virtues for many diseases. Read more about the health benefits of carrots here.
What would you call this juice?
[print_this]Carrot, Pear, Raspberry, Cucumber Juice
makes 1 large serving4 or 5 carrots
1 pear (I used a green Anjou)
12 ounces of organic raspberries
1 cucumberJuice all of the ingredients. Serve immediately with ice, if you wish.
[/print_this] -
Green Goddess Juice
Yup – I am still on a major juicing kick. I am loving it. I am so full of energy, I feel totally content with what I am eating otherwise and I have no cravings at all. I think by cutting back on some things but not going into a full on cleanse or detox, I am able to reap many of the benefits without putting my body through hell of those rough few first days and I am not taxing my digestive system, which is already a bit grumpy. I didn’t want to do that to my body right now.
I am excited because every day my tummy is feeling better and better and I am really able to notice what is triggering it when it does get upset again. The juicing has really given my digestive tract the rest that it so badly needed. This Green Goddess juice in particular is full of so many of my favorite things and it really made me feel great, on top of the energy I am already bursting with, this juice actually made me feel like I had more! That’s why I decided to call it Green Goddess Juice. Truthfully I really wanted to call it “Green Superheroine Juice”, but that just didn’t have the same ring to it, but it did make me feel like I had super powers! I once again included fennel in this juice, I have been trying to include it in every juice I am making right now since it is so great for your digestion, plus I am really loving the unique flavor it adds.
We had a very busy weekend filled with tons of home projects like ripping up carpeting, reflooring our bedroom, moving furniture around and work for clients. While doing all of those things, I have been ridding myself of so much stuff, both in my personal life and my digital life. I have been going through all of my clothes and accessories and getting rid of things I no longer need or wear. I have donated so many bags of clothes and other goodies to the Salvation Army in the last few weeks and yesterday I did the same to my computer. Well kinda. I backed up and removed over 200 GB of files on my computer that I really didn’t need on there, so my computer can perform better. I streamlined my already existing backup system to be even more thorough and easy to manage. I also organized my email inbox and archived old emails. I took my inbox from over 4000 email down to 81! It feels so good to be lightening my baggage in all of these areas of my life, it is instantly therapeutic and cathartic. It only takes a few bags full of stuff and a handful of gigabytes for you to feel that liberation and suddenly you find yourself looking at everything and thinking “Do I really need that?”.
Since we plan to move later this year and we are in the process of finishing up a few projects to the house that we have to do before we put it on the market, there really has never been a better time to do all of this, than now. I have been putting it off because it takes time and some tough decision making to decide what things in your life you don’t need, but once you start, it really gets easier and easier.
Now I can walk into a room in our house and feel the weight that has been lifted. There is still a lot of stuff that we need to go through and I actually can’t wait! It is ironic the timing on all of this, with me deciding to also take out things from my diet that I really don’t need. I think I can say the same for my eating as my house, I was putting off removing certain things but now that I have, I feel great! I honestly haven’t felt as good as I do right now, in years. So, if there are boxes you need to go through, piles of shoes you know you don’t wear, an email inbox that is jammed full of messages, etc – make the time to go through it. It doesn’t take as long as you think, in the last 3 days I have gotten rid of more stuff from my life than I have in the last year plus I still had time to grocery shop, go to yoga, bake bread, make soup, watch a movie and some football with my hubby and more. Don’t talk yourself out of things, don’t put them off, just do them. It feels better to accomplish something than it does to sit down and feel guilty that you aren’t.
I plan to continue purging things from my life this upcoming week and I am looking forward to it instead of dreading it and I also plan to continue juicing, so look for more recipes.
Have you gotten rid of anything in your life lately? How does it feel?
[print_this]Green Goddess Juice
Makes 1 large serving or 2 smaller (it makes about 1 quart)
(if you want less juice go with 1 cucumber and 1 stalk of celery)2 cucumbers
1 granny smith apple
1/2 or 1/3 of a large bulb of fennel (stalks and leaves included)
2 stalks of celeryJuice all of the ingredients, saving the celery for last since it is stringy and can sometimes clog the machine. Serve immediately.
[/print_this]
-
Chickpea and Brown Rice Burgers
This week has been really nice. I am feeling much more like myself, I have been spending time taking the necessary (and long overdue) steps to be as organized and productive as I can (in life and work) and I have actually really been enjoying eating a limited diet.
The only bad thing about this week is that it’s almost over. I cannot believe it is already Thursday night. How did that happen?
Today is day 5 of no dairy (among other things) and I am feeling really good. I stepped on the scale today for the first time since the holidays and my weight was WAY down (like nearly 10lbs)! YAY! A wonderful bonus to healing my grumpy digestive tract, I would say! I have been enjoying piling in the vegetables this week but on Tuesday night I was wanting something a little bit different for dinner than a plate of vegetables, a smoothie or fresh juice. Since the January/February issue of Whole Living features tons (over 50) great cleansing recipes for their New Year’s Action Plan, I knew I would be able to find the perfect starting point recipe that would still adhere to all of my current self-imposed rules!
These burgers jumped out at my instantly. They are so simple, just a few ingredients and with a few tweaks on my end to my tastes, they would be exactly what I was looking for. I served my burger on top of a nice big leafy piece of green lettuce as they suggested, hoping that the raw roughage wouldn’t be too much for me right now, and it wasn’t, which I was definitely pleased about. I served my burger with some roasted cauliflower tossed with steamed baby spinach on the side and it was a nice light dinner! These patties held together very nicely when cooking and had a beautiful crispy and browned outside. The original recipe suggests mashing the chickpeas with the rice by hand, but I just wasn’t getting the consistency I was looking for and I worried they would end up falling apart, so I processed the chickpeas and brown rice and my food processor and I think that was a wise decision. I also went with cilantro instead of the recipe’s suggested parsley, for a brighter and bigger punch of flavor and I added in some lime juice and chile powder. You could certainly add whatever your favorite fresh herbs and spices are, so many different combinations would work in these bugers. The flavors I went with were so perfect together and topping the burger with fresh scallions and dijon mustard was a great way to finish them.
I kept debating adding fresh spinach to these, but I was worried about them staying together, so I figured it was best not to mess with the ratio too much, but I hope to make these again and play with adding either the spinach or shredded carrots or zucchini or something like that, for some extra color and nutrients.
I think you could also make these burgers a bit smaller and make them more of an appetizer than a meal, serving them with a fun dipping sauce.
How has your week been? Has it flown by or carried on very slowly?
Chickpea and Brown Rice Burgers
Adapted from Whole Living Magazine, January/February 2012 Issue
Makes 4 burgers2 cups cooked and drained chickpeas
1 cup cooked brown rice
1 large shallot, minced
1 clove garlic, minced
2 tablespoons chopped fresh cilantro (You could also use parsley, chives or whatever your favorite fresh herb is)
1/2 teaspoon chile powder (I used ground smoked chipotle powder)
2 tablespoons freshly squeeze lime juice
Coarse salt and pepper
1 large farm fresh brown egg, whisked (you could try an egg replacer here, I haven’t yet, but it’s worth a shot)
2 tablespoons olive oil
Whole-grain or Dijon mustard
Tomato, sliced, for garnish
4 green onions, thinly sliced, for garnish
Green-leaf lettuce, for wrappingAdd the chickpeas and brown rice to your food processor and process until a thick paste forms (you can also mash them by hand). Add the mixture to a large mixing bowl. Stir in shallot, garlic, cilantro, chile powder and fresh lime juice. Season with salt and pepper. Stir in the egg. Form into four 1/2-inch-thick patties.
Heat olive oil in a large skillet over a medium-high heat. Add the burgers and cook until golden brown, about 4 to 5 minutes per side. Spread with mustard, top with tomatoes and scallions and wrap in lettuce.
-
Digest Ease Juice
As I have previously mentioned this week, I have been on a bit of a healing path for the last few days. Trying to ease my digestion woes caused by a grumpy ileocecal valve. In addition to avoiding all dairy, I have also cut out caffeine, alcohol, sugar and chocolate. I am also avoiding roughage like raw leafy green vegetables, raw whole nuts and seeds and spicy foods, among other things. One of the things I have been doing every day is after my morning yoga practice, I come home and make a smoothie or a fresh juice blend. This has been a nice way to get some necessary nutrients and to also give my upset digestion a little rest. I have really been enjoying it. Then I have a light lunch and a light dinner. I have been drinking a lot of water, not really snacking much and making sure to self-massage my abdomen (you can read more about that in my last post).
In my research to find the best ingredients for juicing to help with digestion, the ingredients I used in this particular juice seemed to be at the top of many of the lists. Here is just a tad bit of info about each ingredient from what I have read. I’ve learned that carrot juice is considered the golden juice of healing, it is an excellent tonic for just about every ailment imaginable. It can be consumed in large quantities as well. Carrots are a natural blast of high energy and they are a powerful internal cleanser and detoxifier and they can help an inflamed colon (I dunno if mine is, but it can’t hurt either way).
Apples remove toxins from the intenstines; stimulate peristalsis and bowels; flush kidneys; natural acids for digestion. Apples contain pectin which is a form of soluble fiber. This helps with the detox flush that removes cholesterol and toxins through the liver and kidneys. Apples also contain a substance called malic acid, that helps maintain liver function and improves digestion.
Celery has been known to help in diseases of the kidneys, pancreas, liver and gallbladder. The nutrients in the fiber released during juicing, aid in bowel movements. Celery promotes healthy and normal kidney function by aiding elimination of toxins from the body. While eliminating toxins, it also prevents formation of kidney stones. Celery actually boasts a very very long list of incredible powers, these are just some of the many.
Fennel is probably best well known as a digestive aid. It can help with trapped wind, poor digestion and more painful conditions such as gastritis and enteritis. Fennel is also a diuretic and therefore is very effective when dealing with kidney or bladder troubles and fluid retention. It is also a general pick-me-up and helps to combat general tiredness and fatigue.
Ginger helps to soothe and improve digestion by increasing secretions of digestive juices in the stomach. It also aids blood circulation and metabolism, increases the immune system and strengthens the internal organs of the digestive tract.
When juicing you always want to use organic produce whenever possible and regardless if produce is organic or not, you always want to thoroughly wash it. I am absolutely no expert on juicing so please use your own judgement and do your research before jumping into any sort of juice-only cleanse or detox. Leanne of Healthful Pursuit, a holistic nutritionist, has been doing an enlightening series of posts this week talking about her own journey to healing her digestion. Leanne’s posts have all been very thorough and provide some really great information about what she is going through, how she feels and what she is doing. Yesterday’s post (the third in the series) features some really great information as well as two great juice recipes. Be sure to check it out and follow Leanne along her journey, as I am.
Look for more juice recipes from me over the next two weeks and hopefully in that time my photos of said juice will get better. After I was about halfway done with this glass of juice and was looking at the photos, I realized how boring and blah they were. I need a fun glass or I should have put some of the ingredients in the background. Ah well.
What is your favorite juice combination?
[print_this]Digest Ease Juice
serves 11/2 to 1-inch piece of ginger
1/4 to 1/2 of a large fennel bulb (about 4 oz), I also included some stalk and leaves
3 carrots
1 apple (I used a honeycrisp)
2 celery stalks, with leavesJuice all of the ingredients, saving the celery for last since it is stringy and can sometimes clog the machine. Serve immediately.
[/print_this]
-
Roasted Winter Vegetables with White Beans
First off – I apologize for the photo, it’s kinda hard to make super roasted vegetables look super pretty.
Regardless of the photo – I absolutely love, I repeat and will yell it – L O V E – roasted vegetables – especially winter vegetables. You can really go with any combination you’d like – I based mine this time on what I already had in the fridge from my most recent grocery trip where I bought whatever produce looked best. I made a few additions and skipped some items from the original recipe. Though I will definitely be making this again and again and I know the ingredients will likely change around each time.
I found the original concept for this recipe in the January/February 2012 issue of Whole Living Magazine, which features their New Year Clean Eating Action Plan. These Action Plan issues always have their best recipes, in my opinion. Simple, fresh, clean and totally cleansing. Even though I have been making roasted vegetables for years, what I liked about this recipe were the additions of both the white beans and the balsamic vinegar. Both brilliant additions to an already amazing meal. The original recipe had a sweet potato instead of baby reds like I used, and I went with 2 onions instead of a leek, because I absolutely love roasted onions. The Whole Loving recipe also included rutabaga and parsnips – both items I love but I decided on my own little combination. Broccoli or cauliflower would also be good, as well as a squashes like butternut or acorn, you could add beets or turnips, too. Cabbage or celeriac would also be great. The possibilities really are endless, so just go with your favorites. And don’t worry too much about measuring just add in as much as you’d like of each item, there really is no wrong way. I think this mixture would also be nice tossed with fresh baby spinach or arugula, right when it comes out of the hot oven but since I am avoiding raw vegetables right now, especially leafy ones, I passed on that idea the minute I thought of it.
I ate these vegetables on their own the first night, and tossed them with some brown rice pasta a day later for lunch, you could also serve them with quinoa or brown rice or on top of polenta, etc. Have fun with this.
Since I am eating a bit of a toned down diet this week while I allow my digestive tract to heal (you can read more about that here), I am, as I mentioned, avoiding any raw vegetables, which can be quite rough on your digestion, so I am really enjoying roasting vegetables more than ever right now. Just tonight I made a version of my Spicy Roasted Cauliflower that I served with chickpea and brown rice patties – so I decided to skip the chickpeas in the roasted cauliflower mixture. I also skipped the pine nuts (since nuts can also be a bit rough on your digestion) and I also left out the chiles (same goes with heavy-duty spices for your digestion, they can be rough). I did toss the tasty cauliflower with some cooked baby spinach and it was both delicious and beautiful.
I have been doing a bit more reading about the ileocecal valve stuff that I mentioned yesterday and something interesting that I learned is that your ileocecal valve is on your kidney meridian, so I suppose and I am starting to wonder if that could have caused the upset with my kidneys. Interesting, right? I am actually quite fascinated by all of this and how everything is totally connected, even when you think it isn’t. At the suggestion of Elyssa, my yoga teacher/Chiropractor, I have an upcoming appointment with a local acupuncturist/Doctor of Chinese Medicine. I am really excited to learn more about this and to hopefully take the next steps to feeling even better and maybe fixing some other symptoms that have been going on. Additionally, I have come across quite a few articles that illustrate how to self-massage your ileocecal valve and your overall abdomen – that has been giving me a nice relief throughout the day. I would say if you have any digestive issues at all, take some time and read about this. It definitely has been helping me. Here are the two that I found most helpful, this one and this one (Yes, I know the photos on this page are weird, but it definitely helps get the point across).
I have been juicing in the mornings this week after yoga and I plan to share those recipes with you guys, too. As nice as it would be to do a full-on juice cleanse right now, I also know this may be too much for my body to handle since I am not 100%, so I am just taking it all easy and being smart. But between really toning down my diet and being back at my regular daily yoga practice, I am already feeling better. Hopefully after two weeks of being sure not to consume things that will upset my current sensitive digestion and daily self-massaging I should be back to new in no time.
What have you been eating a lot of lately? Are you avoiding any foods right now?
[print_this]Roasted Winter Vegetables with White Beans
Adapted from Whole Living Magazine January/February 2012 Issue
Serves 42 large yellow onions, peeled and cut into eighths
5 garlic cloves, peeled and minced
2 carrots, peeled and chopped
1/2 pound of baby red potatoes, chopped
12 brussels sprouts, trimmed and halved
3 tablespoons olive oil, plus more for drizzling
1 tablespoon plus 1 teaspoon balsamic vinegar
Coarse salt and pepper
2 teaspoons of Herbes de Provence
1 1/2 cups cooked and drained white beans (I used great northern beans, cannellini beans would also be great)Heat oven to 400º. On a rimmed baking sheet or a roasting pan, toss potatoes, onion, garlic, carrots and brussels sprouts with olive oil and 1 tablespoon balsamic vinegar. Season with salt and pepper.
Roast, tossing once or twice, until golden brown and tender, 30 to 45 minutes. Remove from oven and stir in beans.
Add the pan back to the oven and roast until the beans are crisped, about 5 minutes more. Toss vegetables with 1 teaspoon vinegar and drizzle with additional oil.
[/print_this]
Our dog, Seri, absolutely LOVES green veggies, especially Brussels Sprouts. She kept trying to sneak one while I was taking the photos. I finally gave her one when we I was done. She loves them!
