-
Chewy Pumpkin Spice Granola Bars – Gluten-free + Vegan
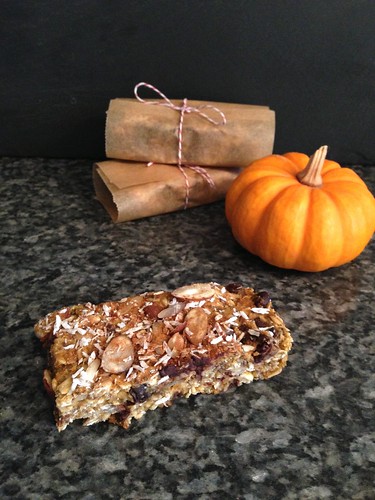
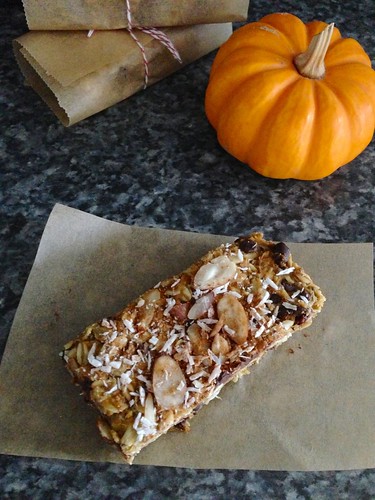
So, I’m doing a little something different today, I’m posting this recipe from the road. I don’t mean just that I’m on the road away from home, but I am actually in the road, in the car. We are driving to Chicago and we are somewhere in Ohio right now, about 6 hours from our final destination. I made these granola bars for this trip and I had every intention of photographing them and writing up the recipe to share before we left. Of course I ran out of time and didn’t get time to set up a quick photo shoot with my nice camera, as usual. As I was packing these up for the drive, I thought rather than not sharing the recipe at all, I would just snap a few quick photos with my iPhone and make it work.
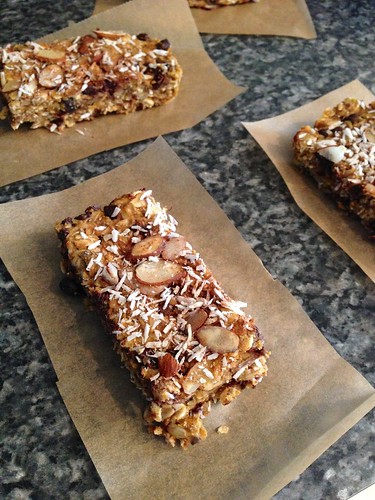
They may not be the best photos, but you get the idea. These granola bars are full of goodies and lots of flavor. They aren’t the super crispy crunchy kind, but more soft and chewy, which I prefer. I added in mini chocolate chips, dried currants, sliced almonds and shredded coconut. Feel free to add in your favorite extras and make these your own. If you are using fresh pumpkin purée , which is what I did, make sure you squeeze or drain any excess water from it, so you don’t end up with soggy bars.
if you are in Chicago this weekend, come see us at the Renegade Craft Fair Holiday Market on Saturday or Sunday!
[print_this] Chewy Pumpkin Spice Granola Bars – Gluten-free + Vegan
Makes 8 bars (you can also cut them into smaller squares to 16 or more)- 2 cups certified gluten-free rolled oats
- 1/2 cup certified gluten-free oat flour
- 1 cup fresh pumpkin puree (canned will also work)
- 1/2 cup maple syrup (honey or coconut nectar would also work)
- 1 teaspoon ground cinnamon
- 1/2 teaspoon ground nutmeg
- Pinch of cloves
- 1/4 teaspoon salt
- 1 teaspoon vanilla extract
- 1 tablespoon chia seeds (or flax seeds)
- 1/2 cup mini-chocolate chips (certified gluten-free and vegan)
- 1/4 cup dried currants, cranberries or raisins
- 1/4 cup sliced almond, plus a tad but extra for the top
- 1/2 cup shredded coconut, plus a tad but extra for the top
Preheat oven to 350º F. Grease an 8″ x 8″ glass baking pan very well (with coconut oil, butter, oil, etc), or line it with foil, leaving some overhang on two of the sides so you can easily pull it out of the pan to make cutting even easier (this is what I did).
In a large mixing bowl, add all of your ingredients. Mix and mash up very well until it is all well combined. Get your hands in there if you really want to.
Press the mixture firmly and evenly into your pan. Sprinkle a bit more coconut, chopped nuts and some cinnamon on top. Place the pan into the oven and bake for 20-25 minutes. Don’t worry if the bars seem a bit soft, they will firm up as they cool. After it has completely cooled, either lift the entire thing out of the pan and cut into bars or squares, or cut while it is in the pan.
These can be stored individually in the fridge or freezer. Since I made these two days ago, I stored them in the fridge and then wrapped each one individually in a little piece of parchment paper and a sandwich bag for easy eating in the car. [/print_this]
-
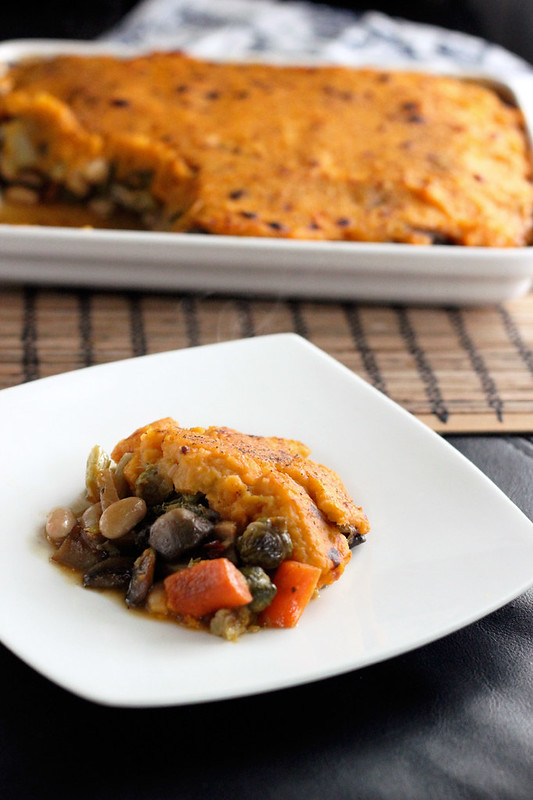
Roasted Veggie Shepherd’s Pie with Sweet Potato Topping – Vegan + Gluten-free
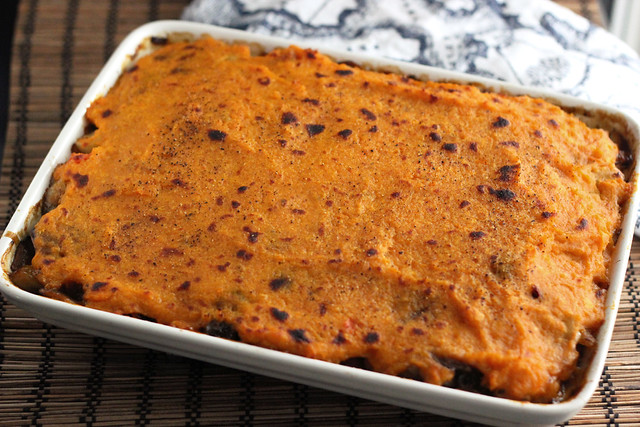
I am so excited that it’s comfort-food season!! As much as I adore the fresh local produce and cool and light dishes of the summer, there is something about the hearty, hot and comforting foods of the winter that are so enticing. A good comfort food meal will leave you feeling like you just got the biggest, warmest hug from your favorite loved one! Even better when it can be healthy comfort food! What’s your favorite comfort food?
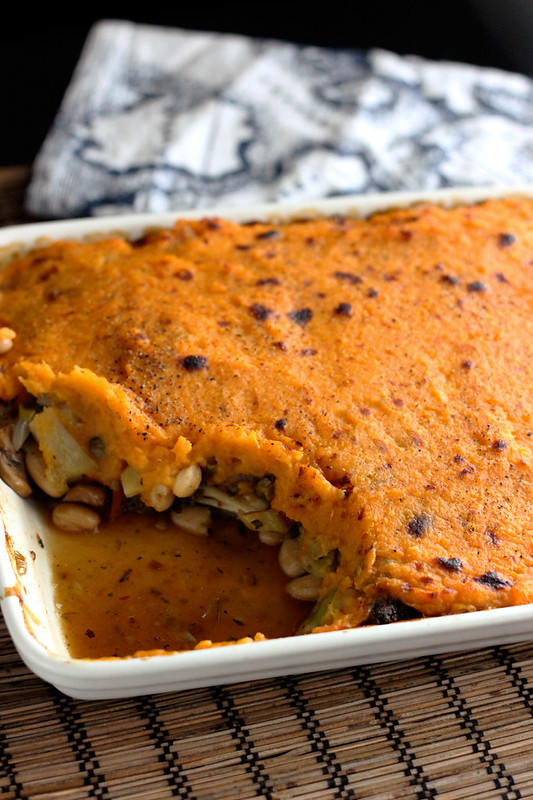
Although this isn’t technically a one-pot meal, since it requires some prep, it is in theory and in it’s final state. I love a meal where it’s all inclusive. One big scoop and you are all set. Plus, a meal like this is perfect for leftovers. For some reason, I find meals like this even better as leftovers, I am not sure if it’s because I didn’t spend all the time prepping just before, or if it just really allows the flavors to come together to their fullest.
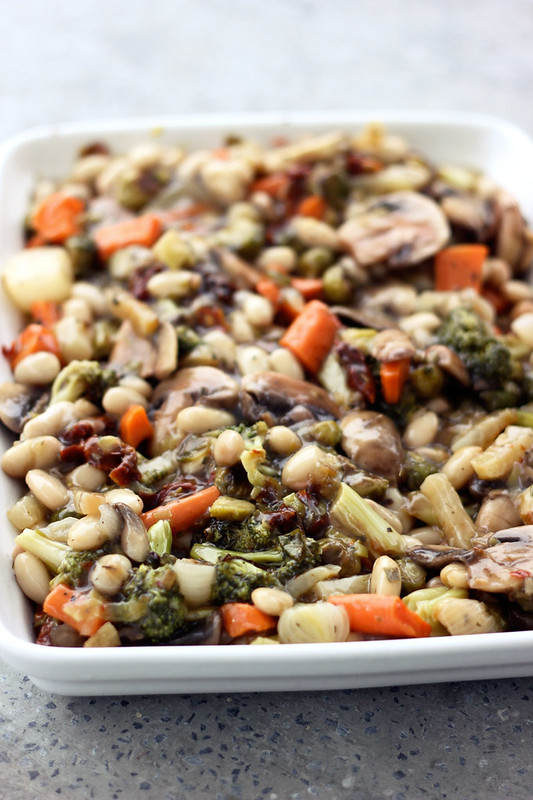
Please keep in mind, I used what vegetables I had on hand and what I would like best for the filling, but feel free to have some fun and add in whatever you’d like. Other wonderful add-ins for the filling would be squash, cauliflower, corn, green beans, asparagus, peas, lentils, beets, turnips, meat or tofu, etc, etc. The possibilities are endless. You could make this many times, each a totally different way. Another thing to note, you don’t have to roast your vegetables if you don’t want to. You could simply sautee them in a large pan on the stove top, I just personally love the flavor of roasted vegetables. I didn’t exactly accurately measure, so use my measurements below as a guide, but don’t get too hung up on the specifics, there really is no wrong way.
[print_this]Roasted Veggie Shepherd’s Pie with Sweet Potato Topping – Vegan + Gluten-free
Serves 4-6Filling:
(please keep in mind you can really use whatever veggies you would like and prefer, this is just what I had on hand.)- 2 tablespoons olive oil
- 1 small head broccoli, cut into small florets
- 1-2 cups pearl onions, peeled and halved, if need be (I used fresh, not frozen)
- 1 small bulb of kohlrabi, peeled and sliced
- 2 cups brussels sprouts, halved
- 1 leeks, rinsed very well, slice thinly white and light green parts only
- 2-3 carrots, peeled and cut into 1 1/2 inch pieces
- 2 celery stalks, diced
- 1/2 cup sun dried tomatoes, thinly slices
- 1 15 ounce can of organic white beans
- 8 ounces cremini mushrooms, sliced
- 2 cloves garlic, minced
- Fresh or dried herbs, to your liking – I used both fresh rosemary and fresh thyme
- salt and pepper, to taste
Sauce:
- 1 1/2 cups vegetable stock (or other stock like chicken or mushroom, etc)
- 2 tablespoons tapioca starch (potato or corn starch would also work)
- salt and pepper, to taste
- 1 teaspoon herbes de Provence
Sweet Potato Topping:
- 4 medium organic sweet potatoes, peeled and diced
- 1 large clove garlic, minced
- 2 tablespoons oil or butter (olive oil, coconut oil, butter, vegan butter, ghee, etc)
- splash of non-dairy milk (I used a bit of coconut milk)
- salt and pepper, to taste
Preheat the oven to 425ºF.
Toss all of your vegetables, leaving out the white beans, mushrooms and sun dried tomatoes, together with olive oil, fresh herbs, salt and pepper in a roasting pan. Place in the oven and roast for about 20 to 25 minutes, until the veggies are slightly tender and beginning to brown. While the veggies are roasting, quickly sautee the mushrooms with a small drizzle of olive oil over a medium high heat. Take the roasted vegetables out when they are ready and toss in the white beans, sauteed mushrooms and sun dried tomatoes.
Lower the oven temperature to 375ºF.
In a small saucepan heat the stock for your broth plus your herbs, over a medium-high heat, once simmering, carefully whisk in your starch to thicken. To avoid lumps, sprinkle it in lightly a little at a time or add some stock to a small bowl with the starch in and whisk quickly to fully incorporate. Once the veggies are done and all together, pour the sauce over, don’t add it all at once, you may not want it all, depending on how many veggies you have.
Pour the filling evenly into a very lightly greased glass baking pan and set aside. Meanwhile boil the sweet potatoes with the garlic in a medium saucepan full of water over a high heat. Once boiling, continue simmering for about 10-12 minutes until the sweet potatoes are nice and tender. Quickly drain the potatoes and then add back to the pot, add your oil or butter (or vegan butter) and mash with a potato masher, a hand mixer, etc. until smooth and creamy. Add a splash a non-dairy milk if you need a bit more liquid or to give just a hint of creaminess. Salt and pepper to taste.
Smooth the mashed sweet potatoes over the filling, using a spatula to spread evenly. Place in the 375ºF oven and bake for 30 – 35 minutes until the filling is bubbling. If you wish to get a bit of crispy brown goodness on top, place your shepherd’s pie under the broiler for a few minutes.
Let cool for a few minutes then serve while hot.
[/print_this]
-
Raw Butternut Squash and Kale Salad – Gluten-free + Vegan

Today I am sharing a recipe as part of both our Very Tasty Thanksgiving series as well as my ongoing vegetarian Thanksgiving series I am doing with Free People this month. This colorful raw squash and kale salad is so simple to make, full of delicious seasonal flavors and doesn’t require any cooking or baking, which is a huge bonus on Thanksgiving, when the oven and stove are in high demand. Enjoy.
• • • • • • • • • • • • • • • • • • • • • • • • • • • • • • • • • • • • • • • • • • • • • • • • • • • • • • • • • • • • • •
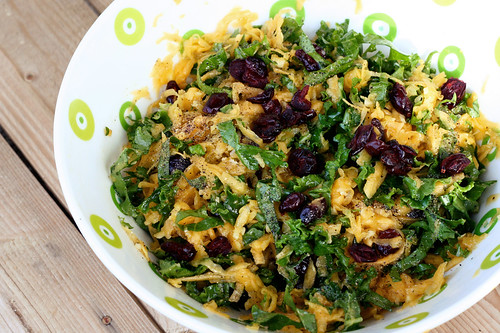
I shared this recipe previously when I made it last year for Thanksgiving. It was such a hit, so easy to make, I couldn’t let it get passed by this year. Anything raw and this healthy should be celebrated on a day of indulgences.
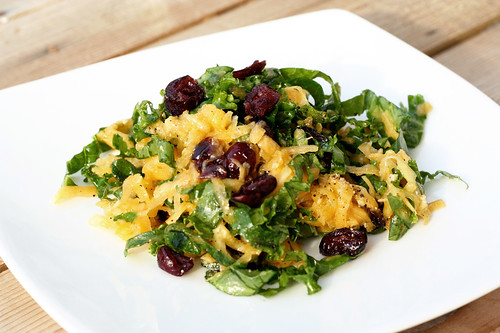
This vibrant and bright salad is crunchy, sweet and so satisfying. It would be a welcome side dish at any Thanksgiving feast and it is a wonderfully unique option for everyone, especially for those who are gluten-free, vegan and/or vegetarian. Plus, I personally love the idea of any Thanksgiving sides that aren’t heavy and carb loaded and more importantly, that don’t require the use of the oven that is always far too crowded on Thanksgiving. Head over to the Free People blog BLDG 25 now to get both recipes. -
Balancing through Imbalance – a Seasonal Ayurveda Practice {Guest Post by Yogalina}
I am so excited about this next post in our Thanksgiving series. Instead of bringing you another recipe, today we are so lucky to have Meg Everingham of Yogalina, to share some great seasonal Ayurvedic tips and simple yoga poses with us, perfect for this time of year. I have been friends with Meg online for a while now, I think we initially connected on Twitter over tweets about yoga and it went from there. I really enjoy that Meg fully embraces the seasons on all levels and believes in living a natural, healthy “yoga” life! Please enjoy today’s post from Meg and let us know what you think. Meg and I have been chatting about collaborating on Ayurvedic recipes and we’d love to know if there is an interest in Ayurveda and eating for the seasons and doshas. Enjoy!
• • • • • • • • • • • • • • • • • • • • • • • • • • • • • • • • • • • • • • • • • • • • • • • • • • • • • • • • • • • • • •
Balancing through Imbalance – a Seasonal Ayurveda Practice
Ayurveda is the ancient Indian science of life. It is a 5,000 year-old holistic approach to health that focuses on maintaining balance in the body and mind in order to prevent and treat illness. In Ayurveda, it is believed that we are all interconnected to natures; as the seasons change we are effected. Each season and each person is ruled by a temperament, known as a doshas. There are three doshas: vata, pitta and kapha. These energies are present to some degree in each person and the balance of them sways with our energy shifts that are affected by our actions, diet and the environment. Just as we are in constant flux with our internal balance, so is the environment season to season. Here we will look into the dosha related to autumn and how our diet and routine can help us to maintain balance within change.
Autumn is ruled by the vata dosha. This is a season of rapid change: from sunlight and warmth to darkness and cooling temperatures. With this transition from long summer days to the slower pace of fall we are asked to pause and reflect. The element related to the vata dosha is wind. If you’ve begun to experience dry skin, a feeling of unease, insomnia or anxiety, this is why. Just look at the weather here in the east coast this past week – hurricane Sandy wreaked havoc not just on peoples’ homes and property but also on their emotions. Many of my clients have told me how their sleep and eating habits have been off since the storm. In order to regain balance from this increase in vata energy we need to slow down, gather and nourish.
Fall is the season of the harvest. Taking a cue from nature it is a time to ground yourself through gathering the harvest in your life and storing gratitude for a long dark winter. Mirroring nature and its rhythm in this way allows for us find balance. Look to bring warmth and stability back into your life in order to pacify vata by gathering your energy.
Let’s begin with diet. Again, look to mirror nature. Enjoy the wonderful bounty of fall. Warm yourself with slow cooked meals such as stews and soups. Nurture yourself by eating seasonal produce such as root vegetables and squashes. Preparing for winter, store up the bright tastes of apples and tomatoes by preserving and canning them. Bring stability to your eating routine and be extra mindful not to skip meals. Starting the day with warm water with lemon is a fantastic day to both ground yourself and jumpstart your digestion.
As nature slows down, we too can begin to draw inwards, pause and reflect. Fall is a great time to start or deeper your sadhana practice. Begin a gratitude journal, writing at least one thing a day that brings you love, joy and warmth to your life. Practicing meditation each day, even if just for a few minutes, can help to draw you back to the here and now. When vata is out of balance is when you feel out of control or like you could fly away. Move your body everyday. Practicing some warming yoga sequences can be beneficial but be mindful not to go too hot or too long. A gentle or restorative yoga practice is like a moving meditation and will allow you to connect with your mind and body.
Through this seasonal practice of Ayurveda I hope to help bring you stability and grace through this season of change. Gather your harvest of gratitude and love to keep you glowing and warm as we prepare to transition into the darker days of winter.
Here is a vata-pacifying, grounding sequence to keep you balanced this fall holiday season.
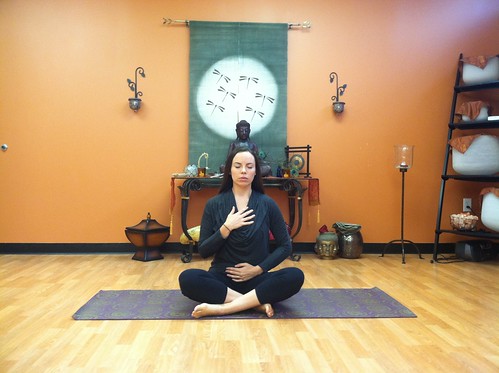


All photos above taken at Pilates Core Center

About Meg Everingham:
Classically trained in ballet, Meg translates her love of movement to teaching Pilates & barre classes. Based outside of Philadelphia, Meg teaches in-home, in-studio and online group & privates sessions. A student of Yoga & Pilates for 15 years, Meg’s teaching style has grown from her sense of body awareness, love of movement and union of body & mind. Meg is also a practitioner of Ayurvedic & plant-based living, a freelance writer & yoga-living enthusiast. Fusing her classical training, knowledge & experience, Meg strives to empower her clients through the freedom & strength of mind-body movement.
Visit Meg’s blog Yogalina
You can also follow Meg on:Twitter: @yogalinaInstagram: @yogalina
Facebook: facebook.com/megzeveringham
-
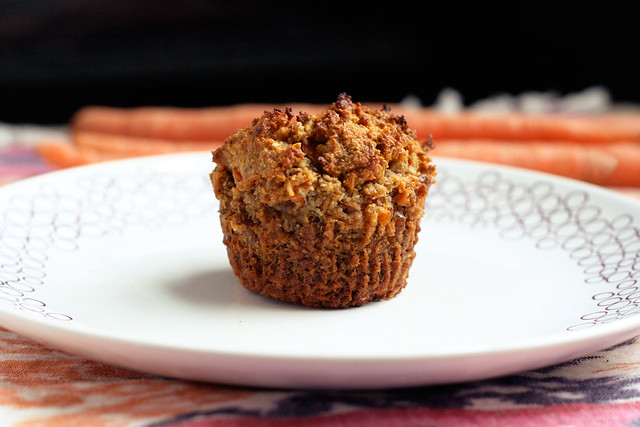
Gluten-Free + Vegan Carrot Cake Muffins
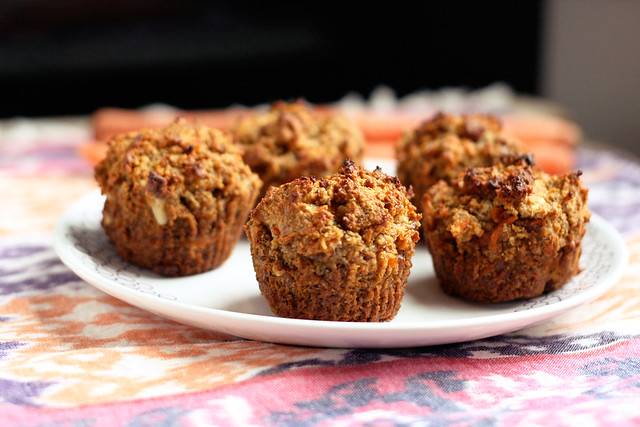
These delicious little treats were the second batch of muffins I made after the first batch ended up too soggy. They were very tasty, but I think that the carrot shreds have more water content than I gave them credit for, so the second time around I decided to add in some finely shredded coconut, since coconut is known to soak up moisture in recipes. You could also give coconut flour a try, but I am not sure if you would want the full 1/2 cup. Experiment.
The coconut flavor is subtle but it really compliments the rest of the flavors in this muffin quite nicely. The walnuts and golden raisins are both optional, but I would say unless you hate them, you should add them in. Their addition to this muffin reminds me of a slice of traditional carrot cake. These muffins are subtly sweet so they would be perfect for breakfast, dessert or even a little snack. Hubby was of course begging for some sort of cream cheese frosting.
I love how rustic these muffins ended up looking after baking, that is why I ended up taking off the papers before I photographed them. The outside of each muffin had such a beautiful toasted, golden brown hue with specs of the shreds of carrots shining through.
Normally when I am writing up a recipe or editing photos, I still have leftovers in the kitchen, so after I am done staring at the photos forever and craving another taste of whatever it is, I head downstairs and grab a little bite. Sadly, I made these muffins about 10 days ago, but we’ve been so busy getting ready for our pop-up shop this past weekend that I haven’t had a moment to edit the photos and write this up. So, now I think I am going to have to make another batch of these ASAP, I want them that badly.
[print_this]Gluten-Free + Vegan Carrot Cake Muffins
Makes approximately 6 large muffins2 flaxseed eggs (or you could also just use two large eggs):
2 tablespoons ground flaxseed
6 tablespoons hot water2 cups blanched almond flour*
1/2 cup unsweetened finely shredded coconut
1 teaspoon baking soda
1/2 teaspoon sea salt
1/2 teaspoon nutmeg
1/2 teaspoon cinnamon
1/4 cup maple syrup (or honey)
1/4 cup olive oil (melted coconut oil or melted ghee)
1 teaspoon vanilla extract
1 cup shredded carrot
1/4 cup walnuts, roughly chopped (optional)
1/4 cup golden raisins (optional)Preheat oven to 350˚F. Line a muffin tin with paper liners.
In a small bowl, whisk together the ground flaxseeds and water, set aside and allow to get thick and gelatinous.
In a large bowl, whisk together the almond flour, baking soda, salt, nutmeg and cinnamon. Add in the shredded coconut, stir to combine.
In a separate bowl, combine the maple syrup (or honey), vanilla, oil and flax seed eggs and whisk until well combined.
Add the dry mixture to the wet, stirring until combined. Carefully fold in the carrots, walnuts and raisins.
Spoon the batter into the muffin tin, filling each cup to the top if you want a nice muffin dome. Bake for approximately 25 minutes or until the tops are golden brown and a toothpick inserted into the center comes out clean. Cool the muffin pan on a wire rack for five minutes. Gently pop the muffins out to continue cooling on the rack (don’t cool them longer than 5 minutes in the hot pan they’ll definitely get soggy). Enjoy a muffin after they have cooled 10 minutes, you know you want to.
I find storing muffins covered tightly in the refrigerator or freezer to be the best, especially in the heat of summer. Just pop one out as you want it, heat slightly in the microwave if you want to take the chill off and go.
*NOTE: Something I have learned from baking on my own and from reading Elana’s Pantry, is that not all almond flour (or meal) is created equal. Bob’s Red Mill makes an almond flour, though easy to find, that doesn’t seem to react quite the same as other almond flours. It doesn’t seem to rise as much and it just seems to leave recipes flat. On Elana’s recommendation I now buy Honeyville brand almond flour in a 5-lb bag from their website. [/print_this]
-
Eggplant and Roasted Red Pepper Dip (gluten-free and vegan)

As I mentioned in my last post, for my Creamy Dairy-Free Spinach Dip, I have really been enjoying cooking and baking without dairy. In addition to cooking without processed foods and gluten, it has been a fun and rewarding challenge. However, it is definitely one thing to just be cooking at home for myself and my hubby, but coming up with some fun and unique snacks to share with other people that can eat both gluten and dairy, can be a bit harder. I never ever want someone that is eating my food to feel like they are eating a weirdo diet food or some sort of concoction that only someone that hasn’t had gluten in over 7 years, would love.
When coming up with snack ideas for our little Super Bowl get together, I wanted something everyone could love that was light but still satisfying and with my dips I really wanted to challenge myself to create creamy but without the dairy. In the past, I definitely would have enjoyed some of the healthy snacks that others or likely myself made, but then, of course, indulging a bit in the inevitable cheese that would be there in some capacity. Using the excuse of a holiday or special occasion to eat more cheese than normal sounds all well and good, until you have a terrible cheese-induced tummy-ache later because you have all but cut out dairy in your every day life.
So I came across a version of this recipe on my Pinterest travels and it looked super creamy and delicious, I decided to add in the roasted red peppers because they pack some incredible flavors that I thought would pair very well with the eggplant! The original recipe was just the eggplant and it had a bit more olive oil, the photo I saw with the recipe made it look so insanely creamy, I couldn’t believe there wasn’t any dairy in it. So after making this my way, I am actually looking forward to trying this dip again, the original way, to see which I prefer.
This dip is smooth and creamy and has a bright, almost tart flavor from the roasted red pepper. I really love how the peppery spice from the oregano works with all of the different elements. Feel free to play around with different spices and/or herbs to get this to the flavors you love. The original recipe called for thyme, you could also add in some red pepper flakes or other spices that you love.
I served this dip with a bunch of fresh raw veggies like baby carrots, celery, radishes, bell peppers, etc as well as some crackers. This dip would also make a great spread to put on sandwiches, eggs, even on top of a salad, pasta, etc.

[print_this]Eggplant and Roasted Red Pepper Dip (gluten-free and vegan)
Adapted from Body+Soul Magazine, July/August 2010
Serves 103 medium eggplant (about 4 pounds), halved the long way
4 cloves garlic, peeled and very thinly sliced lengthwise
1 tablespoon plus 2 teaspoons extra-virgin olive oil
Kosher salt
1 cup roasted red peppers, roughly chopped (roast the peppers yourself or jarred will work too)
1 tablespoon fresh oregano (roughly chopped)
2 tablespoons fresh lemon juice
Freshly ground pepperPreheat the oven to 400º F. Arrange the eggplant cut side up on a baking sheet. Make slits in eggplant and insert garlic . Drizzle with 2 tablespoons oil. Season with 1/2 teaspoon salt. Bake until tender, about 1 hour. Remove from oven; let stand until cool, about 20 minutes.
Scoop the flesh of the eggplant into a food processor. Add roasted red peppers, oregano, 1 tablespoon oil, and lemon juice. Puree until smooth. Pulse to combine with salt and pepper, to taste. Will keep refrigerated up to 3 days. Serve with crackers, fresh vegetables or crostini.
[/print_this]
-
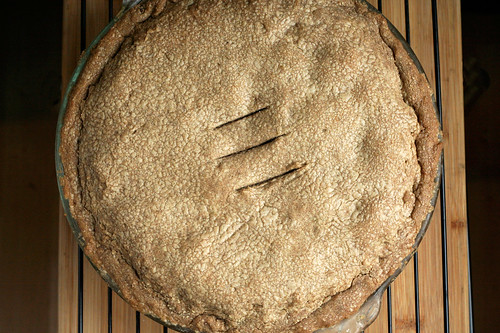
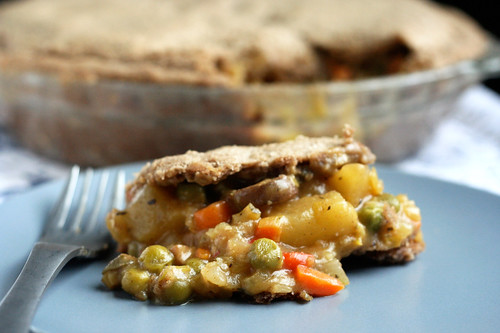
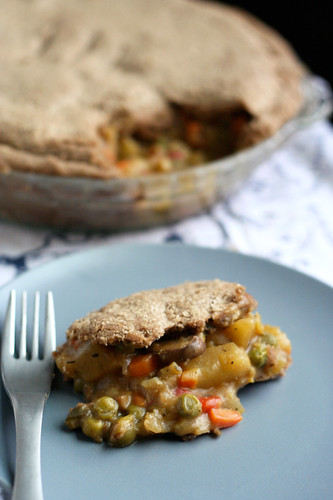
Gluten-free & Vegan Vegetable Pot Pie
I am super excited to share this recipe with you. I know it seems complicated and like a lot of steps, but it really isn’t that bad. If you want to buy a store bought pie crust or mix, and just make this filling, I say go for it. If you aren’t gluten-free and you wanna make this filling, just sub in your regular flour. Just looking for vegetarian not vegan, use butter and regular milk. But whatever you do, make time to make this pot pie. It is so delicious!
I have really come to love baking and even though I am not quite at the point with my baking where I can completely, on my own, create a complicated recipe yet, like a vegan gluten-free pie crust, I still really love doing it. Having a beautiful and perfect recipe for a pie crust from a true pro like Shauna (Gluten-free Girl), is seriously a blessing. It is a great jumping off point for recipes like this one and I am truly grateful for people like her that can find the perfect ratios, keep their cool while experimenting and destroying things and come up with the perfect pie crust! It is so damn admirable.
I keep my own gluten-free whole-grain flour blend on hand (that I make using Gluten Free Girl’s suggestions on flours, starches and ratios) in a large quantity for use in lots of different recipes. I used Shauna’s pie recipe after Thanksgiving to make a turkey pot pie and I made it exactly as the recipe calls for, with the same flour blend that she uses and with butter. It turned out perfectly. Since I have since cut out dairy, I was very excited to try it all again but making the pie dough vegan and using a whole-grain blend of flours instead. The crust was definitely a bit flakier with the butter than the vegan butter sticks, but I have to say I am extremely excited and impressed with both the crust on this pie and the delicious vegan filling. The pie crust was tender and it had a beautiful tasty crisp and even a slight flakiness to it. The filling is thick, hearty and even a bit creamy. It amazed even me that there wasn’t a bit of dairy in this whole pie. Since it has been nearly 3 weeks since I have had any dairy, I kept feeling like I was doing something wrong when I was eating this. But I made the entire thing myself, not a drop of dairy in the whole thing. Considering my meat and cheese loving hubby, Mark, not only at this, but went back for seconds – I knew I had struck gold!
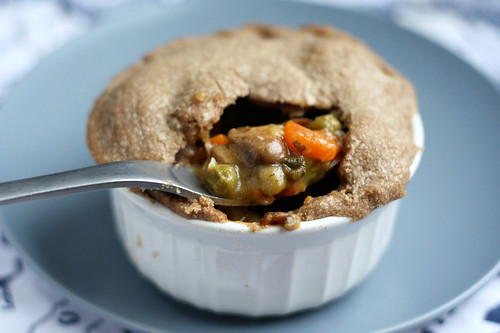
When making the large pie, I was afraid to overload it with too much filling, so I had a little bit leftover after putting the top crust on (though I realized after I should have just mounded it all in there), I also ended up with the smallest piece of extra pie dough since I had over rolled it just a tad, so I made the tiniest little mini-pot pie in a ramekin. I was actually really excited that it worked out this way, since I wanted to see how it would turn out if I made mini pot pies instead. It was perfect! The only thing I would change for the next time is to load all of the filling in, even though it seems like a lot. The filling does cook down a bit, so there is more room there than you think. I just had visions of veggie filling overflowing all over my own and ruining the pretty picture-perfect pie I had made.
You can have some fun with your pot pie fillings and add or take away any of your favorite or not so favorite ingredients. Turnips or parsnips would be good, asparagus or butternut squash, chives instead of sage. Play with your ingredients depending on what is in season. You could add some tofu. Have fun with this!
[print_this]Gluten-free & Vegan Vegetable Pot Pie
serves 6-8This pot pie has a top and bottom crust, which is how my husband requires his pot pies! If you wish to only have a top crust or if you wish to make smaller pot pies in ramekins with just top crusts, make sure to halve the pie dough recipe.
Gluten-Free Vegan Whole-Grain Pie Dough:
Adapted from Gluten-free Girl350 grams all-purpose gluten-free whole-grain flour (or your favorite gluten-free AP flour) – I used Shauna’s ratio and flour suggestion list to make my own whole-grain flour mix. My blend included a combination of almond flour, buckwheat, teff, sorghum, arrowroot and potato starch.
1/2 teaspoon kosher salt
226 grams (2 sticks) Earth Balance Vegan Buttery Sticks (you can use two regular sticks of butter if you aren’t vegan)
1/2 cup ice-cold water, plus a few splashes moreGluten-Free Vegan Veggie Pot Pie Filling:
1 tablespoon olive oil
1 medium onion, diced
1 leek, white and green parts only, diced
1 clove garlic, minced
3 carrots, peeled and diced into 1/2-inch pieces
2 stalks celery, diced into 1/2-inch pieces
1 red bell pepper, diced into 1/2-inch pieces
1 sweet potato, diced into 1-inch cubes
1/2 cup dry white wine
1/2 cup gluten-free flour
2 cups vegetable broth (mushroom stock would also be good)
1 cup non-dairy milk (almond, cashew, coconut, etc)
1 cup frozen peas
1 tablespoon fresh sage, roughly choppedCut the buttery sticks into one-inch cubes. Place them on a plate in the freezer for 15 minutes.
Put the flour and salt into a large food processor. Pulse them together a few times until the flour is fluffy and aerated. Add the butter cubes. Pulse ten times. Your flour mixture should now look sandy, with some butter chunks still visible.
Pour in the ½ cup of ice-cold water. Pulse five times. Look at the dough. If it still looks a bit dry, add a splash more water, not exceeding another ¼ cup. The finished dough should like curds of dry cottage cheese. Do not add anymore water.
Forming the dough into a disk. Dump the dough onto a clean, cool surface. I work on a piece of parchment paper on the counter top. Gently gather all the dough together in your hands. Working quickly, take half the dough, make it into a ball, then flatten it into a plump disk, about 2 inches tall. Wrap it in plastic wrap and let it rest in the refrigerator for 30 minutes. Do the same with the remaining dough.
While the dough is chilling you can make your pot pie filling. Heat 1/2 of the olive oil in a large saucepan over a medium-high heat. Add in the carrots, celery, onion, garlic, bell pepper, sweet potato and leek. Stir frequently and allow to cook for 5 minutes. Add in the white wine and turn the heat down to medium-low, cover and allow the vegetables to simmer and steam for about 15-minutes, stirring frequently. Meanwhile heat a medium pan over a medium-high heat and add the remaining olive oil. Add in the mushroom and saute until they are browned and tender, about 10 minutes.
Add the mushrooms to the other vegetables and sprinkle the flour over the vegetables, stir to evenly distribute and add the vegetable broth, sage and frozen peas. Stir to combine and break up the flour clumps, it should immediately start to thicken. Add in the non-dairy milk. Stir. You can add more broth if the mixture gets too thick. Allow to simmer on low for another 5 minutes, to cook the peas, then turn off the heat.
Once the filling is done, set it aside to cool slightly.
You are now ready to assemble your pot pie. Take the pie dough disks out of the refrigerator and let them sit out for 15 minutes or so, so they are still slightly chilly – but a wee bit closer to room temperature and preheat the oven to 425°. (Honestly, this time around I forgot to let the dough sit and it rolled out just perfectly.)
For rolling out the dough you can either work on a floured countertop, a floured marble pastry board, or two pieces of parchment paper (I go this route and I still add a tad bit of flour). I would love to one day make my pies with a marble pastry board!
Gluten-free dough is definitely stickier than regular gluten dough. Be sure to use plenty of gluten-free flour on your surface when rolling it out. When I use two pieces of parchment paper, I lightly dust a bit of flour down on each side of the dough before I place it between the sheets of parchment paper. Shauna recommends very, very lightly oiling the parchment paper, to try to prevent sticking. (I have never done it this way)
could try really hard to explain in detail exactly how to do these next steps, or I could quote Shauna’s beautiful and incredibly descriptive words on rolling out the dough and prepping it to place in the pie pan. Honestly I wrote this part out in my own words so many times and it just never sounded as good as how Shauna put it. Somehow she makes rolling out a pie dough sound like a graceful dance. Seriously, you’ll see what I mean…
“Pat down the disk and put the rolling pin on it. Now, imagine that the dough is the face of a clock. Roll out once at 12 o’clock. Then, lift the pin and roll at 12:10. Moving in “ten-minute” increments, roll out the pie dough to slightly larger than your pie pan. Be patient. Think of this as meditation. Roll out the dough evenly.
Now, if you have worked with the parchment paper, lift the top paper, put the pie pan on top of the dough, and flip it over. Carefully, strip away the parchment paper. Go slowly. Voila! Pat the dough down into the pan.
Now, if some of the pie dough has stuck onto the parchment, do not despair. Simply peel it off and pat into the rest of the pie dough. With a gluten dough, this might make a crust tough. Guess what here? No gluten! No problem. Pat away.
(If you have used the marble board or countertop, roll the dough onto your rolling pin and transfer to the pie pan. Again, if it sticks, no worries.)
Crimping the edges. Crimp the edges of the pie pan by working with floured fingers. I press from the inside of the pie pan with my thumb and first finger on the left hand, then press between those with the first finger of my right hand from the outside. (That’s a lot of words. Try to visualize it. This will make sense.) This is one of my favorite activities in the world. Go slowly and enjoy it.
Fill the pie with the filling. Pat it down.
Roll out the remaining dough the same way. Lay it onto the pie gently, like you’re putting a blanket on a sleeping child. And if the dough sticks and breaks, just pat the pieces together. (That’s what happened with both the finished pies you see here. They didn’t suffer.) Tuck the edges into the crust.”
I will be honest, crimping the edges of a pie crust just isn’t my thing, not because I don’t like it or think it is pretty, I just find myself getting frustrated and wanting to just get it in the oven and then eat it. I guess I just go with the rustic look. I make sure all the edges are sealed and tucked in and go with that! Maybe some day I will have the patience and the eye for pretty pastry techniques.
It is now time to bake the pot pie! YAY! Cut a few slits into the top crust. Place a sheet pan on the bottom rack of the oven, under the rack where the pie pan will be, to catch any potential drip overs. Place the pie pan into the oven and bake for 15 minutes at 425ºF, then turn the temperature down to 375°F. Bake until the juices are bubbling out of the pie (this may or may not actually happen depending on how juicy or thick your pot pie filling is) and the crust is browned, about 45 to 55 minutes.
Allow the pot pie to cool 10 to 15 minutes before serving. Enjoy!
Please note, instead of one large pot pie with a top and bottom crust, you could certainly halve the dough recipe and make mini-pot pies in 6 – 10 ounce oven-safe ramekins. Just cut the dough into 6 rounds that are slightly larger than the circumference of the ramekins. Lay the dough onto the filling and bake the same way. I had a little extra filling and some extra pie dough, so I made one this way to try it out. It was perfect and super adorable.[/print_this]
-
Butternut Squash and Roasted Red Pepper Soup (Vegan and Gluten-free)
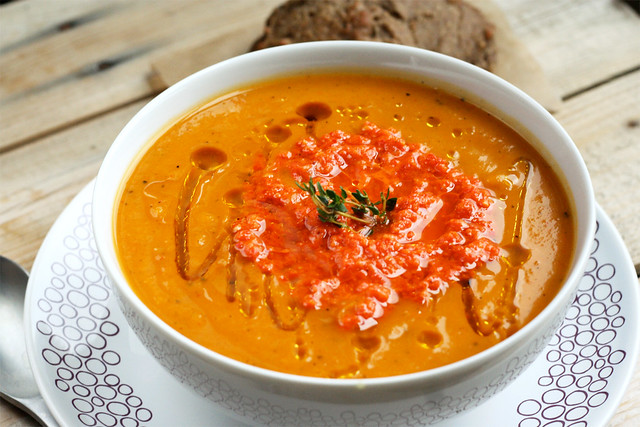
I am super excited about how this soup turned out. This soup actually made me realize what a dork I am about good healthy food. It actually makes me stupid excited and I wanna dance around my kitchen! I love when you have an idea in your mind for a dish, you start experimenting, tasting and playing around and it just all falls perfectly into place. That happened with this soup. In fact, it actually came out better than I had imagined it would.
I topped this soup with a roasted red pepper puree that was inspired by a recipe I came across from Bon Appetit magazine in 2003 and I also drizzled some roasted butternut squash seed oil over top. I realize this oil is a very specialized product, and many of you may not have access to it, so you could certainly just use a good quality extra virgin olive oil, or just skip it altogether. The butternut squash seed oil that I have is from a company based in the Finger Lakes region of NY called Stony Brook Oils, I picked it up at Farmers and Artisans here in Buffalo. You can visit Stony Brook’s web site to get a listing of all of the stores you can buy their various squash seed oils at or you can even buy them online. Honestly, if you ever get a chance to try a pumpkin or a squash seed oil, do it. The flavors are incredible. It brings a unique nutty and roasted flavor to so many different dishes. I have never tasted anything like it.
I happened to be able to get my hands on some beautiful red bell peppers that I roasted on my stove top to use in this soup and for the puree on top. If the red peppers at your market aren’t looking so hot, just go with jarred roasted red peppers, they will work perfectly fine, too.
This naturally gluten-free and vegan soup is bursting with flavors and it is so beautiful and colorful. The roasted red peppers in the soup compliment the nutty flavor of the squash and the spicy, garlicky puree on top is a nice burst of bright flavor with a hint of spiciness. The puree was so delicious that I have been using it as a spread on sandwiches and on top of freshly steamed vegetables, etc. I feel like I always need to have a batch of this stuff on hand.

[print_this]Butternut Squash and Roasted Red Pepper Soup
serves 6-81 tablespoon olive oil
1 large butternut squash (about 2 to 2 1/2 lbs), peeled, seeded and cubed
1 large onion, diced
2 celery stalks, diced
2 cloves of garlic, minced
2 roasted red peppers, diced (here is a great page of different options on how you can roast your own red peppers at home, I roasted mine on my stove top)
1 tablespoon fresh thyme, roughly chopped
1/4 teaspoon of crushed red pepper flakes
1 teaspoon kosher salt
7 cups low sodium vegetable brothbutternut squash seed oil (or olive oil) for drizzling
Heat oil in heavy large pot over medium-high heat. Add onions, celery and butternut squash and sauté until the onions and celery are tender, about 10 minutes. Add garlic and roasted red peppers; stir 1-2 minutes. Add thyme, red pepper flakes, salt and vegetable broth; bring to boil. Reduce heat; cover and simmer until squash is soft, about 45 minutes.
Purée with an immersion blender or in batches using a regular blender or food processor*, until smooth. Return puree to pot. Thin soup with more broth if desired. Ladle soup into bowls. Top each bowl with 1 tablespoon of the roasted red pepper purée and a light drizzle of butternut squash seed oil. Sprinkle with a pinch of fresh thyme.
* When puréeing hot soup in a blender or food processor, do so in small batches, filling the blender pitcher only about halfway. Put the lid on, but remove that small cap in the lid (if you have it) and hold the lid down tight with a towel, otherwise the steam will cause the lid to explode off, spewing hot liquid everywhere. This has never happened to me, but it can, so be careful.
[/print_this]
[print_this]Roasted Red Pepper Puree
via Bon Appetit Magazine, November 20032 roasted red peppers (approximately 1 cup)
2-3 garlic cloves
1/2 tablespoon olive oil
1/4 teaspoon crushed red pepper flakesPuree all ingredients in processor until smooth. Season with salt and pepper.
[/print_this]
-
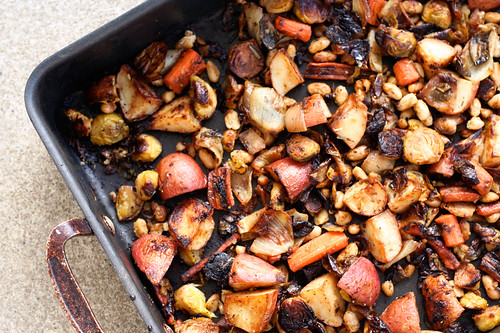
Roasted Winter Vegetables with White Beans
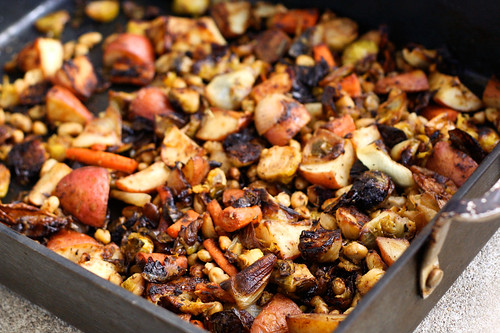
First off – I apologize for the photo, it’s kinda hard to make super roasted vegetables look super pretty.
Regardless of the photo – I absolutely love, I repeat and will yell it – L O V E – roasted vegetables – especially winter vegetables. You can really go with any combination you’d like – I based mine this time on what I already had in the fridge from my most recent grocery trip where I bought whatever produce looked best. I made a few additions and skipped some items from the original recipe. Though I will definitely be making this again and again and I know the ingredients will likely change around each time.
I found the original concept for this recipe in the January/February 2012 issue of Whole Living Magazine, which features their New Year Clean Eating Action Plan. These Action Plan issues always have their best recipes, in my opinion. Simple, fresh, clean and totally cleansing. Even though I have been making roasted vegetables for years, what I liked about this recipe were the additions of both the white beans and the balsamic vinegar. Both brilliant additions to an already amazing meal. The original recipe had a sweet potato instead of baby reds like I used, and I went with 2 onions instead of a leek, because I absolutely love roasted onions. The Whole Loving recipe also included rutabaga and parsnips – both items I love but I decided on my own little combination. Broccoli or cauliflower would also be good, as well as a squashes like butternut or acorn, you could add beets or turnips, too. Cabbage or celeriac would also be great. The possibilities really are endless, so just go with your favorites. And don’t worry too much about measuring just add in as much as you’d like of each item, there really is no wrong way. I think this mixture would also be nice tossed with fresh baby spinach or arugula, right when it comes out of the hot oven but since I am avoiding raw vegetables right now, especially leafy ones, I passed on that idea the minute I thought of it.
I ate these vegetables on their own the first night, and tossed them with some brown rice pasta a day later for lunch, you could also serve them with quinoa or brown rice or on top of polenta, etc. Have fun with this.
Since I am eating a bit of a toned down diet this week while I allow my digestive tract to heal (you can read more about that here), I am, as I mentioned, avoiding any raw vegetables, which can be quite rough on your digestion, so I am really enjoying roasting vegetables more than ever right now. Just tonight I made a version of my Spicy Roasted Cauliflower that I served with chickpea and brown rice patties – so I decided to skip the chickpeas in the roasted cauliflower mixture. I also skipped the pine nuts (since nuts can also be a bit rough on your digestion) and I also left out the chiles (same goes with heavy-duty spices for your digestion, they can be rough). I did toss the tasty cauliflower with some cooked baby spinach and it was both delicious and beautiful.
I have been doing a bit more reading about the ileocecal valve stuff that I mentioned yesterday and something interesting that I learned is that your ileocecal valve is on your kidney meridian, so I suppose and I am starting to wonder if that could have caused the upset with my kidneys. Interesting, right? I am actually quite fascinated by all of this and how everything is totally connected, even when you think it isn’t. At the suggestion of Elyssa, my yoga teacher/Chiropractor, I have an upcoming appointment with a local acupuncturist/Doctor of Chinese Medicine. I am really excited to learn more about this and to hopefully take the next steps to feeling even better and maybe fixing some other symptoms that have been going on. Additionally, I have come across quite a few articles that illustrate how to self-massage your ileocecal valve and your overall abdomen – that has been giving me a nice relief throughout the day. I would say if you have any digestive issues at all, take some time and read about this. It definitely has been helping me. Here are the two that I found most helpful, this one and this one (Yes, I know the photos on this page are weird, but it definitely helps get the point across).
I have been juicing in the mornings this week after yoga and I plan to share those recipes with you guys, too. As nice as it would be to do a full-on juice cleanse right now, I also know this may be too much for my body to handle since I am not 100%, so I am just taking it all easy and being smart. But between really toning down my diet and being back at my regular daily yoga practice, I am already feeling better. Hopefully after two weeks of being sure not to consume things that will upset my current sensitive digestion and daily self-massaging I should be back to new in no time.
What have you been eating a lot of lately? Are you avoiding any foods right now?
[print_this]Roasted Winter Vegetables with White Beans
Adapted from Whole Living Magazine January/February 2012 Issue
Serves 42 large yellow onions, peeled and cut into eighths
5 garlic cloves, peeled and minced
2 carrots, peeled and chopped
1/2 pound of baby red potatoes, chopped
12 brussels sprouts, trimmed and halved
3 tablespoons olive oil, plus more for drizzling
1 tablespoon plus 1 teaspoon balsamic vinegar
Coarse salt and pepper
2 teaspoons of Herbes de Provence
1 1/2 cups cooked and drained white beans (I used great northern beans, cannellini beans would also be great)Heat oven to 400º. On a rimmed baking sheet or a roasting pan, toss potatoes, onion, garlic, carrots and brussels sprouts with olive oil and 1 tablespoon balsamic vinegar. Season with salt and pepper.
Roast, tossing once or twice, until golden brown and tender, 30 to 45 minutes. Remove from oven and stir in beans.
Add the pan back to the oven and roast until the beans are crisped, about 5 minutes more. Toss vegetables with 1 teaspoon vinegar and drizzle with additional oil.
[/print_this]
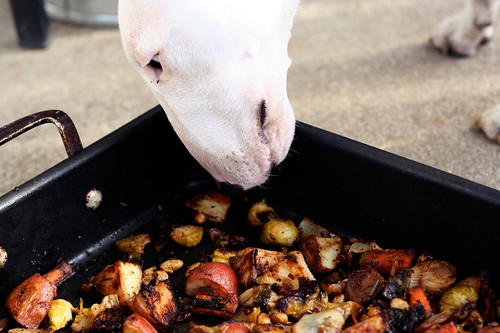
Our dog, Seri, absolutely LOVES green veggies, especially Brussels Sprouts. She kept trying to sneak one while I was taking the photos. I finally gave her one when we I was done. She loves them!
-
Gluten-Free French Onion Soup

I can admit that writing this recipe and editing the photos on this soup was a bit painful, in more ways than one. I’ll explain why…
For the last two weeks I have been feeling a bit under the weather. No cold or flu showed it’s face but I was just not feeling like myself. In addition to feeling a bit “off”, a few other symptoms arose and I was experiencing sharp and abnormal pains on my right side, near my kidney. It started in the back, then slowly made it’s way to the front to my upper abdomen then found it’s way to my lower right pelvis. I also noticed blood in my urine last Monday.
Being that both of my parents have kidney stones, and I myself was diagnosed with small kidney stones years ago, I decided to make my way to the urologist to rule out any type of infection or the passing of a stone, etc. The stones that I was diagnosed with years ago, were very very small at the time and have caused me no issues at all. Back when I was diagnosed, the doctor explained that it was likely hereditary and with a healthy diet I could keep them that small and probably never have to worry about them. So when I made it to the doctor this time around, they tested for infections and that came up negative but they did say I had a higher than normal level of blood in my urine. I say higher than normal because every time they have ever tested me, I have always had a small amount of blood. They tell me that this is somewhat normal for some people and that it was so microscopic, and normally it wasn’t anything I needed to be concerned with.
At first, based on my symptoms and the blood, they told me I was likely passing a stone or a stone had moved and caused some irritation and inflammation of my kidney, they tried to talk me into a CT scan, which I declined, sent me home with some pain meds and told me to come back in a few days. When I came back everything was about the same, but the pain had traveled to the front almost exclusively and I was now experiencing digestive issues and pain, the pain still very much only on the right side and now very low in my pelvis. I felt bloated, gassy and I was experiencing indigestion, all things I haven’t experienced in years. There have been other not so pleasant side-effects as well, but I will spare you all the details.
So, I began speaking with my good friend, Jane, a chiropractor who very much believes in an all-natural, holistic and homeopathic approach to symptoms, first, then looking at all aspects of your life – like diet, stress, etc. to determine the problem and the causes to the problem. Jane has been a part of my life since I was an infant, she and my mom went to high school together and reconnected after my mom had my older sister and I and was pregnant with my little sister and she was experiencing some health issues. Jane now lives in Colorado, so I explained my symptoms to her through email and she told me to have my Chiropractor here in Buffalo look at my ileocecal valve (which admittedly I had never heard of). I googled it before I even got in to see my chiropractor/yoga teacher Elyssa and many of the symptoms of a grumpy ileocecal valve sounded just like what I was experiencing. The ileocecal valve is situated at the junction of the small intestine (ileum) and the large intestine. Its critical function is to limit the reflux of colonic contents into the ileum.
After a brief examination by Elyssa, she confirmed Jane’s suspicions and I had an explanation – my ileocecal valve was definitely grumpy. The valve is supposed to function on it’s own – opening and closing to release what needs to go to the large intestine from the small, leaving behind what doesn’t need to and shouldn’t go. (You can definitely google and find out even more of the details, I just wanted to keep this brief – a good intro to your ICV can be found here). Our ileocecal valves can get stuck in the open or closed position. Elyssa believes that mine is stuck open. After discussing my diet and trying to determine what may have caused this, Elyssa asked if there had been any major changes in my diet and I told her “no”, I have maintained the same diet that I have for the last nearly 2-years. However, this is when I recalled the cheese that I ate on New Years Eve. I have pretty much completely cut-out dairy milk when I am both baking and cooking, etc and I have cut way way back on cheese. Admittedly and embarrassingly, I consumed a good amount of cheese on New Years Eve with Mark’s family in Kentucky (we were in the South and we did stop at Grandpa’s Cheese Barn in Ohio, afterall). Not really thinking what it could do to my system after not really eating much of it, just thinking about how I rarely eat it anymore and that I would enjoy it just this once. Well the joke is on me. Elyssa explained that because I hadn’t been eating much dairy and more specifically cheese, just eating it this once, it could have just shocked my system, causing my ileocecal valve to freak out!
Now, let me explain to you that I haven’t been to a medical doctor with the exception of a physical in over two years. I have managed to stay fairly healthy minus a cold or stomach bug here and there, which is far better than my health in the past. I am not one to post around on Facebook or Twitter about how I am feeling and complain complain complain instead of taking the necessary actions to improve my health, I try to stay very positive and not dwell since I really think that has an effect on your health and well being. So, the only reason I even chose to share this on here at all – was that first, I thought it to be an interesting diagnosis, one that I never would have imagined. I have always found my digestive tract to be quite sensitive so finding out I have a part of that system, that I didn’t even know existed, not functioning properly, doesn’t really shock me. Secondly, I wanted to explain why you may not see as many posts for the next week or so, or why some of the recipes may be drastically different and toned down. I am definitely going to take it easy with eating, give my system a break and be very mindful of what I consume as I allow my body to heal. In addition to the dairy, I also plan to cut out caffeine, alcohol, sugar and chocolate. I am still not quite sure of everything involved with the ileocecal valve and what has to be done to heal it to make sure it doesn’t happen again. So, I definitely plan to share more with you as I learn more and I will also share the recipes that I am creating as I figure out what to eat to combat this.
The reason that I decided to share this diagnosis with you on this recipe, besides that it was the next recipe that was waiting to be written up, is that the biggest thing that I am removing from my diet, at least for the next few weeks, if not for the long haul, is dairy and more specifically cheese, so you won’t be seeing anything else like this cheesy-topped soup, for a while. I have always seemed to have trouble digesting it, but knowing that it wreaked such havoc on my poor ileocecal valve really has me thinking if I should remove it from my diet altogether. I am definitely not making any rash decisions just yet (gosh, even though I know it’s bad, I really do love cheese), but I do plan to start exploring all of my options and to really investigate all of my diet, once again. I obviously made this soup before we could pinpoint that my troubles were digestion related and I was absolutely craving soup. Had I known that my poor body was pissed at the fact that I consumed so much cheese on NYE – I would have just skipped out on the cheese topping and just had the toast on top. The broth to this French onion soup is soo darn delicious on it’s own, you could honestly enjoy a bowl of this without the melted cheese and be just as content. I promise – I know you think I am crazy, but this soup is that good.
Being that we purchased and shared half of a pasture-raised cow this fall with my parents from Sojourner Farms in Olean, I wanted to use some of the soup bones and beef that we received with our order to make this stock from scratch, I took all the steps to make sure that it was the richest and most flavorful stock I could make. I roasted the bones before I boiled them to make the stock and the results were phenomenal. I have never done this before, but it produced the darkest and most robust beef stock that you could ever imagine. I used this recipe here from Simply Recipes. I enjoyed so many of the different flavors from this soup that I want to attempt it again but next time with a vegetarian or a mushroom stock. I think with the right flavors, possibly roasting the vegetables a bit first and maybe adding in some miso to round out the stock, I could make an equally delicious vegetarian version of this. Stay tuned, I am determined to try it out.
A note – I would have really enjoyed making a French-style gluten free bread for the top of the soup, but I was a bit limited in time, so I bought these beautiful and tasty gluten-free baguettes from Schär. They toasted up absolutely perfectly and retained a nice amount of that crunch even when floating on top of the soup. What a treat to find those at the store. It was a perfect finish to this incredible soup!
[print_this] Gluten-Free French Onion Soup
Adapted from Julia Child’s Recipe
Serves 6-85-6 cups yellow onions, thinly sliced (about 1 1/2 to 2 lbs)
1 tablespoon olive oil
2 tablespoons unsalted organic butter (if you wish to skip the butter, you can just add a bit more olive oil)
1/2 teaspoon raw sugar
1 teaspoon kosher salt
3 tablespoons gluten-free all purpose flour (whatever your favorite blend is, I used Bob’s Red Mill)
8 cups (2-quarts) beef stock* (preferably homemade stock made with pasture-raised beef – I used this recipe to make mine with bones from our pasture raised beef from Sojourner Farms in Olean, NY)
1/2 cup wine (dry red or white – I used dry white vermouth since that is what I had and it works wonderfully – do not skip this, it really makes the flavor of the soup)
1 bay leaf
1/4 teaspoon of dried thyme
salt and pepperFor finishing:
12 ounces swiss cheese, grated
4 ounces gruyere cheese, grated
1/2 raw yellow onion
2 -3 tablespoons cognac or brandy (optional – sadly I had neither of these on hand so I skipped it)
8 slices gluten-free French bread (cut about 1 inch thick), toasted until hardPlace heavy bottom stock pot or dutch over a medium-low heat. Add olive oil and butter to the bottom, melt. Add sliced onions and stir until they are evenly coated with the oil and butter. Cover and cook for about 20 minutes until they are very tender and translucent. Remove the cover and add the salt and sugar, mix. Raise the heat to a medium. Continue cooking the onions, stirring frequently, allowing them to caramelize and turn a deep golden brown. They will reduce significantly. This will take about 30 to 40 minutes. Don’t rush this step, you don’t want the onions to burn and the caramelization of the onions is what gives this soup it’s classic flavor.
Once caramelized, reduce heat to medium-low and sprinkle the flour over the onions. Brown the flour for about 2-3 minutes trying not to scorch it. (If the flour does not form a thick paste, you can add a bit more butter here). Stir constantly. Add in the wine, a bay leaf, the thyme and your stock, adding the stock a little bit at a time, scraping the bottom of the pan to get up all of the cooked-on brown bits. Add salt and pepper to taste (don’t add too much salt as the cheese will also add saltiness and you can always add more – you can’t take it away). Continue adding the rest of your stock. Stirring as you add. Simmer for 30 minutes. After simmering for 30 minutes, find the bay leaf and take it out.
You can certainly skip the crusty bread and melted cheese on top, this soup is really THAT good. But if you want to go further and enjoy this soup the way Julia fully intended, then keep reading.
To toast your bread, heat oven to 325º F. Bake the bread in the oven on a cookie sheet for about 15 minutes on each side (30 minutes total) or until golden brown and very hard, being careful not to burn it. Increase the temperature of your oven to 350º F.
To serve – either ladle the soup into individual oven-proof soup bowls or ramekins or one large casserole dish. I personally prefer individual servings. If you are adding raw onions, add that to the soup now and stir. Cover the soup with a single layer of the toasted bread and sprinkle with as much cheese as you’d like, I would say we probably went with about 1/4 cup of total cheese (a blend of the two cheeses). Place the bowls onto a baking sheet and place into a 350º oven for about 20 minutes. Then preheat your broiler and finish the soups under the broiler until the cheese is bubbling and golden brown. Remove from the broiler carefully, let cool for a minute or two and serve immediately.
*mushroom stock would make a great vegetarian substitution
[/print_this] -
Pumpkin Gingerbread Muffins with Dried Cranberries {Gluten-free, Vegan}

We’re leaving bright and early, hopefully before the sun rises, tomorrow morning for Kentucky to visit my husband’s family. We’re gonna celebrate Christmas a little late, ring in the new year and enjoy the last of the holidays. It’s about 8 or 9 hours to drive there, possibly longer with having the pooch with us, but it’s not too bad. I usually try to pack some healthy snacks and foods both for the drive and for when we get there.
So, this morning I baked a small pie pumpkin to purée to make these muffins, I toasted the seeds with a super spicy pepper blend and I also made dark chocolate bark with dried bing cherries, pistachios and grey sea salt (recipe soon).
I had to change my pumpkin muffin recipe a bit as I was nearly out of almond flour, so I turned to Gluten Free Goddess‘s pumpkin muffin for some changes and additions to my original recipe. I used the last of some coconut milk I had and since I wanted to skip the regular sugar, I decided use coconut sugar and some blackstrap molasses. The minute I smelled the molasses with the spices it gave me the idea to add additional flavors to create a “gingerbread” type muffin.
The gingerbread flavors went so well with the pumpkin and these turned out great, they are so moist and tender. These will be great for the drive and wonderful for breakfasts when we get there. Since hubby likes to cram in as much Southern junk and comfort food as he can while we’re down there, I’m usually on my own for food. I’m ok with it, I even encourage it, since he’s such a trooper all the time here at home and he usually only gets this food once a year. But, this does mean I am on my own while we are down there. I usually pack snacks and food to cook for myself while everyone else is having fried chicken and pizza from their favorite local joint.
I am making my tortilla soup for everyone on New Years night, and I’m super excited for them to try it for the first time.
What do you have planned for New Year’s Eve?
I hope everyone has a peaceful, safe and blessed New Years celebration, surrounded by loved ones. I am so excited for all the lies ahead in 2012. It promises to be a year full of wonderful adventures, big changes and so much more. We are planning a big move and we already have some super amazing projects lined up. I am so full of anticipation for the journey ahead. I am not sure I have ever looked forward to a new year, as much as this upcoming one.
[print_this]Pumpkin Gingerbread Muffins with Dried Cranberries – Gluten-free, Vegan
Adapted from my own pumpkin muffin recipe and Gluten-free Goddess’ recipe1 cup sorghum flour
3/4 cup almond flour
1/3 cup organic coconut flour
1/2 cup tapioca starch
1 1/2 teaspoons baking powder
1 teaspoon baking soda
1/2 teaspoon sea salt
1/2 teaspoon xanthan gum
1 teaspoon ground cinnamon
1 teaspoon ground ginger
1/2 teaspoon nutmeg
1/4 teaspoon ground cloves
1/4 cup blackstrap molasses
3/4 cup coconut sugar
1 1/3 cups fresh pumpkin puree (canned organic puree would also work)
1/4 cup light olive oil
2 large pasture-raised eggs, beaten (or 1 tablespoon Ener-G Egg Replacer whisked with 1/4 cup warm water)
1 teaspoon vanilla extract
1/3 cup coconut milk (or almond milk)
1/2 cup dried cranberries (you could also add raisins, dried cherries, nuts or chocolate chips here, instead or in addition to)Preheat oven to 375º F. Line a standard muffin tin with paper liners.
In a large mixing bowl whisk together all of the dry ingredients (up to and including the cloves). In a medium mixing bowl, whisk together the wet ingredients (up to and including the milk). Add the wet ingredients to the dry and mix very well by hand or with a stand mixer or hand mixer to incorporate the ingredients. The batter should be very smooth and not clumpy. Fold the cranberries into the batter by hand.
Divide the batter evenly among the muffin cups. Bake in the center of the preheated oven for 20 to 25 minutes until golden and firm to the touch. A wooden pick inserted into the center should emerge clean.
Cool the muffin pan on a wire rack for five minutes. Gently pop the muffins out to continue cooling on the rack (don’t cool them longer than 5 minutes in the hot pan- they’ll definitely get soggy). Enjoy a muffin after they have cooled 10 minutes.
Freeze any leftover muffins in tightly sealed freezer bags and pop one out for a quick and easy breakfast.[/print_this]
-
Gluten-free Gingerbread Granola {Vegan}
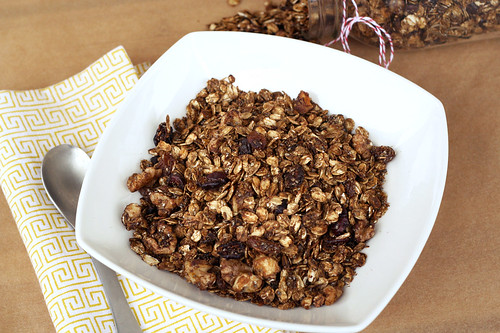

We are back from our very short trip to Chicago, we got back late Monday night. It was a whirlwind of a trip, but it was super fun and totally successful on the business front. The holiday market was jammed packed with people and everyone was in such a festive holiday mood. I love that about this time of year.
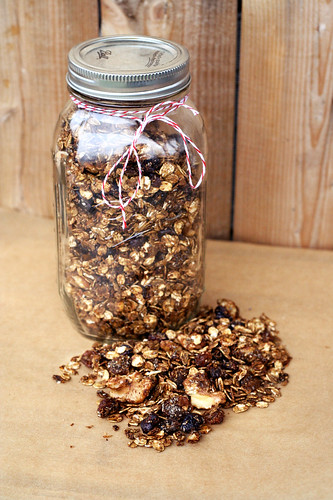
When we are in Chicago we stay with good friends and it is so enjoyable and relaxing. We are so lucky to have so many amazing friends across the country that open their homes to us. It makes it feel like we took a trip to see and stay with family instead of the alternative of it feeling like the (somewhat) stressful work filled trip that it actually is. I really wish I had more time before we left for this trip to make cute little homemade gifts like this granola for our friends that we stayed with as a “thank you”. This granola would make a wonderful holiday gift for the cereal lover on your list and it would also be the perfect gift for the host or hostess that invites you by for a holiday party. This granola in a simple canning jar wrapped up with some sweet ribbon or twine with a little tag, it really doesn’t get any better. I wish I could also capture and bottle up the smell in the house after baking this and wrap that in a bow and give it to everyone I know. It was that good.
The only bad thing about coming home after traveling, is that the fridge is usually so empty when we return. I try to be smart and plan ahead so we don’t leave town with a ton of fresh produce or leftovers in the fridge, etc. But that also means that when we come home there is very little fresh food to eat and I need to find the time to get to the market. We are pretty busy with work right now, so I haven’t had the extra time to get groceries just yet, so we have been just making do with what we have on hand right now. I have been craving some holiday-inspired goodies, like crazy, so, I decided a fun and healthy way to get some holiday flavor in my life, is to make this gingerbread granola. It made the house smell amazing and it is a great breakfast and snack option. It would also be good sprinkled on top of greek yogurt or ice cream. I’ve been enjoying this granola for breakfast with a few glugs of almond milk or coconut milk (not the canned kind, the beverage kind from So Delicious).
I had blackstrap molasses on hand, so I used that, but feel free to use regular light or dark molasses if that is what you have. Since blackstrap molasses can have a bit of a bittersweet taste, I also added an additional 1/4 cup of coconut sugar. You could leave this off or substitute brown sugar or honey here if you are looking for a bit more sweetness, like I was. Blackstrap molasses is not only a healthier choice for a sweetener, it actually has some health benefits, which is a lot more than more sweeteners can say for themselves. Blackstrap molasses is high in iron and a variety of other minerals.
Is it bad that I want to wrap this granola up and give it to everyone on my list? It’s that good.
Do you plan to make homemade gifts food or otherwise for anyone on your list?
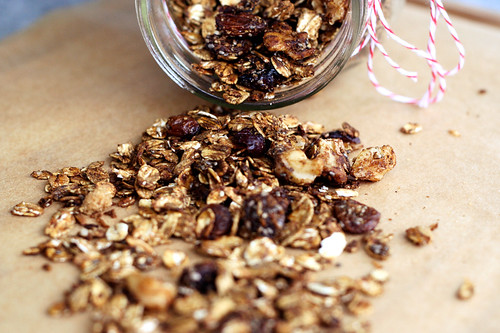
Gingerbread Granola
This made enough to fill two 1-quart canning jars4 cups old-fashioned rolled oats (if you are gluten intolerant, be sure these are certified gluten-free oats. I use Bob’s Red Mill)
1 teaspoon cinnamon
1 teaspoon of ground ginger
1/4 teaspoon ground nutmeg
1/4 teaspoon ground cloves
1/2 cup chia seeds (flax seeds would also be nice)
1/2 cup unsweetened shredded coconut
3/4 cup walnuts, roughly chopped (or pecans, almonds, etc)
1/2 cup golden raisins
1/2 cup dried cranberries
1 teaspoon kosher salt
1/3 cup blackstrap molasses (light or dark molasses will also work)
1/4 cup coconut sugar (optional, you can also use brown sugar)
2 teaspoons vanillaPreheat oven to 325ºF. Line large baking sheet with parchment paper. You can also use a roasting pan, which is nice since you can just mix all of the ingredients right in it, without losing things over the edge.
Combine all of your dry ingredients, oats, seeds, nuts, dried fruit etc., in a large bowl (or in your roasting pan). Add in your spices and salt. Mix well.
Pour the molasses and vanilla over the dry ingredients and stir until well coated. Let sit 5 to 10 minutes. Give the mixture a little taste and add the coconut sugar (or brown sugar) if it’s too bitter for you.If you aren’t using a roasting pan, spread the granola on the baking sheet and bake for 30-40 minutes. Toss every 10 minutes or so to provide even toasting.
Let cool completely – it will get crispier as it cools. Keep in airtight container.
-
Smashed Potato Puffs

I didn’t get a chance to get on here Thanksgiving Day to wish you all a Happy Day, like I had planned but I was cooking away in the kitchen and watching the parade, the dog show and football! I hope all of my American readers had an incredible day surrounded by people they love most and filled with delicious and tasty fresh foods made with so much love and care. If you aren’t in the US – I hope you have a beautiful Thursday, still!
Our day was perfect, I spent the day cooking in my kitchen and relaxing with hubby, we really needed a day like that, then we headed to my parents to see a ton of family for dessert. It is going to be an insane few weeks coming up so I was very happy to have the perfect balance of a quiet and calm day, with a bit of the usual holiday fare with the extended family.
Of course the best part of making a big feast for 2, is that we have a ton of leftovers. This is so perfect since we are leaving on Friday of this coming week to head to Chicago – so finding time to cook is probably going to be tough. Besides just reheating things, I plan to come up with all kinds of fun and creative ways to eat up the leftovers. This morning I saw a post on the Kitchn with this very topic – lots of great and delicious ways to eat up those leftovers! One of the hardest things to just simply reheat are the mashed potatoes, they are never as creamy and delicious as they are that night! You could certainly make a shepherd’s pie with them or potato pancakes of some sort, which I had planned on doing until I saw this post. The Kitchn had this delicious recipe for Mashed Potato Puffs that caught my eye instantly. Their puffs included ham and cheese, though this was a bit too rich for me after the two days of eating that I just had, so I skipped the cheese and ham and just added a small amount of turkey and some fresh chives from my garden. If you had a vegetarian Thanksgiving, these would still be equally as delicious without any meat at all. These adorable little puffs were super simple to put together and ready in 20 minutes. We had ours for breakfast and we put the leftovers in the fridge for either a side dish or another breakfast. They were puffy, had a slight crisp on the outside and were perfectly soft and creamy inside. I almost always make my mashed potatoes as garlic smashed potatoes, which I add a smidge of Nancy’s Organic Cultured Cream Cheese to for a little bit of creamy and tart flavor. I make my smashed potatoes with red potatoes, leaving the skins on – so my puffs were a bit more rustic and chunky than the original recipe, which I really liked. They can stick a bit when coming out of the muffin tin, at least they did for me, so make sure you grease your tin, even if it is non-stick. I personally didn’t care about that little bit of sticking – they were delicious regardless.
Well we’re off to the country to cut down our Christmas tree today and then to walk around beautiful Elicottville to really get even more into the Christmas mood! I cannot wait!
Tomorrow I plan to make a gluten-free turkey pot pie with some of the leftovers and I am going to cook down the bones to make a turkey stock for soup. What are you making with your leftovers?

Smashed Potato Puffs
makes between 12 and 24 puffs, depending the size of the pan used
Adapted from The Kitchn2 cups leftover smashed (or mashed) potatoes
3 large farm fresh brown eggs, beaten
1/4 cup minced fresh chives
1/4 cup shredded leftover turkey (optional)
Salt and freshly ground pepper, to tasteHeat the oven to 400°F and lightly grease the cups of a regular muffin tin or a mini-muffin tin.
Whisk together the smashed potatoes, eggs, chives, and turkey. Taste and season, if necessary, with salt and pepper.
Put a spoonful of the mixture in each muffin cup. Bake for 20-25 minutes, or until the potato cups are set, browned on top, and hot through and through. Serve immediately. -
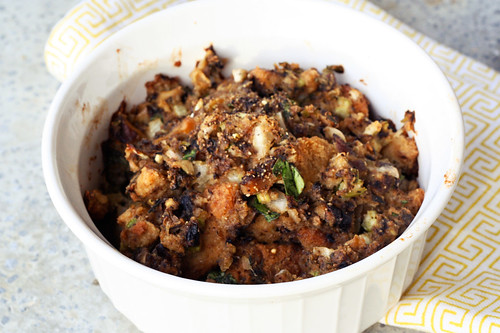
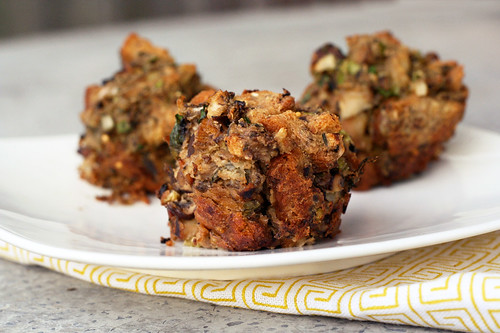
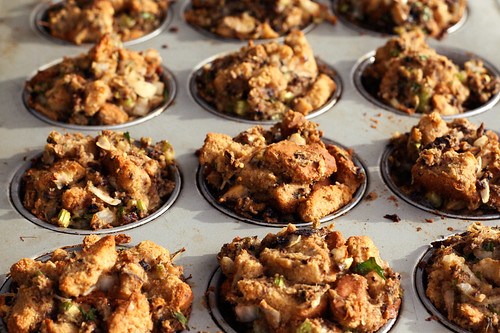
Gluten-Free Mushroom Stuffing (Vegetarian)

When I found out I was going to be a part of Book of Yum’s Gluten-free Vegetarian Thanksgiving Event – I was so excited. This is the first time I have had the pleasure of participating in something like this, but I have wanted to ever since I started my blog a year and a half ago. This one felt like the perfect place for me. Although I am not exactly a traditional vegetarian, I consider myself to be a “conscientious omnivore”, meaning I only eat meat that I feel good about eating that comes from a local farmer where it is raised humanely, free to roam, eat pasture and not be filled with hormones or antibiotics. We get all of our meat from Sojourner Farms in Olean, NY. This is the ONLY meat we ever have in our home and I feel like it is the right choice for us. We probably only eat meat anywhere from once a week to once a month at home, depending on what we have on hand and what we feel like. The rest of the time we eat completely vegetarian. I really love cooking vegetarian and find that eating a mostly vegetarian diet plus eating a small amount of local pasture-raised meat to have really changed my health immensely. I also feel like for me, it is a wonderful way for me to take a stand against the factory farming industry.
Sea, from Book of Yum, really wanted this event to not only make the transition into the first holiday season for newly diagnosed gluten-free folks to not seem so daunting, but to also highlight all of the wonderful options for those who are, or are cooking for those who are gluten-free and/or vegetarian (or vegan). Many of us find ourselves bringing our own food since many times the hosts are so terrified and paralyzed by what to cook, plus it alleviates the stress we have on wondering what we are even going to eat when we show up at someone else’s house. I love all of the wonderful recipes that have been featured so far, it’s such a great collection of classic dishes and new unique Thanksgiving options.
This year, like last, hubby and I are making the healthy and gluten-free Thanksgiving meal that we want and eating early in the day. After I get up and go to an early morning yoga class, while hubby takes our dog, Seri, to the park, we’ll spend the day cooking together, watching the parade and football and a enjoying a relaxing day at together at home without any work. After we are done eating, we will head over to my parent’s where they are having nearly 30 people for dinner (!) and we’ll join them for dessert, a cocktail or two and it will be the perfect way to have it all.
We took a nice long drive out to the country yesterday to pick up our Thanksgiving turkey from our farmer, Pierre, at Sojourner Farm in Olean. Since we will be having a turkey for our Thanksgiving dinner, I wanted to plan the rest of the meal without any meat. I was really excited to take on the challenge of making a meat free stuffing this year. So making it ahead of time for Book of Yum’s event was even more exciting since it was a test run of this recipe, for me. In the past I have sought out some type of healthy sausage to make my mom’s famous stuffing recipe that I had to have, but it always feels so redundant and unnecessary to have a side dish with meat in it, alongside the turkey. I really don’t need or want that much meat in one meal.
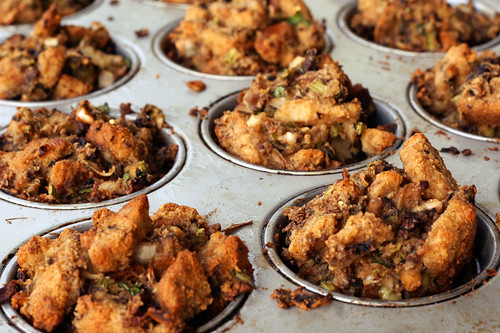
I decided on making mushrooms the stars of the stuffing this year. This delicious side dish is so full of rustic and earthy flavor, the mushrooms have a nice chewiness to them and the beautiful fresh thyme pulled it all together so nicely. Additionally, as you can see by the above photos, I also decided to experiment with making little individual stuffing “muffins”, if you will. I dreamt this up as a way to make sure that everyone gets lots of the crispy goodness that makes stuffing so darn delicious. Come on, admit it, you’ve gotten into with a family member on Thanksgiving over who get’s the edges. In our house, my hubby usually gets the crispy edges on anything that has them, by default. If you don’t care about the crispies (as my husband calls it) or don’t want to mess with a muffin tin, this will perfectly fit into a 9″ x 13″ baking pan. I ended up having a little bit leftover after filling the 12 muffin cups, that I put into a very small glass casserole dish. I didn’t want to call this recipe “Stuffing Muffins”, as I feared it would turn people off, since it does sound pretty disgusting, really. Even if you don’t try the stuffing “muffin” approach for this Thanksgiving, you have to try it soon, it is so worth it and I honestly cannot believe I didn’t think of it sooner.
This stuffing does have two eggs in it, so if you are vegan you could experiment with an egg replacer such as Ener-G or making your own flax-seed egg replacer (To replace one egg: 1 tablespoon ground flaxseeds plus 3 tablespoons hot water. Stir together until thick and gelatinous.) I have never made my stuffing vegan, but I am sure it would work perfectly. Please let me know if you try it out. Additionally, you will obviously have to make sure the bread you use is vegan.
Besides being very excited about how this recipe turned out, I am also very excited that I get to have stuffing twice in a week’s time, that isn’t a bad deal at all. Stuffing is one of my favorite things about Thanksgiving dinner, I don’t think I have it any other time during the year, so it always feels so special. Between that and the mashed potatoes, those are two things that will NEVER be missing from my Thanksgiving menu. For my husband, Mark, I always have to make him a single-serving of his Momo’s famous sweet potato casserole, complete with an ungodly amount of butter, brown sugar and yes, it is even topped with marshmallows. It’s not for me, but I can totally appreciate how it won’t be Thanksgiving for Mark without it, so I will always make it for him.
What dish will always be a part of your Thanksgiving dinner?

Gluten-Free Mushroom Stuffing (Vegetarian)
serves 6-81 loaf of gluten-free bread, dried and roughly torn into small pieces (I used a loaf of Rudi’s all natural gluten-free multigrain bread, you can use your favorite bread)
1 – 1 1/2 cups mushroom broth, vegetable broth or water
1 medium onion, finely chopped or grated
2 stalks celery, finely chopped
8 ounces fresh cremini mushrooms, roughly chopped
1 cup wild mushrooms, fresh or reconstituted from dried, roughly chopped
1 1/2 tablespoons fresh thyme, finely chopped
1 tablespoon fresh Italian parsley, roughly chopped
2 large farm fresh brown eggs
2 tablespoons olive oil
1/2 teaspoon kosher salt
1/4 – 1/2 teaspoon freshly ground black pepperPreheat oven to 350ºF. Crumble or tear the dried bread into small pieces and place into a 9″ x 13″ glass baking pan. Wet the bread with enough broth or water so it starts to get soft, but you don’t want it insanely soggy, either. If you add too much liquid, just pour it out. Mix with eggs, mushrooms, onions, celery, herbs, olive oil and salt and pepper. Don’t be afraid to get your hands dirty, roll your sleeves up and just get your hands in there to mix it all up, it’s the only way to do it. Once everything is evenly mixed in you can either leave it in the baking pan and bake it as is or start scooping with your hands, an ice cream scoop or a large spoon into a greased non-stick muffin pan. (I greased mine with a very small amount of vegetable shortening). If it doesn’t all fit into the muffin pan, scoop the remainder into a small glass casserole dish.
Place the glass pan or the muffin tin into the oven and bake for 45 minutes to an hour until the top(s) are browned and crispy. Let the stuffing “muffins” cool slightly before attempting to pop them out of the muffin tin and don’t worry if they don’t come out like a perfect muffin shape, most of mine didn’t, some even fell apart a little. Don’t worry, it’s stuffing, its rustic and it isn’t about the shape and look of them, it is all about the crispies!
Enjoy.
NOTE: since I didn’t want to dry my bread overnight or for a day or so, I placed the sliced loaf in a single layer on a baking pan in the oven at 200º for about an hour to dry it out.
-
Arugula, Fennel and Orange Salad
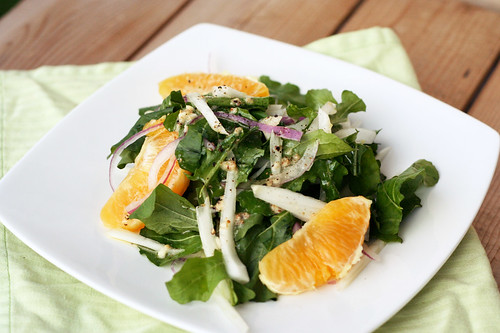
Once the fall really sets in, I already start missing my green veggies. I know we are blessed with squash and root vegetables aplenty throughout the winter, but I really start missing all the beautiful local green stuff from the peak of the summertime. I love that at this point that we are still able to get our hands on arugula, kale, spinach and other leafy greens, but I know soon those will be hard to come by. So, I try to get in as much as possible. I grabbed the fennel, arugula and red onion at the farmers market this past weekend along with some potatoes, bok choy, peppers, beets, carrots and as many other vegetables as I could get my hands on. Gotta get it all in now.
I absolutely love salads, any type really. I rarely meet a salad I don’t love. This cool-weather winter salad has so much vibrant flavor. The peppery crisp from the arugula, the subtle hint of anise from fennel and the tangy sweetness of the oranges all come together perfectly. If I had some in the pantry, I would have topped this salad with some toasted walnut pieces.
What is your favorite fall/winter salad?
Arugula, Fennel and Orange Salad
serves 4Vinaigrette
1 small clove garlic, minced
1 teaspoon wholegrain or stoneground mustard, no salt added
1 1/2 tablespoons olive oil
juice from half an orange (or lemon) – approximately 1 1/2 tablespoons
1/2 teaspoon kosher salt
1/4 teaspoon freshly ground black pepperSalad
5 cups baby arugula, trimmed and roughly chopped
1 small fennel bulb, trimmed, cored and thinly sliced crosswise
1 1/2 oranges, peeled, white pith removed and cut into segments (use the remaining half for the vinaigrette)
1 small red onion, thinly slicedIn a small bowl combine all dressing ingredients and whisk to thoroughly combine, set aside.
Place the arugula in the bottom of a large serving bowl, scatter the orange segments, fennel slices and onions over the arugula; drizzle the dressing over the salad to serve, toss gently. Serve.
-
Butternut Squash & Chickpea Coconut Curry (Crock Pot Recipe)
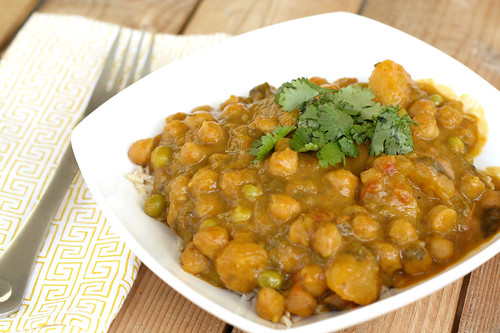
I absolutely adore my slow cooker. It is so perfect for those days where you kinda feel like cooking, but you don’t really have the time or desire to stand around stir this pot so it doesn’t stick, toss that thing in this dressing, cut up this and that. I always love eating at home and cooking my own meals, but sometimes after a long day of work, I just don’t have the energy to head to the kitchen and start on another 1-2 hour adventure. Though it hardly feels like work, sometimes it’s just hard to muster up the energy after a long and busy day. With a crock pot there is no preheating, no keeping an eye on it so it doesn’t over cook, no stirring. It’s just simple, easy home-cooking. When you are ready to eat, just head to the kitchen and serve yourself. I always tell Mark that my crock pot is the closest I will ever come to having a personal chef, it really feels like that.
This recipe is exceptionally easy, just toss all (well, almost all) of the ingredients in to your crock pot in the morning and check back later. I decided to keep out the peas until the end and wished I had done the same with the spinach, so I altered the recipe to reflect that. That’s it. You could certainly fuss with sautéing the onions and garlic ahead of time if you wish, but I really don’t see why you should bother. I tossed it all in and it was ready to go 6 hours later. I had some beautiful spinach and peas from the market so I decided to toss those in for some extra greeny goodness and that was our meal.
I truly think this was the best curry I have made yet. I personally have a wonderful yellow curry powder that I love, though I know many people swear by making your own mix, toasting the spices yourself, etc. I have yet to try that as I really love the powder I buy. If you prefer to take that route, please do. Beyond being extremely easy to make, this curry is loaded with flavor and is so satisfying. I served it over a small serving of brown basmati rice and topped it with fresh cilantro and a bit of unsweetened shredded coconut. The perfect cleanse-friendly, fall meal.
Butternut Squash & Chickpea Coconut Curry (Crock Pot Recipe)
serves 82 1/2 cups diced butternut squash
1 1/2 cups dried organic chick peas
1 small onion, chopped
2 cloves garlic, minced
1 can 13.5 ounce organic coconut milk (you can use light here, I didn’t)
1 bunch of fresh spinach, rinsed and roughly chopped (you could also use kale here)
1 1/2 cups freshly shelled peas (you can use frozen here, if you wish)
1-2 large tomatoes, diced
3 cups vegetable broth or water
3 tablespoons yellow curry powder (you can use your own blend of spices here, I just happen to have a premixed curry powder from a local indian grocery store that I love)
1 teaspoon kosher salt
handful of fresh cilantro, roughly chopped (save some for serving)Rinse and sort through the dry chickpeas. Cut the skin off the squash, remove seeds and cut into 1 inch square cubes. Add all of the ingredients to your slow cooker besides the peas and spinach. Cook on high for 6 hours. About 20-30 minutes before serving add in the fresh peas and spinach, and give it a stir. If your sauce seems to be a bit too thin or watery when it is done cooking, you could make a quick mix of cornstarch and hot water and pour a tablespoon or two of the mixture into the crock pot, allow it to simmer a bit longer. This will thicken it right up.
Serve over brown basmati or jasmine rice topped with fresh cilantro, mint or basil and maybe even some shredded coconut.
-
Lentil Soup – Info on My Cleanse
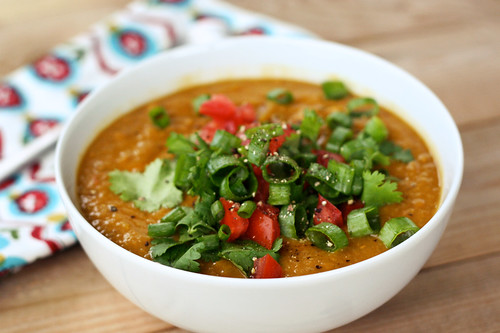
Well it is official, this past Friday marked the Autumn Equinox, so that means we are officially amidst my favorite season – Fall! Besides all the beautiful weather, cooler temperatures and lovely leaves – we are also blessed with some of my favorite foods of the year. Squashes, pumpkins, apples, brussels sprouts…pies, crisps, soups, stews, roasts…the list goes on and on. As much as I want to enjoy every single one of these things, after a long summer of traveling and the indulgences that goes along with it, I decided to once again mark the shift of the seasons with a cleanse. We were in NYC this past weekend, so rather than starting my cleanse on the equinox as I would have liked, I started on Monday. That was our driving home day, so it was definitely a bit tricky, but I was able to pack some snacks ahead of time for the car rides, like kale chips, roasted chickpeas and unsalted cashews. Plus our gracious hostess in Brooklyn, Karen, made me a delicious glass of fresh kale, apple, celery and cucumber juice before we hit the road. I made a delicious batch of kitchari (recipe coming soon) as soon as I got home and was able to make it through day 1, without a hitch.
I am doing a minimum of 2-weeks this time around, but definitely shooting for a full 28-days if my schedule allows. As with the cleanses I have done in the past, I am loosely following the Ayurvedic traditions, along with the items I tend to have issues with, personally. I am very excited to have a group of 25+ friends on Facebook that are all following along and participating in their own matter. It’s so amazing to have other people to motivate me and as a support system, it makes it even easier. Since I have had quite a few people ask me about how I cleanse, I thought I would put a very loose description of what I personally do in this post. If you have any additional questions about what I am doing, please contact me and I will do my best to help.
I am avoiding the following things:
Dairy*
Eggs
Sugar
Excess Salt (I will use a very small amount when cooking)
Caffeine
Alcohol
Meat (chicken, beef, pork, etc)
Fish and Shellfish (shrimp, scallops, mussels, etc)
Gluten (wheat, barley, oats, rye, etc)**
Soy
Corn
Foods with preservatives, additives or chemicals, and foods grown in an environment laced with chemical fertilizers or pesticides, and canned, frozen or processed foods.***Ayurveda doesn’t restrict dairy, but I personally seem to have issues with it, so besides ghee, I am avoiding all dairy during my cleanse.
** these are both things that I avoid on a regular basis, but are very important to a cleanseSo you are probably wondering what exactly I am eating, then…
What I am eating:
Fresh organic fruit. I am going light on the fruit because of the sugar and I am focusing on suggested fruits that are best for digestion such as apples, pears, figs, prunes, papaya, etc.
Fresh organic veggies. Some of the best for digestion are leafy greens, cabbage, celery, brussels sprouts, broccoli, etc
Whole organic grains such as brown rice, quinoa, amarynth, buckwheat, millet
Beans like lentil, mung beans, etc
Vegetable juice and broth
Soups and stews made with vegetables, legumes and grains.
I am cooking with a small amount of olive oil and/or ghee (indian clarified butter that is GREAT for detox)
Raw honey (sparingly)
lots of luke warm water with lemon and/or ginger
detox tea (I like Yogi brand Detox tea)
I am also taking probiotics in the morning after breakfastI plan to get as many recipes on this blog throughout the cleanse, so you can see a good example of how I eat when I am cleansing.
Here are some additional tips that I have learned along the way:
Some of the differences with an Ayurvedic cleanse vs a regular cleanse is that it teaches you to avoid or focus on foods specific to you and your body-mind type (or your dosha) and it’s needs. Also, although you should be eating TONS of fresh fruits and veggies, you shouldn’t eat them raw during this cleanse. Raw foods are harder on your digestive tract, so you should be heating and/or boiling your veggies and eating them warm.Eat whole, fresh, natural foods, organic if you can get it. Buy your produce fresh, and consume it quickly.
Also avoid ICE cold water and beverages, it can disrupt the “fire” needed in your digestive tract.
Cook with digestion-enhancing, detoxifying spices such as turmeric, cumin, coriander, clove, ajwain, fenugreek, dried ginger, Chinese cinnamon and fennel. Add the turmeric to foods as they are cooking, and sauté other spices in ghee or olive oil and pour over prepared dishes for the best therapeutic benefit.
According to Ayurveda, each meal should be a feast for all of your senses. When your plate reflects an appealing variety of colors, textures, flavors and aromas, your digestive juices start freely flowing in anticipation and your body, mind and heart are all fulfilled by the eating experience.
As I mention above, normally I avoid raw vegetables and fruit since it can disrupt your digestive tract and it is harder to digest, however this time around, I am including juices that I am making from fresh, organic vegetables and fruit. I decided to include this, as most mornings I go to yoga from 9:30 – 11:00am, I do not eat before I practice yoga and by the time I get home around 11:30, I am not quite ready for lunch but I am slightly hungry. The juices have been a great and fast way for me to get much-needed nutrients without having to prepare an involved breakfast, plus it is light enough that I am ready for lunch a couple of hours later.
I made this lentil soup for dinner last night and served it with some roasted butternut squash with rosemary, on the side. It was so delicious and perfectly satisfying. I love lentil soup because it can be quite versatile, every time I make it, it is a bit different from the last. You can experiment with different spices and flavors, you can add many different types of vegetables, including leafy greens like spinach or kale and if you aren’t on a cleanse, you could even top it with a delicious homemade yogurt sauce.
When I made this particular pot, I wanted to make sure to include some cleansing spices and I also wanted to get some smokey spice from a couple of dried chipotles. If you don’t like the spices I used, experiment with your own, there are so many possibilities, you could use smoked paprika, yellow curry powder, chile powder, dill, etc – the flavor combinations are endless. For a real hearty pot of lentil soup, you could add some brown rice or other grains to this soup, which I have done in the past and it is delicious. Just add the uncooked rice with the lentils, and skip the pureeing at the end. You could also roast the butternut squash (recipe coming soon) with spices to match your soup and just add it to the pot just before serving. Honestly, I debated this for quite sometime, but ultimately I really wanted to savor and enjoy the crispy browned bites of squash on their own, it felt like such a treat.
Sometimes I like my lentil soup smooth with just a few whole lentils, which is how I made it this time. If you wish to have a chunkier, heartier soup, simply skip the pureeing step and serve the soup, as is.
Lentil Soup
serves 6-82 tablespoons of ghee or olive oil
1 teaspoon cumin seeds
1/2 teaspoon turmeric
1-2 dried chipotle(s)
1 medium organic red onion, diced
2 cloves of organic garlic, minced
1 organic celery stalk, diced
1 organic carrot, peeled and diced
1 organic green bell pepper, diced
a dash of sea salt (I used very little since I am cleansing)
3 cups of lentils (you don’t have to presoak lentils, but I do as it is supposed to lessen the gassy after-affects)
8 cups of low-sodium organic vegetable broth or water (you may need to add more if your soup gets too thick)
1 large organic tomato, diced (you can just use a can of organic diced tomatoes here, if you wish)For serving:
1 small tomato, diced
1 small bunch cilantro, roughly chopped
1 green onion, thinly slicedIf you wish to soak your lentils, rinse them well, sort through to pick out any small stones and place in a large glass bowl. Cover the lentils in water and allow to soak a few hours. Once you are ready to make your soup, drain the lentils and rinse again. If you aren’t soaking your lentils, just rinse well, pick through to remove any small stones and allow to drain.
In a large stock pot, heat the ghee (or olive oil) over a medium-high heat, add the cumin seeds, turmeric and dried chipotles, stir until fragrant and the cumin seeds begin dancing around the pot. Add in the onion, garlic, celery, carrot, bell pepper and a dash of salt, saute for approximately 7 minutes until the vegetables are translucent and soft.
Add in the lentils, vegetable broth (or water) and diced tomato, turn the heat to high. Bring to a boil, then reduce the heat to a medium-high, cover and allow to simmer for approximately 45 minutes, stirring often. Cook until the lentils are tender. This may take less time, it may take more time, it depends on the lentils you are using and it depends if you soaked them first. You also may need to add more broth or water if the soup becomes too thick. Salt and pepper the soup to taste. You can leave the soup chunky as it is, or if you wish for it to be smooth and creamy, remove the dried chipotle pepper(s) and puree 2/3 of the finished soup in batches, in a blender, adding it to a large bowl as you go and then adding it all back to the pot when you are finished. Stir to combine. Serve the soup topped with freshly diced tomatoes, chopped fresh cilantro and green onions, or whatever your toppings of choice may be.
NOTE: the above information about my cleanse is not meant to be taken as medical advice. Every individual is different, this is just what I have found works for me. There are obviously different ways of thinking and a gazillion different types of cleanses. I have done this particular style of cleanse many times over the last two years and have always had great results. Please acknowledge what is right for you, your own body and health and take this all into consideration when embarking on a journey like this.
-
Winter Squash Risotto with Radicchio
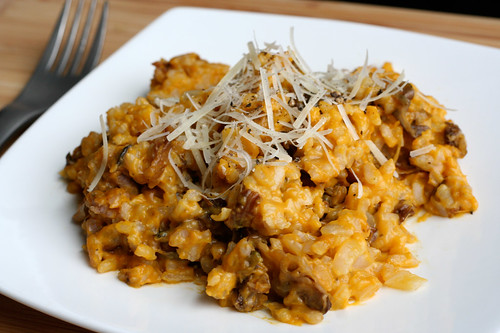
After a few months with our butts parked here in wintry Buffalo, it’s that time again, we are hitting the road. We leave Saturday morning for Austin, Texas for the South by Southwest Music Festival and Flatstock 29! I love this trip not only because we drive down, and I love a good road trip, but we also get a great dose of some much-needed sunshine and warmer weather plus great music, hang outs with our good friends, good food and so much more. As with all of our trips, though they are an escape from the every day and a bit of a vacation in that sense, they are very much about work and business, so the weeks leading up require a lot of long days and nights of prep. We have to wrap up any client projects we have on deck and we also have to pack and restock all of our handmade goodies, print stuff, sew stuff, etc. I have been trying in these two weeks before, to make meals that require one day of prep and cooking but gives us many meals. I have made pasta Bolognese, vegetarian shepherd’s pie, italian sausage, white bean and escarole soup, slow cooked black beans for tacos and this risotto. It’s been great because we have a ton of leftovers and we’ve been able to just focus on work and when need be, take breaks, heat up some dinner and then get back to work. I love it. Home cooked meals are most important to me when life gets busy and stressful.
This risotto is a nice, hearty winter dish that is comforting, while being light. I love all the different flavors, a good quality vegetable broth in itself has so many layers of flavors, the sweetness from the squash really compliments the sharp bitterness from the little bit of radicchio and the creaminess from the milk and the cheese finish it all off, perfectly. The rich, creaminess from the squash really makes this risotto feel sinful, but you can enjoy it, guilt-free. We served it as our main dish but it is light enough to be a side-dish. If you don’t care for radicchio you could add in baby spinach instead.
Winter Squash Risotto with Radicchio
serves 6
adapted from Cooking Light Magazine1 butternut squash (about 4 pounds)
6 cups organic low-sodium vegetable broth
1 tablespoon olive oil
2 1/2 cups sliced radicchio
1/4 teaspoon freshly ground black pepper, divided
1 1/2 teaspoons organic butter
1 small onion, finely diced
1 1/2 cups uncooked Arborio rice or other short-grain rice
1/4 cup dry white wine (I didn’t have any so I used dry vermouth)
3 tablespoons organic half-and-half or whole milk
fresh ground black pepper
kosher salt
3/4 cup (3 ounces) grated fresh Parmesan cheesePreheat oven to 375°F.
Cut squash in half lengthwise; discard the seeds and membrane. Place squash halves, cut sides down, on a baking sheet; bake at 375° for 50 minutes or until squash is tender. Cool. Peel squash; mash pulp. Set aside 1 1/2 cups pulp, reserving remaining pulp for another use.
Bring vegetable broth to a simmer in a large saucepan. Keep warm over low heat. Heat olive oil over medium-high heat until hot in a large pan or dutch oven. Add radicchio; sauté 2 minutes or until wilted. Place radicchio in a bowl. Sprinkle with 1/8 teaspoon each of pepper and salt, set aside. Melt butter in Dutch oven. Add onion; sauté 3 minutes or until lightly browned. Add rice; sauté 1 minute. Stir in wine and 1/2 cup broth mixture; cook 3 minutes or until the liquid is nearly absorbed, stirring constantly. Add 2 cups broth mixture, 1/2 cup at a time, stirring constantly until each portion of liquid is absorbed before adding the next (about 15 minutes total). Stir in squash pulp. Repeat procedure with remaining 1 1/4 cups broth mixture (about 9 minutes total). Stir in radicchio mixture and half-and-half. Season to taste with black pepper and kosher salt. Remove from heat; stir in cheese. Sprinkle with a bit more cheese and 1/8 teaspoon pepper.
-
Chipotle Potato Soup with Bell Pepper Salsa

There is something about a creamy and spicy soup that just warms your tummy and your soul. It is still bitter cold here in Buffalo and I am trying to look on the bright side of this brutal winter, by enjoying that I can still cook hearty and hot, wintry dinners. I know soon when the warm weather is upon us, I will miss the hot soups and stews, one of my favorite things about the winter months.
This soup brings a nice kick of smokey spice from the chipotles, it’s comforting, thick and creamy, three things that just really make winter dinner satisfying, to me. The great thing about this soup and the fact that most of the creaminess comes from blending the potatoes, is that it can easily be made vegan. Go with vegetable stock over chicken and you can either skip the milk altogether or use a non-dairy milk like plain unsweetened almond, rice or soy milk. Then just skip the cheese or top with your favorite vegan cheese. I used local, pasture-raised whole milk that we bought at Farmers and Artisans, one of the few milks I have ever tasted that is actually good enough to enjoy a glass of (in my opinion). There is only a cup of milk and a cup of cheese in the entire pot of soup, so don’t even feel the littlest bit guilty about it. On the other hand, if you have no guilt and really want to indulge, you could go with a cup of heavy cream instead of milk and maybe even some crispy bacon on top, why not right? Either way, before the warm weather shows itself again, you need to make a pot of this soup and not only remember, but enjoy the lovely things about the winter that we will all surely miss in the heat of July or August. Trust me, we all miss it, even just a little.
Chipotle Potato Soup with Bell Pepper Salsa
serves 8Bell Pepper Salsa
1/2 red bell pepper, seeded and diced
1/2 orange bell pepper, seeded and diced
1/4 cup fresh cilantro, chopped
1 1/2 tablespoons chopped red onion
Juice from 1 lime
Kosher salt , to tasteIn small bowl, mix together bell peppers, cilantro and onion. Squeeze lime over. Gently stir to combine. Season to taste with salt. Set aside.
Chipotle Potato Soup
2 1/2 – 3 lbs red potatoes, peeled and cut into 2 inch cubes
1 onion, roughly chopped
2 large cloves garlic, minced
1/2 red bell pepper, seeded and diced
1/2 orange bell pepper, seeded and diced
2 tablespoons olive oil
3 tablespoons chipotle chiles in adobo sauce (this soup is spicy, go with less chipotles if you don’t want all the heat, you can always add in more)
6 cups low-sodium vegetable stock or chicken stock
1 cup organic whole milk (you can either skip the milk and add an extra cup of stock or use a non-dairy milk and skip the cheese, to make this soup vegan)
1 teaspoon ground chili powder
1 cup grated extra-sharp cheddar cheese, plus additional for garnish
kosher salt, to taste
fresh ground black pepper, to tasteIn a large pan of salted water over high-heat, bring the potatoes to a boil and then drop the heat to simmer and cook for approximately 20 minutes, until potatoes are soft. Drain.
In a large stock pot, over high heat, sauté onion, bell peppers and garlic in olive oil for 2 minutes, add the chipotle chiles and the chili powder. Lower heat to medium; continue cooking until the onions are soft and translucent, approximately 5 minutes.
Add the potatoes, stock and milk (if you are using it) to the stock pot. Bring to gentle boil. Reduce the heat to low and simmer 10-15 minutes. Turn off heat and let the soup cool about 5 minutes.
Purée with immersion blender or in batches using a regular blender*, until smooth, gradually adding cheese. Season to taste with kosher salt and pepper. Ladle the soup in large serving bowls and top with shredded cheese and the bell pepper salsa.
* When blending hot soup in a blender, do so in small batches, filling the blender pitcher only about halfway. Put the lid on, but remove that small cap in the lid (if you have it) and hold the lid down tight with a towel, otherwise the steam will cause the lid to explode off, spewing hot liquid everywhere. This has never happened to me, but it can, so be careful.
-
Creamy Italian Sausage and Potato Soup

As you can probably tell from reading my recipes, we eat very little meat in our household. We aren’t vegetarians, but I would say we are mostly vegetarian. I consider myself to be a conscientious omnivore, I do eat meat occasionally, but only meat that I know where it comes from, how it was raised, what it ate, etc. At this point the only meat in our house comes from a local farm where it was all pasture-raised without the use of hormones, antibiotics or other chemicals. We have visited the farm, we have seen the animals and we have shaken the hand of the man who does it all. This is the only way I will ever buy meat for our home. It feels right. This fall we shared a pig with my parents. We have more pork that you can even imagine in our freezer. At home I would say we probably enjoy pork once or twice a month and chicken once a month. I have a good supply of this wonderful ground italian sausage that is unlike anything you can ever imagine. So tasty, sweet, subtly spicy and not too greasy, it is perfect. Without the ability to make patties and throw them on the grill (it is WAY too cold for that), I was trying to think of some winter friendly ways to enjoy the sausage. I thought a nice hearty soup would be perfect. I was torn between a tomato-based vegetable pasta sausage soup but then I thought something creamy and hearty sounded even better (though I plan to make that first soup soon).
This soup was really incredible, spicy and creamy with a nice green crunch from the spinach. The fresh herbs were wonderful, though dried will do if you can’t find fresh. I wanted it to be nice and brothy and wanted more servings so I used about 7 or 8 cups of chicken broth, you can certainly go with less, 5 or 6, if you want it to be a chunkier and less brothy soup. I also decided to go with half and half versus heavy cream to keep it a bit lighter per serving, but heavy cream would certainly be delicious and with less broth you would have a nice thick soup, just a bit fewer servings. Oh and the freshly grated parmesan cheese on top really sets this soup over the edge. It is the perfect finishing move.
*I am not at all crazy about the photo of this soup, it was hard to photograph with all the lovely bits, and I forgot to put the cheese on top for the photo, but you get the idea.
Creamy Italian Sausage and Potato Soup
serves 6-82 tablespoons of olive oil
1 large onion, diced
3 cloves garlic, minced
1 pound of ground Italian pork sausage, local, pasture-raised and free from hormones and antibiotics
6-8 cups of organic chicken broth, low sodium
5 small russet potatoes, washed and cut into 1 inch cubes with the skins still on
1/2 cup of fresh basil, roughly chopped
1/2 cup of fresh parsley, roughly chopped
1 teaspoon of red pepper flakes (more if you like spicy)
1/4 teaspoon freshly ground black pepper
1/2 teaspoon kosher salt
1 cup of organic half and half
2 cups of coarsely cut spinach
1/4 cup of freshly grated Parmesan cheesePlace the olive oil in a large pan over a medium-high heat. When the pan is hot add the onion and garlic and saute until the onion gets soft. At this point add the Italian Sausage and cook until its browned. Our sausage isn’t very greasy so I didn’t need to pour any out, if your sausage produces a lot of grease pour some off before adding the soup.
In a large stock pot over medium-high heat add in the chicken broth, potatoes, basil, parsley, red pepper flakes, pepper and salt. Bring to a boil. Reduce the heat and bring to a simmer, allow to simmer for 20 minutes.
After the soup has been simmering add the sausage, onion and garlic mixture and cook another 5-10 minutes. After it is done simmering, add in the half and half and stir. Reduce the heat and be sure it doesn’t boil. Cook another 2 minutes. Taste the soup, add more salt and pepper to taste. More red pepper flakes if you want it spicier.
Remove the soup from the heat, add in the spinach and cover. Let it sit for an additional 3-5 minutes until the spinach is cooked.
Ladle the soup in your bowls and sprinkle with a little parmesan cheese.
-
Sweet Potato and Black Bean Stew
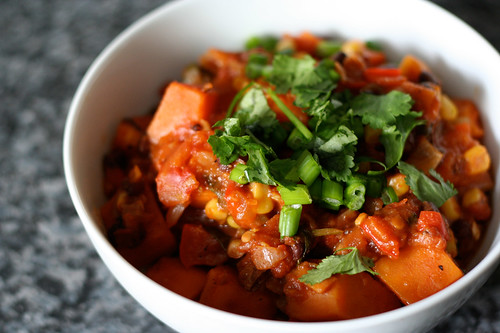
This is what winter is all about – spicy, hearty and healthy! This was a delicious one-pot dinner for a very frigid winter night. I made this for dinner on the second to last day of my cleanse and it was hard to believe this was not only healthy, but cleanse-friendly. I had been avoiding corn throughout my entire cleanse, though I just couldn’t resist adding it to this stew, not only for taste, but for the lovely “pop” of the bright sunshine color in an already beautiful dish. Though this dish is vegan, it would satisfy the most ravenous of meat eaters, Mark was raving about it, which can be hard to get him to do sometimes without meat. It is reminiscent of chili but is a combination of flavors unlike any chili I have ever had. The subtle sweetness from the sweet potatoes is so perfectly unexpected. I personally love spicy, so I kept the seeds in on both the jalapeño and chipotle pepper, this stew had a pretty nice kick to it. If you don’t like spicy, you can certainly choose one over the other on the spicy peppers or leave out the seeds. The splash of fresh lime juice is such a perfect compliment to all the flavors and really brings a nice brightness to the dish. If you don’t like black beans or don’t have any on hand, so many other beans would work well in this dish, kidney, pinto, navy, etc. I also think this stew would be great with butternut squash or pumpkin, as well. If you aren’t vegan or on a cleanse and you love your cheese, grate some nice extra-sharp cheddar cheese on top of this stew when you serve it. It would be incredible. Avocado or sour cream would also be great on top. And, if you really like the heat, a few squirts of your favorite hot sauce when serving, would give you another kick of spice. Please do yourself and make this super easy and hearty stew before winter is over and you regret it.
Sweet Potato and Black Bean Stew
serves 62 tablespoons olive oil
3 small-medium organic sweet potatoes, peeled and chopped into 1-inch cubes (you basically want about 1 1/2 pounds of sweet potato)
2 small onions, peeled and roughly diced
2 cloves garlic, minced
1 red bell pepper, seeds removed and chopped into 1/2-inch pieces
1 jalapeño, diced (I left the seeds in, I like spicy, take them out if you don’t)
2 teaspoons chili powder
1 1/2 teaspoons cumin
1 teaspoon kosher salt
1 dried chipotle pepper, roughly chopped, again seeds left in
3 cups organic low sodium vegetable broth
1 – 15 ounce can organic black beans, no salt added, rinsed and drained
1 – 28 ounce can diced organic fire-roasted tomatoes
1 1/2 cups frozen organic sweet corn
1/2 cup fresh cilantro, chopped, plus more for serving
1/4 cup freshly squeezed lime juice, plus more for serving
3 green onions, thinly slicedHeat olive oil in a large stock pot over medium-high heat. Add sweet potatoes, onion, garlic, red pepper and jalapeño, stir well to coat. Sauté until onion and peppers are slightly soft, about 5-7 minutes. Add in the chili powder, cumin, salt, and chopped chipotle pepper, still well to combine. Add in the vegetable broth, black beans and diced tomatoes (including all the juice in the can). Bring the stew to a boil, stirring well to combine all the ingredients and remove any stuck bits or spices at the bottom of the pot, reduce the heat to a simmer, add in the frozen corn and allow it to cook 15-20 minutes longer or until the sweet potatoes are fork-tender.
Just before serving add the fresh cilantro and lime juice to the stew, season to taste with salt and pepper. Serve in large soup bowls, top with a bit more fresh cilantro and green onions, you can add an additional squeeze of lime, if desired. Enjoy.


