-
How-to Make Infused Olive Oil {+ Video}
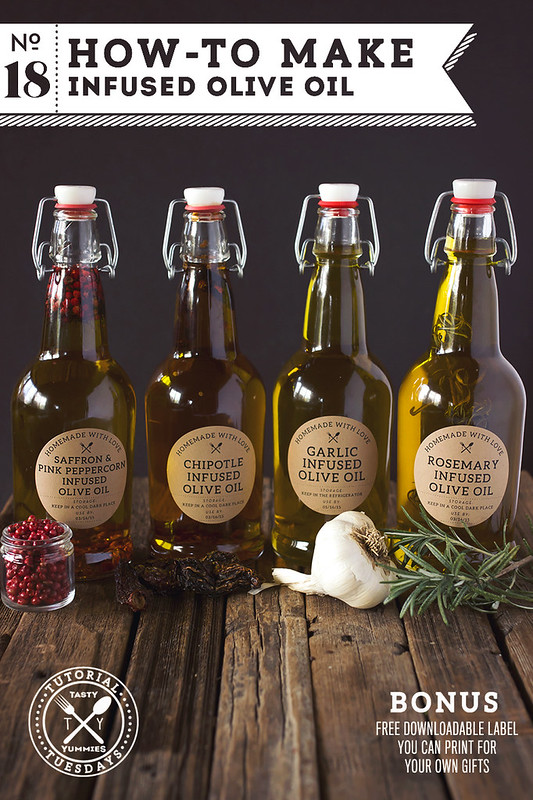
Infused Olive Oils make really great and beautiful gifts for the food lovers in your life! They are also great to have on hand in your own kitchen for your own cooking adventures. The flavor possibilities are endless and it is truly a fun and unique gift.
There are lots of great options for simple homemade gifts here on TY: Healthier Hot Cocoa Mix, Homemade Chocolate Bark, Paleo Chocolate Chip Cookie Mix in a Jar, DIY homemade Vanilla Extract, Essential Oil Holiday Room Sprays, Crock Pot Pumpkin Butter, Coconut Butter, Nut Butters, Candy Cane Hot Cocoa Mix, Chai Concentrate, just to name a few of my favorites.
A handmade gift, made with love, packaged up sweetly with beautiful custom labels and a thoughtful note, to me, is what the season is all about. Sharing something you created with your own two hands, especially for the person receiving it.
There are so many various ways you can infuse olive oil and there are just as many posts floating around the web telling us about them. Some heat the oil, while others just throw it all together in the bottle and call it a day, some leave in the ingredients in, others strain them out before bottling. I have done a lot of reading and no matter what method you choose, there are a few concerns we have to take into account when making infused olive oils.
-
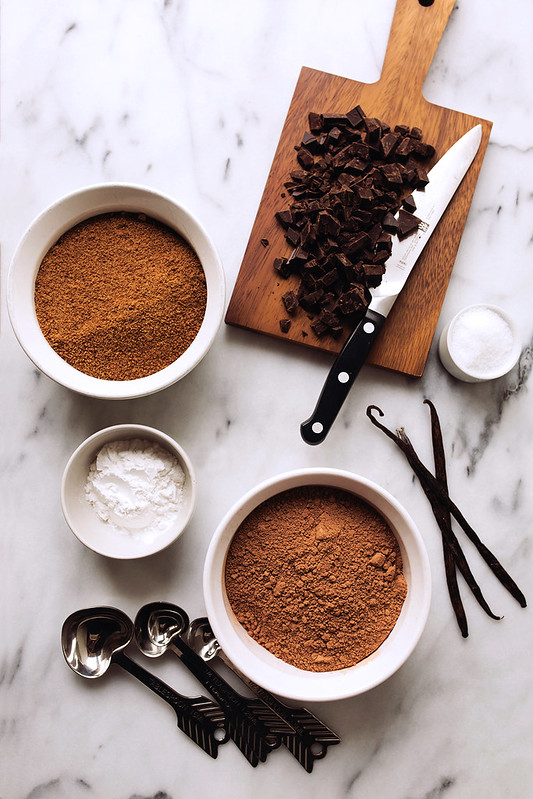
How-to Make Healthier Hot Cocoa Mix w/ Video {Paleo, Keto, Vegan}

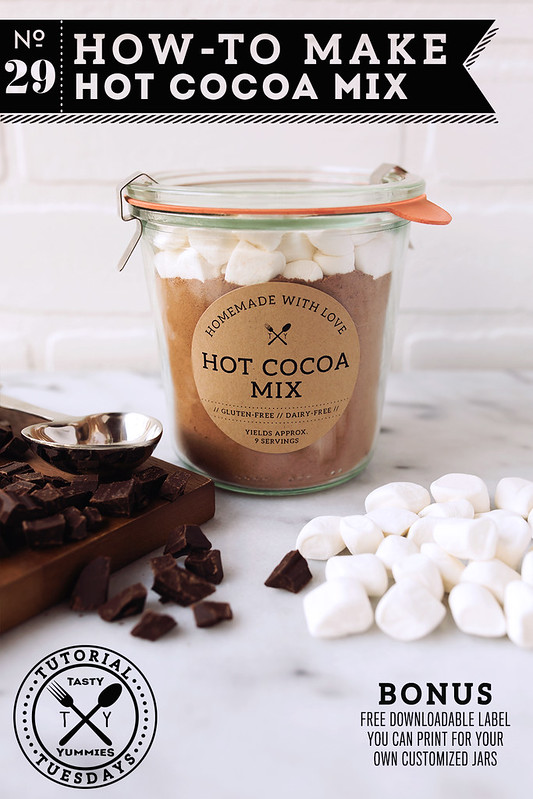
With the holidays upon us, it’s time once again that I share with you some of my favorite, simple homemade holiday gifts. This wintertime staple is a quintessential way to deal with the frosty cold weather. This homemade version is made with only a few, all-natural ingredients and the bonus to making it yourself, besides the obvious, is the free reign to add whatever you’d like to it. If you like less sweet, opt for unsweetened chocolate, looking for a little more sweetness try bitter or semisweet chocolate instead. You can add cinnamon or cayenne or any other flavors you’d like (see the bottom of the post for flavor variations). Today I am sharing my recipe for a basic hot cocoa mix with a few suggestions at the end for extra add-ins, as well as a free printable label for you to print out, customize and add to your gift.
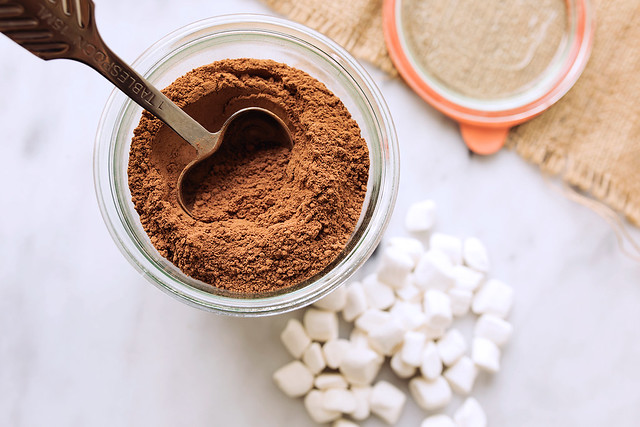
There’s nothing like giving the gift of tasty treats, made with love this time of year, but especially cozy, heart-warming decadence like this homemade Hot Cocoa Mix. Rich and luxurious without being excessively sweet. Download the included printable, customizable label, throw in some mini marshmallows, this is a great recipe if you want to make your own. Package it all up in a cute jar, include a tablespoon tied with a little ribbon or string and voila, the perfect holiday gift.
How-to Make Hot Cocoa Mix
-
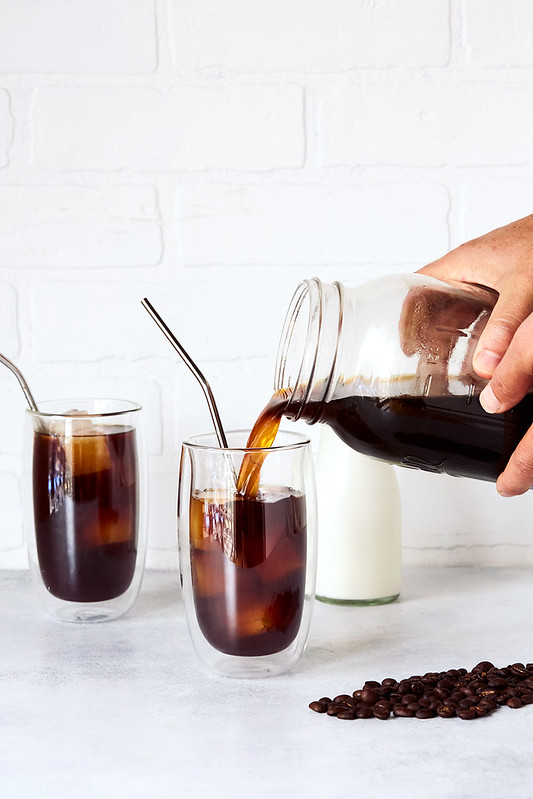
How-to Make Cold Brew Coffee {+ Video}
Learn How-to Make Cold Brew Coffee with this surprisingly simple process. It takes just three simple steps to the best cold brew coffee you’ll ever have. No super special equipment needed, it’s much more affordable than your local coffee shops and you can customize the strength of your cold brew to your liking.
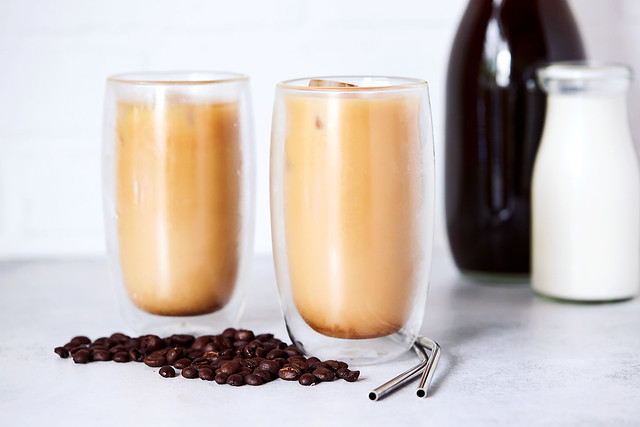
It has happened slowly over the last year or so, as my body and my health has continued to shift and improve, but I have developed a pretty solid morning habit that involves a quality cup of organic coffee shortly after I rise. I have come to find that this morning routine serves many purposes for me, personally, but most importantly, I find it’s a really beautiful morning ritual, something that I greatly enjoy and always allow myself the space to honor and totally embrace, no matter where in the world I am.
Often I am asked “is coffee good for you?” As you can probably imagine, my answer to this question is quite similar to how I respond to many other food and health related questions and that is – “it depends”.
-
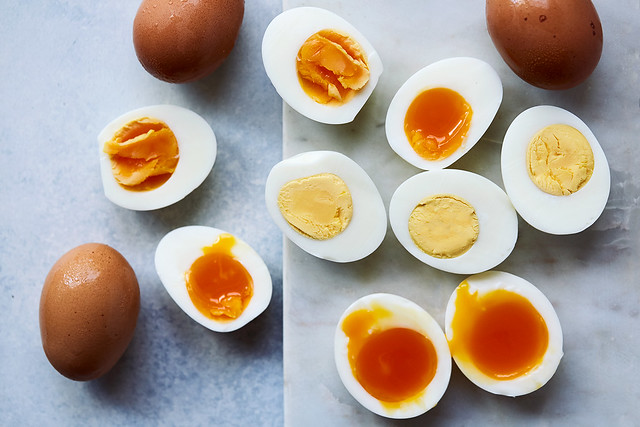
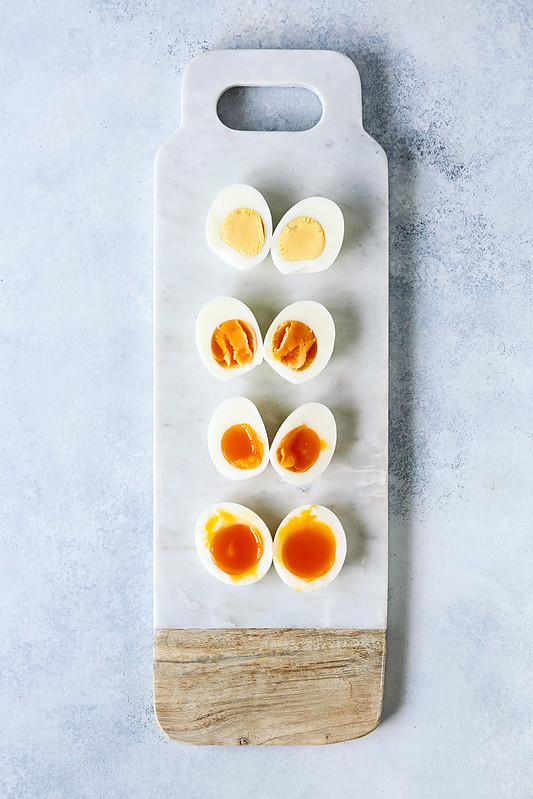
How-to Cook Eggs in the Instant Pot – Soft, Medium and Hard Cooked
Learn How-to Cook Eggs in the Instant Pot and forget the uncertainty of cooking your eggs on the stove top – using your Instant Pot provides consistent results and the eggs are easy to peel EVERY SINGLE TIME. Whether you want soft, medium or hard cooked, we’ve got the time figured out for you, so there’s no guessing.
Well, I am embarrassed to say it took me far too long to finally experiment with cooking eggs in my Instant Pot. I always had a *mostly* foolproof method to hard boiling eggs on the stovetop, but “mostly” ends up being the key word. My breaking point was Easter weekend, this year. I wanted to make a bunch of hard boiled eggs, to make a post for the website, Deviled Eggs Two Ways. Things didn’t go quite as planned and my hard boiled eggs were a nightmare to peel. One of the most frustrating afternoons EVER. I was cursing over the sink as I watched about half of every single egg white stick to the shells and peel off, leaving the most janky looking, lumpy eggs behind. UGH!
I’ve heard so many variations on how to make the perfect hard boiled eggs. I’ve heard it has to do with how fresh the eggs are, adding vinegar or baking soda to the water, boiling for less time then letting the eggs sit, boiling the entire time then right into the ice bath. All of these methods work, until they don’t.
Several people had mentioned to me how great the Instant Pot is for hard boiling eggs, so I decided to give it a whirl and WOW – GAME CHANGER! I experimented with finding the right time and what variables affected the results. Additionally, I found the perfect time for soft and medium cooked eggs, too. Because I love a perfectly-cooked, delicious yolky soft boiled egg over veggies many mornings and the various medium cooked eggs are great when you want a little yolkiness, but not the whole runny shabang.
I find fully hard cooked eggs to be the most sensitive to variables, since the window of a perfectly cooked hard boiled egg is just like a ripe avocado. It’s not cooked, it’s not cooked, then WHAM overcooked, weirdly dry with that green ring. Not much deviation from perfection.
With many many many dozens of eggs and experiments later, I have worked up a simple formula with varying times. OK let’s get to it – How-to Cook Eggs in the Instant Pot…
-
How-to Make Sauerkraut {+ Video}

Sauerkraut and all it’s live culture, raw, funky smelling goodness, it’s been a favorite of mine for sometime. But, it wasn’t until this past year, while taking on the arduous task of healing my gut, that I have truly learned to love and appreciate this stuff for all of it’s magical healing qualities. I have shared this simple tutorial at workshops, including retreats I have hosted and cooking demos. It’s a very simple process, a food that has been around for thousands of years that produces incredible, tasty and healing results. While not very cumbersome at all, sauerkraut is a timely process, but I can tell you that patience is very much a virtue in this game. It’s worth the wait. For those new to sauerkraut, I do recommend starting out consuming a very small amount, a tablespoon or two, used as a condiment of sorts. As with any fermented or probiotic rich food, too much too soon, even when it’s good bacteria, can have some gnarly affects on your gut. More isn’t always better. Take it slow.
This tutorial offers the step by steps on making small batch sauerkraut, in a glass mason jar. To make a larger batch in a fermentation crock, you can just double or triple the recipe, as necessary.
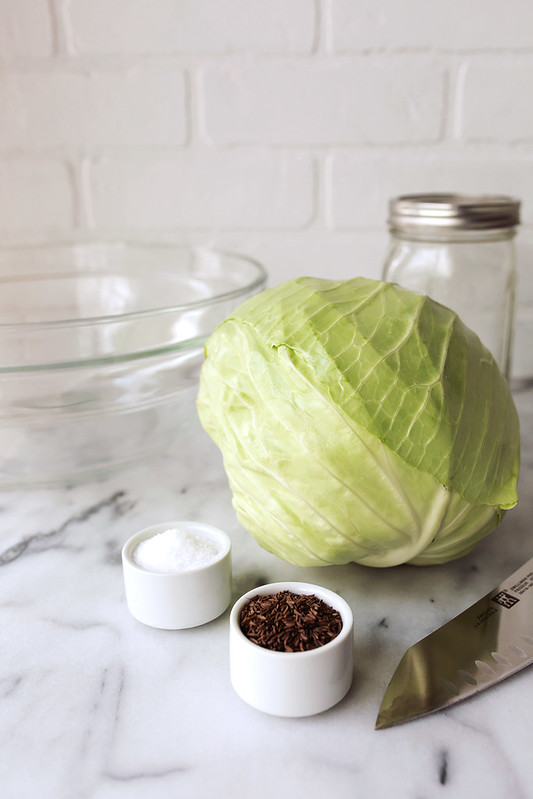
All You Need:
1 or 2 quart wide mouth glass canning jar or 3 pint size glass jars, with tight fitting lid(s)
1 medium head organic cabbage
1 tablespoon sea salt
additional spices, vegetables or fruit you wish to add
glass mixing bowl
sharp knife and cutting board (or food processor with shredding plate)
HOW IT WORKS:Letting the cabbage ferment at room temperature invites beneficial bacteria to grow via lacto-fermentation. These microorganisms feed on sugars in the vegetables and raise levels of lactic acid, giving fermented foods their tang while also preserving them. Most commercial sauerkraut is required by the FDA to be pasteurized—which effectively destroys all the bacteria in it, including the beneficial bacteria— so making your own sauerkraut at home is definitely a better choice to improve your digestive health.
-
How-To Make Grain-free Granola {Paleo-friendly}
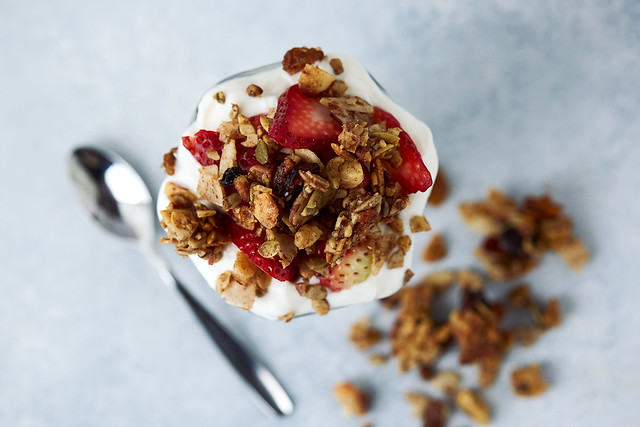
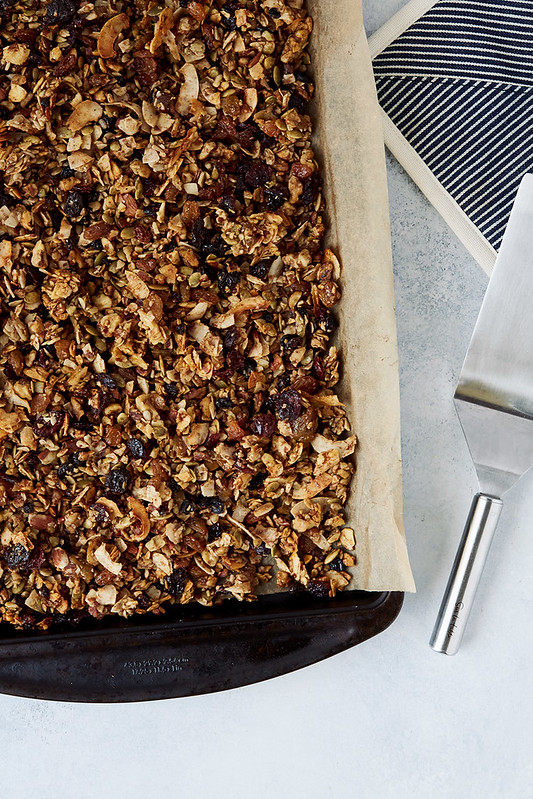
For my granola loving friends, I am super excited about this how-to and recipe. Most commercial granolas, even when gluten-free, are loaded with gut-upsetting grains, and worse yet – vegetable oils and loads of sugar. After lots of experimenting and playing around, I created the perfect base recipe for this paleo grain-free granola, with two variations. Sweet and Savory.
Using the formula for the base on this paleo recipe, you can get creative there with your favorite nuts and seeds and then when it comes to flavor combinations, the sky is the limit – so get creative and make it your own.
-
How-to Make Homemade Dark Chocolate and the Many Benefits of Dark Chocolate
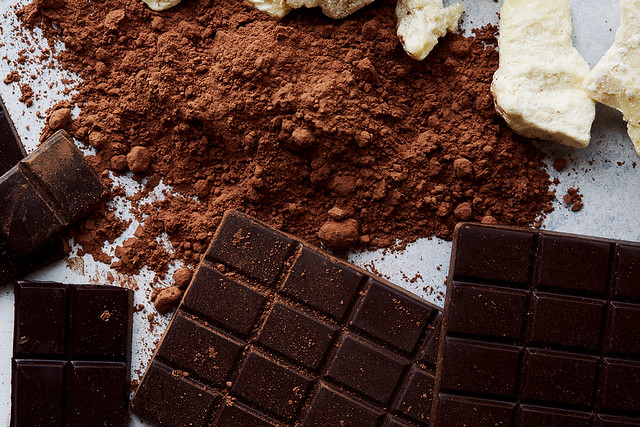
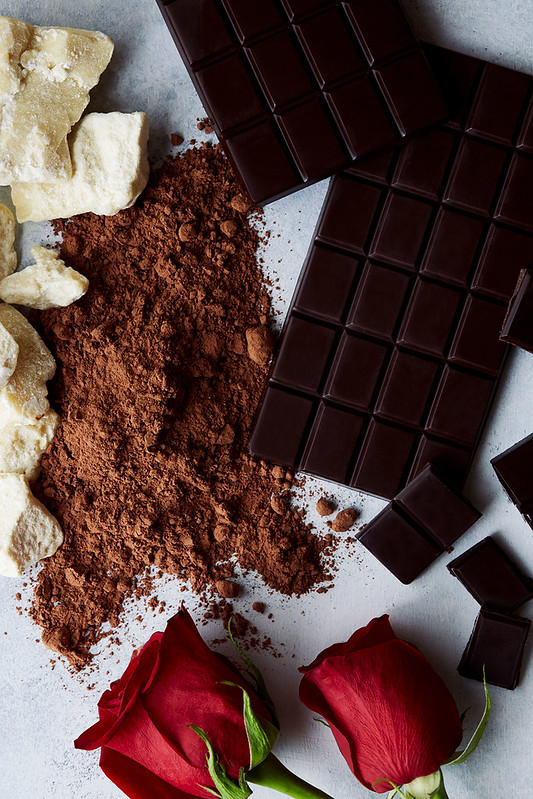
This homemade dark chocolate is simple to make and very easy to customize and make it exactly the way you want it, from sweeteners to flavorful add-ins. With constant research showing the many health benefits of dark chocolate, this is one indulgence I plan to never give up. A food that is not only good for your soul, but your mind and body as well?! Yes please. In fact new research has even reported that certain bacteria in the stomach gobble the chocolate and ferment it into anti-inflammatory compounds that are good for the heart 1https://www.sciencedaily.com/releases/2014/03/140318154725.htm.
Sadly, not all dark chocolate is created equally. So many of the bars at the store contain soy lecithin, a ridiculous amount of refined sugar, vegetable oils, “natural flavors”, corn syrup and other unnecessary ingredients. Conventional chocolate bars filled with lots of additives will not have the same benefits as clean dark chocolate and are likely to do more harm than good! The closer your cocoa is to its natural raw unrefined state, the higher its nutritional value.
References
1. ↑ https://www.sciencedaily.com/releases/2014/03/140318154725.htm -
How-to Make Chia Seed Pudding {Paleo, Keto, Vegan}
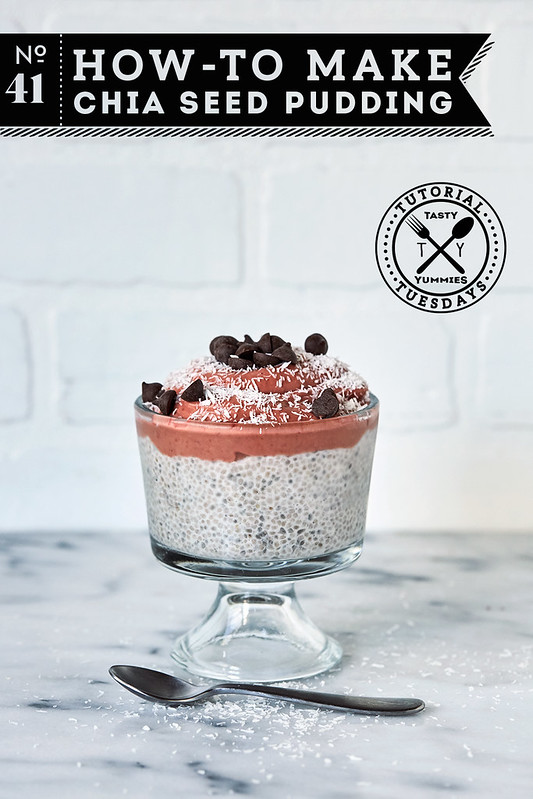
I have been a long time fan of chia seed pudding and it’s become a simple dish that I recommend often as an egg-free, dairy-free snack, breakfast or dessert option to my nutritional clients, especially those I recommend blood sugar control diets or sugar detoxes to. Without sweetener (or sweetened very lightly) chia pudding can be a great, nutrient-dense alternative to the more standard grain and carb-forward breakfasts. It’s loaded with omega-3 essential fatty acids, fiber, protein, and various micronutrients and chia seeds are also high in calcium, magnesium and phosphorus.
-
How-to Make Bone Broth
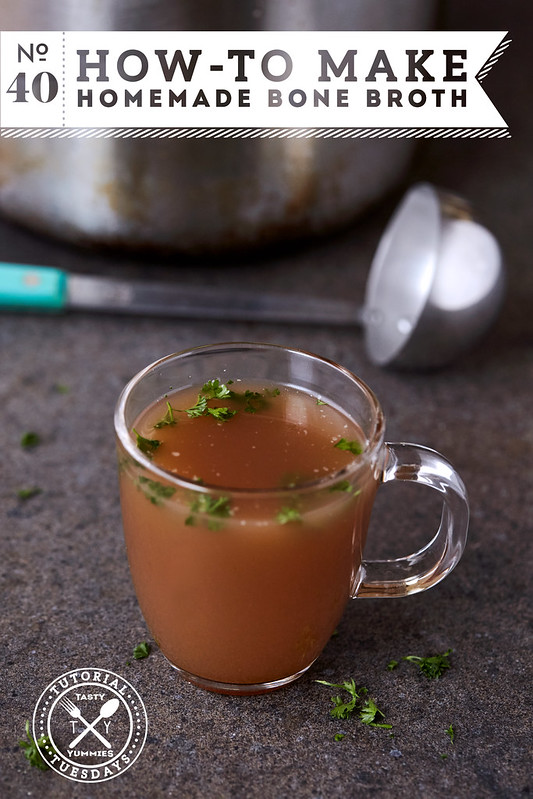
What is Bone Broth:
Bone broth truly is one of the greatest superfoods. A soul-warming, healing, mineral-rich infusion found in many traditional households across many diverse cultures, bone broth is rich in amino acids and minerals and it’s healing properties run the gamut. This nutrient-dense, inexpensive magic elixir provides minerals in a highly bio-available form, meaning that the body can absorb easily them. Calcium, magnesium, phosphorus, silicon, sulphur and trace minerals. As the cartilage and tendons breaks down, you’ll also receive chondroitin sulphates and glucosamine, both sold as expensive supplements for arthritis and joint pain. The long cook time of bone broth allows the maximum release of nutrients. Bone broth contains collagen and gelatin, providing great healing value to cartilage and bones but also to the skin, digestive tract, immune system, heart and muscles.
Bone broth is a liquid made by simmering bones for an extended period of time, between 4 and 24 hours. Any bones can be used: chicken, turkey, beef, lamb, pork, bison and even fish. Vegetables, herbs and spices are often added to enhance the flavor and the bones and vegetables are strained and discarded before serving. Typically, the bones will have some connective tissue, like joints and tendons, and some meat attached.
Additionally bone broth and stocks is a wonderful way of letting nothing go to waste. The nose-to-tail concept of sustainability.
You’ve probably heard the terms Bone Broth, Broth and Stock all used fairly interchangeably, but there are actually some differences between them. Each is made using meat and/or bones, cold water, vegetables and spices / seasonings. Cooking remains similar but the time of simmering varies between them. Bone broth is different from traditional stocks and broths in that it typically is made just from the bones and whatever small amounts of meat are adhering to those bones. Bone broth is simmered for a very long period of time, upwards of 48 hours. Stock is made generally with bones and a small amount of meat and is simmered for much less time, just several hours, 3-4. Meat broth is generally made mostly with meat and sometimes a small amount of bones, simmering for usually under 2 hours. Meat broth and stock still have great health benefits, however it’s a lower nutrient content then long simmering bone broth. For some, bone broth vs stock also means the presence of meat and veggies vs. just bones. Bone broth usually does not contain these and stock usually does. That said, those clear definitions have definitely blurred as bone broth has become more prevalent and people find their own ways of making it, so don’t get too hung up on the words.
-
How-to Make Everything Bagel Spice Blend
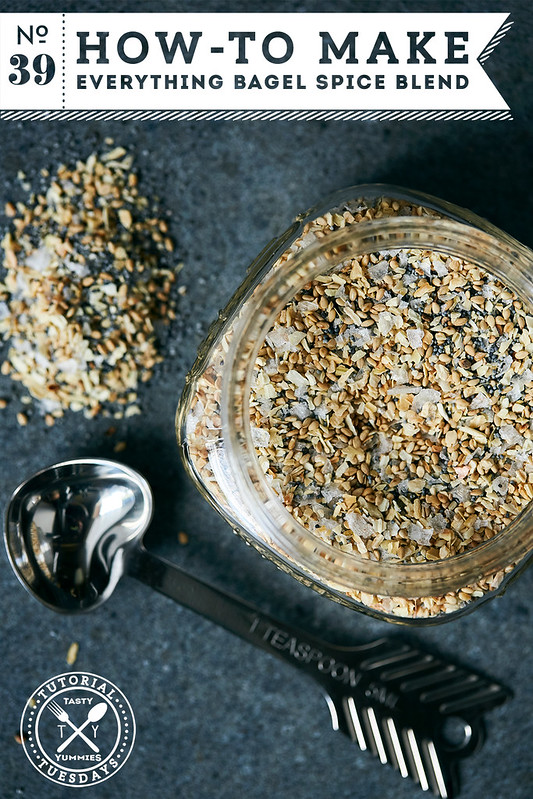
If you guys following me on Snapchat, you know that I have been Everything Spicing basically ALL the things this past month or two. I have been on a bender of keeping my weekday meals as simple as possible, but maximizing the flavors whenever I can. This blend is basically the best way to do this.
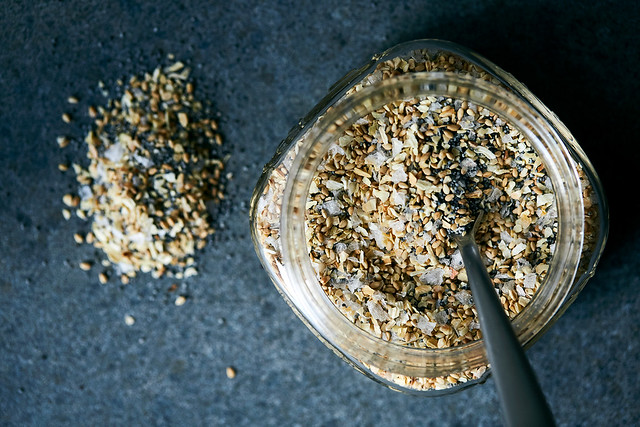
I mix up a batch of this and it gets tossed on roast potatoes and squash. It’s incredible an avocado toast and the perfect topped to your morning eggs. I have added it to sautéed veggies, we did a whole chicken on the grill sometime last month, beer-can style with some hard cider and we coated the chicken in this blend. Out of this world good. It’s been an amazing as a rub on grilled, roasted and sautéed meats and fish of all varying types. And finally, I have made amazing grain-free crackers with this blend (that recipe is coming later this week). You could also swirl this blend into cream cheese or goat cheese, or just add it to homemade hummus or other dips.
-
How-To Preserve and Freeze Fresh Herbs in Olive Oil
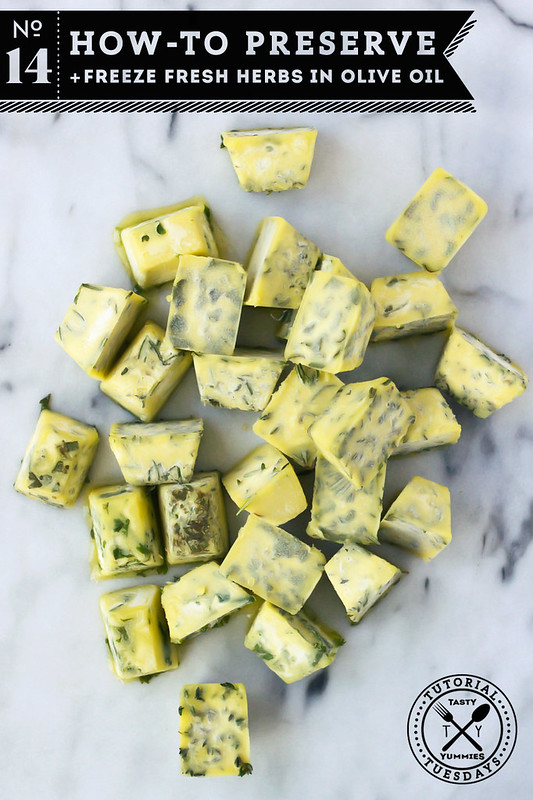
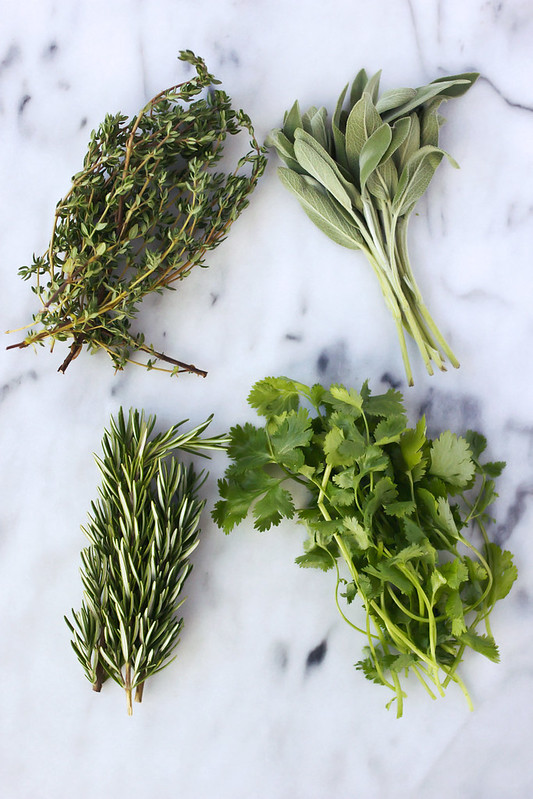
Living in California, worrying about not having access to the fresh local herbs in the winter, isn’t exactly an issue, but I do remember what it was like living in New York. The minute the first frost hits in the early fall, there is a scramble to save plants and there is a huge sense of loss when you can no longer just walk into the yard and snip off your favorite fresh herbs. If you are
luckysmart enough to have your fresh herbs in pots, you can just bring those in, otherwise you can kiss them goodbye until the start of the next season.This simple method for preserving fresh herbs is a really great way to keep the fresh flavors of your summer garden or the local farmers market – all through the fall and winter. When thawed or just heated right up from frozen, these frozen cubes work great in stews, sautés, soups, roasts and more. Besides being super helpful and functional, this project is super fun and very simple – it would be a really great and educational project to do with kids.
Regardless of how cold it gets where you live, this is such a great, money-saving way to make the most of your herbs. For me, I love this method of preserving because oftentimes I will buy a large amount of fresh herbs for a recipe that I am testing, however if there are any leftover, they tend to go bad or get sad and wilted before I can get to them again. -
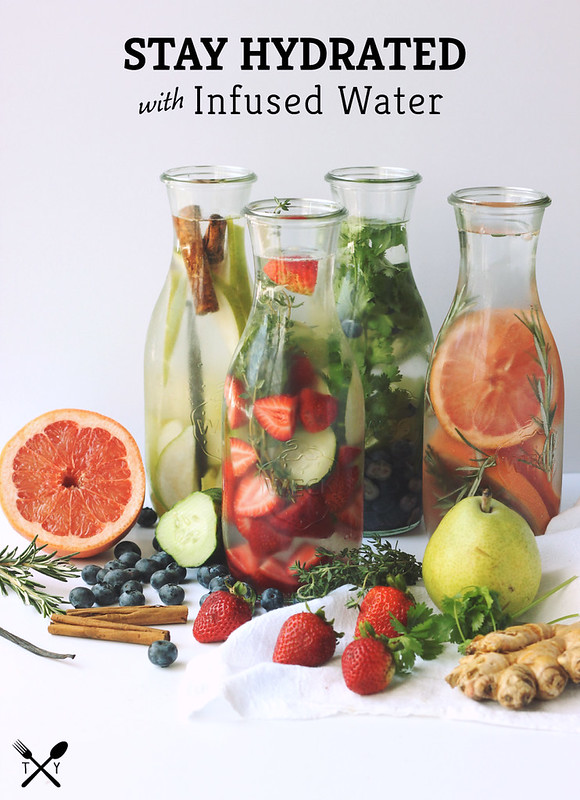
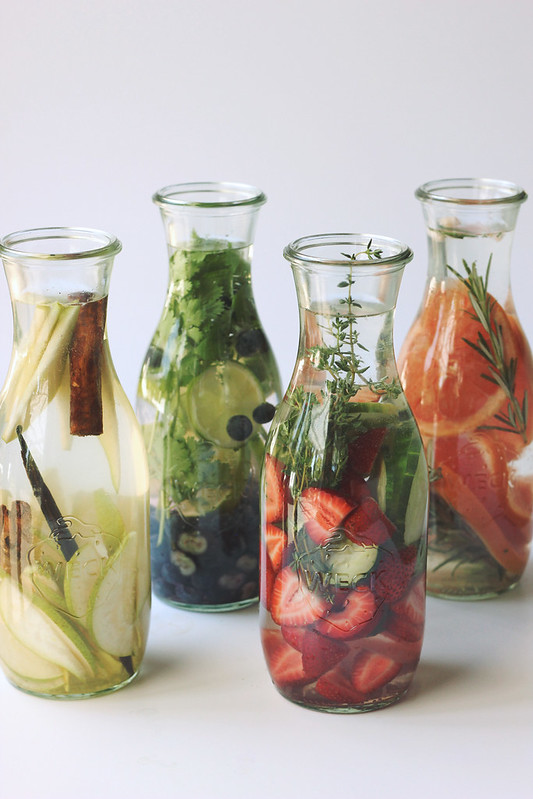
Stay Hydrated // How-to Make Infused Spa Water at Home
We all know how important it is to stay hydrated, yet somehow water is still THE most common nutritional deficiency in our culture. Good news is, it’s a super simple one to remedy! There are plenty of varying formulas from all different sources in regards to how much water to consume, but it’s best to know that whatever formula you subscribe to, just like the nutrition from food and the dietary guides that we each subscribe to, we are highly bio-individualistic beings and there is no one definitive firm answer out there. Listen to your body and pay attention to what works for you.
As a guideline, I recommend to my clients that they shoot for half your body weight in ounces every day. For example if you weight 150lbs, shoot for 75 ounces of water daily, taking into account the need to rehydrate additionally for the consumption of diuretics like coffee, tea, fruit juices, alcohol and sodas or excessive perspiration. I also subscribe to the idea that we don’t want to be consuming too much more than 100 ounces of water daily, as too much water can also have negative affects, like diluting/flushing our electrolytes and causing mineral imbalances.
The best practice to follow is to slowly and mindfully sip on high quality filtered water throughout the day, all day, every day. Drink water before you start feeling thirsty – as thirst is a sure sign you are already on your way to dehydration.
Did you know that every single cell in the human body needs water to function properly? Much like the plants in your garden, your cells, too, can perk up immediately upon watering. It’s that simple.
“Chronic cellular dehydration of the body is the primary etiology of painful degenerative disease.” – Dr F. Batmanghelidj, M.D.
What Roles Does Water Play in the Body?
Water Helps Your Body with the Following:
- Improves oxygen delivery to cells
- Transports nutrients
- Enables cellular hydration
- Moistens oxygen for easier breathing
- Cushions bones and joints
- Absorbing shocks to joints and organs
- Regulates body temperature
- Removes wastes
- Flushes toxins
- Prevents tissues from sticking
- Lubricates joints
- Improves cell-to-cell communications
- Maintains normal electrical properties of cells
- Empowers the body’s natural healing process
Excerpt from “Water the Ultimate Cure”
Tips for Drinking More Water:
- Drink a glass of water as soon as you wake up in the morning (I prefer mine warm with a little lemon).
- Carry a dedicated bottle or container with you are all times, at work, at home, even if you are just out running a few errands.
- Use an app on your mobile phone to track your water intake or simply set an alert on your phone to remind you.
- Choose water at restaurants instead of other beverages. not only will you save on calories while simultaneously hydrating yourself, but it also saves money.
- When you are hungry, start with a glass of water before you reach for the snack. sometimes feelings of hunger are actually your body telling you that it’s thirsty. it may just curb the cravings.
- Drink before you eat. 16 ounces 30 minutes before every meal can actually keep you from over indulging. make this a regular practice and you might even find yourself losing weight.
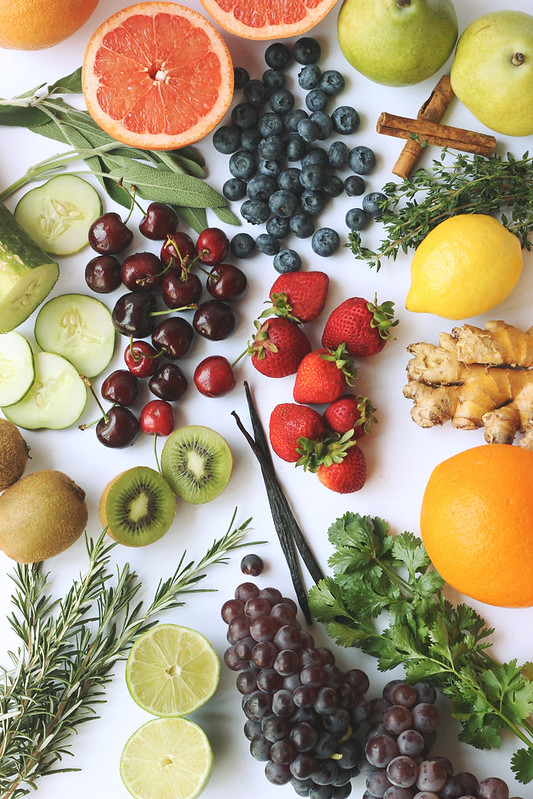
- Infuse and flavor your water.
BONUS: Add a pinch of high quality sea salt to your water, it adds trace minerals and helps to balance electrolytes
Today, I am sharing with you one of my very favorite ways to stay hydrated…
INFUSED SPA WATER!
Infused water is not only a tasty way to stay hydrated but it is nutritional, healthy, fresh and all-natural!
How-to Make Infused Spa Water at Home:
 Read the rest of this entry »
 -
How-to Make French Vanilla Coffee Creamer (Dairy and Non-Dairy)
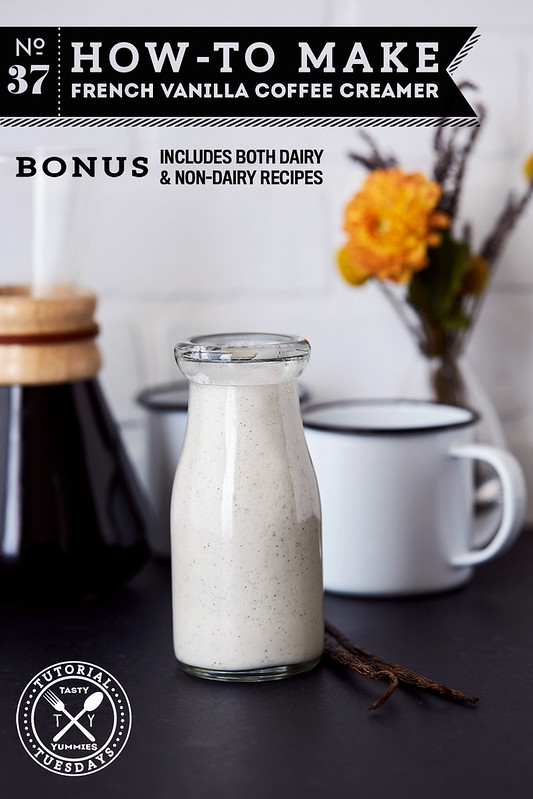
Since I have begun seeing clients as a Nutritional Therapy Practitioner, I am so grateful for my longstanding experiences with and my love for food. I am constantly asked the question “If I shouldn’t eat this, then what can I have, instead?”. I love having answers to this question.
I firmly believe that changing diet and lifestyle has to come from a place of both education and confidence. If I meet with a new client and tell them to stop drinking several Cokes daily, but don’t explain why, I can’t really expect them to want to make this change. Why would they? They are both chemically and emotionally attached and possibly even addicted. If I can take the time to explain the effects that the high levels of sugar are doing to their insulin resistance, if I can talk through the reasons why high fructose corn syrup is terrifying and explain the affects this one drink can have on their blood sugar, digestion, mineral absorption and so on, I have a much better chance of getting them on board for the long haul.
-
How-to Make Quick Pickled Veggies
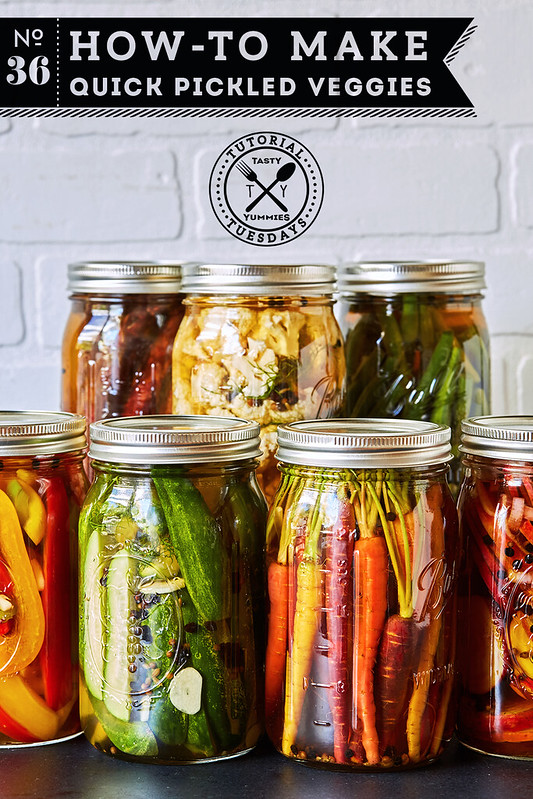
With the end of summer not too far off, it’s time we start planning our graceful exit strategy, for me this usually includes preserving as much of the summer flavors as possible. Besides preserving fresh herbs in olive oil, I find quick pickled veggies to be an excellent way to hang on to the tasty abundance of summer, just a little bit longer.
Sure, canning, fermentation and other more long-term storage options are always available, but this is a super quick method, that you can throw together in a mere 15 or 20 minutes. No mess and no fuss.
-
How-to Make Salad Dressing
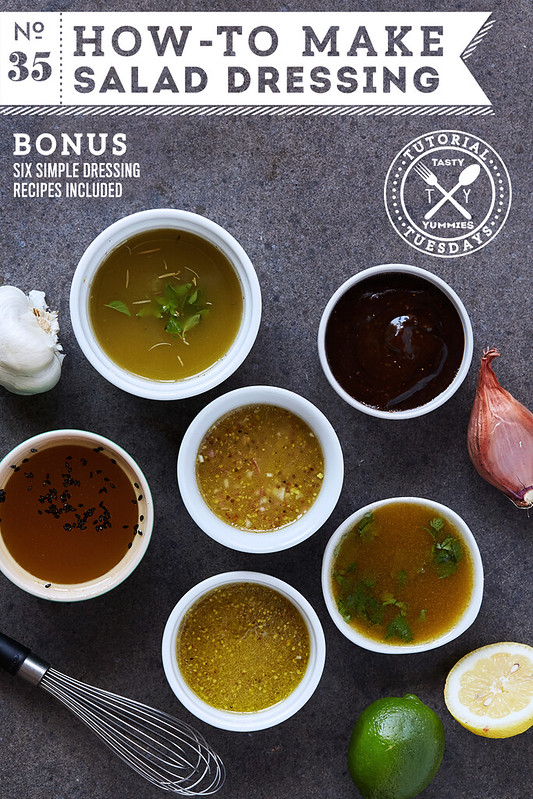
“The usual proportion of vinegar to oil is one to three, but you should establish your own relationship.”
Julia Child, Mastering the Art of French CookingA well-crafted dressing or vinaigrette is a thing of profound beauty. Delicate, yet prominent, understated while still making a statement. To me, the finesse found in the subtleties of a good dressing says a lot about someone’s skills in the kitchen and on that same note, it is one of THE most simple tasks to master. Ready in under 5 minutes, homemade dressings and vinaigrettes are one of the best ways to start the process of ditching store-bought, processed foods – making it a very budget and health conscious option.
Since they only really require three main ingredients, base (oil), acid and seasonings, you can pretty much make any flavor profile you can think of, with any combination of ingredients available in your kitchen. From here, knowing this simple formula and the any options, you can get creative, adjust to your preferences and you can come up with an unlimited supply of varying staple dressings.
-
How-to Make Homemade Barbecue Sauce
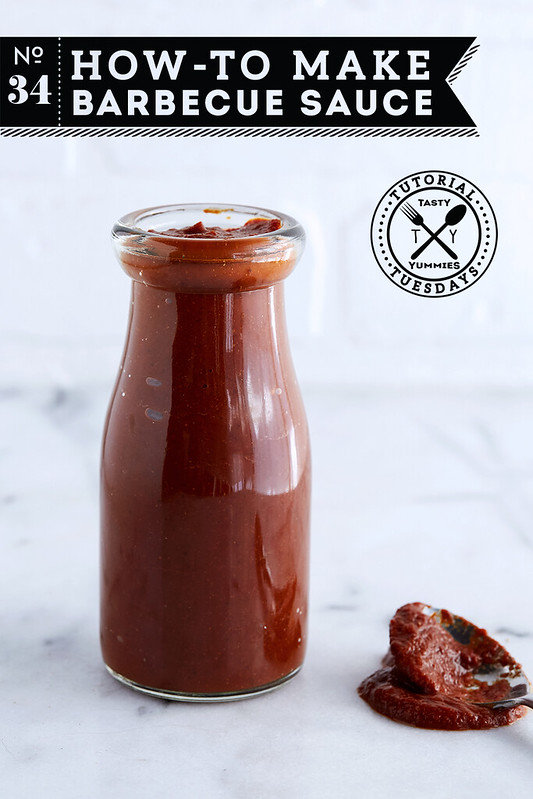
Yesterday’s summer solstice marked the official start of summer, which means we also kicked off the season of grilling and barbecue. A good traditional barbecue sauce is key to a season of delicious backyard feasts. However, if you are like me, when you turn over most jars and bottles from the store, to investigate the ingredients, you are sorely disappointed. Most contain loads of sugar, high fructose corn syrup, various preservatives, thickeners, artificial flavors, colors and who know’s what else. Let’s be honest, they are also not all that good. We can do better!
Making your own sauce is incredible simple, you don’t need any special ingredients and with this simple tutorial and formula, I also give you the options to customize your sauce and make it just how you like it.
-
How-to Make Beet Kvass // A Cleansing Medicinal Tonic
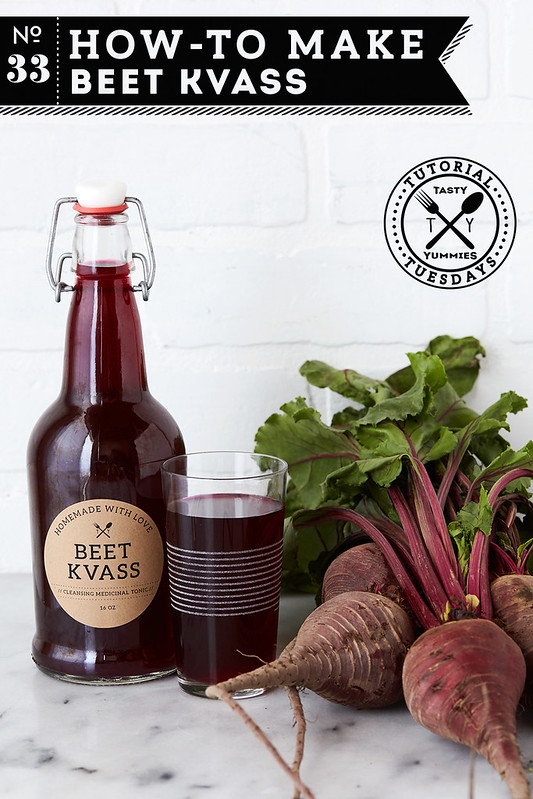
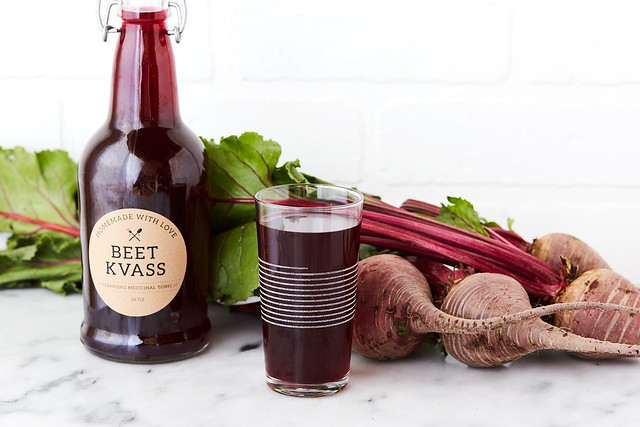
How-to Make Beet Kvass // A Cleansing Medicinal Tonic
Part of my journey towards healing my body has been transitioning myself from the standard approach to food consumption that we have all grown up with, eating whatever is served to you or whatever was around and seems right or easy – to instead being able to fully tap into my innate sense of knowing what my body truly needs in the moment and nourishing it in a much more mindful way. Most effective has been the practice slowing down and quieting my mind enough to access this intuition, not just while preparing and actually eating my food, but also harnessing this skill away from meal time – in my yoga and meditation practices. It is in these moments that I truly give myself the space the fully listen to my body and trust that deep down I know what is right.
While this may to you, sound like the beginnings of a meditation series rather than a recipe tutorial, your instincts are not actually far off. For me, this ability to tap into my intuition first came by way of my yoga practice, then it was further developed in my meditation practice and now I find myself opening the fridge and not rummaging through for what I am craving and what sounds good, but rather quieting the chatter of my mind enough to really access the place where my body can communicate to me what it needs. I think in this busy and hectic world we have lost touch with this incredible primal ability to be so in tune with our body and it’s needs and I fear that we are missing out on the opportunity to truly nourish ourselves in a far more effective and meaningful way. Both in the food we eat, but also in the life that we choose to lead.
Recently I was at a new moon sound healing journey, hosted by my friend Brook. As I always do, every few weeks, I showed up for myself. To give myself the much needed time and space for self care, but to also honor my healing path, my guides, and most importantly to set an intention. In my most recent journey, a few weeks back, as we lie there drinking in the healing vibes of the beautiful sound, I found myself receiving messages about what I needed more of, what I should be following and the places that my energy would be best spent. It was powerful, moving and truthfully, it was a little scary (maybe scarier is actually typing it up and sharing it with the world, though).
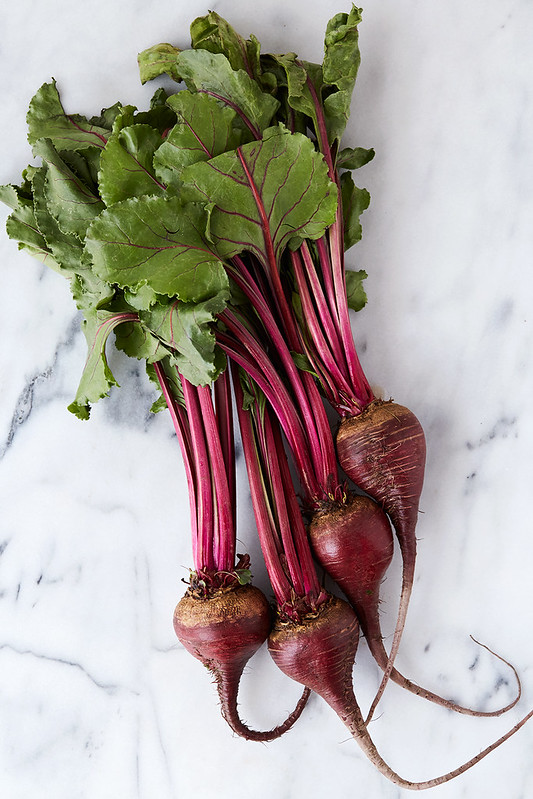
While much of the messages pertained to my work with others and the new paths I am exploring in my work and as a healer, I also heard, very clearly, certain personal needs that I should explore. To receive very clear messages while meditating isn’t something new to me, but to be told what to do very loudly and very specifically in this manner, this was a first. Without boring you with of the details I will just share the part of that journey that inspired this post. The word beet and images of beets continuously appeared throughout the session. While so much was zipping past me, so many ideas, so many words and images, suddenly rising above the rest, very loudly and clearly I heard: “You need more beets” “Try a beet tonic”. I instantly was reminded of Beet Kvass, something I have tried before, but never actually made for myself.
What is Beet Kvass
Beet Kvass is a healing and cleansing medicinal tonic. A traditional probiotic drink, popular in Eastern Europe, Ukraine and Russia, it is the result of fermentation by friendly Lactobacillus bacteria, which gives it a briny, tangy flavor. Beet kvass has a very interesting flavor combination, that is certainly an acquired taste. A little more intense than the kombucha or sauerkraut we’ve all come to know, it’s earthy, salty, sour, a little sweet and it has that elusive umami flavor – sometimes it’s even a little fizzy.
Benefits of Beet Kvass:
- Rich in Probiotics
- Dense in Valuable Nutrients
- Excellent Liver Cleanser
- Beneficial Blood Tonic that Balances the pH of the Blood
- Reduces the Risk of Cancer from it’s Various Antioxidant and Anti-inflammatory Properties
Created through lacto-fermentation, this nutrient-dense stimulating tonic is loaded with friendly probiotic bacteria and beneficial enzymes, great for intestinal health, aiding in digestion and elimination, it’s an excellent liver cleanser and along with the healthy probiotics, beet’s high levels of vitamin C make this tonic an excellent boost for the immune system. It’s also more hydrating than water, containing a collection of minerals necessary to electrolyte balance in the body. Beets also contain phytonutrients called betalains that are found in the pigment of beets and are what causes your hands to stain. These betalains help create red blood cells, making beet kvass an excellent blood tonic for alkalizing the blood. Beet kvass and beets also help to naturally cleanse the gallbladder, improve bile flow, remove plenty of toxins and promote regularity!
Beet kvass can be drank as a tonic, straight up, it can be used in place of vinegar in cooking or in salad dressings, it’s also a great addition to soup and you can even use it in cocktail, the way you would a vinegar shrub.
From Sally Fallon in Nourishing Traditions (page 610):
This drink is valuable for it’s medicinal qualities and as a digestive aid. Beets are just loaded with nutrients. One 4-ounce glass, morning and night, is an excellent blood tonic, promotes regularity, aid digestion, alkalizes the blood, cleanses the liver and is good treatment for kidney stones and other ailments.
-
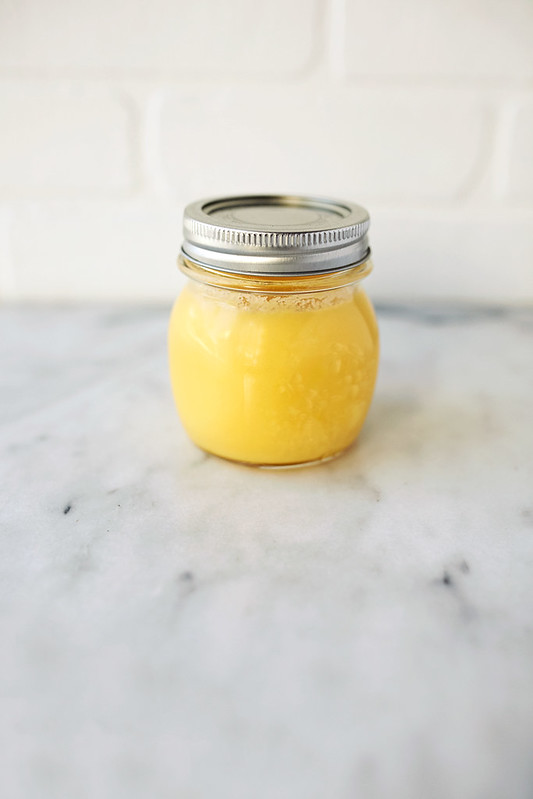
How-to Make Ghee at Home
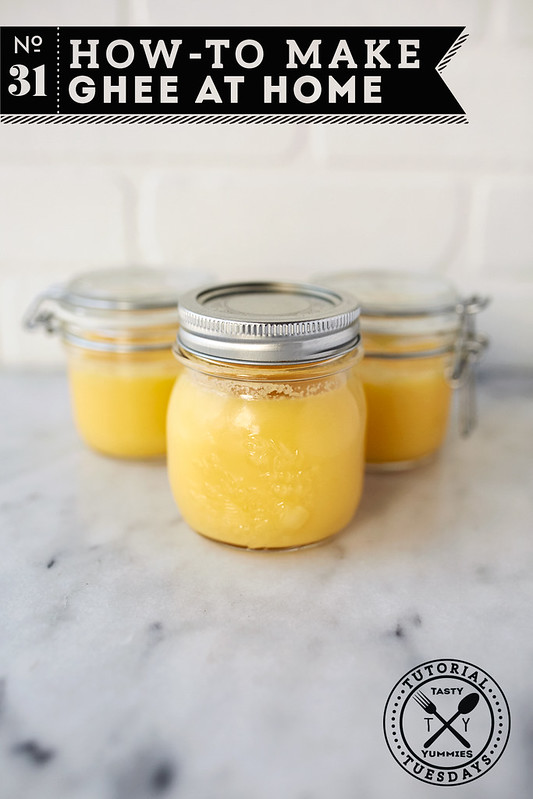
Ghee is a kitchen staple around here. For the longest time I was buying it, and I still do in a pinch, but as I discovered the cost efficiency and simplicity of making it at home, I have made this part of my DIY repertoire.
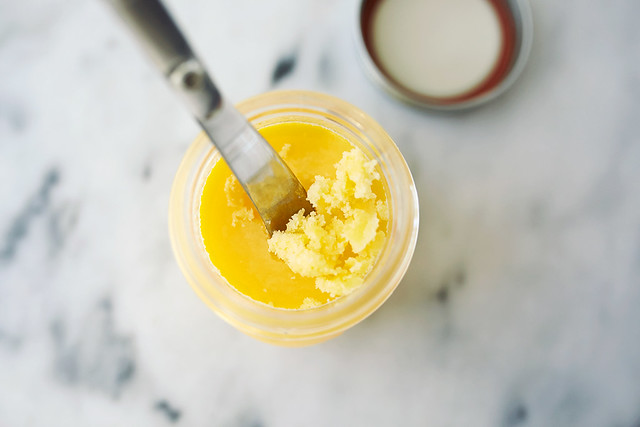
For those unfamiliar, ghee is a clarified butter, of sorts, that has been cooked down for some time, removing any moisture, milk solids and impurities. What remains is a pure and delicious butter oil, that has turned a beautiful golden color, it’s taste and flavor are slightly sweet and nutty. Ghee brings an aroma, taste and flavor a lot like butter, but even better. The difference between clarified butter and ghee is ghee’s lengthier cooking process, to remove all the moisture and the milk solids are browned in the fat and then strained out, bringing the slightly nutty taste. Ghee has a longer shelf life, due to all the moisture being removed.
Ghee is a wonderful option for those who are lactose or casein intolerant and want to enjoy the taste of butter. Ghee is also clearly a much better option than those scary hydrogenated oil-filled margarines and other highly processed vegan spreads. It does not burn, unless heated excessively, so it’s a wonderful option for stir fries, sautéing, frying, roasting, sauces, ettc. It’s also delicious as a spread, on toast, pancakes, scones, over rice and more. It can also be used on the body, as an oil for massage, as a base for healing herbal treatments, for burns, skin rashes, etc.
In India, ghee is a sacred and celebrated symbol of nourishment and healing, especially in daily rituals. It is also used in every day cooking. Ayurvedic physicians celebrate this liquid gold as being important to health and well-being, balance and vitality. If you don’t wish to make your own, ghee is usually found in the ethnic section of any big grocery store, in most Indian/South Asian stores or online.
Always make ghee with high-quality grass-fed organic butter. Cheap butter contains a lot of water and chemicals and it tends to burn faster. Due to the reduction and straining process, always start with 25% more butter than the amount of clarified butter desired. 1 pound of butter = approximately 1 1/2 cups ghee.
The Benefits of Choosing Ghee:
Rich Butter Taste without the Lactose or Casein. Made from butter ghee has the buttery flavor, but the milk solids have been removed, so if you are lactose or casein free, enjoy without issue.
Ghee has a high smoke point. 485ºF. You can cook and fry with ghee and it will not burn nor will it break down into free radicals, like so many other cooking oils can.
Ghee doesn’t spoil easily. Without the presence of milk fat and water, this makes ghee shelf stable. If you desire, it can be stored at room temperature rather then refrigeration. Ghee will last a couple months in an air-tight container at room temperature. If you aren’t sure if any moisture or milk solids remain, you can certainly play it safe and store in the fridge, to maximize it’s shelf life. That’s generally what I do.
Ghee is rich in fat soluable vitamins A D and E. If you have gluten sensitivity, leaky gut, IBS, Crohn’s or certain pancreatic disorders, you may have a problem absorbing vitamin A. By using ghee for cooking, and as a replacement for butter, you can increase your intake. Vitamin D can be made in the body, after exposure to sunlight, but obviously in the colder winter months is can be challenging for us to make enough. Ghee benefits the body by improving moisture and contains vitamin E, which is an antioxidant whose role is to repair damaged skin, balance hormones, improve vision and help to balance cholesterol. Fat-soluble vitamins are absorbed with fat and stored in the gastrointestinal tract — and they are essential to maintaining a healthy metabolism and various biochemical functions in the body. (1)
Ghee is also rich is K2 and Conjugated Linoleum Acid. Studies show K2 is better for building bones than calcium and proper levels of K2 can help fight tooth decay, bone loss and aid in the fight against the calcification of arteries. CJA is antioxidant with anti-viral properties, when sourced from grass-fed cows. Studies indicate that it may help to reduce tumors, lower cholesterol and high blood pressure, reduce inflammation, and actually lower body fat.(2)
Like coconut oil, ghee is rich is medium chain fatty acids, which are quickly absorbed directly to the liver and used as energy. This quick burn can actually lead to weight loss.
Ghee and butter are rich in butyric acid, a short chain fatty acid great for protection against fungal infections and aids in colon health. It’s been shown to support healthy insulin levels, is an anti-inflammatory, and may be helpful for individuals suffering from IBS, Crohn’s disease and ulcerative colitis. (3)
Ghee Reduces Inflammation. Ghee’s levels of butyrate play a role in reducing inflammation in the digestive tract and throughout the body. In Ayurvedic practice, ghee benefits the body by creating a more alkaline system that overall reduces inflammation by reducing the leukotriene secretion and reducing prostaglandin in the body(4)
-
How-to Make Elderberry Syrup
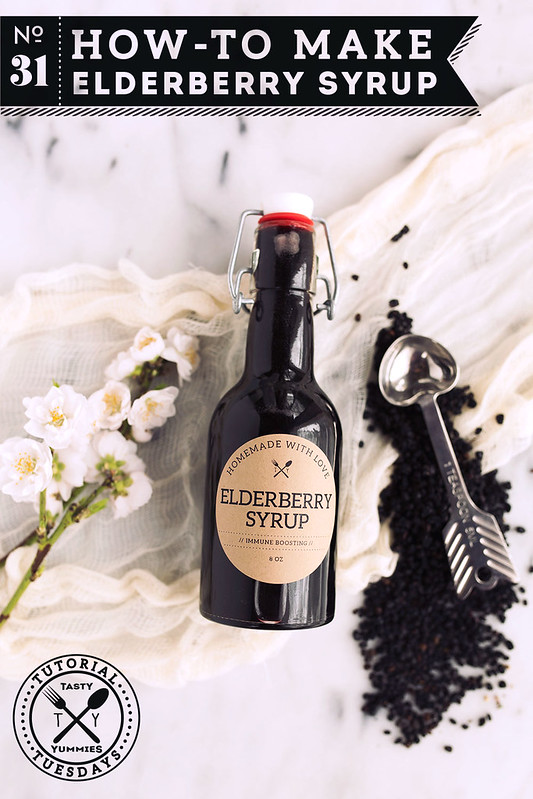
We aren’t out of the woods just yet, cold and flu season is very much still upon us! Rather than going into hiding, I suggest you arm yourself. Your first line of defense being a nutrient-dense, properly prepared whole foods diet, eliminating sugar and processed foods and of course, minimizing stress and maximizing your rest and relaxation time. That said, extra boosts to your immune system, also never hurt. Elderberry Syrup is an incredible, all-natural remedy that is high in immune-boosting compounds, research (and my own personal experiences) show that it is an effective therapy for shortening the duration of colds and flus.
I swear by this stuff, you guys! It works. I always have it on hand for the onset of symptoms, but I also take it as an immune boosting player as part of my maintenance plan during the cold and flu season and/or during high stress periods where my immune system may be more compromised. While I have loved elderberry for a long time, after attending an herbal medicine workshop here in Long Beach a few weeks ago, where we learned all about elder, I was inspired to share with you just how easy it is to make. I really enjoyed spending time learning all about elderberries, their healing properties, meditating with the plant, learning it’s history and sampling various preparations. Elderberry syrup is one of my favorite ways to receive the healing powers of elder, because of course, the sweetness from the honey is delicious and it really brings out the sweetness of the berries, but honey in it’s own right is also very healing and soothing.
Store-bought elderberry syrups can be quite expensive and often times they contain high-fructose corn syrup, some contain food dyes, preservatives, and so on. Making your own syrup means that you not only save some money, but you also can control every ingredient used and once you make this yourself at home, you will wonder why you have ever bought it.
Elderberries – What Are They?
Elderberries (family Caprifoliaceae) are large deciduous shrubs or small trees native mostly to the northern hemisphere, although they have become naturalized throughout much of the temperate and subtropical regions where humans live. Elderberries or Sambucus Nigra L., have long been used for centuries by indigenous cultures to treat wounds, respiratory illness, viruses and more. Elder may have anti-inflammatory, antiviral, and anticancer properties. The berries of the plant are often used for preserves, syrups and tinctures, while the bark and flowers are also useful for treating allergies, creating salves, toning the skin and more. The leaves, stems are toxic.
Besides lots of flavonoids and free radical-scouring antioxidants, elderberries contain 87 percent of the daily value in vitamin C, and high amounts of vitamin A, potassium, iron, vitamin B6, fiber, and betacarotene. {source}
Elderberries add a bright, tart, and delightful flavor to various foods, making it a great choice for sauces, syrups, dressings and they can also be used to make wine. I suggest buying high-quality organic dried elderberries, this is a great brand, I also recommend these and finally, this brand. You can also use dried elderberries to make a quick tea. 1 tablespoon of dried berries, to every 8 ounces of filtered water. Bring to a boil, them simmer for 15 minutes. Strain out the berries and enjoy.

Treatment and Prevention of Colds and Flu:
In a human clinical trial, a significant improvement of influenza symptoms, including fever, was seen in 93.3% of the cases in the elderberry-treated group within 2 days, whereas in the control group 91.7% of the patients showed an improvement within 6 days. (Zakay-Rones, 1995)
The beautiful, deep rich purple elderberries are rich in antioxidant flavanoids believed to stimulate the immune system, reduce swelling and fight inflammation. The benefits seem to be greatest when started within 24 to 48 hours after the symptoms begin. One study found that elderberry could cut the duration of flu symptoms by more than 50%. {source}
The anthocyanins present in elderberries are similar to those found in other deeply hued foods like blueberries, acai berries, raspberries, red cabbage, grapes, black rice and others. These antioxidants may neutralize free radical buildup, also known as oxidative stress. Free radicals are linked to the development of a number of degenerative diseases and conditions. Free radicals are by-products of normal bodily functions and are inevitable in daily life. However, it is the delicate balance of antioxidants and free radicals that determine our state of health. {source} One laboratory study demonstrated that the anthocyanins taken from elderberries helped protect blood vessels from free radical damage, suggesting it could also be beneficial against cardiovascular disease.
Experts think that elderberry reduces the path of flu simply by suppressing an enzyme known as neuraminidase, a proteins that enables flu to spread. Some studies also show that elderberry may have distinct ability to bind with viruses, halting their ability to mutate, change or multiply, thereby shortening the duration of illness or halting the virus before it’s effects are felt by the body.
The antiviral components of elderberry fruit extract were tested and found to effectively inhibit Human Influenza A (H1N1 virus) in vitro, possibly by blocking the ability of the virus to infect host cells. The extract was so effective, that researchers compared it with the prescription medications Amantadine and Oseltamivir (Tamiflu). {source}
-
How-to Make Roast Chicken in the Slow Cooker
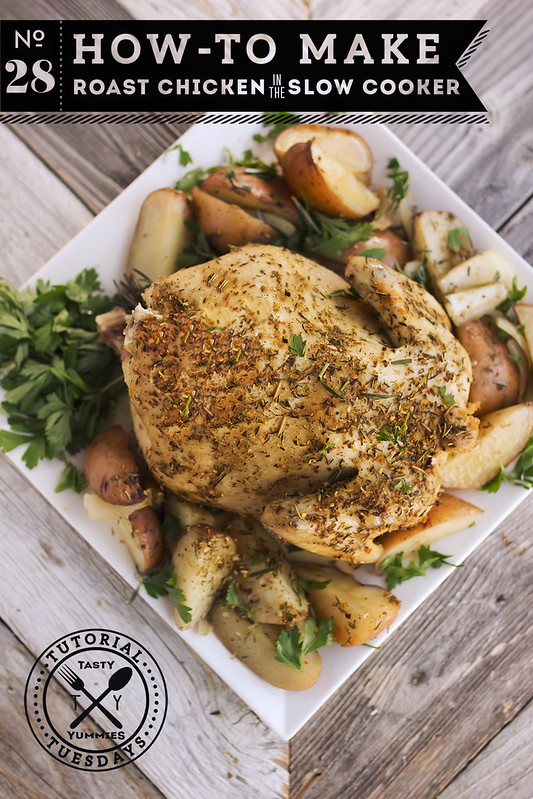
This tutorial falls under the category of simple, yet sweet. Or should I say, simple, yet savory! This is the perfect weeknight meal solution and as of recent, it is a near weekly occurrence in our house. I grab a fresh 3-4 lb whole pasture-raised chicken at the farmers market or Whole Foods, I rub it down, season it up, pile it atop some root veggies in the Crock Pot and voila, 4 hours later, dinner is ready.
The best part of a weekly whole chicken is how many meals we get from it. The meal from the whole roasted chicken is good for at least 2-3 meals, we enjoy it with the potatoes, as chicken salad, on top of big green salads, etc. Then I make a big pot of stock from the leftover bones and we get another 2-3 meals from that. This is truly a must for any busy family.
The seasonings on your chicken can vary with your preference and your mood. Generally I use this all-purpose herb and seasoning blend, that I love, occasionally I will opt for a spicy, chile pepper rub, it’s also great with lemon zest, garlic and freshly ground black pepper. The possibilities are endless. Seriously, you will never buy that rotisserie chicken from the store, again.
-
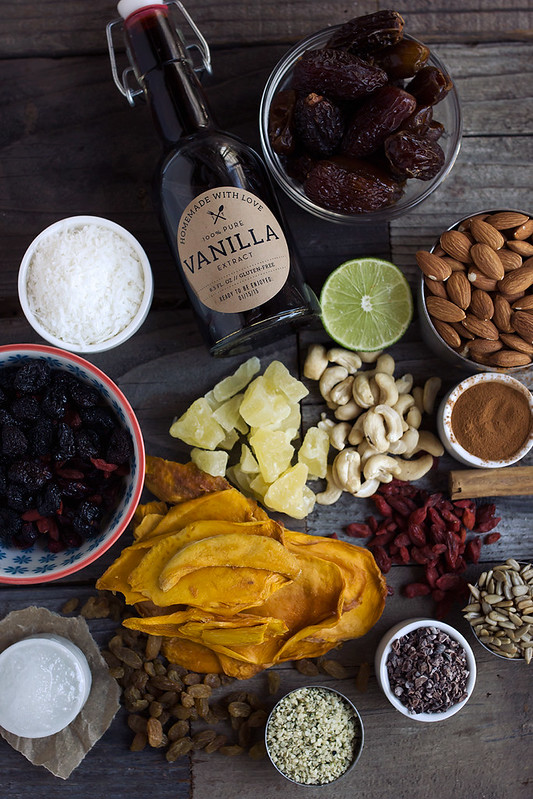
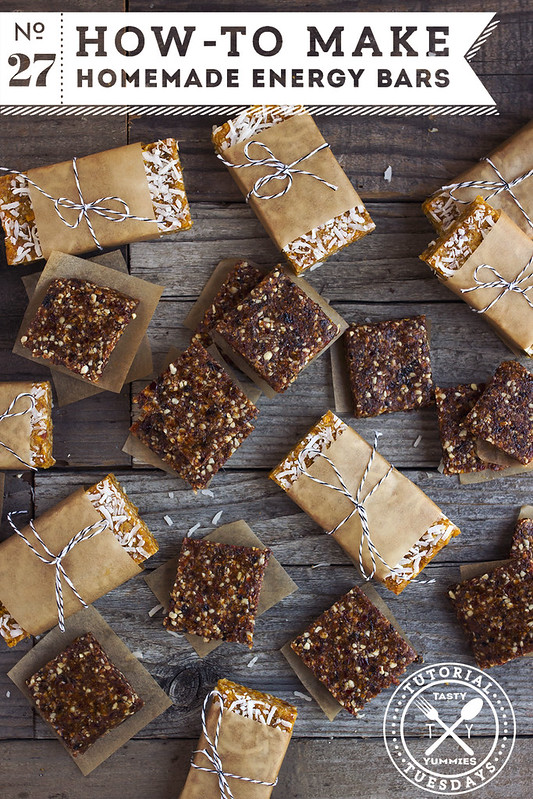
How-to Make Homemade Energy Bars
I’m leaving town tomorrow. No, not for good, just for a few days. I am hitting the road to head up to Lake Tahoe for the Wanderlust Festival in Squaw Valley. With an 8+ hour drive ahead of me, I have to plan ahead with snacks and food for both the drive and when I get there. It’s super important for me to know that I have what I need to be nourished and energized, especially when I am away from home and my routines, but also with how active I will be over the 4 days of the festival. Lots of yoga, hiking, maybe some stand-up paddle boarding and definitely some dancing!
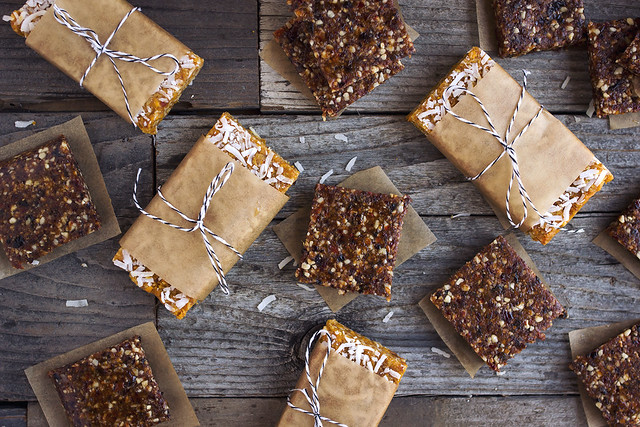
One of my favorite things to make are homemade energy bars. They are so simple to make, a great way to energize with healthy fats, proteins and fiber and they are always soo yummy! I have gone from baking my own with oats and nuts, to keeping it super simple with these no-bake, grain-free, date-sweetened bars, reminiscent of the LÄRABAR®.
The great thing about making these yourself is not only having full control of the quality of the ingredients, but also having fun with various flavor combos. You can get creative with by pairing your favorite flavors or you can simply go nuts with whatever you happen to have on hand in the pantry, that you need to use up. The latter tends to be the case for me.

For the sake of this tutorial I whipped up two of my favorite flavor combos: Coconut Mango Lime and Berry Cobbler. The Coconut Mango Lime Energy Bars on top of being grain-free and vegan they are also totally nut and seed-free, so they are perfect for those with allergies or intolerances or even someone following the autoimmune protocol. The Berry Cobbler bars, I made bite-sized and those do contain nuts.

All you have to do is follow my simple base recipe and then you can get creative from there. Trust me when I tell you, these are really hard to screw up. Once you’ve made your base mixture and get creative with your flavors, you can decide if you want to opt for full-sized bars, smaller bites or little balls. If you really wanna get crazy, dip them in some melted chocolate.