-
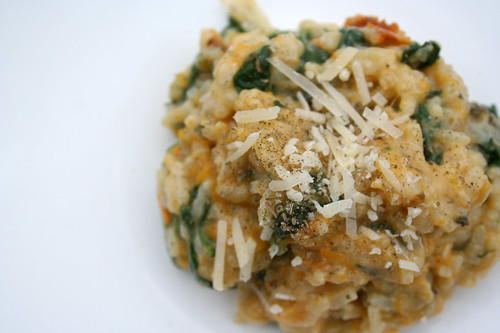
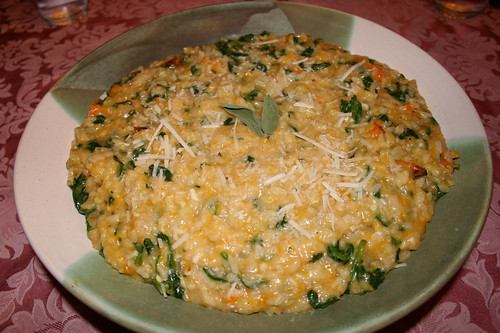
Roasted Butternut Squash Risotto
My sister, Vicky, and I took an amazing trip out to the Farm Sanctuary in Watkins Glen yesterday, and I will be posting about this trip separately very soon, once I can organize all of my thoughts properly. It was an incredible experience, there is so much to say and I can’t wait to share it with you. After the beautiful drive, we went back to my parent’s house for our usual Sunday dinner with the whole family, where I made a big pot of this delicious risotto. Nothing sounded better than a delicious Autumn dinner with squash after driving through beautiful New York looking at all the colorful leaves and seeing farm stands selling squash everywhere. Vicky and I ended up stopping at one and I picked up butternut and acorn squashes and two beautiful sugar pumpkins for baking, so look out for lots of squash and pumpkin recipes in the next week or so. YUM!
I have never made a squash risotto myself, but I have eaten it at restaurants before and I have been so excited for squash season to come so I could try it out. It was incredible. So many delicious Fall flavors, and it was so filling and satisfying. The squash is so sweet and perfect with the spinach and salty tang from the cheeses, the colors in this dish were as pretty as the countryside we had driven through all day. Oh and I really love one pot meals so much, such easy prep and clean-up. My dad was very concerned this wouldn’t be enough food for 7 adults, but not only was it enough, but seconds were had by most of us and there were even leftovers.
Roasted Butternut Squash Risotto
serves 8 as main-course3-4 lb butternut squash (or two smaller squashes)
6-8 cups organic, free-range chicken broth (use vegetable broth to make vegetarian)
1 medium onion, chopped
1 tablespoon unsalted organic butter
1 tablespoon olive oil
2 cups Arborio rice
2 large garlic cloves, minced
1/2 cup finely grated blend of Parmigiano-Reggiano and Pecorino Romano
1 teaspoon kosher salt
1 1/2 teaspoons chopped fresh sage
4 oz arugula or baby spinach (6 cups), stems discarded and leaves very coarsely choppedPreheat oven to 450°F.
Halve squash lengthwise and seed, then cut crosswise into 1 1/2-inch-wide slices and season with salt. Roast slices, skin side down, in a shallow baking pan in middle of oven until tender and golden, about 50 minutes.
Set aside 6 crescent-shaped squash slices for serving and keep warm. Cut flesh from remaining slices into 1/2-inch pieces, discarding skin.When the squash has about 10 minutes left, you can begin the risotto. Bring broth to a simmer and keep covered and barely at a simmer.
Meanwhile, cook onion in butter and olive oil in a 4-quart heavy pot over moderate heat, stirring, until softened, about 6 minutes. Add rice, garlic, and cook, stirring, 3 minutes.
Stir in 1/2 cup simmering broth and cook at a strong simmer, stirring frequently, until broth is absorbed. Continue simmering and adding broth 1/2 cup at a time, stirring constantly and letting each addition be absorbed before adding the next, until rice is creamy-looking but still al dente (it should be the consistency of thick soup), about 25-30 minutes. (There may be leftover broth)
Stir in squash pieces, then stir in cheese, salt, sage, and arugula (or spinach) and simmer, stirring, 1 minute. Serve risotto immediately, spooned over reserved squash slices, top with fresh cheese and freshly ground pepper.
-
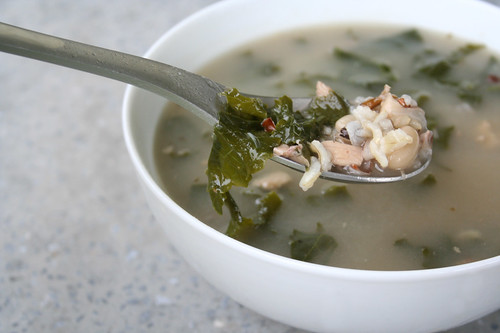
Chicken and Wild Rice Soup with Roast Garlic, White Beans and Kale
On Saturday, Mark and I took our nephew, Noah, apple picking at Becker Farms in Gasport, New York. It was the perfect Autumn day and we had a super fun time (look for some apple recipes very soon). The weather was perfect, there wasn’t a cloud in the sky and the drive out was beautiful. I hadn’t planned a dinner for when we got home, so I was scrambling to figure out a perfect Fall dinner. Soup sounded delicious so I took some of the bones from the freezer that I had from our Sojourner Farms whole chickens that we made over the last few weeks. I also took a peek at the garden and noticed I still had an abundance of kale growing, so I came up with this soup with things I had on hand. Wow, it was not only delicious, but the perfect end to the perfect October day. The wild rice has a beautiful nutty flavor, the roasted garlic is so tasty and not only does the “super-food”, kale, add a nice green color and TONS of nutrients to the soup, the slight crunch and flavor is the perfect finishing move.
You could use store-bought stock, if you don’t have any homemade on hand, but you may find you’ll want to add onions, celery and some fresh herbs to the soup to give it a bit more flavor.
Chicken Stock
4 quarts of water
1 fresh whole chicken 3-4 lbs, cut into pieces or 4 lbs assorted chicken bones (I prefer organic, free range and without hormones or antibiotics)
4 celery stalks, roughly chopped
1 large onion, quartered
2 garlic cloves, halved
2 bay leaves
5 sprigs fresh thyme
2 teaspoons sea salt
2 teaspoons pepperIn a large stockpot, (use the strainer that fits in your stock pot if you have one) combine all the ingredients and bring to a gentle boil. Reduce the heat and simmer, uncovered, for 2 1/2 hours, skimming the surface occasionally to remove any foam that forms on the surface. I added a bit more water as it was cooking to keep the chicken and vegetables covered. The longer you cook the stock, the stronger the flavor will be, but 2 1/2 hours was more than adequate and the stock had a fantastic flavor to it.
Remove the meat and bones and reserve, the meat can be separated and added back to the soup, used for chicken salad, etc. I prefer to add it back to the soup. If you didn’t use the strainer when making the stock, strain the stock to remove all the vegetables and other bits and add back to the pot. Throw out the bones and vegetables. Use the stock immediately or let the stock cool completely, and refrigerate overnight. Skim any fat that forms on the surface. Keep refrigerated in airtight containers until ready to use, up to 3 days, or freeze for up to 2 months. Since I was using the stock immediately, I skimmed any visible fat off the top, made sure that it was strained of everything, and kept it on a low heat while I prepped everything for the soup.
Chicken and Wild Rice Soup with Roast Garlic, White Beans and Kale
Serves 6-88 cups of homemade chicken stock
1 whole head of organic garlic
1 cup organic wild rice
1 15 ounce can of organic white beans, drained. (I used cannellini)
1 tablespoon fresh thyme, chopped
1 large bunch of kale, stems and center ribs discarded and leaves coarsely chopped
salt
freshly ground black pepperWhile your stock is simmering, preheat your oven to 400°F.
Peel away the outer layers of the garlic bulb skin, leaving the skins of the individual cloves intact. Wrap the entire head tightly in aluminum foil. Bake for 30-35 minutes or until the cloves feel soft. Allow the garlic to cool slightly.
Once your stock is ready, the bones have been removed and it has been strained, add back in any chicken that you’d like in the soup. After the garlic is cool enough to touch, take each clove of garlic from the head and squeeze it over a small bowl, removing the roasted garlic cloves out of their skins, or cutting it out. Add all of the roasted garlic to the soup. Stir to combine.
Add 1 cup of wild rice to the stock, bring to a boil, then cover and simmer for 35-40 minutes or until the rice is cooked. Add the beans and kale. Stir and allow the kale to wilt, about 5 to 10 minutes. Salt and pepper to taste. Serve and enjoy!
-
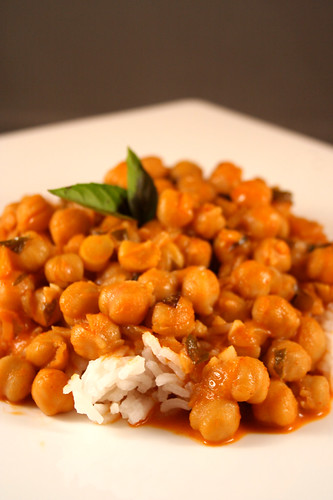
Chickpea Red Curry with Coconut Milk
When trying to come up with this recipe, I came across many, many variations on chickpea curry dishes, some with yellow curry, some with potatoes or tomatoes, I saw a few that added in spinach or root vegetables. There really is a lot you can do. Because this was a weeknight dinner, I wanted to keep it simple and quick, so I went fairly basic. It really is a quick and easy meal (less than 30 minutes) and you only have to dirty one pot and your rice cooker. My Thai basil is still hanging on in the garden so I thought this would be the perfect dish to use it in. I also really love red curry, it is filled with so many fragrant aromatics like the lemongrass, ginger and red chilis. Red curry can pack a lot of heat, so taste as you go and add more or less depending on your love of spice. Play around with this recipe and the ingredients, I plan on making this often throughout the winter. It is hearty, spicy and perfect for the cooler weather. If you have never cooked with coconut milk, you need to, it is a highly underrated, tasty addition to so many dishes. Lastly, I cannot recommend enough serving this over jasmine rice, it is the perfect addition to this meal and the smell from the rice is one of my favorite smells in the whole world. Of course, brown rice or any other rice will do just perfectly.
Chickpea Red Curry with Coconut Milk
serves 42 tablespoons olive oil
1 medium onion, diced
3 cloves garlic, minced
1 25 ounce can organic chick peas, drained
2 tablespoons red curry paste (I use Thai Kitchen brand)
1 can light organic coconut milk
Pinch of kosher salt
1 teaspoon Thai fish sauce (omit if you’d like to make this vegan)
Large handful of fresh Thai basil, chopped (regular basil will do if you can’t find Thai basil)Heat olive oil in large saucepan over medium-high heat, add onion and saute a few minutes before adding the garlic, then add the garlic and cook both until they just start to take on a bit of color, about 10 minutes. Add the red curry paste and coconut milk, whisk briskly to combine the paste with the milk. Bring the sauce to a simmer, taste and add more curry paste if it needs it. Add the chickpeas, a pinch of salt, fish sauce and half of your Thai basil, stir to combine. Allow the sauce to simmer for at least 15-20 minutes. If your sauce becomes a bit too thick for your liking, you can thin it a bit with vegetable broth.
Serve over jasmine rice and top with fresh Thai basil. Salt to taste, as needed.
-
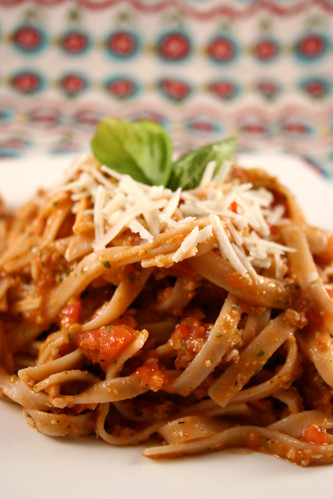
Fettucini with Tomato-Almond Pesto (Gluten-free)
Happy October to you all!! This is my absolute favorite month and I couldn’t be happier that it is finally here. Not only is it my birthday month, but it is the most beautiful weather of the year and the trees are already singing with color around here. This morning I was thinking about this time last year, and I recalled the lovely surprise 30th birthday party that my amazing hubby, Mark, threw for me. It was a super great night filled with so many people who I love. I also remembered looking at the photos from that night, the very next day, and thinking, ‘Ooof, I need to lose weight! I don’t look healthy’. After seeing those photos, I promised myself the day after my 30th birthday that I would lose 30 pounds before I turned 31.
It took my a bit to get the motivation and the plan down. I read some great books on food, the food industry, industrialized and processed foods and in March of this year, I changed my life. I say it that way because I honestly made a lifestyle change for the first time in my life. No more diets, no more counting points or calories, I made a conscious choice to change for good, and I have stuck with it. From March until now, I lost those 30 pounds and in the process have become the healthiest me, I have ever been. I no longer eat processed foods, no more junk with ingredients I can’t pronounce, no more packages of gluten-free this or that. Just fresh, honest and pure foods. I have always cooked a lot, but I am cooking now more than I ever have and I couldn’t be any prouder of all of this.
I would like to lose another 10-15 pounds, but I am not rushing it, nor am I stressing about it. If it takes two years, I am totally content with that. I am finally at a healthy weight, I am practicing yoga daily and I know that I am in a good place. I always thought losing a significant amount of weight meant that I wouldn’t be able to enjoy food the way that I always have, in my head I always thought of ‘carrot sticks and bland chicken breasts and worst of all, no more cheese’, I couldn’t have been more wrong. It is obvious by this blog, I am eating well and loving food more than ever.
On nights when I get home late and a meal needs to be cooked, I sometimes feel overwhelmed with the idea of committing to fresh food and then I take 2 minutes to sit and think about the weight that I lost and how I feel and I find that energy to make a delicious and quick dinner. This meal was made on one of those nights. I had a busy and long day, I went to my 90-minute yoga practice and got home near 8:30. I was feeling sorry for myself because I was starving and feeling too tired to cook. Then I saw the beautiful plum tomatoes on the counter, the print out of this recipe and knew that it would be a short 15-minute prep to have a delicious and fresh dinner.
This pasta has so much flavor, the nutty toasted flavor from the almonds, the pungent kick of the garlic, the beautiful fresh basil from our garden and the salty tang from the Pecorino Romano, all made me smile on the first forkful. These were all gentle pats on the back that cooking this was worth the time and effort.
Gluten-Free Fettucini with Tomato-Almond Pesto [Pesto Trapenese]
Adapted from Smitten Kitchen3/4 cup slivered almonds
1 large handful fresh basil leaves
2 large garlic cloves
Several sprinkles of sea salt
6 ripe plum tomatoes, quartered
1/2 cup grated Pecorino
1/4 to 1/3 cup olive oil
1 pound of your favorite gluten-free fettuciniIn a large skillet, sauté the almonds in a little olive oil until toasted. Let cool, then blend them in a food processor until they are in coarse pieces. (“The size of orzo,” the original recipe suggests.) Remove from the processor and set them aside.
Put the basil, garlic and a few pinches of sea salt into the food processor and chop. Add the almonds back to the food processor with the tomatoes, cheese and olive oil and whirl briefly. Season it with freshly ground black pepper.
Cook your fettucini until it is al dente and could use another minute of cooking time. Drain instantly and reserve one cup of pasta cooking water. Immediately toss the hot fettucini with the pesto and mix quickly so that it drinks the sauce up a bit. Add more pasta water if needed. Serve this lukewarm, or at room temperature. Enjoy.
-
Buffalo Foodies – Our Favorites in the 716!
My hubby, Mark, and I are the featured “Buffalo Foodies” on Buffalo Eats today. Check it out, we’re chatting about our favorite places for yummies here in Buffalo.
-
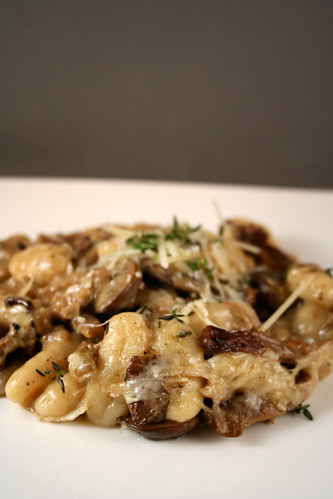
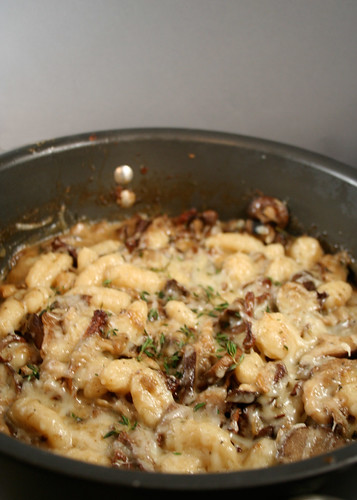
Gluten-Free Gnocchi with Wild Mushrooms
There is not much else to say about this dish, than “WOW!” This is a super simple and easy, perfect Autumn weeknight meal. Every year when we are in Seattle, I spend a significant amount of time (and money) at Delaurenti – Specialty Food and Wine, at the Pike Place Market. They have a great selection of artisanal foods, gluten-free products, wines and chocolates (and so so much more). That is the only place I have ever found gluten-free gnocchi. They are imported from an Italian company called rustichella d’abruzzo . So each year, I pick up a bag or two and I usually just serve them with a little fresh marinara and some nice cheese. I came across this recipe on Food & Wine’s website recently and decided to give it a try with the gnocchi I bought this year. I definitely want to find a great recipes for homemade gluten-free gnocchi (if you know of one, please send it my way) and I am sure that would take this dish over the top, but for a weeknight, packaged or frozen artisanal gnocchi is perfect. You could also use a homemade chicken, mushroom or vegetable stock as well, but since I didn’t have any homemade stock on hand, I went with a low-sodium organic free-range chicken stock. Certainly you could also use a store-bought vegetable or mushroom stock to make this recipe vegetarian. And obviously, if you aren’t gluten-free buy a nice store-bought gnocchi (frozen or fresh) or make your favorite gnocchi recipe. I unfortunately didn’t get my hands on any truffle oil to finish this, but that just means I will have to make this again with fresh homemade gluten-free gnocchi and truffle oil. Darn!
Gluten-Free Gnocchi with Wild Mushrooms
serves 4
adapted from Food & Wine Magazine, November 20062 tablespoons extra-virgin olive oil
2 tablespoons unsalted butter
1 – 1/2 pounds mixed wild mushrooms, stemmed if necessary and thickly sliced (I had a nice mix of baby bella, shiitake, oyster, porcini and chanterelle)
2 shallots, minced
1/4 cup dry vermouth
3/4 cup chicken stock or low-sodium broth (you can also use vegetable or mushroom broth or stock, to make this vegetarian)
1/2 cup heavy cream
1 teaspoon chopped thyme
Salt and freshly ground pepper
1 pound fresh or frozen prepared gluten-free gnocchi (I love rustichella d’abruzzo brand gluten-free gnocchi)
6 tablespoons freshly grated Parmesan cheese
1 teaspoon white truffle oil (optional)Preheat the broiler. In a large ovenproof skillet, heat the olive oil with the butter. Add the mushrooms and shallots and cook over high heat, stirring occasionally, until browned, 12 minutes. Add the vermouth and cook until evaporated. Add the stock, cream and thyme, season with salt and pepper; bring to a boil.
Meanwhile, in a large pot of boiling salted water, cook the gnocchi until they float to the surface, about 3 minutes. Drain well. Add the gnocchi to the mushrooms and simmer, stirring, for 1 minute. Stir in 1/4 cup of the Parmesan and sprinkle the remaining 2 tablespoons of Parmesan on top.
Broil the gnocchi 6 inches from the heat for 2 to 3 minutes, until golden and bubbling. Drizzle with truffle oil and serve.
-
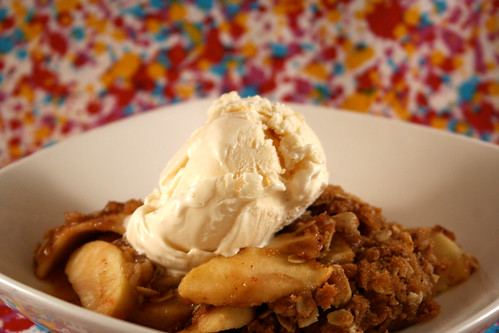
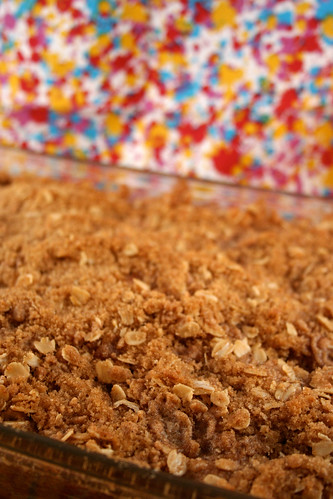
Gluten-Free Apple Crisp
NOTE: I posted an updated version of this recipe – here! The new version is still gluten-free but it is also vegan and refined sugar free!
This is my Mom’s recipe, she is an incredible baker. My Dad does most of the cooking and my mom does all of the baking. Every Fall she whips up a pan of this just for me, with the freshly picked apples from the tree in their yard and it is the best. She made a big pan of it for dessert for the big dinner I made last night. This is what Autumn tastes and smells like! This recipe is super simple, I have made it a couple of times myself, though somehow it is never as good as when my mom makes it.
Gluten-Free Apple Crisp
4 cups of peeled and sliced apples (4 med)
2/3 – 3/4 cup packed brown sugar
1/2 cup gluten-free flour (your favorite all-purpose will work perfectly)
1/2 cup certified gluten-free oats (I like Bob’s Red Mill Gluten Free Rolled Oats)
3/4 tsp ground cinnamon
3/4 tsp ground nutmeg
1/3 cup butter softenedPreheat oven to 375°F.
Grease a square 8″ x 8″ pan. Place apples in pan.
Mix remaining ingredients cutting butter in to make crumbly consistency.
Sprinkle over the apples and bake 30 minutes or until apples are tender and topping is golden brown. Serve warm topped with fresh whip cream or your favorite vanilla ice cream. -
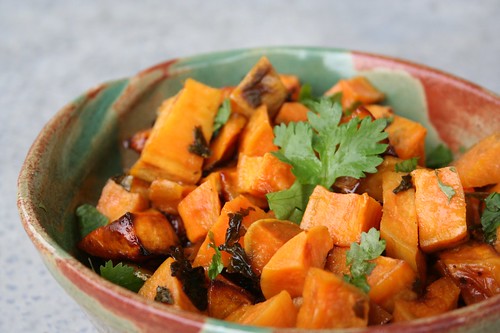
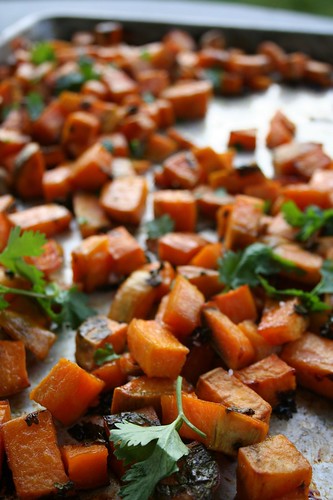
Cilantro Lime Sweet Potatoes with Honey
This is a lovely Autumn recipe that my good friend April shared with me years ago. It is a staple in our house once the cooler weather hits, perfect with so many meals. It is super easy to throw together and it’s very tasty. The sweetness from the honey, the salt and the tang from the lime all match-up so perfectly, then the distinct flavor from the cilantro finishes it off so nicely. If you are vegan and want to skip the honey, a nice organic brown sugar would be nice, too.
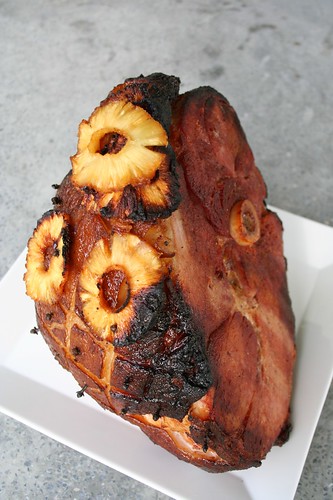
I had my parents over for a delicious Autumn dinner last night and this was the perfect side. Our entire meal was made from either our gardens, the farmers market or Sojourner Farms. We had a baked smoked ham from our pork share at Sojourner, these fantastic sweet potatoes, a green salad and southern-style green beans. My mom even made her delicious gluten-free apple crisp from the apples growing on the tree in their yard. (Recipe to follow).
Cilantro Lime Sweet Potatoes
serves 42 lb sweet potatoes, peeled and cut into 3/4-inch pieces (about 4-6 potatoes, depending on size)
3 tablespoons extra-virgin olive oil
3/4 teaspoon kosher salt
2 tablespoons honey (You can find great local honey from your farmers market)
1/2 teaspoon finely grated fresh lime zest
fresh lime juice from one lime
1/4 cup chopped fresh cilantroPut oven rack in lower third of oven and preheat oven to 425°F.
Toss sweet potatoes with oil, honey, lime juice and salt in a shallow baking pan. Top with lime zest. Arrange potatoes in 1 layer and roast, stirring halfway through roasting, until tender, about 30 minutes total. (You can taste halfway too to see if you need more of any of the ingredients – sometimes you may need a bit more of something) Remove potatoes from pan to a serving bowl, top with a bit more fresh cilantro, lime juice, lime zest and kosher salt to taste. Toss slightly and serve.Here is a photo of the beautiful smoked ham that we baked from Sojourner Farms. Hands down, the tastiest ham I have ever had.
-
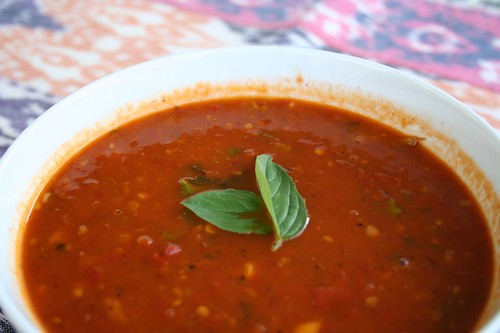
Roasted Tomato Soup with Garlic and Basil
Considering I had so many tomatoes, I decided that I wanted to make a big pot of tomato soup and I thought that roasting the tomatoes would bring even more flavor to the soup. I had a bowl of this soup for lunch today, it was rustic and had so much flavor. I had a bit of a stuffy head today, so the heat from the soup and the hint of spice from the red pepper flakes really did wonders for me. This is a very simple recipe, with just a few ingredients and it could be served hot or if you like gazpacho, it would also be great cold.
Roasted Tomato Soup with Garlic and Basil
serves 43 pounds plum tomatoes, halved lengthwise
6 tablespoons olive oil4 tablespoons minced garlic
1 1/2 tablespoons finely chopped fresh rosemary
1 1/2 tablespoons finely chopped fresh thyme
1/4 teaspoon (or more) dried crushed red pepper
6 cups low-salt organic vegetable stock
kosher salt and freshly ground black pepper, to taste
8 tablespoons chopped fresh basilPreheat oven to 400°F. Place tomatoes, cut side up, on large baking sheet. Sprinkle with salt and pepper. Drizzle tomatoes with 3 tablespoons olive oil. Roast until tomatoes are brown and tender, about 1 hour. Cool slightly.
Transfer tomatoes and any accumulated juices to processor. Using on/off turns, process until slightly chunky.
Heat 3 tablespoons oil in large pot over medium-high heat. Add garlic and sauté until fragrant, about 2 minutes. Stir in tomatoes, rosemary, thyme, about 1/4 of the fresh basil and dried crushed red pepper. Add vegetable stock; bring to boil. Reduce heat and simmer uncovered until soup thickens slightly, about 25 minutes. Stir in the remaining basil. Season to taste with salt and pepper. Serve.
If you want to make it a day or two ahead of time (it keeps very well), remove the soup from heat, save the fresh basil. Rewarm the soup over medium-high heat before continuing. Then stir in the remaining basil. Season to taste with salt and pepper. Serve.
-
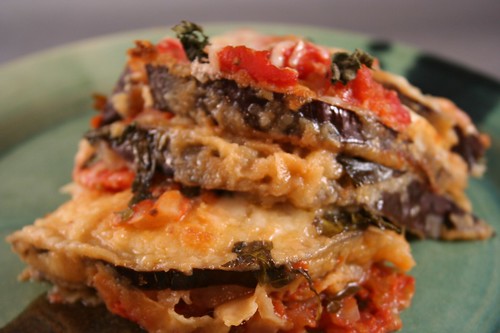
Eggplant Parmesan (gluten-free)
This is one of my favorite dishes to make once the temperatures allow for the oven to be used again. This delicious and simple dish of battered eggplant, sauce and cheese is an authentic Italian dish that could be great as an appetizer but makes a wonderful main dish. I usually serve it with a side salad and a small side of pasta and if I have it, a slice or two of some crusty bread. This time I used the fresh tomato sauce that I had just made, this was first time I have ever made this dish with fresh homemade sauce as compared to a jarred marinara and OH MY GOSH, that plus the beautiful eggplant I got at the farmers market this weekend, really put this over the top. This dish is officially amazing!
If you would rather fry the eggplant than bake it, just heat your olive oil in a large skillet. Follow the instructions below to dress the eggplant, add to the hot oil and fry until golden brown, about 3-5 minutes, turning once. Place on a paper towel-lined plate. Salt to taste.
My hubby Mark told me last night after we finished eating, “this is THE best Italian food that I have ever had”. That is quite the compliment.
Eggplant Parmesan (Gluten-Free)
serves 4
adapted from The Gluten Free Italian Cookbook, by Mary Capone1 large purple globed eggplant, thinly sliced
1/3 cup tapioca flour, plus more if needed
1 cup gluten-free bread crumbs, plus more if needed
3 eggs, beaten
olive oil for drizzling
3 cups Fresh Chunky Tomato Sauce, or your favorite tomato sauce
1/2 cup parmesan cheese, grated
8 oz. fresh mozzarella cheese, thinly sliced
3 tablespoons fresh basil, chopped
salt and pepper to tastePreheat over to 375°F. Set out a 9 x 9″ baking dish.
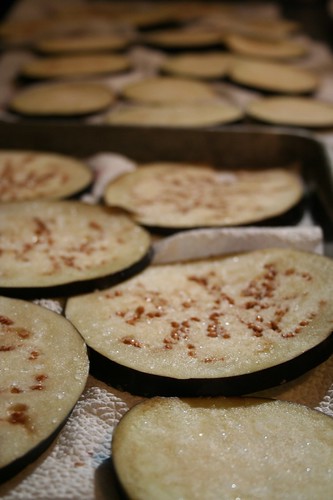
Slice eggplant into 1/4″ thick slices. Place slices in a single layer on paper towels. Sprinkle with salt. Let stand for 30 minutes. Blot moisture and excess salt from the eggplant.
On 2 separate place, add tapioca flour and bread crumbs. Lightly beat 3 eggs in a medium bowl.
Line 2 baking sheets with parchment paper. Dust eggplant with tapioca, dip in egg, and on pat onto the plate of gluten-free bread crumbs. Place in a single layer on the baking sheets. Drizzle olive oil over the top, and sprinkle with sea salt. Bake in the 375°F oven until tender and slightly brown, about 15 minutes.
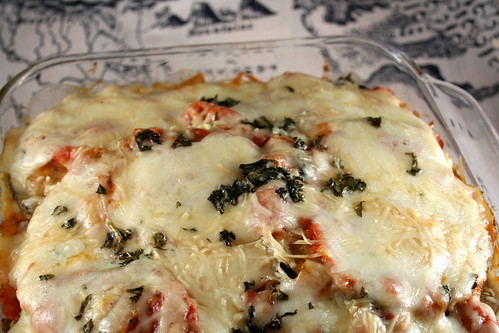
Ladle 1/4 cup of the sauce into the baking dish. Add eggplant pieces in a single layer. Add another ladle of sauce to the top, and sprinkle with about 2 tablespoons of parmesan cheese and 1/4 of the mozzarella and 1 tablespoon fresh basil. Repeat the process until all the ingredients are used up. Cover the top with the remaining sauce, sprinkle with the remaining cheese and decorate with fresh basil.
Bake in oven covered with a tightly fitted lid of foil for about 20-25 minutes, or until cheese is melted and sauce is bubbling. Let set for 5 minutes.
-
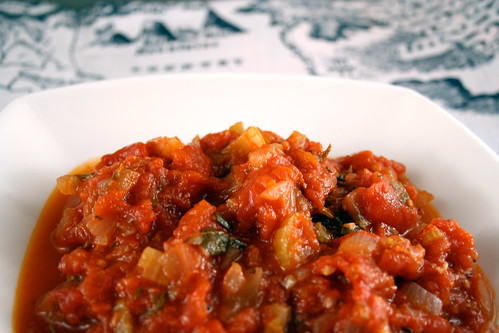
Fresh Chunky Tomato Sauce
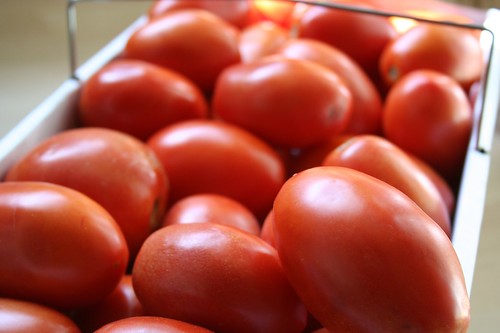
This time of year, as soon as the temperatures start to drop, and the leaves start to fall, I begin thinking about all the things I can make in a large pot. Soups, stews, sauces, etc. – I love it all. Seeing as the tomatoes I planted in my garden this year have been getting eaten by an unknown little critter and I didn’t get nearly the amount of tomatoes I thought I would, I bought an 8-quart crate of plum tomatoes from the farmers market this past weekend. I decided I would make tomato sauce and soup.
Though this seems like a complicated and time-consuming recipe, it really isn’t. It is somehow very therapeutic and calming to peel and squeeze all the tomatoes one at a time and to have a big pot of sauce, made entirely from fresh ingredients. The smell of this sauce simmering is incredible and I really can’t see myself ever buying jarred sauce again.
If you have a food mill you can run your tomatoes through them on a fine setting and it will remove both the seeds and the skin. Then you can skip the first two steps.
Obviously, everyone has their preferences on their tomato sauce, sweet, spicy, chunky, smooth, etc. – this recipe is very versatile so play around.
Fresh Chunky Tomato Sauce
makes about 4 cups sauce4 quarts plum tomatoes (or any variety of tomato you prefer)
1/4 cup olive oil Small onion 3 small cloves of garlic 1 stalk of celery
2 bay leaves
red pepper flakes
fresh thyme
fresh oregano
fresh basil 1/2 teaspoon salt plus more to taste
glug of red wine Slivers of fresh basil, to finishBring a pot of water to boil. Cut a small X at the bottom of each tomato. Blanche the tomatoes in the boiling water for approximately 30 seconds, and shock in an ice water bath. Peeling the tomatoes will now be very easy. If any of them give you trouble, toss it back in the boiling water for another 10 seconds until the skin loosens up. Discard the skins.
If using plum tomatoes, halve each lengthwise. If using beefsteak or another round variety, quarter them. Squeeze the seeds out over a strainer over a bowl and reserve the juices. (Discard the seeds.) Either coarsely chop the tomatoes or use a potato masher to do so in your pot, as they cook.
Prepare your vegetables by finely chopping the onion, celery and garlic. Heat your olive oil in a large pot over medium. Cook the onion, celery and garlic until they just start to take on a little color, about 10 minutes. Add the tomatoes, fresh thyme, oregano, basil, red pepper flakes and bay leaves, bring to a simmer, lowering the heat to medium-low to keep it at a gentle simmer. I also added a glug or two of some red wine that I had open. At this point, if you haven’t chopped your tomatoes yet, use a potato masher to break them up as you cook them. Simmer your sauce, stirring occasionally. Allow to simmer for 30-45 minutes, longer if you have it.
If your sauce is thicker than you would like, you can add back the reserved tomato juice as need. If your sauce is too lumpy for your taste, use an immersion blender to break it down to your desired texture. I prefer a chunky, almost marinara type sauce, myself. Season with 1/2 to 1 teaspoon of salt to taste. Scatter fresh basil over the pot before serving. Taste again.
-
Open-Face Chicken Salad Sandwich
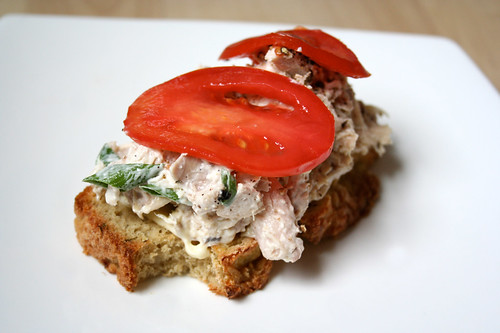
On more than one occasion after roasting or grilling one of whole chickens from Sojourner Farms, we have taken the leftovers and thrown together the tastiest chicken salad we’ve ever had. I decided to take one of the chickens this week and roast it, with the sole purpose of making the best chicken salad ever! I roasted it very simply with just salt and pepper, no oil or anything else.
Simple Roast Chicken
One 3- to 4-pound farm-raised chicken
Kosher salt and freshly ground black pepperPreheat the oven to 450°F. Rinse the chicken, then dry it very well with paper towels, inside and out. The less it steams, the drier the heat, the better.
Salt and pepper the cavity. Now, salt the chicken— try to rain the salt over the bird so that it has a nice uniform coating that will result in a crisp, salty, flavorful skin (about 1 tablespoon). When it’s cooked, you should still be able to make out the salt baked onto the crisp skin. Season to taste with pepper.Place the chicken in a roasting pan and, when the oven is up to temperature, put the chicken in the oven. I left it alone—I didn’t add butter or olive oil; you can if you wish, but I feel this creates steam, which I didn’t want. Roast it until it’s done, 50 to 60 minutes. Remove it from the oven and let it rest for 15 minutes on a cutting board.
Chicken Salad
4-cups (or thereabouts) of chicken from a whole roast chicken
1 cup of homemade aioli (or any mayo of your choice)
2 to 3 green onions, sliced thinly
kosher salt
fresh ground black pepperAfter the chicken has cooled enough to handle it, remove all of the meat and skin. Put the skin to the side or give it to your husband as a late night snack, like I did. Using kitchen shears or a knife and fork, cut the meat into bit sized pieces or shred it. I placed the chicken in a bowl and allowed it to cool overnight in the refrigerator.
After the chicken is cooled, add the aioli and green onions to the chicken, salt and pepper to taste. Mix well to coat all of the chicken. Add more aioli if needed. This can be made ahead of time, covered and chilled.
The Sandwich
2 slices of your favorite sandwich bread (see my recipe for gluten-free sandwich bread)
Aioli
1 plum tomato, sliced thinly
Arugula or Lettuce
Salt and Pepper
Any other condiments of your choiceToast the bread to your liking. Spread a thin layer of aioli on each slice of bread and top with the chicken salad, top with a bit of fresh ground pepper. Place two thin slices of tomato on top. Add lettuce or anything else you might like. Enjoy the tastiest chicken salad you will ever have.
-
Aioli
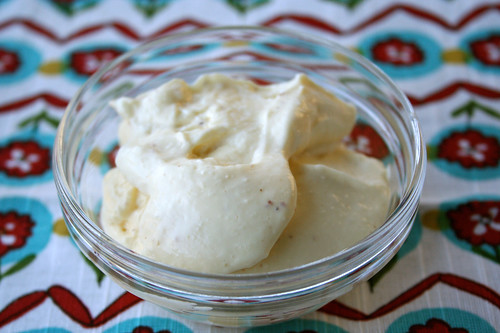
I have always wanted to try my hand at making my own mayonnaise, from what I had heard, it’s easy and once you make it yourself, you will never go back to store-bought. Honestly, I don’t use mayo often, but there are a few dishes and recipes that you can’t go without. Since I got the new Cookbook from Gluten-Free Girl and the Chef, on Friday, I already have a long list of recipes I can’t wait to try. This may be a simple one to start with, but it worked out perfectly for what I was already making – chicken salad. Though any old store-bought mayo would do, I really wanted this chicken salad to be above and beyond. Once I came across this aioli recipe, I knew this was the key thing to finish it off perfectly. Why aioli and not mayo you ask? Well honestly, they really are the same thing, the only major difference is that aioli typically has garlic (or other flavors) added, where mayo goes without. I can never say no to garlic, so aioli it is! Some aioli recipes go without the eggs and are just an emulsion of olive oil, but I really love this recipe. I may try it with olive oil next time to see which I prefer.
Aioli
makes 2 cups1 large egg (I used a fresh brown egg from Painted Meadows Farms)
1 egg yolk
1 teaspoon Dijon mustard (I used organic, no salt added, stone ground mustard)
2 garlic cloves, minced
2 teaspoons fresh lemon juice
1 cup canola oil
½ teaspoon each, kosher salt and cracked black pepperPlace the egg, egg yolk, mustard, garlic and lemon juice in the food processor. (You can make it by hand, but it is much easier and more fail-safe in the food processor.) While it is blending, slowly drizzle in the oil, until it is thick and creamy. Add salt and pepper.
Did you add the oil too fast? If you add the oil too fast, the aioli will separate, so go very slowly. If it does separate, take the mixture out of the food processor, and start over. Put another egg and egg yolk into the food processor and blend them. Slowly, slowly add the separated aioli. That should do the trick.
-
Gluten-Free Sandwich Bread
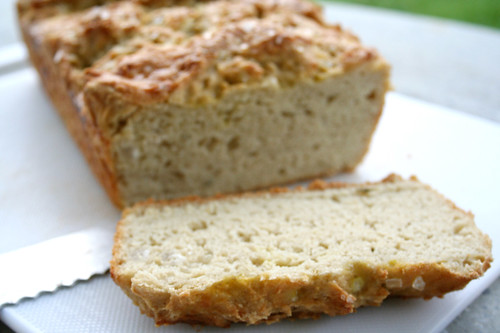
This is simply a variation of the Gluten-Free Crusty Boule Bread that I posted about back in May. Though I love that bread dearly, the shape of the loaves make sandwiches kinda tough. I had been wanting to make some open-faced chicken salad sandwiches this week (recipes to follow), so rather than buying some terrible, store-bought gluten-free sandwich bread, I decided to experiment with this recipe a little. It turned out beautifully, this bread is the real deal. Crusty, grainy and just plain tasty. Feel free to add in fresh herbs on any kind, I decided to go without this time, but with how easy this bread is to make, I plan on making it often, so I think next time I may add in from fresh thyme or rosemary.
Gluten-Free Sandwich Bread
adapted from Healthy Bread in Five Minutes a Day, by Jeff Hertzberg and Zoë Francois
Makes enough for one loaf1 cup brown rice flour
3/4 cup sorghum flour
1 1/2 cups tapioca flour
1 tablespoon granulated active dry yeast
1 1/2 teaspoons kosher salt
1 tablespoon xanthan gum
1 1/3 cups lukewarm water (heated to 110°F)
2 large eggs, at room temperature* (I use fresh brown eggs from Painted Meadows Farm)
2 tablespoons + 2 teaspoons olive oil
1 tablespoon honey
olive oil
coarse sea salt*A note about the eggs: The first two times I made this bread I didn’t totally make sure that the eggs were adequately at room temperature, then I read somewhere that making sure they are at room temperature is very important because if they are too cold it will keep the yeast from doing it’s job. So this time, I put the eggs in a lukewarm bath for about 10 minutes to bring them to room temperature, and wow what a difference it made in the final dough.
Egg Wash:
1 Tbsp heavy cream, half and half, or milk
1 large egg yolkBeat egg yolk with cream.
Directions:
Mix together the brown rice flour, sorghum flour, tapioca flour, yeast, salt, and xanthan gum in the bowl of your stand mixer (or a large bowl, if you are doing this by hand).Add the water, eggs, oil, and honey to the dry ingredients. Mix with the paddle attachment (or with a large spoon if you are mixing by hand) for a few moments until the dough has fully come together. It will be soft. It will sort of slump off the paddle. Don’t worry. That’s the right texture. Add the rosemary and mix one more time.
Put the dough in a large, clean bowl and cover it with a clean towel. Put the dough in a warm place in your kitchen, then leave it alone to rise about 1 hour. After 1 hour, put the dough in a greased loaf pan and allow to rise another hour.
Preheat the oven to 375°. After the dough has risen a total of two hours, brush the top of the loaf with the egg wash and sprinkle with sea salt. Bake for 45 minutes or so, or until the internal temperature has reached 180° and the thermometer comes out dry.
Now here is the hard part: Take the bread out of the oven, allow to cool a couple of minutes and remove the loaf from the pan. Let it cool at least 30 minutes before slicing.
-
Win a copy of “Gluten-Free Girl and the Chef: A Love Story with 100 Tempting Recipes”
This past Friday, I received my copy of Shauna James Ahern’s & Danny Ahern’s new cookbook and memoir, Gluten-Free Girl and the Chef: A Love Story with 100 Tempting Recipes and I cannot say enough good things about it. I went through page by page, really looking at all the recipes and I can’t wait to start cooking from it. I think I am most excited about trying my hand at homemade gluten-free pasta and a tart of some sort.
Shauna’s blog and her first book, Gluten-Free Girl: How I Found the Food That Loves Me Back…And How You Can Too, both really changed the way I look at gluten-free cooking and really, cooking in general. I have found so many great ingredients and grains that I never knew existed, let alone had tasted. I have been gluten-free for over 5 years and I am eating better now than I ever have. I know this new cookbook is going to do more of the same for me and hopefully for you, too. Whether you are gluten-free or not, there are some wonderful recipes in here that will allow you to experiment with new ingredients and you never know when you’ll need to cook for a gluten-free friend.
Do you want to a win a copy of this book?? All I want to know is what has changed the way you look at cooking? Tell me a story about a family member, a book, whatever! Leave a comment here on this blog post. I will choose a winner at random (using random.org) on Monday, October 4, 2010 at 12pm EST.
I can’t wait to hear your stories! Oh and stay tuned, I will have a couple more fun giveaways happening in the next month or so.
******************************************************************************************************************************
Thank you to everyone that entered to win a copy of Shauna James Ahern’s & Danny Ahern’s new cookbook and memoir, Gluten-Free Girl and the Chef: A Love Story with 100 Tempting Recipes. Reading all of your stories was so inspiring.
Congrats to the winner, Val R. who was chosen at random today at 12pm EST (using random.org).
Val, please contact me via email at beth.manos {at} mac.com with your shipping information and I will get the book out to you, ASAP.
Stay tuned for more giveaways in the near future. Thank you so much for sharing your stories and reading my blog. 🙂
******************************************************************************************************************************
-
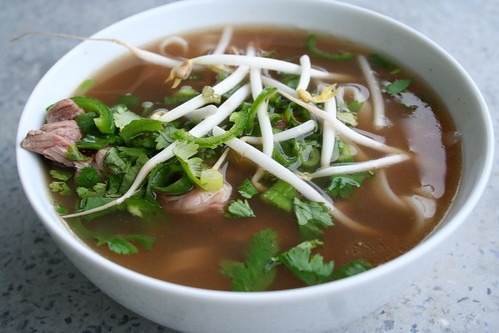
Beef Pho Noodle Soup (Pho bo)
I have been wanting to make traditional Vietnamese Pho forever and finally made the time to do so this weekend. I can’t get over all the depths of flavor and how easy it is to make. I used two different recipes as reference and consulted a Vietnamese friend, who is an incredible chef, known for his world-class Pho. The two recipes I followed are both traditional and have just a couple of small differences. The first, which I followed the closest was from Viet World Kitchen, the other recipe that I used more for tips and a couple of spices that weren’t in the first recipe, was from an article about Pho, that was in the Washington Post back in 2005.
The only thing I would change next time around would be to possibly simmer the broth even longer, not that it needed it, but I can only imagine how much more intense those flavors would be with more simmering. Also, I really wish I had taken more photos of the process and all the beautiful ingredients, but I was way too excited to sit down and eat that I couldn’t be bothered with taking photos. Plus Saturday was a marathon cooking day in my kitchen, beside the Pho, I was making tomato sauce from scratch, gluten-free sandwich bread and I preserved Meyer lemons. (Recipes to follow on all of those)
I was unable to get soup bones at the farmers market from Hanova Hills Farm, as I had liked, since they were sold out, but I was able to get both a beautiful piece of chuck for the broth and a 1lb cut of sirloin to slice thin for the bowls. I ended up buying the soup bones at Wegmans, I was happy at the great selection they had.
Beef Pho Noodle Soup (Pho bo)
serves 8For the broth:
2 medium yellow onions (about 1 pound total)
4-inch piece ginger (about 4 ounces)
4-5 pounds beef soup bones (preferably marrow, knuckle and shin bones, with some meat on them)
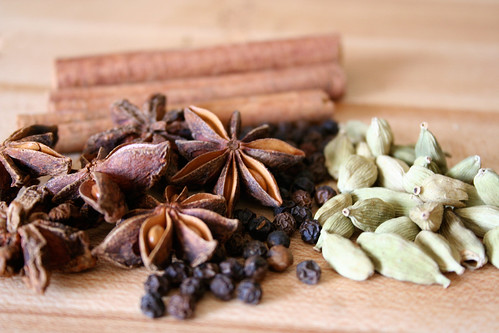
6 star anise
6 whole cloves
3 cinnamon sticks
1 tablespoon cardamom pods
1 tablespoon black peppercorns
1 pound piece of beef chuck, rump, brisket or cross rib roast, cut into 2-by-4-inch pieces (weight after trimming)
1 tablespoon kosher salt, or to taste
4 tablespoons fish sauce
1 ounce (1-inch chunk) yellow rock sugar (I just used about 2 tablespoons of organic raw sugar)For the bowls:
1 pound (16 ounces) rice noodles
1/2 – 1 pound raw eye of round, sirloin, London broil or tri-tip steak, thinly sliced across the grain (1/16 inch thick; freeze for 15 minutes to make it easier to slice) We bought a lovely 1 pound piece of grass-fed sirloin from the farmers market.
1 medium yellow onion, sliced paper-thin, left to soak for 30 minutes in a bowl of cold water
3 or 4 scallions, green part only, cut into thin rings
1/3 cup chopped cilantro
Ground black pepperOptional garnishes arranged on a plate and placed at the table:
Sprigs of spearmint and Asian/Thai basil
Bean sprouts (about 1/2 pound)
Sliced green chili peppers (jalapeño or serrano)
Lime wedges
Red chili sauce (such as Tuong Ot Sriracha)Prepare the pho broth:
Char onion and ginger. Use an open flame on grill or gas stove. Place onions and ginger on cooking grate and let skin burn. (If using stove, turn on exhaust fan and open a window.) After about 15 minutes, they will soften and become sweetly fragrant. Use tongs to occasionally rotate them and to grab and discard any flyaway onion skin. You do not have to blacken entire surface, just enough to slightly cook onion and ginger. You may also instead roast the ginger and onions on a baking sheet in a 400-degree oven for 30 minutes, this is what I did.Let cool. Under warm water, remove charred onion skin; trim and discard blackened parts of root or stem ends. If ginger skin is puckered and blistered, smash ginger with flat side of knife to loosen flesh from skin. Otherwise, use sharp paring knife to remove skin, running ginger under warm water to wash off blackened bits. Set aside. (I’ll be honest, since I roasted the ginger in the oven, and it was far too hot to peel, I just halved the big piece in two and dropped it into the stock, peel and all.)
Parboil bones. Place bones in stockpot (minimum 8-quart capacity) and cover with cold water. Over high heat, bring to boil. Boil vigorously 2 to 3 minutes to allow impurities to be released. Dump bones and water into sink and rinse bones with warm water. Quickly scrub stockpot to remove any residue. Return bones to pot.
Simmer broth. Add 4 quarts water to pot, bring to boil over high heat, then lower flame to gently simmer. Use ladle to skim any scum that rises to surface. Add all remaining broth ingredients and cook, uncovered, for 1 1/2 hours. Boneless meat should be slightly chewy but not tough. When it is cooked to your liking, remove it and place in bowl of cold water for 10 minutes; this prevents the meat from drying up and turning dark as it cools. Drain the meat; cool, then refrigerate. Allow broth to continue cooking; in total, the broth should simmer a minimum of 3 hours, I simmered mine for around 6 hours. If I had the time, I would have simmered it even longer.
Strain the pho broth through fine strainer. If desired, remove any bits of gelatinous tendon from bones to add to your pho bowl. Store tendon with cooked beef. Discard solids.
Use ladle to skim as much fat from top of the pho broth as you like. (Cool it and refrigerate it overnight to make this task easier; reheat before continuing.) Taste and adjust flavor with additional salt, fish sauce and yellow rock sugar. The pho broth should taste slightly too strong because the noodles and other ingredients are not salted. (If you’ve gone too far, add water to dilute.)
Assemble pho bowls:
The key is to be organized and have everything ready to go. Thinly slice cooked meat. For best results, make sure it’s cold.
Heat the pho broth and ready the noodles. To ensure good timing, reheat broth over medium flame as you’re assembling bowls. If you’re using dried noodles, cover with hot tap water and soak 15-20 minutes, until softened and opaque white. Drain in colander. For fresh rice noodles, just untangle and briefly rinse in a colander with cold water.Blanch noodles. Fill 3- or 4-quart saucepan with water and bring to boil. For each bowl, use long-handle strainer to blanch a portion of noodles. As soon as noodles have collapsed and lost their stiffness (10-20 seconds), pull strainer from water, letting water drain back into saucepan. Empty noodles into bowls. Noodles should occupy 1/4 to 1/3 of bowl; the latter is for noodle lovers, while the former is for those who prize broth. We used a thicker noodle, so I went with the package instructions which called for adding the noodles to boiling water, and to boil for 6-8 minutes until cooked to your desired doneness.
If desired, after blanching noodles, blanch bean sprouts for 30 seconds in same saucepan. They should slightly wilt but retain some crunch. Drain and add to the garnish plate.
Add other ingredients. Place slices of cooked meat, raw meat and tendon (if using) atop noodles. (If your cooked meat is not at room temperature, blanch slices for few seconds in hot water from above.) Garnish with onion, scallion and chopped cilantro. Finish with black pepper.
Ladle in broth and serve. Bring broth to rolling boil. Check seasoning. Ladle broth into each bowl, distributing hot liquid evenly so as to cook raw beef and warm other ingredients. Serve your pho with the garnish plate.
Note: Yellow rock sugar (a.k.a. lump sugar) is sold in one-pound boxes at Chinese and Southeast Asian markets. Break up large chunks with hammer.
-
Frozen Yogurt
A couple of years ago, while in New York City with my cousin, after a long day of walking we took a cab to the 59th Street Bloomingdales just to have frozen yogurt from the fabulous 40 Carrots on the 7th floor before they closed. Andrea had raved about how great their frozen yogurt was and I am always game to try something new. Their plain frozen yogurt was the best frozen treat I have ever tasted, tangy and a little sweet, the perfect pairing. I have yet to find frozen yogurt to rival it, until now. I came across this recipe from David Lebovitz that many people swear rivals Pinkberry’s frozen yogurt, which I have yet to try myself.
This recipe was insanely easy to make. You could add vanilla or chocolate swirls if you wish, but I cannot recommend enough making it straight up. This might win out over ice cream, for me. You will be amazed at all of the flavor. I would definitely recommend using a high quality whole milk Greek yogurt. If you cannot find a good Greek yogurt, make 1 cup of strained yogurt, by lining a mesh strainer with a few layers of cheese cloth. Place 16 ounces or 2 cups of plain whole-milk yogurt into the cheesecloth. Gather the ends and fold them over the yogurt, then refrigerate for at least 6 hours. To make the 4 cups you would need for this recipe by straining 8 cups of yogurt.
The recipe calls for 3/4 cup of sugar, I went with a little bit less and I skipped the vanilla this time, to really get that tang that I love. You can use regular sugar if you wish, I prefer organic raw sugar. We served it with some fresh blackberries. So delicious.
Frozen Yogurt
makes about 1 quart4 cups Greek-style yogurt
3/4 cup organic raw sugar
1 teaspoon vanilla extract (optional)Mix together the yogurt, sugar, and vanilla (if using). Stir until the sugar is completely dissolved. Refrigerate 1 hour.
Freeze in your ice cream maker according to the manufacturer’s instructions.
-
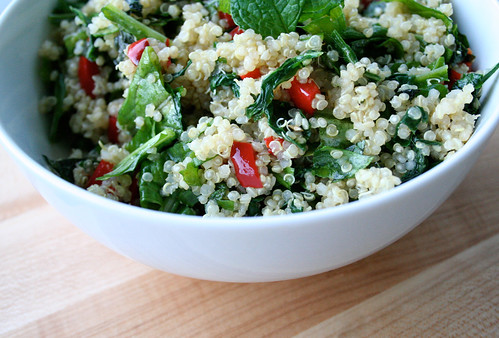
Warm Quinoa Salad with Kale and Arugula
One of my favorite ways to create a recipe is to hit the farmer’s market, buy what looks best, go through the garden at home grabbing what’s ready and then I look through the pantry. The arugula and bell peppers at the farmers market looked so amazing and my kale and mint at home are both growing like crazy, so I wanted to come up with a meal using these things. I thought a warm quinoa dish would be perfect. I decided to cook up the kale to wilt it, since it can be tough and bitter, but I left the arugula raw since it would wilt with the warmth of the quinoa and veggies, plus I wanted a little bit of crunch. YUM! this salad had so much flavor going on. We had this as our main dish, it was light but filling and delicious and equally as pretty to look at. This dish would work great as a side dish or your main, as we did. It’s also great cold, right out of the fridge for a quick snack or lunch. Another great vegan dish, perfect for a dinner party or BBQ.
Warm Quinoa Salad with Kale and Arugula
serves 41 cup quinoa
1 large bunch kale, stems removed, finely chopped
3 cloves garlic, minced
1 red bell pepper, chopped
1/4 cup olive oil plus 2 teaspoons
1 medium onion, diced
1 lemon, zested
1-2 lemons, juiced
1 bunch of arugula, stems removed, finely chopped
1 bunch fresh mint, stems removed, finely chopped
kosher salt
freshly ground black pepperCook quinoa according to the package directions. Meanwhile, in a large skillet, heat 2 teaspoons of olive oil over a medium-high heat. Add onion and red pepper, saute until onions are translucent. Add garlic, cook for 1-2 minutes. Add kale and lemon zest. Cook for 5-7 minutes, until the kale is wilted. Remove from the heat.
In a small bowl add 1/4 cup of olive oil, the juice from 1-2 lemons, 1 minced garlic clove, salt and pepper. Whisk together.
After the quinoa is cooked (about 15 minutes), add to a large serving bowl and fluff with a fork. Add the kale mixture, fresh arugula and fresh mint, toss to combine. Pour the dressing over the top, toss again to combine. Taste, add more salt and pepper if needed. Serve. This can be served warm, room temperature or cold.
-
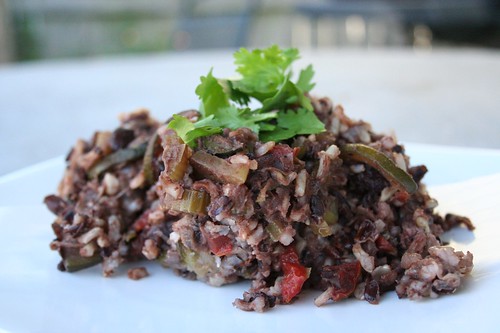
Brown & Black Rice Casserole with Black Beans & Garden Vegetables
Yesterday was a bit cooler of a day and it got me so excited, Autumn is coming, yay yay! It’s my favorite time of year! I can’t wait to do more cooking inside and stop relying on the grill and cold dishes. I wanted to make some sort of casserole or bake with ingredients I had on hand, and it of course had to be cleanse-friendly, so I came up with this recipe on the fly. It is a wordy name, but it is a super simple dish to prepare. It is quite hearty and really can be pretty versatile, as well. I would have added bell peppers if I had any on hand, but since I have an abundance of banana peppers from our garden, I thought that little kick of spice would be nice. You could also add carrots if you had them on hand. I had black rice in the pantry that I thought would make this dish even tastier, so instead of just brown rice, I decided to add a bit of the black rice in. The flavor from the it is unlike any other rice I have had, a bit sweet and nutty. Certainly if you don’t have any on hand, just brown rice would do or you could add in wild rice.
This would also make a great side dish or if you like your meat with dinner, you could to bake it with chicken breasts. For you cheese lovers, topping the casserole with a bit of shredded cheese right at the end to get a little melty top would be delicious, too. Since I am avoiding dairy right now on this cleanse, I was of course thinking about the cheese on top, the whole time I was making this, however when it came out and I took that first bite, I realized quickly, it didn’t need it at all. I put a dollop of guacamole on the side and it was perfect.
I was concerned about how this dish would photograph as the color from the beans and black rice took over and made it a bit muddy. After making this, I think that a yellow or orange bell pepper would have added a bit more of a pop of color. What do you think – does it look tasty?
Brown & Black Rice Casserole with Black Beans & Garden Vegetables
serves 4 as a main course, 6-8 as a side dish1 cup uncooked organic brown rice
1/2 cup uncooked black rice
1 small red onion, diced
2 cloves garlic, minced
2 banana peppers, chopped, seeds and ribs removed
1 medium zucchini, halved lengthwise and sliced
2 stalks celery, sliced
1-2 plum tomatoes, diced
1 can organic black beans, drained and rinsed
2 cups water
1 teaspoon ground cumin
1/2 teaspoon chili powder
small bunch of cilantro, freshly chopped
2 teaspoons kosher salt
freshly ground black pepper
1 tablespoon organic olive oilPreheat oven to 375º
Rinse the brown and black rice; our into a 2 quart casserole dish. To the rice add the next 7 ingredients. Stir in cumin, chili powder, salt, fresh cilantro (reserve some for serving) and olive oil, mix well. Pour water over the mixture and cover.
Bake in preheated oven for 45 minutes; check at this point to see if more water needs to be added. Bake another 30-45 minutes more, or until rice is cooked (cooking time with vary greatly based on the types of rice used). Stir well before serving and season with salt and freshly ground black pepper, top with fresh cilantro.
-
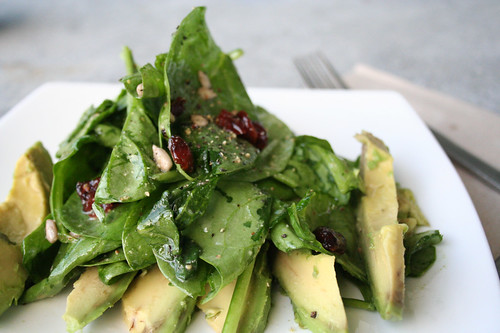
Spinach Salad with Dried Cranberries and Avocado
Being on this cleanse has given me the opportunity to cram in the veggies, even more than I already do. I made a huge and simple pot of vegetable soup on Monday that I have been eating from all week-long, with the weather being a bit cooler, it has been perfect. When I got home last night I was so hungry, I couldn’t even wait for the soup to heat up, so I threw this salad together quick as a little starter before the soup. It is based on a recipe I saved from Whole Living, but the original recipe called for pomegranate instead of cranberries. However, it isn’t in season quite yet and I was unable to find any at the market so I thought the dried cranberries sounded like a great substitute. I also went with baby spinach instead of flat leaf spinach. The salad was so refreshing and light, the crunch from the sunflower seeds and the subtle sweetness from the cranberries were perfect together. What Whole Living said about this recipe “The sunflower seeds and spinach in this salad are top-notch sources of magnesium, which enables your body to create dopamine. The avocado’s vitamin B6 produces serotonin, a calming neurotransmitter.” Even better.
Spinach Salad with Dried Cranberries and Avocado
serves 61/4 cup dried cranberries
1/4 cup fresh lemon juice
1 teaspoon Dijon mustard
2 tablespoons olive oil
Coarse salt and ground pepper
2 cups organic baby spinach, well washed and dried
2 tablespoons roasted, hulled sunflower seeds
1 Hass avocadoIn a large bowl, whisk together 3 tablespoons lemon juice, mustard, and oil; season with salt and pepper. Toss spinach, sunflower seeds, and cranberries with dressing in bowl. Transfer to a serving platter.
Halve avocado and remove pit. Scoop out flesh and thinly slice lengthwise; drizzle with remaining lemon juice. Transfer to plate and arrange salad on top. Serve immediately.
-
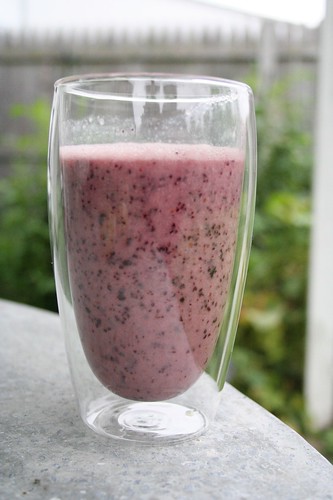
Blueberry Ginger Almond Milk Smoothie
After a week at the beach, filled with friends, food, beach fires, sun and of course, cocktails, I wanted to treat my body to a 10-day cleanse when I got home. Mostly it was because I felt like I had eaten more meat, cheese and alcohol than normal. Though I stayed away from the junk food, the processed crap and yucky meats, I definitely got ice cream one night and may have had a smore or two around the fire over the week. I could feel that sluggish feeling and I knew that meant my body needed some cleaning up. I decided on top of my usual gluten-free, no processed foods lifestyle, I was going to avoid meat, dairy, sugar, caffeine and alcohol for 10 days. I am on day 5 and I am glad I made the decision to do this quick cleanse. Since I did the 30-day cleanse a few months ago and there is little detox I had to go through this time around, in a way, this feels like a breeze. Though, I am not going quite as strict as the last time, I know that just avoiding the major things will make a huge difference in the way I feel. For me, when I cleanse, I try to focus on eating a lot of vegetables, healthy grains and legumes. I go light on the fruits and healthy oils, but I don’t cut them out completely. I hope to cleanse again at the change of the seasons, but it will depend on how my body is feeling. I also really try to include a lot of spices and herbs in my meals, since they are great natural detox and healing aids and are really helpful for purifying your digestive system. I had some ginger in the fridge and thought it would be a great addition to this smoothie. Ginger is warming and promotes digestion and has been used for centuries to aid in gastrointestinal distress. It is also known to boost the immune system and is an effective remedy for coughs, congestion and sore throat.
Most almond milks have a sweetener of some sort added, I try to find one with the least amount of sweetener, I have yet to find one without any. The organic almond milk I used was very lightly sweetened with evaporated cane juice, so this smoothie didn’t need any sweetener added, but if you wish, you could add 1/2 – 1 teaspoon of organic raw honey or whatever your sweetener of choice is. Homemade almond milk is also an option. I came across this recipe on So Good and Tasty for Homemade Almond Milk and I plan to try making it very soon. The nice thing about making your own almond milk is you can control the amount of sweetness and you can even use the pulp from the nuts for a spread.
I have made this smoothie a couple of times this week and not only is it a filling and tasty breakfast, it has definitely helped with the sweet cravings I had early on.
Blueberry Ginger Almond Milk Smoothie
serves 11 – 1 1/2 cups organic almond milk (I used vanilla flavored)
1 cup fresh blueberries
1/2 – 1 teaspoon fresh ginger, finely minced
a few ice cubesPut all the ingredients in the blender, blend until smooth. Add more almond milk or ice as necessary.
Posts by Beth @ Tasty Yummies
-
Buffalo Foodies – Our Favorites in the 716!
My hubby, Mark, and I are the featured “Buffalo Foodies” on Buffalo Eats today. Check it out, we’re chatting about our favorite places for yummies here in Buffalo.
-
Gluten-Free Sandwich Bread
This is simply a variation of the Gluten-Free Crusty Boule Bread that I posted about back in May. Though I love that bread dearly, the shape of the loaves make sandwiches kinda tough. I had been wanting to make some open-faced chicken salad sandwiches this week (recipes to follow), so rather than buying some terrible, store-bought gluten-free sandwich bread, I decided to experiment with this recipe a little. It turned out beautifully, this bread is the real deal. Crusty, grainy and just plain tasty. Feel free to add in fresh herbs on any kind, I decided to go without this time, but with how easy this bread is to make, I plan on making it often, so I think next time I may add in from fresh thyme or rosemary.
Gluten-Free Sandwich Bread
adapted from Healthy Bread in Five Minutes a Day, by Jeff Hertzberg and Zoë Francois
Makes enough for one loaf1 cup brown rice flour
3/4 cup sorghum flour
1 1/2 cups tapioca flour
1 tablespoon granulated active dry yeast
1 1/2 teaspoons kosher salt
1 tablespoon xanthan gum
1 1/3 cups lukewarm water (heated to 110°F)
2 large eggs, at room temperature* (I use fresh brown eggs from Painted Meadows Farm)
2 tablespoons + 2 teaspoons olive oil
1 tablespoon honey
olive oil
coarse sea salt*A note about the eggs: The first two times I made this bread I didn’t totally make sure that the eggs were adequately at room temperature, then I read somewhere that making sure they are at room temperature is very important because if they are too cold it will keep the yeast from doing it’s job. So this time, I put the eggs in a lukewarm bath for about 10 minutes to bring them to room temperature, and wow what a difference it made in the final dough.
Egg Wash:
1 Tbsp heavy cream, half and half, or milk
1 large egg yolkBeat egg yolk with cream.
Directions:
Mix together the brown rice flour, sorghum flour, tapioca flour, yeast, salt, and xanthan gum in the bowl of your stand mixer (or a large bowl, if you are doing this by hand).Add the water, eggs, oil, and honey to the dry ingredients. Mix with the paddle attachment (or with a large spoon if you are mixing by hand) for a few moments until the dough has fully come together. It will be soft. It will sort of slump off the paddle. Don’t worry. That’s the right texture. Add the rosemary and mix one more time.
Put the dough in a large, clean bowl and cover it with a clean towel. Put the dough in a warm place in your kitchen, then leave it alone to rise about 1 hour. After 1 hour, put the dough in a greased loaf pan and allow to rise another hour.
Preheat the oven to 375°. After the dough has risen a total of two hours, brush the top of the loaf with the egg wash and sprinkle with sea salt. Bake for 45 minutes or so, or until the internal temperature has reached 180° and the thermometer comes out dry.
Now here is the hard part: Take the bread out of the oven, allow to cool a couple of minutes and remove the loaf from the pan. Let it cool at least 30 minutes before slicing.
-
Win a copy of “Gluten-Free Girl and the Chef: A Love Story with 100 Tempting Recipes”
This past Friday, I received my copy of Shauna James Ahern’s & Danny Ahern’s new cookbook and memoir, Gluten-Free Girl and the Chef: A Love Story with 100 Tempting Recipes and I cannot say enough good things about it. I went through page by page, really looking at all the recipes and I can’t wait to start cooking from it. I think I am most excited about trying my hand at homemade gluten-free pasta and a tart of some sort.
Shauna’s blog and her first book, Gluten-Free Girl: How I Found the Food That Loves Me Back…And How You Can Too, both really changed the way I look at gluten-free cooking and really, cooking in general. I have found so many great ingredients and grains that I never knew existed, let alone had tasted. I have been gluten-free for over 5 years and I am eating better now than I ever have. I know this new cookbook is going to do more of the same for me and hopefully for you, too. Whether you are gluten-free or not, there are some wonderful recipes in here that will allow you to experiment with new ingredients and you never know when you’ll need to cook for a gluten-free friend.
Do you want to a win a copy of this book?? All I want to know is what has changed the way you look at cooking? Tell me a story about a family member, a book, whatever! Leave a comment here on this blog post. I will choose a winner at random (using random.org) on Monday, October 4, 2010 at 12pm EST.
I can’t wait to hear your stories! Oh and stay tuned, I will have a couple more fun giveaways happening in the next month or so.
******************************************************************************************************************************
Thank you to everyone that entered to win a copy of Shauna James Ahern’s & Danny Ahern’s new cookbook and memoir, Gluten-Free Girl and the Chef: A Love Story with 100 Tempting Recipes. Reading all of your stories was so inspiring.
Congrats to the winner, Val R. who was chosen at random today at 12pm EST (using random.org).
Val, please contact me via email at beth.manos {at} mac.com with your shipping information and I will get the book out to you, ASAP.
Stay tuned for more giveaways in the near future. Thank you so much for sharing your stories and reading my blog. 🙂
******************************************************************************************************************************
