-
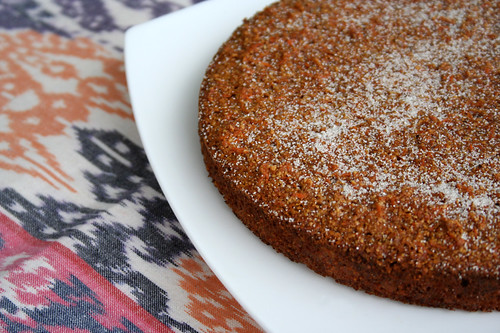
Flourless Carrot Cake
I am very behind on posting recipes right now. I still have recipes from Thanksgiving dinner, that I have yet to post. We are in the thick of one of our busiest times of the year. Our store is busy for the holidays, our web sales have been killer, we have two pretty big jobs on the books and we have been traveling to many different holiday events selling our stuff. On top of all of this, a week and a half ago, Buffalo got slammed with a really nasty snow storm that dumped about 3 feet of snow at our house in a very short amount of time. Our street wasn’t plowed for days and we were stranded at home. This all wasn’t so bad, except my husband Mark was supposed to be in Chicago selling our wares at the Renegade Craft Fair Holiday Sale. And worst of all, our fridge and pantry were pretty bare, I had planned to shop that coming weekend. So, I couldn’t even make the best of the situation by baking and cooking. Needless to say, I have been craving to have a few days to just relax, sip on a cocktail or two and just cook!
I came across this recipe just days before Thanksgiving and I had still been looking for the perfect dessert option to bring to my parent’s house. I made a huge feast at our house beforehand for just Mark and I, complete with a pastured turkey from our farm and tons of healthy and gluten-free dishes. Admittedly, I had my hands full and didn’t get the best pictures, so I am unsure on how many of the dishes I will be able to feature this year (I still have to go through all the photos), but that just means I may have to recreate them again some time soon, so I can get them on here. Darn.
This cake was the perfect light finish to a day full of eating and it was so incredibly easy to make. I loved that it was naturally gluten-free and didn’t have many ingredients at all. It had a lovely spice to it, reminiscent of pumpkin pie filling and the flavor from the almonds was so great. It’s like this recipe was created just for me on the day.
Make sure to grate the carrots on the fine holes of your grater, or they’ll be too crunchy. For best results, wrap the cake tightly in plastic after it cools and serve it the next day. It will keep for five days in the refrigerator if wrapped airtight.
Flourless Carrot Cake
Adapted from Recipes for Health by Martha Rose Shulman, New York Times
serves 10-121 1/2 cups (1/2 pound) unsalted toasted almonds
1/4 cup organic dark brown sugar
1 1/2 teaspoons baking powder
1/8 teaspoon salt
1 teaspoon cinnamon
1/2 teaspoon freshly grated nutmeg
2 teaspoons grated lemon zest
4 large farm fresh eggs
1/3 cup organic raw sugar
1 teaspoon vanilla extract
2 cups finely grated organic carrots (about 10 ounces)
a bit of raw sugar for dustingHeat the oven to 350 degrees with a rack in the middle. Oil a 9-inch springform pan, and line it with parchment. Lightly oil the parchment.
Combine the almonds and the brown sugar in a food processor fitted with the steel blade. Blend until the almonds are finely ground. Add the baking powder, salt, cinnamon, nutmeg and lemon zest, and pulse together.
Beat the eggs until thick in the bowl of a standing mixer fitted with the whisk attachment, or with an electric beater. Add the organic raw sugar, and continue to beat until the mixture is thick and forms a ribbon when lifted from the bowl with a spatula. Beat in the vanilla. Add the almond mixture and the carrots in three alternating additions, and slowly beat or fold in each time.
Scrape the batter into the prepared cake pan. Place in the oven, and bake one hour until firm to the touch and beginning to pull away from the pan. A toothpick inserted into the center of the cake should come out clean. Remove from the heat, and allow to cool on a rack for 10 minutes. Run a knife around the edges of the pan, and carefully remove the spring form ring. Allow the cake to cool completely, sprinkle lightly with raw sugar, then wrap tightly in plastic.
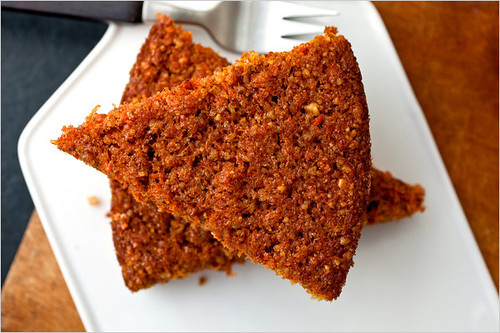
I realized in all the excitement of my first Thanksgiving dinner and sharing this dessert with the family, I never took a photo of the cake sliced, so I am doing something I never do and including a photo from the original recipe. The photo is what sold me on the recipe, so I figure it only fitting you get to enjoy it (and drool over it), as well.
-
Sautéed Shredded Brussels Sprouts with Toasted Walnuts and Dried Currants
I am a huge fan of brussels sprouts, always have been. For some reason, getting one of those huge stalks at the farmers market, is one my favorite things in the world. There is something about that beautiful green stalk peaking out of your canvas bag, that feels so right. I had big stalk that I grabbed while I was at the market and I couldn’t decide what to do with it. I absolutely love oven roasted brussels sprouts, but I always prepare them that way, I wanted to do something different. So after a little looking around, I came across many many recipes for sautéed shredded brussels sprouts. This sounded perfect. I was also very happy to discover that my amazing food processor, has an attachment for shredding. Who knew? That made shredding all the brussels sprouts, a breeze, it took me far longer to cut each one off of the stalk then to shred them all.
I didn’t have a large and deep enough skillet to cook the amount that I had, so I just used a large pot. The key is to get whatever pan you are using hot, but not too hot. If the heat is too high, you will cook them too fast. You want them tender, with a tad bit of a brown crisp to the outside. I found that since I had so many sprouts and I was cooking them in a pot rather than a skillet, the key was to keep stirring them around, so they wouldn’t just sit there and steam, only the bottom ones getting browned. Stirring allowed them to cook evenly and for all them to brown up nicely.
This is definitely going to be a winter side dish staple in our house. Perfect with so many different meals and I promise, even those that swear they hate brussels sprouts, would enjoy this. Looking to add a little meat? A bit of smoked ham, bacon or pancetta would be beautiful with this.
Sautéed Shredded Brussels Sprouts with Toasted Walnuts and Dried Currants
serves 6-8
2 pounds brussels sprouts
4 tablespoons extra-virgin olive oil
1 large garlic clove, minced
Coarse kosher salt
Fresh ground black pepper
1/2 cup walnuts, toasted, chopped
1/2 cup dried currantsTrim root ends from brussels sprouts. Using sharp knife or processor fitted with coarse shredding disk, thinly slice brussels sprouts into shreds. (This can be done one day ahead, cover and chill)
Heat olive oil in large deep skillet (or large pot) over medium heat. Add garlic; stir 30 seconds. Add brussels sprouts; sauté until crisp-tender but still bright green, 5 to 7 minutes. Season with coarse salt and black pepper. Transfer to serving bowl. Toss with toasted walnuts and dried currants. Serve.
-
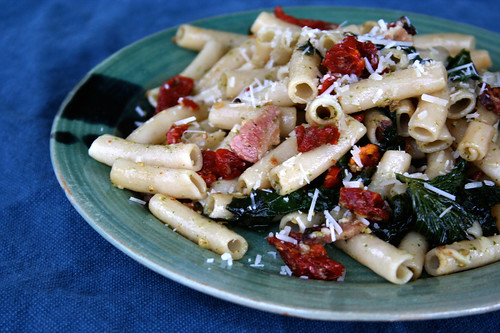
Pasta with Kale, Sun-Dried Tomatoes and Bacon (gluten-free)
Last weekend, we took the drive out to Olean to visit our farmer (I love the sound of that). We were picking up our pork share for the winter, as well as our Thanksgiving turkey. We are so lucky to have found Pierre and Sojourner Farms. The fact that every animal on the farm is pasture-raised and not pumped full of antibiotics and hormones means so much to us. I am so happy to support a wonderful place like that. It’s truly the only meat we buy.
After making the drive, it seemed wrong not to at least cook up a quick dinner with some of the delicious food we picked up. It was pretty late by the time we were ready to make dinner, so I decided to whip up a quick pasta dish for us (yeh, I know, more pasta!). The kale in my garden was still holding on and I had everything else on hand, so I thought this would be perfect. It was so perfect and delicious. Light but still hearty, it was a great quick dinner. The smokey bacon flavor was delicious and cooking the kale in the same pan as the bacon gave some of the edges that nice crisp as well. There are so many great flavors in this dish that you really don’t need much more than a pinch of Parmigiano-Reggiano on each serving, it’s that good. I am really going to miss my kale this winter, it is such a versatile green that really stands up to so many dishes. Here’s to next year’s gardening season!
Pasta with Kale, Bacon and Sun-Dried Tomatoes
serves 416 ounces organic gluten-free brown rice pasta
4 cups kale, stems removed and roughly chopped
3 slices pasture-raised farm fresh bacon (we get ours from Sojourner Farms)
1/2 cup sun-dried tomatoes, roughly chopped
1/2 teaspoon crushed red pepper flakes
2 garlic cloves, minced
1/2 teaspoon freshly ground black pepper
1/4 teaspoon kosher salt
1/4 cup of freshly shredded Parmigiano-Reggiano cheeseCook pasta in salted boiling water according to package directions. Drain.
While pasta cooks, cook bacon in a large skillet over medium-high heat, 4-5 minutes or until crisp. Remove bacon from pan, set aside. Crumble when cooled. Reduce heat to medium-low. Add kale to the pan and cook 3-5 minutes until tender and a bit crisp around the edges.
In a large serving bowl, add the cooked pasta, bacon, sun-dried tomatoes, kale, garlic, red pepper flakes, salt and pepper. Toss to combine. The little bit of grease from the bacon should be enough for the pasta, if it isn’t, add a drizzle or two of olive oil. Top the pasta with the shredded Parmigiano-Reggiano cheese. Serve.
-
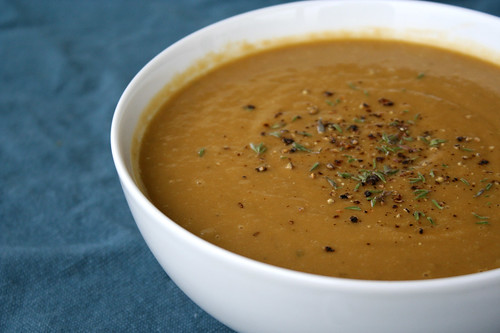
Slow Cooker Split Pea Soup
I love my slow cooker this time of year. It is so fun to load it up with ingredients in the morning before a long and busy day at the studio. And it’s even more fun to walk through the front door after said busy day, to smell your delicious dinner, totally cooked and waiting for you. I always joke that it is the closest I will come to a personal chef.
I honestly haven’t had split pea soup in probably 10 years, my mom used to make it, but I have never made it myself. I saw a beautiful bag of organic split peas when I was shopping at Farmers & Artisans and thought I would buy them and give this a try. I also had two ham hocks in the freezer from our pork share from Sojourner Farms, that I hadn’t known what to do with, this seemed like the perfect dish to use them in. You can easily leave the ham hocks out to make this is vegan.
I have to say, this soup was deliciously filling and very satisfying. The perfect meal for a cool and damp Autumn or Winter night.
[print_this]Slow Cooker Split Pea Soup – Gluten-free with Vegan Option
serves 61 lb of organic dried green split peas
Olive oil
1 large onion, chopped
2 organic celery stalks, chopped
2 organic carrots, peeled and chopped
2 cloves garlic, minced
2 ham hocks from a pasture-raised pig, hormone and antibiotic free (skip these to make this vegan)
6 cups of water
2 teaspoons of fresh thyme, minced
2 teaspoons fresh sage, minced
Kosher salt
Fresh ground black pepperIn a large skillet, heat about 1 tablespoon of olive oil over a medium-high heat. Add onion, celery and carrots. Saute until onions are translucent, about 5-7 minutes, add in the garlic, cook another minute. Remove from the heat.
Add the peas, cooked vegetables, water and ham hocks to your slow cooker/crock-pot. Stir to combine, add your herbs, salt and pepper.
Cover and cook on HIGH 4-5 hours or on LOW 8-10 hours until the peas are soft and the ham falls off the bone. Remove the bones and puree the soup with a blender. Use either an immersion blender or ladle the soup in batches, only filling the blender halfway. Hold down the lid with a towel while blending. Return the pureed soup to the pot. If you wish, add back the meat from the bones. Salt and pepper to taste, serve topped with freshly minced thyme. This soup would be great with homemade toasted croutons on top. [/print_this]
-
Avgolemono Soup
This classic Greek soup reminds me of both my Mom and my late Yia Yia (Grandma), this is one of my all time favorite comfort foods. The perfect dinner on a cool night or when you have the sniffles. My husband, Mark, swears this is an acquired taste, I have been trying for 7 years to get him to like it, but he just isn’t a fan of the lemon. I personally think the lemon is what makes this soup and the more the better. Growing up in a Greek family, this soup was a winter staple and definitely something I would beg my Mom for when I was feeling under the weather.
I find some soups taste good enough made with store-bought stock, if you don’t have time to make your own, this soup isn’t one of those. It needs homemade stock, made from scratch, cooked for a few hours. It’s the only way. Whenever we make a whole roast chicken, I freeze the bones for stock, I love being able to make my own stock. I usually go very simple with the spices on my roast chicken so whatever is leftover is perfect for making stock with. I personally prefer to make each stock specific for each soup I make, since most times the ingredients that I add to the stock varies to each recipe.
This soup is a very simple to make, only a few ingredients. I like mine with a lot of fresh ground pepper and the perfect amount of rice. Too much rice and it isn’t brothy enough, too little rice and it’s just not quite right. Some people prefer orzo to rice, but I like the classic white rice much better. If it were possible, I would always have a fresh pot of this soup in the fridge, ready to be warmed up whenever I wanted it. Thickened with eggs and brightened with the lemon, there is really nothing like this. This is my family’s recipe and honestly, have tried other people’s Avgolemeno before and it just isn’t nearly as good, in my opinion.
Chicken Stock
2-3 quarts of water
Bones from a whole roast chicken 3-4 lbs (I prefer organic, free range and without hormones or antibiotics)*
1 large onion, quartered
2 garlic cloves, halved
2 teaspoons sea salt
2 teaspoons pepperIn a large stockpot, (use the strainer that fits in your stock pot if you have one) combine all the ingredients and bring to a gentle boil. Reduce the heat and simmer, uncovered, for 2 1/2 hours, skimming the surface occasionally to remove any foam that forms on the surface. I added a bit more water as it was cooking to keep the chicken and vegetables covered. The longer you cook the stock, the stronger the flavor will be, but 2 1/2 hours was more than adequate and the stock had a fantastic flavor to it.
Remove the meat and bones and reserve, any meat on the bones can be separated and added back to the soup. If you didn’t use the strainer when making the stock, strain the stock to remove all the vegetables and other bits and add back to the pot. Throw out the bones and vegetables. Use the stock immediately or let the stock cool completely, and refrigerate overnight. Skim any fat that forms on the surface. Keep refrigerated in airtight containers until ready to use, up to 3 days, or freeze for up to 2 months. Since I was using the stock immediately, I skimmed any visible fat off the top, made sure that it was strained of everything, and kept it on a low heat while I prepped everything for the soup. You will probably end up with about 48 ounces of stock when making it homemade (give or take). Use all of it.
*You could also use a whole chicken or chicken parts. Whatever you have and whatever works best for you.
Avgolemono Soup
serves 4-66 cups homemade chicken stock*
1/2 cup rice
kosher salt
fresh ground black pepper
2 eggs
juice from 2 lemonsBring the stock to a boil, stir in rice, salt and pepper. Bring to a boil, cover and cook for 20 minutes, or until the rice is cooked.
Meanwhile, separate the eggs. Beat the egg yolks in a small bowl, set aside. In a large mixing bowl, whip the egg whites until peaks form. Add in the egg yolks, stir until well blended. Add lemon juice, barely mix, just enough to combine (you don’t want to break the whites).
Slowly ladle the hot soup into your egg mixture until the mixture is warm, stir constantly. You want to do this slowly so as not to cook the eggs to fast. Pour the mixture back into the pot of soup very gently. Taste the soup, salt and pepper to your liking. Ladle into large soup bowls with a lemon wedge on the side, top with freshly ground black pepper.
*If you absolutely must use store-bought chicken stock, you most definitely can. The soup is still very good.
-
Chili
I have found chili to be one of those dishes that is so different, no matter where you have it and who makes it. Each pot is as unique as the fingerprints of the person making it. I myself don’t follow this recipe exactly, my spice measurements always vary (I almost never measure) and it changes depending on what I have on hand and what I am in the mood for. I am pretty certain each pot of my chili is different from the last, though the core flavors tend to stay the same. I prefer a spicier chili and I have fallen in love with the smokiness from the chipotles, the sweetness from the chocolate and the unique spicy flavor from cinnamon. These are the three things I added to the recipe I originally got from my mom to make this chili my own and that I include every single time I make it. I usually make a vegan chili and I just double or triple my beans and go with 2-3 cans of different beans or sometimes just all black beans. This time around I went with the classic, ground beef. I had stopped at Farmers & Artisans, a local food market that carries a wide selection of locally grown and produced foods and I was able to get some pasture-raised, hormone and antibiotic free ground beef from Librock Farms in Gasport, NY.
I tend to like my chili spicy, so if you are a bit heat shy, go with fewer chipotles, less crushed red pepper flakes and add more if you like. If you go too spicy, too fast, it is very hard to off set it and get it back. I would prefer to not have to use canned tomatoes and canned beans, but my garden (once again) didn’t yield enough tomatoes for canning and the frozen roast tomatoes I do have, wouldn’t have been enough for a pot of chili. I do go with a good organic canned tomato, but if you have homemade canned tomatoes and dry beans that you have time to soak, by all means these are both better options. I know there are a lot of things going around about canned goods and the risks from BPA, but at this point, I personally believe it is much better to be cooking from scratch and getting the nutrients and benefits from things like tomatoes and beans (from a can, if that is how I have to get it), then skipping it all together for the fear of BPA. There are more risks in a can of Coke and I haven’t had a soda in forever. Beans and tomatoes are the only two things I buy canned and both are staples for winter cooking in our house. I am hoping by next year, I will have mastered canning, even if it means canning tomatoes from the farmers market and then canned tomatoes can be skipped altogether.
Sharing your chili recipe is an interesting thing, for some reason it feels like you are sharing a secret, since everyone has their own special way of making it and the recipe is always continuing to evolve and become this one-of-a-kind, special thing. So, now I have bared my soul and my recipe. My secret it out. It’s time for you to share yours. Tell me about your chili, how do you make yours, what makes it unique, what one ingredient can you not live without in your chili?
Chili
serves 6-8Olive oil
1 and 1/2 lbs pasture-raised antibiotic and hormone free local ground beef (make it vegan by doubling or tripling the beans)
1 large onion, diced
1 celery stalk, diced
1 large green bell pepper
3 cloves garlic, minced
2 teaspoons kosher salt
2 teaspoons cumin
2 teaspoons chili powder
1 teaspoon cinnamon
1 teaspoon red pepper flakes
2-3 dried whole chipotle peppers (I usually have a can of chipotles in adobo sauce on hand, so I sometimes use 1 or 2 dried and 1 or 2 from the can and I also include a tablespoon of the adobo sauce)
2 cans (28 oz) organic diced tomatoes in juice (if you homemade diced canned tomatoes you can also use those)
2-3 ounces of a good quality dark chocolate, roughly chopped (many dark chocolates are vegan, so have at it)
1-2 cans (15 oz) organic black beans, drained (more if you are making this vegan)Topping options:
Cilantro
Green onions
Lime
Avocado
Cheddar cheese
Sour cream
Corn tortilla chips
Fritos (A must for Mark)In a large pot, heat a drizzle of olive oil over a medium-high heat. Add your ground beef, stir gently and cook until it begins to brown about 7-10 minutes. Drain off a decent amount of the excess fat, but not all. (If you are going meatless, just skip this first step and go right to cooking the vegetables in the olive oil) Add your onion, celery and green pepper and cook about 5 minutes until the onion becomes translucent. Add your garlic, cook another 2-3 minutes. Add in salt, cumin, chili powder, cinnamon, red pepper flakes and chipotle peppers, cook for a minute. Add in tomatoes and stir for about 2 minutes. Stir in your chocolate and beans. Lower the heat and simmer for at least 30 minutes. After 30 minutes, taste the chili and adjust your seasons to your taste. Feel free to allow it to simmer longer, the longer it is left to simmer, the better the flavors. Once you are ready to serve, ladle into large soup bowls and top with your favorite accompaniments. I love cilantro, green onions, a squeeze of lime and a good shredded sharp cheddar cheese. Mark loves all of these and a huge handful of crushed Fritos.
-
Pumpkin Hummus
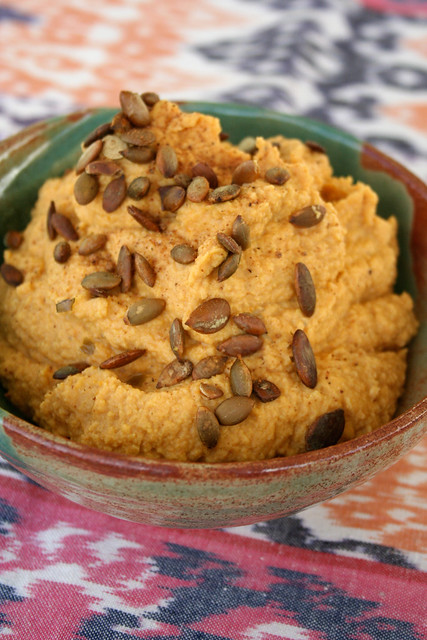
I had a bit more fresh pumpkin puree leftover from all my pumpkin creations, so I thought this sounded like another delicious and savory way to enjoy fresh pumpkin. I have to say, I am pretty excited about how this came together. The pumpkin flavor is subtle and it doesn’t overpower, but it is there and it is delicious. The nutmeg compliments it perfectly and the hint of spicy heat is perfect. Add as much or as little of the pepper blend as you like, I prefer a spicier hummus myself, but if you don’t like heat, dial it back a little. The toasted hulled pumpkin seeds on top are a must, they bring a nuttiness that just finished it off nicely. I think this would be just as nice with a butternut squash puree as well, I may have to try that next. I’ve been enjoying this on organic corn tortilla chips, but it would be great on veggies or even a sandwich.
Pumpkin Hummus
Makes about 3 cups2 cans (15.5 ounces each) organic garbanzo beans
1/3 cup fresh lemon juice
1/4 cup tahini
2 cloves garlic, chopped
1 1/4 teaspoons coarse or kosher salt
1 T olive oil
1 cup fresh pumpkin puree
1/2 teaspoon ground nutmeg
1/2 – 1 teaspoon cayenne pepper and black pepper blend (I love Penzeys Black & Red mixture)
1/2 cup hulled pumpkin seeds, rawPreheat your oven to 375º, place hulled pumpkin seeds in a single layer on a baking sheet. Bake 7-10 minutes or until golden brown and toasted, stir occasionally. Set aside to cool.
Rinse and drain 2 cans of chickpeas, reserve 1/4 cup liquid. Place chickpeas and reserved liquid in a food processor. Add 1/3 cup fresh squeezed lemon juice, 1/4 cup tahini, well stirred, 2 garlic cloves, pumpkin, nutmeg, cayenne and 1 1/4 teaspoons coarse salt. Process until smooth. I drizzle in just a bit of olive oil while its processing, it makes it even smoother and gives it a bit of a better taste. Taste the hummus, add more seasonings to taste.
Sprinkle a bit of cayenne and/or nutmeg and toasted pumpkin seeds on top when serving. To store, refrigerate in an airtight container up to 1 week. Serve with pitas, tortilla chips, crackers, raw veggies, on a sandwich and more.
-
Millet and Apple Salad with Curry Dressing
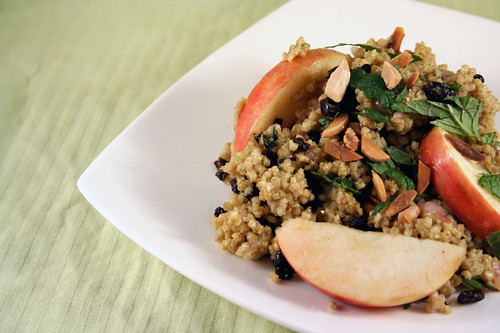
Yes, another millet salad. This is great warm, cold or room temperature. I ate it warm, just after the millet was done cooking. I have to say, tossing millet with fruits, veggies, nuts, etc, to create a salad, has to be one of my new favorite things. It works perfectly as a starter, side dish or in this case, a main course. I came home and wanted to throw something together quick for a dinner for just myself and I didn’t have a huge appetite. This has the perfect combination of so many great things, spicy, sweet and crunchy. The colors on this dish are perfectly beautiful. The curry flavor isn’t overpowering and is perfect with the fresh mint, which I was happy to be cooking with, we still have so much of it growing in the yard. This is another great vegan dish to take to a party to share or maybe even a Thanksgiving side.
Warm Millet and Apple Salad with Curry Dressing
Serves 4
adapted from Martha Stewart Living, October 20041/4 cup raw sliced almonds
1 cup organic whole millet
2 teaspoons olive oil
1 teaspoon honey (use maple syrup to make vegan)
1 tablespoon finely chopped shallot
1 1/2 teaspoons curry powder
1/4 teaspoon coarse salt
2 tablespoons fresh lemon juice
Freshly ground pepper
2 tablespoons extra-virgin olive oil
1/4 cup dried currants
1 small apple, cut into 1/8-inch-thick wedges
1/4 cup loosely packed fresh mint leaves, coarsely chopped, plus more for garnishPreheat oven to 375º. Spread almonds on a rimmed baking sheet; toast in oven until lightly toasted and fragrant, about 7 minutes.
In heavy skillet heat 1 tsp of oil, add the millet and toast gently until the grain is tan. Bring the water to a boil in saucepan, add remaining oil and grain. Stir; cover and simmer gently for 25 to 30 minutes to desired texture or until all of the water is absorbed.
Whisk together honey, shallot, curry powder, salt, and lemon juice in a large bowl. Season with pepper. Whisking constantly, pour in oil in a slow, steady stream; whisk until dressing is emulsified. Add millet, currants, apple, mint, and almonds; toss well. Garnish with mint.
-
Pumpkin, Ricotta & Gruyère Pasta Casserole (gluten-free)
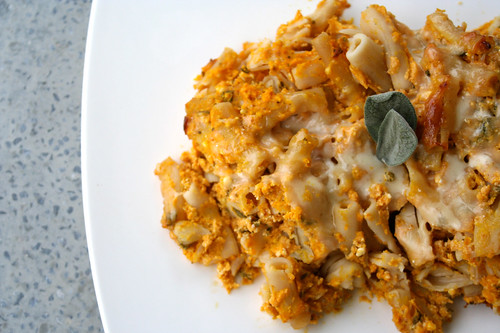
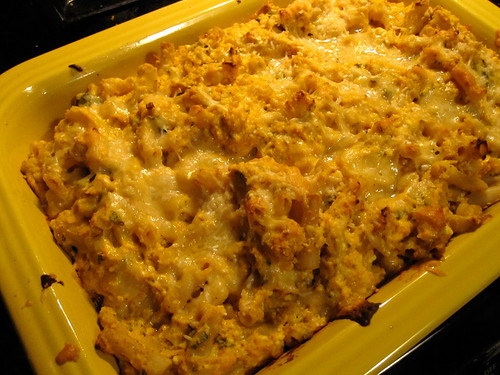
For some reason the word “casserole” reminds me of being a kid and it always makes me laugh, it just seems like such an 80’s dinner. That being said, the world needs more casseroles. A hearty, one-dish meal, that provides leftovers for days to come, how can you go wrong? I came across this recipe on the kitchn last week and I was excited to try it out. I am still on my major pumpkin kick, and I have been having so much fun trying out all the different things I can make with pumpkin. The original recipe calls for a 15-ounce can of pumpkin puree, but I had baked a beautiful fresh sugar pumpkin over the weekend to make muffins again and I have enough leftover for this recipe. I also still had some Gruyère leftover from these muffins I made a few weeks back, so I decided instead of just parmesan cheese as the original recipe called for, I would go with both Gruyère and a little bit of Parmesan Reggiano. This casserole (still making me giggle), is the perfect cool Autumn night dinner, definitely filling but not too heavy. The sweetness from the pumpkin is so perfect with the cheeses, the sage is a party in your mouth and little bit of crispiness on the top and around the edges is just amazing. This is a perfect vegetarian weeknight meal that can be whipped together, very quickly. The original recipe called for pecans, I decided to leave them out, but they would be great in the recipe. Do you have any favorite casserole recipes?
Pumpkin, Ricotta & Gruyère Pasta Casserole
serves 6
adapted from The KitchnOlive oil
1 pound gluten-free organic brown rice pasta, such penne, small shells, or elbows
One 15-ounce container organic whole milk ricotta cheese
2 cups fresh pumpkin puree
2 farm fresh free-range brown eggs (We get our eggs from Painted Meadows Farms)
1/2 cup yogurt (I use plain yogurt from White Cow Dairy)
2 teaspoons salt
Freshly ground black pepper
1/2 teaspoon ground nutmeg
1/2 teaspoon ground ginger
1/2 cup loosely packed fresh sage leaves, finely chopped
2 large garlic cloves, finely chopped
3/4 cup grated Gruyère, divided
1/2 cup grated Parmesan Reggiano, dividedHeat the oven to 375°F. Lightly oil a 9×13-inch baking dish with olive oil. Set aside. Bring a 4-quart pot of water to boil over high heat, and stir about 1 tablespoon of salt. Add the pasta, and turn the heat down to medium. Cook for a slightly shorter amount of time than specified by the package. (For example, if the package specifies 10 to 12 minutes, cook for 9 to 10, or until just barely al dente.) Drain the pasta.
In a large bowl, whisk together the ricotta, pureed pumpkin, eggs, and yogurt. Whisk in the salt, pepper, nutmeg, and ginger.
Stir in the pasta and coat completely with the pumpkin mixture. Stir in sage, and garlic. Stir in 1/2 cup of the Gruyère and 1/4 cup of the Parmesan.
Spread the mixture evenly in the prepared baking dish and sprinkle the remaining 1/4 cups of Gruyère and Parmesan over top. Bake uncovered for 35 minutes or until golden brown on top. Let stand for 5 minutes before serving.
sorry, not the best photo in the world, but I didn’t have my good SLR when it came out of the oven
-
Chunky Applesauce
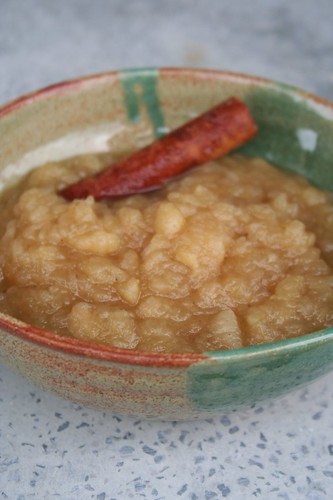
My friend Margaux, shared her family’s recipe for applesauce on her blog, Sweet and Savory Kitchens, a couple of weeks back and I haven’t been able to stop thinking about applesauce, since. The smell in your kitchen and that unremarkable old-fashioned taste, just reminds me of being a kid, for some reason. My mom must have made applesauce when we were kids. I would like to have homemade applesauce simmering on the stove everyday during Autumn, just so I could enjoy that lovely smell.
Applesauce is a great way to use up the apples that are maybe a bit too bruised and dinged up or that may have started to get a bit softer. We went apple picking a few weeks back and I was a feeling bit “appled-out”, I think I may have eaten one too many whole apples, so I thought this would be a great way to use up the last of them. This applesauce is great on its own as a side dish, it’s a wonderful and healthy snack or dessert, you can serve it over vanilla ice cream or yogurt, spread it on toast and you can eat it warm or cold. It’s just a great homestyle dish that is incredibly easy to make.
I like the flavor from the spices and how it pairs so nicely with the apples, if you are a purist and just want to enjoy the apple flavor, leave out the spices. I also tend to like my applesauce on the chunky side, so I hardly mash mine up, though some folks love a smooth pureed applesauce, whatever you like, this recipe is super simple and in no time your house will smell so good, you won’t want to leave.
Chunky Applesauce
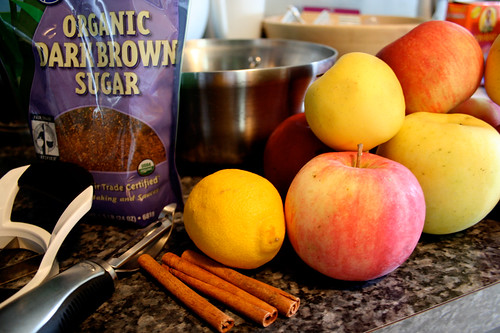
3 to 4 lbs of apples, peeled, cored and sliced ( I think I used about 8 apples, a couple different varieties*, left over from apple picking)
Juice of one lemon
3/4 cup water
1/4 cup organic dark brown sugar
2 tablespoons organic pure cane sugar
3 whole cinnamon sticks (3-inch sticks)
2 whole star anise
1 teaspoon ground cloves
1/2 teaspoon saltAs you are slicing and peeling your apples, place them in a large saucepan. Once you have all of your apples in there, place the saucepan over a medium-high heat, add the lemon juice and water. Stir in the sugars and add in the spices and the salt. Stir to combine. Bring the mixture to a boil then lower to a low-medium heat and simmer for 25-30 minutes or until the apples are thoroughly cooked. They will start to mash-up and breakdown on their own. Once your apples are fully cooked, and soft, remove the pan from the heat and remove the cinnamon sticks and star anise. Mash it up with a potato masher or a large wooden spoon, it won’t take much. Leave your sauce as chunky as you would like. If you like a very smooth applesauce you can blend it in your blender or food processor. Serve warm or cool.
This applesauce will keep a few weeks, covered in the refrigerator or it can easily be stored in your freezer.
* Be sure to choose a good quality sweet cooking apple such as – Cortland, Empire, Gala, Golden Delicious, Granny Smith, HoneyCrisp, McIntosh, Pink Lady, Rome, Fuji, Ginger Gold or Jonathan. I think I used a combination of golden delicious and McIntosh, not entirely sure since I was apple picking with my high-energy 3-year old nephew, Noah.
-
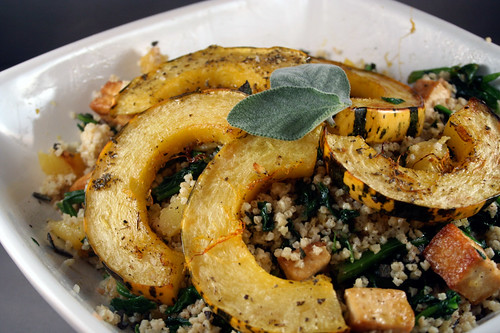
Warm Millet Salad with Delicata Squash, Crispy Tofu and Spinach
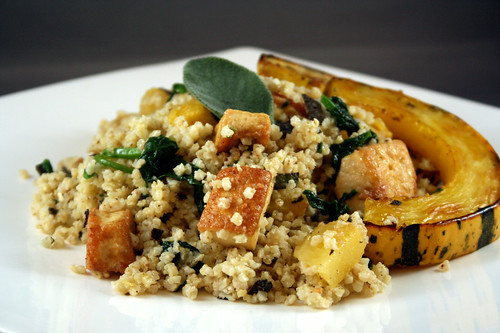
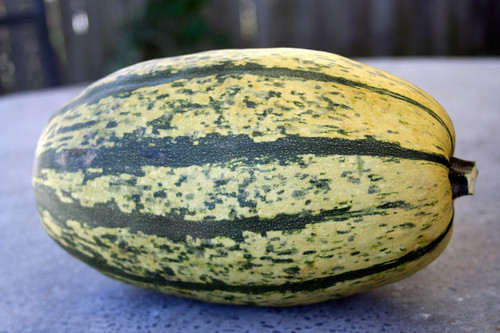
Looking at this recipe, it may seem labor intensive and difficult, it really isn’t. You are doing most of the steps simultaneously. This was my first attempt at cooking with delicata squash. It had a really great taste and it was perfect in this dish. A bit on the firmer side, this squash really holds up to being tossed around in the salad. My only complaint is, from everything I read, the skin of a delicata squash is meant to be edible, apparently it is very thin, like the skin on a zucchini. I have to say, I found the skin on the squash I cooked to be one of the toughest I have ever came across on a squash. I am curious if it was because the squash I was roasting, was on the larger side compared to some of the others I saw, or maybe I needed to cook it much longer than I did, though I doubt that was the case. We just peeled the flesh away from the skin when we were eating the wedges that we served on top, no big deal.
If you haven’t tried millet yet, I can’t recommend it enough. A naturally gluten-free grain, millet is loaded with protein and is very versatile. It has a slight sweetness to it and a nutty flavor. Great in dishes like this, as cereal, in soup or in stuffings, there really are so many things you could do with it. Like many other grains, it is great sweet or savory. It is very fluffy when cooked and it is super easy to prepare.
I am quite proud of this dish, it is really hearty and loaded with flavor. On top of all of these things, it is both vegan and gluten-free. Like many of the recipes I share, there are many variations you could take with this. This would be great with quinoa, as well and would work with any winter squash variety you have on hand. You could add dried cranberries, apples or raisins and you could substitute kale or arugula for the spinach. You could even add a chopped toasted nut like walnuts or almonds. Have fun and experiment, these types of dishes are my favorite, each time you make it, can be a new experience.
I served this as our main dish, but it would make a great side and would be the perfect item on a dinner party that includes a vegan.
Warm Millet Salad with Delicata Squash, Crispy Tofu and Spinach
Serves 4-61 medium to large delicata squash
1 cup hulled organic whole millet, uncooked
2 cups water
1 14 oz package of extra-firm tofu, cut into 3/4 – 1 inch cubes, drained and pressed to remove as much liquid as possible
5-6 cups fresh spinach, roughly chopped
olive oil, enough for drizzling on squash and pan frying your tofu
kosher salt
fresh ground black pepper
1 tablespoon fresh sage, choppedDressing:
1/4 cup red wine vinegar
1 teaspoon honey
1/4 cup olive oil
2 small cloves garlic, minced
1/2 teaspoon kosher salt
fresh ground black pepperPrepare your dressing by adding all of the above ingredients to a small bowl, whisk to combine, set aside.
Preheat your oven to 425º F. Cut the squash lengthwise into quarters, scrape out the seeds, then slice the squash into bite-sized, moon-shaped pieces, about 1/2 inch thick each. Drizzle with olive oil and season lightly with salt and pepper. Roast for 20-30 minutes (depending on how big the pieces are) in a single layer in a roasting pan or on a baking sheet or until the flesh is tender and the edges have begun to brown. Cube the flesh of half of the squash and place in a large serving bowl.
While the squash is roasting, prepare your millet. Toast the millet in a dry, medium-sized pot over medium-high heat for about 3-5 minutes, until it begins to brown and become fragrant. Add 2 cups of water and a pinch of salt. Bring to a boil, cover and simmer until the liquid is mostly absorbed, 20 to 25 minutes. Once the millet is done, remove from the heat and keep covered.
While the squash and millet is cooking, take a large frying pan and coat the bottom of it in olive oil, a couple of tablespoons will do. Heat the pan to a medium-high heat and make sure it is hot when you put the tofu in (it should sizzle). Once all the tofu is in, sprinkle it all with a dash of salt and fresh ground pepper. Now leave them alone in the pan for about 6-7 minutes. Shaking gently to keep them from sticking. Once they being to brown and get crispy, turn them. Continue this process until the tofu is cooked to your liking.
Once the tofu is cooked, remove the tofu to a plate lined with paper-towels to allow some of the oil to be absorbed. Meanwhile, with the remaining oil in the pan, keep the heat at a medium-high and add the spinach, cook for a few minutes until wilted.
Hopefully if timed correctly, when your spinach is done, your squash will now be ready and your millet will be done cooking. Add your cooked spinach to a large serving bowl with the cubed squash and add the cooked millet, tofu and chopped sage. Toss gently to combine all the ingredients. Drizzle the dressing over everything and toss again to combine. Top the salad with the remaining squash wedges. Serve on plates with a wedge or two of squash. Salt and pepper to taste.
-
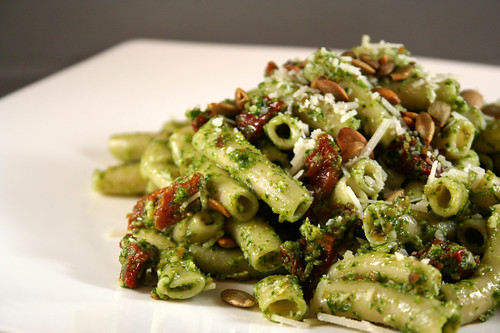
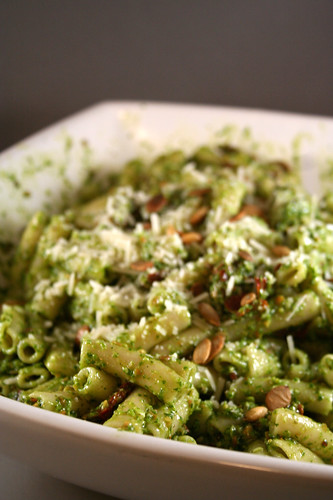
Penne with Sun-Dried Tomatoes and Arugula Pumpkin Seed Pesto
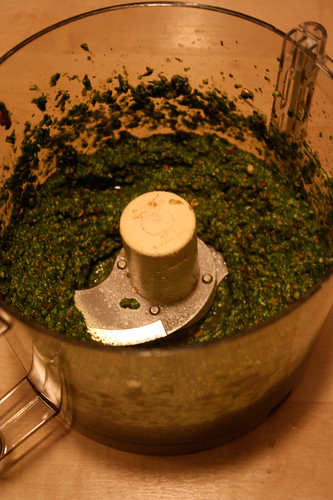
Since pesto can really be made with any type of nut, I figured making a pumpkin seed pesto would work great, too. I had also grabbed a huge bunch of arugula at the farmers market and I know I had seen pesto made with arugula instead of basil before, so I figured I would give this combination a try. It was so incredible. The spicy peppery flavor from the arugula was perfection and the toasted nutty flavor from the pumpkin seeds complimented the arugula so nicely. It was such a robust combination of so many great flavors. I personally love a garlicky pesto, I love that spicy kick! However, if you aren’t a fan of the raw garlic taste, either cut back and only use one clove, or consider roasting the garlic first. I happened to have both Parmesan Reggiano and Pecorino Romano cheeses on hand, so I went with a mix of the two. Feel free to just use one or the other.
This pesto is very versatile and it would be great spread on a sandwich, or served over vegetables, chicken or fish. I didn’t use the entire batch of pesto, so I put the leftovers in an air-tight container and in the fridge, to use in the next day or two. You can also freeze pesto in small batches and thaw to use, as needed.
Arugula and Pumpkin Seed Pesto
4 cups tightly packed fresh Arugula
3/4 cup unsalted hulled pumpkin seeds, raw
1/3 cup olive oil
2 large garlic cloves
3/4 cup blend of freshly grated Pecorino Romano and Parmesan Reggiano cheeses
3/4 teaspoon kosher salt
freshly ground black pepperToast pumpkin seeds in a single layer of a cookie sheet, at 400º until they are toasted on all sides, stir occasionally, about 5-10 minutes. Remove and allow to cool. Reserve 1/4 cup of the toasted pumpkin seeds for serving. In the blender mix arugula, olive oil, garlic and cheeses until everything is well blended. Add pumpkin seeds and pulse into the mix until minced. Salt and pepper to taste. Add more olive oil if you like your pesto more drizzly and thin, less if you like it drier and thicker.
Penne with Sun-Dried Tomatoes and Arugula Pumpkin Seed Pesto
serves 416 oz gluten-free organic brown rice penne pasta
1 cup sun-dried tomatoes, thinly sliced
1/4 cup of reserved pasta cooking liquid
Arugula and Pumpkin Seed Pesto
1/4 cup of toasted pumpkin seeds
Parmesan Reggiano cheese
kosher salt
freshly ground black pepperCook your pasta according to package directions, reserving 1/4 cup of the cooking liquid. Drain and rinse your pasta. Place the pasta in a large serving bowl, add the sun-dried tomatoes and pesto. Toss to combine, making sure all the pasta is coated with pesto, adding in the pasta cooking liquid as need to thin the sauce. Salt and pepper to taste. Serve the pasta to each plate, sprinkle toasted pumpkin seeds and Parmesan Reggiano cheese over the top.
-
Potato Leek Soup

This past weekend, I had to make sure to make a trip to the Elmwood Bidwell Farmers Market, since it was the second to last weekend that it is going to be there. I stocked up on pumpkins and squashes, brussel sprouts, arugula, sage, leeks, potatoes and so much more. I couldn’t wait to get home and make a huge pot of this creamy potato leek soup. I was happy to find I had everything I needed for this soup already in the pantry, so I could just throw it together quick and enjoy my Saturday evening at home, cuddling with hubby and puppy. I decided to skip any type of cream or milk and go with vegetable broth to keep this soup vegan. I am telling you, on first taste, you could swear there was some type of dairy in there, Mark couldn’t believe it. It is so creamy. If you’d like to go with a chicken stock instead, feel free and if you want the ultimate in creaminess, add a splash or two of heavy cream or milk. I honestly suggest making this soup without the dairy first, you’ll be pleasantly surprised by how creamy it is without it and no reason to add the extra calories and fat. If you really want to be indulgent, top your soup with some crumbled bacon (only if it’s farm fresh pastured-raised, humanely treated bacon, of course).Potato Leek Soup
serves 63 leeks, rinsed very well, slice thinly white and light green parts only*
2 tablespoons olive oil (or butter)
6 cups organic low-sodium vegetable broth (you can also use chicken broth, water or any combination of the three)
2 lbs of potatoes, peeled and diced into 1/2 inch pieces
1 teaspoon of marjoram (I didn’t have fresh, so I used dried)
2 teaspoons chopped fresh thyme plus a dash more for serving (use can use dried here, just use less)
1/2 teaspoon of cayenne pepper
kosher salt
freshly ground black pepperIn a large pot, heat the olive oil over a medium heat. Add the leek slices and season with salt and pepper. Cook leeks over a medium-low heat for approximately 10 minutes. Stir often, making sure they don’t brown. Cook until they are soft and wilted. Add your thyme marjoram and cayenne pepper, stir to combine.
Pour in your broth and add your potatoes. Cover and simmer until the potatoes are tender. This can take anywhere from 15-30 minutes. Check for doneness by piercing a potato with a sharp knife. If it goes in easily, they are done.
Scoop the soup into a blender and puree until smooth. (be sure not to blend too much soup at once and put a towel over the lid when you are blending so the hot soup doesn’t explode out) Add the pureed soup to a large bowl. Continue blending the whole pot of soup in batches, until it has all been blended. Add the soup back to your pot, season with salt and freshly ground black pepper to taste. Top each bowl with a few sprinkles of freshly chopped thyme.
* a quick note on cleaning leeks: leeks tend to have a lot of dirt and grit in them. If you aren’t careful when cleaning them, you may think they are totally clean, start cooking with them and find your entire dish has a nasty grittiness to it. This can ruin a dish 🙁 After trimming off the ends (called the beards) and the dark green tops (save these for stocks). You can run them under cold water at this point, or even better, you can submerge the leeks in a large pot of cold water. Swirl them around to really remove all the grit and dirt. Drain well and then cut.
-
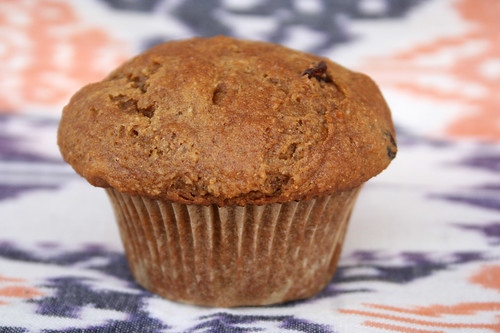
Pumpkin Spice Muffins with Hazelnuts and Cranberries (Gluten-free + Dairy-free)
I am obviously on a pumpkin kick right now, so I am playing around with all kinds of pumpkin recipes. Since I had baked the beautiful sugar pumpkin to make homemade fresh pumpkin puree a few days prior, I had muffins on my mind. I also wanted to experiment with making up my own recipe, since I had really never done so with baking. Playing around with flours and measurements when it concerns baking, frankly intimidates me. I am always worried that with one little misstep, an entire recipe can be ruined. With all the baking I have been doing in the last few months, I felt like I knew enough about what flours I liked and what they needed to be paired with, to attempt to create my own combination. I am happy to report that my first attempt at making my own recipe, was a success!
These muffins are perfectly moist and fluffy and have so much pumpkin flavor. I decided to add in some chopped hazelnuts and dried cranberries that I had in the pantry, please feel free to omit these, or try out other nuts, fruits or even chocolate chips. Experiment and have fun. I am finally loving baking, which is something I have always longed to enjoy.
Looking to make these vegan? Instead of two eggs, use 1 tablespoon Ener-G Egg Replacer whisked with 1/4 cup warm water and use almond or soy milk in place of the milk.
Pumpkin Spice Muffins with Hazelnuts and Cranberries
makes 12 muffins1 1/3 cups almond flour
1 cup corn flour (allergic to corn? – try sorghum or brown rice flour)
1/2 cup tapioca starch
1 1/2 teaspoons baking powder
1 teaspoon baking soda
1/2 teaspoon salt
1 teaspoon xanthan gum
1 teaspoon ground cinnamon
1/2 teaspoon ground nutmeg
1/2 teaspoon ground cloves
1 cup organic dark brown sugar
2 farm fresh free range brown eggs (We get our eggs from Painted Meadows Farms)
1 1/3 cups fresh pumpkin puree
1/4 cup olive oil
1/4 cup non-dairy milk
1/2 tablespoon organic vanilla
1 1/2 teaspoons fresh lemon juice
1/2 cup dried cranberries
1/2 cup chopped hazelnutsPreheat oven to 375º F. Line a standard muffin tin with paper liners.
Mix dry ingredients (the first 11 ingredients) together in a large mixing bowl. In another bowl, whisk together your eggs, pumpkin, olive oil, milk, vanilla and lemon juice. Add the wet ingredients to the dry. Mix the batter thoroughly, either with your stand mixer or by hand, to combine all the ingredients, mix until smooth. Stir in the hazelnuts and dried cranberries by hand, mix until incorporated.
Divide the batter evenly among the muffin cups. Bake in the center of a preheated oven for 20 to 25 minutes, until golden and firm to the touch. A wooden pick inserted into the center should emerge clean.
Cool the muffin pan on a wire rack for five minutes. Gently pop the muffins out to continue cooling on the rack (don’t cool them longer than 5 minutes in the hot pan- they’ll definitely get soggy). Enjoy a muffin after they have cooled 10 minutes.
Freeze any leftover muffins in tightly sealed freezer bags and pop one out for a quick and easy breakfast.
-
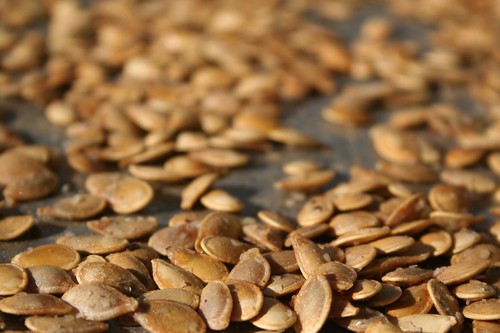
Toasted Pumpkin Seeds
If you are baking a pumpkin to use in a variety of different recipes, do yourself a favor and do not throw away the seeds. They can be used in so many different recipes and they are a perfect Fall snack just on their own. Toasted pumpkin seeds have a beautiful nutty flavor and they are great on salads, you can make pesto with them and so much more. Feel free to experiment with spices to flavor the seeds either savory or sweet.
Toasted Pumpkin Seeds
1 medium pumpkin
olive oil
kosher salt
freshly ground black pepperPreheat oven to 400°F. Cut your pumpkin in half and remove the seeds and the stringy pulp. Rinse pumpkin seeds under cold water and pick out the pulp and strings. Spread the seeds out over a cookie sheet, all in one layer. Drizzle the pumpkin seeds with a tablespoon or two (depending on how many seeds you have) of olive oil or melted butter. Toss to combine. Sprinkle with kosher salt, freshly ground black pepper and any other spices you may be using. Bake until the seeds begin to brown and get crisp, 10-20 minutes. When browned to your satisfaction, remove from the oven and let the pan cool on a rack. Store in an air-tight container.
-
Vegan Pumpkin Spice Ice Cream
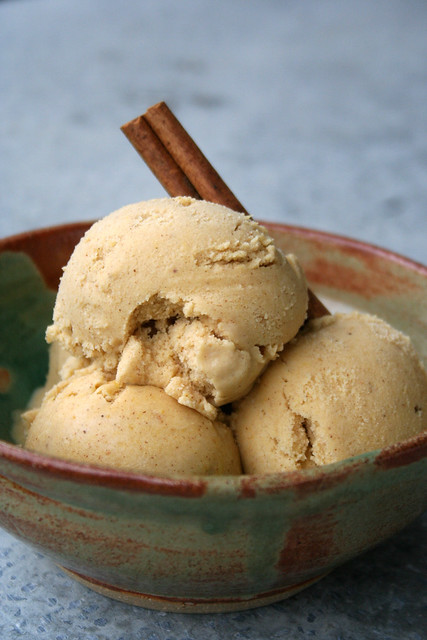
Ever since I got my ice cream maker, I’ve been wanting to try my hand at making a vegan ice cream. This ice cream is so creamy you would never ever know it is dairy free. Mark didn’t believe me. I liked it better than most ice creams I have ever had, because it was a bit lighter and didn’t give my stomach that heavy feeling after I ate it, like many ice creams can. I also really loved how easy this was to make. Basically no work at all. A lot of people are hesitant to bake and cook with coconut milk for fear the coconut flavor will outshine the other ingredients. There is relatively no coconut flavor from the milk, so it doesn’t over power the taste of the pumpkin or the spices.Each spoonful of this ice cream actually tastes just like a perfect bite of crustless pumpkin pie with a dollop of whipped cream on top. I can’t recommend enough using fresh pumpkin puree if you can. If you can’t some good quality canned organic pumpkin puree will do.
Vegan Pumpkin Spice Ice Cream
1 – 14 ounce can organic coconut milk (full fat, not light)
1 cup unsweetened organic almond milk (or any other non-dairy milk)
1 teaspoon vanilla extract
1 teaspoon cinnamon
1/2 teaspoon ground nutmeg
1/4 teaspoon ground cloves
3/4 cup organic pure cane sugar (coconut sugar, palm sugar or sucanat, also work great)
1 1/4 cup fresh pumpkin puree (you can use canned if you don’t have fresh, but fresh is much tastier)Combine all of the ingredients together in a large bowl and whisk to combine well. Let chill for about an hour in your fridge. Once it is thoroughly chilled, follow instructions for your ice cream maker.
-
Skip the canned junk. How to make your own pumpkin puree.
The processed goop in a can, doesn’t even begin to compare to using fresh pumpkin in recipes. The taste is so much richer and it is so much better for you. Pumpkins are loaded with vitamins and nutrients. Making your own pumpkin puree is easier than you think and once you do it, you’ll probably never use the canned junk again.
I picked up two decent sized sugar pumpkins at the farmers market this weekend. Each pumpkin was just $2 each and together they will probably yield at least 4 cups of pumpkin puree, if not more. You can even use the pumpkin from the jack-o-lantern that you carved up, but the sugar (or pie) pumpkins are just a bit sweeter and more tender. If you do use your jack-o-latern pumpkin, be sure to increase the spices a bit more as they can tend to be a bit bland.
Pumpkin puree is great for pies, muffins, bread, ice cream, the list goes on and on. From one pumpkin I was able to make vegan pumpkin spice ice cream, pumpkin spice muffins and I still had some leftover that I just added some brown sugar, butter, hazelnuts and some spices for a little lunch side-dish, which I am eating as I type this.
Another great thing about baking your own pumpkin, are the seeds. Save those seeds and then toast them with a bit of olive oil and salt. They are great as a snack, on salads, or you can even make a great fall pesto with them. (that’s on the agenda for this week).
Fresh Pumpkin Puree
1 fresh sugar pumpkin (also known as a pie pumpkin)
Preheat the oven to 350º F.
Cut the pumpkin in half and clean out the seeds and stringy membrane. Reserve seeds to make toasted pumpkin seeds. lace the pieces cut side down in a roasting pan along with 1/2 inch of water. Cook for 45 minutes to an hour, until the pumpkin is soft. You can check for doneness by piercing a fork into the flesh of the pumpkin. Remove from the oven and allow to cool. Scoop the flesh away from the skin. Blend the flesh in your food processor until smooth like canned pumpkin.
The pureed pumpkin can be used right away in recipes or you can store it a day or two in the refrigerator in an air-tight container. If it is going to be more than a couple days until you will be using it, freeze it in small quantities in freezer safe bags.
-
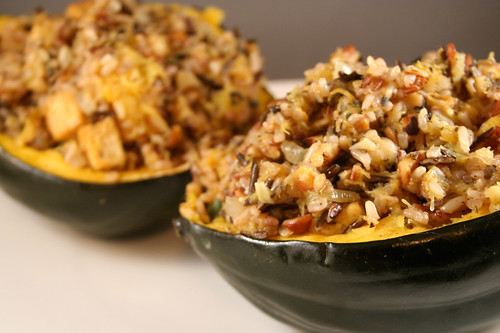
Tofu, Wild Rice and Hazelnut Stuffed Acorn Squash
I had a beautiful acorn squash that I needed to use before it turned and I had been dreaming up a delicious vegan stuffed dish. The smells alone from this were incredible and the flavors couldn’t have been more perfect together. I have to admit, I think I am most obsessed with Autumn and all of the foods associated with it. Even though produce is becoming a bit limited, there is something about experimenting and trying out new recipes with all of the wonderful ingredients that are in season. Each season, I make an effort to try at least one new seasonal ingredient that I have never cooked with. So far for this season it’s delicata squash, I picked one up this week and I am still trying to figure out what I would like to make with it. Got any suggestions? What new seasonal ingredient are you going to try for the first time this Autumn?
This dish had so much flavor, the crunch from the nuts with the creamy squash and the nutty sweetness from the rice were all absolutely made for each other. I had been thinking about adding kale for color and extra nutrients, but honestly forgot until I pulled it out to serve it. Next time. Other great additions to the stuffing would be dried cranberries or even apples. You could also use walnuts or pecans instead of hazelnuts. I love all the variations and improvisations you can take with cooking, you can really make a dish unique every time you make it. Have fun.
Tofu, Wild Rice and Hazelnut Stuffed Acorn Squash
serves 41 medium acorn squash, cut in half
2 tablespoons fresh sage leaves, finely chopped
1 tablespoon olive oil
1 cup uncooked wild rice blend
3 tablespoons olive oil
1/2 package firm tofu, pressed* and cut into 1/2 inch cubes
1/2 cup hazelnuts, chopped and toasted
1 medium onion, chopped
1 large clove garlic, minced
kosher salt
freshly ground black pepperPreheat oven to 375°F. Cut each Squash in half crosswise. Scoop out and discard the seeds and strings. Place on rimmed baking sheet or in baking pan, cut side up. Sprinkle each half with a little salt, pepper, and fresh sage. Using 1 tablespoon of olive oil, drizzle each half with the oil. Cover the pan with foil and bake the squash just until moist and a bit tender, about 30-45 minutes.
Meanwhile, cook your rice according to the package directions.
In a saute pan, heat your olive oil over medium to high heat. Add your tofu and fry until brown and your desired amount of crispiness is received. When done remove to a paper towel line plate. Reduce the heat to medium, add more olive oil if needed, add chopped onion and saute for 2-3 minutes until it begins to soften, add garlic and saute another 3 minutes until both are soft but before they begin to brown. Remove from heat.
In a large bowl, combine cooked rice, tofu, sautéed onions and garlic, fresh sage, and the toasted walnuts. When the squash is done, remove from the oven and spoon out some of the cooked squash to the bowl with the rest of your ingredients. Be sure to only scrape a little, you will want to leave some squash in the shells. Mix the ingredients together, salt and pepper to taste.
Press the rice mixture into the squash halves, dividing it evenly. You can round the stuffing above the rim of the squash shell. You may have rice mixture left over depending on how big your squash is. It is a great side dish on its own.
Cover with aluminum foil and bake for 20-30 minutes or until the squash flesh is thoroughly tender and it is warm throughout.
*To press tofu, drain the water from the package and lightly squeeze the tofu between paper towels to remove excess moisture.
-
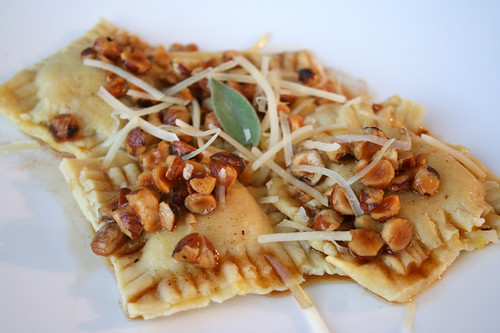
Butternut Squash, Sage and Goat Cheese Ravioli with Hazelnut Brown-Butter Sauce (Gluten-Free)
I have been wanting to attempt to make fresh gluten-free pasta for a while, but I didn’t even know where to begin. What types of flours to use, what type of pasta should I make, could I make it without a pasta machine or attachment, etc. After I got my copy of the book “Gluten-Free Girl and the Chef: A Love Story with 100 Tempting Recipes“, one of the first recipes that caught my eye was for fresh gluten-free pasta. Their directions include how to cut the pasta by hand and even how to make ravioli. The recipe had relatively few ingredients and the instructions seemed easy enough, so I decided making fresh ravioli would be my first attempt at making pasta. I also had a beautiful butternut squash that I wanted to make some type of filling out of so I went a variation of a recipe that I had saved from Gourmet Magazine from many years ago.
I cannot even begin to describe how amazing it was to eat fresh pasta, that I made myself, by hand. It was tender and the texture was exactly as it should be. Being that I have never made fresh pasta, I had this fear I would spend the time making it, stuffing and sealing each ravioli and then it would fall apart the minute it hit the boiling water. This didn’t happen. They went in, cooked through beautifully, rose to the top of the water and when I took them out to drain, I knew immediately that they would be delicious. They looked like little clouds.
The butternut squash goat cheese filling was so incredible that I couldn’t help but eat some as I was filling the ravioli. The fresh sage with the roasted squash is truly what Autumn tastes like and the creaminess from the goat cheese was rich but not too heavy. Lucky for me, the squash I used was rather large and there was a decent amount of the filling leftover. It was great on its own for lunch the following day. The hazelnut brown-butter sauce is decadent and had a lovely sweetness to it. I hadn’t had brown butter in a long time, I forgot what a great nutty flavor it has. Though it doesn’t look like much on a large dinner plate, you really can only eat about 4 of these ravioli and with a small salad to start the meal, it is a perfectly filling meal. Certainly if you are not gluten-intolerant and don’t wish to make fresh pasta, you could use store-bought won ton wrappers and make a quick ravioli the same way.
It should be noted, that since I have a scale in my kitchen I decided to weigh my flours as opposed to measuring. This is something I rarely do, but I decided I should really start doing it more. I have read that it is important when baking and cooking with flours and probably even more so with gluten-free cooking as the ratio of flours is so important to the final outcome. I most definitely plan on making ravioli often this fall and winter and experimenting with lots different fillings. Now I can’t wait to get the pasta attachment for my KitchenAid mixer so I can make other shapes with this pasta recipe, too.
Butternut Squash, Sage and Goat Cheese Ravioli with Hazelnut Brown-Butter Sauce
serves 4Fresh Gluten-Free Pasta
via Gluten-Free Girl and the Chef2/3 cup (70g) corn flour
1/2 cup (70g) quinoa flour
1/2 cup (60g) potato starch
2 teaspoons xanthan gum
1 teaspoon guar gum
1 teaspoon fine sea salt
2 large eggs (I prefer to use fresh brown eggs from Painted Meadows Farms)
4 egg yolks from large eggsEgg Wash
1 egg yolk
1 tablespoon of milk, half and half or cream
Whisk togetherButternut Squash, Goat Cheese filling
a 2-pound butternut squash, halved lengthwise and seeded
1 medium onion, chopped (about 1 1/2 cups)
1 tablespoon fresh sage, chopped finely
1 tablespoon unsalted butter
1 garlic clove, minced
4 ounces crumbled goat cheese, grated
1/2 cup Parmesan Reggiano cheese, gratedHazelnut Brown-Butter Sauce
1 stick (1/2 cup) unsalted butter
1/3 cup hazelnuts,toasted lightly and skinned and chopped coarse
1 teaspoon fresh sage, finely choppedMake the filling. Put squash halves, flesh sides down, a baking sheet and roast in middle of oven 30 minutes, or until flesh is very tender. When squash is cool enough to handle, scoop out flesh into a bowl and discard skin. Mash squash with a fork until smooth.
While squash is roasting, in a skillet cook onion and sage in butter with salt and pepper to taste over moderate heat, stirring, 5 minutes, or until onion is golden brown. Stir in garlic and cook, stirring, 1 minute.
Cool onion mixture slightly and add to squash. Add goat cheese and parmesan reggiano and stir to combine well. Set aside while you make your pasta.
Make the sauce. In skillet cook butter with hazelnuts over moderate heat until butter begins to brown, about 3 minutes, and immediately remove from heat (nuts will continue to cook), add fresh sage. Season hazelnut butter with salt and pepper and keep warm, covered.
In a 6-quart kettle bring 5 quarts salted water to a gentle boil for ravioli.
Make the pasta. Sift the corn flour, quinoa flour, and potato starch into a large bowl. Add the xanthan gum, guar gum and salt, stir. Sift the entire mixture into the bowl of your stand mixer.
Put the eggs and egg yolks into the bowl of dry ingredients. Run the stand mixer on medium speed with a paddle attachment until the dough feels fully formed, about 3 minutes. The final dough should feel firm, yet still pliable, a bit like playdough.
If you are using a pasta machine, cut the ball of dough into quarters and roll each piece of dough to about 1/2 inch thickness. You can flour your surface and rolling-pin with potato starch to keep it from sticking. Run your dough through the machine, increasing the setting each time, until the dough is paper-thin and long. If the sheet start to break, it is thin enough.
If you are making your dough by hand, as I did, I cut the large ball into 8 pieces. Roll out each piece of dough as thin as you can. I didn’t have a very large work space and I was struggling a bit with my dough sticking, so next time I am going to work with even smaller pieces of dough.
Filling the ravioli. Cut the rolled out pasta into 2-inch square pieces. Dollop the filling in the middle of a square of pasta. Brush the edges with your egg wash. Place another pasta square on top and press down, crimping the edges with a fork.
Cook your ravioli. Add the ravioli in batches of about 5 at time, so as not to crowd them. Cook until the ravioli feels soft and pliable, about 4 to 5 minutes. Take one out of the water and test the edge with a fork, if it yields to the fork easily, it is ready to eat. Drain the ravioli.
Plate the ravioli on each plate and top with the warm hazelnut brown-butter sauce and a sprinkle of fresh Parmesan Reggiano cheese.
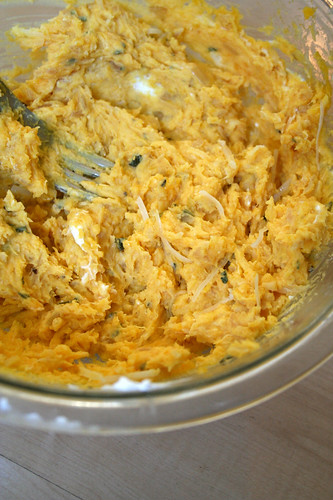
The filling is good enough to eat on it’s own. -
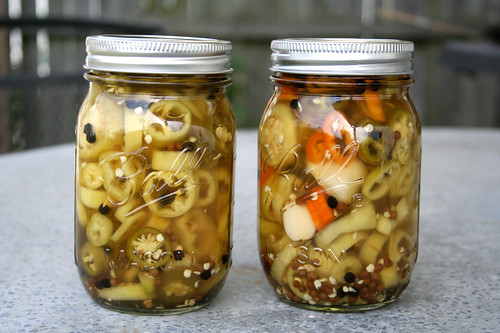
Pickled Hot Peppers
It’s nearing the end of the gardening season and one of my favorite things to do this time of year, is grab the last of the peppers from their plants and make a few quick jars of pickled hot peppers. They are great on salads, in eggs, Mexican dishes, etc. This recipe is for simple refrigerator pickled peppers as opposed to a preserved, canned version that can be stored on the shelf for many months. Honestly, I prefer making them this way, since I never make a large amount of them and I hate all the work involved in canning. Besides, these don’t last long in our house anyway. Pickled peppers like this are good for quite a few weeks, under refrigeration. If you would like them to last longer, follow these canning instructions and guidelines. Use can use this same brine mixture to pickle other vegetables like carrots, cauliflower, beets, fennel, green beans and so much more.
Pickled Hot Peppers
Adapted from David Lebovitz which was adapted from Michael Symon’s Live to Cook1 pound fresh hot peppers, washed (I used a combination of banana, hungarian wax and jalapeño peppers)
2 1/2 cups water
2 1/2 cups white distilled vinegar
3 tablespoons raw cane sugar
3 tablespoons coarse kosher salt
2 bay leaves
2 tablespoons whole coriander seeds
4 cloves garlic, peeled
2 tablespoons black peppercorns1. You can leave the peppers whole if you’d like, just stab each pepper a few times, or you can slice them in rings, which I prefer. I just remove the tops and slice them into thin rings. I leave the seeds in, as both Mark and I love spicy. Place them in a large glass preserving jar or two smaller jars.
2. In a non-reactive saucepan, bring the other ingredients to a boil, then reduce the heat and simmer for five minutes.
3. Remove from heat and pour the brine over the peppers. Place the lid on the jar and let cool. Once cool, refrigerate for at least a week before using, if possible. (You can use them sooner, but it is well worth the wait to let them sit)
-
Apple, Gruyère and Sage Muffins (Gluten-Free)
I would LOVE to take credit for this amazing recipe and all of it’s tastiness. But, I cannot. I simply saw the recipe, knew they would be amazing and made them. Now I am sharing it with you because you really need to make them yourself. Someone recently told me about Cannelle Et Vanille, a lovely food blog filled with some of the most beautiful photography I have ever seen. On top of all of that, the recipes are all gluten-free :swoon:!
I had been wanting to make some type of apple muffin or bread ever since we had gone apple picking last weekend, so when I came across this recipe, I knew it was perfect. Let’s be honest, apples and cheese together are definitely drool-worthy. I am a big fan of savory for breakfast instead of overly sweet, so these have been the perfect morning meal for me the last few days. I used a really nice aged Gruyère that brings a nice earthy flavor to these muffins that are a bit sweet, a bit salty and perfectly moist. The nice thing about this recipe is you could also make it in loaf form instead of muffins. Bake it at the same temperature at 40 minutes instead of 20.
Apple, Gruyère and Sage Muffins (Gluten-Free)
adapted from Canelle et Vanille
makes 12 muffins1 cup (150 grams) superfine brown rice flour
1/2 cup (75 grams)millet flour
2 tablespoons (30 grams) potato starch
2 tablespoons (20 grams) tapioca starch
1/3 cup (70 grams) cane sugar
1 tsp (8 grams) baking powder
1/2 tsp (3 grams) baking soda
1/2 tsp (5 grams) salt
1/4 tsp xanthan gum
1 tablespoons fresh sage, finely chopped
1 cup (55 grams) shredded Gruyère
1 egg
1 cup (250 ml) buttermilk
1/4 cup (55 ml) olive oil
2 apples, peeled and small diced
Extra shredded Gruyère for toppingPreheat over to 400ºF. Grease your muffin pan. In a large bowl, whisk together the first 11 ingredients. In a small bowl, whisk together the egg, buttermilk and olive oil. Add the wet ingredients to the dry and mix until combined. Fold in the diced apples.
Scoop batter into mold, sprinkle a bit of shredded Gruyère on each muffin. Bake for 20 minutes or until golden and firm to the touch. A wooden pick inserted into the center should emerge clean.
