Posts by Beth @ Tasty Yummies

  1. Strawberry Rhubarb Ice Cream

    Strawberry Rhubarb Ice Cream

    If the flavor combination of strawberries and rhubarb together isn’t the taste of spring, I don’t know what is. Our friend Letta was passing through Buffalo last week on a road trip she was taking from Minneapolis, so when we found out she would be staying with us for a night before we left for NYC, I really had wanted to make a whole meal for her, but I just didn’t have the time to pull it all together with everything we had going on and us leaving the next day for New York. Regardless though, I knew I had to make some ice cream for her. We met Letta about 6 years ago through the gigposters and screen printing world and we’ve managed to stay in contact all these years. She was one of the people I spoke at length with when I decided to start this blog, she helped me narrow down my blog name and concept and she’s just an all around awesome friend, who’s always awesome to chat with. Letta reads my blog and tries my recipes, but I am pretty sure my ice cream recipes make her the happiest, so I let her pick the flavor and she went with strawberry rhubarb. I decided I wanted to get as many of the ingredients locally and I was lucky enough to finally squeeze some time in to hit the farmers market a few days before she arrived. It’s still pretty early in the season, so the pickens were slim, but I was just happy to be there and see fresh, local food.

    It was a bit too early for strawberries here, so I got some organic strawberries from Wegman’s along with some organic half and half and heavy cream, otherwise I grabbed the rhubarb and eggs from the farmers market. I searched around for a good custard based ice cream recipe that I could modify a bit and make my own. I ended up going with a bit more half and half then heavy cream since I was able to buy them packaged in the perfect amounts. You could also use milk in place of the half and half or any other proportional variation that you prefer. I also find that adding in a bit of vodka, or other liquor, tends to brighten the flavors a bit and keep the ice cream from getting insanely hard once frozen. Vodka really doesn’t produce any specific taste, but you could certainly play around with something that does. You could also add a teaspoon or two of vanilla.

    This ice cream is so beautifully smooth and creamy, a subtle fruitiness from the strawberry with a bit of tartness from the rhubarb. And as Letta put it, “I found that it had this amazing almost marshmallow flavor to it, under the standard expected tartness from the rhubarb and sweetness from the strawberry. ” Mark was not only excited about the ice cream, but maybe even more so about the leftovers we had for when we got home from NYC.

    Nothing makes me happier than making something for friends and family that I can see makes them happy, there really is nothing better than spending time with someone, catching up and enjoying some delicious food made with love.

    Strawberry Rhubarb Ice Cream

    Strawberry Rhubarb Ice Cream 
    Adapted from David Lebovitz’s ‘The Perfect Scoop’ via innBrooklyn

    4-6 stalks fresh rhubarb
    1 cup organic raw sugar, divided in half
    1 pint organic strawberries
    2 cups of organic half-and-half
    1 cup organic heavy cream
    4 large brown egg yolks, from local pasture raised chickens
    1-2 tablespoons vodka

    Cut off the leaves, ends, etc of the rhubarb and cut into 1/2″ pieces, put in a medium saucepan, add in 1 cup of water and 1/2 cup of raw sugar, simmer for about 5-8 minutes until tender, then drain.

    Place the hulled and washed strawberries in a small bowl and sprinkle with 1/2 cup of sugar, mash slightly w/ fork and leave at room temperature for about 1 hour.

    Puree the rhubarb and strawberry together in blender until smooth and combined.

    Warm the half-and-half  in a medium saucepan. Pour the cream into a large bowl and set a mesh strainer over the top.

    In a separate medium bowl, whisk together the egg yolks. Slowly pour the warm half-and-half into the egg yolks, whisking constantly, then scrape the warmed egg yolks back into the saucepan.

    Stir the mixture constantly over medium heat with a heatproof spatula, scraping the bottom as you stir, until the mixture thickens and coats the spatula. Pour the custard through the strainer and stir it into the cream. Mix in the fruit puree, stirring until cool over an ice bath.

    Chill thoroughly in the refrigerator and churn according to your ice-cream maker’s directions.

  2. Creamy Asparagus, Potato and Leek Soup (Vegan)

    Creamy Asparagus, Potato and Leek Soup

    We just got back from a week-long vacation (yes, an actual vacation, no working, just vacation) on South Padre Island in the Gulf of Mexico. We spent the week on the beach, enjoying each other’s company, celebrating our 4-year wedding anniversary and just relaxing. It was much-needed and absolutely perfect. After a long, busy and very cold winter we both needed some time to do nothing and we definitely needed the sunshine and hot temps. It was also nice to enjoy some summer-esque cocktails and meals, too. There really is nothing like eating fresh gulf shrimp at a beach bar that overlooks the beautiful, crystal blue gulf; cocktail in hand, slathered in sunscreen, wearing a sundress and sandals – all with the person you love most. I am already missing and craving that feeling. However, like many good things, the trip had to come to an end and we had to come back home to life and all of the craziness. Unfortunately, this also meant coming home to cool, almost autumn-like weather. You’d never guess it by looking out the window or feeling the cold breeze, that it is actually spring here in Buffalo.

    The temperatures have been in the 40s and 50s and rainy since we got home and I am not sure the sun has shown it’s face once. Strangely, all I have wanted since we got off the plane was hot soup, but I really wanted to take advantage of the beautiful spring produce showing up at the market. I decided to make a big pot of this delicious and creamy spring soup with a gorgeous spring salad on the side. I actually doubled this recipe since I knew life would be a bit crazy (and cold and rainy) this week and it would be perfect for leftovers. This soup was exactly what my body and mind both wanted, hot and creamy, light, healthy and green! It is hard to believe this soup is naturally vegan, it is so creamy, achieved from the potatoes instead of dairy. Topped with spicy dried red pepper flakes, bright green chives from our yard and a drizzle of some really good olive oil, it was absolute nutrient-filled perfection.

    We leave for NYC next week for work, hopefully before we go I will both get to the farmers market and the weather will warm up a bit so I can start posting even more spring dishes. Do you have any favorite spring recipes?

    Creamy Asparagus, Potato and Leek Soup
    serves 6

    2 tablespoons olive oil
    1 large Vidalia onion, diced
    1 large leek, rinsed very well, slice thinly white and light green parts only*
    1 pound organic asparagus, ends trimmed and cut into 1-2 inch pieces
    1 pound organic russet potatoes, peeled and diced into 1-inch cubes
    4-5 cups low sodium organic vegetable broth or low sodium organic chicken broth
    1 teaspoon kosher salt
    2 teaspoons fresh thyme, chopped
    2 teaspoons fresh marjoram, chopped
    1 teaspoon crushed red pepper flakes, plus more for serving
    Bunch of fresh chives, sliced thin
    Additional high quality olive oil to drizzle over top
    If you wish the soup to be even creamier you can add in 1/4 cup of greek yogurt (or half and half or heavy cream) just before pureeing

    In a large soup pot, heat the olive oil over low heat. Add the onions and leeks and cook, covered, until they are soft and translucent, about 8 minutes. Add in the asparagus and potatoes and cook another 5-8 minutes. Add the broth, herbs and crushed red pepper. Simmer until the potatoes and asparagus are soft, about 15 minutes. If you notice that there isn’t enough liquid you can add water to the broth so it doesn’t get too thick when you puree it.

    Ladle the soup into a blender and puree until smooth (be sure not to blend too much soup at once and put a towel over the lid when you are blending so the hot soup doesn’t explode out). Add the pureed soup to a large bowl. Continue blending the whole pot of soup in batches, until it has all been blended. Add the soup back to your pot, season with salt and freshly ground black pepper to taste, serve immediately topped with a sprinkle of both red pepper flakes and freshly chopped chives. Drizzle with a high-quality olive oil.

    * a quick note on cleaning leeks: leeks tend to have a lot of dirt and grit in them. If you aren’t careful when cleaning them, you may think they are totally clean, start cooking with them and find your entire dish has a nasty grittiness to it. This can ruin a dish. After trimming off the ends (called the beards) and the dark green tops (save these for stocks). You can run them under cold water at this point, or even better, you can submerge the leeks in a large pot of cold water. Swirl them around to really remove all the grit and dirt. Drain well and then cut.

  3. Penne with Eggplant and Pine Nut Crunch (Gluten-free)

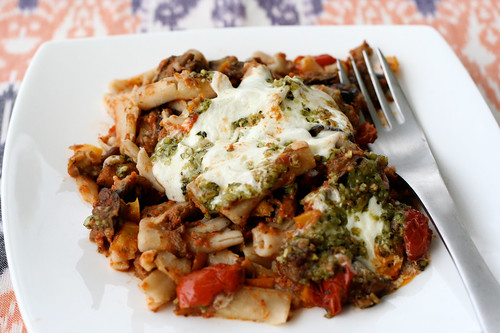
    Penne with Eggplant and Pine Nut Crunch

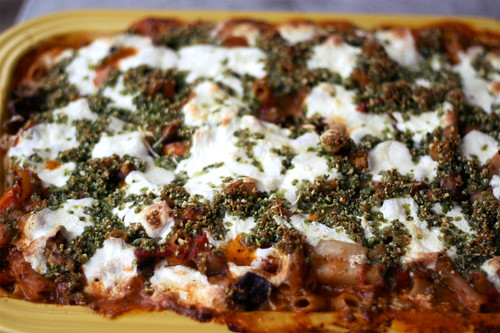
    It  is no secret that I love pasta. More than your regular ‘ol pasta dish made on the stove top, what I love most is a good and hearty, baked pasta dish. There is something so comforting about baked pasta, I am sure it has a bit to do with the extra cheesiness (aka fat and calories), but either way it’s always good. This particular recipe really caught my eye because though it’s traditional in concept, the ingredients are a bit unique. Although I know eggplant isn’t in season, ironically throughout the winter when I looked for it, it either wasn’t in stock or didn’t look very good. This past grocery trip was the first time I saw it there and looking good, in a while.

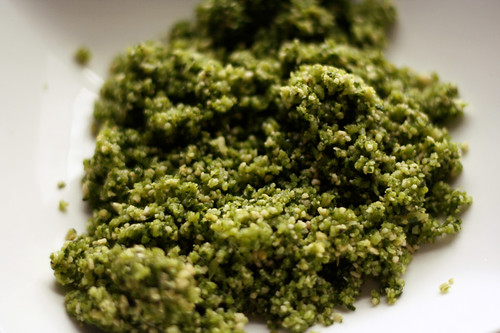
    Loaded with veggies (yes, this does offset the cheese and heavy cream) and full of flavor, this baked pasta really is a meal all in itself. The fresh basil brings a wonderful bright taste to the dish and the fresh mozzarella is creamy and melty but not too over the top. The original recipe called for a whole pound of cheese, but as I was adding the cubes of cheese, I realized that by the time I got to 3/4 of a pound it was more than enough. The pine nut crunch on top is quite the finishing move, it basically tastes like pesto without the oil. It was so good and crunchy, that I think next time I make this I will actually make a bit more of that.

    As stated in the recipe below, if you are concerned about fat and calories from the heavy cream (though I don’t think you should be, each serving will have barely 2 tablespoons), you could either go with half and half or whole milk or just hit a few extra yoga classes and enjoy your life. I made this over a weekend for nice dinner and we enjoyed for meals throughout the week, I love dishes like that.

    Penne with Eggplant and Pine Nut Crunch

    Penne with Eggplant and Pine Nut Crunch

    Penne with Eggplant and Pine Nut Crunch

    Penne with Eggplant and Pine Nut Crunch (Gluten-free)
    Adapted from Bon Appétit Magazine, March 2011
    Serves 8

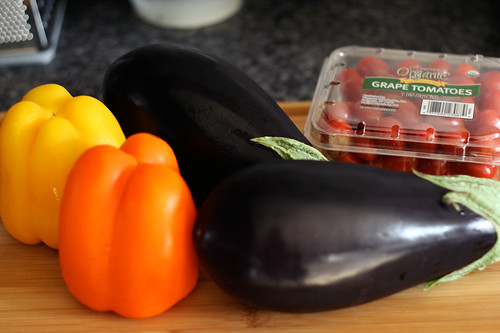
    1 unpeeled large (or 2 small) eggplant (1 1/2 to 1 3/4 pounds), cut into 1/2-inch cubes
    2 medium yellow bell peppers, cut into 1/2-inch squares (I used one yellow and one orange)
    2 cups organic grape tomatoes
    3 large garlic cloves, divided
    1/3 cup olive oil
    2 cups (firmly packed) fresh basil leaves, divided
    1 cup freshly grated Parmesan cheese, divided
    1/4 cup pine nuts
    1 28-ounce can organic whole tomatoes in juice
    1 cup organic heavy whipping cream (you can use less, use half and half or milk if you are concerned about fat and calories)
    1 pound organic gluten-free brown rice pasta
    3/4 pound fresh mozzarella cheese, cut into 1/2-inch cubes

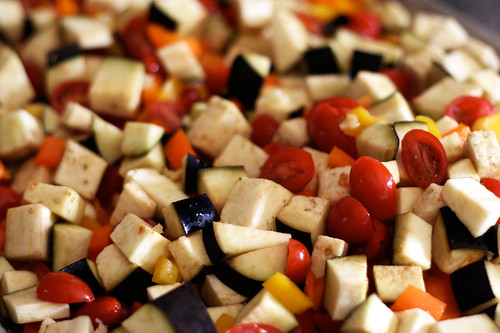
    Preheat oven to 425°F. Place eggplant and peppers on a large rimmed baking sheet. Cut tomatoes in half lengthwise; add to sheet. Using garlic press, squeeze 1 garlic clove onto vegetables. Drizzle vegetables with olive oil; toss. Sprinkle with salt and pepper. Roast vegetables until tender, stirring often, 35 to 45 minutes.

    Combine 2/3 cup basil, 1/2 cup Parmesan, pine nuts, and 1 garlic clove in the food processor. Blend until crumbly. Season topping with salt and set aside.
    Blend tomatoes with juice, cream, 1 1/3 cups basil, and 1 garlic clove in processor until smooth. Season sauce with salt and pepper.

    Cook pasta in pot of boiling salted water according to package directions. Only cook until just tender but still firm to bite, stirring occasionally; drain. Return to pot or a large bowl. Toss with vegetables, sauce, and 1/2 cup Parmesan. Transfer to 13x9x2-inch baking dish. Sprinkle with fresh mozzarella and pine nut topping.
    Bake pasta until heated through, 25 to 35 minutes. Let stand 10 minutes and serve.

    Penne with Eggplant and Pine Nut Crunch

  4. How-to Make Homemade Raw Almond Milk (Vegan)

    Homemade Raw Almond Milk

    Homemade Raw Almond Milk (Vegan)

    I have been meaning to make homemade almond milk for sometime now. I absolutely love almond milk and tend to buy it often. The thing I really dislike about it (as with most foods from the grocery store) is that a lot of times it has added ingredients that really just don’t seem to need to be in there, even the organic stuff. Though that tends to be the story of most of the food products people buy. It’s all so over-processed and filled with unnatural junk. These are all reasons why I’ve changed my lifestyle and rarely consume store-bought processed foods, I try to make everything I can myself and eat as many fresh foods as possible.

    I came across a few really great recipes and finally took the time to experiment and make my own homemade almond milk and now that I have, I will never buy it again. This recipe is simple, fast (besides soaking time) and it requires only a few ingredients. It is creamy, sweet, nutty, rich and full of luscious nutrients, plus it is great for those on dairy-free or raw diets and vegans. It’s great as is, in smoothies, served over your favorite granola or cereal, heated up with chai spices or chocolate, etc.

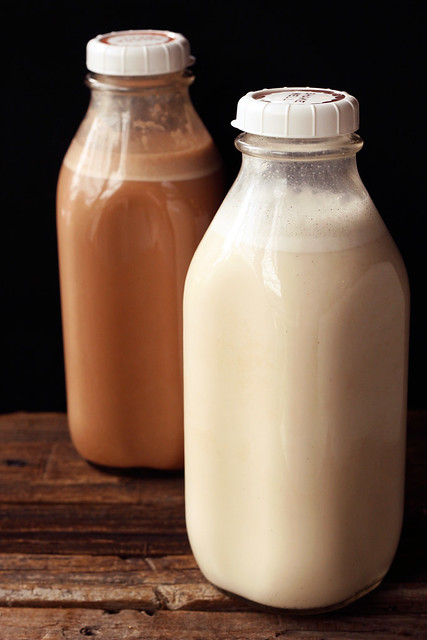
    In addition to all these other great things, it’s also much cheaper than the almond milk you buy at the store and it isn’t loaded with all that scary junk like carrageenan, gums, etc. Bonus if you are into chocolate milk – try adding 1-2 tablespoons of raw cacao powder or unsweetened baking cocoa when blending.


    Homemade Raw Chocolate Almond Milk

    [print_this]How-to Make Homemade Raw Almond Milk

    • 1 cup whole raw organic almonds (look for unpasteurized if you can)
    • 4-6 cups water (you can use more depending on how light you want it, I used about 5 cups)
    • 1 teaspoon vanilla or 1 vanilla bean split open
    • 2-4 tablespoons local raw honey* (you could also use maple syrup, dates, stevia or whatever sweetener you prefer)
    • A dash of sea salt (I prefer Pink Himalayan Salt)

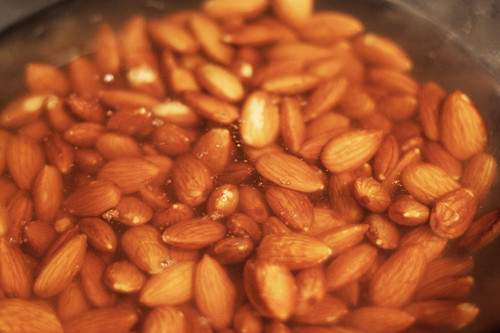
    Soak almonds and vanilla bean (if you are using one) for at least 6 hours, preferably overnight.
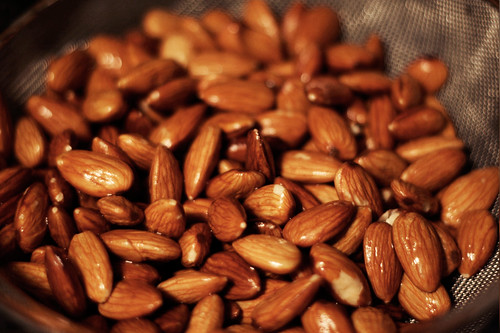
    Discard soaking water and rinse almonds and the vanilla bean.

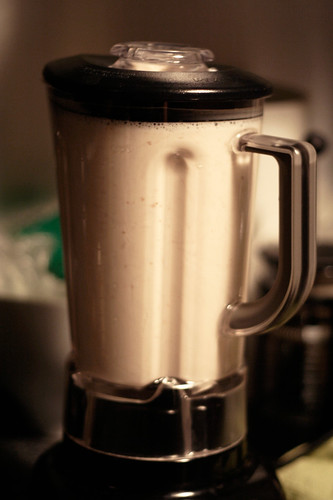
    Place soaked almonds, the whole soaked vanilla bean chopped up or vanilla extract, honey (or other sweetener), a dash of sea salt and 4-6 cups of water in a blender. Cover and blend on high for 1-2 minutes. It will be milky and have a bit of foam on the top.

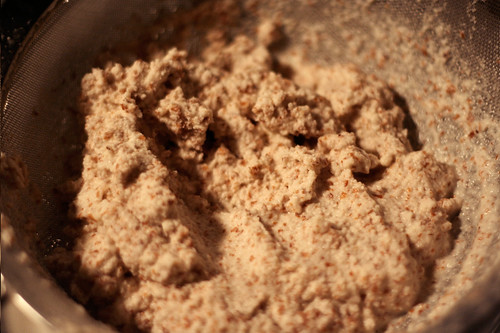
    Strain milk through a nut bag, doubled up cheesecloth or a fine mesh strainer. You will then be left with almond pulp that can be saved and used for spreads, butter, crackers, cookies, crusts, etc. You can also freeze the almond pulp for later use.

    Serve or store in a covered jar or pitcher in the refrigerator, it’ll be good for about 5 days.

    Try adding 1 tablespoon of raw cacao powder or unsweetened baking cocoa when blending for delicious chocolate almond milk!!

    * You can also leave out the sweetener if you wish to have it be unsweetened
    [/print_this]

    EDIT 9/2013 – I realized I was using far too many almonds than what was needed so I changed the recipe from 2 cups of almonds to 1. Still just as good and way cheaper to make!

    Homemade Almond Milk

    Homemade Almond Milk

    Homemade Almond Milk

    Homemade Almond Milk

    Almond Pulp from Homemade Raw Almond Milk

  5. Thai Chicken Soup

    Thai Chicken Soup

    I absolutely love Thai food! The layers of flavors and the spices are so amazing and there are so many naturally gluten-free options. One of my favorite things are the different soups. The flavors are always so distinct in Thai soups from the curry pastes, lemongrass, ginger, cilantro, etc. I have wanted to try making a Thai coconut milk soup at home with all the fresh herbs and spices. With the lingering chilly weather, last week was the perfect time. The original recipe I found was a bit basic, so I added in mushrooms, fresh ginger, fresh lemongrass and jarred kaffir lime leaves (which I was very excited to finally find), I also went with a light coconut milk instead of the full fat version and I used more of it, I find it is still quite creamy and it has a bit less fat and calories. I also added a bit more broth, curry paste, fish sauce and noodles so I would have more leftovers for lunches and dinners on some of the busy nights we have this week. Don’t worry if you can’t find lemongrass or the kaffir lime leaves, the soup will still be really great even without them. The curry paste really has a lot of flavor. I just find that adding those extra fresh ingredients makes this soup more authentic. I know from eating a lot of Thai food that lemongrass can be a bit annoying to eat, since they are a bit tough to chew, so I decided to cut the stalk in large pieces so that I could easily pull them out just before serving.

    Since we normally buy whole chickens from the farm we get all of our meat from, I just grabbed two organic chicken breasts from Wegmans, I honestly can’t tell you the last time I bought meat from the grocery store. Thankfully Wegmans has a great selection of organic and grass-fed meats, though it just isn’t the same as getting it from a local farm. You could also roast a whole chicken or buy a rotisserie chicken and shred some of the cooked chicken and add it in to the soup at the end. This soup could also easily be made vegetarian/vegan with vegetable broth and by skipping the chicken or you could make a seafood version and add shrimp or scallops.

    Serve the soup with lime wedges and maybe even a little Sriracha if you want a bit more heat. Enjoy, this soup really is incredible.

    Thai Chicken Soup
    serves 6
    loosely adapted from Food Network Magazine

    1 tablespoon olive oil
    1/2 lb of sliced mushrooms (I used baby bellas)
    1 onion, thinly sliced
    2 cloves garlic, minced
    1 tablespoon fresh ginger, peeled and chopped finely
    1 stalk fresh lemongrass, cut into 1-inch pieces
    4 tablespoons green curry paste (If you don’t like spicy, start with 2 and go from there. It seems some curry pastes are spicier than others)
    8 cups low-sodium organic chicken broth
    2 15-ounce cans organic lite coconut milk
    2 tablespoons fish sauce, plus more to taste
    2 red bell peppers, thinly sliced
    6 ounces thin rice noodles, broken into pieces
    2 small skinless, boneless chicken breasts preferably local and hormone and antibiotic free (about 1 pound), very thinly sliced crosswise
    1 tablespoon fresh lime juice, plus more to taste
    1 tablespoon kaffir lime leaves (I used were jarred, you can also find them fresh or frozen, use about 3 or 4 leaves)
    1 cup roughly chopped fresh cilantro

    Heat the oil in a large pot over medium-high heat. Add the mushrooms and cook, stirring often until they begin to soften and get a bit brown, about 5-7 minutes. Remove the mushrooms and set aside. Add a bit more oil if you need it and add the onion to the pot over medium-high heat and cook, stirring occasionally, until softened and lightly browned, about 8 minutes. Add the garlic, ginger, lemongrass and curry paste, cook, stirring, 1 to 2 minutes. Add the chicken broth, coconut milk and fish sauce; cover and bring to a boil.

    Add the mushrooms, bell peppers and noodles and simmer, uncovered, until the noodles are al dente, about 3 minutes. Add the chicken and simmer until just cooked through, about 3-5 more minutes. Stir in the lime juice, kaffir lime leaves and cilantro. Remove the chunks of lemongrass just before serving. Add more fish sauce and lime juice, if desired.

  6. Fried Black Rice with Ginger Tofu and Baby Arugula

    Fried Black Rice With Ginger Tofu and Baby Arugula

    I came across this recipe in a recent issue of Whole Living and couldn’t wait to make it. I love black rice so much, it is full of flavor. I always keep a pound or two of Black Japonica in the pantry, a unique field blend of medium grain black and short grain mahogany rice. It’s so nutty and sweet, perfect in many different dishes.

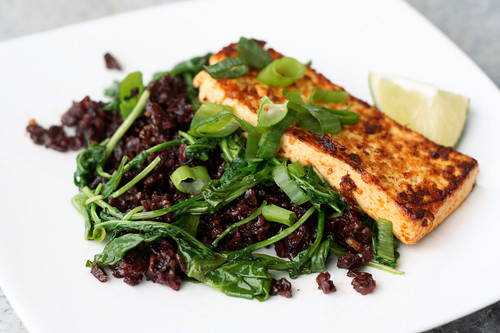
    This recipe is so healthy and fresh, simple to make and full of so many flavors. The original recipe called for spinach but since I still had some baby arugula on hand, I figured that would work just as well. I was pleasantly surprised how much more delicious the rice was after frying it up in the pan, it grabbed all the little bits of ginger and garlic and the Sriracha left in the pan from the tofu. The tofu had a nice crisp outside and it was full of flavor from the ginger and Sriracha and the arugula brought a beautiful peppery crunch. I hope to plan spinach and/or arugula in our garden this year so I have a feeling we’ll be eating this dish a lot this summer.

    Fried Black Rice With Ginger Tofu and Baby Arugula
    Adapted from Whole Living, March 2011
    Serves 4-6

    3/4 cup black rice (I used a blend of black and mahogany rices)
    1 1/2 cups water
    1 bunch organic baby arugula, rinsed and roughly chopped (spinach will work here, too)
    3 tablespoons olive oil
    2 cloves garlic, minced
    3 tablespoons finely chopped fresh ginger
    3 scallions, thinly sliced, white and green parts separated
    1 pound extra-firm tofu, cut into six 1/2-inch-thick rectangles
    2 tablespoons Sriracha sauce
    Lime wedges, for serving

    Bring rice and water to a boil in a small saucepan. Reduce to a simmer, cover, and cook until rice is tender and liquid is absorbed, about 45 minutes. Let stand 5 minutes. Fluff with a fork and set aside.

    Steam baby arugula, covered, in 1 tablespoon oil over medium-high heat for 2 minutes; set aside. Saute garlic, ginger, and scallion whites in remaining oil until fragrant, about 1 minute. Add tofu and Sriracha and cook until tofu is golden, about 6 minutes per side. Remove and set aside.

    Add rice to skillet and cook over medium-high heat until crisp, about 2 minutes. Serve with baby arugula and tofu. Garnish with scallion greens and serve with lime. Add more Sriracha when serving, if you like.

  7. Gluten-Free Banana Bread

    Gluten-Free Banana Bread

    For some reason the smell of overripe bananas drives me crazy. There is no specific reason for it, it’s just so strong and obnoxious to me. Any time they are on the counter and past the point of eating on their own, I always think ‘banana bread’. The perfect use for those little stinkers. This is a very simple gluten-free recipe that requires very little thought and only a  few ingredients. If you hate measuring and buying multiple flours, Bob’s Red Mill makes a great all-purpose gluten-free flour. Of course, you can always create your own all-purpose flour mix, as well.

    The great thing about this recipe is you can always change it up, you can add dried fruits like raisins, cranberries or cherries, chopped nuts, chocolate chips, etc. You can even come up with a sweet glaze to drizzle over the top and make this a delicious and simple dessert. This time around I kept it simple and just went with chopped pecans. I also have read you can substitute apple sauce for the oil in this recipe, I will have to give it a try to see how it works out.

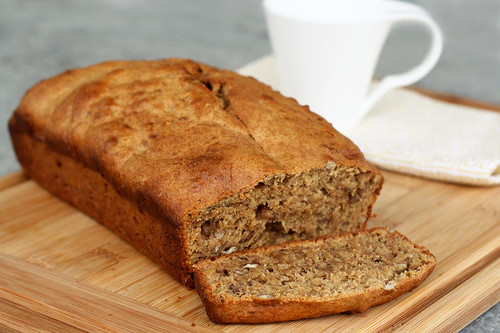
    This bread is just like the “real thing”, moist and light and it browns nicely on the outside. It has a nice sweetness and has the perfect amount of banana flavor without overpowering. It is equally as nice for breakfast toasted and topped with a smidge of butter alongside a cup of your favorite tea as it is served as dessert with a bit of cream cheese spread over it (I have fallen in love with Nancy’s Organic Cultured Cream Cheese).

    Gluten-Free Banana Bread
    adapted from Bob’s Red Mill
    serves 10

    1/3 cup grapeseed oil
    2/3 cup organic dark brown sugar, packed
    2 large local farm-fresh brown eggs
    1 teaspoon vanilla extract
    1 3/4 cups all-purpose gluten-free flour
    2 teaspoons baking powder
    1 1/4 teaspoons cinnamon
    1 teaspoon fresh nutmeg
    1 teaspoon xanthan gum
    1/2 teaspoon salt
    1 1/2 cups mashed ripe organic bananas (I used 4 small bananas)
    1/2 cup chopped pecans or walnuts

    Other ingredients you could add:
    chocolate chips
    raisins
    dried cranberries
    blueberries
    peanut butter chips
    coconut

    Preheat oven to 350º F.

    Use a bit of grapeseed oil to grease a 9×5-inch non-stick loaf pan. You can also make smaller loaves, use three 5×3 inch loaf pans.

    Cream together oil, sugar, eggs, and vanilla in large bowl. Add flour, xanthan gum, salt, baking powder, cinnamon and nutmeg to egg mixture, alternating with bananas.

    Beat until smooth. Stir in nuts and any other add-ins. Transfer to pan(s).

    Bake 9×5″ loaf for 1 hour, 5×3″ loaves for 45 minutes. Make sure a cake tester or knife comes out clean.

  8. Baked Sweet Potato Chips

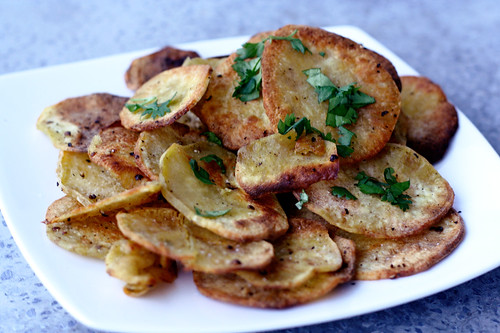
    Baked Sweet Potato Chips

    This is a super easy and healthy treat you can make at home that is perfect for a mid-day snack or for the road trip munchies. I made these for our drive to NYC a couple of weekends ago, they were perfect for the car.

    You can certainly leave the peels on, though the potatoes that I had on-hand were looking a bit rough, so I decided to peel them. I used organic white sweet potatoes but any sweet potato or regular potato would work just as well. You can have fun with spices, oils and other flavors. I kept it simple with just salt and pepper and a good olive oil and topped them with a squeeze of lime and a bit of chopped cilantro. You could add chili powder, cinnamon or any other spice or herb you desire. I made these again today, for a mid-afternoon snack, and this time I used applewood smoked sea salt! WOW, it was incredible.

    Once you get into making your own chips, you’ll really laugh at the thought of eating them out of a bag. These are so much more filling and have a great flavor. You will still have the great crunch but without the insane amount of fat from frying and all the chemicals and preservatives.

    Once thing I recommend highly when it comes to making your own chips at home is to slice the potatoes (or whatever you are making the chips from) with a mandoline slicer. This ensures a consistent thickness on all the chips so they will cook evenly, plus it is incredibly easy to use. You can go-it by hand with a sharp knife and a steady hand, but it isn’t easy.

    Baked Sweet Potato Chips
    serves 4

    2 medium organic sweet potatoes, scrubbed well or peeled, sliced about 1/8 inch thick
    1 tablespoon olive oil
    1/2 teaspoon coarse sea salt
    1/2 teaspoon freshly ground black pepper

    lime wedges for serving
    fresh chopped cilantro for serving

    Preheat oven to 400º F.

    In a large bowl, add the potato slices, olive oil, salt and pepper. Toss gently to evenly coat.

    Place the potato slices on two rimmed baking pans, drizzle with olive oil and sprinkle with salt and pepper. Gently toss to coat evenly. Arrange in a single layer between the two pans.

    Bake uncovered for 20 to 25 minutes until the potato slices are golden brown, crisp and cooked thoroughly, turning a couple of times to crisp evenly. Sprinkle with a bit more salt and pepper a squeeze of lime juice and the chopped cilantro just before serving.

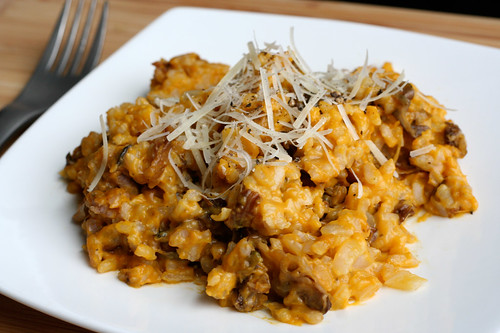
  9. Spring Mushroom Risotto with Leeks and Sweet Peas

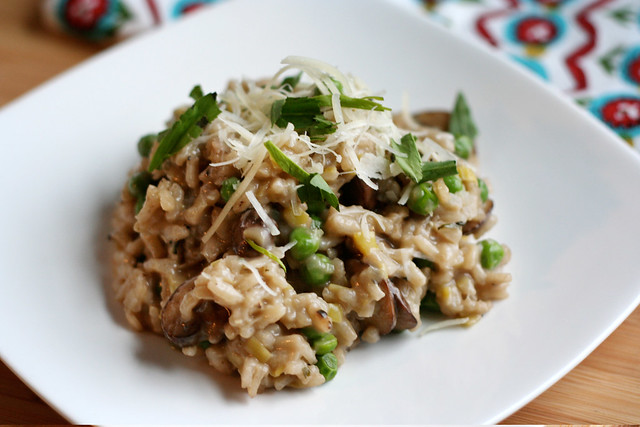
    Spring Mushroom Risotto with Leeks and Sweet Peas

    I am so ready for it to just be spring already. This chilly, dreary weather is getting a tad bit old and we’ve gotten a taste of the warm weather already, so I just wish it would stay. It was near 80º when we were in NYC last weekend and apparently it was in the 70s here in Buffalo at the same time. Today it is in the low 30s and it’s snowing again. Don’t get me wrong, I love the snow and the change of seasons, but this has been one of the longest and nastiest winters I can ever recall here.

    I guess since the weather isn’t cooperating the only thing to do is to bring the spring to our bellies via delicious spring inspired dishes like this one! Once again this risotto, like the pasta recipe I posted yesterday, was inspired by what looked best in the produce section when we went to the market. I had actually hoped to find fresh sweet peas, but I guess it is still a bit early, so I went with frozen organic sweet peas. You can certainly substitute fresh peas here, you’d just want to quickly blanch them first.

    This risotto is so creamy and satisfying it is hard to believe it is healthy. There is very little cheese and really since arborio rice creates such a creamy risotto, if you wanted to make this vegan you could simply leave out the cheese and it would still be incredible. The leeks bring a nice fresh but subtle onion flavor, the mushrooms a nice rustic earthy aroma and taste and the peas are a nice burst of brightness to finish it all off. The fresh tarragon was the perfect unique compliment to all of these flavors, bringing subtle scent and taste reminiscent of anise. You can play with adding in some white wine or vermouth as well as different cheeses, mascarpone or heavy cream, different herbs, lemon zest, etc. There are so many variations on classic risotto and you really can’t go wrong.

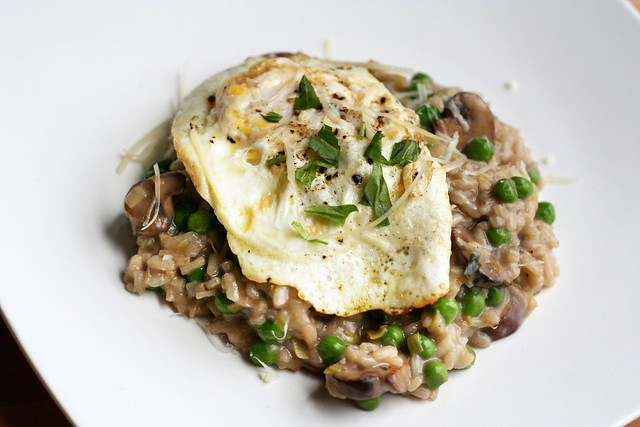
    I had a dozen local farm fresh eggs that I picked up and want to use while they are at their freshest so I decided to fry up an egg for each of us to serve on top of the risotto. I had never done this before, but I knew it would be incredible and I was right. Such a nice way to finish it off. The yolk was a tad runny and it was just perfect.

    Spring Mushroom Risotto with Leeks and Sweet Peas
    Spring Mushroom Risotto with Leeks and Sweet Peas
    serves 4-6

    5-6 cups of organic mushroom broth
    2 tablespoons organic olive oil
    1/2 lb sliced mushrooms, I used baby bellas
    2 leeks, rinsed very well, slice thinly white and green parts only*
    1 clove garlic, minced
    1 1/2 cups arborio rice
    1 1/2 cups frozen organic sweet peas (I would have preferred fresh, but they weren’t yet at the market)
    1 tablespoon fresh tarragon, chopped
    kosher salt
    freshly ground black pepper
    1/2 cup freshly grated Parmigiano-Reggiano

    Bring the broth to a simmer in a heavy medium saucepan. Keep the broth warm over very low heat.

    Heat 1 tablespoon olive oil in a large saucepan over medium-high heat. Add the sliced mushrooms and a sprinkle of salt, sauté until tender and beginning to brown, 3 to 4 minutes. Transfer to a bowl and set aside.

    Add the remaining tablespoon of oil to the pan over a medium-low heat. Add the leeks and garlic, sprinkle with salt. Sauté until the leeks are tender, about 5 minutes. Add the rice and increase the heat to medium. Stir until the edges begin to look transparent, careful not to brown the rice or leeks. Add the mushroom broth, 2 ladles at a time (or approximately 3/4 cup); stirring constantly and waiting for the stock to be absorbed before adding more. Always adding enough just to cover the rice. Continue stirring and adding broth, waiting for it to absorb and then adding more. Cook about halfway, which should be about 10-15 minutes. Stir in the sautéed mushrooms. Continue adding broth until the rice is tender but has a bit of a firm bite and the risotto is creamy, another 10-15 minutes. Add the frozen peas and fresh tarragon with just a few minutes remaining, stir to combine. The peas will cook very quickly. Once cooked, turn off the heat. Taste the risotto and salt and pepper to taste.

    Stir in approximately 1/4 cup of the parmigiano-reggiano cheese, reserving the remaining for serving. Transfer the risotto to a serving bowl, top with fresh ground black pepper and a pinch or two of freshly chopped tarragon. Serve with the remaining grated parmigiano-raggiano. This risotto is incredible with a fried farm-fresh egg served on top. If the yolk is just a tad bit runny, it is absolute perfection! Trust me, try it.

    * a quick note on cleaning leeks: leeks tend to have a lot of dirt and grit in them. If you aren’t careful when cleaning them, you may think they are totally clean, start cooking with them and find your entire dish has a nasty grittiness to it. This can ruin a dish After trimming off the ends (called the beards) and the dark green tops (save these for stocks). You can run them under cold water at this point, or even better, you can submerge the leeks in a large pot of cold water. Swirl them around to really remove all the grit and dirt. Drain well and then cut.

    Spring Mushroom Risotto with Leeks and Sweet Peas

    Oh and one last thing to mention, this is what was going on outside my kitchen window while I crafted up this beautiful spring dinner. Ironic, isn’t it?

    SaveSave

  10. Spicy Spring Pasta with Roasted Asparagus and Baby Arugula (Gluten-Free)

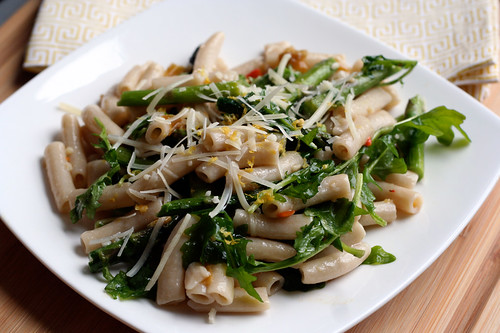
    Spicy Spring Pasta with Roasted Asparagus and Baby Arugula (Gluten-Free)

    Pasta is definitely my go-to comfort meal, it rarely disappoints. I almost always have a couple of pounds of dried gluten-free pasta in the pantry and enough ingredients to throw together a tasty and seasonal dish with it. Plus, I really love how little effort it takes. In the time it takes to preheat the oven and make a horrible processed frozen pizza, you can have a delicious main-course pasta made with fresh ingredients. With all the traveling we’ve had going on and how busy we’ve been I have been craving one of my homemade pasta creations, so last week after we got home from NYC and before we left again for Pittsburgh, I thought up this dish and threw it together for us.

    Besides the beautiful spring produce that is finally showing itself at the grocery store, what inspired this dish was a jar of hot pepper spread from Wegmans in my refrigerator. We always have it on-hand for things like sandwiches, soups, eggs, pizza etc. It has a mere 5 ingredients, all natural, and it’s the perfect condiment. It caught my eye the other day and I realized that I had never made a pasta dish with it. I decided to take a trip to the grocery store and let the fresh produce decide the rest. I was definitely craving a spring inspired dish! Though the choices are still limited and it isn’t all necessarily local, I was happy to see more green in the produce section. It feels like we are finally through the winter and onto brighter things, literally.

    The asparagus and baby arugula both jumped out at me in the produce section and I thought paired with the spicy peppers, a nice parmigiano-reggiano and some lemon, they would be perfect. Certainly skip the hot pepper spread if you don’t care for spicy or if you can’t find anything like it, or you can substitute it with a teaspoon or two of red pepper flakes. Have fun with it and always start out slow with the spicy ingredients if you don’t like the heat, you can always add more. This pasta just explodes with fresh flavors, the heat from the hot pepper spread brings a nice zing, but it’s not too overpowering, the subtle peppery crunch from baby arugula is fresh and welcomed after a long winter, along with the brightness from the lemon. It is a very light and healthy, but certainly satisfying, spring dinner. If you are looking for a nice vegan spring pasta dish, just leave off the cheese or substitute with your favorite cheese substitute, it will still be delicious.

    After a winter of root vegetables, frozen vegetables and just plain ‘blah’ produce, it really is nice to start seeing better fresh produce options again at the grocery store. The farmers market opens in less than 3 weeks (I am counting down the days) and shortly thereafter I will be starting our garden.

    Here’s to the spring, more green and a lot sunshine!! (FYI – as I type this, it is snowing)

    Spicy Spring Pasta with Roasted Asparagus and Baby Arugula (Gluten-Free)
    serves 4-6

    1 lb asparagus
    3 tablespoon organic olive oil
    kosher salt
    fresh ground black pepper
    1 lb organic gluten-free brown rice pasta (you can use any shape you’d like and certainly you can use regular pasta here, as well)
    2 cups organic baby arugula roughly chopped or torn
    2 cloves organic garlic, minced
    1 tablespoon hot pepper spread (I buy Wegmans brand, but you can also substitute 1 teaspoon of red pepper flakes or leave it out)
    1/2 cup freshly grated Parmigiano-Reggiano
    Lemon zest
    fresh lemon juice

    Preheat the oven to 400º F.

    Clean your asparagus and snap off the tough ends. Cut into 2-inch pieces and toss with 1 tablespoon olive oil, a sprinkle of kosher salt and fresh ground black pepper. Arrange in a single layer on a baking pan and place in the preheated oven. Roast for 15-25 minutes until tender, but still a bit crisp.

    Meanwhile, cook your pasta according to package directions. Once the pasta is cooked to al dente, reserve approximately 1/4 cup of the cooking liquid, drain the pasta and rinse in hot water. Place the rinsed pasta in a large serving bowl, immediately add the baby arugula and toss, so it begins to wilt. Then add the minced garlic, hot pepper spread (or red pepper flakes), 2 tablespoons of olive oil and as much cooking liquid as necessary to make the pasta a bit creamy. Toss carefully to combine all the ingredients, add more cooking liquid as needed. Once the asparagus is done, add this to the pasta along with most of the parmigiano-reggiano cheese, reserving a bit for serving. Squeeze a bit of lemon juice over the pasta, taste the pasta and salt and pepper to taste. Toss everything carefully one last time. Plate the pasta individually and top each serving with fresh lemon zest and the remaining cheese.

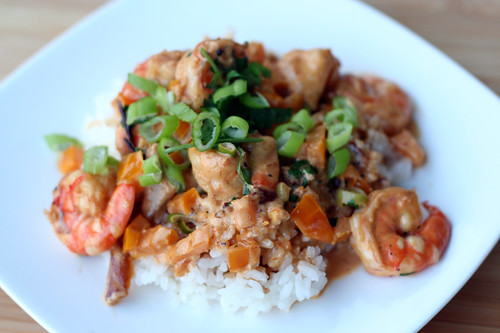
  11. Camarones en Crema De Chipotle (Shrimp in Chipotle Cream Sauce)

    Camarones en Crema De Chipotle (Shrimp in Chipotle Cream Sauce)

    As mentioned in my previous post, I fell in love with this dish while at Fonda San Miguel in Austin. It is a simple, but very delicious dish, full of smokey, spicy flavor. Though it is made with heavy cream, it is actually, surprisingly, very light. This is a very impressive dish that will ‘wow ‘your spouse or dinner guests and it can easily be made in about 15 minutes with little ingredients needed.

    After savoring each and every bite while at Fonda San Miguel, I feel like I had a fairly good idea on how to recreate the dish, I am sure there are some variations that could be taken but I feel like I got the general concept. If I remember correctly, there wasn’t bell pepper in the original, but I thought the color and slight crunch would be a nice addition. Additionally, I suppose if you are worried about fat or calories, you could go with half and half or just use half milk and half heavy cream or something like sour cream, etc. I personally feel that as long as you aren’t consuming heavy cream multiple times throughout the week, one meal with a bit of it, isn’t bad for you and certainly won’t tip the scale. Everything in moderation. The original was also made with chives instead of scallions, but I had scallions on-hand from a stir-fry I made last week and I sometimes prefer that bigger burst of flavor.

    I love the smokey heat from chipotles and a little really goes a long way. In this dish I don’t even add a whole chipotle pepper. I open the can and use approximately 1 tablespoon of just the adobo sauce, you’d be surprised how much kick just the sauce has, plus it always has bits of the pepper and little chunks of onion. If you like a bit less heat, start with 1/2 a tablespoon (or even less) and add from there. The creaminess is a really nice compliment to the heat from the chipotles.

    This dish is a really great week-night dinner that feels so luxurious and special. If you have surprise or short-notice dinner guests, this dish will knock-their socks off both in flavor and in heat and they’ll think you slaved and planned over it for much longer than 15 minutes.

    Camarones en Crema De Chipotle (Shrimp in Chipotle Cream Sauce)
    serves 2
    Inspired by Fonda San Miguel

    1/2 lb (approximately 16-20) large peeled and deveined raw gulf shrimp (if you are unable to get gulf shrimp, go with whatever your preference, we had tiger shrimp)
    1 tablespoon olive oil
    kosher salt
    fresh ground black pepper
    1 organic bell pepper (red, orange or yellow), diced
    1 large garlic clove, minced
    1/2 cup organic heavy cream
    1 tablespoon adobe sauce from canned chipotles (you can use more of less depending on how spicy you want it, I don’t even bother using any of the peppers, as the sauce gives a really nice smokey heat on its own)
    1 small handful fresh cilantro, chopped roughly
    2 scallions, thinly sliced
    fresh lime juice

    If your shrimp are/were frozen, be sure they are thoroughly thawed, pat shrimp dry with a paper towel. Place the shrimp on a single layer on a paper towel lined plate and sprinkle with kosher salt and freshly ground black pepper. Set aside.

    Heat olive oil in a large skillet over a medium-high heat, add the garlic and bell pepper, stirring often until the peppers are soft and begin to brown a bit. Add the shrimp and watch it carefully, it will cook quickly. Cook 1 minute on the first side, flip over and cook another minute or so on the other side, until nearly fully cooked. Add the heavy cream and adobo sauce, whisk quickly to fully combine. Lower the heat to a low-medium , stirring the sauce often, it will begin to thicken. Cook only about 2-3 minutes until thick and warmed through. Be mindful not to cook much longer, you don’t want to overcook the shrimp or they will be rubbery. Turn off the heat and add in half of the cilantro and sliced scallions, stir to combine.

    Serve over white rice and top with the remaining cilantro and scallions, give a squeeze of fresh lime juice over top, if you wish.

  12. It’s Been a While. Travelin’ Eats from Our Drive to Austin.

    So here I am, after a very long and crazy month and the craziness continues. We went to Austin for SXSW and Flatstock, we closed our store, the big job we’ve been working on finally launched and my head is officially spinning. That being said, I honestly don’t know if I have ever been this happy. The only thing missing right now, which I am quite sad about, is the time to cook and more importantly to blog about it. I have been cooking as much as I can, which isn’t nearly as much as I would like and I definitely feel like life is just a bit incomplete without it. However, there is light at the end of the tunnel and I know once April is over, life will certainly calm down a bit and the time to cook will be there once again. Part of the reason we closed the store after nearly 5 years, was to be able to focus better on the things that matter most to us, both professionally and personally. We are only five days in on being without a store and I already feel more focused.

    This month we are finishing up modifying our home to move the studio in – we have to gut the garage of all the junk and garage-items to be able to move in our presses, poster inventory and all the print-related equipment. We also converted the two additional bedrooms upstairs into home offices for each of us. We have to go through what feels like millions and millions of things, both at home and at work to donate, give away and sell to be able to consolidate everything in one place. It’s definitely a daunting and overwhelming task, especially with the deadline of May 1st looming overhead, but we will get through it all.

    Part of what is keeping us going right now besides the excitement of what’s to come is all the traveling and fun things we have going on. We took the long and fun road trip down to Austin in the middle of March and that was incredible, the weather was beautiful, we saw so many great friends whom we missed dearly, we saw family (albeit too briefly) and of course, we ate!

    As usual, I didn’t bring my camera to every restaurant as I would have liked, so I did the best I could. On this trip we decided to take our time driving to and from Austin, enjoying the drive as much as the rest of the trip. We tried to seek out the best local restaurants for our taste in each city we stopped in and we had so much fun figuring it out as we went and of course we loved trying out new places. We certainly weren’t disappointed by traveling this way.

    I am going to do my best to give you a review of some of our most favorite restaurants from the trip, some will include photos (some of which are better than others) and with others you will have to use your imagination.

    Travelin' Eats from Our Drive to Austin.

    Travelin' Eats from Our Drive to Austin.

    Columbus, Ohio – zpizza

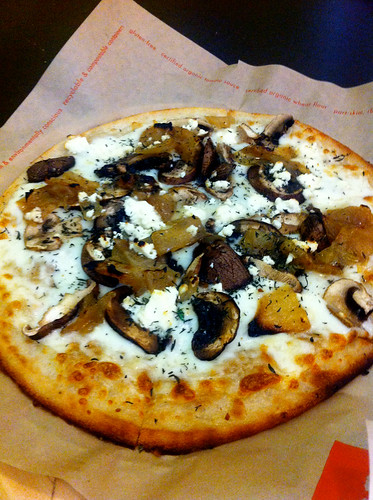
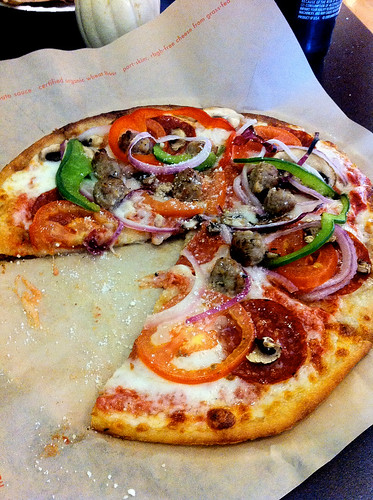
    At the start of the trip we left Buffalo Saturday at a reasonable time and once we got to driving decided that our first major stop would be in Columbus for lunch. I did a little google searching for a fun gluten-free friendly restaurant where I could fill up and eat with assurance of not getting sick on the drive. I ended up finding a place called Z Pizza. It isn’t exactly “local” but certainly met all of our other criteria. Their pizzas are fire-baked on hot bricks and they even feature organic ingredients, additive free meats, daiya vegan cheese and most importantly gluten-free pizza crust. So we took a peek at their menu online and called ahead to order two small pizzas to share. (Please excuse the photos, my good camera was packed very deeply in the car at this point, so I made do with my iPhone). We went with the Tuscan and American pizzas. The Tuscan is a white pizza that features their homemade roasted garlic sauce, mozzarella, feta, a variety of mushrooms, caramelized onions, truffle oil and fresh thyme. WOW this pizza tasted like something I would make at home, all the ingredients were very fresh, the sauce had so much flavor and the crust was perfectly thin and crisp. The American was just like it sounds, a classic. It featured their classic organic tomato sauce, mozzarella, bell peppers, red onions, pepperoni, sausage, mushrooms and fresh tomatoes. It was definitely a great pizza as well, lots of flavor with very fresh ingredients, though it really didn’t come close to comparing to the Tuscan. I am actually excited for all the drives we take to Louisville now that I know I have an easy and good lunch option along the way. For a chain restaurant I was thoroughly impressed with not only the quality of the food but also the service. It also didn’t hurt that they stocked gluten-free beer, always a plus for me!

    Travelin' Eats from Our Drive to Austin.

    Bowling Green, Kentucky – Greener Groundz

    We continued driving after lunch on Saturday and stopped in Louisville to see Mark’s family and we got to have a short, but quality visit with his Momo (Grandma). After that stop-off we continued on to Bowling Green, Kentucky to spend the next two nights with our good friends Connie and Stacey from Print Mafia. Connie and Stacey took us to their friend’s restaurant for brunch Sunday morning before we headed to Nashville for a bit. Greener Groundz is an adorable little coffee shop / cafe right in Bowling Green that offers 100% organic fair-trade coffee, local and organic ingredients and they have a wide variety of vegetarian and vegan options. They also cater to many food allergies! When I saw they had a breakfast pizza that could be made with gluten-free crust, I went for it. It had a delicious white sauce, you have your choice of scrambled local free-range eggs or tofu scramble, green peppers, tomatoes, mushrooms, red onion, cheese and your choice of protein – ham, crumbles sausage, sliced italian sausage or vegan sausage. I had the local eggs and crumbled sausage. WOW this pizza was incredible and so filling. I had half for breakfast that morning and the other half the next day before we hit the road again. I was content all day! Everyone else at the table had Kentucky Hot Damns – a fun and creamy spin on the famous Kentucky Hot Brown. We all started with a serving of their homemade hummus that Connie and Stacey raved about. I love my own hummus so much that it is rare I care for other hummus (whether at a restaurant or store-bought), this time I was impressed, it was full of flavor, creamy and very well made. We had it served with tortilla chips but you can also get it with pizza crisps or gluten-free pizza crisps. I really cannot recommend Greener Groundz enough if you ever find yourself in the Bowling Green area, in fact it’s so good I would recommend stopping there even if you are traveling on to somewhere else. It really is the type of place that I wish every city and little town had, it really makes me so happy to support places like this. I knew when we pulled up and walked through the front door that this place that it was just my kind of place. I can’t wait to go back.

    Travelin' Eats from Our Drive to Austin.

    Travelin' Eats from Our Drive to Austin.

    Memphis, Tennessee – Gus’s World Famous Fried Chicken

    This stop was all for Mark. Since he had eaten at all these great organic and gluten-free restaurants for me, it was his turn. I started asking around on Twitter if anyone had recommendations on somewhere we could grab lunch in Memphis when we passed through. More than one person recommended Gus’s. Being the fried chicken-loving Southern boy that he is, we had to stop and get lunch there for Mark. I was happy just to eat sides and enjoy the smile on my husband’s face. Much to my surprise they even had bottled hard cider on their menu, even better! Mark got a classic plate of fried-chicken with sides. When I told our waiter that I was just gonna have a few sides he asked if I was vegetarian, I replied with “not exactly, I don’t eat much meat and I am also gluten-intolerant so either way the fried chicken wouldn’t work for me”. He leaned in really close to me and said “our fried chicken is gluten-free, I cannot tell you the recipe since it is secret but we use corn starch, not flour. My ex-girlfriend was very very sensitive to gluten and she ate it all the time”. As tempting as it was, I just couldn’t bring myself to do it. I have learned to trust few people who can’t tell me with 100% assurance that something is safe and though I am sure I would be OK I didn’t want to risk it with all the traveling we had ahead. Though I would definitely be curious to know how true this really is. So I obviously cannot give you a first-hand review of the fried chicken here but Mark did say it was the best damn fried-chicken he has ever had and that I can trust.

    Travelin' Eats from Our Drive to Austin.

    Travelin' Eats from Our Drive to Austin.

    Travelin' Eats from Our Drive to Austin.

    Austin, Texas – Frank

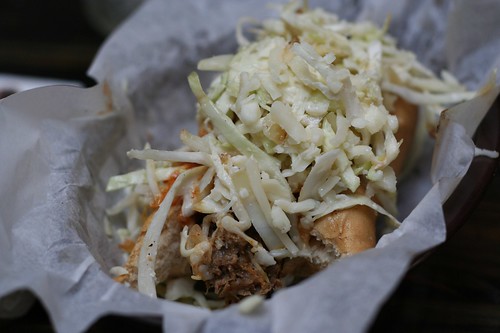
    This wasn’t our first time at Frank, in fact I have actually lost track of how many times we’ve eaten there. A poster/designer friend of ours from Austin, Geoff Peveto, opened Frank with a couple of his buddies and their wives. Normally you wouldn’t find me excited about a hot dog / sausage restaurant. It’s never really been my thing, plus having a gluten-intolerance and being mostly vegetarian makes this all even less fun. Frank, however, really caters to everyone – they carry gluten-free rolls, homemade vegetarian sausage and dogs and plenty of house made sausage from local meats and ingredients. Though I wanted their homemade veggie sausage, I couldn’t have it as it contained gluten, unfortunately. So I make sure to always go with one of their homemade sausages since they never disappoint. To be able to eat a sausage or a hot dog on a bun feels like a luxury after 6+ years. We usually eat there at least two times when we are in town and I like to try something different each time. On this visit I had the Texalina served on a gluten-free bun which is their housemade local pork and beef sausage covered in a grilled coleslaw and topped with a Carolina mustard BBQ sauce and shredded white cheddar. It was so incredible and tasty, it had a nice subtle spicy heat and the crunch from the coleslaw is what makes this sausage really stand-out, in my opinion. Though I am not a huge BBQ sauce lover – I am always down for a mustard based sauce and it was perfect on this. The Texalina is definitely messy, but something I was willing to deal with. I, of course, washed this incredible treat down with one of Frank’s deliciously fresh house margaritas (ok well maybe, two). Besides having delicious food, Frank is one of the most aesthetically pleasing restaurants I have ever been to, complete with hand painted signage and well though out menus and decor. A must see if you are in Austin.

    Austin, Texas – Fonda San Miguel

    One of our favorite things to do while we’re in Austin is to eat as much Mexican food as we can. Living in Buffalo there really isn’t much authentic Mexican food and I certainly crave it. What isn’t there to love about Mexican food, the spices, the margaritas, etc and it is so very gluten-free friendly. We definitely have a long list of classic taqueria style Mexican joints in Austin that we like to visit, but this time we decided to try out something a bit different that a friend recommended. Fonda San Miguel is an upscale restaurant that features fine interior Mexican cuisine, something I had never really experienced. It’s classic regional cuisine prepared authentically using numerous ingredients from their on-site organic garden.  I really didn’t know what to expect, but I can honestly say it is one of the best Mexican meals I have ever had. So different from the classic taqueria’s that I have become accustomed to. I decided to go with the Camarones en Crema De Chipotle, gulf shrimp in a spicy chipotle cream sauce. I am a big fan of the gulf shrimp and when I saw this dish, I knew it was right up my alley. It had a wonderful smokey heat that was balanced by the creaminess. Once we returned home to Buffalo I promptly recreated this dish myself so I could enjoy it again. I plan to make it again really soon so I can share the recipe here. I don’t have access to delicious gulf shrimp so my recipe was definitely lacking there, but otherwise I think I came close. I also had an incredible martini style cocktail that featured mezcal, tequila and fresh lime juice, this was my first time trying mezcal and I loved it. The strong smoky flavor from the mezcal was so unique and special, I am certainly going to have to keep an eye out for this at my local liquor store. I cannot wait to go back to Austin next year so we can go back to Fonda San Miguel and try even more things on their menu. I am sorry to say I had my camera with me, but was far too happy, relaxed and involved with both incredible food and wonderful company, to take any photos of the meal, so you will have to use your imagination on this one or get your butt to Austin and visit Fonda San Miguel yourself.

    Travelin' Eats from Our Drive to Austin.

    Austin, Texas – Juan in a Million

    Last, but certainly not least, is Juan in a Million. Though simplistic in many ways, it is one of my favorite grub spots in Austin. There’s no organic garden or gluten-free breads, it is just straight-up, classic Mexican food, perfected. We always try to hit Juan in a Million at least twice for breakfast while we’re in town – they have amazing breakfast tacos and THE best migas, probably my favorite breakfast dish of all time. It is a simple concept, scrambled eggs with various veggies like peppers, onions, tomatoes and it also has strips of fried tortilla. Then it’s all topped with fresh grated cheese. Don’t ask me why it’s so much better than every other ‘ol scrambled egg dish, it just is. There is something about it. Juan’s migas with a side of their delicious beans, some fresh warm corn tortillas and their super spicy salsa? That really is heaven. Unfortunately the terrible iPhone photo that I took, really doesn’t do the food any justice, but you get the idea. If you are a Travel Channel junky then you probably saw Juan in a Million featured on Man Vs Food. Oh and Juan in a Million consistently wins the award for best handshake in all of Texas – so if Juan is there, make sure to shake his hand, it is not only award-winning but it’s also epic (your hand will burn afterwards)!

    We obviously ate at other great restaurants along the trip, but these are the ones that most stick out in my mind. I always try to remember to bring my camera but somehow this part of the blogging process always alludes me. That being said, I plan to do more of these types of posts with all the traveling we have coming up, so I hope you enjoy it. I would also love if you shared any restaurant recommendations that you have for me. This weekend we will be in NYC and Brooklyn for a gallery show our work is in and some meetings and next weekend we’ll be in Pittsburgh for Handmade Arcade. We are home the rest of the month finalizing our move home and getting the new print studio all set-up, after that we are off to a week-long vacation on the beach on South Padre Island, which will certainly be needed. If you have any restaurant recommendations for any of these places, definitely post them.

    Look for some recipes in the next week or so, I hope to recreate the Camarones en Crema De Chipotle again for dinner tonight along with a gluten-free Chocolate Almond Pound Cake for dessert, if I can squeeze in the time to do it. And look for more travel/restaurant reviews very soon. Hope everyone is well!

  13. Winter Squash Risotto with Radicchio

    Winter Squash Risotto with Radicchio

    After a few months with our butts parked here in wintry Buffalo, it’s that time again, we are hitting the road. We leave Saturday morning for Austin, Texas for the South by Southwest Music Festival and Flatstock 29! I love this trip not only because we drive down, and I love a good road trip, but we also get a great dose of some much-needed sunshine and warmer weather plus great music, hang outs with our good friends, good food and so much more. As with all of our trips, though they are an escape from the every day and a bit of a vacation in that sense, they are very much about work and business, so the weeks leading up require a lot of long days and nights of prep. We have to wrap up any client projects we have on deck and we also have to pack and restock all of our handmade goodies, print stuff, sew stuff, etc. I have been trying in these two weeks before, to make meals that require one day of prep and cooking but gives us many meals. I have made pasta Bolognese, vegetarian shepherd’s pie, italian sausage, white bean and escarole soup, slow cooked black beans for tacos and this risotto. It’s been great because we have a ton of leftovers and we’ve been able to just focus on work and when need be, take breaks, heat up some dinner and then get back to work. I love it. Home cooked meals are most important to me when life gets busy and stressful.
    This risotto is a nice, hearty winter dish that is comforting, while being light. I love all the different flavors, a good quality vegetable broth in itself has so many layers of flavors, the sweetness from the squash really compliments the sharp bitterness from the little bit of radicchio and the creaminess from the milk and the cheese finish it all off, perfectly. The rich, creaminess from the squash really makes this risotto feel sinful, but you can enjoy it, guilt-free. We served it as our main dish but it is light enough to be a side-dish. If you don’t care for radicchio you could add in baby spinach instead.

    Winter Squash Risotto with Radicchio
    serves 6
    adapted from Cooking Light Magazine

    1 butternut squash (about 4 pounds)
    6 cups organic low-sodium vegetable broth
    1 tablespoon olive oil
    2 1/2 cups sliced radicchio
    1/4 teaspoon freshly ground black pepper, divided
    1 1/2 teaspoons organic butter
    1 small onion, finely diced
    1 1/2  cups uncooked Arborio rice or other short-grain rice
    1/4  cup dry white wine (I didn’t have any so I used dry vermouth)
    3 tablespoons organic half-and-half or whole milk
    fresh ground black pepper
    kosher salt
    3/4 cup  (3 ounces) grated fresh Parmesan cheese

    Preheat oven to 375°F.

    Cut squash in half lengthwise; discard the seeds and membrane. Place squash halves, cut sides down, on a baking sheet; bake at 375° for 50 minutes or until squash is tender. Cool. Peel squash; mash pulp. Set aside 1 1/2 cups pulp, reserving remaining pulp for another use.

    Bring vegetable broth to a simmer in a large saucepan. Keep warm over low heat. Heat olive oil over medium-high heat until hot in a large pan or dutch oven. Add radicchio; sauté 2 minutes or until wilted. Place radicchio in a bowl. Sprinkle with 1/8 teaspoon each of pepper and salt, set aside. Melt butter in Dutch oven. Add onion; sauté 3 minutes or until lightly browned. Add rice; sauté 1 minute. Stir in wine and 1/2 cup broth mixture; cook 3 minutes or until the liquid is nearly absorbed, stirring constantly. Add 2 cups broth mixture, 1/2 cup at a time, stirring constantly until each portion of liquid is absorbed before adding the next (about 15 minutes total). Stir in squash pulp. Repeat procedure with remaining 1 1/4 cups broth mixture (about 9 minutes total). Stir in radicchio mixture and half-and-half. Season to taste with black pepper and kosher salt. Remove from heat; stir in cheese. Sprinkle with a bit more cheese and 1/8 teaspoon pepper.

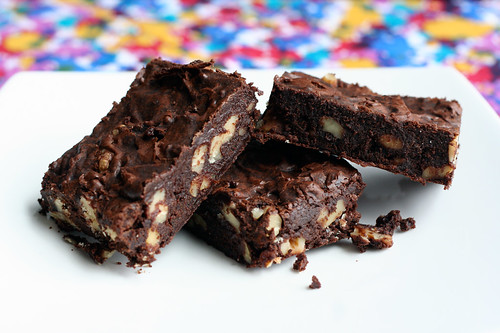
  14. Cocoa Brownies with Browned Butter and Walnuts (Gluten-Free)

    Cocoa Brownies with Browned Butter and Walnuts (Gluten-free)

    I made mention of the February issue of Bon Appétit magazine on Facebook last week and a gluten-free friend of mine told me I just HAD to try the cover recipe for the brownies pictured. Ironically, I had just finished drooling over the recipe, seconds before. She mentioned to substitute gluten-free all-purpose flour for the regular flour in the recipe, which I had on hand along with all the other ingredients. We had a friend over helping us with some dry wall work on the house so I decided right then, with tarp and ladders in the kitchen and all,  to give this recipe a try.  Despite its name, this is a very simple brownie recipe, that rivals the brownie recipe I posted a few weeks back.  These brownies are a bit different, not only because they include flour but because the star of the show this time is the browned butter. It brings a beautiful rich and almost nutty flavor. They are so wonderfully fudgy and chewy with a bit of a crust on top. The walnuts are the perfect addition, but you could certainly use pecans or almonds instead of walnuts or skip the nuts altogether. If you aren’t gluten-free, just use regular all-purpose flour in place of the gluten-free flour and skip the xanthan gum. The original recipe called for unsalted butter and a generous 1/4 teaspoon of sea salt. I personally adore a dessert with a salty/sweet combo, even more when it includes chocolate, so I went with salted butter and 1/2 teaspoon of sea salt. Why not, right? I definitely didn’t find the salt overpowering, in fact I expected to taste the salt a bit more.

    My favorite part of this recipe is that my mixer didn’t even need to get brought out. I made the entire recipe in the pot I browned the butter in. Simple. Once the dry wall work was done and we had cleaned up, I made sure the brownies were cooled and we sat and enjoyed a small sliver before dinner, we couldn’t wait. Just when I thought I couldn’t make my husband any happier, I saw his face with one bite of this brownie, I did it again! I love when he loves gluten-free desserts I make, not only because I love cooking and baking for him, but if he loves it as much as me, this means I won’t get stuck eating an entire pan of brownies. I have someone else to help. I also have to mention, I have been very happy with how well these have kept. I made these last Saturday and we still have 4 brownies left, nearly a week later. I cut the pieces up and simply covered the pan with plastic wrap, they haven’t dried out and have kept the lovely fudgy chewiness that makes them so great, something a lot of brownie recipes cannot say for themselves.


    Cocoa Brownies with Browned Butter and Walnuts (Gluten-Free)
    Makes 16 brownies
    Adapted from Bon Appétit Magazine – February 2011

    10 tablespoons (1 1/4 sticks) salted organic butter, cut into 1-inch pieces + a bit extra to grease the pan
    1 1/4 cups organic pure cane sugar
    3/4 cup natural unsweetened organic free-trade cocoa powder (I used Equal Exchange)
    2 teaspoons water
    1 teaspoon organic vanilla extract
    1/2 teaspoon of sea salt
    2 chilled local brown eggs, cage-free and pasture raised
    1/3 cup plus 1 tablespoon gluten-free all-purpose flour (I used Bob’s Red Mill)
    1/2 teaspoon xanthan gum (do not add this if it is included in your gluten-free all-purpose flour mix)
    1 cup walnut pieces

    Position rack in bottom third of oven; preheat to 325°F. Grease a 8x8x2-inch glass baking pan with softened butter. Melt 10 tablespoons of butter in medium saucepan over medium heat. Continue cooking until butter stops foaming and browned bits form at bottom of pan, stirring often, about 5 minutes. Remove from heat; immediately add sugar, cocoa, 2 teaspoons water, vanilla, and 1/2 teaspoon (generous) salt. Stir to blend. Let cool about 5 minutes (it will still be hot). Add eggs to hot mixture 1 at a time, beating vigorously to blend after each addition. When mixture looks thick and shiny, add flour and stir until blended. Beat vigorously 60 strokes. Stir in nuts. Transfer batter to prepared pan.

    Bake brownies until toothpick inserted into center comes out almost clean (with a few moist crumbs attached), about 30-35 minutes*. Cool in pan on rack. After the brownies have fully cooled (a few hours) cut into 16 square pieces and enjoy. Store airtight at room temperature.


    *Don’t be alarmed if it takes a bit longer than this, I had read some reviews of this recipe online and some people mentioned it took them over 40 minutes to be fully baked.

  15. Chipotle Potato Soup with Bell Pepper Salsa

    Chipotle Potato Soup with Bell Pepper Salsa

    There is something about a creamy and spicy soup that just warms your tummy and your soul. It is still bitter cold here in Buffalo and I am trying to look on the bright side of this brutal winter, by enjoying that I can still cook hearty and hot, wintry dinners. I know soon when the warm weather is upon us, I will miss the hot soups and stews, one of my favorite things about the winter months.

    This soup brings a nice kick of smokey spice from the chipotles, it’s comforting, thick and creamy, three things that just really make winter dinner satisfying, to me. The great thing about this soup and the fact that most of the creaminess comes from blending the potatoes, is that it can easily be made vegan. Go with vegetable stock over chicken and you can either skip the milk altogether or use a non-dairy milk like plain unsweetened almond, rice or soy milk. Then just skip the cheese or top with your favorite vegan cheese. I used local, pasture-raised whole milk that we bought at Farmers and Artisans, one of the few milks I have ever tasted that is actually good enough to enjoy a glass of (in my opinion). There is only a cup of milk and a cup of cheese in the entire pot of soup, so don’t even feel the littlest bit guilty about it. On the other hand, if you have no guilt and really want to indulge, you could go with a cup of heavy cream instead of milk and maybe even some crispy bacon on top, why not right? Either way, before the warm weather shows itself again, you need to make a pot of this soup and not only remember, but enjoy the lovely things about the winter that we will all surely miss in the heat of July or August. Trust me, we all miss it, even just a little.

    Chipotle Potato Soup with Bell Pepper Salsa
    serves 8

    Bell Pepper Salsa

    1/2 red bell pepper, seeded and diced
    1/2 orange bell pepper, seeded and diced
    1/4 cup fresh cilantro, chopped
    1 1/2 tablespoons chopped red onion
    Juice from 1 lime
    Kosher salt , to taste

    In small bowl, mix together bell peppers, cilantro and onion. Squeeze lime over. Gently stir to combine. Season to taste with salt. Set aside.

    Chipotle Potato Soup

    2  1/2 – 3 lbs red potatoes, peeled and cut into 2 inch cubes
    1 onion, roughly chopped
    2 large cloves garlic, minced
    1/2 red bell pepper, seeded and diced
    1/2 orange bell pepper, seeded and diced
    2 tablespoons olive oil
    3 tablespoons chipotle chiles in adobo sauce (this soup is spicy, go with less chipotles if you don’t want all the heat, you can always add in more)
    6 cups low-sodium vegetable stock or chicken stock
    1 cup organic whole milk (you can either skip the milk and add an extra cup of stock or use a non-dairy milk and skip the cheese, to make this soup vegan)
    1 teaspoon ground chili powder
    1 cup grated extra-sharp cheddar cheese, plus additional for garnish
    kosher salt, to taste
    fresh ground black pepper, to taste

    In a large pan of salted water over high-heat, bring the potatoes to a boil and then drop the heat to simmer and cook for approximately 20 minutes, until potatoes are soft. Drain.

    In a large stock pot, over high heat, sauté onion, bell peppers and garlic in olive oil for 2 minutes, add the chipotle chiles and the chili powder. Lower heat to medium; continue cooking until the onions are soft and translucent, approximately 5 minutes.

    Add the potatoes, stock and milk (if you are using it) to the stock pot. Bring to gentle boil. Reduce the heat to low and simmer 10-15 minutes. Turn off heat and let the soup cool about 5 minutes.

    Purée with immersion blender or in batches using a regular blender*, until smooth, gradually adding cheese. Season to taste with kosher salt and pepper. Ladle the soup in large serving bowls and top with shredded cheese and the bell pepper salsa.

    * When blending hot soup in a blender, do so in small batches, filling the blender pitcher only about halfway. Put the lid on, but remove that small cap in the lid (if you have it) and hold the lid down tight with a towel, otherwise the steam will cause the lid to explode off, spewing hot liquid everywhere. This has never happened to me, but it can, so be careful.

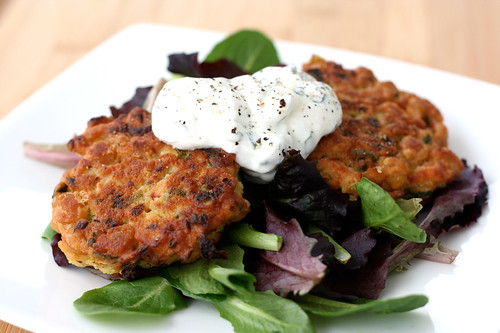
  16. Chickpea Croquettes (Gluten-Free) with Cilantro Yogurt Sauce

    Chickpea Croquettes (Gluten-Free) with Cilantro Yogurt Sauce


    I love chickpeas! There is so much you can do with them. A spicy hummus, roasted for a snack, throw them in a curry, in a pasta dish, on a salad, etc. They are a wonderful protein-packed ingredient that works great if you are vegan or vegetarian or is the perfect substitute for your weekly meat-less dinner. In our house we eat vegetarian most nights so I always have at least 4 or 5 cans of chickpeas and a pound or two of dried chickpeas in the pantry. The ideas on what can be done with them just keep coming and each is better than the last.

    These croquettes are surprisingly easy to put together considering how fancy and intimidating they may seem. They mix up quickly and cook up just as swiftly and conveniently. Some croquettes and patties have a tendency to fall apart when they hit the pan, but these are very durable. Place the dollop in the pan and leave it be, don’t move it around or continuously press it, just let it cook and brown up. Don’t try to go bigger, as they may start to lose their structure. After the first side begins to brown, flip it over and allow the other side to cook, that’s it. So easy. You can have some fun with the ingredients, try a beautiful red bell pepper for some color, add shredded zucchini, red onion, etc. You can play with the spices and the flavor profile, serve them plain as an appetizer, over rice, or on baby greens for a meal. Top with different sauces or salads. Have fun with this recipe. I decided to serve these over baby greens tossed in a light balsamic vinaigrette and I topped them with a citrusy cilantro yogurt sauce. This sauce can also be as difficult or easy as you wish, have fun with that, too. Obviously skip the yogurt sauce if you are vegan and if you aren’t gluten-free and don’t wish to buy chickpea flour, you can simply substitute 1 cup of whole wheat flour.

    This is a simple and healthy weeknight dinner that satisfies that urge for crispy fried food without tipping your scale. Though I would hardly called these fried, they are cooked in just a couple of tablespoons of olive oil and are perfectly crisped without the greasy sludge.


    Chickpea Croquettes (Gluten-Free) with Cilantro Yogurt Sauce

    Cilantro Yogurt Sauce

    1 handful fresh cilantro, stemmed and chopped
    2 tablespoons fresh lemon juice
    1 small clove garlic, minced
    1 cup of greek yogurt
    salt and pepper to taste

    To make the sauce, combine the cilantro, lemon juice, minced garlic and yogurt in a small bowl. Stir well to combine. Salt and pepper to taste. Transfer the sauce to a container with a lid and refrigerate for at least 1 hour.

    Chickpea Croquettes
    adapted from Vegetarian Times. makes 8 patties

    1 cup chickpea flour
    3/4 cup hot water
    juice of 1/2 lemon
    1 teaspoon ground cumin
    1 1/2 teaspoons salt
    15-oz can chickpeas, rinsed and drained well
    4 scallions, chopped
    1 medium carrot shredded
    1 habanero or jalapeno, minced (I left the seeds in)
    3 garlic cloves, minced
    2 tablespoons chopped cilantro leaves
    3 tablespoons olive oil

    In a large bowl, add flour, water, lemon juice, cumin and salt. Add more water if needed. Stir until well combined. Add in chickpeas, carrots, scallions, jalapeno, garlic and cilantro. Stir well.

    In a large saucepan, heat olive oil, over medium heat. Scoop (approximately) 1/4 cup dollops of chickpea mixture into skillet, and reduce heat to medium-low. If the dollop is too much of a mound you can lightly press it down with the back of your spatula, just don’t press too hard. Cook 3-4 minutes, or until golden brown on the bottom. With a spatula, flip the patties and cook 3-4 minutes more. Repeat with remaining chickpea mixture (the finished croquettes can sit on a baking sheet in a 200º F oven). Serve two croquettes over field greens, topped with the yogurt sauce.

  17. Spicy Spaghetti with Fennel and Herbs (Gluten-free)

    Spicy Spaghetti with Fennel and Herbs


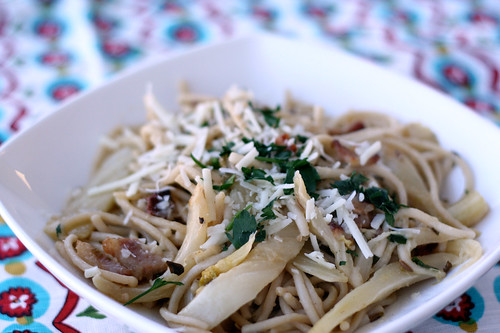
    Yes, yet another pasta dish. I am a pasta-aholic, I can admit it. I cannot get enough of the stuff and I am always excited to try out new recipes. The possibilities really are endless and it’s rare that I meet a pasta dish that I don’t love. This recipe is no exception. I came across it a while back and couldn’t wait to try it with a few subtle changes. Even with the bacon and cheese, it is still very light and healthy pasta dish. See you can have your bacon and eat it, too!

    The subtle crunch and bold flavor from the fennel is so wonderful and the heat from the chilies is what I live for in a spicy dish. The original recipe calls for red jalapeños, though I could only find green, I think the red would have really been nice for a pop of color. It also called for seeding the chilies, but I left them in, when I tasted the peppers while I was cutting they didn’t have too much heat, and I really wanted a good kick. It is rare that I find something to be too spicy. If you want a more subtle spice, certainly leave the seeds from the chilies out and you can always make it spicier at the end, if it needs it, by adding in some red pepper flakes. The recipe also called for adding in crushed fennel seeds untoasted, I felt like toasting the whole seeds first would give a much better flavor by releasing it during toasting, not only did it taste great, the house smell amazing. Additionally, the original recipe called for pancetta instead of bacon. Since we buy all of our pork from Sojourner Farms, a local pasture-raised farm, I decided to use some of the delicious bacon that we purchased from them, instead. I would advise not to substitute dried herbs for the fresh stuff in this dish, it would surely be missed. It is also important to use a low-sodium broth, as you will reduce the broth down and you will also be getting some salt from the bacon (or pancetta), you can always add more salt to taste, before serving. I am a big fan of using the pasta water to thicken and bring back liquid to a pasta dish, just go slow so you don’t add too much, but don’t leave this step out, it can make or break a dish without sauce, like this one. Obviously, I also changed the original recipe by substituting gluten-free spaghetti, if you aren’t gluten-free you can use whatever your favorite pasta is, a nice whole-wheat spaghetti would be great, I am sure.

    If you wanted to make this vegetarian you could easily leave out the bacon and use a vegetable broth instead of chicken, you may just want to add in a bit more fresh herbs to bump up the flavors. It would still be very tasty and hearty.


    Spicy Spaghetti with Fennel and Herbs
    serves 8
    Adapted from Bon Appétit Magazine

    6 slices of farm fresh local, pasture raised bacon, chopped
    1 tablespoon olive oil
    3 garlic cloves, chopped
    2 large jalapeño chiles, finely chopped – remove seeds if you want less heat
    2 large fennel bulbs, stalks trimmed, cut into thin wedges with some core attached
    1 1/2 cups low-salt organic free-range chicken broth
    4 tablespoons finely chopped fresh Italian parsley, divided
    2 tablespoons fresh lemon juice
    11/2 teaspoons fennel seeds
    1 pound gluten-free organic brown rice spaghetti (or whatever your favorite pasta is, gluten-free or not)
    2 tablespoons extra-virgin olive oil
    1 1/2 cups finely grated Pecorino Romano or Pecorino Toscano cheese, divided

    Toast the fennel seeds in a large dry skillet over high heat, until slightly brown and fragrant. Remove the seeds and set aside. Sauté bacon in the same large skillet over medium heat until golden and a bit crispy. Using slotted spoon, transfer bacon to paper towels and set aside. Add 1 tablespoon oil to the bacon drippings in skillet. Add garlic and chiles; sauté over medium heat 1 minute. Add the fresh fennel; cook until beginning to soften, 5 minutes. Mix in broth, 2 tablespoons parsley, lemon juice, and the toasted fennel seeds. Bring to boil. Reduce heat to low, cover, and cook until fennel is very tender, 20 minutes. Remove from heat. Season to taste with salt and pepper.

    Cook pasta until tender; drain. Reserve 1 cup cooking liquid. Transfer pasta back to the pot or a large serving bowl.
    Uncover skillet with fennel mixture and return to high heat. Cook until almost all liquid is absorbed, about 4 minutes. Add fennel to pasta. Stir in 2 tablespoons oil, 1/2 cup cheese, and pancetta. Add cooking liquid by 1/4 cupfuls if it’s too dry. Toss pasta; transfer to serving bowl if it was in a pot. Season to taste with salt and pepper. Sprinkle 2 tablespoons parsley over. Serve with cheese.

  18. Gluten Free Breakfast Bars

    Gluten-free Breakfast Bars

    I am always looking for different easy breakfast options. Since I don’t eat processed and packaged foods, breakfast can be tough sometimes if I don’t feel like eggs, a smoothie or fresh fruit and yogurt. If I don’t plan ahead and have some homemade baked goods or some fresh bread to toast up, my options can be a bit limited since I don’t eat most cereals and I never eat packaged cereal bars or things of that nature. I came across a great post on The Kitchn in January that featured “10 Vegan Breakfast Ideas“, though some of the recipes contain things I can’t eat, the first post was about breakfast bars and it had a link to two different recipes. The one that caught my eye was for Gluten Free Breakfast Bars, another great recipe from Elana’s Pantry. They looked incredible and surprisingly I had every last ingredient on hand in my pantry and I always do. This made me so excited since besides muffins, if these turned out as good as I had imagined they would, I knew this gave me another great breakfast option and additionally another great travel breakfast item.

    Sure enough, these were just as incredible as I had imagined. I changed up the recipe slightly by substituting dried cranberries for the raisins and adding ground cinnamon and fresh ground nutmeg. I couldn’t resist adding the spices and they were just perfect in there. The crunch from the nuts and seeds was so perfect. The original recipe mentions just using the seeds and nuts raw, untoasted since that made it even easier, so that is what I did. They still had a perfect nutty crunch.

    It should be noted that after I let the pan cool for a while and went to cut in, the pieces came out very easily but were a tad bit crumbly. I decided to put plastic wrap over the pan and refrigerate the rest. When I cut the remaining bars the following day, they stayed together much better and were far less crumbly. After spending a little time on Elana’s blog I am learning there are lots of different almond flours available and a lot of people prefer buying online to get the right one, so I am curious if a different almond flour changes the way the bar is held together. I will have to experiment with that. Another note on this recipe is that wherever I can in recipes I buy organic ingredients. Many of the items in these bars are organic, I just thought it may be a bit redundant to continuously post that.

    Gluten Free Breakfast Bars
    adapted from Elana’s Pantry
    Makes 12-16 bars

    1 1/4 cup blanched almond flour
    1/4 teaspoon celtic sea salt
    1/4 teaspoon baking soda
    1 teaspoon ground cinnamon
    1/2 teaspoon fresh ground nutmeg
    1/4 cup grapeseed oil
    1/4 cup agave nectar
    1 teaspoon vanilla extract
    1/2 cup shredded coconut
    1/2 cup pumpkin seeds
    ½ cup sunflower seeds
    ¼ cup almond slivers
    ¼ cup dried cranberries, unsweetened

    Preheat  oven to 350º.

    In a small bowl, combine almond flour, salt, baking soda, cinnamon and nutmeg. In a large bowl, combine grapeseed oil, agave and vanilla.
    Stir dry ingredients into wet. Mix in coconut, pumpkin seeds, sunflower seeds, almond slivers and cranberries.
    Grease an 8×8 baking dish with grapeseed oil. Press the dough into the baking dish, wetting your hands with water to help pat the dough down evenly.
    Bake for 20 minutes.

    Allow to cool completely before cutting. I found they were a bit crumbly even after cooling, so I allowed it to cool overnight in the fridge and then cut the pieces, it held together much better.

    * None of the nuts and seeds in this recipe are toasted.  This keeps it easy and fast, you could certainly toast them if you wish, it’s just an extra step before you start.


    Gluten-free Breakfast Bars

  19. Citrus Quinoa Salad with Toasted Almonds

    Citrus Quinoa Salad with Toasted Almonds


    I have sung quinoa’s praises many, many times on this blog, so I think you know by now how I feel about it. It really is a super food and incredibly versatile. This salad caught my eye while I was searching the web last week, looking at recipes. I couldn’t wait to make it as a side for dinner and to enjoy the leftovers throughout the week for lunch. I ended up doubling the recipe so we had extra for leftovers.

    This salad has a bright and sunny taste to it and it was the perfect side with the grilled pork steaks from Sojourner Farms that we were making. It was even more perfect being that it finally warmed up a bit here. It was a balmy 42º when we were getting ready to start dinner last night and rather than heating up the oven and cooking inside, we decided it would be the perfect night to fire up the grill. Honestly, it felt a bit like a heat-wave, it has been such a brutal and frigid winter here. I am actually calling “Uncle” on the 2010/11 Winter season, officially here and now! I am done, I want to see the sun, some lovely flower buds and the beautiful green grass and trees. We have been buried since early December in so many feet of snow. Don’t get me wrong, I love the snow and I still, after all these years of living here, get excited with each and every flake that falls and even the major storms, but this year I have hit my limit. Thankfully Spring is just around the corner and with the Spring comes more green and more fresh produce, which I am equally missing.

    Oranges and other citrus are in season right now, but I have never been a big orange eater. However, I have been trying out different types of oranges and tangerines and I am liking them more each time, I particularly like them in dishes instead of just plain. The tangerines in this salad were perfectly juicy and sweet but not too overpowering. You could certainly use your citrus of choice, oranges would be just as good. The fresh scallions and parsley were both perfect, I changed the original recipe a bit by adding garlic and adding a bit more sriracha, since I like spicy, though even with increasing the sriracha it was still a very subtle spiciness, not intense by any stretch of the imagination. This salad is best served room temperature and it was perfect with the grilled pork and green beans with pine nuts that I also made. This salad was great as a side, but would also be great as the main dish or an appetizer. Additionally, it would be a nice vegan dish to bring to a party. If you double the recipe as I did, just top each individual serving with the toasted almonds and keep them on the side, this way they won’t lose that lovely crunch by sitting in the fridge with the salad. Just top each serving individually as you serve them.

    Citrus Quinoa Salad with Toasted Almonds
    Serves 4
    adapted from Cooking with Amy

    1 tangerine, peeled, seeded and cut into chunks (remove as much of the membranes as you can)
    1 cup organic quinoa, rinsed well
    1 3/4 cups water
    1/2 teaspoon kosher salt, plus more for serving
    1/2 lemon, preferably organic
    2 tablespoons extra-virgin olive oil
    2 garlic cloves, minced
    2 medium scallions, thinly sliced
    2 tablespoons Italian parsley, minced
    1/2 tablespoon sriracha, or more to taste
    2 tablespoons thinly sliced toasted almonds

    Toast your almond slices ahead of time and set aside.

    Rinse the quinoa thoroughly, then toast it in a dry medium saucepan, over medium heat for a few minutes until it is fragrant.

    Add the water and salt to the quinoa, and bring to a boil over a high heat. Cover and reduce the heat to medium, and simmer until the water is absorbed and the quinoa is tender, 10 to 15 minutes. Spread the quinoa out on a baking sheet to cool to room temperature quicker, while you prepare the salad.

    Before cutting the lemon, finely grate the zest and then squeeze the juice into a large serving bowl. Add the olive oil, garlic, scallions, parsley and sriracha. Once the quinoa has cooled and is room temperature add in the quinoa and tangerine pieces, season to taste with salt and top with almonds and a bit of fresh parsley just before serving.

  20. Chocolate Chip Brownies (Gluten-Free)

    Chocolate Chip Brownies (Gluten-free)

    I came across this recipe while on my cleanse last month, and I wished I hadn’t at that time, because it was all I could think about for the last day or two of the cleanse. I couldn’t wait to try it out. I had almond butter on hand from smoothies and other recipes during my cleanse and I had really fallen in love with it. So versatile and there so many recipes it will work in, plus it is super tasty on its own on a spoon, just like old faithful, peanut butter. I had an amazing gluten-free brownie a while ago at the Lexington Coop and had been looking around online for a similar recipe using those ingredients. I came across this recipe on Elana’s Pantry, a wonderful gluten-free blog that features so many great recipes, many of which are made with almond flours and almond flour butter, etc.

    These brownies are not only the best gluten-free brownies I have ever had, I think they are the best brownies, period. My husband couldn’t get enough and couldn’t stop raving about them, he said they were the best had ever had, too. He is such a good gauge for these types of recipes, since many times what I think is good, really isn’t, since it’s been over 6 years since I have had gluten and the original versions. When he can’t get enough and says it’s the best ever, I know I have struck gold. I cannot wait to make these again, maybe with nuts or coconut, even.

    Whether you can have gluten or not, you need to make these brownies. It’s not only amazing that these are gluten-free but I cannot believe that there isn’t any flour in them. Not only are they a lovely protein-packed, healthier version of a classic dessert but they are just plain perfect!

    Chocolate Chip Brownies (Gluten-Free)
    Makes about 24 brownies
    Recipe via Elana’s Pantry

    1 (16) ounce jar organic almond butter, smooth roasted (if it is salted only add 1/2 teaspoon of sea salt)
    2 local farm fresh brown eggs
    1 1/4 cups agave nectar
    1 tablespoon vanilla extract
    1/2 cup cocoa powder
    1 teaspoon celtic sea salt
    1 teaspoon baking soda
    1 cup dark chocolate chips 73% cacao

    Preheat oven to 325º. In a large bowl, blend almond butter until smooth with your mixer or a hand blender. Mix in eggs, then add in agave and vanilla
    Blend in cocoa, salt and baking soda, mix well, then fold in chocolate chips. Grease a 9 x 13 Pyrex baking dish. Pour batter into dish. Bake for 35-40 minutes

  21. Creamy Italian Sausage and Potato Soup

    Creamy Italian Sausage and Potato Soup

    As you can probably tell from reading my recipes, we eat very little meat in our household. We aren’t vegetarians, but I would say we are mostly vegetarian. I consider myself to be a conscientious omnivore, I do eat meat occasionally, but only meat that I know where it comes from, how it was raised, what it ate, etc. At this point the only meat in our house comes from a local farm where it was all pasture-raised without the use of hormones, antibiotics or other chemicals. We have visited the farm, we have seen the animals and we have shaken the hand of the man who does it all. This is the only way I will ever buy meat for our home. It feels right. This fall we shared a pig with my parents. We have more pork that you can even imagine in our freezer. At home I would say we probably enjoy pork once or twice a month and chicken once a month. I have a good supply of this wonderful ground italian sausage that is unlike anything you can ever imagine. So tasty, sweet, subtly spicy and not too greasy, it is perfect. Without the ability to make patties and throw them on the grill (it is WAY too cold for that), I was trying to think of some winter friendly ways to enjoy the sausage. I thought a nice hearty soup would be perfect. I was torn between a tomato-based vegetable pasta sausage soup but then I thought something creamy and hearty sounded even better (though I plan to make that first soup soon).

    This soup was really incredible, spicy and creamy with a nice green crunch from the spinach. The fresh herbs were wonderful, though dried will do if you can’t find fresh. I wanted it to be nice and brothy and wanted more servings so I used about 7 or 8 cups of chicken broth, you can certainly go with less, 5 or 6, if you want it to be a chunkier and less brothy soup. I also decided to go with half and half versus heavy cream to keep it a bit lighter per serving, but heavy cream would certainly be delicious and with less broth you would have a nice thick soup, just a bit fewer servings. Oh and the freshly grated parmesan cheese on top really sets this soup over the edge. It is the perfect finishing move.

    *I am not at all crazy about the photo of this soup, it was hard to photograph with all the lovely bits, and I forgot to put the cheese on top for the photo, but you get the idea.

    Creamy Italian Sausage and Potato Soup
    serves 6-8

    2 tablespoons of olive oil
    1 large onion, diced
    3 cloves garlic, minced
    1 pound of ground Italian pork sausage, local, pasture-raised and free from hormones and antibiotics
    6-8 cups of organic chicken broth, low sodium
    5 small russet potatoes, washed and cut into 1 inch cubes with the skins still on
    1/2 cup of fresh basil, roughly chopped
    1/2 cup of fresh parsley, roughly chopped
    1 teaspoon of red pepper flakes (more if you like spicy)
    1/4 teaspoon freshly ground black pepper
    1/2 teaspoon kosher salt
    1 cup of organic half and half
    2 cups of coarsely cut spinach
    1/4 cup of freshly grated Parmesan cheese

    Place the olive oil in a large pan over a medium-high heat. When the pan is hot add the onion and garlic and saute until the onion gets soft. At this point add the Italian Sausage and cook until its browned. Our sausage isn’t very greasy so I didn’t need to pour any out, if your sausage produces a lot of grease pour some off before adding the soup.

    In a large stock pot over medium-high heat add in the chicken broth, potatoes, basil, parsley, red pepper flakes, pepper and salt. Bring to a boil. Reduce the heat and bring to a simmer, allow to simmer for 20 minutes.

    After the soup has been simmering add the sausage, onion and garlic mixture and cook another 5-10 minutes. After it is done simmering, add in the half and half and stir. Reduce the heat and be sure it doesn’t boil. Cook another 2 minutes. Taste the soup, add more salt and pepper to taste. More red pepper flakes if you want it spicier.

    Remove the soup from the heat, add in the spinach and cover. Let it sit for an additional 3-5 minutes until the spinach is cooked.

    Ladle the soup in your bowls and sprinkle with a little parmesan cheese.

DISCLAIMER: This website is written and produced for informational and educational purposes only. Statements within this site have not been approved by the FDA. Content should not be considered a substitute for professional medical expertise. The reader assumes full responsibility for consulting a qualified health professional before starting a new diet or health program. Please seek professional help regarding any health conditions or concerns. The writer(s) and publisher(s) of this site are not responsible for adverse reactions, effects, or consequences resulting from the use of any recipes or suggestions herein or procedures undertaken hereafter.