-
Gluten-Free Cheddar and Green Onion Cornbread
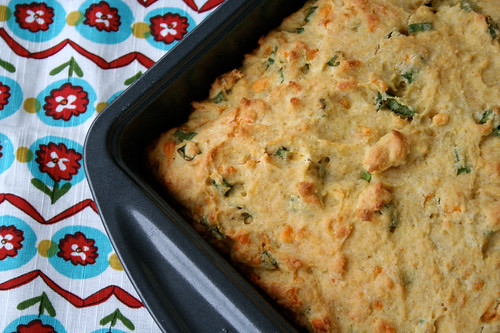
Here is another recipe from our Thanksgiving feast. This cornbread was great. It has been years since I have had cornbread. I wanted to have some fun with it, so I decided to go with a cheddar and green onion variation. It was so fantastic. Moist and fluffy, with the little bits of extra flavor from the cheese and green onions. As with most cornbread, it is best slightly warm with the smallest little pat of butter on top. I can’t wait to make this again. It was so easy and it made for great breakfasts the week following Thanksgiving.
I am remembering how amazing this cornbread was while writing this post and I think I am going to have to make it again this weekend. Hmm maybe this time with some jalapeños and cheddar. Yum. Enjoy.
Gluten-Free Cheddar and Green Onion Cornbread
serves 8
adapted from Gluten-Free Girl and the Chef1/4 cup sorghum flour
1/4 cup tapioca starch
1/4 cup potato starch
1/4 cup sweet rice flour
1 cup yellow cornmeal
2 tablespoons organic raw sugar
4 teaspoons baking powder
1 teaspoon salt
1 teaspoon xanthan gum
1/3 cup canola oil or melted butter
2 large farm fresh eggs, at room temperature
1 cup low-fat organic milk, at room temperature
1 cup thinly sliced green onions
1 cup shredded sharp cheddar cheesePlace rack in the middle of the oven and preheat oven to 400º. Generously grease a deep, 9-inch square baking dish with soft butter, oil or nonstick spray.
Sift the sorghum, tapioca, potato and sweet rice flours into a large bowl. Add the sugar, baking powder, salt and xanthan gum, mixing well. Add in corn meal, stir to combine.
Combine the eggs, milk and oil in a small bowl and beat with a fork. Pour the wet ingredients into the dry and mix on low-speed with your mixer until blended. Beat another 30 seconds with the mixer on high. Do not overmix. Add in the cheddar and green onions, stir gently to combine.
Pour the batter into the greased pan. Bake for 20 to 25 minutes, or until nicely browned and a toothpick stuck into the center comes out clean. Allow to cool for 5 minutes before cutting.
-
Flourless Carrot Cake
I am very behind on posting recipes right now. I still have recipes from Thanksgiving dinner, that I have yet to post. We are in the thick of one of our busiest times of the year. Our store is busy for the holidays, our web sales have been killer, we have two pretty big jobs on the books and we have been traveling to many different holiday events selling our stuff. On top of all of this, a week and a half ago, Buffalo got slammed with a really nasty snow storm that dumped about 3 feet of snow at our house in a very short amount of time. Our street wasn’t plowed for days and we were stranded at home. This all wasn’t so bad, except my husband Mark was supposed to be in Chicago selling our wares at the Renegade Craft Fair Holiday Sale. And worst of all, our fridge and pantry were pretty bare, I had planned to shop that coming weekend. So, I couldn’t even make the best of the situation by baking and cooking. Needless to say, I have been craving to have a few days to just relax, sip on a cocktail or two and just cook!
I came across this recipe just days before Thanksgiving and I had still been looking for the perfect dessert option to bring to my parent’s house. I made a huge feast at our house beforehand for just Mark and I, complete with a pastured turkey from our farm and tons of healthy and gluten-free dishes. Admittedly, I had my hands full and didn’t get the best pictures, so I am unsure on how many of the dishes I will be able to feature this year (I still have to go through all the photos), but that just means I may have to recreate them again some time soon, so I can get them on here. Darn.
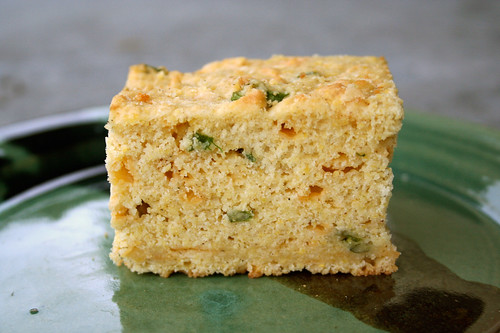
This cake was the perfect light finish to a day full of eating and it was so incredibly easy to make. I loved that it was naturally gluten-free and didn’t have many ingredients at all. It had a lovely spice to it, reminiscent of pumpkin pie filling and the flavor from the almonds was so great. It’s like this recipe was created just for me on the day.
Make sure to grate the carrots on the fine holes of your grater, or they’ll be too crunchy. For best results, wrap the cake tightly in plastic after it cools and serve it the next day. It will keep for five days in the refrigerator if wrapped airtight.
Flourless Carrot Cake
Adapted from Recipes for Health by Martha Rose Shulman, New York Times
serves 10-121 1/2 cups (1/2 pound) unsalted toasted almonds
1/4 cup organic dark brown sugar
1 1/2 teaspoons baking powder
1/8 teaspoon salt
1 teaspoon cinnamon
1/2 teaspoon freshly grated nutmeg
2 teaspoons grated lemon zest
4 large farm fresh eggs
1/3 cup organic raw sugar
1 teaspoon vanilla extract
2 cups finely grated organic carrots (about 10 ounces)
a bit of raw sugar for dustingHeat the oven to 350 degrees with a rack in the middle. Oil a 9-inch springform pan, and line it with parchment. Lightly oil the parchment.
Combine the almonds and the brown sugar in a food processor fitted with the steel blade. Blend until the almonds are finely ground. Add the baking powder, salt, cinnamon, nutmeg and lemon zest, and pulse together.
Beat the eggs until thick in the bowl of a standing mixer fitted with the whisk attachment, or with an electric beater. Add the organic raw sugar, and continue to beat until the mixture is thick and forms a ribbon when lifted from the bowl with a spatula. Beat in the vanilla. Add the almond mixture and the carrots in three alternating additions, and slowly beat or fold in each time.
Scrape the batter into the prepared cake pan. Place in the oven, and bake one hour until firm to the touch and beginning to pull away from the pan. A toothpick inserted into the center of the cake should come out clean. Remove from the heat, and allow to cool on a rack for 10 minutes. Run a knife around the edges of the pan, and carefully remove the spring form ring. Allow the cake to cool completely, sprinkle lightly with raw sugar, then wrap tightly in plastic.
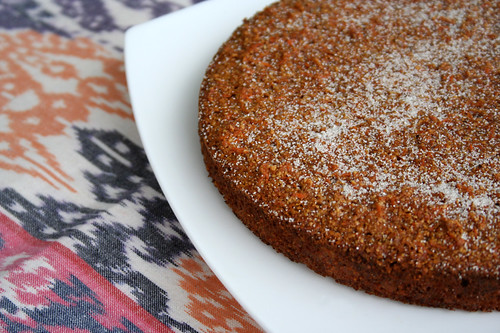
I realized in all the excitement of my first Thanksgiving dinner and sharing this dessert with the family, I never took a photo of the cake sliced, so I am doing something I never do and including a photo from the original recipe. The photo is what sold me on the recipe, so I figure it only fitting you get to enjoy it (and drool over it), as well.

©Andrew Scrivani for The New York Times -
Sautéed Shredded Brussels Sprouts with Toasted Walnuts and Dried Currants

I am a huge fan of brussels sprouts, always have been. For some reason, getting one of those huge stalks at the farmers market, is one my favorite things in the world. There is something about that beautiful green stalk peaking out of your canvas bag, that feels so right. I had big stalk that I grabbed while I was at the market and I couldn’t decide what to do with it. I absolutely love oven roasted brussels sprouts, but I always prepare them that way, I wanted to do something different. So after a little looking around, I came across many many recipes for sautéed shredded brussels sprouts. This sounded perfect. I was also very happy to discover that my amazing food processor, has an attachment for shredding. Who knew? That made shredding all the brussels sprouts, a breeze, it took me far longer to cut each one off of the stalk then to shred them all.
I didn’t have a large and deep enough skillet to cook the amount that I had, so I just used a large pot. The key is to get whatever pan you are using hot, but not too hot. If the heat is too high, you will cook them too fast. You want them tender, with a tad bit of a brown crisp to the outside. I found that since I had so many sprouts and I was cooking them in a pot rather than a skillet, the key was to keep stirring them around, so they wouldn’t just sit there and steam, only the bottom ones getting browned. Stirring allowed them to cook evenly and for all them to brown up nicely.
This is definitely going to be a winter side dish staple in our house. Perfect with so many different meals and I promise, even those that swear they hate brussels sprouts, would enjoy this. Looking to add a little meat? A bit of smoked ham, bacon or pancetta would be beautiful with this.

Sautéed Shredded Brussels Sprouts with Toasted Walnuts and Dried Currants
serves 6-8
2 pounds brussels sprouts
4 tablespoons extra-virgin olive oil
1 large garlic clove, minced
Coarse kosher salt
Fresh ground black pepper
1/2 cup walnuts, toasted, chopped
1/2 cup dried currantsTrim root ends from brussels sprouts. Using sharp knife or processor fitted with coarse shredding disk, thinly slice brussels sprouts into shreds. (This can be done one day ahead, cover and chill)
Heat olive oil in large deep skillet (or large pot) over medium heat. Add garlic; stir 30 seconds. Add brussels sprouts; sauté until crisp-tender but still bright green, 5 to 7 minutes. Season with coarse salt and black pepper. Transfer to serving bowl. Toss with toasted walnuts and dried currants. Serve.
-
Skip the canned junk. How to make your own pumpkin puree.

The processed goop in a can, doesn’t even begin to compare to using fresh pumpkin in recipes. The taste is so much richer and it is so much better for you. Pumpkins are loaded with vitamins and nutrients. Making your own pumpkin puree is easier than you think and once you do it, you’ll probably never use the canned junk again.
I picked up two decent sized sugar pumpkins at the farmers market this weekend. Each pumpkin was just $2 each and together they will probably yield at least 4 cups of pumpkin puree, if not more. You can even use the pumpkin from the jack-o-lantern that you carved up, but the sugar (or pie) pumpkins are just a bit sweeter and more tender. If you do use your jack-o-latern pumpkin, be sure to increase the spices a bit more as they can tend to be a bit bland.
Pumpkin puree is great for pies, muffins, bread, ice cream, the list goes on and on. From one pumpkin I was able to make vegan pumpkin spice ice cream, pumpkin spice muffins and I still had some leftover that I just added some brown sugar, butter, hazelnuts and some spices for a little lunch side-dish, which I am eating as I type this.
Another great thing about baking your own pumpkin, are the seeds. Save those seeds and then toast them with a bit of olive oil and salt. They are great as a snack, on salads, or you can even make a great fall pesto with them. (that’s on the agenda for this week).
Fresh Pumpkin Puree
1 fresh sugar pumpkin (also known as a pie pumpkin)
Preheat the oven to 350º F.
Cut the pumpkin in half and clean out the seeds and stringy membrane. Reserve seeds to make toasted pumpkin seeds. lace the pieces cut side down in a roasting pan along with 1/2 inch of water. Cook for 45 minutes to an hour, until the pumpkin is soft. You can check for doneness by piercing a fork into the flesh of the pumpkin. Remove from the oven and allow to cool. Scoop the flesh away from the skin. Blend the flesh in your food processor until smooth like canned pumpkin.
The pureed pumpkin can be used right away in recipes or you can store it a day or two in the refrigerator in an air-tight container. If it is going to be more than a couple days until you will be using it, freeze it in small quantities in freezer safe bags.


