-
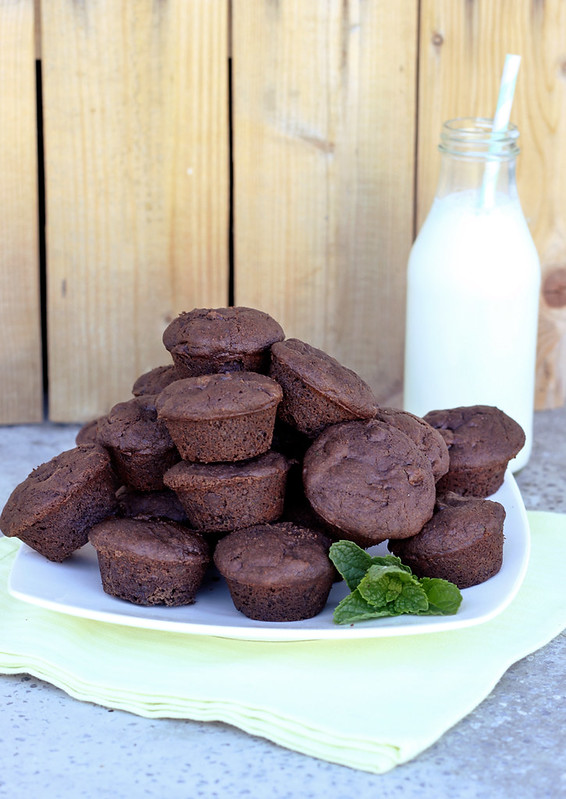
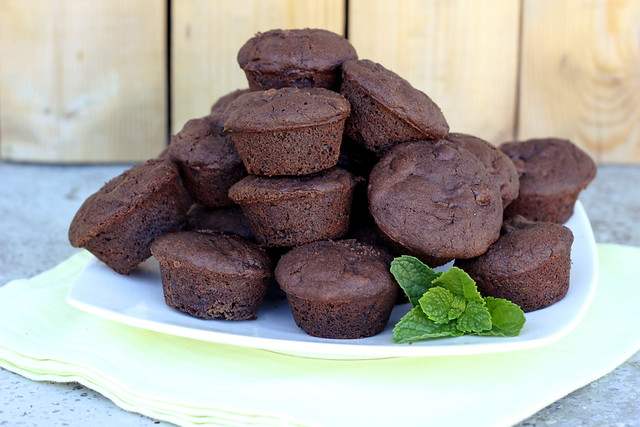
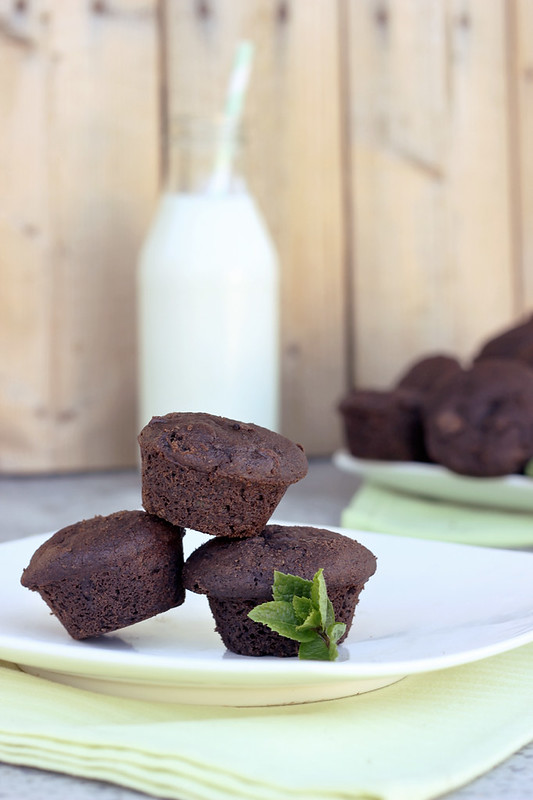
Mint Chocolate Chip Brownie Bites – Gluten-free + Vegan
I feel a little bad, because I really haven’t addressed the running thing in about two weeks. So many of you offered really great advice and I was really feeling great about it all. I went on a total of three runs and I really took each one very easy, trying not to go too hard too fast. Because I was using an iPhone app that basically was helping me ease into running, it had me on a program where I would walk for about 90 seconds then run for 45 and so forth, including a warm up and a cool down. The workouts were 30 minutes long and I was “running” about 2 miles each time. After my third run I was experiencing some very severe inner knee pain almost immediately afterward. I hesitate to even call it knee pain, as it was far more like leg pain, than knee pain. I wasn’t having any pain in my knee caps, I could kneel on them, etc. It was more any amount of pressure was seriously irritating both of my inner legs near the knee. Going up and down the stairs was horrid. I decided I need to take a break from running before I did any major damage to my body. Shortest running career, EVER! I kept up with my daily yoga practice and I did a ton of icing and I was taking ibuprofen, as needed. All of those things helped, but it took a solid 2 weeks for my legs and knees to stop hurting as much as they were. I wouldn’t say that now I am back to the way I was before this happened, but I am very close. So yeh, that was seriously upsetting and totally a let down. It is partially why I haven’t really mentioned it, because I was a little let down that only 3 runs in, I was already forced to take a break.
In talking with my friend Elyssa, who is also my amazing chiropractor and one of my yoga teachers, and in her looking at my knees, she explained that it seemed to be a tracking issue. My knees just aren’t tracking straight, so when I bend them, they tend to want to fall in, instead of staying in line over my toes. Not caused by the running, something that was already there, but aggravated by the running. Now that I am aware of this, I notice all of these things I do, even in yoga, where I allow my knees to fall in. So she gave me some strengthening exercises to do and I haven’t given up all hope, just yet. I do feel like I need to do some work on my body before I jump back into running. That knee pain honestly scared the crap out of me and made me quite sad that I was never going to be able to enjoy running.
At any rate, the running stuff really has very little to do with these brownies, but I felt the need to share the status on my newfound and short love affair with running, since I had left everyone high and dry after you all offered so much incredible advice and encouragement. Thank you again, seriously and hopefully I will need more of that advice again soon, when I feel ready to go back.
I guess what these brownies do have to do with this story is that I made them over the weekend for a Sip ‘N See party for Elyssa, her husband Aaron and their brand new baby boy, Oliver! The party was a bit of baby shower, but everyone got to meet the amazing Oliver and welcome him to the world. Elyssa and Aaron adopted baby Oliver and the party was one of the nicest celebrations I have ever been to. It was a very casual and laid back get together with lots of people from our yoga studio and obviously some of their other family and friends. Everyone just got to visit, swoon over the baby and just enjoy each other’s company and lots of yummy food. Since a handful of other people there are also gluten-free, a few are vegan, some are just dairy-free or just vegan, etc – my friend Kathleeen (hi, Kathleen! 🙂 ) asked me to make something sweet for a dessert! I was all over that. I love making sweets for people, especially when I know they will appreciate them being gluten-free and vegan!
It took me a couple of days to decide what to make for a good amount of people, in a casual grab-it and go kinda setting. It had to be small, bite-sized and easy to just pick up and eat. I was thinking about cupcakes for a while, but I am not much for the decorating part of cupcakes. It just isn’t my thing. That’s when I realized a brownie bite would be perfect. When I made these for the party, I wasn’t sure everyone would love the addition of mint, so I made half of them mint and half just classic chocolate. It could have been their placement on the plate, or coincidence, but the mint ones went so quickly. They were gone long before the classic ones. Since it was the first time I had made them, for the party, I did decide that I wanted to change a couple things about the recipe, so I made them again a few days later, to try to perfect them. The second time was definitely the charm, I seemed to get the ratios more on point and they were exactly right.
The fact that I have an overabundance of fresh mint growing in my yard, is the reason why I
wanted tohad to include some fresh mint in these brownie bites. I couldn’t resist. If you don’t have any on hand, no worries, you can simply leave it out. If you don’t like mint flavor, just leave out the fresh mint and the mint extract and add in a little more vanilla and you are left with classic chocolate chip brownie bites.These tasty little nuggets are filled with flavor, they are the perfect size, they are easy to eat and the mint and chocolate combination is really to die for! They are fluffy and moist, while being chocolatey and gooey from the chocolate chips and for me, they are the right amount of sweet.

[print_this]Mint Chocolate Chip Brownie Bites – Gluten-free + Vegan
makes approximately 30 brownie bites
Loosely adapted from this recipe- 1/2 cup coconut oil, melted, plus a little more for the pans
- 1/2 cup garbanzo and fava bean flour
- 1/2 cup almond flour (aka almond meal)
- 1/4 cup potato starch
- 2 tablespoons arrowroot starch
- 1/2 cup maple syrup
- 2 1/2 teaspoons baking powder
- 1/2 teaspoon baking soda
- 1 teaspoon salt
- 3/4 cup unsweetened cocoa powder
- 1/2 cup mashed ripe bananas
- 1 tablespoon pure vanilla extract
- 1/4 – 1/2 teaspoon mint extract (I used just about 1/2 teaspoon and the mint flavor was perfect, not too overpowering at all)
- 1/4 cup hot water
- 10 ounces vegan, gluten-free semi-sweet chocolate chips (mini chocolate chips would also be good)
- 1/4 cup firmly packed, fresh mint, very finely chopped
Preheat oven to 325 degrees. Brush 3 dozen mini-muffin pans with oil; set aside. You can also just use one pan and wait until each batch cools to unfold them and then regrease the pan to make the next batch (this is what I did).
In a medium bowl, whisk together garbanzo and fava bean flour, almond flour, potato starch, arrowroot, baking powder, baking soda, salt, and unsweetened cocoa powder; set aside. In a large bowl, mix together banana, maple syrup, coconut oil, vanilla and mint extract. Slowly add flour mixture, stirring to combine. Stir in water until it forms a batter. Fold in chocolate chips and fresh mint.
Place approximately 1 tablespoon batter into each prepared muffin cup, you want them about 3/4 of the way filled. Transfer muffin pans to oven, and bake until a toothpick inserted into the center comes out clean, 18 to 22 minutes. Let cool completely in the pan on a wire rack before unmolding.
[/print_this]
-
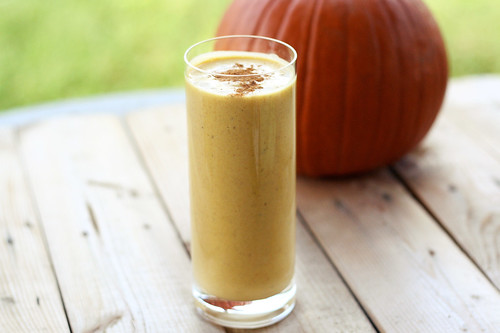
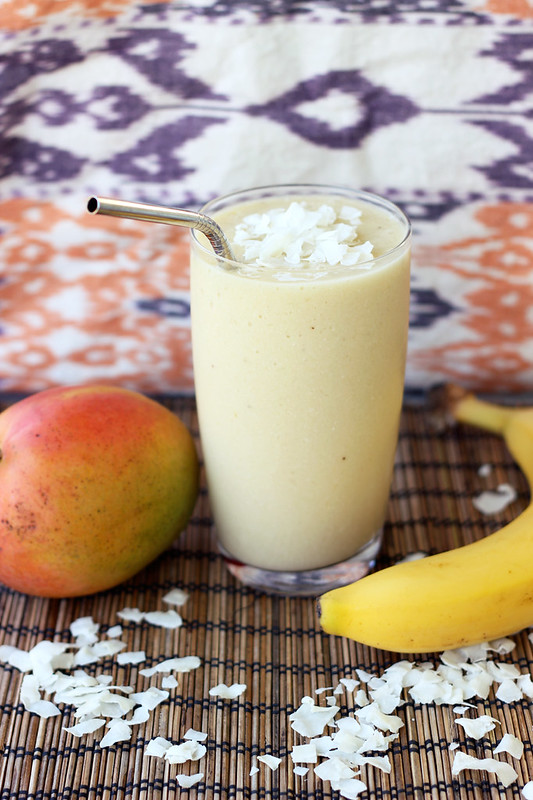
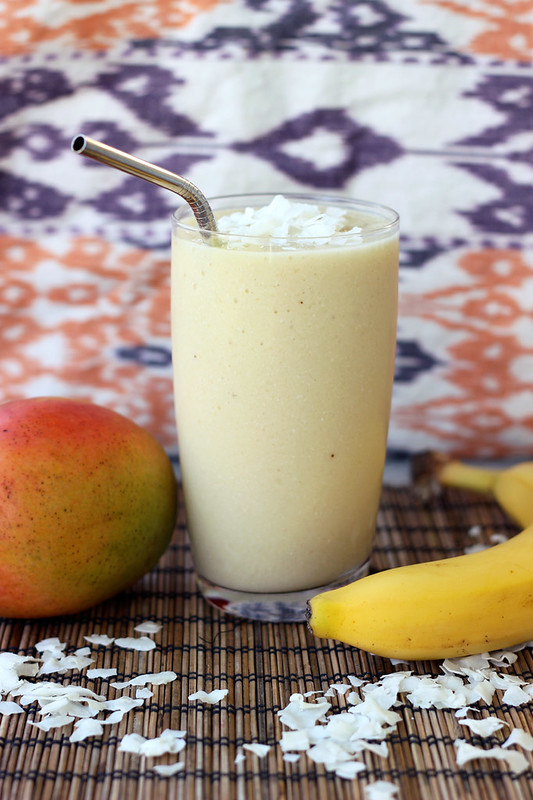
Coconut Mango Banana Smoothie – Gluten-free, Vegan + Refined Sugar-free
Not only did I live through my first run on Thursday evening, but I even went again today! So far, so good, I’m actually really enjoying it and I wasn’t even sore after. I definitely need to take it slowly and not try to do too much, but I could already see a slight improvement from my first run to the second.
In addition to adding running to my weekly fitness routine, I also decided I am going to try to wake up every morning at 6am (or thereabouts). I have found I am quite productive in the morning hours, so I really should be getting up as early as I can. With the sun already being up that early this time of year, it’s actually quite easy. I’ve done it every day this week since we returned home and I’m loving it. Even if I don’t jump right out of bed, at least I’m awake and getting my day started.
This morning I was up at 6 am and out of the house by 8:00 for a 90-minute vinyasa yoga class at East Meets West. Then I got home, grabbed my hubby and my iPod and we went for a 2-mile run together. It felt great to run after being nice and stretched out from yoga. I was hungry but I really didn’t have a huge appetite for a big meal after doing all of that. Since I had an afternoon’s worth of house cleaning to do, I decided to make this deliciously satisfying smoothie and it kept me full for many hours after while I washed flours, did dishes and cleaned the bathtub.
This filling and creamy little drink is so smooth and thick, almost milk-shake like. The flavor from the mango and banana are so bright and fresh which pairs so nice with the smooth creamy taste of the coconut and vanilla. I had grabbed a carton of unsweetened almond milk/coconut milk blend at the store the other day so I used that, but you could use straight coconut milk , almond milk or whatever your favorite non-dairy milk is.
[print_this]Coconut Mango Banana Smoothie – Gluten-free, Vegan + Refined Sugar-free
serves 1- 1 cup unsweetened almond milk / coconut milk blend (or any other non-dairy milk)
- 1 organic mango, sliced
- 1 organic banana, peeled
- 1 tablespoon maple syrup (or any other sweetener of your choice, dates, stevia, hone, raw sugar, etc)
- 1 tablespoon extra virgin coconut oil
- 1 handful of ice
- 1 teaspoon vanilla extract
- 1/2 tablespoon unsweetened coconut flakes for topping, optional
Add all of the ingredients to a blender and puree until smooth and creamy. Serve immediately. Sprinkle some coconut flakes on top, if you wish.
[/print_this]
-
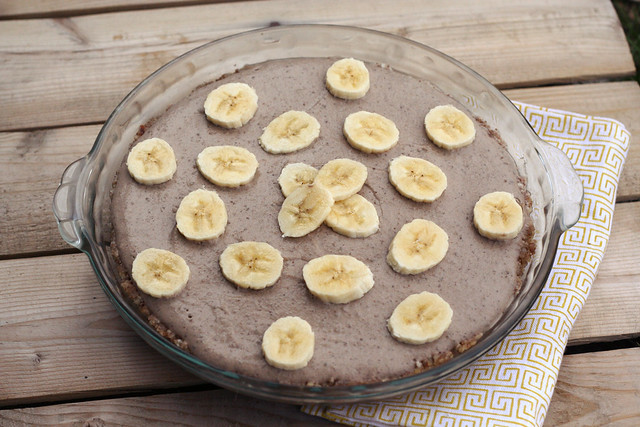
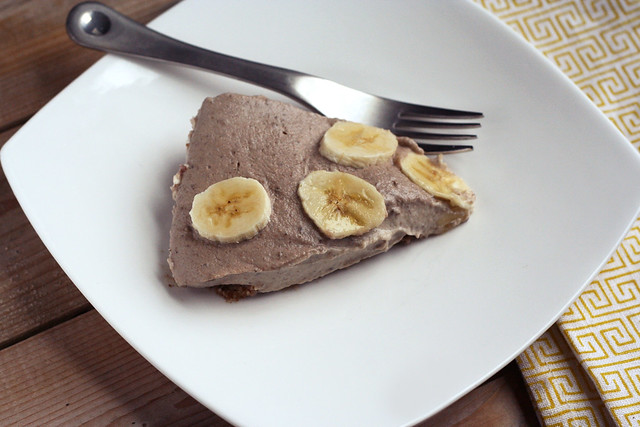
No-Bake Banana Cream Pie – Gluten-free + Vegan
I was very excited when I got an email a few weeks ago from Free People asking if I’d like to be a guest blogger on their popular blog, BLDG 25. I, of course, said yes, and I am a regular lurker of the blog and I really love it. They asked if I would share an exciting recipe for the launch of their newly designed and updated blog, so I knew the perfect recipe to share.
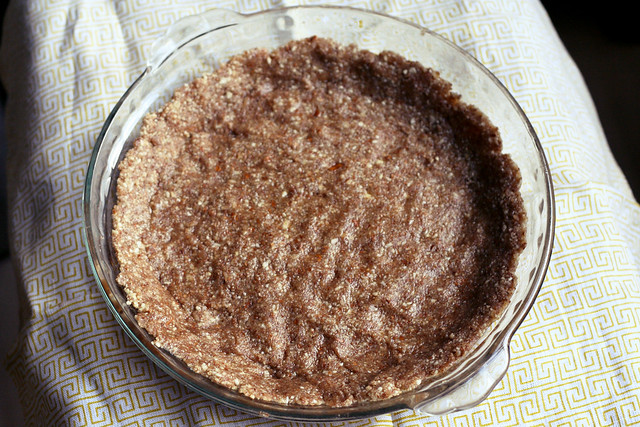
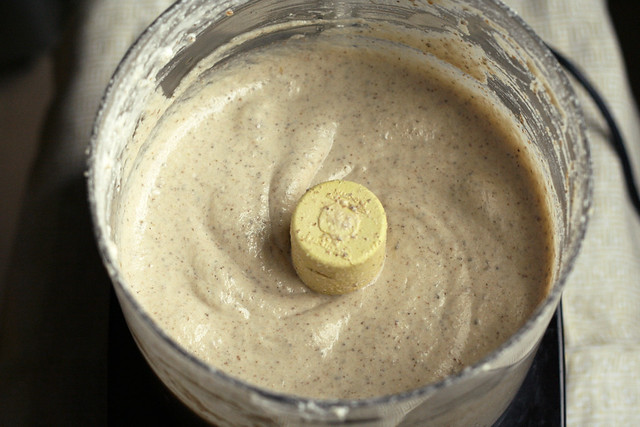
I had been working on a recipe for No-Bake Banana Cream Pie, with a raw nut based crust and a non-dairy filling, so that seemed like the absolute perfect fit. This pie is both gluten-free and vegan and easily made raw, and it is of course absolutely delicious, even without all the sugar, dairy and other yucky stuff. And come on, who doesn’t love pie?
So, go on over to the newly redesigned and updated Free People Blog, BLDG 25, now and check out the recipe for my No-Bake Banana Cream Pie and please take a minute to comment, if you will. There was mentioned of me being an ongoing guest poster, so who knows, there may be more Tasty Yummies on the Free People blog soon enough! Enjoy.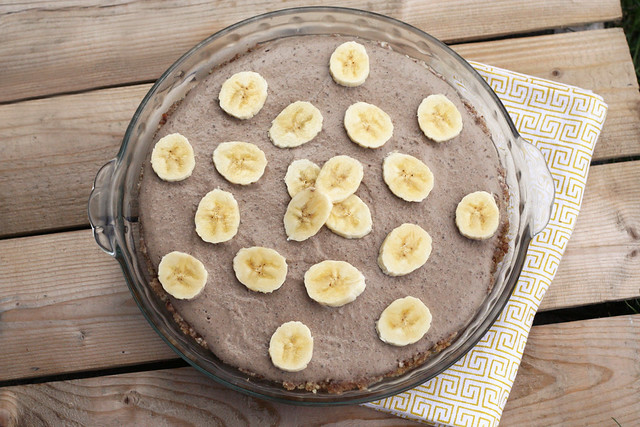
-
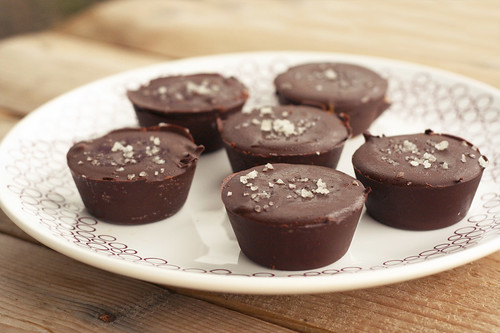
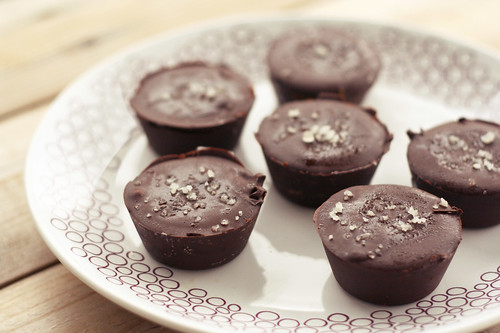
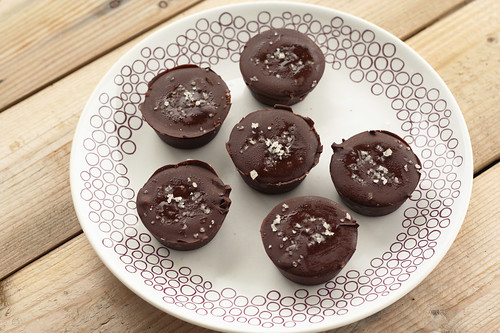
Dark Chocolate, Almond Butter Mini-Cups with Sea Salt – Gluten-free, Vegan + Refined Sugar-free
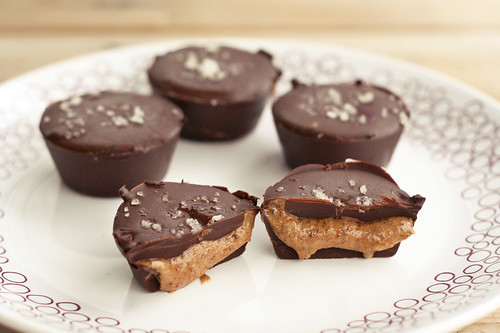
Ever since I made these dark chocolate coconut treats about a month or so ago, I have been a little obsessed with making simple little chocolate treats at home. On Easter, since we really don’t keep many sweets at home and we didn’t do the Easter basket thing, I was craving chocolate treats and decided to make some dark chocolate peanut butter cups. I didn’t take any photos since they weren’t totally perfect and I also decided I wanted to buy a mini-muffin tin so I could make smaller cups. The full size muffin cups are nice, but it is way more chocolate than what I need. I also thought it would be nice to make them with almond butter instead of peanut butter since I am so obsessed with it. Any nut or seed butter would work here, so play around. You will also see in my notes below that if you don’t wish to sweeten your own dark chocolate, you can simply just melt semi-sweet chocolate chips. I prefer to start with a good quality organic unsweetened dark chocolate something in the range of 70 – 100%, and then sweetened to my own liking since I like my dark chocolate to be subtly sweet. You may find that my measurements are too low and you want more sweetness. Go for it. Or skip sweetening it yourself and buy premade chocolate. Whatever you’d like.

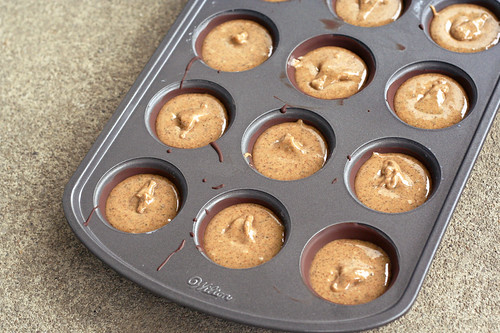
I make these in a non-stick mini-muffin pan, like this one. You could definitely use a candy mold, a full sized muffin tray or maybe even a larger ice-cube tray. If you’d like, you can also line your muffin pan with paper liners. I didn’t happen to have any, so I went without, and very lightly greased my pan with some coconut oil, to be sure they wouldn’t stick. They likely wouldn’t have stuck, but I wanted to be sure of it.
Some of you may be wondering why I included the chia seeds in the almond butter filling or if you could use flax seed meal instead. I decided to include it because besides LOVING chia seeds, I had some leftover ground up chia sees on hand after making these delicious tortilla wraps from The Spunky Coconut, over the weekend. I thought it would help bind together the filling so it wouldn’t be too runny and I also thought it was a nice way to add some of the lovely benefits that chia seeds have to offer. You can read more about all of those lovely benefits here in this post from Lexie’s Kitchen. Feel free to use ground flax seeds instead or to skip it all together. It isn’t a necessity in the recipe.
As far as the sea salt goes, I really adore the flavor combination of dark chocolate with sea salt, so I try to squeeze it into my life whenever humanly possible. It may actually be one of my all time favorite things. If you aren’t a fan of the luscious salty/sweet combo, leave off the salt. You could also press a single almond or some almond slices into each one. Have fun.
What is your favorite flavor combination when it comes to sweets?
[print_this]Dark Chocolate, Almond Butter Mini-Cups with Sea Salt – Gluten-free, Vegan + Refined Sugar-free
makes 12 mini-cupsDark Chocolate Outside:
- 8-9 ounces of dairy-free, dark chocolate – (I used this unsweetened dark chocolate and sweetened it myself, as you can see below. If you use semi-sweet chocolate or chocolate chips you can skip the coconut oil and the sweeteners below.)
(optional if using unsweetened chocolate)
- 1 tablespoon coconut oil
- 3 tablespoons pure maple syrup*
Almond Butter Inside:
- 1/2 cup chilled organic unsalted almond butter (or any other nut butter or seed butter of your choice)
- 1 tablespoon ground chia seeds (you can just grind whole chia seeds in a coffee grinder or Magic Bullet)
- 2 tablespoons pure maple syrup
- a pinch of fine grain sea salt
For Topping:
- 1/2 to 1 teaspoon course grey sea salt (you can also try smoked sea salt)
Using a little coconut oil on some wax paper or a paper towel, very lightly grease a non-stick mini-muffin pan. (the muffin tin may not need to be greased, but since I didn’t use any paper liners, I didn’t want to risk the candies sticking.) You could also use a silicon candy mold. Set the pan aside. Melt the dark chocolate with the coconut oil (or your chocolate chips), either very carefully in a double boiler setup on the stove top or in small increments in the microwave. After the chocolate and coconut oil is melted, whisked together and well combined, remove from the heat (if you melted it on the stove), and add in the maple syrup. Stir well to combine. Give the chocolate topping a little taste to see if you want it any sweeter. Add more syrup, if you wish.
Using about half of the melted chocolate, add a little bit to each cup of your mini-muffin tin. Probably about a teaspoon or so to start. Grabbing either side of the tin, swirl the pan around to start moving the chocolate up the sides of each cup. Try to get it all the way up if you can. You can also use a pastry brush or spoon to push it up the sides, but I find just swirling it around works best. You can also line each cup with a paper mini-muffin liner and just paint the melted chocolate up the sides. Once it is evenly up the sides, you can add a little more chocolate to make sure that the bottom is covered, just don’t add too much, you need to save room for the filling and top.
Place the muffin tin into the freezer to allow the chocolate to set. Meanwhile, start making your filling. Add the almond butter, ground chia seeds, maple syrup and a pinch of sea salt to a small bowl. Mix very well to combine and allow it to sit about 5 to 10 minutes while the chocolate sets up in the freezer.
Once the chocolate has hardened, pull the muffin tin out of the freezer and add about 1 teaspoon of almond butter filling to each cup. Then take the remaining melted chocolate and spread it over top of the almond butter. I find using the back of a spoon is the easiest to give it a nice smooth surface. And if you are adding the sea salt on top, sprinkle a few pieces on top of each cup. Place the muffin tin back into the freezer to allow the chocolate to harden. This will probably only take about 30-minutes, total.
Once hardened, remove the muffin tin from the freezer and carefully pop or slide each chocolate mini-cup from the tin. Should happen very easily. Store these in the fridge or they will get pretty soft and melted.* NOTE about sweeteners: You can use whatever sweetener of your choice and as much as you would like. Traditional sugar will obviously work if that’s your thing, as would honey or other sugar alternatives. Use what you like. Everyone likes their chocolate at different sweetness levels. I prefer mine not too overly sweet. As mentioned above, you could also just melt semi-sweet chocolate chips that are already sweetened and skip adding your own sweetener and coconut oil. Same goes for sweetness in the almond butter filling.
[/print_this]
{this post contains affiliate links}
-
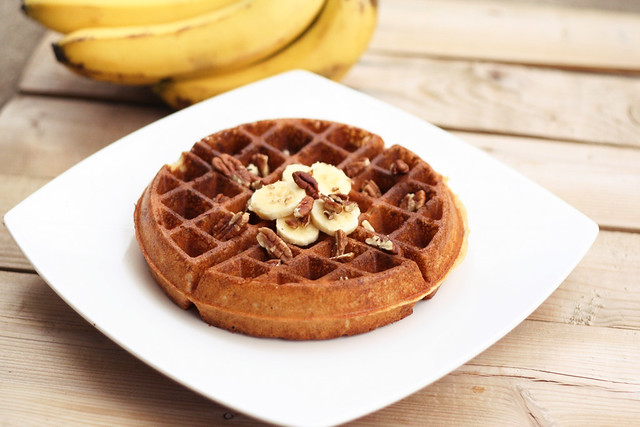
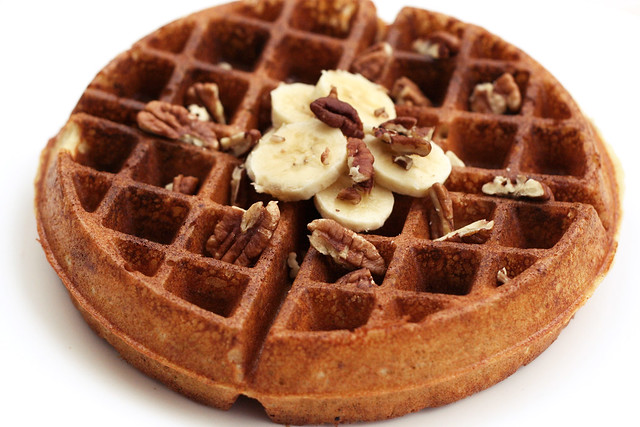
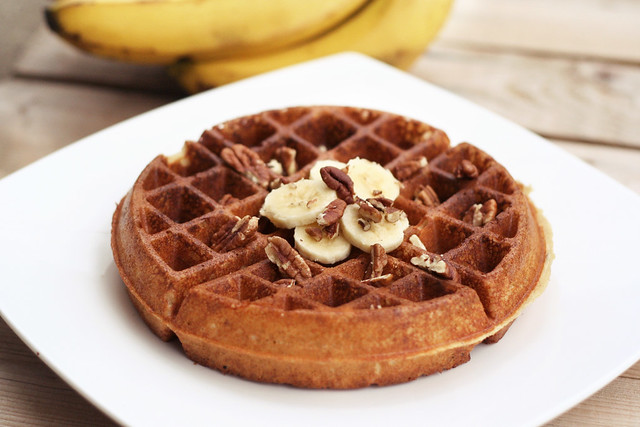
Banana Pecan Waffles – Gluten-free, Vegan + Refined Sugar-free
I am so so so excited about this recipe! I have been playing around with this recipe or some version of it for months. I made it once on a whim, first time I had ever tried and I didn’t measure too accurately and they came out perfectly. I have tried several times since to recreate it, each time without success. It has been a while since I tried, since I tend to get really frustrated when it’s just not working and I know it should. However, yesterday morning was my day! I went back to yoga first thing in the morning for an 8:30am vinyasa class, after a week off due to a slight injury and I couldn’t wait to get home to make these for breakfast. Fully expecting another crumbled, annoying mess, I didn’t really make a big deal about making these. But, alas, the stars aligned, I got my measurements on point and it all just worked! I love that.
Admittedly, one waffle, the first one, was sacrificed for the greater good of this recipe. I tried to open the waffle iron and take it out after just 3 minutes (which seems to usually be the sweet spot with my waffle iron) and it just wasn’t happening. The waffle stuck to either side of the iron and split into two halves when I opened it. That was when I realized I need to give it another minute or two. The remnants of that sacrificed waffle were still edible, so just know on your first time making these, you may lose the first one while learning that perfect time for your iron and this recipe.
I always have different gluten-free all-purpose flour blends on hand, whether pre-mixed or custom made with my own blends of flours and starches. This time I used Bob’s Red Mill since that is what I had on hand. It worked out perfectly. I cannot wait to try this again with one of my multi-grain blends, maybe something with teff, sorghum and/or buckwheat flours. I also can’t wait to try this with applesauce instead of banana for an apple cinnamon waffle.
These waffles are wonderfully fluffy with the perfect amount of golden browned crispiness to the outside. From what I have read about most waffle irons, that nice golden brown outside is achieved by using cooking oil instead of cooking spray to grease your iron. I used grapessed oil and I greased it right before I started and again in the middle of making these, after I made the first two. I decided to use some of the Pure Liquid Clear Stevia I received from NuNaturals, to lightly sweeten them. There is some natural sweetness that will come from the bananas, so if you want to skip a sweetener or use a little maple syrup or honey instead of stevia, that will work, too.
When serving, you can certainly drown these in your favorite local maple syrup and a pat of your favorite butter-alternative, or maybe some non-dairy whipped topping, (like whipped coconut milk). Or, you can just eat them as is, warm, topped with fresh bananas and chopped pecans. Feel free to use whatever your favorite nut is, or maybe try adding in some mini chocolate chips instead, or in addition to. This waffle would also be delicious sectioned into the little wedges and served warm, 1 or 2 of the wedges per person, topped with your favorite ice cream!
[print_this]Banana Pecan Waffles – Gluten-free, Vegan + Refined Sugar-free
makes 4 large Belgium style waffles – may make more depending on the size of your waffle iron- 1 large or 2 small organic banana(s), mashed – you are looking to get approximately 1 cup
- 1 3/4 cups unsweetened vanilla almond milk (or other non-dairy milk) – make sure it is room temperature, not cold
- 1/2 cup coconut oil, melted
- 10-15 drops liquid stevia (or you could use approx. 1 tablespoon of maple syrup or another liquid sweetener of your choice)
- 1 teaspoon vanilla extract
- 2 cups gluten-free all-purpose flour (I use Bob’s Red Mill)
- 1 1/2 tablespoons baking powder
- 1/4 teaspoon sea salt
- 1/2 teaspoon ground nutmeg
- 1/2 cup roughly chopped unsalted pecans (or any other nut of your choice. mini chocolate chips would be really good, too)
Topping:
- 1 banana sliced
- 1/4 cup of roughly chopped pecans
- butter, ghee or coconut butter
- maple syrup
- or anything else you might like.
Preheat your waffle iron. Make sure it is properly greased with cooking oil or non-stick spray. I drizzled a bit of grape seed oil on mine and made sure to spread it around. Cooking oil will give your waffles a nice golden outside that you won’t get with cooking spray.
In a large mixing bowl, whisk together the mashed banana, almond milk and melted coconut oil. Be sure your almond milk isn’t too cold or it will solidify the melted coconut oil. Add in your stevia and vanilla extract and give it a good stir.
Then add in the flour, baking powder, sea salt and nutmeg. Mix very well to combine, then fold in the chopped pecans or other goodies. Allow the batter to sit for 3-5 minutes.
Add 3/4 – 1 cup of batter to your hot waffle iron. Cook for 3-5 minutes, depending on your machine’s instructions. Mine took just over 4 minutes. Any less for me and the waffle would stick to either side of the iron and come apart in two when I opened it to check on it.
You can make as many waffles as you’d like and just store the remaining batter in an airtight container for up to 2 days in the refrigerator. You can also store any uneaten but already made waffles in an airtight freezer bag, either in the refrigerator or in the freezer and you can just heat one up in the microwave and/or toaster oven when you are ready to eat it.
[/print_this]
-
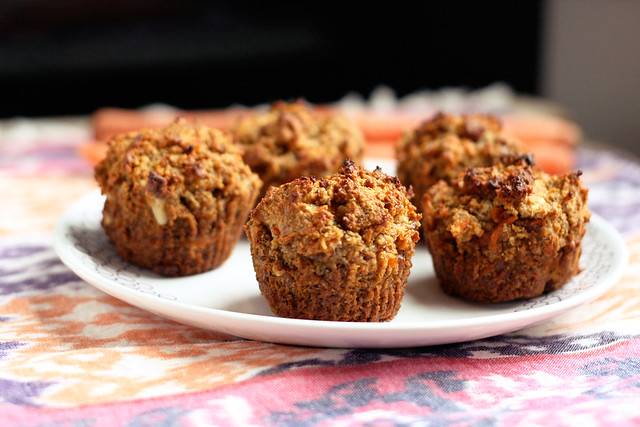
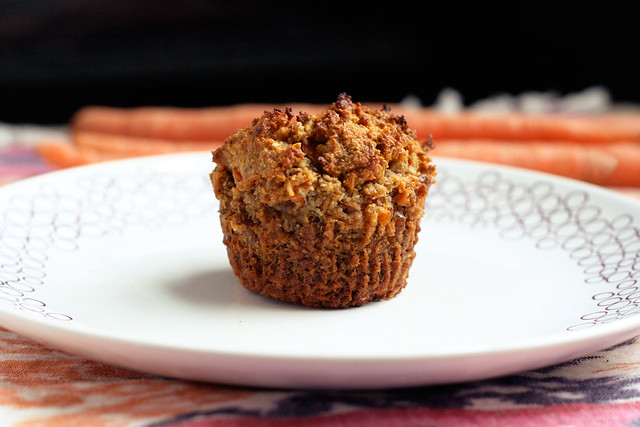
Gluten-Free + Vegan Carrot Cake Muffins
These delicious little treats were the second batch of muffins I made after the first batch ended up too soggy. They were very tasty, but I think that the carrot shreds have more water content than I gave them credit for, so the second time around I decided to add in some finely shredded coconut, since coconut is known to soak up moisture in recipes. You could also give coconut flour a try, but I am not sure if you would want the full 1/2 cup. Experiment.
The coconut flavor is subtle but it really compliments the rest of the flavors in this muffin quite nicely. The walnuts and golden raisins are both optional, but I would say unless you hate them, you should add them in. Their addition to this muffin reminds me of a slice of traditional carrot cake. These muffins are subtly sweet so they would be perfect for breakfast, dessert or even a little snack. Hubby was of course begging for some sort of cream cheese frosting.
I love how rustic these muffins ended up looking after baking, that is why I ended up taking off the papers before I photographed them. The outside of each muffin had such a beautiful toasted, golden brown hue with specs of the shreds of carrots shining through.
Normally when I am writing up a recipe or editing photos, I still have leftovers in the kitchen, so after I am done staring at the photos forever and craving another taste of whatever it is, I head downstairs and grab a little bite. Sadly, I made these muffins about 10 days ago, but we’ve been so busy getting ready for our pop-up shop this past weekend that I haven’t had a moment to edit the photos and write this up. So, now I think I am going to have to make another batch of these ASAP, I want them that badly.
[print_this]Gluten-Free + Vegan Carrot Cake Muffins
Makes approximately 6 large muffins2 flaxseed eggs (or you could also just use two large eggs):
2 tablespoons ground flaxseed
6 tablespoons hot water2 cups blanched almond flour*
1/2 cup unsweetened finely shredded coconut
1 teaspoon baking soda
1/2 teaspoon sea salt
1/2 teaspoon nutmeg
1/2 teaspoon cinnamon
1/4 cup maple syrup (or honey)
1/4 cup olive oil (melted coconut oil or melted ghee)
1 teaspoon vanilla extract
1 cup shredded carrot
1/4 cup walnuts, roughly chopped (optional)
1/4 cup golden raisins (optional)Preheat oven to 350˚F. Line a muffin tin with paper liners.
In a small bowl, whisk together the ground flaxseeds and water, set aside and allow to get thick and gelatinous.
In a large bowl, whisk together the almond flour, baking soda, salt, nutmeg and cinnamon. Add in the shredded coconut, stir to combine.
In a separate bowl, combine the maple syrup (or honey), vanilla, oil and flax seed eggs and whisk until well combined.
Add the dry mixture to the wet, stirring until combined. Carefully fold in the carrots, walnuts and raisins.
Spoon the batter into the muffin tin, filling each cup to the top if you want a nice muffin dome. Bake for approximately 25 minutes or until the tops are golden brown and a toothpick inserted into the center comes out clean. Cool the muffin pan on a wire rack for five minutes. Gently pop the muffins out to continue cooling on the rack (don’t cool them longer than 5 minutes in the hot pan they’ll definitely get soggy). Enjoy a muffin after they have cooled 10 minutes, you know you want to.
I find storing muffins covered tightly in the refrigerator or freezer to be the best, especially in the heat of summer. Just pop one out as you want it, heat slightly in the microwave if you want to take the chill off and go.
*NOTE: Something I have learned from baking on my own and from reading Elana’s Pantry, is that not all almond flour (or meal) is created equal. Bob’s Red Mill makes an almond flour, though easy to find, that doesn’t seem to react quite the same as other almond flours. It doesn’t seem to rise as much and it just seems to leave recipes flat. On Elana’s recommendation I now buy Honeyville brand almond flour in a 5-lb bag from their website. [/print_this]
-
Double Fudge Candy Cane Cupcakes – Gluten-free, Dairy-free
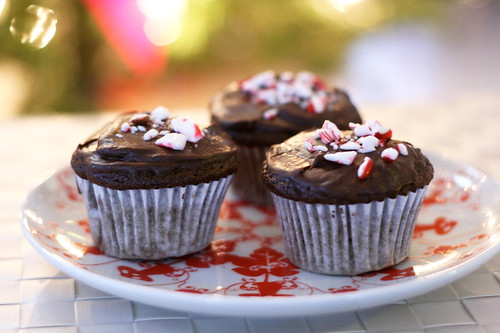
I know Christmas has come and gone now, but I still wanted to share these delicious cupcakes with you. I made these for Christmas Eve dinner and they were a huge hit, my 2-year old niece took one bite of the one I was about to eat and ran off with it before I even took a bite! They are super fluffy and moist with a perfect balance of chocolate gooey-ness inside and a bright peppermint burst from the peppermint extract inside and the candy cane bits on top. I told you I have been on a chocolate peppermint kick! I adapted Elana’s Almond Fudge Cupcake recipe from her cupcake cookbook, substituting peppermint extract for the almond extract. I really wanted a strong peppermint flavor so I kept it at the 1 tablespoon, but I actually think it could use a bit less (use your judgement). I cannot get over how incredible and simple Elana’s cupcake recipes are, in terms of flours and starches, these delicious treats only had almond flour and coconut flour, that’s it – no gums, no starches, no oil or butter, it is so simple. I, once again, also used Elana’s vegan chocolate frosting recipe from her cookbook, because I absolutely love how simple it is to make and I almost always have everything on hand to just whip it up quickly. If you are gluten-free and you don’t own Elana’s Gluten-free Cupcakes cookbook, you need to get it ASAP!
I want to note that I have almost completely stopped baking with agave nectar since I learned a few months ago that even though it is an unrefined vegan sugar-alternative, naturally coming from a cactus plant and having a low-glycemic index, it has been discovered it is very high in fructose and it’s affects on the body are very similar to that of high-fructose corn syrup. Yes it is true that sugar is sugar no matter what the source and I know everyone has their own opinions on all sugars and sugar alternatives and it is also true that no sugar is truly good for you, per se. I just personally try to limit my sugar intake (no matter what the source) and be smart when I do use sugar and sugar alternatives, choosing things that I know work for me, like dates or bananas to sweeten things like smoothies, cookies and muffins, naturally whenever possible or choosing coconut sugar, honey or maple syrup when those won’t work in baking, etc. There are times when a recipe is best made with sugar and I will obviously go that route and in this particular recipe since I was adapting a recipe from Elana’s Pantry, who uses agave nectar quite often, I decided rather than experimenting, to just keep the recipe as is in that way and use the remaining agave I had in the pantry from before. I figured it was best to keep the recipe with it’s original ratios, to avoid a Christmas eve cupcake failure. Leanne from Healthful Pursuit has a wonderful video here about healthy alternative sweeteners.
The holiday celebrations continue for us until New Years Day, so I hope to be making other goodies in the next few days. We have dinner with the family tonight, a big Greek feast with souvlaki and avgolemono soup, I am not doing any of the cooking or baking for tonight, but we are heading down to Kentucky later this week to visit with Mark’s family and celebrate Christmas and New Years there, so I plan to make some healthy treats for us all to munch on then.
I hope everyone had a wonderful Christmas Day, hanukkah or whatever you celebrate! Did you make any special treats for the holidays? Are your holiday celebrations continuing this entire week, like ours?
[print_this]Double Fudge Candy Cane Cupcakes – Gluten-free, Dairy-free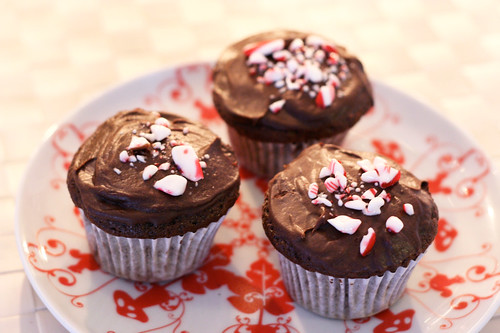
makes 12 cupcakes
Adapted from Elana Amsterdam’s Almond Fudge Cupcake recipe from “Gluten-Free Cupcakes – 50 Irresistible Recipes Made with Almond and Coconut Flour”1 cup blanched almond flour
2 tablespoons coconut flour
2 tablespoons unsweetened cocoa powder
1/4 teaspoon sea salt
1 teaspoon baking soda
4 large farm-fresh brown eggs
1/2 cup honey (maple syrup or agave nectar
1 tablespoon peppermint extract (use less here if you want the peppermint flavor to be subtle)
1/2 cup dairy-free mini dark chocolate chips (73% cacao)
1/4 cup crushed candy canes (corn syrup free, if you can find them)Preheat the oven to 350ºF. Line 12 muffin cups with paper liners.
In a large bowl, combine the almond flour, coconut flour, cocoa powder, salt and baking soda. Set aside.
In a medium bowl, whisk together the eggs, agave nectar, and peppermint extract. Blend the wet ingredients into the almond flour mixture with a handheld mixer until thoroughly combined, then stir in the mini chocolate chops.
Scoop 1/4 cup of the batter into each prepared muffin cup.
Bake for 20 to 25 minutes, until a toothpick inserted into the center a cupcake comes out with just a few moist crumbs on it. Let the cupcakes cook in the pan for 1 hour, then frost (see below recipe), sprinkle with candy cane bits and serve.
Chocolate Frosting
6 ounces dark chocolate chips (73% cacao) (about 1 heaping cup)
1/2 cup Spectrum all-vegetable shortening (I use Spectrum sustainable organic palm oil shortening)
1/4 cup raw honey (maple syrup or agave nectar)
1 tablespoon vanilla extract
2 tablespoon water
Pinch of sea saltHeat the chocolate in a medium saucepan over a very low heat, melt until it is smooth. (You can also melt them in the microwave in a medium glass microwave-safe bowl). Allow the pan or bowl to rest on the counter for 5 to 10 minutes to cool the chocolate to room temperature.
With a handheld mixer, blend in the shortening, then blend in the agave nectar, vanilla extract, water and salt until smooth. Place the saucepan in the refrigerator for 3 to 8 minutes, until the frosting is spreadable.
If the frosting gets too stiff to work with, reheat the pan very briefly over a low heat and stir until it is softened. If the frosting is too runny, place it back in the refrigerator until it firms up.
Use the frosting immediately or store in a glass Mason jar in the refrigerator for up to 3 days.
[/print_this] -
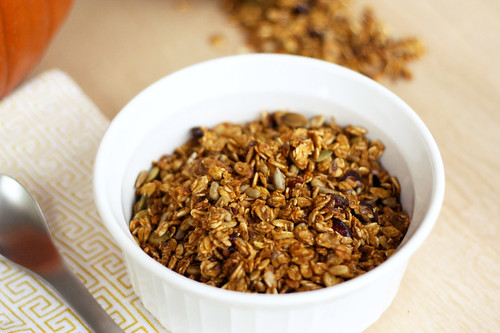
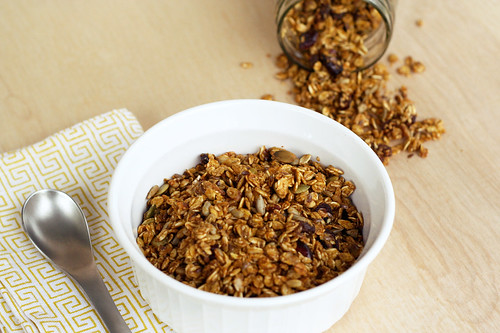
Pumpkin Spice Granola, Gluten-Free
This time of year I really cannot get enough squash, apples and especially pumpkin. I honestly buy as many sugar pumpkins as I can stand cutting up and baking, so I can puree the flesh and freeze it to use throughout the winter. I stayed strong for two weeks on my cleanse and I am now slowly adding some items back into my diet such as a small amount of organic dairy, some alternatives to sugar such as honey and coconut sugar and some of our pasture raised meat from the farm. I had fresh fruit and vegetable juices or smoothies many mornings for breakfast throughout the first two weeks of the cleanse that I was excited to bring a little something different into my morning routine this week.
I was looking for something a bit crunchy, subtly sweet and that echoed the beautiful fall weather that we’ve been experiencing. I thought of granola late Tuesday night and couldn’t wait to get up the next morning to make it. Granola – YES! I was most excited that I still had some fresh pumpkin puree in the fridge from the last pumpkin I baked, so I decided to incorporate that.
Granola is one of those things that for many people scream “healthy hippie food”, for me it was something I had given up on, being that I am gluten-free. For many years I couldn’t find a granola that I liked and I honestly never thought about making my own. When I started seeing different recipes throughout my travels online, I realized how simple it was to make at home and how much fun you could have with your recipe. I am not usually a traditional cereal person, I find it to rarely be satisfying and since I try not to eat processed foods that usually leaves most cereals in the dust. Granola, though it could be considered a cereal, is so much more than that junk in a box (cue Justin Timberlake and that Saturday Night Live skit, wait – what?).
There are so many variations you can take when making your own granola, with different nuts, fruits and seeds, you can experiment with sweeteners, you could go with or without oil or butter, the possibilities are endless. Really any combination of dried fruits and nuts would be delicious. I almost added some dry quinoa, but I figured I could experiment with that next time since my list of ingredients was already getting super long. Heck – you could even add chocolate chips if you’re one of those people who loves a sweet breakfast. Many granola recipes call for oil, but I decided to attempt to keep the recipe low in fat and make it without, it came out perfectly crispy. Feel free to add a tablespoon or two, if you’d like.
Beyond being super satisfying and delicious this granola made our house smell incredible. After it cooled and I took some photos, I poured a bunch into a bowl and splashed some ice-cold organic almond milk over the top, it was perfection. I haven’t yet done it, but it would also be delicious sprinkled over some greek yogurt or your favorite ice cream.
I had so much fun making this granola yesterday morning mostly because it was the first day my back felt like it was getting better instead of worse or staying the same. Getting down to go in and out of the oven was much less painful and tedious, sitting at my desk finally doesn’t hurt and yesterday and today were the first days since I hurt my back over a week and a half ago, that I didn’t cry from the pain and frustration. I think I am on the mend folks!! Cross your fingers and send me more of those healing thoughts – I miss yoga terribly and I can’t wait to be back to feeling like my normal self again. This granola definitely made it feel like I am taking a step in the right direction. Enjoy.
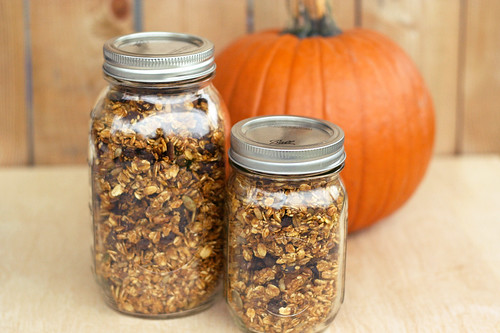
By the way – is anyone else as obsessed with jars as I am? I want to store everything in jars, they just look so pretty on the countertop and in the pantry.Pumpkin Spice Granola
1 cup fresh pumpkin puree (canned will also work here, but fresh is much tastier)
1 teaspoon cinnamon
1/4 teaspoon nutmeg
1/4 teaspoon of ground ginger
1 teaspoon salt
1/2 cup honey, maple syrup or agave (I used honey)
1 teaspoon vanilla extract
4 cups old-fashioned rolled oats (if you are gluten intolerant, be sure these are certified gluten-free oats. I use Bob’s Red Mill)
1/4 cup flax seeds
1/4 cup sesame seeds
1/4 cup hulled sunflower seeds
1/4 cup hulled pumpkin seeds (pepitas)
1/4 cup raisins
1/4 cup of dried cranberries (you can mix and match your dried fruits as you wish, I just used what I had in the pantry)
1/4 cup dried apricots, roughly chopped
1/2 cup pecans , roughly chopped (almonds or walnuts would also be delicious)
1/4 cup unsweetened flaked coconutPreheat oven to 300ºF.
Line large baking sheet with parchment paper. You can also use a roasting pan, which is nice since you can just mix all of the ingredients right in it, without losing things over the edge.Combine all of your dry ingredients, oats, seeds, nuts, dried fruit etc., in a large bowl (or in your roasting pan). Mix well.
In a small bowl stir together all wet ingredients plus your spices (pumpkin, honey, spices, etc).
Pour the wet ingredients over the dry ingredients and stir until well coated. Let sit 5 to 10 minutes.
If you aren’t using a roasting pan, spread the granola on the baking sheet and bake for 30-40 minutes. Toss every 10 minutes or so to provide even toasting.
Let cool completely – it will get crispier as it cools. Keep in airtight container.
Here are a few of my other favorite pumpkin recipes:
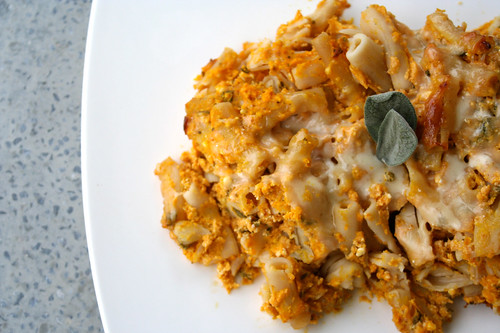
Pumpkin, Ricotta & Gruyère Pasta Casserole (gluten-free)
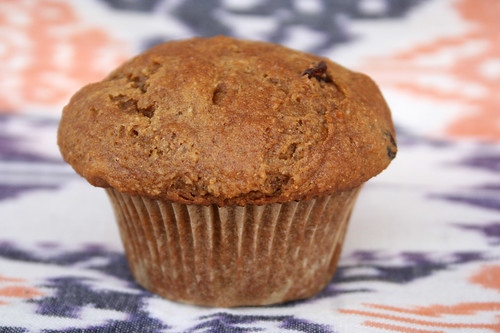
Gluten-Free Pumpkin Spice Muffins with Hazelnuts and Cranberries