Posts by Beth @ Tasty Yummies

  1. Black Bean Enchiladas

    IMG_9011

    IMG_8996

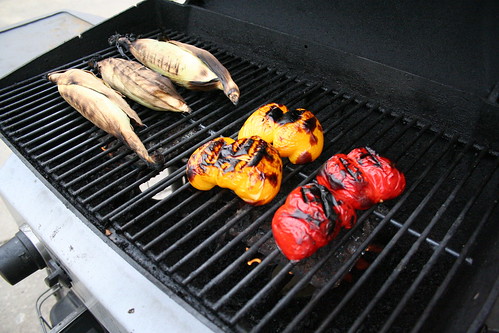
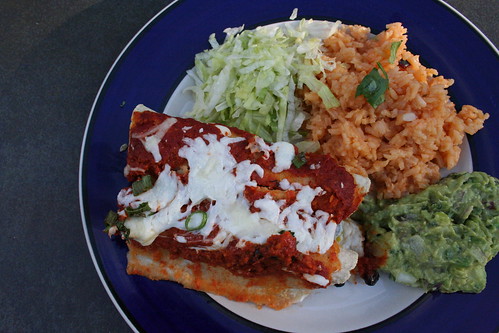
    I find buying things just for the sake of a holiday to be silly, I don’t do it. I’d rather give something to someone I love because it reminds me of them, no matter what the day. Being that today was Mother’s Day, I decided that my gift to my mom would be to cook for her. We all get together at my parent’s house every Sunday and have a delicious dinner together, so I offered early in the week to be the one to do the cooking this week.

    We were very lucky growing up, my parents always had a home cooked meal prepared for us for dinner every night, we would all sit down at the end of the day and have dinner together. Whether it was my mom cooking something in the crock pot or my dad concocting some random recipe, it was always there, it was always homemade and it always made with love.  I am realizing now as an adult what an amazing gift that was, and just how lucky we were. I know this is where my love to cook comes from and why I love that feeling you get when you are able to share something you’ve made from scratch with the people you love the most. This meal was even better than me just cooking it alone for everyone, because we made it together and hung out all afternoon in the kitchen. My dad helped grill the veggies, made his famous Spanish rice and some delicious margaritas to go with the meal. My mom cooked the corn tortillas as I was pressing them and she helped assemble the enchiladas.  My sister, Dana, hung out and kept us all company (I swear I will get you cooking Dana). My husband, Mark, and my nephew, Noah, watched movies, rough housed and played cars in the living room. A fun family day. Though we missed my sister, Vicky, her boyfriend, Nick, and my lovely niece, Teagan.

    IMG_8947

    IMG_8949

    There are a few different elements to this recipe and they will all be in this post. I will post a separate entry for my guacamole, which we enjoyed as a side.

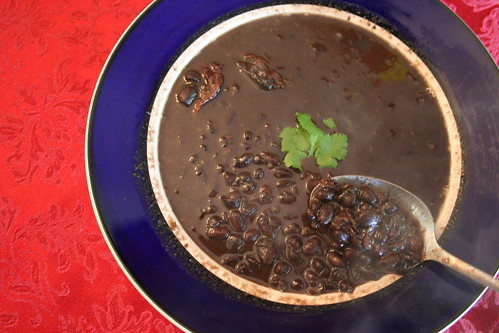
    I started preparing the meal the day prior by soaking the beans for the slow cooked black beans, which I wanted to have a ton of flavor since they would be the main element of the enchiladas. I also grabbed a plain rotisserie chicken at the grocery store this morning since I knew my dad wouldn’t go for an entirely vegetarian meal, being the typical “meat and potatoes” guy and my older sister, Dana, doesn’t like beans. There really are so many ways you can make these enchiladas, adding different vegetables like zucchini, spinach or mushrooms, and different proteins like tofu or various meats, you can even go just cheese. The sky is the limit. This was what I thought sounded the best, so this is what I went with. They really turned out great. The enchilada sauce had so much flavor, I can’t believe I ever bought canned enchilada sauce in the past, this was so easy. The beans had a delicious smokey, slow cooked flavor that you won’t find in any can of black beans on the shelf at the grocery store. Definitely worth the extra time.

    IMG_9002

    Slow cooked black beans
    Adapted from Recipes for Health, New York Times, March 2009

    1 pound dry organic black beans, washed and picked over
    2 quarts water
    1 tablespoon olive oil
    1 medium onion
    4 large garlic cloves, minced
    1/4 cup cilantro, chopped
    3 whole chipotles, dried
    kosher salt

    Soak the beans in the water for at least six hours. Keep them in the refrigerator if you are soaking for a long time in hot weather.

    Heat the oil over medium heat in a large soup pot and add the onion, stirring until it begins to soften. Add two cloves of the minced garlic. Cook until fragrant, about a minute. Add the beans and soaking water. Be sure the beans are covered by at least 1 inch of water, add more if necessary and bring to a boil. Reduce the heat to low and skim off any foam that rises. Cover and simmer one hour.

    Add the salt, remaining two cloves of minced garlic, cilantro and the whole chipotles. Continue to simmer another hour until the beans are soft and the broth is thick and fragrant. Taste. Add more salt to taste, add more garlic if it needs it. Let sit overnight in the refrigerator for the best flavor. Heat back up over medium heat before making the enchiladas.

    IMG_8943

    Enchilada Sauce

    2 tablespoons olive oil
    1 small onion, chopped
    2 large garlic cloves, minced
    2 small jalapeno peppers, chopped
    6 medium tomatoes, coarsely chopped
    2 teaspoons cumin
    2 teaspoons chili powder
    3 dried chipotles, whole
    2 roasted red peppers, chopped
    2 teaspoons salt

    Heat oil over medium heat in a large saucepan, add onion, garlic and jalapeno. Sauté, stirring until the vegetables begin to soften, about three minutes. Add tomatoes, cumin, chili powder, chipotles, roasted red peppers and salt, simmer on a low heat for at least 30 minutes, until the sauce has thickened and the tomatoes are very soft. Turn the heat off, remove the whole chipotles and add the sauce to a food processor, blend until smooth. Set aside.


    IMG_8954

    IMG_8957

    IMG_8960

    Black Bean Enchiladas
    Serves 8-10

    20 fresh homemade corn tortillas, prepared, cooked and ready to be eaten
    (if you used store-bought corn tortillas, you will need to heat these up to make them less breakable)
    slow cooked black beans, see recipe above (or if you must, canned black beans)
    enchilada sauce, see recipe above
    3 ears sweet corn, cooked thoroughly on the grill
    2 bell peppers, roasted on the grill (red, orange, yellow or green), cut into strips
    1 cup shredded queso blanco
    1 cup shredded jack cheese
    green onions
    cilantro
    sour cream
    guacamole
    shredded lettuce

    Preheat your oven to 350° F

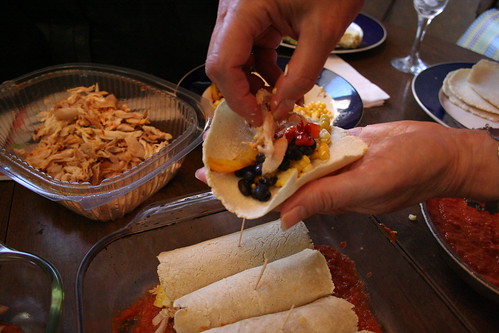
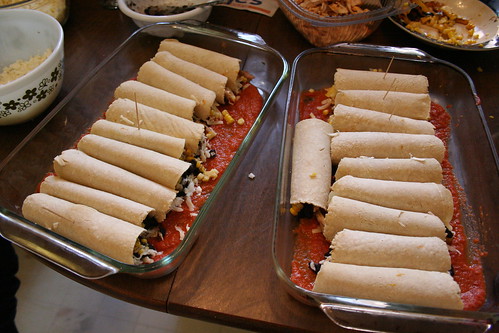
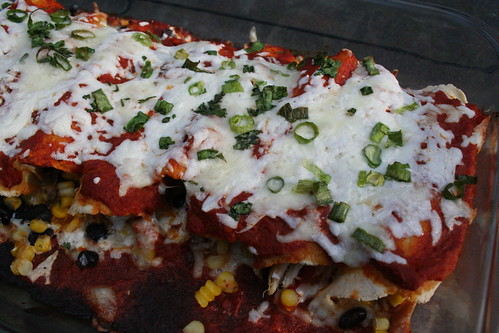
    Prepare your corn tortillas, black beans and enchilada sauce ahead of time. Lightly coat the bottom of two 9″ x 13″ glass pans with the enchilada sauce, probably about 1/2 cup in each. Place a corn tortilla, flat in the palm of your hand (or on a flat surface) and put a spoonful of corn, black beans, a couple of peppers, and a sprinkling of each cheese in the tortilla, careful to not overfill it and to leave enough ingredients for the rest of the tortillas. Be sure to leave enough cheese to top the enchiladas as well. Carefully roll the tortilla up and place it with the open side down in the sauce lined pan. Repeat this with the rest. Because we made some with chicken and beans, some with just beans and some with just chicken, we marked them accordingly with toothpicks. You really can add anything to the filling of these, be creative. Pour the remaining sauce over the enchiladas and top with the remaining shredded queso blanco and jack cheese and chopped green onions and cilantro. Bake 25 – 30 minutes until the cheese is melted, browning and bubbling. Top with (or serve on the side) sour cream, lettuce, and/or guacamole or any other favorite garnishes.

    IMG_9020

    With love.

  2. Roast Chicken, Apples, Leeks and Baby Potatoes

    IMG_8829

    IMG_8827

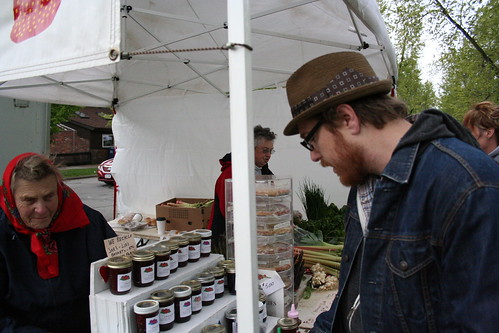
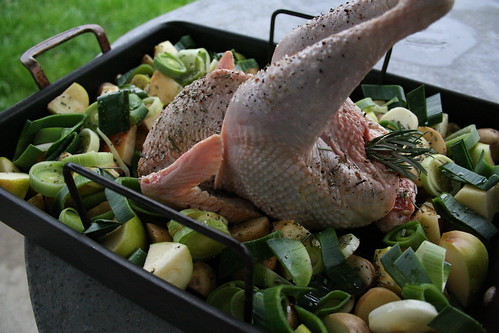
    Yesterday was the first day of our big Farmers Market at Elmwood and Bidwell and I knew all week that the weather was doomed for it’s opening day. We decided to meet my parents there right at 9 am to possibly beat the rain and wind. It actually wasn’t too bad, though it felt more like a very cool Autumn Day, not Spring. We walked around, looked at everything, ran into friends and began to make a plan for what we wanted to buy. The sun even peaked out a time or two. Eventually dark clouds made their way overhead, the wind picked up and we knew we should probably make our purchases soon.

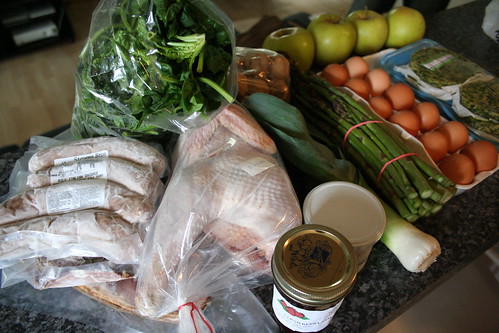
    We got so much great stuff, apples, leeks, spinach, asparagus, baby potatoes, veggie burgers, yogurt leek sauce, homemade strawberry jam, fresh from the farm eggs, sausage, bacon, and a beautiful, whole, fresh Heritage chicken. I decided this would be dinner. A roast chicken. It was the perfect day for it, it was cold, rainy and windy and I just wanted to stay in. So, I took a look at everything else we bought and made a plan.

    IMG_8843

    IMG_8867

    IMG_8877


    Roast Chicken, Apples, Leeks and Baby Potatoes

    Serves 2 with leftover veggies

    2 medium apples (I used Crispin) chopped
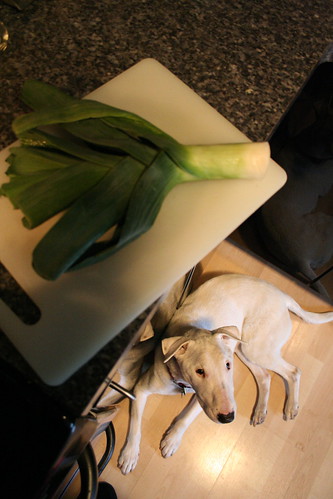
    1 leek (white and light green parts), chopped
    1 pound of baby potatoes, halved
    4 small sprigs fresh rosemary, chopped
    olive oil
    Sea salt and freshly ground black pepper
    1 3 pound whole chicken – we had a farm raised, all natural, heritage chicken from Painted Meadows Farms in Franklinville, NY

    Preheat your oven to 350° F

    Rinse the bird, inside and out and pat dry. Place the potatoes, leeks and apples in the roasting tray of a large roasting pan, place the chicken in the center (breast side up). Drizzle olive oil over everything, making sure to get a good light coating over the whole bird to give you a crispy, perfectly browned skin. Sprinkle everything with rosemary, sea salt and freshly ground pepper. You can also sprinkle the inside of the bird with your spices as well, I did that plus I stuffed a couple of chopped leeks in there, as well as a whole sprig of rosemary. Toss the vegetables gently to make sure they are coated.

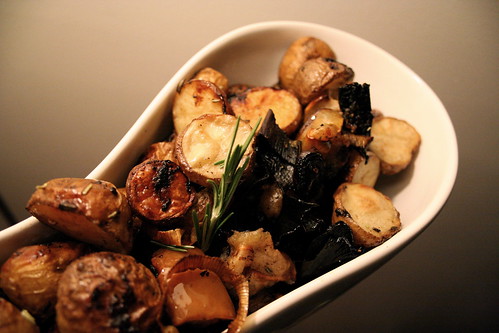
    Roast the chicken until it is cooked through and the apples, potatoes and leeks are tender. I took the chicken out around 2 hours and the veggies could still use more time, so I took the chicken out to rest, took the vegetables out of the roasting tray so they could cook in the juices from the chicken and turned the oven up to 400° F. I wanted to get them really brown and crispy, the way we like them. Taste the veggies as they are done and season to taste with salt and pepper.

    Allow the chicken to rest 10-15 minutes before cutting into it, this will allow the juices to redistribute. Serve with a nice helping of the apples, leeks and potatoes.

    IMG_8898

    IMG_8927

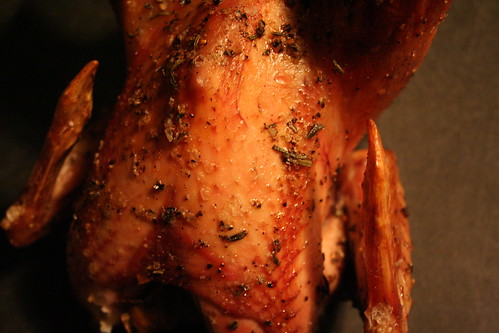
    We found that the Heritage Chicken was much different from any other chicken we had ever roasted before, it had an incredible scent when it came out of the oven and it tasted so amazing, a much more rich chicken flavor than from the grocery store chickens. We found the dark meat to be very dark and slightly tougher (almost gamier), a bit more like a cornish hen. However, the breast meat was impeccable, what chicken should taste like, the best I have ever had. The skin, though I don’t typically eat it any way, was thicker than usual and tough to eat. Mark usually eats as much as he can before I start nagging him about the fat, but this time he couldn’t eat much. I’ll have to ask the women we bought the chicken from next week if there is a trick for cooking the Heritage birds, from what I had read it is best to cook these birds low and slow so as not to dry them out and toughen the meat. The legs on this bird seemed longer than I have ever seen and they were sticking straight up (!), but I didn’t have any kitchen twine to truss them, so I went without. I am curious if that could have been why the leg meat seemed tougher, maybe it was overcooked.

    We ate dinner a bit later than normal last night, so by the time it was ready it was fairly dark and the pictures of the finished bird are not that great. Still working on a way around the night-time photos.

    All in all, this was the perfect start to the farmers market season, I cannot wait to make more meals this week with the goodies we bought and of course to go back next week.

  3. Chicken Soup for the Sniffles.

    IMG_8819

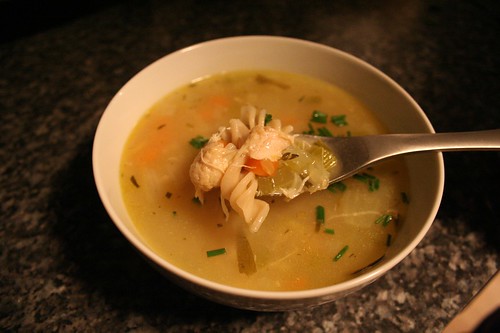
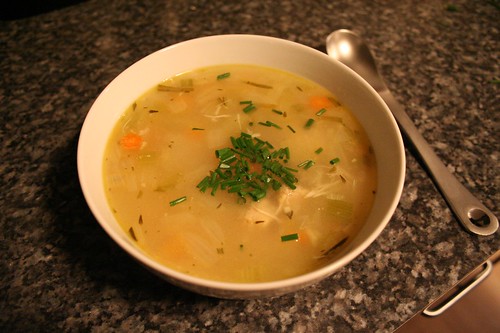
    Yesterday morning, when I woke, I realized that what I thought was allergies the day before, turned out to apparently be an old-fashioned, end of the season, COLD. I had the sniffles and I was feeling off. I was also feeling guilty as it was a beautiful, warm and sunny day and I had a ton to do at the studio. For some reason being sick on cold and dreary days is much easier. I eventually realized it was far more important to take care of myself than to stay at work, so I left a few hours early, swung by the grocery store to buy supplies and headed home to make soup. I figured that, combined with everything else I was doing, was sure to make me well quicker. Now that I am eating clean, I am treating things like headaches and colds naturally, not that I was a big medicine person before, so I am attacking this cold with homeopathic syrup, vitamin C, cold care tea and zinc. I have to say, today is day two and I am actually feeling much better already.

    I decided to make the stock for my soup from scratch, since there is really nothing like it. This is the first time I had meat in over 7 weeks, but chicken noodle soup was the only thing that I wanted, and I knew it would help my sniffles. Being that the chickens we ordered from the farm won’t be ready until mid-June, I settled on an organic whole fryer chicken from Wegmans and some good organic veggies, so it was perfect.

    You can most certainly make this soup with canned or boxed broth or stock, but I am telling you, it just isn’t the same.

    By the time the soup was ready to be served, a cold chill had come over the air, dark clouds moved in and the rain and thunder started. It was perfect soup weather. I started feeling better almost instantly and today I can tell that the cold is on its way out the door.

    Chicken Stock

    4 quarts of water
    1 fresh whole chicken 3-4 lbs, cut into pieces or 4 lbs assorted chicken bones (I prefer organic, free range and without hormones or antibiotics)
    4 celery stalks, roughly chopped
    4 carrots, halved (I kept the skin on, but washed them)
    1 large onion, quartered
    2 garlic cloves, halved
    1 cup fennel, chopped
    2 bay leaves
    5 sprigs fresh thyme
    2 teaspoons sea salt
    2 teaspoons pepper
    1 tablespoon fresh tarragon

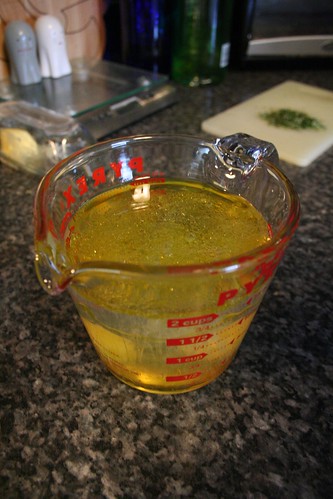
    In a large stockpot, (use the strainer that fits in your stock pot if you have one) combine all the ingredients and bring to a gentle boil. Reduce the heat and simmer, uncovered, for 2 1/2 hours, skimming the surface occasionally to remove any foam that forms on the surface. I added a bit more water as it was cooking to keep the chicken and vegetables covered. The longer you cook the stock, the stronger the flavor will be, but 2 1/2 hours was more than adequate and the stock had a fantastic flavor to it.

    Remove the meat and bones and reserve, the meat can be separated and added back to the soup, used for chicken salad, etc. I prefer to add it back to the soup. If you didn’t use the strainer when making the stock, strain the stock to remove all the vegetables and other bits and add back to the pot. Throw out the bones and vegetables. Use the stock immediately or let the stock cool completely, and refrigerate overnight. Skim any fat that forms on the surface. Keep refrigerated in airtight containers until ready to use, up to 3 days, or freeze for up to 2 months. Since I was using the stock immediately, I skimmed any visible fat off the top, made sure that it was strained of everything, and kept it on a low heat while I prepped everything for the soup.

    Chicken Noodle Soup
    Serves 6-8

    4 quarts of chicken stock
    chicken leftover from making stock or 2 chicken breast, already cooked, chopped or shredded
    4 carrots, chopped
    4 ribs celery, cut in half lengthwise, then chopped
    1 onion, chopped
    4 large cloves garlic, minced (you don’t have to use so much, but garlic is good for treating a cold)
    1 tablespoon olive oil
    1 tablespoon fresh rosemary, minced
    2 tablespoon fresh tarragon, minced
    2 1/2 cups of gluten-free noodles
    1 bunch fresh chives, chopped

    In a medium-sized pan, heat the olive oil over a medium heat and sautée the carrots, celery, onion and garlic. Stir occasionally, making sure they do not burn. After the onion has become translucent, but all the veggies still have a crisp, add the rosemary and tarragon, stir to mix the flavors.

    Add the veggies back to the pot with the stock and bring the heat to a medium-high. Let the stock and vegetable simmer, until it comes to a gentle boil, continue to let boil for about ten minutes. After ten minutes, taste the veggies to be sure they are softening to your liking. Add the cooked chicken and stir to let all the flavors mix. Taste, then season to taste, I found it needed more salt and pepper and I added more tarragon.

    At the end, add the gluten-free noodles. Make sure that you account for how much liquid you started with when deciding on an amount of noodles, if you add too many they will blow up and take in all the liquid. Cook the noodles until the are done, mine took about 10 mins or so, you want a bit of a bite to them. Ladle into bowls, add a sprinkle of your favorite salt, fresh ground pepper and top with some chopped fresh chives. I love a small sprinkling of freshly grated Parmigiano Reggiano over the top, as well. Enjoy.

    IMG_8813

  4. Gluten-Free Crusty Rosemary Boule Bread

    IMG_8307

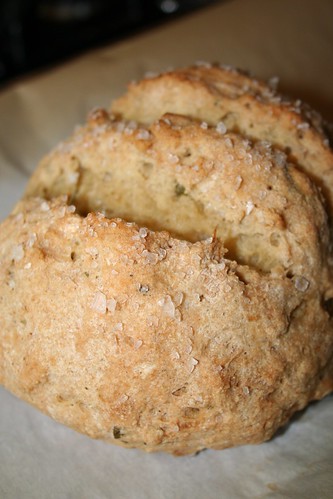
    I have never been much of a baker, I am not one for precise and exact anything. That is what I love about cooking, measuring and pouring by taste and sense. Once I learned I have to eat a completely gluten-free diet, I swore I would never bake again since most gluten-free recipes for baking have so many strange ingredients and odd flours. To be honest, it just seemed like far more work than it was worth since most of the gluten-free baked goods that I had tried were just plain gross. I finally decided that I should at least try baking something gluten-free completely from scratch, especially since I am really trying to avoid anything processed and only eat whole and fresh. That is when I saw the recipe for this bread posted on Gluten Free Girl & The Chef, I decided to give it a whirl, and boy am I glad I did.

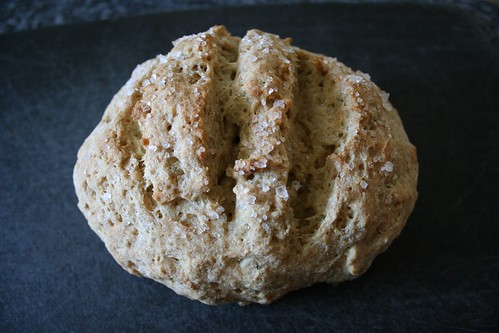
    It is the real deal! Crusty, grainy, delicious bread.  And yes, I will say it again, it is gluten-free!  I have served it to a number of people who don’t eat gluten-free and they have all loved it. Besides the crusty outside, the inside is light and airy, unlike most gluten-free breads that end up dense and heavy. It is great on sandwiches, lovely for breakfast, it is just amazing! What can I say, I am in love. I have made this bread so many times now and each time it gets better.

    IMG_8207

    IMG_8218

    IMG_8220

    IMG_8239

    IMG_8297

    Gluten-Free Crusty Rosemary Boule Bread
    adapted from Healthy Bread in Five Minutes a Day, by Jeff Hertzberg and Zoë Francois via Gluten Free Girl & the Chef
    Makes enough dough for  two 1-pound loaves

    1 cup brown rice flour
    3/4 cup sorghum flour
    1 1/2 cups tapioca flour
    1 tablespoon granulated active dry yeast
    1 1/2 teaspoons kosher salt
    1 tablespoon xanthan gum
    1 1/3 cups lukewarm water (heated to 110°F)
    2 large eggs, at room temperature*
    2 tablespoons + 2 teaspoons olive oil
    1 tablespoon honey
    2 sprigs fresh rosemary, taken off the stem and finely chopped
    olive oil
    coarse sea salt

    *A note about the eggs: The first two times I made this bread I didn’t totally make sure that the eggs were adequately at room temperature, then I read somewhere that making sure they are at room temperature is very important because if they are too cold it will keep the yeast from doing it’s job. So this time, I put the eggs in a lukewarm bath for about 10 minutes to bring them to room temperature, and wow what a difference it made in the final dough.

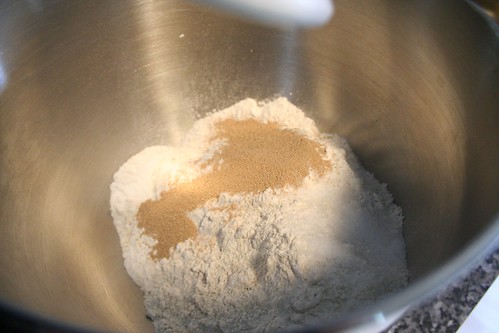
    Mix together the brown rice flour, sorghum flour, tapioca flour, yeast, salt, and xanthan gum in the bowl of your stand mixer (or a large bowl, if you are doing this by hand).

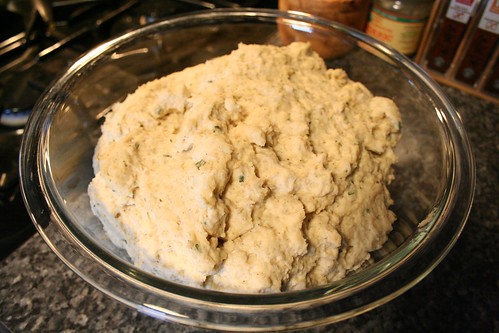
    Add the water, eggs, oil, and honey to the dry ingredients. Mix with the paddle attachment (or with a large spoon if you are mixing by hand) for a few moments until the dough has fully come together. It will be soft. It will sort of slump off the paddle. Don’t worry. That’s the right texture. Add the rosemary and mix one more time.

    Put the dough in a large, clean bowl and cover it with a clean towel. Put the dough in a warm place in your kitchen, then leave it alone to rise about 2 hours.

    You can now use the dough. Or, you can refrigerate it in a large container with a lid. The dough stays good for a week. Even just refrigerating overnight seems to improve the flavor, as well. I usually leave one loaf overnight and bake it the next day and keep the other loaf for 1 week and then bake it.

    When you are ready to bake, take about 1 pound of the dough (1/2 of the total amount) out of the container and place it on parchment paper, using wet hands form it into a squat oval shape or small ball.  Cover with plastic wrap. Let the dough rest for 40 minutes. (If you are pulling the dough out of the refrigerator, let it rest for 1 1/2 hours before baking it.)

    Half an hour before you will put the bread into the oven to bake, turn on the oven to 450°.

    (I bake this bread on a pizza stone, when you turn your oven on to preheat, slide the pizza stone in the oven. You can also bake this bread in a 5 1/2 quart dutch oven. Please make sure both are never before used for items containing gluten, if you are gluten-free.)

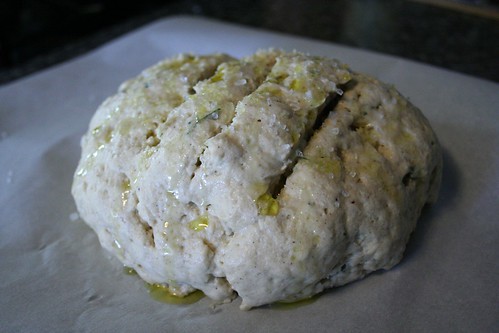
    Before baking, make 1/4-inch-deep cuts with a serrated knife to the top of the dough. Pour on a bit of olive oil and sprinkle with coarse sea salt.

    Put the dough and the parchment paper onto the hot pizza stone and return it to the hot oven. Close the oven door and bake the bread until the top has lightly browned and the bread feels firm, about 35 minutes. (Also, the internal temperature of the bread should be at least 180°.)

    Now here is the hard part: Take the bread out of the oven and let it cool at least 15 minutes before slicing.

    IMG_8323

    In love.

  5. Brown Rice & Garbanzo Stuffed Green Peppers

    IMG_8806

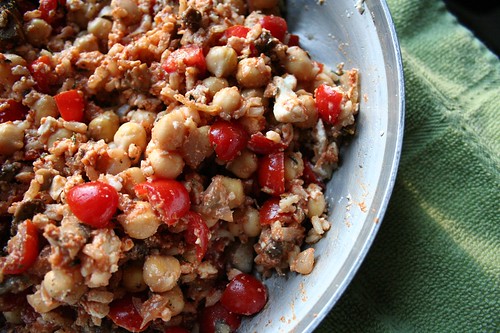
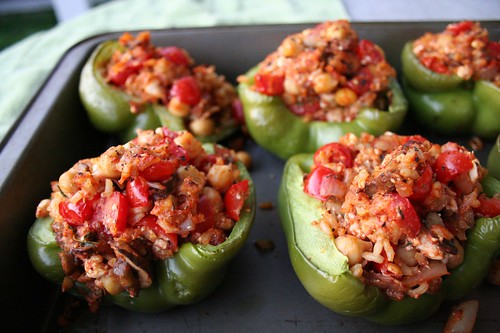
    Growing up in a Greek family, there was no shortage of delicious, traditional and Greek inspired dishes at mealtime. My mom has an amazing recipe for greek style rice and ground beef stuffed peppers and tomatoes that are one of my favorite meals. Her recipe calls for the rice to be added to the stuffing uncooked and then it’s baked for a long time, to where the peppers get very soft. I came across this recipe and was excited to try it as it sounded very similar but without the meat, and it adds in garbanzos and feta. It cooks a short time, so I figured the peppers would retain some of their crunch, which I prefer.

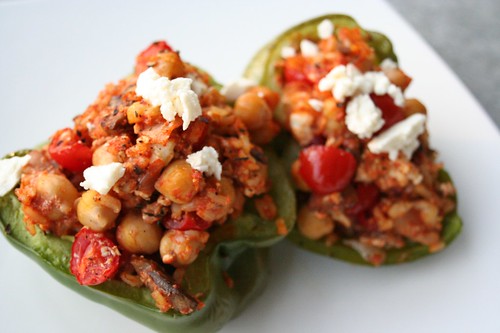
    This was so tasty and quite filling, I couldn’t finish my two halves. The garbanzos bring an almost meaty texture and the chunks of tomato are so sweet and they burst in your mouth. Of course, the feta was a perfect addition as my mom always serves feta on the side with her stuffed peppers, which I like having with almost every bite. I am for sure going to make this again, playing around with the different filling elements and possibly stuffing tomatoes with it as well. I was thinking that some chopped kalamata olives would go great in the stuffing as well. Yum.

    IMG_8776

    Brown Rice & Garbanzo Stuffed Green Peppers
    serves 3-6
    Adapted from Fresh365

    1 c brown rice, cooked
    3 large organic bell peppers
    2 t olive oil
    1 small onion, chopped
    2 large garlic cloves, minced
    1 cup of baby bella mushrooms, chopped
    2 t fresh thyme leaves
    1/2 t salt
    1 c plum tomatoes, quartered
    3 T tomato paste
    15.5-oz can organic low sodium chickpeas, drained and rinsed
    1 c crumbled feta cheese

    Preheat oven to 350F. Cook your brown rice according to package directions. While rice is cooking, cut the peppers in half length-wise, remove the stems and scoop out the seeds. Place peppers cut side up in a non-stick baking dish, drizzle with olive oil and roast for 25 minutes.

    In a large skillet, heat oil and add onion, garlic, mushrooms, thyme, and salt. Cook, stirring frequently, 5 minutes or until vegetables are softened. Remove from heat and stir in the tomatoes, tomato paste, chickpeas, cooked rice and feta. Season to taste with salt and pepper. Fill roasted peppers with the vegi-rice mixture. Bake 10-15 minutes. Sprinkle remaining feta on top.

    Serve 1 half as a side or 2 halves as a main course.

    IMG_8786

  6. Balsamic Strawberries with Mascarpone

    IMG_8760

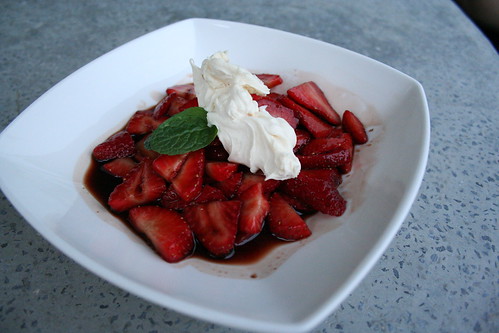
    Believe it or not, I do not have much of a sweet tooth. Occasionally, I crave a small piece of really nice chocolate or other little bits, but generally I am not one to go for dessert. However, his time of year the strawberries are just begging to be eaten, they are so sweet and delicious. I thought this was the perfect way to showcase the berries with the mellow flavor from the vinegar and the richness of the mascarpone.

    Mascarpone cheese is a soft, rich and easily spreadable cheese, made from cream. It is native to the Lombardy region of Italy, where it is used in both desserts and savory foods. It is the main ingredient in Tirimisu but can also be found in pasta dishes, risotto, sauces etc. It has an almost butter-like quality and a small amount of this stuff goes a very long way, this is one of the things I like most about it.

    Balsamic Strawberries with Mascarpone
    Serves 2

    1/4 cup balsamic vinegar
    2 teaspoons raw honey
    2 tablespoons sugar
    1/2 teaspoon fresh lemon juice
    1/3 cup chilled mascarpone cheese
    1/2 teaspoon vanilla extract
    1-pint of strawberries, hulled and sliced
    fresh mint leaves

    Combine vinegar, 2 teaspoons raw honey, and lemon juice in small saucepan. Stir over medium heat until honey dissolves. Boil until syrup is reduced, about 3 minutes. Transfer to small bowl; cool completely. (Can be made 2 days ahead. Cover and refrigerate.)

    Combine berries and 2 tablespoons sugar in large bowl; drizzle with balsamic syrup and toss to blend. Let stand 30 minutes, stirring occasionally.

    Whisk mascarpone and vanilla in small bowl.

    Divide berries up between two dishes and top with mascarpone topping and mint leaves.
    This can also be served over biscuits or shortcakes, which is how Mark requested his.

    IMG_8768

  7. Springtime Mushroom and Asparagus Risotto

    IMG_8739

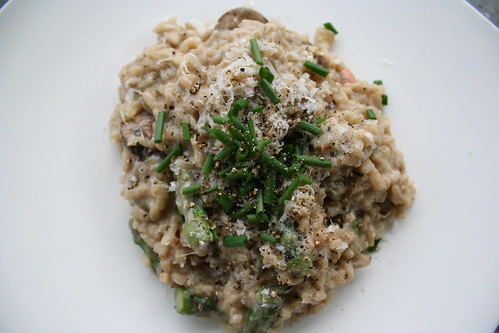
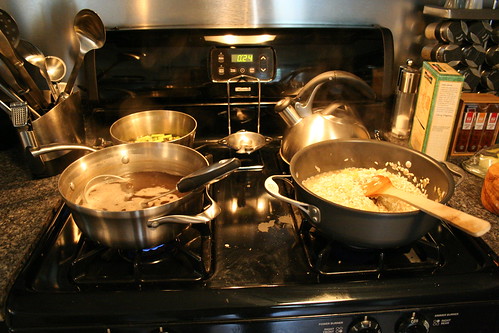
    I have been making some variation of this risotto for years, changing the ingredients around by the season and to what I have on hand, sometimes adding shrimp, scallops or crab meat, sometimes with chicken stock, others with vegetable broth. White wine, peas, mushrooms, squash, there are so many possibilities. Looking at the list of ingredients and directions may seem daunting, but it really is fairly simple. You just need the time to dedicate and a good parking spot in front of your stove. The perfect recipe for a Sunday night.

    This particular version of my risotto showcases some of the lovely ingredients in season right now, asparagus, fennel and chives. I thought about adding peas, but I didn’t want to over do it. I recently saw a recipe, on an episode of Barefoot Contessa, where Ina Garten added mascarpone cheese at the end of her risotto to add creaminess. This was the first time I tried it and wow, what a delicious finishing move it is. This will remain a part of my recipe moving forward.

    IMG_8717

    IMG_8720

    IMG_8724

    Springtime Mushroom and Asparagus Risotto
    Serves 6

    1 1/2 tablespoons of olive oil
    1 tablespoon of butter
    1 cup fennel, chopped
    1 small white onion, chopped
    1 large clove garlic, minced
    2 cups Arborio rice
    6 to 7 cups simmering mushroom broth (I like Pacific Foods Organic Mushroom Broth)
    1/2 pound of asparagus
    1 cup of baby bella mushrooms, sliced
    .5 oz package of dried porcini mushrooms (equals 2 ounces fresh)
    1/2 tablespoon of freshly grated lemon zest
    Kosher salt and freshly ground black pepper
    2 tablespoons freshly squeezed lemon juice
    2 teaspoons fresh thyme
    1/3 cup mascarpone cheese
    1/2 cup freshly grated Parmigiano Reggiano, plus extra for serving
    1 small bunch of fresh chives, chopped

    Place the dried mushrooms into a bowl and cover with warm water. Allow to sit for about 30 minutes or until all the mushrooms are soft and pliable.

    Bring the broth to a simmer in a heavy medium saucepan. Keep the broth warm over very low heat.

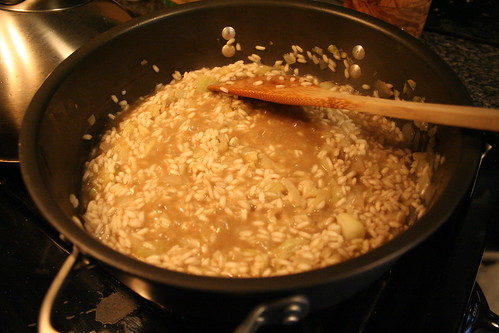
    Heat the olive oil and butter in a large saucepan over medium heat. Add fennel, onion, garlic and a pinch of salt, saute for 5 to 7 minutes, until tender. Add the rice and stir for about 3 to 5 minutes to coat with the vegetables, oil, and butter or until the rice is transparent around the edges. Careful not to brown the rice or the vegetables. Add the mushroom broth, 2 ladles at a time, stirring almost constantly and waiting for the stock to be absorbed before adding more liquid, just enough to cover the rice and continue stirring or moving as before. This process should take 30-35 minutes.

    Meanwhile, cut the asparagus diagonally in 1-inch lengths and discard the tough ends. Blanch in boiling salted water for 4 to 5 minutes, until al dente. Drain and cool immediately in ice water.

    When the risotto has been cooking for 15 minutes, drain the asparagus and add it to the risotto with both the baby bella and the dried mushrooms, lemon zest, 2 teaspoons salt, 2 teaspoons pepper and the fresh thyme. Continue cooking and adding stock, stirring almost constantly, until the rice is tender but still firm.

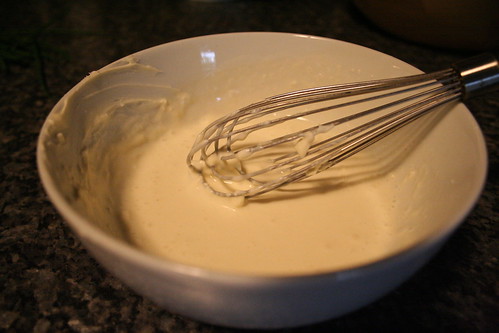
    Whisk the lemon juice and mascarpone together in a small bowl. When the risotto is done, turn off the heat and stir in the mascarpone mixture and the Parmigiano Reggiano. Taste and season, to taste, with salt and pepper, and serve hot with a sprinkling of chives and more Parmigiano Reggiano.

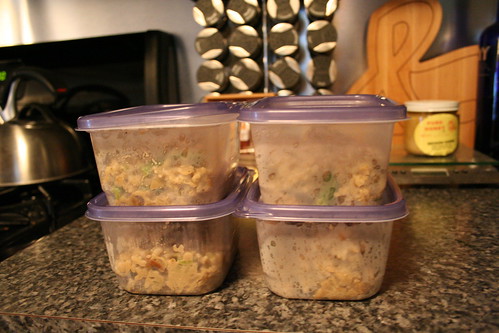
    And here is the best part – LEFTOVERS!

    IMG_8752

  8. Huevos Rancheros

    IMG_8716

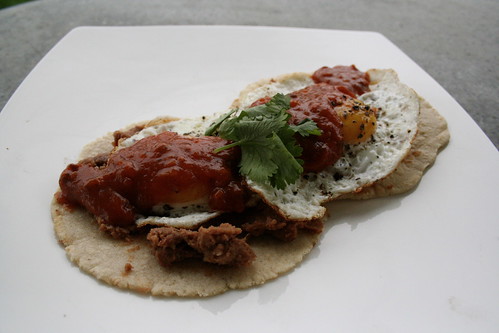
    There is nothing like a hearty weekend breakfast after a late night. After having two very late nights in a row prepping for and printing live at the Artists & Models Hallwalls fundraiser, I knew this was the perfect morning for hearty. This breakfast was more like a brunch since we slept in until almost 11am (which we never do), but I was craving a Mexican breakfast and that is what I made.

    I would have preferred to have made my own ranchero sauce from scratch, but it just wasn’t happening this morning, so I went for the Sofrito sauce that I had in the pantry, I keep that on hand for Mexican rice and other things. You can also heat up any bottled or fresh salsa for the sauce, as well.

    I made fresh corn tortillas yesterday morning and had some uncooked ones on hand and ready for this morning. I quick heated them up and kept them in the tortilla warmer while I prepped the beans, sauce and eggs.

    Huevos Rancheros
    Serves 2

    4 corn tortillas

    4 eggs
    butter
    1/2 can of refried beans (I like Eden Organic’s Low Sodium Spicy Refried Pinto Beans)
    1 cup of Sofrito, salso or ranchero sauce. (I used Goya’s Sofrito)
    salt
    pepper
    cilantro

    Heat up the corn tortillas in a skillet over medium heat, keep in a tortilla warmer until ready to serve. Heat the refried beans and your sauce in the microwave or in small saucepans on the stove top. Melt a small amount of butter the skillet you used to heat the tortillas, over medium/high heat, crack your eggs into the pan. Salt and pepper the eggs and cook for 3-4 minutes until the white is solid, cook the yolk to your desired doneness. We like a bit of a runny yolk. Plate two tortillas per plate, put a thin layer of beans on the tortillas, place the eggs on top, spoon sauce over and top with cilantro.

  9. Mango Shrimp Kebabs

    IMG_8688

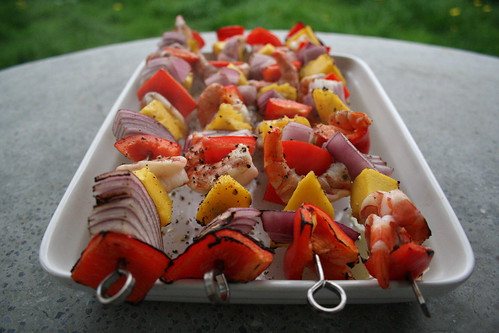
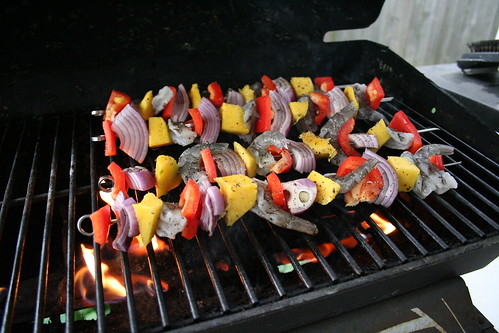
    These simple and fresh-flavored skewers were the perfect quick and tasty dinner option for a very busy night. Plus, it happened to be a perfect night for grilling. Besides being delicious, they are so colorful and beautiful to look at. A feast for your senses. Mangoes are in season right now and though they are not local I couldn’t resist buying a couple at the market, they are one of my favorite fruits.

    The only thing I would change the next time I made these would be to add some sort of fresh herbs or additional spices, it needed another level of flavor. I am thinking some freshly grated ginger and/or some red pepper flakes. Another thing I may try next time would be to create a marinade of the lime juice, olive oil and spices and marinade the shrimp for 5-10 minutes, first.

    These skewers would be great served as an appetizer or entrée with rice or a salad. I served them over brown rice.

    IMG_8685

    Mango Shrimp Kebabs
    Adapted from Cooking Light, April 2010
    Serves 2-4

    1/2 lb of large peeled and deveined shrimp
    1 large red bell pepper, cut into 1-inch pieces
    1 mango, peeled and cut into 1-inch cubes
    1 small red onion, cut into 1-inch pieces
    1 lime, cut into wedges
    olive oil
    salt
    pepper
    (fresh grated ginger and/or red pepper flakes – see above notes)

    Prepare grill to medium-high heat. Sprinkle shrimp evenly with 1/4 teaspoon salt and 1/8 teaspoon of freshly ground pepper. Thread shrimp, pepper pieces, mango cubes, and onion pieces alternately onto each of 4 (12-inch) skewers – if using bamboo skewers don’t forget to pre-soak. Drizzle a small amount of olive oil over the top, if adding ginger or pepper flakes sprinkle these over the skewers now. Place the skewers on a grill rack coated with cooking spray; grill 2-3 minutes on each side or until the shrimp are done. Yield: 2 servings of 2 skewers each as an entrée or 4 servings of 1 skewer each as an appetizer.

  10. Quinoa Croquettes with Cilantro Yogurt Sauce

    IMG_8655

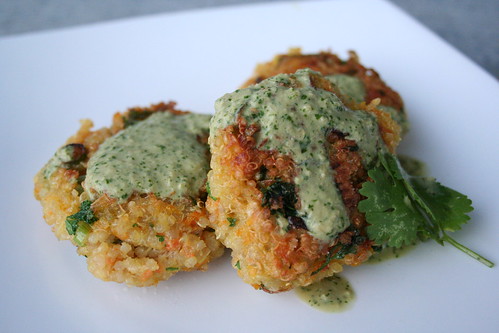
    I had a short time at home yesterday between leaving the studio and heading over to the Rock Harbor Yard to set up for the Hallwalls Artists & Models Stimulus event, that we are screen printing live at tonight. I decided since I was eating alone, it would be a good time to try something different and new (in the event I royally screwed it up). I came across this recipe from Anna Getty’s book Easy Green Organic that she shared on etsy and knew it was something I was going to love, since I have become a huge fan of quinoa. Quinoa is gluten-free, high in fiber and a complete protein which makes it a perfect grain for the gluten-free vegan. Quinoa is great as a replacement for rice or couscous.

    I changed the original recipe a bit to what I had on hand and also to make it gluten-free. The original recipe called for adding shredded zucchini in addition to the carrots, but since I didn’t have any, I opted to go without. However, I definitely plan on making these again and including it.

    The croquettes had just the perfect amount of “fried” crunch, that I actually felt like I was cheating and eating something unhealthy. The quinoa has such a beautifully nutty flavor and there is a subtle tartness from the cilantro sauce. I ate 3 of these as a meal, but they would be great as an appetizer or a side with grilled or roasted vegetables.

    These turned out so good and I was sure my husband, Mark, could use a good snack. So, when I headed over to the warehouse to meet up with him, to start setting up our press and to print the first color on our poster, I decided to bring him a small leftover container of the croquettes, and a bit of the sauce to drizzle over. He was so happy and could not stop talking about them.


    Quinoa Croquettes with Cilantro Yogurt Sauce

    Serves 6

    Cilantro Yogurt Sauce:
    1 large bunch fresh cilantro, stemmed
    1/4 cup soy sauce (I used low sodium gluten-free tamari)
    1/4 cup red wine vinegar
    1 small white onion, quartered (about 1/2 cup)
    1 cup of non-fat greek yogurt (Goat milk yogurt is great here as would be any other non-dairy yogurt)
    1/3 cup olive oil

    Quinoa Croquettes:
    1 cup quinoa, washed thoroughly*
    1 medium carrot, peeled and grated on medium holes
    1 scallion, finely chopped (white and green parts)
    1 clove of garlic, minced
    1 teaspoon salt
    6 sprigs fresh parsley, stemmed and minced
    1 large egg
    1/4 cup brown rice flour
    1 tablespoon tapioca flour
    Vegetable oil for cooking

    (if you don’t wish to make these gluten free, omit the brown rice and tapioca flours and just use 1/4 cup all purpose flour)

    To make the sauce, combine the cilantro, soy sauce, vinegar, and onion in a blender or food processor and blend until smooth. Stop the motor and add the yogurt and olive oil. Blend until creamy. Transfer the sauce to a container with a lid and refrigerate for at least 1 hour.

    To make the croquettes, combine the rinsed quinoa with 2 cups of water in a small pot and bring to a boil. Lower the heat, cover, and simmer for 15 minutes, or until the water is completely absorbed. Remove from the heat and transfer to a medium bowl to cool.

    When cool add the carrot, scallion, garlic, salt, parsley, egg, and flours. Mix well. Using your hands, form the mixture into patties about 1/2 inch thick and 2 inches in diameter.

    Pour just enough oil into a large skillet to cover the bottom of the pan, and heat the oil over medium heat. Working in batches, lay the quinoa cakes in the pan and cook for 3 to 4 minutes. (You can probably cook 5 to 6 patties at once.) When the cakes are golden, turn them over and cook until the second side is golden. (Check by lifting up a side with a spatula.) Add additional oil as needed, and remove any brown bits that accumulate in the pan as you cook.

    Remove the cakes from the pan and place them on a plate lined with a recycled brown paper bag. Serve hot, drizzled with the Cilantro Yogurt Sauce. Or put the yogurt sauce in a bowl for dipping.

    *The key to cooking quinoa is to make sure to adequately rinse the quinoa through a fine-mesh strainer to remove the bitter protective saponin coating that protects the grain from being eaten by birds and insects.


  11. White Bean and Avocado Salad

    IMG_8649_2

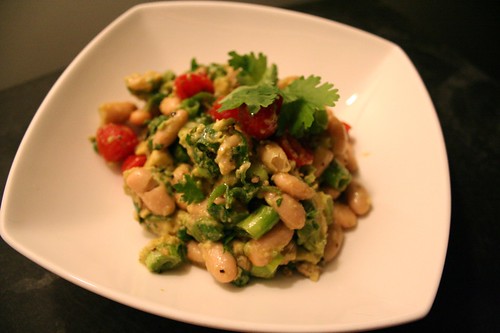
    This is my idea of “fast food”. When I have a long, busy day and I am not getting home until late, I don’t crave take out, a drive thru or a restaurant – I want my home, my kitchen and my ingredients. I have been known to come home from a very busy day and whip together a full on pasta dish with fresh veggies and things I have in the pantry. This recipe is something I threw together randomly, last week after my Thursday night yoga class with things I had on hand and it was so good I went for it again this week. I don’t get home until almost 9pm on Thursdays, so after a long work day and a 90 minute yoga practice I want something light, tasty and quick.

    Since avocados are in season right now, I have been buying a few every time I go to the market since I could eat them daily. The last time I made this salad I had some leftover dried great Northern beans that I had soaked for a soup I had made and they were even better than the canned beans I used this time. Unfortunately, for as much as I prefer dried beans over canned, they are just not as quick to prepare and therefore not ready on the drop of a dime. Any white bean will do for this recipe, great Northern, cannellini, navy or even lima beans.

    This salad is light, refreshing, adequately filling and it has the perfect balance of crunch and creaminess. I had a small piece of toast on the side. This makes a great main course dish or a it can be substituted for your typical green salad.

    White Bean and Avocado Salad
    serves 2-4 (depending on how you are serving it)

    1 can of white beans (15.5 ounces) cannellini, great Northern, etc
    1 avocado diced
    1 handful of cilantro, chopped
    4 or 5 green onions, chopped
    juice from 1/2 lime
    salt
    fresh ground pepper
    2 T olive oil
    handful grape tomatoes, halved

    Drain and rinse the beans. Place the beans, tomatoes, avocado, green onions and cilantro into a mixing bowl. Drizzle with the olive oil and lime juice, season to taste with salt and pepper. Gently toss until combined. Don’t worry if the avocado starts to mash-up a bit, mine did this time as the avocado was very ripe, it still tastes delicious. Serve immediately as main dish or side dish. Refrigerate leftovers.

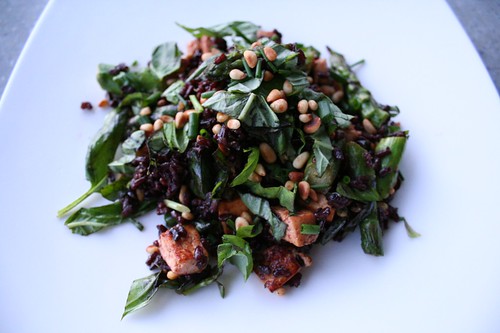
  12. Spring Black & Mahogany Rice

    IMG_8630

    When I made the decision to start this blog, I wanted to make sure that I was not only cooking and sharing my recipes that I have been making for years, but to also try new things and new recipes. I came across a wonderful site a few weeks ago, Fresh365, and quickly realized that I would definitely be trying out a lot of her recipes. The site features a collection of fresh, vegetarian recipes as well as beautiful photography.

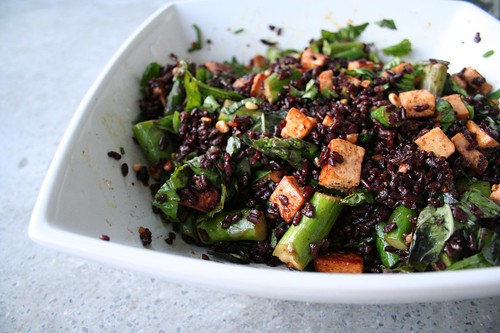
    When I read this recipe I couldn’t wait to make it. I had never had black rice before and I love rice and all of it’s varieties. I wasn’t able to find just plain black rice, but I found something called “Black Japonica” – a blend of Japanese short grain black rice and medium grain mahogany. Between a brand new grain and all of these delicious and beautiful in-season items, I knew that I couldn’t go wrong.

    The asparagus was the best I have seen it yet at the market and my chives have been growing like crazy in the yard. The taste of the black and mahogany rice was nutty, mushroom-like and even a little bit sweet. That paired with the bright hints of orange, the crunch of the fresh herbs and pine nuts, made my mouth and mind just explode with thoughts of “fresh” and “spring”. This dish actually made me insanely excited for the upcoming months and for even more fresh vegetables and herbs. I am counting down the days till I can start my veggie and herb gardens again and that time can’t seem to come soon enough. For now delicious dishes like this, taking advantage of the in-season items I can get at the grocery store and at farmers markets, will definitely hold me over.

    IMG_8615

    IMG_8617

    Spring Black & Mahogany Rice
    Adapted from Fresh365
    serves 4

    14 oz extra firm tofu, drained and pressed, then cut into 1/2″ cubes
    1 1/2 c fresh orange juice (I had 3 oranges and was only able to get 1 c of juice so that’s what I used)
    1 T honey
    4 garlic cloves, minced
    1/2 t salt
    1 c Japanese black and mahogany rice
    2 c water
    4 T olive oil
    20 stems asparagus, tough stems discarded, cut into 1” pieces
    1 small bunch chives, finely chopped
    1 c packed basil leaves, cut into thin strips
    1/4 c pine nuts, toasted
    1 T vinegar (I used red wine)
    salt & pepper, to taste

    Combine pressed tofu, orange juice, honey, garlic and salt in a large bowl. Gently toss to coat tofu. Let sit at least 15 minutes.

    In a medium sauce pan, combine black rice and water, over high heat. Bring to boil, cover and reduce heat to simmer, 40 minutes. Set aside. (I found that I needed to keep adding more water to my rice as it was just soaking it up)

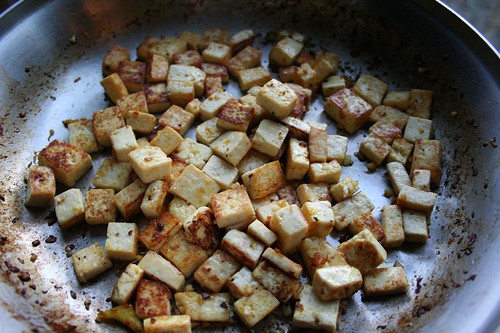
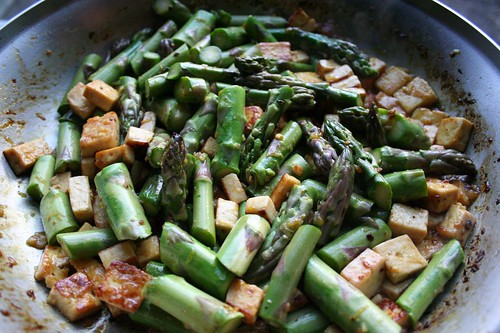
    In a large sauté pan, heat 2 T olive oil, over high heat. Add marinated tofu cubes, and cook 8-10 minutes, until golden brown, shaking pan often to avoid sticking. It was taking a bit for the tofu to start browning so I spooned out some of the marinade and allowed the tofu to brown up a bit then added it back in. Add asparagus, and cook 5 minutes, until tender (again shaking pan often).

    In a large serving bowl, gently combine tofu and asparagus with rice. Add chives, basil and pine nuts. Drizzle with 2 T olive oil and vinegar. Gently toss and season to taste with salt, pepper and more olive oil, vinegar, citrus or honey, if desired.

    IMG_8632

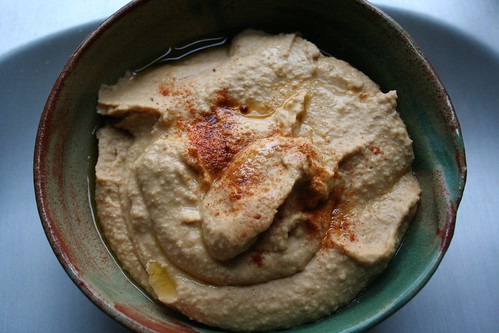
  13. Chipotle Hummus

    I have been making this hummus for years and it is always a hit at parties. There is just the right amount of spiciness with a smokey heat that sneaks up on you from the chipotles. I try to buy low or no sodium organic garbanzo beans (chick peas) when they are available, so I can control the salt myself. Garbanzos are naturally high in fiber and low in fat so this is a perfect snack with carrots when you have the munchies.

    IMG_8530

    Chipotle Hummus
    Makes 3 cups
    2 cans (15.5 ounces each) garbanzo beans (chick peas)
    1/3 cup fresh lemon juice
    1/4 cup tahini
    2 cloves garlic, chopped (I used 1 this time since it was HUGE)
    1 1/4 teaspoons coarse or kosher salt
    1 T olive oil
    1 or 2 chipotle peppers canned in adobo, chopped*

    * sometimes I just put a tablespoon or two of the adobo sauce instead of the peppers – go easy with this if you don’t like spicy, it can get spicy quick

    Reserve 1/4 cup liquid, rinse and drain 2 cans of chickpeas. Place chickpeas and reserved liquid in a food processor. Add 1/3 cup fresh squeezed lemon juice, 1/4 cup tahini, well stirred, 2 garlic cloves, chopped, chopped chipotles, and 1 1/4 teaspoons coarse salt. Process until smooth. I drizzle in just a bit of olive oil while its processing, it makes it even smoother and gives it a bit of a better taste. To store, refrigerate in an airtight container up to 1 week.

    Sprinkle a bit of cayenne or smoked paprika and drizzle a bit of olive oil on top when serving. Serve with pitas, tortilla chips, crackers, raw veggies, on a sandwich and more.

    Other variations:

    Try making with roasted garlic instead of raw garlic.
    Add roasted red peppers.
    Substitute cumin for chipotle.
    Blend in 1 cup of roasted vegetables such as eggplant, zucchini, bell peppers, and garlic for a roasted vegetable hummus.
    For olive hummus, fold in 3/4 cup of chopped green or black olives.
    Try adding some lightly toasted walnuts or pine nuts for a yummy nutty hummus.

    Do you have any other hummus variations you would like to share?

    **The beautiful bowl above is a handmade pottery bowl made by a good friend of mine, Karen Felicetta. I love the way this hummus looks served in this bowl.
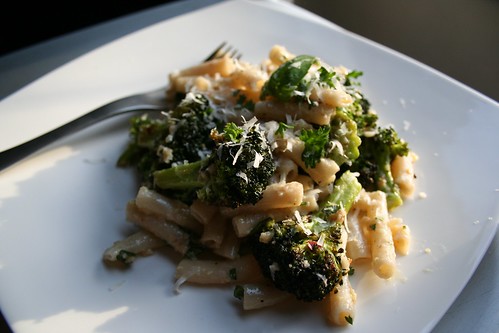
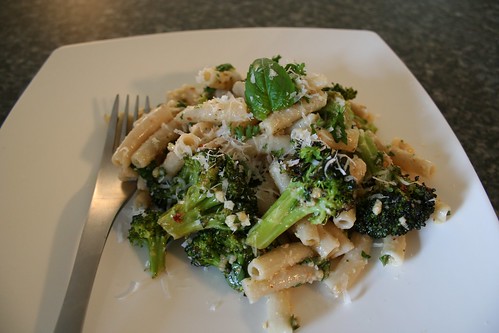
  14. Roasted Broccoli and Almond Penne

    IMG_8434

    (I am super unhappy with these photos, the lighting in the kitchen was horrible and the photos don’t even begin to show how beautiful this dish was)

    I am a carboholic, there I said it. I love pasta and grains. Being that I have a gluten intolerance I have been exploring and finding new carbs and various grains and I love it. Brown rice pasta is soo delicious and far lighter than the usual wheat pasta. Mark actually prefers rice pasta to regular pasta now. It is very easy to find and works in all regular pasta recipes. I am planning on trying to learn how to make my own gluten free pasta soon.

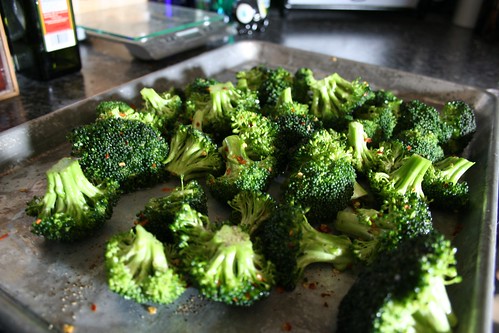
    I will pretty much eat pasta any way it is prepared and I am always playing around with new recipes. This one was fantastic. After being on a cleanse for 30 days and avoiding all dairy and really going light on the carbs this was a great and light way to celebrate. There is very little cheese in this, but by adding back some of the pasta water when mixing the sauce, it give it this delicious and creamy texture. Roasting the broccoli is something I have never done before and it was brilliant, it still had a great crunch, but had that delicious brown-edged roasty flavor and the red pepper flakes gave it just the perfect amount of heat. Mark actually said “this is the single best pasta dish I have ever had, EVER!” I love when I can make something that makes him that happy.

    IMG_8422

    Roasted Broccoli and Almond Penne

    Adapted from Coco: 10 World-Leading Masters Choose 100 Contemporary Chefs via So Good & Tasty
    serves 6*

    3/4 cup almonds
    1 clove garlic, peeled
    1/4 teaspoon fine grain sea salt
    2/3 cup extra-virgin olive oil
    1 tablespoon basil, chopped
    3 tablespoons fresh parsley, chopped
    1/2 cup parmesan reggiano, grated
    salt & pepper
    1 pound brown rice penne pasta

    1 pound broccoli, cut into florets
    extra-virgin olive oil
    salt and pepper
    pinch of red pepper flakes, optional

    Preheat the oven to 450˚F.

    In a large bowl, toss the broccoli florets with a couple of glugs of olive oil. Season with salt and pepper, sprinkle with red pepper flakes. Transfer to a large baking sheet and spread the broccoli into one even layer. Roast for about 20-25 minutes, until some of the edges have started to brown.

    Meanwhile heat a large pot of water, it will take a while for it to come to a boil.

    Place the garlic and salt in the food processor, and pulse to a fine paste. Add the almonds and grind into a chunky pesto paste. (I left it pretty chunky since I wanted to enjoy the bits of nut)

    Transfer the nut mixture to a bowl. Stir in the olive oil, then add most of the herbs. Stir in the parmesan, taste, and adjust the seasoning.

    Salt the pasta water generously, and cook the pasta al dente. Drain and reserve a big cup of the pasta water. Toss the almond pesto with the pasta and broccoli, if you need to thin out the sauce use the reserved water. Serve topped with a sprinkling of the remaining herbs.

    * A quick note on the serving sizes I follow, I tend to make recipes at their full serving size as most of what I cook makes beautiful and light lunches in the next day or two. Feel free to cut the recipes in half if you don’t brown bag it to lunch or don’t like leftovers.

    IMG_8428

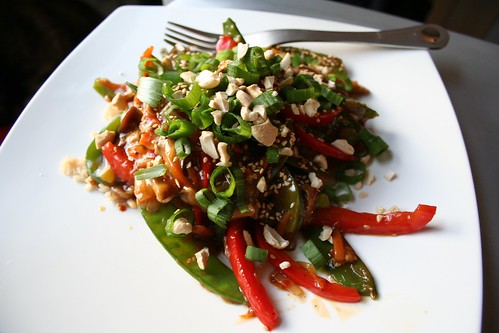
  15. Vegetable Cashew Stir Fry

    IMG_8395

    We eat a stir fry of some sort in our house weekly. I just change the ingredients to the season and our cravings. This particular recipe produces an amazing, colorful and crunchy plate of deliciousness. I serve it over brown rice, but it would also be delicious over thin rice noodles. This recipe is very easy and you could most definitely substitute and change things around often to keep it new and exciting. I will be making this often.

    IMG_8366

    Vegetable Cashew Stir-fry

    adapted from Gourmet, May 2007 and Fresh365

    Yields 4 servings

    3 T sesame oil
    1 red bell pepper, sliced
    1 green bell pepper, sliced
    1 c of shitake mushrooms sliced
    1 c of julienned carrots
    1/4 lb snow peas (apx 2 c)
    1 bunch scallions, chopped (white and green parts separated)
    4 garlic cloves, minced
    1 1/2 T grated peeled fresh ginger
    1/4 t dried red-pepper flakes
    3/4 c vegetable broth
    1 1/2 T soy sauce (I use gluten-free low sodium tamari soy)
    1 1/2 t cornstarch
    1 t honey
    1/2 t salt
    1/4 t black pepper
    1/2 c salted roasted cashews
    1 T sesame seeds

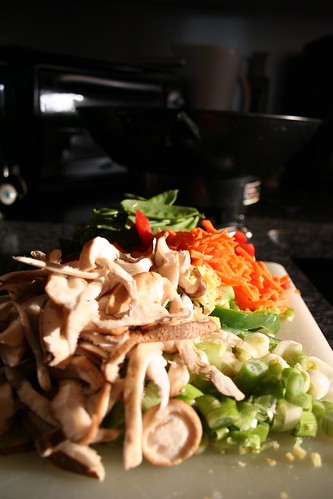
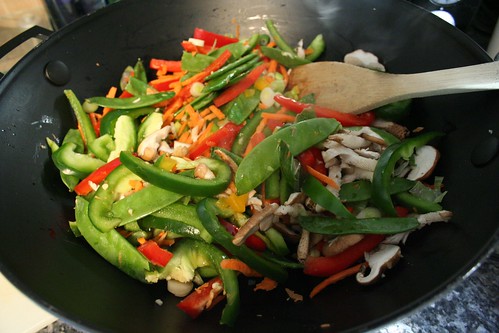
    Heat a wok or large skillet over high heat until a drop of water evaporates immediately. Add oil, then stir fry peppers, mushrooms, peapods, carrots, garlic, ginger, red-pepper flakes, and scallion whites until vegetables are just tender. In a small bowl, stir together broth, soy sauce, cornstarch, sugar, salt and pepper. Add to veggies in wok. Reduce heat and simmer, stirring occasionally, until thickened, 1 to 2 minutes. Stir in scallion greens, cashews and sprinkle with sesame seeds.

    IMG_8388

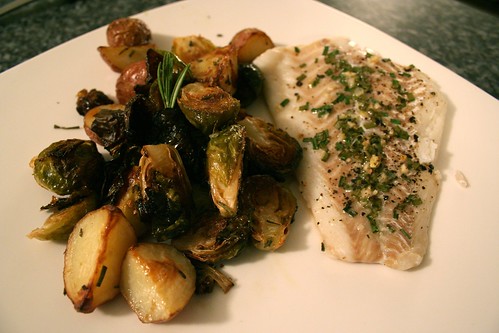
  16. Baked Cod with Roasted Brussels Sprouts and Baby Reds

    A lot of times I cook without a recipe, making stuff up, tasting and perfecting as I go. This was one of those times. So bear with me and the fact that I have no exact measurements.

    IMG_8156

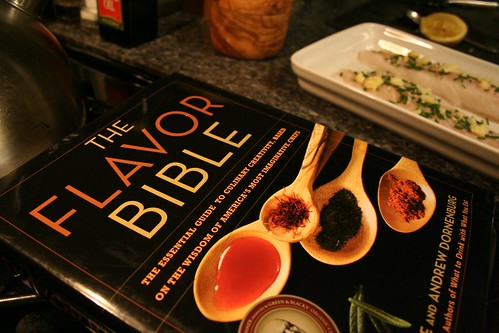
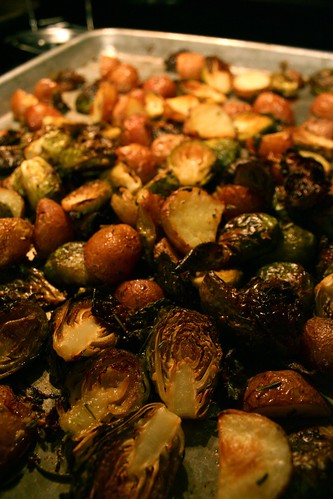
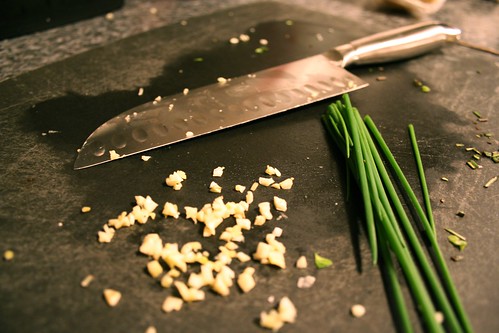
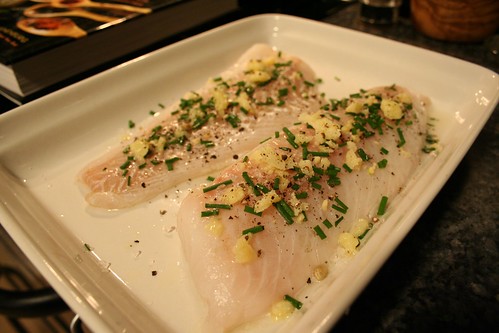
    I bought some fresh Cod at the fish counter at Wegmans and couldn’t wait to get it home and try something new. I pulled out my Flavor Bible, which is a phenomenal book that allows you to search complimentary combinations for particular ingredients. Basically you would look up cod and see what ingredients pair well with it. I found that garlic, butter and chives all did as well as potatoes. I was very excited about this as I had all of those ingredients on hand and our chives had been growing nicely in our yard for a couple of weeks. I decided to bake the fish with a very light coating of butter (I have been using ghee, an Indian clarified butter that I was using while on my cleanse), chives, lemon juice, garlic, salt and pepper. I also had both brussels sprouts and baby red potatoes from the farmers market that sounded like the perfect match with the rosemary I had also just bought. This was a delicious and light meal.

    IMG_8166_2

    Roasted Brussels Sprouts and Baby Red Potatoes

    brussels sprouts halved

    baby red potatoes cut into wedges

    1 T olive oil

    2 T rosemary, chopped

    sea salt

    pepper

    1 garlic clove, minced

    Preheat oven to 450°F

    Place the cut brussels sprouts and potatoes on a cookie sheet or in a roasting pan, drizzle olive oil over, evenly sprinkle the rosemary, garlic, salt and pepper over the top. With your hands gently toss the ingredients together. If they feel a bit too dry, add little more olive oil.

    Roast for about 30-45 minutes depending on how you like them. We like our roast veggies dark and crispy so we leave them in as long as possible.

    IMG_8137_2

    IMG_8157

    Baked Cod with Lemon and Chives

    2 fillets of cod

    1 lemon

    1 bunch of chives, chopped

    1 T of unsalted butter

    1 garlic clove, minced

    sea salt

    pepper

    Squeeze the juice of half of the lemon over the fish, place a small amount of butter on each fillet (I probably used about a tablespoon between the two fillets), sprinkle the garlic, salt, pepper and chives over the fish. Bake for approx 15 minutes at 450°F at the end of your veggies roasting. The fish should be white and easily flake with a fork. Serve the fish with lemon wedges.

    IMG_8177_2

  17. Black Bean Soup with Tortillas de Maíz

    IMG_8191

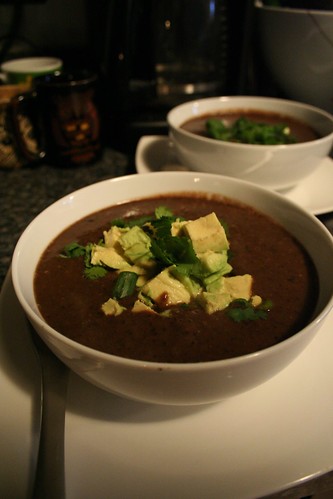
    Three things I am very obsessed with: my slow cooker, soup and fresh corn tortillas! I have made black bean soup quite a few times, but this is hands down, the best it has ever turned out.

    Black Bean Soup

    Adapted from Bon Appetit and smitten kitchen

    A big note about cooking times when using dried beans: The original recipe says 6 hours, smitten kitchen’s took 2 hours 45 minutes, mine took just over 4 hours. Not sure if it is a variation in the beans or slow cookers cook times.

    Yields 6 main course servings

    1 tablespoon olive oil
    2 medium-size red onions, chopped
    1 medium-size red bell pepper, chopped
    1 medium-size green bell pepper, chopped
    4 garlic cloves, minced (I only used 2 this time, as they were MASSIVE cloves)
    4 teaspoons ground cumin
    1 16-ounce package dried black beans
    1 tablespoon chopped chipotle chiles from a can (this gives it a solid kick, dial back if you are wary, I LOVE spicy so I used even more than this)
    7 cups hot water (I just used very hot tap water)
    2 tablespoons fresh lime juice
    2 teaspoons coarse kosher salt
    1/4 teaspoon ground black pepper
    1 avocadocilantro
    green onions

    Heat olive oil in large skillet over medium-high heat. Add onions and both bell peppers and sauté until beginning to brown, about eight minutes. Add garlic and cumin; stir one minute. Transfer mixture to 6-quart slow cooker. Add beans and chipotles, then 7 cups hot water. Cover and cook on high until beans are very tender, about 3 hours. [See note up top.]

    Transfer bean mixture to blender; puree until smooth. Return puree to the pot or a large serving bowl (the original recipe calls for just two cups of the soup to be pureed but I wanted a smooth and creamy soup this time). Stir in lime juice, salt, and pepper. Adjust seasonings to taste; we found we needed more salt. Ladle soup into bowls. Top with diced avocado and chopped cilantro and green onions.

    IMG_8201

    IMG_8192

    IMG_8265

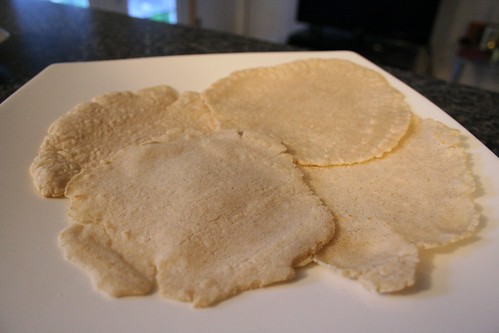
    What goes better for dipping into your spicy black bean soup than warm, freshly made corn tortillas?? NOTHING. Being that I have an intolerance to gluten, I have found a love for corn tortillas and their many practical uses. They are delicious with soup, on tacos, for breakfast, the list just goes on and on. I would always get incredibly excited when I would go to a restaurant that made their own. Since so few did, I always assumed it was incredibly difficult or time consuming. Man, was I wrong. This was the first time I made them and it was a breeze. The most important thing to remember is that the more imperfect they are, the more “homemade” they look, so don’t stress about the perfection.

    IMG_8257

    IMG_8262
    Handmade Tortillas de Maíz (Corn Tortillas)

    Yields 16 tortillas

    2 cups masa harina (Mexican corn “flour” for making tortillas—Maseca brand is widely available in well-stocked groceries and Mexican markets)
    1-1/4 to 1-1/3 cups of water

    1. Mix the Masa Harina and the water; knead to form your masa (dough), you will be able to tell if it needs more water.
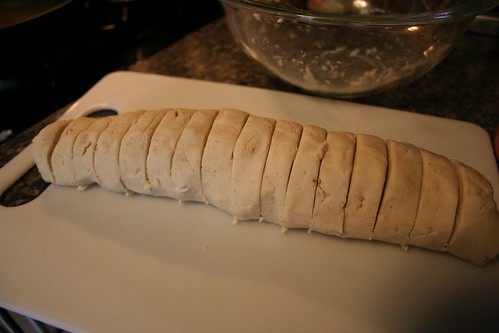
    2. Roll the dough with your hands into a long cylinder and equally divide it into 16 pieces
    3. Take one of the 16 pieces and roll it into a ball with your hands
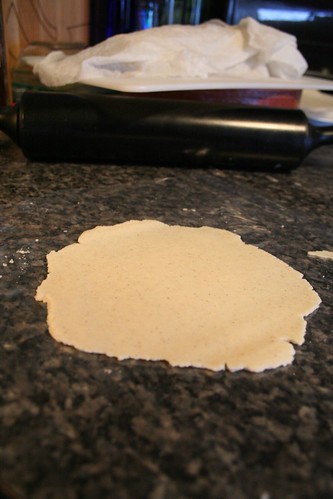
    4. Set the masa on a piece of plastic in the tortilla press; cover with another piece of plastic (at the time I made this, I didn’t yet have a tortillas press and I had to use a combination of a coffee can and a rolling pin)
    5. Press the masa
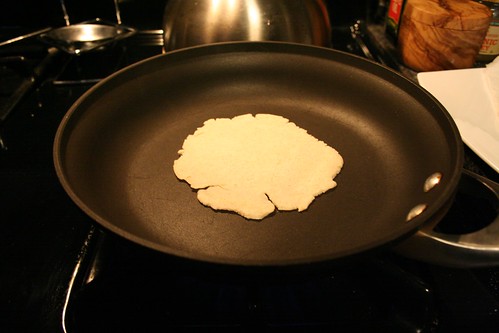
    6. Transfer the tortilla to a hot, dry skillet
    7. Cook for about 50 seconds on one side; gently turn
    8. Cook for about 50 seconds (it should puff slightly); turn back to the first side and cook a few seconds longer if you think you need it. You’ll probably have to play with the time a bit to get it right.
    9. Remove and keep the tortilla warm in a tortillas warmer or on a cookie sheet in the oven (set to 250°F)

    IMG_8264

    IMG_8275

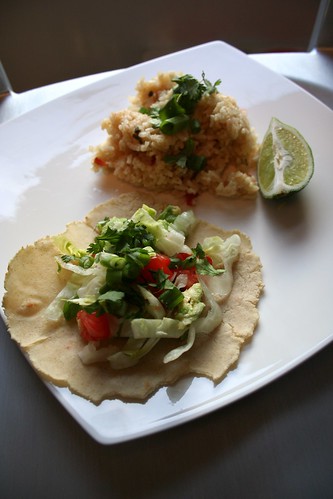
    Here are some of the yummies we made in the days after with the corn tortillas. Veggie tacos with avocados, tomatoes, limes, lettuce, cilantro and green onions and a side of mexican rice (I am still perfecting that recipe so I will post it when I am happy with it).

    IMG_8342

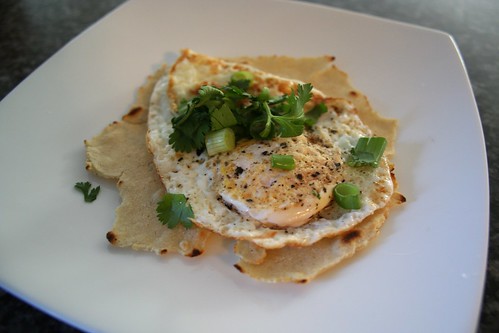
    And a quick egg taco for a tasty and fast breakfast. Just fry an egg quick, put it on a warm tortilla and top with cilantro, green onions, salt and pepper and whatever else you’d like. One of my favorites.

    IMG_8345

  18. Hi!!

    Hi there!

    I am sooo excited to be starting this blog, I am not even sure where to start. I have ALWAYS loved to cook and I try to do it daily. I really love to make everything completely from scratch and with fresh, seasonal and whole ingredients. I recently completed a 30 day cleanse, changed my entire lifestyle and lost 20lbs. This has even further changed the way I look at food, cooking and eating and I am more excited than ever about them all. I happen to be gluten intolerant and don’t consume any gluten, but please do not let that scare you off. I avoid overly complicated recipes created just to make something gluten-free and I definitely shy away from anything that tastes like “special food” for someone with an “allergy”. I use my hubby as the gauge on this and if he can really tell that something is “gluten-free” than I don’t make it again. For the most part he eats a completely gluten-free diet at home due to me being the cook, and he has never complained once.

    I decided to start this blog to not only share what I am cooking and eating, but to act as a digital cookbook and catalog for myself and hubby (who constantly begs for me to make him a menu to choose from). I love to share what I make with the people I love the most and nothing makes me happier than making people smile and say “mmmmmm”.

    This blog is most definitely a work in progress. Given that I am a designer / illustrator / print maker by day, I will constantly be tweaking with the way this blog looks, my photography, etc, so please bare with me while I work out all the kinks.
DISCLAIMER: This website is written and produced for informational and educational purposes only. Statements within this site have not been approved by the FDA. Content should not be considered a substitute for professional medical expertise. The reader assumes full responsibility for consulting a qualified health professional before starting a new diet or health program. Please seek professional help regarding any health conditions or concerns. The writer(s) and publisher(s) of this site are not responsible for adverse reactions, effects, or consequences resulting from the use of any recipes or suggestions herein or procedures undertaken hereafter.