-
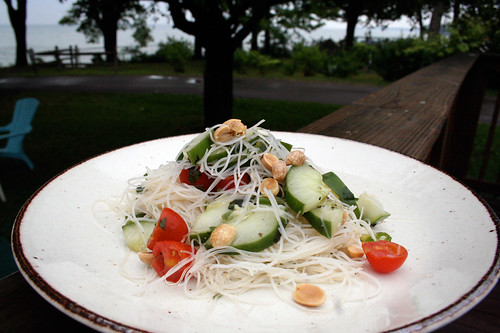
Thai Rice Noodle Salad
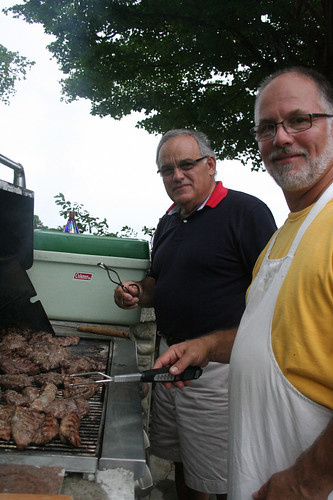
After all of our friends left the beach on Friday, Mark and I stayed and my parents came out to spend the weekend with us and for the big Greek Family reunion on Saturday. Though my Papou (My Grandfather) passed away 7 years ago and my Yia Yia (My Grandmother) 5 years ago, Papou’s remaining siblings, all the children, the grandchildren and the great-grandchildren all get together every summer at the beach. It is so amazing that we all still get together and are so close. We get tons of lamb, it marinates for days and then my Dad and his cousin Paul grill it up. Everyone brings a dish or a snack to share and everyone eats their faces off. So much delicious, authentic Greek food and other goodies.
I had all the ingredients on hand last week to make this salad for everyone at the beach house but never got around to it and although this dish has nothing to do with Greek food in the least, since I had everything with me and it was both vegan and gluten-free, I knew it was a good dish to share. If I had shredded carrots I would have added those, but it certainly didn’t need it. Additionally, I left out the fish sauce in the dressing, since I didn’t know if anyone was vegan, but normally I would have included it. Since there was so many people, I actually doubled this recipe and made huge serving of the salad, which was nice since I had leftovers.
*Also, I’ll be honest, the photo above makes this salad seem boring and blah, but it is anything but, the dressing has so much flavor and it’s damn delicious. I need to get better with the camera.
Paul and my Dad grilling the lamb
Cold Asian Rice Noodle Salad
Dressing:
1/4 cup rice wine vinegar
1 tablespoon sesame oil
1 tablespoon olive oil
3 tablespoons fish sauce (leave this out to keep it vegan)
2 cloves garlic, minced
1 teaspoon of ginger, finely minced
1 teaspoon crushed red pepper flakes
1 tablespoon organic raw sugar (or honey)
juice from 1/2 lime
1 teaspoon kosher saltWhisk it all together. Set aside.
Salad:
8 ounces thin rice noodles or rice stick noodles (the kind you just have to soak)
1/2 pint of cherry tomatoes, halved
1/2 cucumber, quartered lengthwise, and sliced 1/2-inch thick (I used a beautiful organic heirloom satsuki madori from my garden)
1 jalapeno pepper, chopped
1/2 cup of Thai basil, roughly torn or chopped up
1/2 cup of fresh mint, roughly torn or chopped up
*(you can also use fresh cilantro and/or regular basil)
3 or 4 scallions, thinly sliced
1/4 cup dry-roasted peanuts, chopped
1/2 lime
fresh ground black pepper, to taste
kosher salt, to tastePrepare the noodles according to package’s directions.
Drain and rinse with cold water. Drain well and pat dry. Add noodles, cucumbers, tomatoes, jalapeno, basil, mint, scallions, peanuts and whatever else, to a large bowl. Pour on the dressing, toss to combine. Squeeze the juice from the other half of a lime over the top. Garnish with a small handful more each of chopped peanuts and sliced scallions. Taste, add salt, pepper or more lime to taste. Serve room temperature or put in the refrigerator for an hour or two and serve cold. -
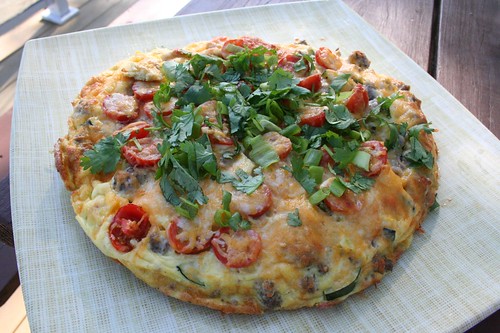
Mexican Frittata
Andrea and I decided on a whim to whip up this Mexican Frittata the last morning we were all together at the beach house and I have to say, I am super impressed with how it came out for completely winging it. I really love cooking for people, I could have stayed at the beach house another week and just continued to cook, enjoy that view and relax. Unfortunately, that wasn’t possible, we leave again in a few days for Seattle, then Chicago. I guess we will have to just make this a yearly trip, then.
My measurements are not exact on some of this, we were trying to use up a lot of the food we had on hand from the week at the beach. I only used half of a green pepper and 11 eggs, because that’s what we had. You can definitely improvise with frittatas, use what you have on hand and get creative. There really are no wrong ingredients. Frittatas are a great way to make breakfast for a large group of people with very little effort. For us, it was a great way to put a lot of the fresh leftover ingredients to good use. I had some ground pork breakfast sausage from Sojourner Farms that I really wanted to make something with, so we came up with the idea to do a Mexican inspired frittata.
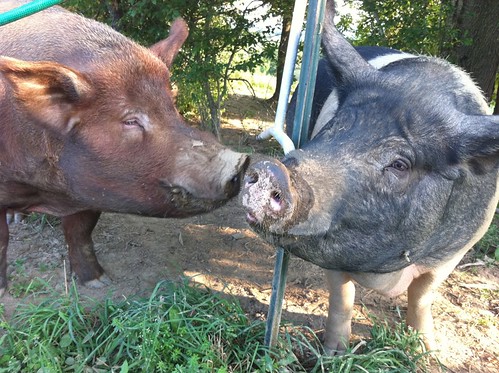
Later that same day, we took a trip out to Sojourner to pick up our chickens for the rest of the season, it was so awesome to be able to show our friends the farm where a lot of the food they ate over the week came from and introduce them to the man who grows it all. We even got to meet and pet a bunch of the pigs. Pierre took us around and we really got to spend some quality time on the land. I really cannot recommend enough that you find a pasture-raised farm close by you, that you truly love, that raises safe, healthy and natural animals. Sojourner Farms has pasture-raised chickens, pork, beef and eggs, he also raises bees and makes honey. We are so lucky that it is a short trip to get there and we are rewarded with supporting a sustainable farmer who raises his animals from birth to market and has a great love not only for his practice and the animals, but also for the land he raises them on. It is so important to see where your food comes from and how it is raised. Find a grass-fed farm near you using Eat Wild
This is Sam and Black from Sojourner Farms, they are huge lovable adults used for breeding.
Mexican Frittata
serves 83/4 lb ground breakfast sausage, I use pastured-raised, antibiotic and hormone free, pork breakfast sausage from Sojourner Farms
1 tablespoon olive oil
1 clove garlic, minced
1 shallot, minced
1/2 green pepper, diced
1 small zucchini, halved lengthwise and sliced
1 small yellow squash, halved lengthwise and sliced
2 teaspoons crushed red pepper flakes
2 tablespoons butter
12 fresh farm eggs, I use brown eggs from Painted Meadows Farms
1 cup mexican blend cheeses, grated (Monterey Jack, Cheddar, Colby, etc)
1 cup of halved cherry tomatoes
2 or 3 scallions, sliced thinly
1/2 cup cilantro, roughly choppedHeat large oven-safe non-stick skillet (or cast iron skillet) over medium heat until hot, add sausage and cook until browned. Remove the sausage from the pan and drain off most of the liquid, leave a bit and add olive oil. Once hot again, add garlic and shallot, cook and stir until tender. Add in green pepper, zucchini, squash and red pepper flakes, stir and sauté until tender, about 5-10 minutes. Drain off any excess liquid. Whisk eggs, salt and pepper in a large bowl. Add the sausage and butter to the vegetable mixture in the skillet, allow the butter to melt. Add the beaten eggs to the skillet, fold gently to combine. Allow the eggs to begin to set. With a spatula, lift up an edge of the frittata and tilt the skillet to allow the uncooked mixture to flow to the bottom of the pan. Continue to lift until the egg on top is barely runny. Top the frittata with the halved cherry tomatoes, sprinkle with grated cheese and slide the skillet into the oven. Bake the frittata until it is firm to the touch, about 5-10 minutes. Slide the frittata out of the pan onto a serving platter, top with red pepper flakes, sliced scallions, chopped cilantro and a bit of kosher salt, cut into 8 wedges. We served a bit of salsa verde on the side.
-
Greek Black-Eyed Peas Salad
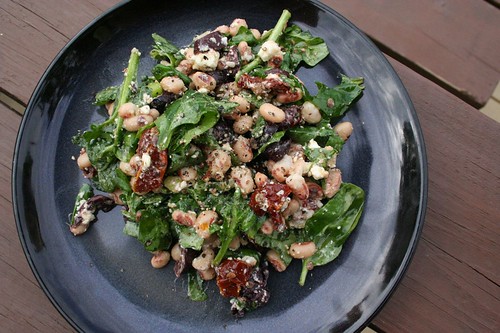
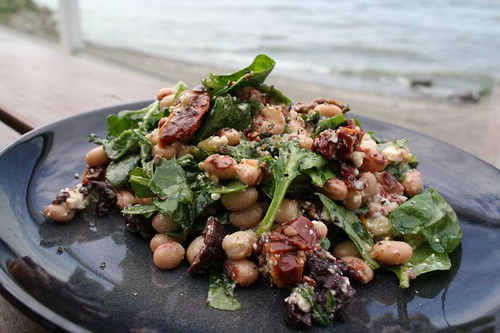
Here is another dish I made out at the beach house for everyone. I am on a big black-eyed peas kick right now (and no, I am not referring to the terrible pop group). I made that Hoppin’ John Salad, not too long ago, which is an Southern tradition brought over from Africa, so, I was surprised to see the beans used in this Greek style salad, as I most definitely think of the South when I think of black-eyed peas. Being a Greek girl, that loves ALL Greek foods, I was excited to try this variation on the classic Greek flavors that I know and it really sounded like the perfect side for an outdoor dinner. Even my cousin Andrea, who doesn’t like beans typically, told me she liked this salad. SCORE!
I was also super excited about using the sun-dried tomatoes preserved in oil, since I always buy them dry and have been looking for an excuse to experiment with these. You won’t want to use the dry ones in this recipe, as you need to be able to slice them and you need the oil in the salad. You can definitely use fresh tomatoes, if you have those on hand, just add a little bit of olive oil to the salad. Since I have so much fresh oregano in my yard, I did add a bunch of fresh chopped oregano to the salad, I really couldn’t resist as it was a perfect match.
I really would prefer to be cooking with dried black-eyed peas, but I have yet to find them locally, so I have been using canned beans. I went ahead and posted the recipe using the dried beans, since that is what I would prefer. If you are substituting canned black-eyed peas for the dry peas, use approximately two 15-ounce cans. Rinse thoroughly. Skip step 1 and step 3 in the instructions. Another tip from Elise on this recipe: Don’t add the lemon juice until you serve the salad: It helps keep the greens bright.
Greek Black-Eyed Peas Salad
Serves 8-10
Adapted from original recipe on Simply Recipes by Hank Shaw of Hunter Angler Gardener Cook2 cups dry black-eyed peas
Salt
1 package of feta cheese, about 7 ounces
1 jar of sun-dried tomatoes in oil, about 8 ounces, sliced
1 cup black olives, preferably Kalamata or oil-cured, roughly chopped
1 finely chopped green onion
1 finely chopped garlic clove
1/2 cup fresh oregano, roughly chopped
1 large bunch of baby spinach, about 1 pound, washed, roughly chopped
Zest and juice of a lemon
Freshly ground black pepper1. Bring a medium pot of water to a boil. Add enough salt to make the water taste like the sea. Turn the heat down to low and add the black-eyed peas. Let them cook slowly, uncovered, until they are done, anywhere from half and hour to an hour, depending on how old the peas are. Don’t let the water simmer.
2. Add the spinach to a large bowl. Crumble the feta cheese into the bowl and add all the other ingredients except the lemon juice. Mix well.
3. When the black-eyed peas are done, pour them into a colander and spray them with cold water to stop the cooking. Pick through and discard any loose skins or mashed peas; you’ll find a few, but hopefully not many.
4. Add the black-eyed peas to the salad, mix well. Squirt some lemon juice over and top with freshly ground black pepper. Serve.
-
Quinoa Salad with Toasted Almonds
Again, sorry for the lack of posts. This time it wasn’t that I wasn’t cooking or away for work, Mark and I took a week “off” with 5 of our friends and spent some time at my family’s beautiful beach house on Lake Erie that we rented for an entire week. What a much-needed, relaxing time away. We got to just hang out and spend time together, no event to rush off to, no posters to be printed, just good a old-fashioned vacation. Sure most of us still had to pull the laptops out and get some work done, but being away from life, on the beach and with the people you love most, is one of the best ways you can spend your time.
We of course, planned meals and cooked and ate like kings and queens, ok and we may have drunk a bit, too. I had a handful of recipes I wanted to make and some that I wanted to try for the first time, what better group of people to use as guinea pigs than your friends.
Over the next couple of days I will be posting some of the recipes that I made. I did make a huge pot of my chili one night, but I never measure with that and of course forgot photos, but I make that often during the fall, so that will be posted soon.
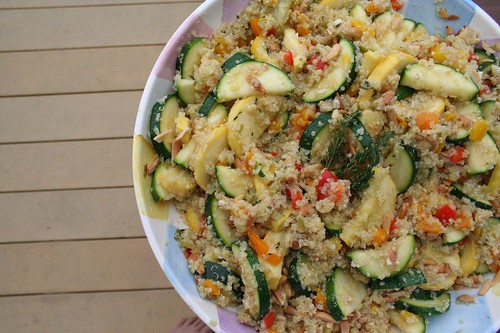
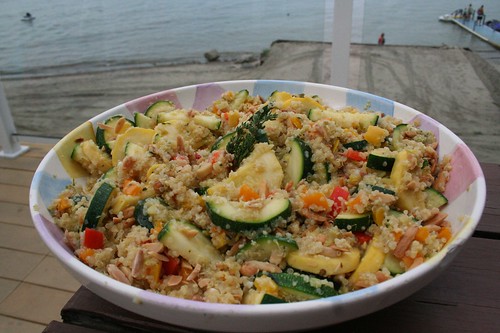
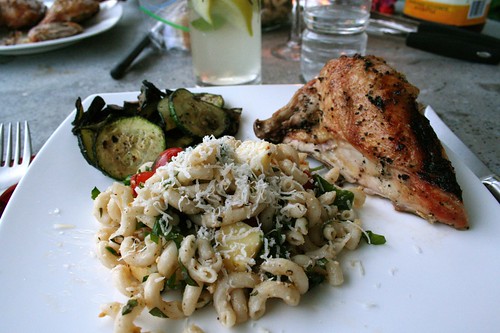
The first recipe that I tried out was this delicious quinoa salad with toasted almonds. It was a great way to highlight all the lovely veggies that are in season and it was the perfect side to one of our butterflied grilled chickens from Sojourner Farms that Mark and I made for everyone. Since there were 7 of us, I multiplied the original recipe for this salad by 4, to serve 8, but I am posting it here to serve 2. Not only is this recipe gluten-free but also vegan.
It was so good, we were all eating it right after it was done cooking, right out of the bowl on the countertop and before it had fully cooled. It is always hard to please a large group of people with food, but surprisingly everyone loved this salad and the leftovers were perfect for lunch after enjoying some time in the sun and swimming. A couple of things that I had changed since I made such a large batch, was instead of 1 yellow pepper, since we needed so much more, I went with one each of yellow, red and orange peppers. I also went with green zucchini and yellow squash, since I had an abundance of both, and I loved all the color. Because we were at the beach house and our supplies were limited, I also skipped the celery when I made it, and instead of dried red pepper flakes (which we didn’t have), I went with a hot pepper oil from some hot pepper sandwich spread that Allison and Craig had bought for sandwiches, the subtle heat was so perfect. I have become a huge fan of quinoa and I love it’s versatility. It can be served like most grains, though it is actually a seed, it is perfect sweet or savory, hot or cold. It really is the super food, as they call it. It is packed with protein and loaded with fiber. Quinoa can be found with other grains in the natural or organic section at most supermarkets or at natural food stores.
This recipe came from the Whole Living website and it was featured in Body + Soul Magazine, March 2006. I have a subscription to Whole Living, and I really cannot recommend it enough, great recipes, articles and tips for clean and healthy living.
Quinoa Salad With Toasted Almonds
Serves 2
Adapted from Body + Soul Magazine, March 20061/4 cup slivered almonds
1/2 cup (3 ounces) quinoa
4 teaspoons olive oil
1 yellow bell pepper, ribs and seeds discarded, cut into 1/2-inch chunks
2 garlic cloves, minced
2 scallions, thinly sliced
1/8 teaspoon red-pepper flakes
1 teaspoon chopped fresh thyme, plus more for garnish (optional)
1/4 teaspoon coarse salt
1 medium zucchini, halved lengthwise and sliced 1/2-inch thick
1 large celery stalk, diced
1 lime, halvedPreheat oven to 350 degrees. Toast almonds until crisp, lightly browned, and fragrant, about 7 minutes. Remove from oven and set aside. Meanwhile, place quinoa in a fine sieve and rinse under cold running water until the water runs clear; drain well.
In a medium saucepan, heat 2 teaspoons olive oil over medium heat. Add yellow pepper, garlic, scallions, and red-pepper flakes; cook until the pepper is crisp-tender, about 5 minutes.
Stir in quinoa, thyme, 1 cup water, and 1/4 teaspoon salt. Bring to a boil, reduce to a simmer, cover, and cook 7 minutes. Stir in zucchini, cover, and cook until quinoa is tender but not mushy, 5 to 8 minutes longer. Remove the saucepan from heat.
Stir in celery, almonds, and remaining 2 teaspoons oil, season with salt, and fluff with a fork. Cool to room temperature before packing into two containers and refrigerating. When ready to eat, squeeze lime over salad, if desired. Serve with additional lime wedge and thyme, if desired. -
Goodbye Sweet Derby. The Best Sous Chef.
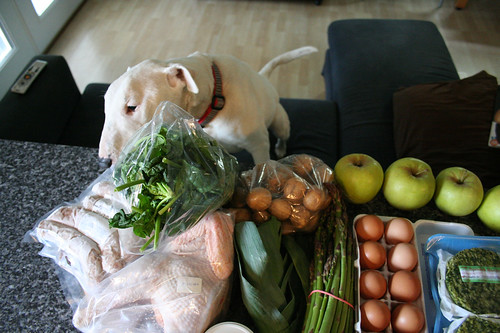
I try to keep this blog all about food, cooking and eating, but as it happens, my life trickles in now and again. This is both the fun and weird parts of blogging. I am sure many of you have seen our sweet dog, Derby’s adorable face pop up on here now and again. We lost our sweet baby girl unexpectedly on July 25, which is part of the reason for my lack of posts on here. She was just 6 years old.
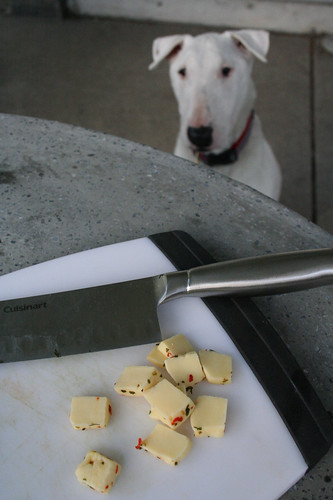
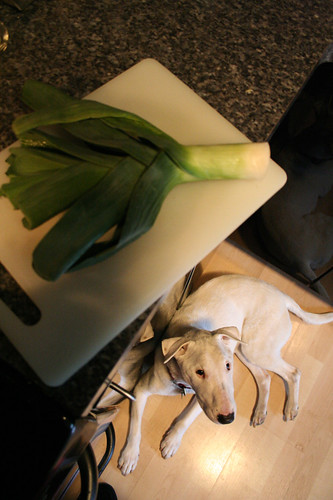
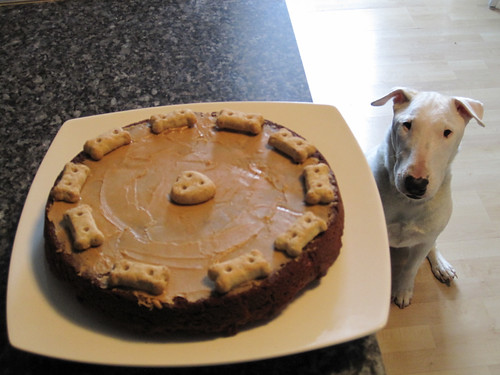
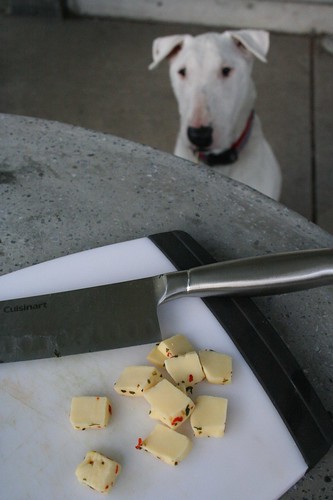
She loved spending time with me in the kitchen and every single meal I ever cooked at home, was made with Derby at my feet. I always joked that she was my sous-chef. Derby loved the sound of the cutting board and the oven door opening, especially since I started baking her treats. I even made her a birthday cake this year for her birthday.
As much as I thought I shouldn’t post this on here, I felt like I owed it to Derby, since she was such a part of me cooking and the joy I felt in the kitchen. It has definitely been hard being in the kitchen since she is gone, but food is and always will be a comfort in life. Although it took me a bit to get back in the kitchen, the first few meals were made with tears in my eyes, and the food that falls off my cutting board lies there uneaten, I will never cook a meal in my kitchen and not think of Derby.
Here is something we posted on our studio blog about our Derby that I wanted to share with all of you:

[vimeo http://vimeo.com/14032950 w=500&h=281]
I’ll be honest, I have been absolutely dreading writing this blog post. My heart is pounding and my hands are shaking. Somehow this blog post just makes this all so much more real.
On July 25, we lost our beloved dog, Derby Lou, very unexpectedly. She was just 6 years old. We are just still in total shock and disbelief. For anyone that knows Mark and I, you know just how big a part of our lives Derby was, she was our baby (a very, very spoiled baby, at that). She came to the studio with us every single day, was always here with us when we were working late, hung by our sides with every poster we printed, was at every party we had at the store, she was a part of everything we did. Her dog bed sat next to my desk and this studio was built with her in mind. Derby was the sweetest little thing and it was hard for people who met her at Hero (or anywhere for that matter) not to fall in love with her on their first meeting. She loved people who loved her and there were so many. We had people who would come by the store, just to see Derby, to bring her toys and treats or to just play with her. It’s quite possible that some of our customers liked her more than us.
Derby loved her super long walks off leash in the woods as much as she loved her city walks through Allentown during the workday. She loved coming home at the end of the work day and laying at my feet while I cooked dinner, she would come running at the sound of my knife hitting the cutting board. Derby had so many nicknames and equally as many songs that we made up for her. She was a super funny dog with a heart of gold and personality that couldn’t be matched. We will miss so many things about Derby, like her “baby dinosaur” groans, which was her subtle way of reminding us she was still here, or the funny spastic freak-out roll that she did all over the floor when she was bored.
There is an emptiness at the studio and our house now and an even bigger emptiness in our hearts. That unmistakable sound of Derby prancing across the hardwood floors, the jingle of her collar and those little bully grunts, are all missing and we both notice it so many times through the day. It’s so quiet. The ride home from work, where she used to bounce around, with an excitement level that could never be matched on the ride into work, is now a quiet, somber drive home to the place where she really got to be herself. At home, Derby could really only ever be found on the couch next to one of us or under the bed upstairs chewing on a roll of toilet paper, if god forbid we were too busy to cuddle.
I can’t bring myself to move her food bowl, or her dog bed in our bedroom. I keep waiting to see her smiling face come around a corner, with her “question mark face”, asking us for a walk or to play. I have slept with her favorite toy every night, just to be able to smell her, and a couple of times a day, every single day since she passed, Mark and I have been remembering all the special moments we had with our little girl, we laugh and we cry together. We are so grateful that in the 6 short years we had together, we got to live and spend more time with Derby, than most people are able to in a lifetime with their pets. The night before Derby got sick we had planned on working late since we had so much going on and were leaving in a few days on a trip, instead we locked up the store, grabbed the leash and we went for a long walk together as a family, it was our last walk. I would give anything to go back on that walk, keep walking and never stop.
Do yourself a favor, enjoy every single day with your pet, take that walk even if you are tired, throw the ball even if you are agitated. Derby made every single day better and she made both of us better people.
Goodbye Derby, we will love you forever.


-
Zucchini Pie
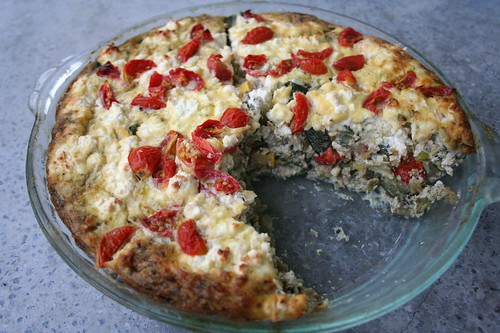
Speaking of an abundance of zucchini, I came across this recipe on the Whole Living website last week and thought it sounded like a delicious and different way to use the zucchini I had so much of. I changed a couple of things around, like using fresh oregano instead of dill and parsley, since my oregano is growing out of control and it seemed like a perfect match with the other lovely mediterranean flavors. I also had a ton of cherry tomatoes from our garden, so I quartered a handful of those instead of using a whole tomato like the original recipe called for. If yellow zucchini is unavailable, you can use just green zucchini.
This simple crustless pie had so much flavor and was perfectly filling. I made it for dinner last night and since there was so much leftover, I had a slice of it for breakfast.
Zucchini Pie
Serves 6
adapted from Whole Living2 teaspoons olive oil
1 pound (about 2 or 3) green zucchini, cut into 1/2-inch pieces
4 scallions, thinly sliced
4 cloves garlic, minced
1 teaspoon dried marjoram
1 teaspoon coarse salt
1/2 teaspoon freshly ground pepper
1 pound (about 2 or 3) yellow zucchini, cut into 1/2-inch pieces
1/2 cup freshly chopped oregano
5 large eggs plus 5 large egg whites, lightly beaten
1 cup cherry tomatoes, quartered
3 ounces feta cheese, crumbled (optional)Preheat oven to 325 degrees. Heat 1 teaspoon olive oil in a large skillet set over medium heat. Add green zucchini, half the scallions, half the garlic, A teaspoon marjoram, 1/2 teaspoon salt, and 1/4 teaspoon pepper; cook, stirring frequently, until zucchini has softened and is beginning to brown, about 5 minutes. Remove from heat; transfer to a large bowl; set aside.
Rinse skillet; repeat process with yellow zucchini and remaining teaspoon olive oil, scallions, garlic, 1/2 teaspoon marjoram, 1/2 teaspoon salt, and 1/4 teaspoon pepper. Transfer to bowl with cooked green zucchini; let sit until cooled. Drain and discard any liquid.
Add oregano, and eggs to zucchini; stir to combine. Pour into a 9 1/2-inch round, deep baking dish. Sprinkle with tomatoes and feta. Bake until set, about 1 hour. Serve hot or at room temperature.
-
Gluten-Free Zucchini Muffins with Almond Flour
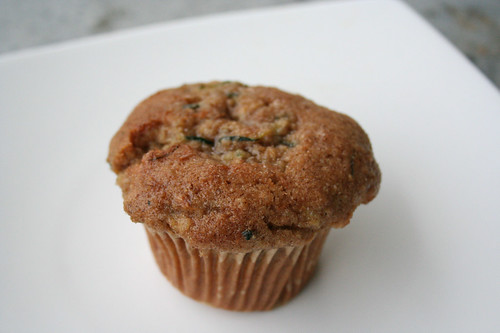
Zucchini season is upon us and although my two plants aren’t producing like crazy (one plant has only male flowers), my parents’ are and I also had a ton on hand from the farmers market on Saturday. I had been craving zucchini bread since my mom made a batch and posted the photos on Facebook. I hadn’t had it in over 6 years and I had never made it myself, especially not gluten-free. So, I decided to try substituting the blueberries in the blueberry muffin recipe that I used recently, with shredded zucchini and adding in the appropriate spices. It was an experiment that I am happy to say worked wonderfully. These muffins are so moist and fluffy, they work equally as well for breakfast as they do for a light dessert. Karina’s gluten-free muffin recipe is so versatile, I can’t wait to keep experimenting with it. As with the blueberry muffin recipe that I posted, you can easily make these muffins vegan by using Ener-G Egg Replacer instead of eggs, 1 tablespoon Ener-G Egg Replacer whisked with 1/4 cup warm water till frothy.
Gluten-Free Zucchini Muffins with Almond Flour
makes a baker’s dozen
adapted from Gluten Free GoddessPreheat the oven to 375 degrees F. Line a standard muffin tin with paper liners.
Whisk together:
1 1/3 cups almond meal (I used Bob’s Red Mill Almond Flour)
1 cup sorghum (or brown rice flour, if desired)
1/2 cup tapioca starch or potato starch (not potato flour!)
1/2 teaspoon sea salt
1/2 teaspoon baking soda
1 teaspoon baking powder
3/4 teaspoon xanthan gumBeat in:
1 1/3 cups organic light brown sugar
2 tablespoons light olive oil
1/2 teaspoon vanilla
2-3 organic free-range egg whites (depending on the size, you are looking to get 1/4 cup of liquid), beaten until frothy
1/2 cup warm water, more as needed, up to 3/4 cup
1 teaspoon fresh lemon juice
2 teaspoons cinnamon
1 teaspoon nutmeg
1/2 teaspoon dried ground ginger
1/2 teaspoon ground allspiceBeat the batter until it is smooth, like a slightly thickened cake batter.
Add in:
2 cups grated fresh zucchini
Stir gently and briefly.
Plop the muffin batter into the twelve lined cups. You’ll probably have some xtra- for a baker’s dozen.
Bake in the center of a preheated oven for 23 to 25 minutes, until golden and firm to the touch. A wooden pick inserted into the center should emerge clean.
Cool the muffin pan on a wire rack for five minutes. Gently pop the muffins out to continue cooling on the rack (don’t cool them in the hot pan- they’ll get soggy). Sprinkle each muffin with a bit of organic raw sugar.
If your muffins are soggy or slightly underdone– due to unforeseen oven temperature variations– place them back into the warm oven directly on the center rack for five minutes or so.
Wrap and freeze cooled muffins for future breakfast treats.
-
Hoppin’ John Salad
This is the salad version of the Southern, down-home classic, Hoppin’ John. This is a perfect light, Summertime salad and it’s vegan, too. According to Southern tradition, eating Hoppin’ John on New Year’s Day can bring good luck, particularly in the area of finances. Here’s hoping it works any time of the year.
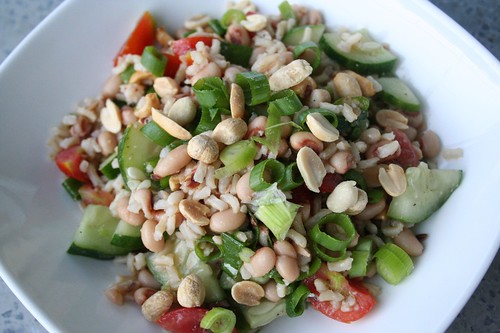
While we were in Chicago a few weeks ago at the Pitchfork Music Festival, Wishbone, a restaurant vendor, had this salad on their menu and it was so good, I had it each day. I couldn’t wait to come home and make it for myself. I used canned black-eyed peas since I didn’t have a ton of time, but you can also cook your own or use frozen ones, cooked to package directions. I also added cucumber, which isn’t traditionally in the salad, but I wanted even more crunch and we have an abundance of cucumbers at our house. This salad is super light and has so much flavor, the longer it sits the better, all those flavors in the vinaigrette get soaked up. And, if you like a little heat, this salad is great with a little drizzle of a hot pepper sauce over top. Most traditional versions of this recipe include bacon, but it definitely doesn’t need it.
Hoppin’ John Salad
Serves 6 to 8For the salad:
2 – 15-ounce cans of black-eyed peas, drained and rinsed or 4 cups cooked (2 cups dry)
3 cups of cooked brown rice, cooled
3/4 cup finely sliced green onions
1 pint of cherry tomatoes, quartered
1 small cucumber, sliced and quartered
1 jalapeno, seeded and minced
1/2 cup dry roasted, salted peanutsFor the vinaigrette:
1/4 cup red wine vinegar
1/8 cup olive oil
1/8 cup sesame oil
2 garlic cloves, minced
1 teaspoon kosher salt
1 teaspoon freshly ground black pepper to tastePrepare rice according to package directions, allow to cool. Add peas, brown rice and next 5 ingredients to a large bowl, toss gently. In a small bowl, whisk together the vinaigrette ingredients and pour over salad. Toss gently to coat evenly. Taste. Add more vinegar, oil or seasonings to taste. Top each serving with a bit of green onions and some peanuts. Chill 1 to 2 hours before serving, if time permits.
-
Beet, Orange and Walnut Salad
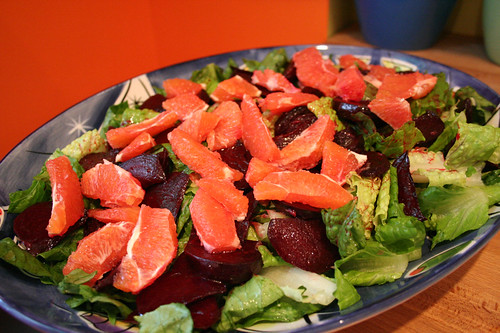
The finished salad without the preserved lemons since those made it on at the last-minute and the walnuts since we burnt them
Whenever we travel to Chicago for either Flatstock or the Renegade Craft Fairs, we are lucky enough to stay with our good friends Jason (of Delicious Design League), his lovely wife Margaux and their adorable 18-month old son, Desmond. They are always so incredibly gracious and welcoming to us and staying with them makes being on the road not so uncomfortable. Margaux always cooks or bakes for us, which is one of my favorite parts of our visit. I absolutely love traveling, but being away from my kitchen and home-cooked food is hard, especially since we spend so much time working when we travel, that we rarely get to go out and experience nice restaurants fit for a foodie, so it ends up being a lot of fast eating and festival food. That part of traveling exhausts me.
This trip, since Margaux and I both recently started our own cooking blogs, we decided to make something together, along with our good friend Anne, and post about it on our blogs. Check out Margaux’s blog, Sweet and Savory Kitchens, that she keeps with her Aunt Suzy. I love the way they post and comment on each other’s recipes or take inspiration from each other’s dishes and create their own.
Margaux had made some preserved lemons, when the Meyer lemons were in season this year and has been experimenting with a lot of different Moroccan dishes using them. She really wanted to make a Moroccan inspired dinner for us and I was all for it since I had never cooked Moroccan food. The dish we were both most excited about was this Beet, Orange and Walnut Salad which features the preserved lemons (which coincidentally, we almost forgot at the end). Since Meyer lemons are no longer in season, you could purchase premade preserved lemons from the store, make preserved lemons with regular lemons or you can skip them all together in this salad and it would still be great. Either way, you must try preserved lemons if you never have, they are incredible and bring a level of fresh and tangy flavor that I have never tasted before. I definitely plan on making some preserved lemons next year when they are in season. I can’t wait.
With this Beet, Orange and Walnut Salad, we also made a simple Oven Baked Chicken, which Margaux marinated beforehand with some delicious Moroccan inspired spices. As an additional side we made Margaux’s house staple, Green Rice, which I loved so much that I made it the first day we were home (look for a blog post about that soon).
Being with good friends and/or family, sharing food, cooking and spending time in the kitchen is most definitely one of my favorite things in the world and I cherish those memories and hold them close to my heart. I have memories from being a child and cooking with good friends of the family, with my Yia Yia, my Dad and so many other people whom I love. Those moments, whether you realize it at the time or not, have so much emotion attached to them that you can smell or taste something years later, that you cooked with someone you love and those memories just come flooding back. Preserved lemons will definitely do that for me and always remind me of Margaux and this dinner.
Check out Marguax’s post about this dinner here.Beet, Orange and Walnut Salad
The Beets

Me, cutting the beets, which by the way really leave your hands stained

1 lb. beets
olive oilWash beets, pat dry, peel and cut into wedges. Place in a baking dish and lightly coat with olive oil. Cover with foil and bake 45-60 minutes in a 375 degree oven until done. Cool and set aside. The original recipe called for baking the beets whole with the skin on, slipping it off after they come out and cutting them into wedges then. We decided it seemed easier to peel and cut them first.
The Walnuts

the walnuts, before they were burnt
1/2 cup walnut halves
pinch of sugar
1 tbsp walnut oil
salt and pepper to tasteToss all ingredients together and place on a baking sheet. Toast in the 375 degree oven for 5-7 minutes (keep a close eye on them after 5 minutes!!! (We had them on the bottom rack in with the beets and I was in charge of watching them. I definitely burnt them and we didn’t have extra, so had to go without in the salad). Cool. Chop coarsely and set aside.
The Dressing
5 tbsp fresh orange juice
1 tbsp walnut oil
2 tbsp olive oil
1 tbsp red wine vinegar
salt and pepperWhisk together.
Final Assembly
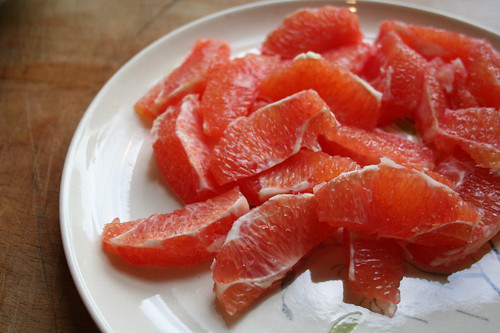
we ended up with blood oranges, which we didn’t know until we cut into them, but they were delicious and so beautiful
2 navel oranges
1/4 preserved lemon, diced (optional)
1 head romaine lettucePrepare the oranges by cutting off the top and bottom. Cut off the skins with a knife so that no white pith remains. Then cut into sections. Wash the lettuce and either tear or cut into pieces. Dry. Toss the lettuce with half the dressing and place on a platter. Toss the beets with the remainder of the dressing and place on top of the lettuce. Garnish with the orange sections, preserved lemon and walnuts.
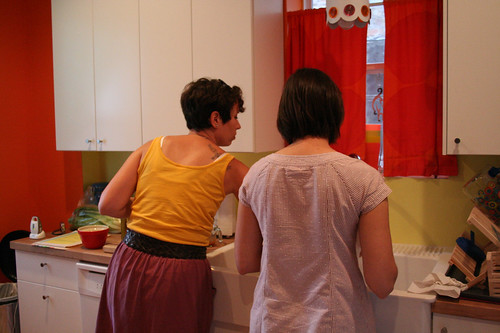
Margaux and Anne in the kitchen
Desi being cute.
The spread
-
Penne with Deconstructed Zucchini Pistou
I came across a recipe recently for a classic Provencial dish, Penne with Zucchini Pistou, and I couldn’t wait to use the zucchini from our garden and make it. I had planned on making this dish last night after we got home from a long day at the studio, but I was so exhausted from all the late nights of work and travel. So, I instead decided I would simplify the dish and deconstruct all the bold flavors from the South of France that were featured in the original recipe and make it my way.
Pistou is to the French what pesto is to Italians, and I really love pesto, so I knew this recipe was a win. The only major thing missing from my recipe that was in the original was 1/4 cup of heavy whipping cream, which is also part of the reason I decided to change the recipe up. Since we didn’t have any on hand and I didn’t feel like hitting the grocery store, I decided to skip it. I, of course, made this with gluten-free pasta and I served it with a beautiful green salad, made completely from our garden. This was the first salad of the season and it made me so incredibly happy.
This is a fantastic vegetarian entree or would make a lovely side dish as well. I can’t wait to make it again from the original recipe, heavy cream and all! Yum. Oh and if you are even thinking about leaving the toasted pine nuts out, or skipping the toasting step, you are CRAZY! Those toasted pine nuts make this dish!!
Penne with Deconstructed Zucchini Pistou
serves 48 ounces uncooked organic brown rice penne pasta (or whatever pasta you prefer)
4 teaspoon extra-virgin olive oil
1/4 cup pine nuts
4 garlic cloves, minced
2 1/2 cups zucchini, sliced and quartered
1 cup packed fresh basil leaves, chopped roughly
3/4 cup Parmigiano-Reggiano cheese, shredded
2 teaspoons kosher salt
freshly ground black pepperBoil water with 1 teaspoon of kosher salt in a large sauce pan over high heat, cook pasta according to package instructions. Drain over a bowl and reserve 1/3 cup of the cooking liquid, rinse pasta in hot water, drain. Leave in colander.
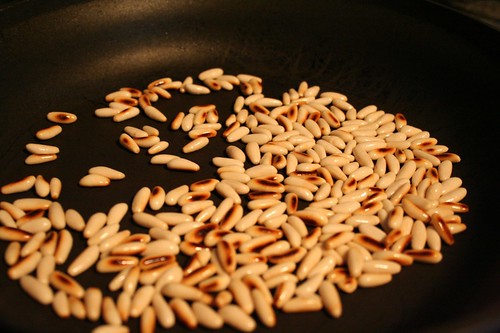
Heat a large skillet over medium-high heat, add pine nuts and toast until golden brown, tossing often so they don’t burn. Remove from the pan and set aside in a bowl.
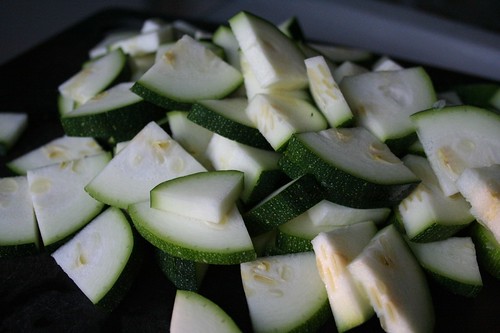
In the same large skillet heat 2 teaspoons of oil, over medium-high heat. Add 2 cloves garlic and zucchini to pan, saute 5-10 minutes until tender and golden. Salt and pepper to taste.
In a large serving bowl, add the pasta, zucchini, pine nuts, chopped basil, the last 2 cloves of minced garlic and 2 teaspoons of olive oil. Toss to combine and mix. Add the cheese to the pasta mixture and slowly add the reserved liquid as needed to coat the pasta and make it creamy. Toss again, salt and pepper to taste and top with a bit more shredded Parmigiano-Reggiano cheese.
-
Toasted Spicy Almonds
Sorry for the lack of posts – we have been very busy over here. We were in Chicago this past weekend for the Pitchfork Music Festival and Flatstock 26 and before that we were busting our butts designing and printed, getting ready for the festival. I have still been cooking, but pulling out the camera, trying out new recipes, etc., gets put on hold when life gets this crazy. Before we left town I did get a chance to make this delicious snack to munch on in the car on the road trip to Chicago. I know most of the reason I crave salty snacks in the car is due to boredom, but I have accepted that and I am happy to enjoy not having a mountain of work and a long to-do list, and to sit back watch the road and enjoy my hubby’s company. Rather than salty processed potato chips from a random gas station, I thought that these would be the perfect alternative. We also packed up some of the gluten-free blueberry muffins that I had previously made and froze and some chipotle hummus with sliced cucumbers from our garden. No reason to hit a drive-thru for lunch or to eat junk!
These almonds were so satisfying and easy to make. I started with roasted almonds since that is what I had on hand, but you could also start with raw almonds, and just toast them even longer. Mark and I both really love spicy food, so you can adjust the peppers accordingly. I used a premade salt-free Black and Red Spice mix from Penzeys, that was a mix of Tellicherry black pepper and hot cayenne red pepper.
We leave again in less than one week for San Francisco for the Renegade Craft Fair, then we are back home for a bit. Hoping to be able to cook a bunch and really use all the goodies we’re getting from the garden.
Toasted Spicy Almonds
1 tablespoon organic butter
8 ounces organic roasted almonds, unsalted
1/2 teaspoon black pepper
1/2 teaspoon cayenne pepper
1/2 teaspoon kosher saltSlowly melt butter in a non-stick skillet over medium-high heat. Add the nuts, peppers and salt. Toss with a rubber spatula to coat the nuts and spread them out in the pan in a single layer. Allow the nuts to start to brown a bit, then toss or stir to flip, allow them to continue to toast. This process only takes a few minutes (3-5), remove the pan from the heat when the desired amount of doneness is achieved. Adjust spices and salt to taste. Allow to cool before serving.
-
Goat Cheese Garlic Smashed Potatoes
I love mashed potatoes. My mom has always, hands down, made the best mashed potatoes in the world. One of her secrets? She always boils the whole garlic cloves with the potatoes and then leaves them in to get mashed up with the potatoes. And in our family, we don’t scrimp on the garlic, none of this one clove crap, you need at least two and they need to be huge.
I almost didn’t type this recipe up and include it, since to me, everyone knows how to make mashed potatoes and has a recipe. Then I got to thinking about all the mashed potatoes I have tried that weren’t very good. For such a simple dish, it requires a bit of a finesse, so as not to over mash, add too much milk, or undercook the potatoes, etc. I have definitely eaten mashed potatoes whose consistency mirrors that of joint compound that you use on dry wall. (I am not naming any names.)
The potatoes at the farmers market have been abundant, so I decided rather than another potato salad, mashed potatoes would be the perfect way to enjoy them. Since I had the goat cheese on hand, I decided to go with a twist on the classic. The goat cheese gives these chunky garlic smashed potatoes a delicious tangy flavor and the crisp, tasty chives on top is the perfect finish.
Goat Cheese Garlic Smashed Potatoes
serves 41 pound baby red potatoes, washed, skins left on
2 large cloves of garlic, whole, peeled
2 ounces goat cheese
1 cup organic milk (whole or skim, whichever you prefer)
1 tablespoon organic butter
kosher salt
freshly ground black pepper
small bunch of fresh chivesPlace potatoes and garlic in a large saucepan, cover with salted cold water by 1 inch. Simmer, covered, until tender – 15 to 20 minutes. Drain potatoes, return potatoes and garlic back to the saucepan.
Add the butter to the potatoes and garlic and slowly pour the milk in, a little bit at a time. Don’t add it all at once, in the event you don’t need it, otherwise you will have runny potatoes. As you add each bit of milk, mash the potatoes either with a fork, potato masher or electric hand-mixer. Continue adding milk as needed to get your desired consistency. I like my potatoes a bit on the chunky side, though there has to be the perfect balance of chunky and creamy. Crumble the goat cheese into the potatoes and add half of the chopped fresh chives; stir to combine. Season with salt and pepper and top with the remaining fresh chopped chives.
-
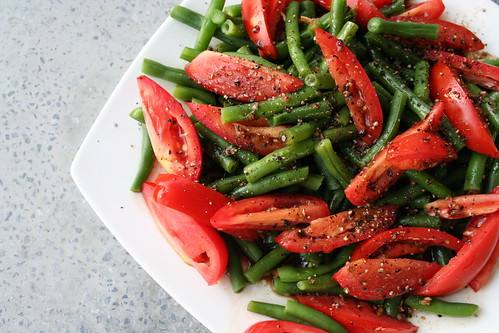
Green Bean and Tomato Salad
This is a very simple, fresh and quick summery salad, perfect side to so many summer dinners. You can serve it room temperature or make it ahead and serve it chilled. Had I had a red onion on hand, I probably would have thinly sliced a bit and included it, but it definitely didn’t need it.
Green Bean and Tomato Salad
serves 8 (approx 1 cup serving each)1 pound green beans, trimmed and cut into 2-inch pieces
3 plus tomatoes, cut into 1/2-inch thick wedges (or 1 pint of cherry or grape tomatoes, halved)
1/4 cup balsamic vinegar
1 large clove garlic, minced
1/2 teaspoon kosher salt
1/2 teaspoon freshly ground black pepper
3 tablespoons extra-virgin olive oilBring large pot of water to boil over high heat. Add green beans; cook 5 minutes or until crisp-tender. Drain and rinse well with cold water. Drain thoroughly and place in large bowl with tomatoes.
Combine vinegar, garlic, salt and pepper. Gradually add oil, stirring constantly with a whisk. Drizzle over bean mixture, toss gently to coat. Top with freshly ground black pepper.
-
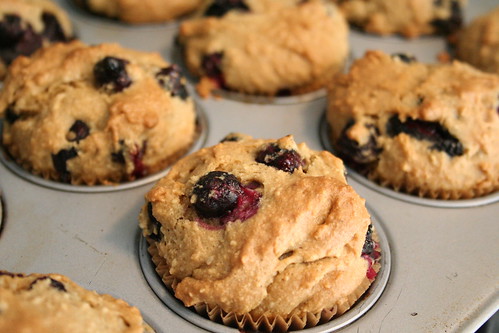
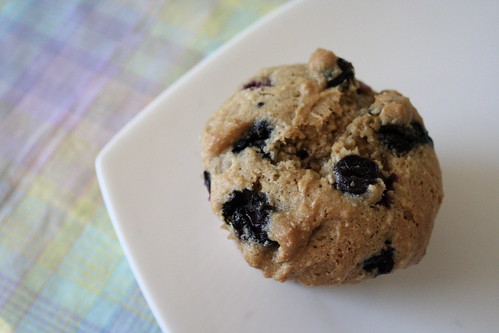
Gluten-Free Blueberry Muffins with Almond Flour
I’ve never been much of a baker, however once I made the decision to avoid all processed foods entirely, I knew with that choice came the fact that I would have to start experimenting with baking if I wanted to enjoy any baked goods again. Thankfully, there are many lovely gluten-free bloggers that have done a lot of the experimenting part for me and I can play around with their recipes. See for me, the problem with baking is that you can’t wing it the way you can with cooking. If you change a measurement or try a different flour, you can’t taste it as you go and tweak it, you have to completely bake it and wait to see what happens, if it’s wrong there is no fixing it. You either have to suck it up and eat said ‘failed experiment’ or start over.
Last week was the start of blueberry season locally and I came across this recipe while searching around. It sounded and looked so good, that I decided to just go for it and make a double batch. This way we can freeze one batch and take it with us on our road trip to Chicago this upcoming week.
I am so incredibly pleased with these muffins. I believe my exact words when I took the first bite were “HOLY F*CK THESE ARE AMAZING”. Seriously, not only are these the best gluten-free blueberry muffins I have ever had, these may be THE best blueberry muffins I have ever had. They plumped up perfectly, so light and airy. They have a delicious nutty flavor from the almond flour and the blueberries just burst in your mouth. This is the first time I have baked with the almond flour and I am very pleased with it. I can’t wait to try out more stuff.
Karina of Gluten-Free Goddess (who created this recipe), recently adopted being vegan on top of her already gluten-free diet, so her recipe used Ener-G Egg Replacer instead of eggs. Since we have been buying the beautiful organic free-range brown eggs direct from the farmer, we used those instead. If you are vegan, use Karina’s original recipe and make these muffins, you won’t regret it.
Gluten-Free Blueberry Muffins with Almond Flour
makes a baker’s dozen
adapted from Gluten Free GoddessPreheat the oven to 375 degrees F. Line a standard muffin tin with paper liners.
Whisk together:
1 1/3 cups almond meal (I used Bob’s Red Mill Almond Flour)
1 cup sorghum (or brown rice flour, if desired)
1/2 cup tapioca starch or potato starch (not potato flour!)
1/2 teaspoon sea salt
1/2 teaspoon baking soda
1 teaspoon baking powder
3/4 teaspoon xanthan gumBeat in:
1 1/3 cups organic light brown sugar
2 tablespoons light olive oil
1/2 teaspoon vanilla
2-3 organic free-range egg whites (depending on the size, you are looking to get 1/4 cup of liquid), beaten until frothy
1/2 cup warm water, more as needed, up to 3/4 cup
1 teaspoon fresh lemon juiceBeat the batter until it is smooth, like a slightly thickened cake batter.
Add in:
1 pint fresh blueberries, washed and patted dry
Stir gently and briefly.
Plop the blueberry muffin batter into the twelve lined cups. You’ll probably have some xtra- for a baker’s dozen.
Bake in the center of a preheated oven for 23 to 25 minutes, until golden and firm to the touch. A wooden pick inserted into the center should emerge clean.
Cool the muffin pan on a wire rack for five minutes. Gently pop the muffins out to continue cooling on the rack (don’t cool them in the hot pan- they’ll get soggy).
If your muffins are soggy or slightly underdone– due to unforeseen oven temperature variations– place them back into the warm oven directly on the center rack for five minutes or so.
Wrap and freeze cooled muffins for future breakfast treats or road trips 😉
Thanks for this lovely recipe Karina, I am forever indebted to you.
-
Penne with Pistachio Pesto, White Beans and Arugula
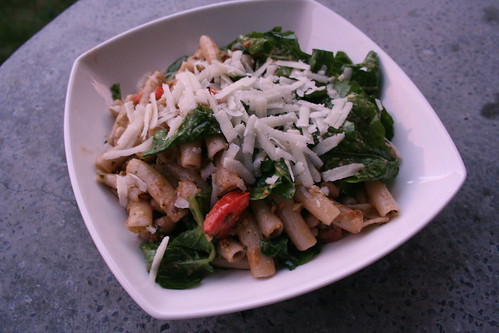
I am not super crazy about this photo, but it was late and I was hungry so I did my best.OK, so it is fair to say my pasta addiction is probably very obvious by now. It has always been one of my favorites and it is definitely both my go-to quick dinner option and my favorite comfort food. When I learned of my gluten intolerance, the loss of pasta in my life is what scared me most, then I discovered Tinkyada’s rice pastas. They are so amazing!! They are light and tasty. I much prefer them to regular pasta, any day, though I really don’t have much choice. Mark actually really loves rice pasta and always mentions how much lighter it is in your ‘gut’.
We got home late from work last night and we were both very tired from a long day of printing and other projects, so while I was contemplating dinner, Mark pulled a Wegman’s pizza out of the freezer for himself. I had pulled this recipe from a recent issue of Cooking Light and had all of the ingredients for it on hand, since it seemed so easy and quick, I decided to make it. In the time it took the oven to preheat and for the frozen pizza to cook and cool, I had made this pasta dish, served it, photographed it and I was finishing up eating, just about the time Mark was sitting down to eat his pizza. Granted, I produced WAY more of a mess and tons more dishes, but I would say cooking from scratch and eating fresh foods wins again!!
The pesto had an amazing flavor to it from the pistachios and the arugula had that lovely peppery crisp that just added to the creaminess from the beans. I was a bit unsure on the beans, but I thought they were really nice and was glad I decided not to omit them. Admittedly, I don’t usually buy romano cheese, as I tend to go for parmigiano-reggiano every time, but the romano had a stronger taste that went perfectly with these flavors, a bit saltier and sharper. I will definitely be buying more of it for pasta dishes.
Penne with Pistachio Pesto, White Beans and Arugula
serves 4
adapted from Cooking Light Magazine, July 20108 ounces uncooked organic brown rice penne pasta (any pasta will do)
1 cup packed fresh basil leaves
1/4 cup roasted shelled pistachios
6 garlic cloves
2 tablespoons olive oil
1 1/2 cups chopped seeded tomato
1 teaspoon freshly ground black pepper
3/4 teaspoon kosher salt
1 (15-ounce) can organic great northern beans, rinsed and drained
2 cups arugula
1/4 cup shredded fresh pecorino Romano cheeseCook pasta according to package direction. Drain and rinse with cold water. Drain.
Combine basil, nuts and garlic in a food process; process until finely chopped.
Heat large skillet over medium heat. Add olive oil to pan, and swirl to coat. Add basil mixture, cook for 2 minutes, stirring frequently. Stir in pasta, tomato, and next 3 ingredients (through beans); cook for 2 minutes or until thoroughly heated, tossing to combine. Remove from heat. Add arugula to pan, and toss slightly to wilt.
Place about 1 1/4 cups pasta mixture in each of 4 bowls and top each serving with 1 tablespoon of cheese.
-
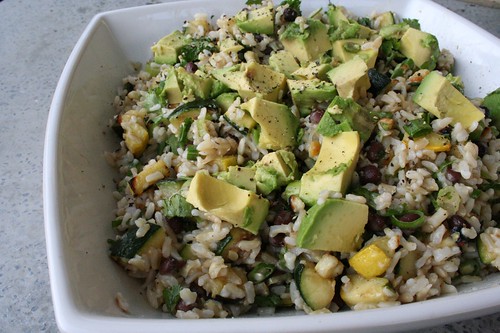
Southwest Rice Salad
I came across this recipe a week or so ago while browsing on the Epicurious iPhone app (which I am obsessed with) and couldn’t wait to try out my version of it. I changed a few things around like using brown rice instead of white and I added some things that weren’t in the original recipe (the beans, banana pepper, green zucchini, etc). Also, considering the corn that we got at the farmers market this week was still very small and a bit early in the season, we didn’t have a lot of it in the dish. Later in the season, that part of the dish will be even better, so we will for sure have to make this again when the corn is tastier. I was very excited though, that we did get to include the first banana pepper of the season from our garden to add a little heat on top of the poblano that was already in there. I made a bit larger of a serving that what the recipe called for, so we could eat it for lunches throughout the week. For a side dish at one meal, you could probably get away with just making 1 cup of rice.
We decided to cook up the corn and other veggies on the grill, which we were already heating up, so we could get some of that lovely smokey grill taste in the dish. You could easily cook the veggies in a non-stick skillet over a medium heat on the stove top if that is easier. This dish was light and refreshing and was the perfect side to the pork steaks from Sojourner Farms that we were cooking up. It had a very subtle spicy kick from the peppers and a great bright flavor from the lime.
Southwest Rice Salad
serves at least 8 as a side dish, less if you are serving it as your main entree
adapted from Bon Appétit2 cups long-grain organic brown rice
1/3 cup fresh lime juice
4 tablespoons olive oil, divided
1 garlic clove, minced
1 1/2 cups fresh corn kernels (cut from 2 or ears) or frozen corn kernels, thawed
1 large fresh poblano pepper, diced
1 seeded spicy banana pepper, diced
1 medium zucchini, cubed
1 medium yellow squash, cubed
1 avocado, halved, peeled, diced
1 cup of canned organic black beans, drained and rinsed
3/4 cup thinly sliced green onions
3/4 cup chopped fresh cilantro
salt
freshly ground black pepperCook rice until just tender, follow directions on the package. Ours cooked for 50 minutes. Drain and rinse in cold water. Drain again. Meanwhile, whisk lime juice, garlic and 3 tablespoons of olive oil in small bowl. Season dressing to taste with salt and pepper.
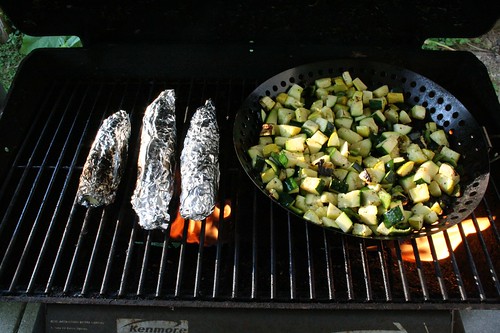
Start your grill and get it to a medium-high temperature. Wrap the ears of corn in foil and place them on the grill. Toss the peppers, squash and zucchini with 1 tablespoon of olive oil and add to a grill pan. Sprinkle with salt and pepper. Place the grill pan on the medium-high grill. Cook the corn until it is done, approximately 10-15 minutes, cut off the cob once done and slightly cooled. Sauté the vegetables until they are just tender and starting to brown up a little, 15-20 minutes; scrape into a large serving bowl. Add rice, beans, green onions, cilantro, and dressing; toss to coat, top with avocado. Season with salt and pepper.
-
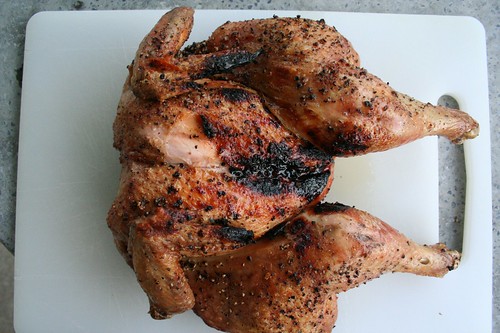
How To: Butterfly and Grill a Whole Chicken
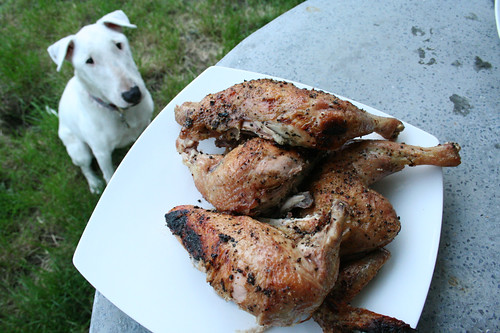
Since we’ve found Sojourner Farms and have bought a bunch of fresh pasture raised whole chickens direct from the farm, we have really been enjoying butterflied grilled chickens. This is such an effortless and delicious summer meal, perfect for those warm summer nights where you just want to relax on the patio with a cocktail and grill out. By butterflying the chicken, it takes less time to cook and you certainly don’t have to worry about it rolling off the grill or falling off of that sticky beer can. We usually get at least two meals from each chicken and once you’ve done the simple work of butterflying you can just sit back and enjoy the evening while it cooks.
I know I have already said this before about everything we have bought from Sojourner, but nothing can describe the taste of the food we are buying from them. Their chickens taste better than any chicken we have ever eaten before. It is unreal. I really cannot recommend enough buying your meats directly from a farm that raises their animals on pasture and without all the chemicals, hormones and antibiotics. You really can taste the extra love and care.
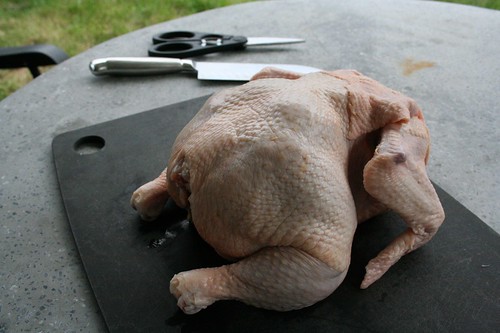
Start with a whole broiler/fryer chicken weighing approximately 4 pounds. Rinse the chicken inside and out with cold water, pat dry with paper towels. Remove the neck and giblets from the body cavity, then trim away any excess fat from around the cavity opening. Position the chicken so the breast side is down and the drumsticks are pointing towards you.
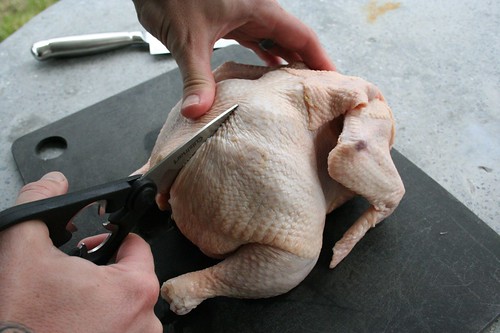
Using a pair of kitchen shears (you can use a sharp knife, but I really recommend the shears), cut all the way down one side of the backbone from the tail to the neck. You’re just cutting through the small rib bones, not through the center of the backbone itself. Cut close to the backbone so you don’t lose too much meat.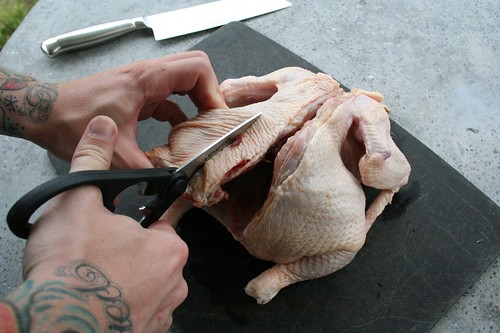
Next, cut all the way down the other side of the backbone, removing it completely.I have read that some people like to cut down only one side of the backbone, leaving it intact. We remove the backbone completely, since we aren’t going to eat it. Reserve the backbone for making stock, if you’re so inclined.
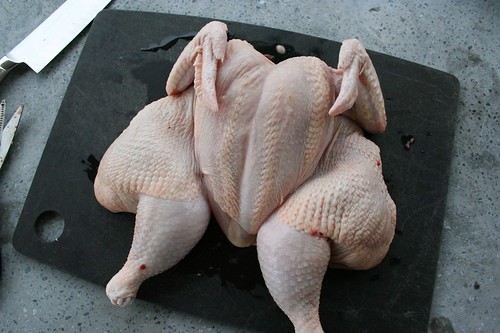
Flip the chicken over, breast side up and simply press firmly to full open the carcass, break the breastbone and flatten out the chicken. We prefer to leave the breastbone intact for less fuss and less steps. We could probably get ours even flatter, but it cooked wonderfully so we have no complaints.Many people prefer to actually cut the breastbone out for better presentation, we don’t mess with the extra steps. If you wish to do that, after you remove the backbone, keep the chicken breast side down, position it with drumsticks pointing away from you (turned 180 degrees from where you started). Use a paring knife make a small cut in the white cartilage that conceals the top of the breastbone. Bend both halves of the carcass backward at the cut to expose the breastbone. It should pop right up through the cut.
Run your thumbs or index fingers down both sides of the breastbone to separate it from the meat, then pull the bone out. If the breastbone breaks into two pieces when you are removing it, it could just mean you haven’t separated it well enough from the meat, just remove both pieces and you are good.
Now you are ready to grill!!
Preheat your grill by turning both sides all the way to high. Pull the hood down and allow the grill to get to a very high heat, this takes about 5-10 minutes, or use your temperature gauge if you have one on your grill.
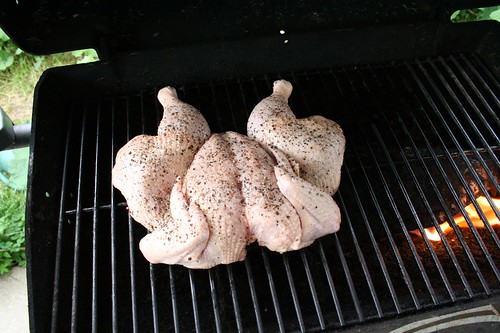
Brush both sides of the chicken with olive oil and season generously with kosher salt and fresh ground black pepper. You can definitely use other seasonings, add lemon or use butter instead of olive oil, we just prefer to keep it simple and not overwhelm it with tons of different flavors. You could also add chips to your grill to get a smoked flavor. Feel free to experiment with different things.
Once your grill gets to a high heat, turn one side off and leave the other on high. Place the chicken breast side up on the off heat side. Allow it to cook for 45 minutes, leave the hood down, don’t play around with it.
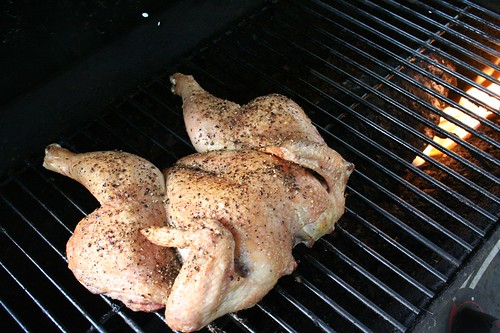
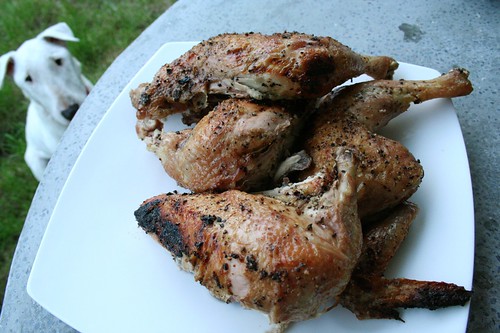
After 45 minutes, as long as you kept the hood down and the heat of the grill stayed at high, your skin should have already started to brown and crisp up. Turn the direct heat side down to a low flame and move the chicken over to the flame side, breast side down. Close the hood and continue to grill about 15 minutes or until an instant-read thermometer inserted in thickest part of breast registers 160°F. Transfer chicken, skin side up, to a cutting board and allow to rest for 10 to 15 minutes. Carve the chicken by removing the wings, legs, thighs and breasts from the bird. If it is a bigger bird, you can cut each breast in half.
All done. YUM!
There she is again, Derby was especially loving this photo session.
-
Pasta Salad with Arugula, Tomatoes and Raw Milk Cheese
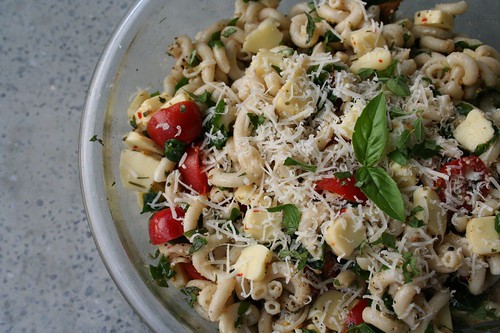
We did some serious local food shopping this past weekend and we made a feast on Saturday night with all of our goodies. I had grabbed a bunch of beautiful arugula from Native Offerings at the Elmwood Bidwell Farmers Market and a small container of spicy italian raw milk cheddar cheese curds at Five Points Bakery from Lapp Dairy and I knew I wanted to make some sort of pasta dish with it. I decided a pasta salad would be the perfect easy side dish to pair with the grilled chicken. The raw milk cheese curds were fantastic, they had a subtle spice that was just perfect with the tomatoes, arugula and fresh herbs. The crisp, peppery taste from the arugula was such a nice addition to the pasta salad, I will be adding that to a lot of pasta salads this summer. As usual, I used an organic brown rice pasta, but feel free to use your favorite pasta. I served the pasta salad at room temperature but it was equally good the next day, cold right out of the refrigerator.
This is our lovely pup, Derby. She loves nothing more than to hang by my side when I cook. She especially loves the nights we cook and eat outside on the patio.
Pasta Salad with Arugula, Tomatoes and Raw Milk Cheese
serves 412 ounces organic brown rice pasta (I used fusilli)
2 cups fresh arugula, roughly chopped
1 pint cherry or plum tomatoes, halved
3 tablespoons olive oil
1 tablespoon fresh basil, chopped
1 tablespoon fresh oregano, chopped
1 clove garlic, minced
4 ounces spicy italian raw milk cheese curds, cut into cubes
wedge of fresh parmigiano-reggiano
kosher salt
freshly ground black pepper
red pepper flakesCook pasta in pot of boiling salted water until just tender but still firm to bite. Rinse the pasta in warm water and drain. After pasta has been drained, move it to a large serving bowl. Add the roughly chopped arugula, halved tomatoes, minced garlic, herbs and olive oil. Carefully toss the pasta to combine all the ingredients, salt and pepper to taste and top with the cubes of cheese curds, lightly toss to mix the cheese throughout. Top with shredded parmigiano-reggiano and fresh herbs.
-
Thai Basil Mojito
I wish I could take credit for the idea of this drink, but I can’t. My dad dreamt it up after tasting the thai basil I had growing in my garden. The thai basil has a subtle anise flavor and is very different from Italian basil. This was a refreshing summer drink, that was perfect for a hot day and grilling out.
Thai Basil Mojito
serves 11/2 lemon, cut into wedges
a small handful of fresh thai basil leaves
1/2 tablespoon organic pure cane sugar (or 2 oz of simple syrup)
2 oz white rum
ice cubes
club sodaPlace the lemon wedges at the bottom of a tall glass along with the basil leaves. Add sugar or simple syrup and muddle the mixture. Stir in the rum and top with ice. Top off with club soda and garnish with a lemon wedge and couple thai basil leaves.
-
Potato Salad with Yogurt Cheese Dressing
I usually am not a fan of mayo based potato salad, something about most of them just never seems very appetizing to me. However, I had been meaning to experiment with a yogurt-based dressing as an alternative. I had bought some great yogurt cheese from White Cow Dairy at the farmer’s market and I thought that would be perfect for a potato salad dressing. White Cow Dairy is located in East Otto, NY where all of their cows enjoy a life full of grazing on their lush pastures. They make a variety of artisan products including custards, crème bulgares, thick yogurts, whey drinks, sauces and more. When sweetening is required, their products are flavored with maple found right on their own land, additionally they use wild leeks, onions, blueberries and apples all from the land on or surrounding their farm. I love that.
I really don’t know much about yogurt cheese, just that it is the creamy white cheese you get when liquid whey drains from yogurt. It has a great thick and rich consistency without the fat and it really gives a nice tang to all kinds of dishes. I have put it on everything from veggie burgers to fresh berries. It is quite versatile with either sweet or savory items. I will definitely be buying it again. I have also seen recipes for making your own yogurt cheese at home, though I am not sure I would bother considering the perfection that White Cow Dairy has achieved with theirs.
As usual, I threw this recipe together by taste, so I am not exactly sure on the measurements. I had a small bushel of baby potatoes from the market last week that needed to get eaten up, so I just pulled this together on the fly.
Potato Salad with Yogurt Cheese Dressing
serves 41 cup yogurt cheese
approx 1/4 cup organic milk to thin the cheese
approx 30 or so baby potatoes, (red or otherwise)
half of a medium-sized red onion, chopped
fresh herbs, dill, chives, etc (dried will work as well)
kosher salt
fresh ground black pepperIn salty water, boil the potatoes, cook until soft. Drain and allow to cool. Once cooled, you can peel and half them. I leave the peels on myself. Put the halved potatoes in a large serving bowl, add the chopped red onion, chopped fresh chives and dill (I went with dried dill as that was all I had). To prepare the dressing, take 1 cup of the yogurt and slowly add the milk, one tablespoon at a time, whisking. Add milk until the yogurt is thinned to your desired consistency. I left mine fairly thick, but not chunky. Add the dressing to the potato salad and season with salt and pepper. Mix to combine and coat, being careful not to mash the potatoes. Taste and add more seasonings as needed. Chill until you are ready to serve. Allowing this to chill for a good couple of hours really brings all the flavors together and all the ingredients get nice and cold. Serve with fresh chives and fresh ground pepper on top. Enjoy.
-
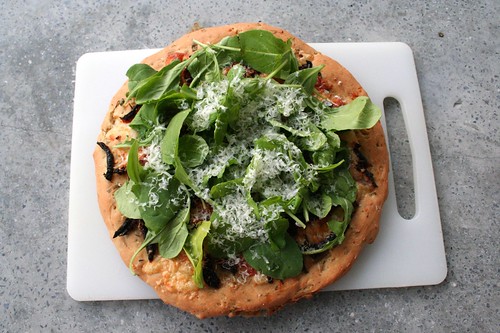
Sun-Dried Tomato, Mozzarella, Fontina & Arugula Pizza (Gluten-Free)
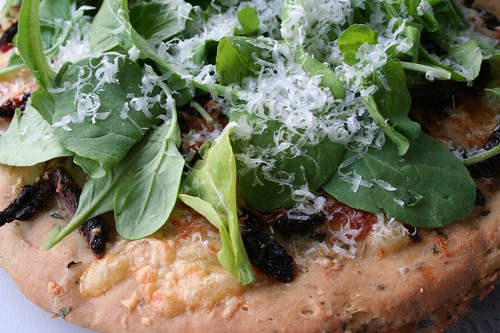
I am a big fan of homemade pizza, my Mom always made it when we were kids, with homemade pizza dough and all. I love how much fun you could have with toppings. This pizza turned out perfectly, it had so many lovely subtle flavors and the arugula finished it off nicely with a little bite. I used the same pizza dough recipe from my Caramelized Onion & Goat Cheese Pizza, but I am going to include it again here so you don’t have to look it up. Since I made this recipe up on the fly and also was making a second non-gluten-free pizza for Mark, my measurements may not be exact, so feel free to just improvise and go with what you think on the toppings. The only thing I would like to find a way to change is, some of the sun-dried tomatoes started to really blacken up as the pizza baked, it seemed to only be the ones not covered by cheese, so maybe I just need to add more cheese next time (oh darn!).
I took one leftover piece of this pizza this morning, toasted it up in the toaster oven and topped it with one fried egg. Oh my gosh was that amazing. The perfect breakfast to start a very busy day.
Sun-Dried Tomato, Mozzarella, Fontina & Arugula Pizza (Gluten-Free)
serves 2-3Gluten-free Pizza Crust
1 tsp sugar
1 1/2 tsp quick-rising yeast
3/4 cup warm water (about 110° F)
3/4 cup brown rice flour
1/4 cup garbanzo bean flour
1/4 cup tapioca flour
1/4 cup potato starch
1 1/2 tsp xanthan gum
1 tsp salt
3 tablespoons olive oil
2 eggs
1/2 tsp balsamic vinegar
2 tsp fresh rosemary, basil or oregano (I went with basil and oregano)Line a baking sheet with parchment paper or lightly grease.
In a small bowl, combine warm water, sugar and yeast. Stir until just dissolved. Cover with a kitchen towel and set aside in warm are for 10 minutes. Mixture will form a foam head of about 3/4″.
Using your food processor (which is how I did it and it worked surprisingly well), add all dry ingredients: flours, potato starch, xanthan gum and salt, directly into the processor bowl. Blend in the processor, about 1 minute. If using a mixing bowl, combine dry ingredients, and whisk together until well combined.
In another small bowl, whisk olive oil, eggs, and vinegar until blended. Add egg mixture and yeast mixture to dry ingredients, mix until combined.
Blend dough in the food processor for 2-3 minutes. Dough will be sticky and soft, it doesn’t seem much like dough at all. Add in the herbs and gently pulse or mix to combine.
Transfer the dough to the prepared baking sheet. Dip your hands in water or olive oil and shape the dough into a round shape about 1/4″ thick. Place in a warm, draft-free area and let rise 40 minutes. Dough should double in size.
Brush top with olive oil and sprinkle with a pinch of course salt.
This recipe can also be used to make gluten-free focaccia if you spread it to 1″ instead of 1/4″.Toppings
1 clove garlic, minced
1 tablespoon of chopped fresh herbs, I went with basil and oregano from my garden
2 ounces of sun-dried tomatoes, sliced very thin
1/2 cup of shredded mozzarella (I used organic)
1/2 cup of shredded fontina
red pepper flakes
2 cups of fresh baby arugula
fresh parmigiano-reggianoPreheat the oven to 400° F
After you have brushed a bit of olive oil on the crust and sprinkled with a bit of salt (see above), sprinkle the minced garlic all over the crust. Next, evenly sprinkle the fresh herbs and sun-dried tomatoes all over the crust. Add both cheeses and a pinch of red pepper flakes. Bake the pizza. Place the baking sheet in the middle of the oven and bake for 20-25 minutes until the crust is a golden brown and the cheese is melted. After you pull the pizza out, top the entire pizza with the baby arugula. Lightly grate fresh parmigiano-reggiano on top. Cut pizza into wedges, serve immediately.
Posts by Beth @ Tasty Yummies
-
Goodbye Sweet Derby. The Best Sous Chef.
I try to keep this blog all about food, cooking and eating, but as it happens, my life trickles in now and again. This is both the fun and weird parts of blogging. I am sure many of you have seen our sweet dog, Derby’s adorable face pop up on here now and again. We lost our sweet baby girl unexpectedly on July 25, which is part of the reason for my lack of posts on here. She was just 6 years old.
She loved spending time with me in the kitchen and every single meal I ever cooked at home, was made with Derby at my feet. I always joked that she was my sous-chef. Derby loved the sound of the cutting board and the oven door opening, especially since I started baking her treats. I even made her a birthday cake this year for her birthday.
As much as I thought I shouldn’t post this on here, I felt like I owed it to Derby, since she was such a part of me cooking and the joy I felt in the kitchen. It has definitely been hard being in the kitchen since she is gone, but food is and always will be a comfort in life. Although it took me a bit to get back in the kitchen, the first few meals were made with tears in my eyes, and the food that falls off my cutting board lies there uneaten, I will never cook a meal in my kitchen and not think of Derby.
Here is something we posted on our studio blog about our Derby that I wanted to share with all of you:

[vimeo http://vimeo.com/14032950 w=500&h=281]
I’ll be honest, I have been absolutely dreading writing this blog post. My heart is pounding and my hands are shaking. Somehow this blog post just makes this all so much more real.
On July 25, we lost our beloved dog, Derby Lou, very unexpectedly. She was just 6 years old. We are just still in total shock and disbelief. For anyone that knows Mark and I, you know just how big a part of our lives Derby was, she was our baby (a very, very spoiled baby, at that). She came to the studio with us every single day, was always here with us when we were working late, hung by our sides with every poster we printed, was at every party we had at the store, she was a part of everything we did. Her dog bed sat next to my desk and this studio was built with her in mind. Derby was the sweetest little thing and it was hard for people who met her at Hero (or anywhere for that matter) not to fall in love with her on their first meeting. She loved people who loved her and there were so many. We had people who would come by the store, just to see Derby, to bring her toys and treats or to just play with her. It’s quite possible that some of our customers liked her more than us.
Derby loved her super long walks off leash in the woods as much as she loved her city walks through Allentown during the workday. She loved coming home at the end of the work day and laying at my feet while I cooked dinner, she would come running at the sound of my knife hitting the cutting board. Derby had so many nicknames and equally as many songs that we made up for her. She was a super funny dog with a heart of gold and personality that couldn’t be matched. We will miss so many things about Derby, like her “baby dinosaur” groans, which was her subtle way of reminding us she was still here, or the funny spastic freak-out roll that she did all over the floor when she was bored.
There is an emptiness at the studio and our house now and an even bigger emptiness in our hearts. That unmistakable sound of Derby prancing across the hardwood floors, the jingle of her collar and those little bully grunts, are all missing and we both notice it so many times through the day. It’s so quiet. The ride home from work, where she used to bounce around, with an excitement level that could never be matched on the ride into work, is now a quiet, somber drive home to the place where she really got to be herself. At home, Derby could really only ever be found on the couch next to one of us or under the bed upstairs chewing on a roll of toilet paper, if god forbid we were too busy to cuddle.
I can’t bring myself to move her food bowl, or her dog bed in our bedroom. I keep waiting to see her smiling face come around a corner, with her “question mark face”, asking us for a walk or to play. I have slept with her favorite toy every night, just to be able to smell her, and a couple of times a day, every single day since she passed, Mark and I have been remembering all the special moments we had with our little girl, we laugh and we cry together. We are so grateful that in the 6 short years we had together, we got to live and spend more time with Derby, than most people are able to in a lifetime with their pets. The night before Derby got sick we had planned on working late since we had so much going on and were leaving in a few days on a trip, instead we locked up the store, grabbed the leash and we went for a long walk together as a family, it was our last walk. I would give anything to go back on that walk, keep walking and never stop.
Do yourself a favor, enjoy every single day with your pet, take that walk even if you are tired, throw the ball even if you are agitated. Derby made every single day better and she made both of us better people.
Goodbye Derby, we will love you forever.


