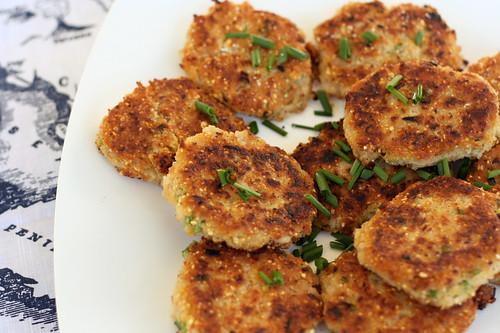
-
Pooch Friendly Ice Cream
This is a little bit different of a post. It is still gluten-free, unprocessed and healthy, but this one isn’t for humans, it’s for our little furry baby, Seri, who turned one yesterday! I decided as a little treat, I had to make her something special to celebrate. In the past I used to bake different goodies for our last dog, Derby, like whole wheat peanut butter treats and one time I even made her a special dog-friendly birthday carrot cake. I decided to do something a little different this time because Seri is on a grain-free diet. Yes, even my dog is gluten-free. Also like me, she doesn’t eat any processed foods. In addition, she eats a fully raw meat diet all of the time. Seri has had some minor itchy-skin/allergy issues in the past, nothing major at all, but enough for us to want to make sure she was eating THE very best. After consulting with a holistic vet and our breeder and some trial and error with different foods and ingredients, we have found the things that work for Seri and those that don’t. We always make sure to avoid anything that could upset her little body, whether it be her daily food, an unnecessary medication or even a little treat. It’s incredible how much unnecessary processed junk is in most dry kibbles and biscuits, even the best brands are loaded with useless fillers and crap that they just don’t need. Just like us, it’s so bad for their health. Dogs are carnivores and they need meat.
Since Seri eats raw bison for breakfast and dinner every day and her treats are usually some other type of dehydrated raw meat, it was really hard to think of something super special for her birthday as a treat. Since I couldn’t really bake any treat from grain, I decided to experiment with ingredients that I knew were safe for her.
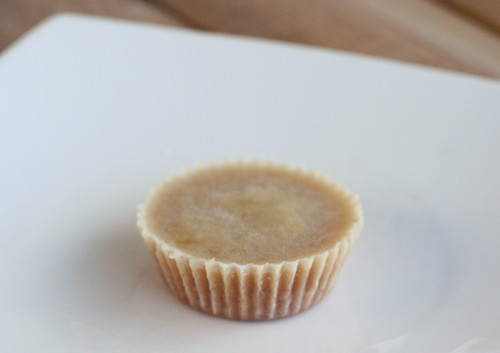
I didn’t want her to get a large portion of whatever special treat I was going to make, so I made small little muffin-cup sized portions, so I could control how much fat she would consume, since we all know what can happen if a dog gets a lot more fat than usual.
Since dog’s are unable to process the lactose in milk, I made the base of the ice cream from almond milk. (If you know your dog has a sensitivity to nuts, or you aren’t sure, you can just go with a simple chicken or beef broth.) I included the coconut oil because in moderation, it is so great for your dog’s health. There have been many studies and countless articles written about the healthy benefits of coconut oil, for both humans and dogs. Additionally, it is great for dogs with allergies and itchy skin. It can also be used topically on any hot spots they may develop. We alternate the coconut oil with salmon oil on Seri’s food each night. If your dog is sensitive to fats, consider skipping the oil or going with a very small amount. Seri goes absolutely nuts for coconut oil, she loves it! That and peanut butter. She rarely gets peanut butter so it was another nice treat for her birthday ice cream.
Seri absolutely loved her birthday ice cream. She couldn’t eat it fast enough! I love now that with having the individual servings, ready in the freezer, whenever I want to give her a little treat, they are ready.
I realize this post may make me seem like a crazy dog person, but in our family, our pets are our life, we would do anything for them and we are willing to make sure they get the very best. I know not everyone is like that, so you may think I am insane. I am pretty ok with that.
Pooch Friendly Ice Cream
makes approximately 8 muffin-sized frozen dog treats2 cups organic unsweetened unflavored almond milk (you can certainly use homemade here, just skip the sugar and vanilla when you make it)
1 tablespoon organic unrefined virgin coconut oil
2 tablespoons organic natural creamy peanut butter
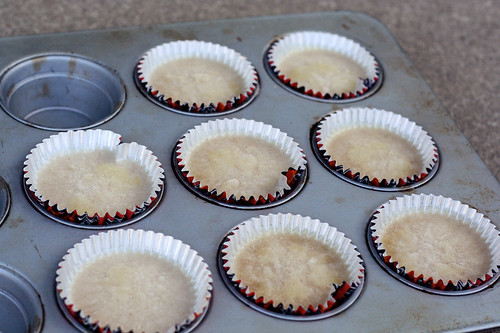
(you could have fun with other dog-safe ingredients like shredded carrots, beef or chicken broth, pieces of their favorite unflavored/unspiced meat, etc)Line a regular sized muffin tin with foil or paper muffin cup liners. Depending on how full you fill them, you can make more or less than this recipe calls for.
Combine all of your ingredients in a large mixing bowl. If the peanut butter was in the refrigerator and is a bit solid, microwave it for about 10-15 seconds to soften it up a bit, to make mixing easier. Using a hand mixer or stand-up mixer, thoroughly combine the three ingredients. Ladle the ice cream mixture into each muffin cup, filling to about 3/4 of the way full. (Again, if you want more, smaller treats, fill them up less or use a mini-muffin tin. If you want less, larger treats, fill them up more.) Place the entire muffin tin in the freezer and allow the mixture to freeze until solid, about 8 hours or so.
When the ice cream treats are frozen solid, you can pop one of out of the tin, peel of the paper muffin cup and give it to your dog. You can remove the remaining treats from the muffin tin and put them in a freezer safe ziplock bag or plastic container.
** Obviously I am not a veterinarian, so please don’t take any of what I am feeding our own dog as a medical advice for your pooch. We just know what works and what doesn’t with Seri. Every dog’s sensitivities are different. If you know your dog cannot have one of these ingredients, go with something else **
-
Gluten-Free Crispy Zucchini Rounds
I have seen a number of crispy oven-baked zucchini recipes floating around online and in cookbooks, some as rounds, some as “fries”, but obviously all were made with regular wheat flour and breadcrumbs, so they weren’t gluten-free. However, with my insane love of zucchini, every single time I would see a photo of one of these recipes, I would instantly salivate, how couldn’t crispy oven-baked zucchini slices be delicious? I decided to experiment with making my own gluten-free version and I have to say for the first attempt, they turned out perfectly. I am so excited. I love when that happens.
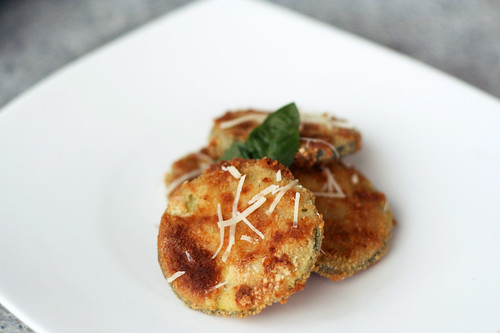
The outside was so incredibly crispy, the inside was tender. Topped with a bit of freshly shredded parmigiano-reggiano and some fresh basil from the garden, each and every bite was full of flavor. I only sliced up one of the large zucchini we grabbed from the farmers market, but it was more than enough for the two of us as a side dish, with plenty leftover. It would be enough for 4 people, but if you like this as much as we did, it is actually a perfect sized side dish for two. We ended up eating seconds, since they were so delicious. I served this alongside some gluten-free penne with a delicious mint pesto .
These crispy zucchini rounds would also be wonderful as an appetizer. You could create a delicious creamy dipping sauce or even serve them with some hot marinara sauce. Though a dipping sauce would be delicious and fun, we went nude and enjoyed them as is. They were so full of flavor, they didn’t really need anything more.
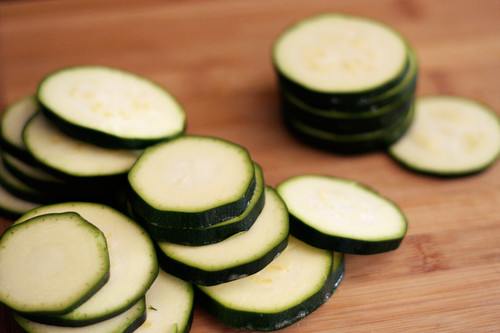
I ended up using my mandoline slicer to make sure each round was cut evenly, so they would cook evenly, but it isn’t necessary. You could simply cut by hand, doing the best to keep them generally at the same thickness.Gluten-Free Crispy Zucchini Rounds
serves 2-41 large zucchini, sliced into 1/4-inch to 3/8-inch thick rounds
2 large farm fresh brown eggs *see below note about making this vegan*
1/3 cup tapioca flour (sometimes called tapioca starch)
1 cup gluten-free bread crumbs, plus more if needed
1/4 cup shredded parmigiano-reggiano cheese
Olive oil for drizzling
sea salt and freshly ground black pepper, to taste
1/4 cup fresh basil, roughly choppedPreheat the oven to 450º and lightly grease a large baking sheet (or two smaller) with olive oil . On 2 separate plates, add tapioca flour and bread crumbs. Lightly beat 2 eggs in a medium bowl.
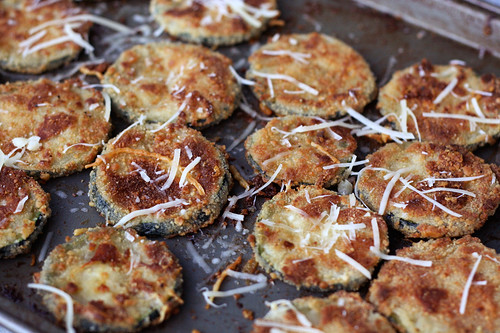
Dust both sides of zucchini rounds with the tapioca flour, dip in egg, and pat onto the plate of gluten-free bread crumbs. Place in a single layer on the baking sheet(s). Drizzle olive oil over the top, sprinkle with sea salt and a very small amount of the parmigiano-reggiano cheese. Bake in the oven for 15 minutes on the first side, using a spatula flip each zucchini round over (you can drizzle a bit more olive oil on this side, if you wish) and bake an additional 10 minutes until crispy and lightly browned on both sides.
Remove the baking sheets from the oven, sprinkle the remaining parmigiano-reggiano cheese and the fresh basil overtop of the rounds and serve immediately. Salt and pepper to taste.
*To Make This Vegan: After a request on Facebook, I decided to make these again, but this time I attempted to make them vegan. In place of the two eggs I used 3 teaspoons of Ener-G Egg Replacer with 1/4 cup of warm water. Stir together until fully mixed. You may find you need to make a bit more depending on how large your zucchini is, but that is a good starting point. Substitute the egg replacer for the eggs in the above recipe, do everything else the exact same and just skip the parmesan cheese. That’s it. They turned out just as delicious, with a perfectly wonderful crispy brown outside.
-
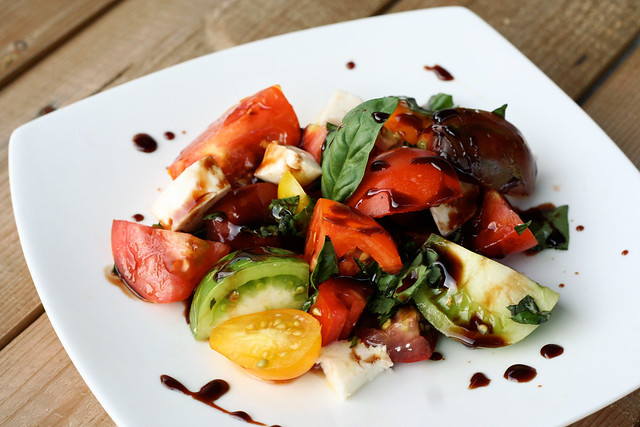
Heirloom Tomato Caprese Salad with Balsamic Reduction
This recipe is a fast and simple twist on the original, with no accurate measurements needed. It’s all about taste. I grabbed a quart of colorful local heirloom tomatoes at the market and I couldn’t wait to pick some of the beautiful heirloom black cherry tomatoes from my own garden to make a big tasty salad with. Since the tomatoes themselves had so much flavor and the basil from our garden was abundant, I decided to not go crazy and put the full 8 oz of fresh mozzarella into the salad, it just didn’t need it. I also decided that by saving half of it, I could use it to add to an omelette with the next morning.
I wanted to get a nice sweet and tart punch from the balsamic, so rather than just pouring it on as is, I made a simple reduction syrup to drizzle over top the salad when serving. It is incredible how the concentrated flavors from the vinegar reduction really sing with the subtle sweetness. It is one of my favorite, simple kitchen tricks that works for so many dishes. In addition to drizzling over top salads like this one, the balsamic reduction is also wonderful drizzled over a steak, grilled fruit and so much more.
There is something about a good insalata caprese that just screams summer to me. But much like the balsamic, it is bitter-sweet, by the time the tomatoes in our gardens are ripe enough to start picking for the beautiful salad, summer is on the down-swing and definitely more than half over.
Heirloom Tomato Caprese Salad with Balsamic Reduction
serves 4Approximately 1 quart of mixed heirloom tomatoes, any variety. (Mine were all smallish – cherry and grape sized, some from our garden)
4 oz fresh mozzarella, cut into small cubes (you can use the full 8oz, but I was attempting to keep this light and much more about the tomatoes)
1/4 cup tightly packed fresh basil, roughly chopped
1/2 cup high quality balsamic vinegar
3 teaspoons brown sugar
A few tablespoons of good quality extra virgin olive oil
sea salt and fresh cracked black pepper, to tasteIn a small saucepan over a medium-high heat bring the balsamic vinegar and sugar to a boil, constantly whisking to prevent burning. Continue cooking until it is reduced by half, stirring often. Remove from heat, allow to cool. (The sugar is optional as the vinegar has a natural sweetness when reduced, but I find that just a little is nice to compliment the tartness of the vinegar)
Meanwhile, half or quarter the tomatoes and place in a large serving bowl. Add the fresh mozzarella and basil. Toss lightly to combine. Season the salad with a bit of salt and pepper to taste. Serve individual servings of the salad on small side plates, drizzle both the olive oil and the balsamic reduction over top each serving. Serve immediately.
-
Homemade Infused Liquor
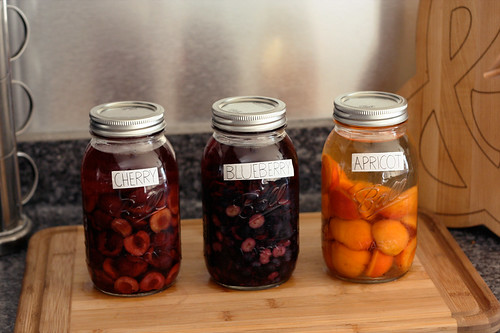
I came across this super easy how-to on the Bon Appétit blog this Spring and I couldn’t wait to start playing around with different flavor combinations. My very first batch was strawberry vodka that I made at the end of June when the strawberries were at their peak ripeness and I couldn’t get over how incredible the flavor was. Since then I have made blueberry, rhubarb, cherry and apricot. In the next week or two I plan to make some cucumber, pepper and basil infused vodkas (separately of course) with the lovely goodies growing my garden. I also want to play around with other liquors like rum and tequila. The sky is really the limit on what you can do.
I have yet to play with other liquors, since vodka tends to be my first pick. Since the vodka itself is fairly tasteless, it can really let the flavor of the ingredient that you are infusing with, shine. Also, FYI, no reason to buy Grey Goose or Ketel one, but don’t buy that cheap crap on the bottom shelf either. I have been buying a nice middle of the road vodka like Svedka or Smirnoff.
I tend to like the fruit infused vodkas with a bit of soda water, a wee bit of simple syrup and a sprig of fresh mint or basil. I keep a jar of homemade raw sugar simple syrup in my fridge at all times which can be made very easily with 1 part sugar to 1 part water, bring sugar and water to a boil in a small saucepan; simmer until the sugar is dissolved, 3 minutes. Remove from the heat and let cool completely.
The strawberry vodka was great with some fresh squeezed lemon juice. Tonight I plan to experiment with an apricot martini of sorts. I cannot wait to make the pepper vodka with the super spicy heirloom Korean peppers growing in our garden, it will be perfect to make delicious homemade bloody marys with. The beet infused vodka that BA suggests is also super intriguing, I think I will have to add that to the list, too.
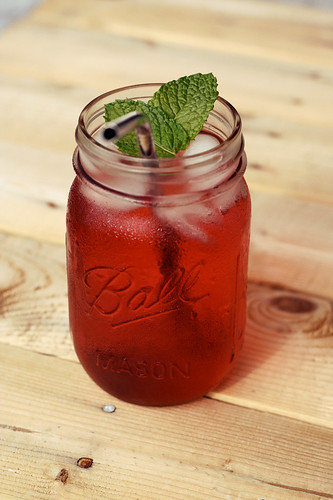
This is a simple cocktail made with my cherry vodka, just a tad bit of my homemade simple syrup, soda water and a fresh sprig of mint. So refreshing!
Step 1: Choose your liquor
Vodka is an obvious choice, but why not use white rum or tequila, brandy or grappa? Don’t go for the really cheap stuff, but don’t splurge either. A middle-of-the-road, neutrally flavored liquor will produce the best infused spirits.Step 2: Choose your produce
Use what’s in season. Go to your local farmers’ market or, better yet, pick berries from your own berry patch, and bring home the most beautiful produce you can find. The super-ripe peach that dribbles juice down your chin is a perfect candidate. Also try raspberries, strawberries, pears, figs, lemons, cherries, blueberries, even beets and chiles, as long as they are ripe, ripe, ripe.Some of Bon Appétit’s favorite fruit-and-spirit combos are:
Apricots + Eau de Vie
Figs + Bourbon
Jalapenos + Tequila
Pineapple + Rum
Beets + VodkaStep 3: Prep your fruit
Wash it well and cut it into pieces. Remove peels and skins plus any part of the fruit that you wouldn’t want to eat: Stems, pits, cores, and seeds should all be tossed into the compost pile. As the liquor infuses, bitter flavors from citrus pith and seeds can leech into the liquor, so you want to avoid that.Step 4: Bottle & Wait
Fill a clean resealable glass jar or bottle with fresh, cleaned fruit. Top off with liquor and screw on the lid. Place in a cool, dark place (like a fridge) until the flavors infuse (anywhere from a week to a month, depending on your taste and the strength of the fruit). Shake the jar every few days. When you’re happy with the flavor of the hooch, strain out fruit* and pour infused spirits into a clean resealable glass jar or bottle; store in the fridge.Step 5: Drink Up
Use your freshly infused spirits in place of plain spirits in your favorite cocktail or serve up on its own as a Martini.One caveat: This process requires a little patience. I generally start one mason jar of infused spirits per week throughout the summer. Depending on the type and ripeness of the fruit, infusions can take 2 to 3 weeks, so plan accordingly if you’re making it for a party (or use a fresh batch as an excuse to party). A pretty jar of rosy strawberry vodka is the perfect hostess gift, and it’s a lot more appealing than neon-green Margarita mix.
* though eating the fruit may be tempting, don’t bother. After the infusing process, the fruit is merely a ghost of its former self. All of the flavor has been sucked out and infused into the liquor so the fruit is left bland, soggy and tasteless.
-
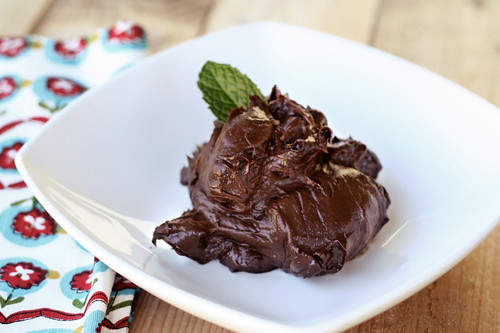
Vegan Chocolate Mousse
I plan to keep this post short and sweet, much like this recipe. It may sound a bit bizarre and hard to believe, but you really need to trust me and make it yourself.
After making some no-bake cookies for Mark in the afternoon yesterday (recipe coming soon), I was having a major sweet craving last night. Since I try not to keep too many sweets in the house for myself, I was feeling a bit bummed out that I couldn’t satisfy my sweet-tooth. I have seen many takes on vegan mousse that involved silken tofu, but I don’t really love tofu since it often bothers my tummy and I wanted to play around with the two very ripe avocados in my fridge that needed to get eaten up.
This mousse is so creamy, it is unbelievable that there is no dairy in there. It is decadent, rich and so satisfying. I was actually dancing around the kitchen and swearing with the spoon hanging out of my mouth on the first bite, I couldn’t get over how delicious it is. This mousse is naturally gluten-free, vegan and raw, it takes only 4 ingredients and you can make it in less than 5 minutes, so you can enjoy every last bite of it, guilt-free.
If it needs a bit more moisture when blending, try adding a little splash of almond or soy milk. You could also play around with adding peanut butter, chunks of your favorite chocolate bar, or simply just topping the mousse with your favorite vegan whipped topping and/or fresh berries. You could also play with adding in a dash of cinnamon or even cayenne for an extra little kick!
Now I need to do a little research about avocado fudge, a fellow food-loving friend, Kate, mentioned it to me on Facebook last night after I was carrying on about how amazing this was.
Vegan Chocolate Mousse
serves 22 ripe avocados, pitted and chopped into large chunks*
1/2 cup organic fair trade baking cocoa
1/2 cup maple syrup (you could also use coconut nectar or honey)
2 teaspoons organic vanillaAdd all of the ingredients to a food processor or heavy-duty blender, process until smooth and creamy. Serve immediately or refrigerate and serve cold.
*your avocados need to be very ripe and very soft to be able to get that just right smooth silky texture.
-
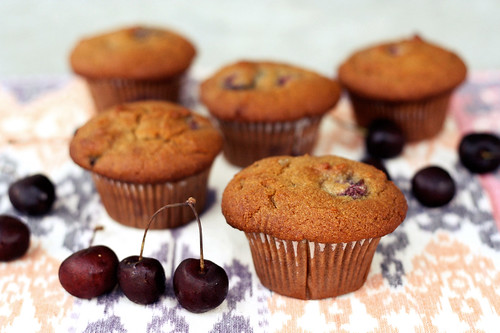
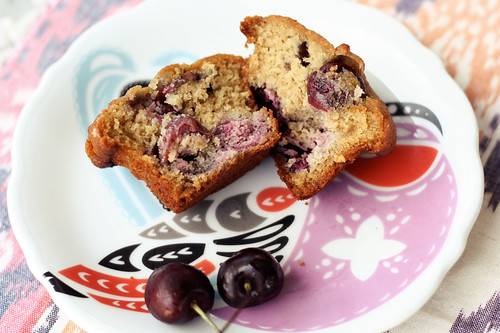
Cherry Almond Flour Muffins
This may seem a bit off topic, but I have a massive obsession with Pinterest. Holly, a friend of mine sent me an invite a few weeks ago, since she knew I would love it, and she couldn’t have been more right. Basically, as you come across images on the web, you can virtually “pin it” onto your different boards on Pinterest. The appeal is that not only does it act like virtual inspiration boards, but it also works as a way to remember and store links to projects, recipes and other fun things you want to try out. I like that I can access my pins and boards from any computer or device. I have been coming across some super fun images for inspiration and a ton of exciting and easy to do DIY projects for both work and for fun. Not that I don’t already have enough to do, but I love a good crafty project, especially once the weather cools down. You can also see other people’s boards and you can repin their items into your boards. It is so addicting.
This recipe is one that caught my eye on my daily internet travels a week or so ago, but when I had come across it, I didn’t have the time to make it, but I really wanted to remember it. Rather than print the recipe out, waste paper and have it get lost in a sea of papers in my office, I “pinned it” to my recipe related board on Pinterest. A few days later I hit the farmers market, grabbed some cherries and was ready to get baking.
These muffins were bursting with flavor and were so easy to make. I have fallen in love with almond flour, it is so easy to bake with, you don’t need to add tons of other flours or any gums, and on top of it, it has a lovely nutty taste. The other bonus is that almond flour is protein packed and low in sugar. I love by keeping the cherries in halves you get a big burst of tart, sweet flavor in every bite.
If you are on Pinterest you can follow my boards here. If you are looking for an invite, post your email address and I will send you an invite.
Cherry Almond Flour Muffins
makes 6 large muffins2 cups blanched almond flour*
1/2 teaspoon baking soda
1/2 teaspoon sea salt
2 local farm fresh large brown eggs
1/4 cup honey (or maple syrup)
1/4 cup grape seed oil (or olive oil)
2 teaspoons vanilla extract
1 cup fresh sweet cherries, pitted and halvedPreheat oven to 350˚F. Line a muffin tin with paper liners.
in a medium bowl, whisk together the almond flour, baking soda, and salt.
In a separate bowl, beat the eggs. Add in the honey, vanilla and oil and whisk until well combined.
Add the dry mixture to the wet, stirring until combined. Carefully fold in the cherries.Spoon the batter into the muffin tin, filling to the top if you want a nice muffin dome, or as us ladies know it “muffin tops”. Bake for 25 minutes or until the tops are golden brown and a toothpick inserted into the center comes out clean. Cool the muffin pan on a wire rack for five minutes. Gently pop the muffins out to continue cooling on the rack (don’t cool them longer than 5 minutes in the hot pan they’ll definitely get soggy). Enjoy a muffin after they have cooled 10 minutes, you know you want to.
I find storing muffins covered tightly in the refrigerator or freezer to be the best, especially in the heat of summer. Just pop one out as you want it, heat slightly in the microwave if you want to take the chill off and go.
* Something I have learned from baking on my own and from reading Elana’s Pantry, is that not all almond flour (or meal) is created equal. Bob’s Red Mill makes an almond flour, though easy to find, that doesn’t seem to react quite the same as other almond flours. It doesn’t seem to rise as much and it just seems to leave recipes flat. On Elana’s recommendation I now buy Honeyville brand almond flour in a 5-lb bag from their website.
-
Gluten-Free Chocolate Cupcakes with Vegan Chocolate Frosting
I came across Elana Amsterdam’s blog, Elana’s Pantry, quite a while ago and I have been playing around with many of her recipes ever since. They are all so wonderfully simplified, not loaded with tons of strange flours or gums. Just simple and healthy gluten-free adaptations of classic recipes, many times featuring almond and coconut flours. After making many of Elana’s recipes and always being impressed, when I found that she was releasing a Gluten-Free Cupcakes cookbook I knew I had to have it. I preordered the cookbook so I would have it the minute it released. I went through every single page the minute it showed up this spring and made a game plan for which recipes I would make first. With it being such a busy spring and summer I haven’t been doing nearly as much baking as I would like, but every single time I passed Elana’s book on my shelf, I salivated thinking about making gluten-free cupcakes from scratch, in my kitchen. I am not one of those people who freak out over cake (like my husband, Mark), even before being gluten-free I almost always passed it up at birthday parties, but there is something about a deliciously made and adorable little cupcake that always gets me. It’s the perfect amount of cake for me. Whenever I am in NYC I always make it a point to travel out of my way to Babycakes, for that very reason.
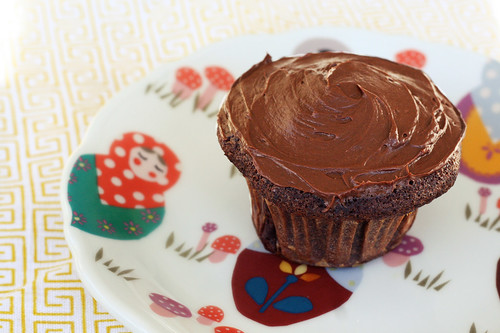
Since it had been so long since I had made a cupcake or any cake for that matter, I decided I wanted to go with the classic, chocolate cupcake with vegan chocolate frosting. Elana’s book has all of the sweet classics as well as some really fun new twists on cupcakes like Raspberry Cheesecake, Vanilla Fig, Pina Colada and so many others, there is even a section of savory treats like Scallion Goat Cheese Muffins, Chive Pepper Muffins and more. All of the recipes in this book feature coconut flour, almond flour or both. So no need to buy strange flours that you’ve never even heard of. Elana’s book also has vegan versions of many of the cupcakes as well as a variety of frostings both vegan and not. I decided to try the vegan frosting since it sounded easy to make and I was very curious to taste it. Not surprisingly, it was some of the best frosting I have ever had, super-rich and very chocolatey. I may have had a spoonful or two (or 5) of the frosting right from the jar, it’s that good.
The cupcakes were so chocolatey, moist and fluffy, I couldn’t believe that the only flour in the entire recipe was a 1/4 cup of coconut flour. When I read the recipe, I was convinced this had to be a mistake. I went to the front of the book to read more about coconut flour where Elana explains that coconut flour absorbs all of the moisture in recipes, which is why the ratio always seems off. Coconut flour is really quite amazing and unique, it rises so nicely in recipes and a little goes a long way. Most people assume that coconut flour will cause a recipe to strongly taste of coconuts, but this isn’t the case. The little bit of experimenting I have done with coconut flour has always yielded wonderful results, I cannot wait to keep playing and baking with it.
I’m gonna tease you with this recipe from the book, but you really really need to go buy the book yourself and start baking from it, you won’t regret it. I myself need to keep baking from it and start practicing my cake decorating skills. I attempted at first to use an icing bag to pipe the frosting on for the photos. Wow, what a mess, it looked like a 5-year-old did it. So, I stuck with what I am good at and decided to just take an icing knife and swirl it on.
Besides this wonderful book, Elana has an array of beautiful and tasty looking cupcake recipes on her blog, which you can access here.
Gluten-Free Chocolate Cupcakes
Makes 9 cupcakes*1/4 cup coconut flour
1/4 cup unsweetened organic cocoa powder
1/4 teaspoon sea salt
1/2 teaspoon baking soda
4 large farm fresh local brown eggs
1/4 cup grapeseed oil
1/2 cup honey (agave or maple syrup)Preheat the oven to 350ºF. Line 9 muffin cups with paper liners.
In a large bowl, combine the coconut flour, cocoa powder, salt and baking soda. In a medium bowl, whisk together the eggs, grapeseed oil and agave nectar. With a hand mixer, blend the wet ingredients into the flour mixture in the large bowl, until thoroughly combined.
Scoop 1/4 cup of batter into each prepared muffin cup.
Bake for 18 to 22 minutes (mine actually took more like 25 to 28 minutes until they were done), just watch them and test for doneness by inserting a toothpick into the center of a cupcake, when it comes out with a few moist crumbs attached, they are done. Let the cupcakes cool in the pan for an hour, then frost and serve.
* Looking for more than 9 cupcakes? Elana notes in the book that rather than doubling the recipe, it is best to just make a second batch.
Vegan Chocolate Frosting
6 ounces dark chocolate chips (73% cacao) (about 1 heaping cup)
1/2 cup Spectrum all-vegetable shortening
1/4 cup agave nectar
1 tablespoon vanilla extract
2 tablespoon water
Pinch of sea saltHeat the chocolate in a medium saucepan over a very low heat, melt until it is smooth. Allow the pan to rest on the counter for 5 to 10 minutes to cool the chocolate to room temperature.
With a handheld mixer, blend in the shortening, then blend in the agave nectar, vanilla extract, water and salt until smooth. Place the saucepan in the refrigerator for 3 to 8 minutes, until the frosting is spreadable.
If the frosting gets too stiff to work with, reheat the pan very briefly over a low heat and stir until it is softened. If the frosting is too runny, place it back in the refrigerator until it firms up.
Use the frosting immediately or store in a glass Mason jar in the refrigerator for up to 3 days.
-
Today is the Only Guarantee…
I will start this post by saying I don’t know Jennifer. I just read her blog and have followed her on Twitter for some time. Jennie’s husband Mike passed away very, very suddenly this past Sunday night and for some reason it hit me hard, considering I don’t even know them. Part of me feels like a jerk for even writing this post, but I haven’t been able to stop thinking about it. I needed to share.
There is a massive group of wonderful well-known food bloggers who are great friends, travel together, go to different food, cooking or blog related events together, etc. Food has brought them all together and it is so inspiring and heart-warming. I admire and watch them all interact online on a daily basis. I may not be a part of that world, but it reminds me so much of all of the wonderful and ongoing relationships we have with our printmaking, gigposter and craft friends all over the world. It is incredible what technology and the age of the internet has done for relationships near and far. In the age of Twitter and Facebook, I find myself being able to stay close and grow even closer with the friends I have had for many years, some of whom are halfway across the world. It has allowed me to meet so many amazing new people I never would have otherwise met and I also find myself attached and connected to people who likely don’t even know I exist. It’s weird.
Over the last few days I have seen many posts to and about @jenniferperillo both on Twitter and the many food blogs I read regularly, filled with sympathy, sadness and a desire to help. Even though I have never met Jennie or her husband, Mike, my heart hurts for her and I cannot help but feel her pain. I also find myself thinking more about my single worst fear, of losing my own husband, Mark. In reading all of the beautifully written blog posts and twitter messages, I can not only see that I am not alone in the way I feel, but I have also witnessed the power of the internet amidst a tragic and personal event in a stranger’s life. In Jennifer’s sadness, we are all finding a need to take a step back from the craziness of our own lives to appreciate who we have, the love we share and how short life is.
I admire the strength and courage it must have taken Jennie to write this beautiful tribute to her husband. It is so real. Something as simple as his favorite pie. Please read it, even if you don’t know Jennie.
In Mikey’s honor, in addition to the peanut butter pie recipe that Jennie shared, I am going to make Mark the no-bake cookies he has been begging me to make for some time now. Admittedly, he has been asking for probably 2 years and I just haven’t made the time. There is always some other recipe I am testing or experimenting with that is “more important”. Nothing is more important than those we love. Nothing. Make Mikey’s pie on Friday or your own true-love’s favorite recipe and enjoy each day to the fullest. Life is too short and we are so blessed for every day and every bite that we share with the people we love.
-
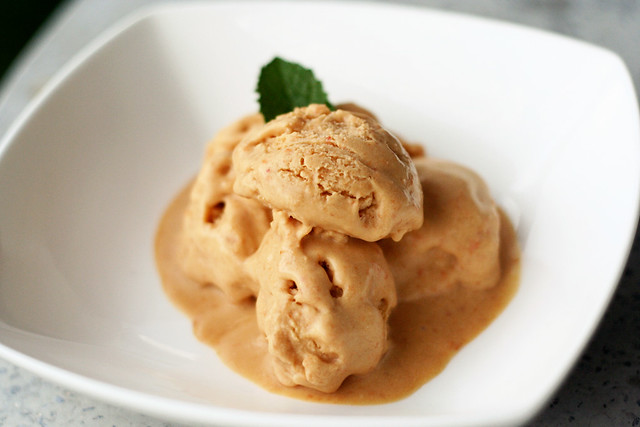
Vegan Coconut Apricot Ice Cream
It has been a hot summer in Buffalo. After the long winter we had this year, it’s definitely welcomed, but it has been hot, none the less. It’s hard to get motivated to cook or bake some days, but I have been doing the best I can. I can’t say that every meal is necessarily blog worthy, some nights I just toss together a leafy green salad with all the goodies from our garden and we just pop home-made pre-frozen veggie burgers in the toaster oven, not exactly cooking but a healthy home-made meal either way.
I am still really trying to enjoy creating and “cooking” any way I can, even if that means never turning the oven or stove top on. One of the best things about the summer are the fun sweets you can make with all the fresh fruit at the farmers market. Besides the muffins and smoothies, there really is nothing better in the summer heat than an icy cold, sweet ice cream treat. As much as I love a classic, custard based ice cream, sometimes I just don’t have the time, patience and energy for all of it. Plus, I tend to have a bit of guilt after enjoying a bowl of it. Sure the ice cream I make at home is all fresh and local ingredients, organic and healthier than the gross dairy queen stuff that they can’t even call ice cream, but it’s a lot more fat than I would prefer to have on a regular basis.
This is where vegan ice cream steps in. I have made quite a few versions of my vegan ice creams and each time I make one I am just as amazed as the first time at the amount of flavor and the creaminess of the ice cream, considering there isn’t a bit of dairy or any egg in there.
This recipe is a bit different from the others that I have made since it is just coconut milk, I didn’t add in almond milk or any other non-dairy milk. I really wanted the coconut flavor this time.
The key is to use the full-fat coconut milk, not the reduced fat kind. You want the creaminess from the fat. The fresh slightly tart apricot flavor was so perfect with the creamy coconut flavor. If you wanted to take the time you could chop up some fresh apricot to add in just before you add the ice cream to the maker and you could also toast up some shredded coconut to top each serving with. I was far too hot and lazy to do either of these things. It was unnecessary either way, but would make for a nice presentation if you are making this for dinner guests.
It was so hot on the day that I was photographing this ice cream, that it was melting much faster than I could take the photos. I took the photos as quickly as I could, then promptly sat down and ate the bowl of ice cream. Guilt free.
Ironically as I typed up this recipe, it was one of the coolers days we’ve had in some time. It has been a lovely cloudy and rainy day, that I was quite happy to see. I am sure my veggies growing out back were likely just as happy as I was to see some rain fall.
Vegan Coconut Apricot Ice Cream
2 – 14 ounce cans organic full-fat coconut milk
1 pound fresh apricots, pitted and halved
1/2 cup honey or agave syrup (you could also use organic raw cane sugar)
1-2 tablespoons vodka*Place the coconut milk, apricots and honey in a blender and puree for about 1 minute until fully blended.
Pour the mixture in a large bowl, stir in the vodka. Cover and refrigerate for at least 2 hours until fully chilled. Once chilled, make according to your ice cream maker‘s instructions. I find that putting the ice cream in the freezer for at least an hour after to allow it to get a bit harder is best. Pull it out a few minutes before serving, scoop and enjoy!
* this keeps the ice cream from over-freezing and being completely hard, a little tip I learned from David Lebovitz – you can substitute any other un-flavored liquor, or have fun with flavored liquor like Grand Marnier or Armagnac, etc.
-
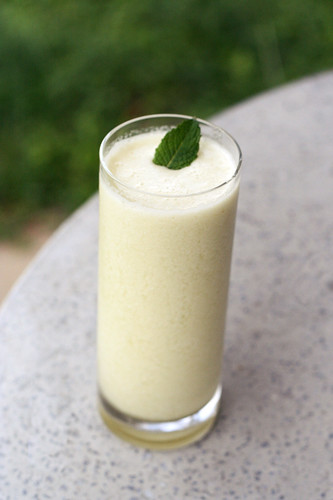
Honeydew Almond Milk Smoothie
After our nearly 2-week long trip that we took mid-July to California for the Renegade Craft Fairs in San Francisco and Los Angeles, I am so happy to be home for a stretch and back into a more normal routine. It seems to take a week or two for things to settle down and feel calm again after a trip that big and with how crazy we were before we left. Besides being able to cook and bake in my own home, one of the most important things for me is to get right back into my daily routine of yoga. I try to get to 5 or 6, 90-minute classes a week. I tend to prefer the morning classes, since I can just come home after I practice and get right to my desk and work for the rest of the day. I don’t eat before I leave for yoga, I usually have a kombucha after I practice, so most times when I get home I am not looking for a large meal, just something light to hold me over until lunch. Many mornings I whip up a quick smoothie and head up for my office. So I can “eat” and work. This past week I was just making up smoothies as I went along, trying out new flavor combinations and just exploring. This honeydew almond smoothie is probably my favorite discovery of the week. It was simple, very light and had a unique and bright flavor. The honeydew that I cut up was so sweet on it’s own I didn’t even have to add any sweetener. If your honeydew leaves a bit to be desired in the sweetness department, feel free to add in a tablespoon of agave syrup or honey.
We don’t leave home again until August 24, when we had back to NYC for another event with the Metropolitan Museum of Art. We are doing a poster for St. Vincent who is playing on the rooftop of the Met. I am so excited to be going back to the city again but I am trying not to count down the days to that trip so as not to rush our time at home, but it is hard. I am hoping to accomplish a ton in the time before we leave again. Beside all of the work we have on the schedule, I have a ton of cooking and baking I want to do, a few crafty projects and some work around the house. Here’s hoping I can be that productive.
Honeydew Almond Milk Smoothie
serves 22 cups honeydew, diced (this was half of a melon for me)
2 cups, organic unsweetened almond milk
1-2 cups of iceAdd all of the ingredients to the blender and process until smooth. Serve immediately.
-
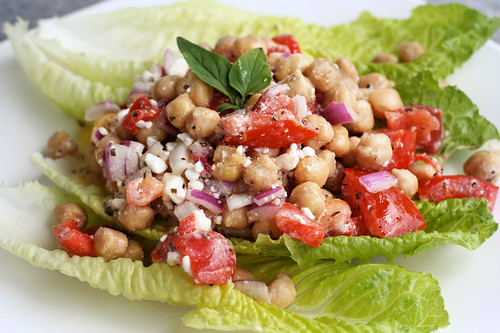
Chickpea, Tomato & Feta Salad
Now that we work from home, I love lunch time. My lunches at the store used to consist of leftovers or veggie burgers, even though I still eat and love both of those, a lot of days I can have more fun creating healthy lunches. Especially with my vegetable garden in full-force, I can just hop into the back yard, grab some lettuce and/or cucumbers, fresh herbs, etc and toss together a quick salad.
I saw a delicious recipe, a while back, for a Chickpea, Spinach & Feta Salad, on my friend Margaux’s blog that she keeps with her aunt, Sweet & Savory Kitchens. I couldn’t wait to play around with my own version. Such a simple, quick and healthy salad, why haven’t I been making this every single week?
I decided to use what I had on hand, so I cut up some red onion, a whole tomato, a roasted red pepper, some fresh oregano, etc and it was that easy. An incredible lunch salad in minutes. I served mine over some romaine lettuce, you could also add chopped up lettuce, spinach or other leafy vegetables like kale or arugula directly to the salad when mixing. Cucumbers would also be delicious. In Margaux and Aunt Suzy’s original recipe they included cooked broccoli which sounds like a tasty, crunchy addition. I think like most salads, the possibilities are endless with this one. This is definitely going to be a staple in my house at lunchtime and as a side at dinner. This would make a delicious dish to share at a picnic or party and with all of the beautiful colors, it’ll definitely impress everyone.
Chickpea, Tomato & Feta Salad
adapted from Sweet and Savory KitchensThe Dressing
1/4 cup extra virgin olive oil
2-3 tablespoons fresh lemon juice
1 tablespoon fresh oregano, roughly chopped
2-3 cloves garlic, pressed or minced
Salt and black pepper to tasteThe Salad
1 large or two small cans of chickpeas (about 3 cups cooked)
1 large tomato, diced
1 large roasted pepper, diced
1/2 large (or 1 small) red onion, diced
1/2 cup crumbled feta cheese, or more to tasteAdd all of the dressing ingredients to a small bowl, whisk thoroughly to combine. Set aside.
Drain and rinse the chickpeas if using canned. Combine all of the salad ingredients in a bowl, except the feta cheese. Add the dressing and gently stir to thoroughly blend. Add the cheese and stir again to blend.
-
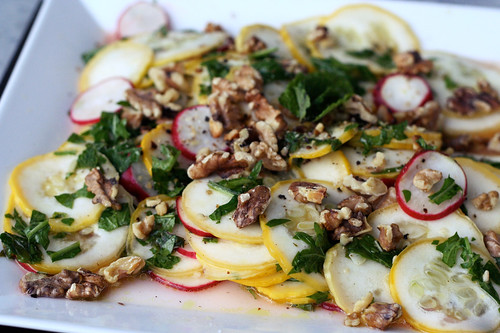
Summer Squash Salad
Zucchini and yellow squash are two of my favorites and both automatically come to mind when I think of summertime eating! They remind me so much of growing up, my parent’s always had an abundance of both growing in our garden. The last few years when I have planted them in my own garden, they take up a HUGE amount of real estate and never really produce much. They must not like my soil. I skipped out on planting them this year. Thankfully, my parent’s still grow both in their garden and never have a problem sharing with me.
After our family dinner this past week, I came home with a bag full of beautiful yellow summer squash and I couldn’t wait to start cooking with them. They are wonderful sliced and browned up on the grill, sauteed or roasted and added in salads or pasta, etc. Not only as a kid when my dad would cook with them, but now as an adult in my own kitchen, I always find myself eating the raw squash slices as I am cutting them to cook, so I decided I wanted to experiment with a raw salad.
When I was dreaming up this salad, I was so excited about it combining so many beautiful summery ingredients and flavors, some of my favorite ingredients. The soft and flavorful squash pairs so nicely with the crisp and spicy radishes and the peppery arugula rounded it all out with a refreshing bite. The fresh mint was a nice compliment to the light and refreshing dressing, the brightness from the lemon sings in your mouth with every bite and the toasted walnuts were a bonus crunch at the end. I couldn’t help but feeling like this salad is everything that summer is about, on one plate.
The other great thing about this salad are the many wonderful variations you could take, by changing out the herbs and going with fresh basil, oregano or chives. You can play with different nuts and seeds like toasted pine nuts, almond slivers or even sunflower seeds. You could even top the salad with cheeses like feta, goat cheese, fresh parmigiano reggiano, pecorino or asiago. I personally opted for no cheese since we wanted a vegan side-salad to accompany our vegan creamy avocado pasta. There is so much you can do with this salad. Keep in mind when picking squash that smaller, younger squashes are better since the larger squash tend to have larger tougher seeds and sometimes a tough skin.
Summer Squash Salad Recipe
serves 41 pound summer squash (yellow or green, or a mixture of both)
5 to 8 radishes (depending on how large they are)
3 tablespoons extra-virgin olive oil
2 tablespoons fresh lemon juice
1 large garlic clove, minced
1/4 teaspoon kosher salt
freshly ground black pepper, to taste
1/4 cup whole walnuts
1 bunch of baby arugula, roughly chopped
1/3 cup fresh mint leaves, roughly choppedToast the walnuts in a dry skillet, the oven or toaster oven and set aside and allow to cool, then roughly chop.
Slice the squash very thin slices using a mandoline or a steady hand and a sharp knife. Set aside in a large bowl. Do the same with the radishes. Add in the roughly chopped arugula.
Combine the oil, lemon juice, garlic and salt and pepper in a small bowl and whisk together. Pour the dressing over the squash, radishes and arugula, toss lightly. Let stand for at least 10 minutes. Add in the fresh mint and toasted walnuts, toss gently again to thoroughly combine.
Serve to individual salad plates or on 1 large serving platter, top with fresh mint and freshly ground black pepper. Enjoy immediately.
-
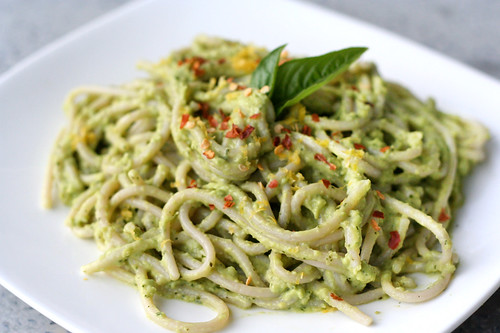
Creamy Avocado Pasta
I have a love for avocados that I cannot be put into words. The mere site of one of those beautiful, creamy, tasty friends is enough to make me happy. It isn’t always easy to buy avocados here, they aren’t always in stock, sometimes when they are they look awful and other times to do so, you may need to take out a small loan. They can be a bit on the pricey side since they have to travel so far to get to us, so I don’t buy them every time I am at the grocery store, I try to spread it out and really enjoy them when I spend the money.
While on our nearly 2-week long trip to California earlier this month, I tried to enjoy the fresh and local avocados as often as possible. On the side with my breakfast eggs instead of home-fries, with salads, etc. Of course when I came home from our trip, I still had California and all of it’s lovely produce on my mind, especially those creamy delights! I came across this recipe on Oh She Glows, while googling different avocado recipes and I couldn’t wait to try it out. But, I knew I had to be a bit strategic when making and serving it, since hubby doesn’t always love avocados. He’ll always eat guacamole, but other than that he isn’t usually a fan. I had a feeling if I asked him if he would like this, he would definitely say ‘no’ so I just went for it. I decided to make the sauce while he took Seri for a walk and I put it all together and served dinner right when he walked in, being careful to rid the kitchen counter of any evidence like the peel or pit from the avocado.
I served the pasta warm, with the fresh lemon zest and spicy red pepper flakes on top and left out some freshly grated parmigiano reggiano, in the event it needed it. I let Mark take a few big bites and I waited for his reaction, he liked it. He kept eating it. His first words were “wow, this is so good, but so different from any other pasta you’ve made”. After a few bites on my own, those were my exact thoughts as well, it was creamy with a nice spicy bite from both the fresh basil and the red pepper flakes and a refreshing brightness from the lemon and lemon zest. The sauce definitely doesn’t mock cheese or cream in taste, but certainly in texture, I wouldn’t say I missed any of the dairy, but I did crave the sharp bite from a good quality cheese on top. I tried a few bites with the parmigiano reggiano and it was good, though I would hardly say it needs it.
I eventually told Mark what the sauce was made of and he was genuinely shocked and surprised, he said he couldn’t taste the avocado, just that it had a much different flavor profile than any pasta than I had ever made. If you don’t care for the bit of spice from the red pepper flakes, you could certainly skip it and just top your pasta with freshly ground black pepper. I have to say this sauce was incredibly easy to make and I was very excited about how healthy it was and I was happy to find another naturally vegan dish. I definitely plan to make this again maybe trying it with some fresh spinach, only this time I won’t have to hide the evidence.
*keep in mind, it is probably best to make only as much of this pasta, as you will eat in the first meal. Due to the avocados most likely browning after time, this dish wouldn’t reheat very well.
Creamy Avocado Pasta
Serves 2
Adapted via Oh She Glows1 medium sized ripe Avocado, peeled and pitted
1/2 lemon, juiced + lemon zest to garnish
2-3 garlic cloves, to taste
1/2 tsp kosher salt, or to taste
1/4 cup fresh basil (or try a cup or two of fresh spinach)
3 tbsp extra virgin olive oil
2 servings (6 oz) organic brown rice pasta (or your choice of pasta)
Crushed red pepper flakes or freshly ground black pepper, to taste
Fresh basil for servingCook your pasta according to package directions. When cooked to al dente, remove from the heat, reserve a 1/4 cup of the pasta water, drain and rinse in a colander, place the cooked pasta in a large serving bowl once drained.
Meanwhile, make the sauce by placing the garlic cloves, lemon juice, and olive oil in a food processor. Process until smooth. Now add in the pitted and peeled avocado, basil and salt. Process until smooth and creamy. If your avocado is more on the firm side, you may want to add a bit more olive oil or even a tablespoon or two of pasta water.
Pour the sauce over the pasta and toss until fully combined, again you may want a bit of the pasta water to thin the sauce a bit so it will coat all of the pasta evenly. Garnish with lemon zest, red pepper flakes and a leave or two of fresh basil. Serve immediately. Makes 2 servings.
-
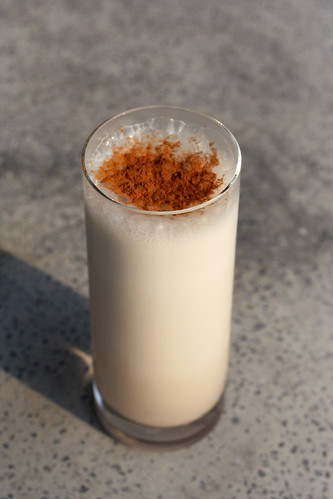
Horchata
It has been a hot summer in Buffalo. One of the hottest that I personally can recall. We’ve been traveling a ton and trying to enjoy every last-minute of the heat and sun while we are in town. We don’t leave again for another month so we hope to get the bikes out a few times, head to the beach and maybe even squeeze in some hiking or camping or something. Now that we are working from home, we really want to take advantage of the summer months while we can and enjoy the beautiful weather, before the snow and cold set in.
One of my favorite things about the short-lived summertime in Buffalo, is playing around with refreshing drink recipes. Admittedly, I planted mint in my yard, just to make mojitos and this summer I even infused my own liquors after reading this article in Bon Appetit magazine. Now that I made my first two batches and they turned out great, I plan to write-up a post about them. Don’t worry though, it isn’t just “adult beverages” I like to create, I love making fresh smoothies in the morning, iced teas, flavored sparkling waters and the like. Naturally, when I came across a post on David Lebovitz’s blog about making homemade horchata, I couldn’t wait to try it. There is nothing better than an ice-cold refreshing glass at an authentic mexican restaurant. OK, so maybe it is a close second to a good margarita, but it’s still incredible. It’s light, full of delicious flavors and it is perfect on ice on a hot summer day. There are few “authentic” Mexican restaurants here in Buffalo, (as far as I am concerned, none of them are authentic) and definitely no taquerias, so the chances of finding horchata here, are slim to none. I usually reserve my mexican indulgences for when we travel, rather than being let down, so when we aren’t traveling and I am craving Mexican, I tackle it myself at home. It isn’t nearly the same, but I still find it to be better than any of the Mexican restaurants here. I make my own tortillas, pico de gallo and guacamole, which is already a step above most places. We are actually having black bean tacos at home this week and I cannot wait.
When I saw how easy this horchata recipe was, I knew that this would be another Mexican treat worth trying at home. It is quite simple, you will spend more time waiting for the rice to soak then all of the prep time combined. You definitely want to make sure you strain in through cheese-cloth so you get all the rice bits, otherwise it will settle to the bottom of the pitcher in the fridge.
In addition to David’s recipe, I also checked out Rick Bayless’ recipe and many others. I came across many variations on the recipe, some include almonds, lime zest, etc. I decided to alter them all slightly and go with my own combination and I was very happy with the results. Oh and definitely try a glass with a shot of good rum stirred in, YUM!
Another fun twist you can take with the horchata is something that I have now learned is called a “Cochata”: Iced Coffee + Horchata. I made this apparently trendy drink in accidental desperation the morning after making the horchata. I wanted an iced coffee and realized after it was poured that we were out of any milk or cream, so I poured in a large glug of the horchata and was instantly in love. You have to try it.
On a side note, I apologize for the lack of posts and recipes on here, we just got home from nearly 2 weeks on the west coast. So I am hoping to get more recipes up here in the next few weeks as we are home for a month straight, finally. It has been a busy summer, full of travel and events, so I am excited to have some time at home.
Horchata
Makes 7 servings
Adapted from recipes from Rick Bayless and David Lebovitz2/3 cup white rice
2 cinnamon sticks
Pinch of freshly ground nutmeg
3 2-inch strips of lime zest (colored rind only) 3/4 inch wide
3 cups of hot water
3/4 – 1 cup sugar
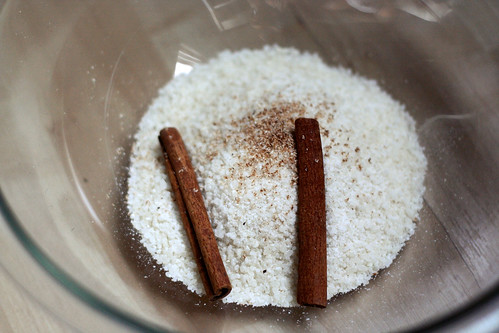
3 cups of cold waterGrind the rice in a blender or spice grinder into fine pieces. Transfer to a medium-sized bowl and add in the cinnamon sticks, nutmeg and lime zest. Stir in 3 cups of hot tap water, cover and let stand at least 6 hours or preferably, overnight.
Remove the cinnamon sticks and pour the mixture into a blender and blend for 3 to 4 minutes, until it no longer feels very gritty. Add 2 cups of water, and then blend for a few seconds more. Set a large sieve over a mixing bowl and line with 3 layers of dampened cheese cloth. Pour in the mixture a little at time, gently stirring to help the liquid pass through. Squeeze the cheese cloth firmly to extract as much of the rice flavor as possible.
Add 1 cup of water and stir in your desired amount of sugar, mix until the sugar is dissolved. Taste, and adjust sweetness, if necessary. If the consistency is too thick, add additional water. Cover and refrigerate until you’re ready to serve. Stir before pouring. Serve over ice with a sprinkling of ground cinnamon on top.
-
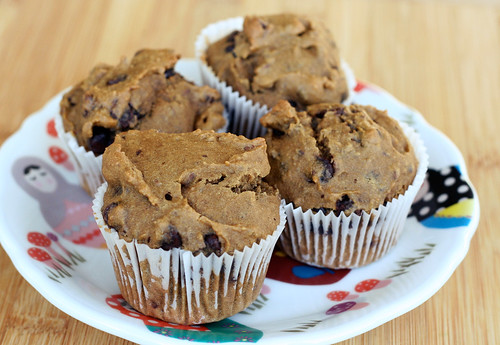
Gluten-Free Chocolate Chip Flax-Seed Muffins
Yes, my muffin obsession continues. I can’t stop playing with recipes and trying out new ingredients. But, don’t be fooled, it isn’t all fun and tasty games, even though you don’t see it, there have been some epic muffin failures. Last week I attempted to make strawberry rhubarb muffins with a cinnamon crumble top and they turned out to be a sunken in soggy mess, boo! They were so delicious and full of flavor, but it appears my measurements weren’t correct and they just plain failed. So, we ate the soggy muffins and I vowed to redeem my muffin-loving self with a new recipe this week.
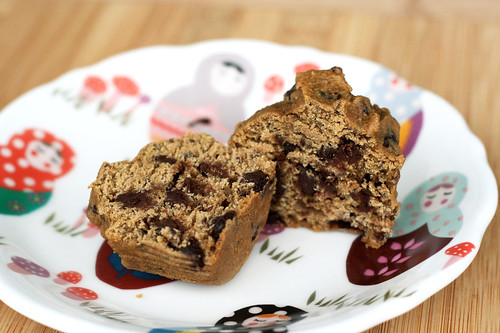
I have been craving a sweet breakfast muffin that was a little bit healthy and a little naughty. I mean, really who doesn’t love the concept of chocolate for breakfast. I actually usually prefer savory over sweet for breakfast but I had been craving something a little sweet, so I went with it. Since I added in chocolate chips, I took the sugar down to a mere 1/2 cup. I figured by taking down the sugar and adding in the flax-seeds, it would balance out the fact that I would be eating chocolate for breakfast. These muffins are perfectly moist and subtly sweet in my opinion. I left the flax-seeds whole, so there would be a nice little nutty crunch, you could grind them first or if you want to skip the flax-seeds altogether, you could just add in your favorite chopped nut or go without. I liked the idea of the flax-seeds since they add in fiber and some of those lovely, healthy Omega-3 fats.
Mark cannot get over that these muffins are gluten-free and every chance he gets, tells me they are better than any gluten-containing muffin like it that he has had. Talk about an ego boost!
*If you wish to skip the eggs to make these muffins vegan, replace the egg whites with 1 tablespoon Ener-G Egg Replacer whisked with 1/4 cup warm water till frothy.
Gluten-Free Chocolate Chip Flax-Seed Muffins
makes 12 muffins1 1/3 cups almond flour
1 cup sorghum flour
1/2 cup potato starch or tapioca starch
1 teaspoon baking powder
1/2 teaspoon baking soda
1/2 teaspoon sea salt
3/4 teaspoon xanthan gum
1/2 cup organic sucanat (dried cane juice)
2 tablespoons light olive oil
1/2 teaspoon vanilla
2-3 organic free-range egg whites (depending on the size, you are looking to get 1/4 cup of liquid), beaten until frothy*
1/2 cup warm water, more as needed, up to 3/4 cup
1/3 cup organic flax seeds, (I used them whole, you could certainly grind them first)
9 ounces of organic, semi-sweet chocolate chipsPreheat oven to 375º F. Line a standard muffin tin with paper liners.
Whisk together the first 7 ingredients (up to and including the xanthan gum). Beat in the sugar, olive oil, vanilla, egg whites and warm water. Beat until it is smooth and like a thick cake batter.
Add in the flax seeds and chocolate chips. Stir briefly, until thoroughly combined.Divide the batter evenly among the muffin cups. Bake in the center of a preheated oven for 20 to 25 minutes, until golden and firm to the touch. A wooden pick inserted into the center should emerge clean.
Cool the muffin pan on a wire rack for five minutes. Gently pop the muffins out to continue cooling on the rack (don’t cool them longer than 5 minutes in the hot pan they’ll definitely get soggy). Enjoy a muffin after they have cooled 10 minutes, you know you want to.
Freeze any leftover muffins in tightly sealed freezer bags and pop one out for a quick and easy breakfast.
*See above note about making these vegan.
-
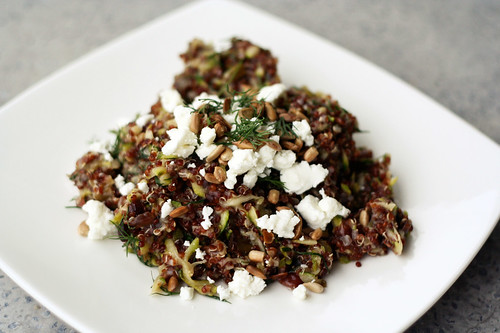
Red Quinoa Salad with Currants, Dill, Zucchini and Sunflower Seeds
I am always on the lookout for a good grain-based salad, bonus points if the grain is my favorite superfood, quinoa. This salad is super simple, very versatile and loaded with flavors. It’s so nutritionally packed it would make a perfect entrée on its own, or it’s beautiful as a side-dish. I served it on the side of our lentil burgers and we were very pleasantly full afterwards.
To be honest, it has been a while since I made a good quinoa salad, I kinda forgot how amazing and simple they are. A recent post on my friend Margaux and her Aunt Suzy’s blog about quinoa salads, inspired me to make one. I need to try their recipe next!
You could use regular quinoa or red, I just happened to have red on hand and it felt like a good time to use it. The fresh herbs were so perfect and the subtle hint of sweet from the currants was very pleasant and the tart, saltiness from the crumbled feta finished it all nicely. The lemon juice and zest brings a brightness that pairs nicely with everything else. This can be made vegan by simply skipping the feta when serving. You can serve it warm, room temperature or even cold. I plan to take the suggestion of 101 Cookbooks and make patties with the leftovers, I absolutely love quinoa patties. According to the adapted recipe on 101 cookbooks, they simply added a few eggs and some breadcrumbs to the leftovers and voila – quinoa patties!
The original recipe called for toasted sesame seeds, but I wanted something with a bit more bite, so I went with sunflower seeds, you could play around with all different kinds of nuts or seeds. Same goes for the currants, you could also try cranberries or raisins and as usual you could play around with your favorite herbs. I love how some dishes are so adaptable it’s almost like playing dress-up with all the ingredients. You could make it over and over and it would never be the same salad twice. Have fun.
Red Quinoa Salad with Currants, Dill, Zucchini and Sunflower Seeds
Serves 6
Adapted from 101 Cookbooks, who adapted it from Maria Speck’s Ancient Grains for Modern Meals1 tablespoon extra-virgin olive oil
1 bunch green onions, chopped
3/4 teaspoons fine-grain sea salt
1 cup organic red quinoa, well rinsed and drained
2 cups water
1/4 cup dried currants
1 lemon
2 sm-med zucchini, grated on box grater
4 tablespoons toasted sunflower seeds
4 tablespoons chopped fresh dill
1 tablespoon chopped fresh mintoptional: feta cheese, crumbled – as much or as little as you like
Heat olive oil in a medium saucepan over medium heat. Add most of the green onions, a pinch of the salt, and cook until the onions soften, just a couple of minutes. Add the quinoa and cook, stirring occasionally, until the grains dry out and toast a bit, roughly another 3 minutes. Add the water, the currants, the remaining salt; bring to a boil. Turn the heat to a medium-low and simmer, covered, until the water is absorbed and the quinoa is just cooked through 15 minutes or so. Be mindful here, you don’t want to overcook the quinoa, and have it go to mush.
While the quinoa is cooking zest the lemon, and squeeze 2 tablespoons of lemon juice into a small bowl.
When the quinoa is cooked, remove the pan from the heat. Stir in the zucchini, lemon juice and zest, most of the sunflower seeds, the mint and most of the dill. Taste and adjust for salt.
Serve topped with crumbled feta, and the remaining green onions, sunflower seeds and dill.
-
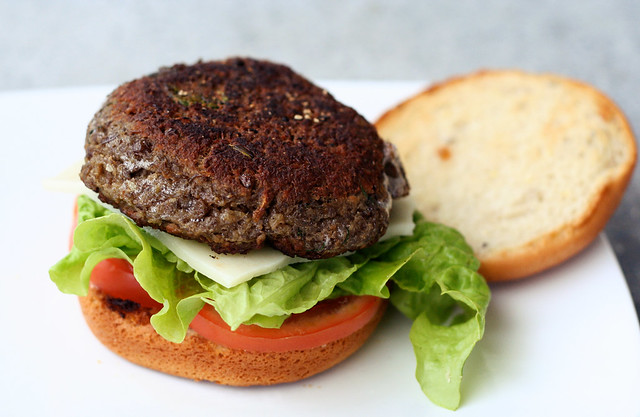
Gluten-Free Lentil Burgers
I absolutely love veggie burgers, but finding good ones that aren’t overly processed and loaded with chemicals, fillers, preservatives and other junk, is really hard on its own, but then add in the additional challenge of finding them gluten-free, it’s damn near impossible. Since I have cut processed foods out of my diet, whenever I want a veggie burger, I have been enjoying organic garden herb burgers from Sunshine Burgers that are not only gluten-free, but they only have 5 ingredients, sunflower seeds, brown rice, carrots, herbs and salt, that’s it. I am quite impressed with how delicious they are, but as with everything, I get bored and I want to figure out how to make my own, since, I really hate buying packaged foods.
I decided I wanted to experiment with making homemade lentil burgers. I had seen quite a few recipes in different cookbooks and online, and I was excited to see if using lentils as opposed to brown rice or other grain-based fillers, would hold up better and not fall apart. In my experience, that seems to be the biggest challenge with homemade veggie burgers. I was also excited to finally have a good reason to use the delicious toasted gluten-free breadcrumbs that I picked up when I was in Colorado earlier this year. The company that makes them is called, Outside the Breadbox and I found them by visiting Granny’s Gluten Free Zone in Loveland. I need to email them about having them shipped to me, they are THAT good. Finally I decided this is the recipe where I would use the beautiful dried Greek green lentils that I picked up a few weekends ago at the Greek Festival here in Buffalo. By the way, a little side note about me, most people buy souvenirs like t-shirts or key chains to remember certain events or trips, not me, I buy food, ingredients, cooking tools, etc. What better way to remember a place or a day then by remembering and recreating the food or cuisine. If a taste or a smell can’t take you back somewhere, I don’t know what can. I have actually been stopped at security in an airport before trying to take olive oil in my carry-on. (oops) Obviously you can make your own homemade breadcrumbs and use those, too.
Now that I have played around with this recipe, I am excited to make it again and again, there are so many variations you could take on the recipe. You could play around with different lentils, change-up the fresh herbs, add in some crumbled feta or other cheeses. Maybe try adding in some sunflower seeds or gluten-free rolled oats or shredded vegetables like zucchini or carrots. I think as long as you adjust your moisture content and breadcrumb content to account for the different ingredients, the sky is the limit with this recipe. Obviously if you aren’t gluten-free you can use your favorite gluten-containing, toasted breadcrumbs.
I served mine on a Rudi’s gluten-free whole grain hamburger bun. This is definitely the best packaged gluten-free roll I have found, yet. I am sure I can make a better gluten-free hamburger roll at home, but I have yet to experiment with a recipe. That is on my to-do list for this summer. If you have a recipe to share, send me a link.
** Vegans – if you don’t want to mess with packaged egg replacers, do some looking around online, there are ways to use even more ground flax-seeds mixed with water to create a paste that acts as an egg replacer. I have done something similar with a pizza crust recipe, so I know it works. The general ratio is 1 tablespoon of ground flax-seed mixed with 3 tablespoons of water = 1 egg, but do some looking around for recipes and do some experimenting. It’s pretty incredible.
Enjoy.
Gluten-Free Lentil Burgers
Makes 8 burgers3 1/4 cups cooked green lentils (follow package directions to cook)
4 large local farm fresh brown eggs (**to make vegan, use your favorite egg replacer or make a flax-seed egg substitute, see above)
1/2 teaspoon kosher salt
1 medium onion, grated with box grater or diced very small
1 clove garlic, finely minced
2 tablespoons fresh mint, finely chopped
1 tablespoon fresh dill, finely chopped
1/2 teaspoon freshly ground black pepper
1 tablespoon ground flax-seed (you can skip this if you don’t have any on hand, it isn’t necessary to the recipe, just a nice way to add in some Omega-3 essential fatty acids and even more fiber)
1 cup toasted gluten-free bread crumbs
1-2 tablespoons olive oilCook your dried lentils according to package directions and allow to cool slightly. Combine 3 cups of the cooked lentils, eggs and salt in a food processor or sturdy blender. Puree until well blended and mostly smooth. Put the mixture in a large mixing bowl and add remaining whole lentils, onion, garlic, fresh herbs and black pepper. Stir to combine. Add in the ground flax-seed and then begin adding in the breadcrumbs slowly, a little at a time and stir to combine. You may not need all the breadcrumbs and you may need more, so go slowly so you can get the consistency right.
You should have a moist mixture that you can easily form into patties. If you need more moisture, you can add more egg or a bit of water. If it needs to be drier you can add more breadcrumbs. Form eight – 3-1/2 to 4-inch patties and set on a plate.
Heat one tablespoon of the oil in a large skillet over medium heat. Add two patties at a time and cook for 8 to 10 minutes until the face down side begins to brown and get a crispy crust on the outside. Flip the burgers and allow to cook on the second side for another 8 to 10 minutes until browned and crisp, add more oil as you cook the additional burgers, if you need to. Remove the finished burgers from the skillet and serve, or if cooking the remaining patties allow the cooked patties to cool on a wire rack while you finish. You can store the uncooked patties in the refrigerator for up to a week, so pull them out whenever you are ready for a quick bite.
Place the cooked lentil burger on your favorite gluten-free roll and top with your favorite toppings. We kept it simple and just went with lettuce from our garden, tomato slices and a slice of organic swiss cheese. These burgers are so good, you could also just skip the roll and serve on their own, topped with your favorite things or served over a bed of baby greens.
-
Chilled Avocado & Corn Soup with Cilantro Oil
I don’t always love cold soups, sometimes I find them to be weird or odd. I almost hate the word soup being used at all since once chilled, it is hardly anything close to a classic soup recipe. I had a puree similar to this a couple of years ago at a local restaurant that has since closed, Juniper, and it was super delicious, light and full of flavor. I am obsessed with avocados, so short of sticking a straw directly into an avocado, it really doesn’t get much better than this. I had wanted to recreate that soup for so long, but kept forgetting about it, but I ended up running across the recipe that I pulled to work from, while moving our studio home a few weeks back. I couldn’t wait to try it out.
I knew I would be on my own with this one though, Mark refuses to try cold soups, he thinks they are “stupid”, haha. So on a work day a week or so ago, I prepped the soup and oil during my lunch time break and allowed everything to cool the rest of the day, while I worked. It was such a nice treat on a hot day where I didn’t feel like cooking. I have also been getting to a ton of yoga classes every week, so this was perfect the following day after a hot and sweaty yoga class. This soup has all the flavorings of a great guacamole recipe in each spoonful. It’s refreshing but adequately filling. The cilantro oil drizzled on top is loaded with a beautiful, fresh, clean finishing flavor and I especially love the subtle heat from the poblano pepper. I went pretty light on the sour cream, as it really didn’t need much, but a small drizzle was nice, especially in contrast to the heat from the pepper. If you love avocado as much as I do, I know you will love this soup. I served it with a handful of organic corn tortilla chips on the side, which ended up being delicious dipped right into the soup. Obviously if you are vegan, simply skip the sour cream or crema at the end and you have a beautiful, tasty vegan dish.
Chilled Avocado & Corn Soup with Cilantro Oil
serves 4-6
adapted from Gourmet Magazine, May 20052 fresh or frozen ears of corn, shucked
4 cups plus 2 tablespoons water
1 garlic clove, smashed
1 1/2 teaspoons salt
1 1/4 cups chopped white onion
1 fresh poblano pepper, stemmed and coarsely chopped (including seeds)
3 firm-ripe California avocados
3 tablespoons fresh lime juice
1/4 cup crema or sour creamFor cilantro oil
1 cup coarsely chopped fresh cilantro
1/4 cup olive oil
1/2 teaspoon saltMake soup:
Roast ears of corn on rack of gas burner over high heat, turning occasionally with tongs, until kernels are charred in spots, 4 to 5 minutes. (Alternatively, heat a dry well-seasoned cast-iron skillet and roast corn over moderately high heat, turning occasionally, about 10 minutes.) Transfer the ears of corn to a cutting board and, when cool enough to handle, cut kernels from cobs with a sharp knife, then cut cobs into thirds.
Bring kernels, cob pieces, 4 cups water, garlic, salt, and 1/2 cup onion to a boil in a 3-quart saucepan and boil until liquid is reduced to about 3 cups, about 20 minutes. Remove from heat and cool, uncovered. Discard cob pieces.
Purée corn mixture along with the poblano pepper and remaining 3/4 cup onion in a blender, then pour through a fine-mesh sieve into a bowl, pressing hard on and then discarding solids. Return broth to cleaned blender.
Quarter, pit, and peel 2 avocados, then add to blender with 2 tablespoons lime juice and purée until smooth. Transfer soup to a bowl and cover surface with plastic wrap. Cover bowl with plastic wrap and chill soup at least 1 hour.Prepare cilantro oil while soup chills:
Purée cilantro, oil, and salt in cleaned blender, scraping down sides of blender several times. Pour oil into cleaned fine-mesh sieve set over a bowl and let drain 15-20 minutes (do not press on solids). Discard solids.Assemble soup:
Halve and pit remaining avocado and cut into 1-inch cubes, toss gently with remaining tablespoon lime juice in a bowl.
Whisk together crema or sour cream and remaining 2 tablespoons water in a small bowl until smooth.
Season soup with salt and ladle into 4-6 soup bowls. Divide avocado chunks among bowls, then drizzle with crema and cilantro oil.Notes:
Soup can be chilled up to 1 day ahead.
Cilantro oil can be made 3 hours ahead and chilled, covered. -
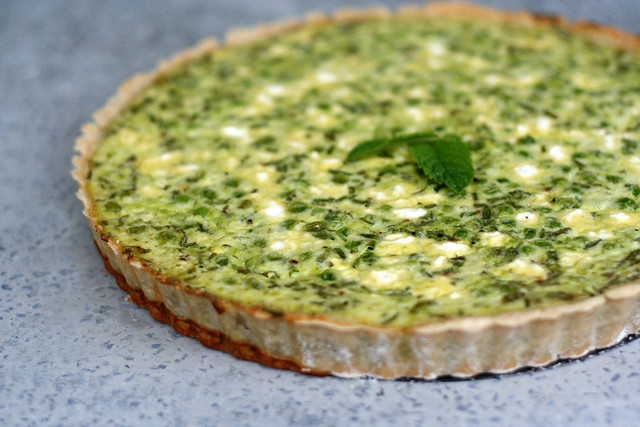
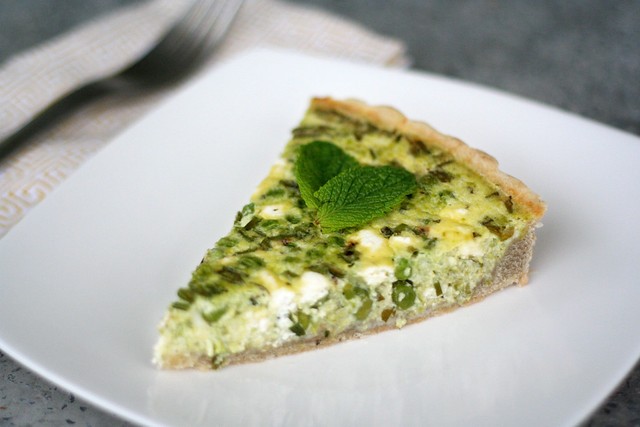
Gluten-Free Pea and Goat Cheese Tart with Fresh Herbs
I actually made this recipe more than 2 weeks ago but life has been so very hectic and I am super behind on posting recipes. We were in NYC last weekend for the Renegade Craft Fair so I made this the weekend before we left, since I knew life would be crazy and it would make for some very lovely leftovers. For some reason I have been dreaming of making a gluten-free spring tart for some time now. I literally could see how I wanted it to look and taste all the flavors I had envisioned. I really wanted it to incorporate all things spring. I recalled a tart shell recipe in Gluten Free Girl and The Chef’s newest book, so I decided for my first attempt at a tart I couldn’t go wrong with one of Shauna’s recipes, they are always so wonderfully created, with each measurement precise and every ingredient well thought-out. It’s so impressive. I once again weighed my flours instead of measuring, which has always yielded such perfect results for me. One of the things I love the most about this tart recipe is how few ingredients there are, it is so simple.
The flavors from the fresh herbs in the tart were incredible,so refreshing and light, so spring. The fresh peas burst with flavor in each bite and the crust was absolutely to die for. NOT KIDDING. It was flaky, light, crusty and browned, if I hadn’t made it myself I would have sworn some one was fooling me and I was eating a gluten-laced crust. Besides being delicious this tart was quite easy to put together and was great for leftovers. We had it for both dinners and breakfasts. This would actually be quite perfect for a brunch where you really want to impress people, but don’t wish to spend all morning in the kitchen. You could actually prepare the tart dough the night before and pull it out of the refrigerator that morning. Simple!
Now that I experimented with and LOVE this tart recipe, I plan to have all kinds of fun with it. I cannot wait to play with both sweet and savory tart recipes now.
Gluten-Free Pea and Goat Cheese Tart with Fresh Herbs
serves 8-10Tart Shell
via Gluten Free Girl and The Chef – A Love Story1/2 cup (63.5g) sorghum flour
1/2 cup (60g) tapioca flour
1/2 cup (96g) potato starch
1/2 cup (102g) sweet rice flour
1/4 teaspoon salt
8 tablespoons (1 stick) frozen organic butter
1 large local farm fresh brown egg
1/4 cup of ice cold water(if making a sweet tart, instead of savory, include 2 tablespoons sugar and 1/4 teaspoon cinnamon)
Sift the sorghum flour, tapioca flour, potato starch, and sweet rice flour into a large bowl. Stir in the salt (sugar and cinnamon if making a sweet tart). Sift into another bowl.
Grate the frozen butter directly into the dry ingredients. The butter will fall into the flours in soft swirls and start to melt in as soon as you stir. Work with your hands to mix everything, until the dough feels like cornmeal or large pieces of sand.
In a small bowl, whisk the egg and water together with a fork. Make a well in the center of the flours. Stir in the liquid, working from the inside out. Feeling the dough for soft suppleness, instead of stiffness or sogginess. Feel free to use your hands at the end.
Refrigerate the dough for at least 1 hour, or overnight if possible.
Preheat the oven to 375ºF. Butter and flour an 11-inch tart shell, I used sweet rice flour as the original recipe suggested. Pull the dough from the refrigerator and allow it to come to room temperature, about 1 hour.
Roll out the dough between 2 pieces of parchment paper, to the approximate shape of the tart pan. (this way you don’t have to flour your countertop and add more flour to the dough).If the dough falls apart or breaks a bit, don’t worry – there is no danger of the crust becoming tough by overworking it, which can happen with gluten dough. Press the dough into the pie pan and repair it that way.
Place the tart shell into the freezer until the crust is frozen, approximately 1 hour.
Butter a piece of aluminum foil approximately the size of the pie crust. Place it butter side down, onto the tart crust and fit snuggly against the sides. Bake pressing down any puffed up spots with a spoon until the shell has a good color, about 15 minutes. The tart should look and feel flaky, rather than sticky. Prepare the filling while the tart is blind baking.
Pea and Goat Cheese Filling
3 cups fresh (or frozen) peas
3 local farm fresh brown eggs
2 tablespoons fresh mint, chopped
2 tablespoons fresh chives, chopped
1/2 cup organic half and half
1 1/2 cups organic whole fat milk
6 ounces goat cheese, crumbled
kosher salt
freshly ground black pepperAdd the peas to a small saucepan of boiling salted water with a pinch of salt, cook for 3-4 minutes until tender, do not overcook, you don’t want mushy peas. It may take less time for frozen peas, than fresh. Drain, cool slightly, then puree half of the peas in a food processor until smooth. Transfer both the pureed and whole peas to a large mixing bowl, add the eggs, mint, chives, half and half and milk. Beat well with a spoon to combine, then stir in approximately three-quarters of the goat’s cheese. Season with kosher salt and freshly ground black pepper.
Once the tart shell has been adequately blind-baked, pour the filling into the shell, sprinkle the remaining cheese on top. My tart shell was very full, so be careful transporting, you may also find you want a cookie sheet on the oven rack below if you think it may boil over at all. Bake for 35-40 minutes until the filling is completely set. Allow the tart to cool for at least 30 minutes, top with fresh chives and/or fresh mint, serve while still warm.
-
Gluten-Free Whole Grain Spring Pizza with Asparagus, Parmesan and Eggs
I’ve been using the same gluten-free pizza dough recipe for sometime now and though I do like it, I wanted to try something a little different and without the gums. I came across this recipe on Gluten Free Girl and The Chef a while back and when I saw that it contained no gums and it was flexible with the flours you can use, I was very intrigued. Shauna has a formula she created to make your own gluten-free all-purpose flour without gums and by weight instead of volume, plus it is very easy to make it a whole-grain mix by using different flours. Here is the original post about their pizza recipe that they changed a bit since their book came out. There are a few different flours you can choose from if you have sensitivities to things like corn or potato. I used their whole grain flour mixture that they featured in their post for whole grain muffins. I don’t have a ton of experience with baking, it is something I have only learned to love in the last year or so, but with the little bit I have done, I find that weighing your dry ingredients as opposed to measuring really gives you a consistent result, time and time again.
I decided a nice way to try out this new pizza dough recipe was to really let it shine, by not loading it with ingredients and sauces. I wanted a simple, tasty spring pizza that featured asparagus and eggs. The only thing I may change next time would be to use some mozzarella in addition to the parmesan to give it a bit more melty of a cheese base since the parmesan tends to not get super melty, however the dough was so delicious it honestly didn’t need it. Overall it was full of flavor from the asparagus and the fresh chives and the eggs were a wonderful compliment on top. The runny yolk was perfect for dipping the delicious crust into. You’ll be so surprised when you taste this crust at how it tastes just like real pizza crust – you’ll never know it’s gluten-free.
I know this post is large and contains a lot of info – but I promise it is all worth reading through. I am happy to finally have a good all-purpose flour mix to have on hand for different things and an even better pizza dough recipe. Play around with different toppings and flour combinations and please feel free share, I’d love to hear what you come up with.
GLUTEN-FREE GIRL’S ALL-PURPOSE FLOUR MIX
Here is the original information on the all-purpose flour mix (all content and info contained in both the flour mix and the pizza recipes is copyright of Gluten Free Girl and The Chef)
Want to make a whole grain AP mix in your kitchen? Here’s how.
We’re working with 70% whole grains/30% starches. We might someday go to all whole grains for some baked goods, but this blend works well for us now.
If you want to make a big batch for all the baking in your kitchen?
Choose 700 grams of any combination of the following flours:
Almond
Amaranth
Brown Rice
Buckwheat
Corn
Millet
Oat
Quinoa
Sorghum
Sweet Brown Rice
Teff
Almond is not a grain, but it is a whole flour, so I’ve thrown it in there. You might notice that I have not put in garbanzo (I don’t like it) or coconut (I don’t like the way it tastes or the way it sucks all the moisture out of a baked good) or soy (I’m having a hard time finding a good gluten-free one). You might like those. Substitute if you want.
This means that you can make your own blend. If you are allergic to corn, and you know you can’t eat the certified gluten-free oats, blend up 100 grams each of almond, brown rice, buckwheat, corn, millet, sorghum, and teff. (I want to write more about this later, but the flavor you find by blending all these different taste is fascinating. It’s amazing how boring regular AP flour seems after you use this.) Find your own favorite combination.
And then throw in 300 grams of any combination of the following:
Arrowroot
Cornstarch
Potato Starch
Tapioca Flour
White Rice Flour
We like using 150 grams each of arrowroot and potato starch, at the moment.
Combine the 700 grams of whole-grain flours with the 300 grams of starches in a big container. Shake it all up. You have whole-grain flour mix.
———————————————————————————————————————————————————-
For my AP mix I went with 175 grams each of Almond, Millet, Sorhum and Teff flours and 150 grams each of potato starch and tapioca flour. It was super simple to mix up and it made 1000 grams of all-purpose flour so I have enough to make pizza again.
The flours brought so much flavor to the crust and it was perfectly crispy on the outside and soft and chewy inside. This was by far the best crust I have ever made at home and it was simple. I’ve noticed that some gluten-free crusts get abnormally puffy and airy and don’t taste like usual pizza, others are so thin and crusty that it’s almost like eating a large cracker. I also really love
GLUTEN-FREE GIRL’S WHOLE GRAIN PIZZA CRUST
1 tablespoon ground flaxseed or ground chia seeds
500 grams whole-grain gluten-free flour mix
1 1/2 teaspoons kosher salt
15 grams (4 teaspoons) active-dry yeast
50 grams (1/4 cup) extra-virgin olive oil
85 to 190 grams (1/2 to 1 cup) warm water, about 110º
olive oil for brushing on top of the crust
Making the flaxseed or chia slurry. Mix the flaxseed (or chia seed) into a bowl. Pour 2 tablespoons of boiling-hot water over the seeds. Whisk immediately and quickly until you have a thick paste. Let this set aside and cool down.
Combining the dry ingredients. Put the gluten-free flours and the salt into the bowl of a stand mixer. Mix them up together.
Activating the yeast. Put the yeast, olive oil, and half the warm water into a small bowl. Stir gently. Let them sit for a moment to activate the yeast.
Making the dough. Add the slurry to the dry ingredients and mix for a moment. Pour the yeasty water into the dry ingredients. With the mixer on medium, whirl for a few moments, until the dough comes together into a soft ball around the paddle of the stand mixer and feels soft and pliable. If the dough feels too dry, add more of the warm water in small amounts until the dough feels right. (You might not need all the water. You might need more. Yeast doughs can differ from kitchen to kitchen.) Set the dough aside in a warm place and let it rise for 1 hour.
Preparing to bake. Preheat the oven to 450°. (If you feel comfortable with heat, take it up to 550°. Just watch the dough in the oven, carefully.) If you have a pizza stone, make sure it is in the oven. If not, sprinkle a pizza tray or baking sheet with gluten-free cornmeal.
Rolling out the dough. Grab 1/2 of the dough and put it between 2 pieces of parchment paper. Through the paper, roll out the dough to your desired thickness. (We like super-thin crust around here. You might like it thicker.)
Pre-baking the dough. Take the parchment paper off the dough, then transfer the dough to the pizza stone or prepared pizza tray. Brush the top with olive oil. Bake until the dough has started to crisp up and browned at the edges, about 8 to 10 minutes. (And less if you have the oven cranked up to 550°!)
Take the crust out of the oven. You now have a pre-baked pizza crust. Top with anything you fancy and continue baking until the cheese is bubbly and melty.
Makes 2 – 8-inch pizza crusts or 1 – 16-inch pizza crust. I went with 1 large round pizza. Don’t worry too much about the shape, enjoy the rustic wonkiness of handmade pizza dough.
SPRING PIZZA WITH ASPARAGUS, PARMESAN AND EGGS
Makes 1 large pizza or 2 small pizzasGluten-free Girl’s Whole Grain Pizza Dough Recipe (above)
Olive oil
Kosher flake salt
Black pepper
10 asparagus stalks
1 clove garlic, minced
1 – 1 1/2 cups freshly grated Parmigiano-Reggiano or mozzarella (or both)
1 bunch of fresh chives, chopped
2-4 local farm fresh brown eggs (I put 2 eggs on one large pizza, but you could certainly put 2 eggs each on 2 small pizzas)Prepare dough according to above instructions (or whatever instructions come with your dough recipe). Preheat oven to 450ºF.
Rinse the asparagus, snap off the tough ends and cut in half or thirds depending on how long they are. You want to end up with 20-30 3-inch pieces. Take each 3-inch piece, cut in half on the long side, and then again to quarter. Heat a tablespoon of oil over medium-high heat , saute the asparagus slivers and the minced garlic with black pepper and a large pinch of kosher salt until tender and still bright green. Remove the asparagus from the heat and set aside.
Brush the pre-baked pizza crust (pre-bake according to above directions) with olive oil. Sprinkle the crust with the cheese, reserving a small amount for sprinkling on top. Arrange the asparagus in a single layer over the cheese. Crack two eggs into the center of the pizza, sprinkle fresh chopped chives over everything and top with another light sprinkle of cheese. (If you are making two small pizzas, divide all the ingredients in half over the two crusts and arrange in the same order)
Bake for about 10-15 minutes, or until the egg whites are cooked and the pizza is golden brown. Allow to cool slightly for a few minutes, then cut and serve while still warm.
SaveSave
-
White Bean and Chive Patties
Since we’ve closed the store and now work from home, I really look forward to the time of day when I can take a break from working and prepare a healthy dinner for us. Many nights we finish dinner, do up the dishes, feed the pets and then return up to our offices to work for a few hours, which is something we never did before, but somehow it is all so much more relaxing and laid back. Working from home has allowed me to really play with my schedule, make it more flexible and find even more time for yoga, dog walks and other fun and physical activities. I think the pressure of having to be at the studio set hours because of the store really put an unnecessary amount of self-imposed stress on both of us. We were always very happy and content before and we definitely miss the store some days, but I really find myself loving my life and my job more now than ever before. I feel so lucky.
One of my other favorite things about the new schedule is being able to take on more involved dinners during the week, that require more prep time or even down time for things to cool or set, etc. Now during the “wait times” in recipes, I can just walk upstairs and get more work done. Both last night’s dinner, Spring Pizza with Asparagus and Eggs that featured a homemade gluten-free multi-grain pizza crust and tonight’s Spring Pea and Goat Cheese Tart, with a homemade tart dough, are perfect examples of that. (Don’t worry those recipes are coming soon.) This particular recipe isn’t nearly as involved or time-consuming, but having to pan fry the patties in batches can take time and patience and it is certainly something I wouldn’t have made after a long day of work at the store and getting home around 7pm.
These patties are simple, healthy and full of flavor. They have a wonderful crispy crunch on the outside and a nice soft inside. They are naturally gluten-free and vegan, too. The original recipe features them with sage instead of chives and amidst a delicious spring brunch menu topped with a roasted tomato sauce. I thought the sauce would take away from the lovely crisp, so I instead envisioned them atop a lovely mix of baby spring greens salad as a meal in and of itself. I made a quick lime cilantro vinaigrette and served it as dinner.
You could definitely play around with different herbs and even different veggie additions, the big thing to keep in mind is to make sure the patties aren’t too moist or dry to where they will fall apart in the pan and to make sure you have your pan is hot enough to get that initial “searing” to create a nice crust on the outside and to keep the patties together. Use a spatula to look at the face-down side before you flip to make sure it is adequately browned before you flip.
We tossed some baby spring greens with the vinaigrette, put the patties on top and drizzled those with a bit more dressing and topped everything with more fresh chives. A perfect spring-time dinner.
White Bean and Chive Patties
makes 12 patties
Adapted from Whole Living, June 20111 19-oz can organic white beans
1 shallot, finely diced
1 small carrot, finely grated
1/3 cup yellow cornmeal
1 tablespoon chopped fresh chives, plus more for serving
Coarse salt and freshly ground black pepper
1/4 cup extra-virgin olive oilDrain beans, reserving 2 tablespoons liquid. Transfer to a bowl and mash. Stir in shallot, carrot, cornmeal, and chives. Season with salt and pepper. Add 1 tablespoon reserved liquid. If mixture is too dry, add the other.
Heat a large skillet over medium-high heat. Add 2 tablespoons oil. Form mixture into 12 patties (about 2 1/2 inches diameter each) and saute in batches until golden brown and crisp, 2 to 3 minutes per side. Repeat with remaining oil and patties. Serve topped with a tasty dressing, yogurt sauce or atop a salad.
Posts by Beth @ Tasty Yummies
-
Pooch Friendly Ice Cream
This is a little bit different of a post. It is still gluten-free, unprocessed and healthy, but this one isn’t for humans, it’s for our little furry baby, Seri, who turned one yesterday! I decided as a little treat, I had to make her something special to celebrate. In the past I used to bake different goodies for our last dog, Derby, like whole wheat peanut butter treats and one time I even made her a special dog-friendly birthday carrot cake. I decided to do something a little different this time because Seri is on a grain-free diet. Yes, even my dog is gluten-free. Also like me, she doesn’t eat any processed foods. In addition, she eats a fully raw meat diet all of the time. Seri has had some minor itchy-skin/allergy issues in the past, nothing major at all, but enough for us to want to make sure she was eating THE very best. After consulting with a holistic vet and our breeder and some trial and error with different foods and ingredients, we have found the things that work for Seri and those that don’t. We always make sure to avoid anything that could upset her little body, whether it be her daily food, an unnecessary medication or even a little treat. It’s incredible how much unnecessary processed junk is in most dry kibbles and biscuits, even the best brands are loaded with useless fillers and crap that they just don’t need. Just like us, it’s so bad for their health. Dogs are carnivores and they need meat.
Since Seri eats raw bison for breakfast and dinner every day and her treats are usually some other type of dehydrated raw meat, it was really hard to think of something super special for her birthday as a treat. Since I couldn’t really bake any treat from grain, I decided to experiment with ingredients that I knew were safe for her.
I didn’t want her to get a large portion of whatever special treat I was going to make, so I made small little muffin-cup sized portions, so I could control how much fat she would consume, since we all know what can happen if a dog gets a lot more fat than usual.
Since dog’s are unable to process the lactose in milk, I made the base of the ice cream from almond milk. (If you know your dog has a sensitivity to nuts, or you aren’t sure, you can just go with a simple chicken or beef broth.) I included the coconut oil because in moderation, it is so great for your dog’s health. There have been many studies and countless articles written about the healthy benefits of coconut oil, for both humans and dogs. Additionally, it is great for dogs with allergies and itchy skin. It can also be used topically on any hot spots they may develop. We alternate the coconut oil with salmon oil on Seri’s food each night. If your dog is sensitive to fats, consider skipping the oil or going with a very small amount. Seri goes absolutely nuts for coconut oil, she loves it! That and peanut butter. She rarely gets peanut butter so it was another nice treat for her birthday ice cream.
Seri absolutely loved her birthday ice cream. She couldn’t eat it fast enough! I love now that with having the individual servings, ready in the freezer, whenever I want to give her a little treat, they are ready.
I realize this post may make me seem like a crazy dog person, but in our family, our pets are our life, we would do anything for them and we are willing to make sure they get the very best. I know not everyone is like that, so you may think I am insane. I am pretty ok with that.
Pooch Friendly Ice Cream
makes approximately 8 muffin-sized frozen dog treats2 cups organic unsweetened unflavored almond milk (you can certainly use homemade here, just skip the sugar and vanilla when you make it)
1 tablespoon organic unrefined virgin coconut oil
2 tablespoons organic natural creamy peanut butter
(you could have fun with other dog-safe ingredients like shredded carrots, beef or chicken broth, pieces of their favorite unflavored/unspiced meat, etc)Line a regular sized muffin tin with foil or paper muffin cup liners. Depending on how full you fill them, you can make more or less than this recipe calls for.
Combine all of your ingredients in a large mixing bowl. If the peanut butter was in the refrigerator and is a bit solid, microwave it for about 10-15 seconds to soften it up a bit, to make mixing easier. Using a hand mixer or stand-up mixer, thoroughly combine the three ingredients. Ladle the ice cream mixture into each muffin cup, filling to about 3/4 of the way full. (Again, if you want more, smaller treats, fill them up less or use a mini-muffin tin. If you want less, larger treats, fill them up more.) Place the entire muffin tin in the freezer and allow the mixture to freeze until solid, about 8 hours or so.
When the ice cream treats are frozen solid, you can pop one of out of the tin, peel of the paper muffin cup and give it to your dog. You can remove the remaining treats from the muffin tin and put them in a freezer safe ziplock bag or plastic container.
** Obviously I am not a veterinarian, so please don’t take any of what I am feeding our own dog as a medical advice for your pooch. We just know what works and what doesn’t with Seri. Every dog’s sensitivities are different. If you know your dog cannot have one of these ingredients, go with something else **
-
Today is the Only Guarantee…
I will start this post by saying I don’t know Jennifer. I just read her blog and have followed her on Twitter for some time. Jennie’s husband Mike passed away very, very suddenly this past Sunday night and for some reason it hit me hard, considering I don’t even know them. Part of me feels like a jerk for even writing this post, but I haven’t been able to stop thinking about it. I needed to share.
There is a massive group of wonderful well-known food bloggers who are great friends, travel together, go to different food, cooking or blog related events together, etc. Food has brought them all together and it is so inspiring and heart-warming. I admire and watch them all interact online on a daily basis. I may not be a part of that world, but it reminds me so much of all of the wonderful and ongoing relationships we have with our printmaking, gigposter and craft friends all over the world. It is incredible what technology and the age of the internet has done for relationships near and far. In the age of Twitter and Facebook, I find myself being able to stay close and grow even closer with the friends I have had for many years, some of whom are halfway across the world. It has allowed me to meet so many amazing new people I never would have otherwise met and I also find myself attached and connected to people who likely don’t even know I exist. It’s weird.
Over the last few days I have seen many posts to and about @jenniferperillo both on Twitter and the many food blogs I read regularly, filled with sympathy, sadness and a desire to help. Even though I have never met Jennie or her husband, Mike, my heart hurts for her and I cannot help but feel her pain. I also find myself thinking more about my single worst fear, of losing my own husband, Mark. In reading all of the beautifully written blog posts and twitter messages, I can not only see that I am not alone in the way I feel, but I have also witnessed the power of the internet amidst a tragic and personal event in a stranger’s life. In Jennifer’s sadness, we are all finding a need to take a step back from the craziness of our own lives to appreciate who we have, the love we share and how short life is.
I admire the strength and courage it must have taken Jennie to write this beautiful tribute to her husband. It is so real. Something as simple as his favorite pie. Please read it, even if you don’t know Jennie.
In Mikey’s honor, in addition to the peanut butter pie recipe that Jennie shared, I am going to make Mark the no-bake cookies he has been begging me to make for some time now. Admittedly, he has been asking for probably 2 years and I just haven’t made the time. There is always some other recipe I am testing or experimenting with that is “more important”. Nothing is more important than those we love. Nothing. Make Mikey’s pie on Friday or your own true-love’s favorite recipe and enjoy each day to the fullest. Life is too short and we are so blessed for every day and every bite that we share with the people we love.

