-
No-Bake Vegan “Cheesecake” – Gluten-free + Refined Sugar-free

This week I thought it was appropriate to share a fun patriotic-inspired treat that you could take to any BBQ or picnic on the 4th! Not only is this dessert festive, but it is super simple to make, doesn’t require you to ever heat up the oven and it is sure to please everyone — restricted diets or not.
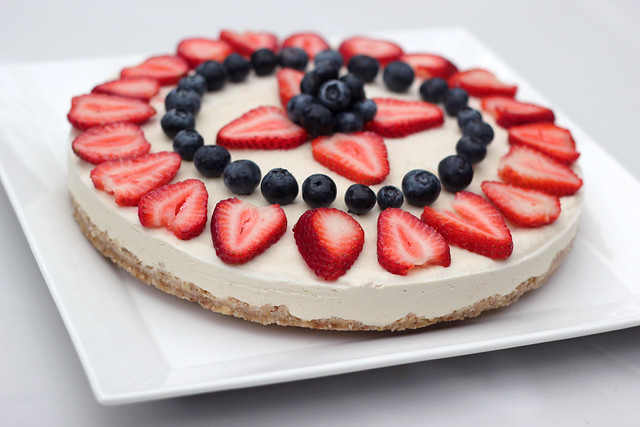
Since I cut most dairy from diet last year, there are a few things I miss from time to time. A rich and creamy cheesecake is certainly one of them. This “cheesecake” has a smooth and creamy flavor, with a bright tanginess you would find in most traditional cheesecakes. The crust is super simple and compliments the filling perfectly. The best part about this crust is, besides being raw, is how super versatile it can, you can use whatever nuts you have, I went with 1 cup raw macadamia nuts and 1/2 cup raw almonds. Plus it would be great for many other pie recipes, too. Read the rest of this entry »
-
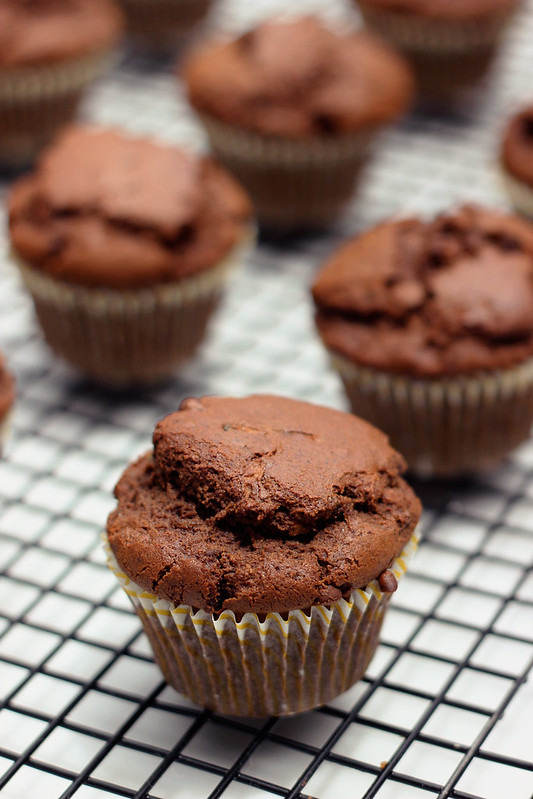
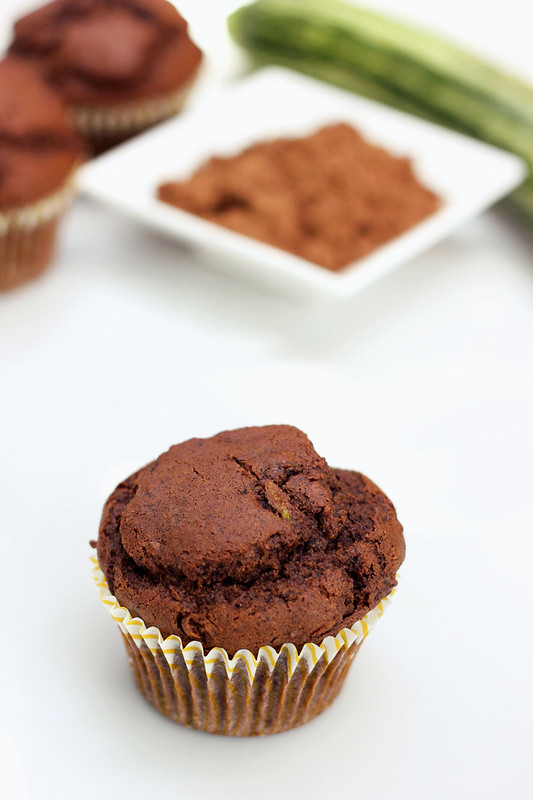
Whole-Grain Chocolate Zucchini Muffins – Gluten-free, Dairy-free & Nut-free

After sharing my guide for gluten-free flour and starches last week, I wanted to create a yummy baked good that you guys could easily make your own, by using your very own all-purpose gluten-free flour blend! I decided to go with a whole grain blend to give these muffins a great texture. Feel free to make your own blend with your favorite flours and starches, whole grain or not. I make my all-purpose flour blends 1000 grams at a time, since it makes measuring simple, and then I have additional flour already made up for other recipes. For a whole grain blend, as mentioned in my previous post, I use 70% grains and 30% starches.
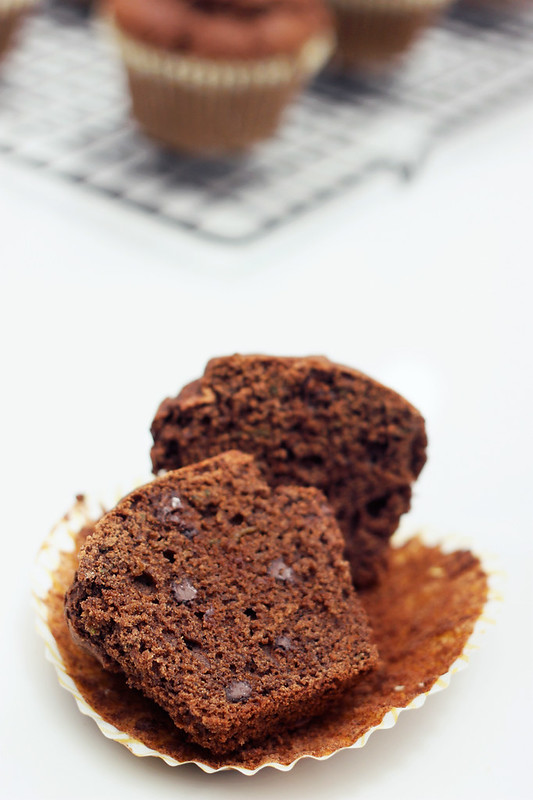
I am already overwhelmed with zucchini from my garden, so these muffins are a great way to use up some of the zucchini but also to sneak some veggies into an unsuspecting place. Chocolate is of course the real start of this show, the cocoa powder gives the muffins a beautiful color then you get the flecks of the little mini chocolate chips! YUM! The best part of this recipe is that it will work with any flour blend you choose. So make up your favorite all-purpose gluten-free blend using my guide for gluten-free flour and starches and as long as you are measuring the flour by weight for this recipe, it should work just fine.
This recipe was originally shared as part of my Restricted Diet series with the Free People blog BLDG 25.
[print_this]Whole-Grain Chocolate Zucchini Muffins {Gluten-free, Dairy-free & Nut-free}
Makes 12 muffins
- 350 grams whole-grain gluten-free flour mix* (approx 2 1/2 cups)
- 1/2 teaspoon baking soda
- 1/2 teaspoon baking powder
- 1/3 cup unsweetened cocoa powder
- 1 teaspoon sea salt
- 2/3 cup honey (I used raw honey)
- 2 large farm-fresh eggs
- 1 teaspoon vanilla
- 1/2 cup grape seed oil, olive oil or melted coconut oil
- 1 1/2 cups shredded zucchini, with as much liquid squeezed out as possible
- 1/3 cup mini chocolate chips (make sure they are gluten-free and dairy-free)
* See above for the blend I used. Any all-purpose flour mix should work here, gluten-free or otherwise, as long as you stick with the same weight for measurement.
Preheat the oven to 350ºF. Line a large muffin tin with paper liners.
Whisk together the flour, baking soda, baking powder, cocoa powder and salt in a large bowl. Set aside.
In a medium bowl add the honey, eggs, vanilla, oil and zucchini, mix together well until combined. Add the wet ingredients to the dry. Mix well until it is all well combined, then add in the mini chocolate chips, folding them in until mixed throughout.
Fill the paper-lined muffin tins about 3/4 full. Place the muffins into the oven and bake 20-25 minutes, until they are cooked through and a toothpick or knife inserted into the center comes out clean.
Let cool for 5 minutes in the muffin pan before removing to a cooling rack to cool completely.[/print_this]
-
Vegan Chocolate Chip Cookie Dough Popsicles – Gluten-free + Refined Sugar-Free
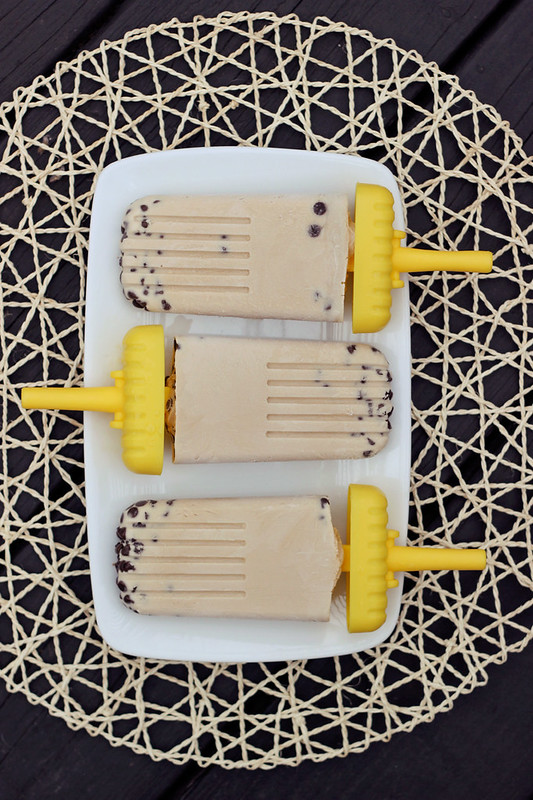
If someone tells you they couldn’t devour a large amount of chocolate chip cookie dough, if given a chance, they are lying. There is no way around it. It has to be some of the yummiest stuff that man has ever created. So how about some summer-ready chocolate chip cookie dough, without the flour or raw eggs, the heat of the oven and the mess in the kitchen?
A week or two ago a vegan friend of mine posted a link to some chocolate chip cookie dough popsicles made with whole milk and two kinds of refined sugar. He mentioned wanting to figure out how to make them vegan. I of course decided to help out and veganize the recipe. Yeh, I wanted to help him, but selfishly as soon as he posted the link, I was unable to get them out of my mind and I couldn’t wait to get a cookie dough popsicle into my tummy! Read the rest of this entry »
-
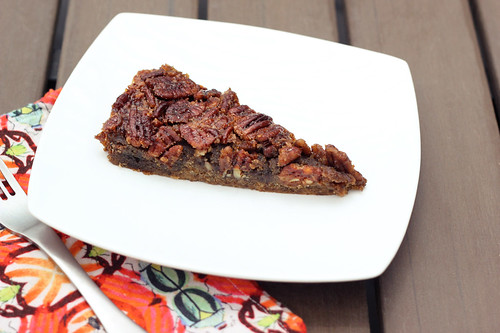
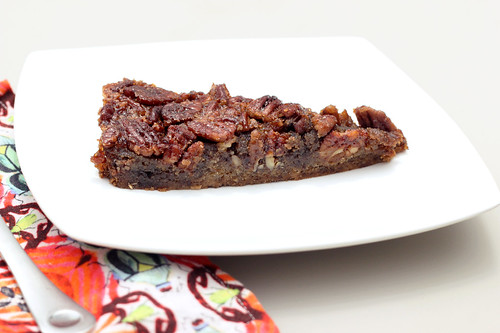
Grain-free Maple Bourbon Pecan Tart – Gluten-free + Dairy-free
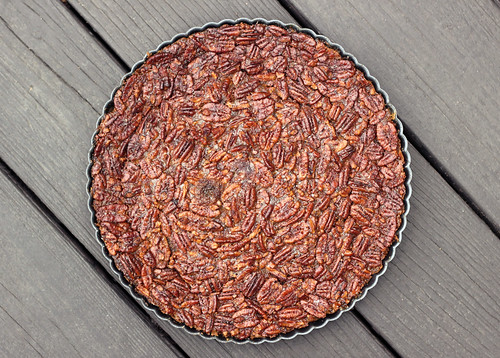 I am going to start off this post by saying that this isn’t the usual über healthy dessert that I am usually touting here on Tasty Yummies. It has a full 2 cups of maple syrup and some additional coconut sugar. So yeh. But the good news is it IS healthier than the usual pecan pie. No butter, no corn syrup, no refined sugar, etc. Could I have made this healthier? Probably, but this was the compromise I came up with since I promised hubby I wouldn’t mess with this classics too much. I actually hadn’t even planned on sharing this recipe, but after I posted a photo on Instagram, people were begging for the recipe.
I made this for the Kentucky Derby party that we hosted here at our house on Saturday. I promised Mark an afternoon of all of his favorite Southern foods that remind him of Louisville. I promised not to “healthy-up” the recipes. I made mini hot browns (the sandwich made famous at the Brown Hotel in Louisville), pimento cheese dip, southern style deviled eggs, jalapeño cornbread mini muffins, a blackeyed pea salad, apple cobbler (I made this recipe with apples instead of the berries), mint-infused raw sugar simple syrup for Mint Juleps and this Maple Bourbon Pecan Tart. The menu was ALL about Mark and though I couldn’t eat a lot of it, I wanted it to be all yummy and I wanted to bring as much of Mark’s home to him on a day he is super homesick
 When I promised to make pecan pie, I did specify that I had to make it gluten-free and dairy-free so I could enjoy it and I refused to make it with the usual corn syrup or regular sugar. I wanted a grain-free crust that would compliment but not overpower the tart and I went for as much maple and bourbon flavor as I could get.
I am so excited with how this turned out. It has a really rich flavor from the maple syrup and the bourbon that is really special. It is luscious, sticky and sweet, without being overly sweet and heavy. Though it isn’t something I will be making often, it is perfect for those special occasions, like a Derby party or the holidays.
[print_this]Grain-free Maple Bourbon Pecan Tart – Gluten-free + Dairy-free
Serves 8-10Tart Crust
- 2.5 cups almond flour aka almond meal
- 3 tablespoons flax seed meal
- 3 tablespoons maple syrup
- 1/4 cup coconut oil, melted
- 1/2 teaspoon baking soda
- 1/8 teaspoon salt
Preheat the oven to 375º F. Lightly grease a 9 or 10-inch tart pan. In a large bowl, add all of the crust ingredients and mix very well. I like to get my hands right in there to make certain it is all mixed up. Add the crust mixture to the tart pan and press down firmly into the pan, going up the sides just a tad bit. Bake for 10-15 minutes until golden brown. Remove from the oven and set aside.
Tart Filling
- 2 cups pure organic maple syrup, preferably Grade B
- 3 large local farm fresh eggs, lightly beaten
- 1/4 cup coconut sugar or firmly packed light or dark brown sugar
- 1/4 teaspon salt
- 3 tablespoons coconut oil, melted
- 3 tablespoons bourbon
- 1 teaspoon vanilla extract
- 2 cups organic raw pecan halves or pieces
Meanwhile in a saucepan over medium-high heat, bring the maple syrup to a boil and boil for 8 to 10 minutes to reduce. Remove from the heat and pour into a heatproof measuring pitcher. The syrup should be reduced to 1 1/2 cups. If necessary, return the syrup to the saucepan and continue to boil until sufficiently reduced. Let cool to room temperature before proceeding.
In a bowl, stir together the eggs, coconut sugar, reduced maple syrup, the bourbon, salt, coconut oil and vanilla until well mixed. Add the pecans and stir well. Pour into the partially baked pie shell, making sure the pecans are evenly distributed.
Bake the pie until the center is set and firm to the touch, 25-30 minutes. Transfer to a wire rack and let cool for 1 hour; remove pan sides. Serve slightly warm or at room temperature.[/print_this]
-
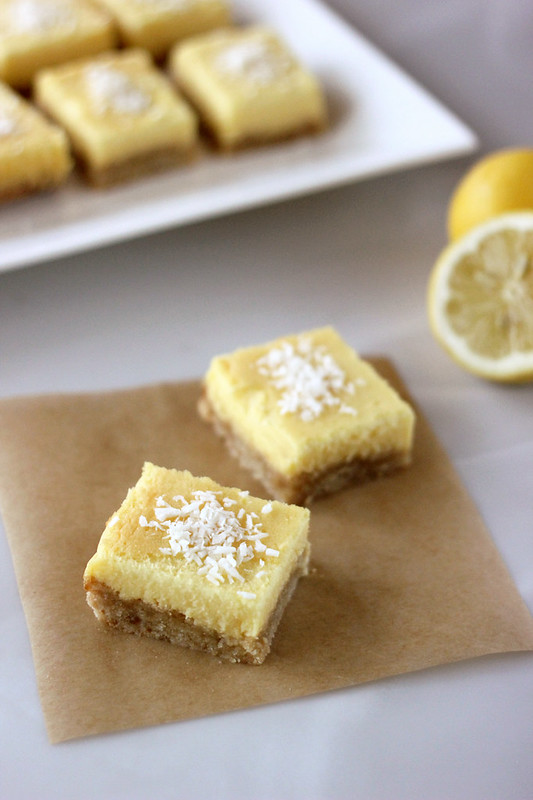
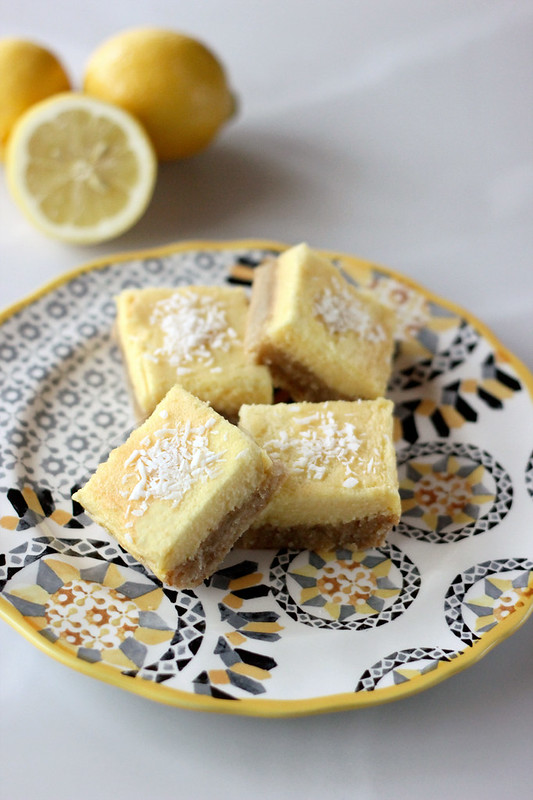
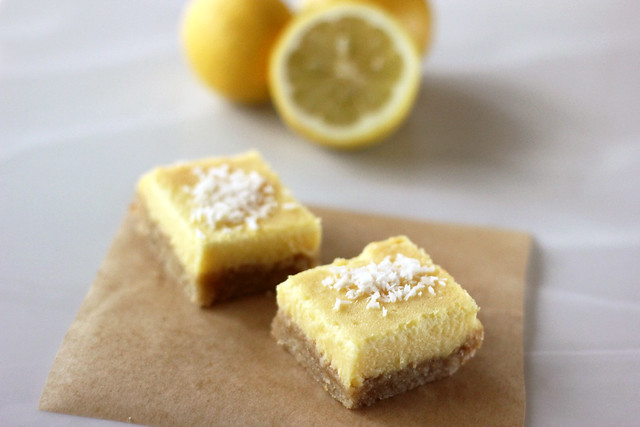
Grain-free Meyer Lemon Bars
Since we’ve moved here to Southern California, just about two months ago, we haven’t had any guests come stay with us just yet. My sister comes two weeks from today and I have literally been counting down the
daysminutes, then my parents come just one month later! I cannot wait! Last week however, our very good friend Jane, who lives in Colorado, came to see us for the day. She had been in Corona, CA for the week and she was able to borrow a car to drive out to our neck of the woods.Although we have quite a few good friends here in Southern California, whom we have known for many years, it was really nice to have our first “family” guest since we’ve moved here. Even if just for a few hours. Jane has been a part of my life since I can remember, she and Mom went to high school together and have remained in contact since. My sisters and I have always jokingly called Jane, “our other Mother”. There hasn’t been a Christmas morning that we didn’t share with Jane, she would always make the trip back to Buffalo from Colorado to spend the holidays with her family and we were always lucky enough to steal her away for a few hours on Christmas morning. Before she had nieces Jane would actually spend Christmas Eve night at our house and we would wake up in the morning and she would make us clean our room before we could go downstairs and attack the tree. Likely buying my parents time to get more sleep, since I am sure they were all up late.
Besides my own actual immediate family, I don’t think that we could have another guest here in the first two months that could have made me any happier. Since she was here a short time, I offered to make her lunch. She absolutely adores my family’s Greek Avgolemeno soup, which she loves to tell me Mom that I make better than her. So I of course, made a big pot of that for her visit. I am sure you have heard me mention many times before that this soup always reminds me of home and my family, so it really couldn’t have been more perfect for this visit.
When Jane arrived she brought me a huge bag FULL of fresh produce from the organic farm on the land where she was staying. So many different varieties of oranges, lemons, a few grapefruits and a few types of citrus that I have never even seen before, plus the most delicious avocados. Besides looking beautiful and tasting amazing, all of the citrus have been making the house smell incredible.
There were some Meyer lemons in the bag. Those are my absolute favorite. They are just so tasty and subtly sweet, so much so that I hate to waste them just in my morning lemon water or in a juice. I wanted to make something extra special with them. I just wish I could have made these bars and then shared them with Jane.
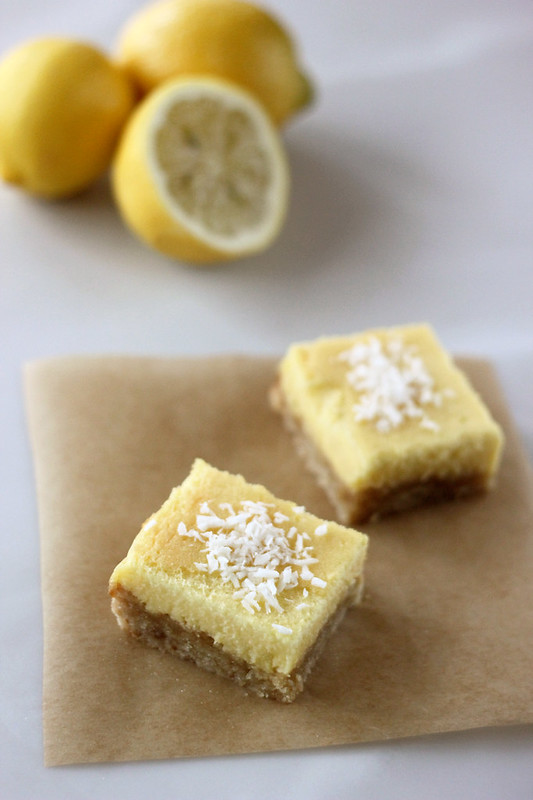
What makes this recipe extra special, besides who/where I got the Meyer lemons from, is that you actually use an entire whole lemon in the filling. Yes the whole fruit. Peel, pith and all. So, it is quite important that you use an organic lemon, or at least one that is unsprayed and free of pesticides or other chemicals.
You can certainly use a regular lemon in place of the Meyer lemon, but you’ll want to increase the sweetener a bit since it won’t be as sweet as the Meyer lemon is. The filling of this recipe was adapted from David Lebovitz. His recipe utilizes corn starch, a regular lemon, regular sugar and butter, so I tweaked it to make it work for me and to highlight the flavor of the Meyer lemon.
*If you are vegan, I would be hesitant to recommend any egg replacers in place of the eggs, since there is a fluffiness from the eggs that gives the filling it’s texture. There are many vegan lemon bar recipes that use silken tofu or soaked cashews to created a creamy topping, but since I had a dozen beautiful brown eggs fresh from a local farmer, I decided they would be perfect for this. If anyone does experiment in making this vegan, please do report back, I would love to hear how it turns out.
[print_this]Grain-free Meyer Lemon Bars
{Gluten-free, Grain-free, Dairy-free + Refined Sugar-free}
One 8-inch Square Pan – Makes 16 squaresCrust:
- 1 1/2 cups blanched almond flour, I prefer Honeyville brand
- 2 tablespoons honey or maple syrup
- 1/4 cup coconut oil, melted
- 1/2 teaspoon baking soda
- 1/8 teaspoon salt
Lemon Topping:
- 1 whole organic Meyer lemon, washed (organic or unsprayed)
- 3 tablespoons honey or maple syrup*
- 1/3 cup freshly squeezed Meyer lemon juice (approx 2 additional lemons)
- 4 large farm fresh brown eggs, at room temperature
- 4 teaspoons arrowroot starch (tapioca starch or corn starch would also work)
- 1/4 teaspoon salt
- 3 tablespoons coconut oil, melted (make sure it isn’t too hot when you add it in, you don’t want it to cook the eggs)
- Unsweetened shredded coconut for topping or the traditional powdered sugar works, too.
*Please Note – since the sweetness and bitterness on Meyer lemons can vary drastically, you may need to increase your sweetener to account for more tart Meyer lemons. Give the mixture a quick taste before you add the eggs to see if you need to. It should be a bit bitter but not too much so. Obviously the sweetener will have to be increased if you choose regular lemons over Meyer lemons. Additionally, if they are on the tart side, powdered sugar on top can definitely help with that, as well.
Preheat the oven to 350º F. Line an 8-inch square pan with two pieces of parchment paper, one going in each direction. In a medium bowl, mix all of the crust ingredients together. You may want to get your hands in there to really get it mixed together well. This will be a thick crumbly crust that you will need press onto bottom of pan. Make sure it is even and gets into the corners. Place in oven to pre-bake the crust. Bake for 15-20 minutes or until lightly golden brown. Remove from oven.
While the crust is baking, cut the whole lemon in half, remove the seeds, and cut the lemon into chunks. Put the chunks of lemon in a food processor or blender along with the honey and additional lemon juice, and let it run until the lemon is completely broken up. Add the eggs, arrowroot powder, salt, and melted coconut oil and blend until almost smooth. (A few tiny bits of lemon pieces are ok and totally encouraged.)
Once the crust comes out of the oven, lower the temperature of the oven to 300ºF. Pour the lemon topping over the hot crust and bake for 25 minutes or just until the filling is no longer jiggling and is barely set.
Remove the bars from the oven and let them cool completely. Once totally cool, carefully lift out the bars out grasping the parchment paper. Cut the bars into squares or rectangles. I like to cut into 16 smaller sized squares. They last longer that way. Add shredded coconut or sift powdered sugar over the top just before serving, if desired.
These bars will keep covered or in an airtight container at room temperature up to three days. The crust will definitely get soggy as they sit, however. You can also freeze the lemon bars for up to one month, letting them come to room temperature before serving. [/print_this]
-
Grain-Free Orange, Almond & Dark Chocolate Biscotti – Gluten-free + Vegan
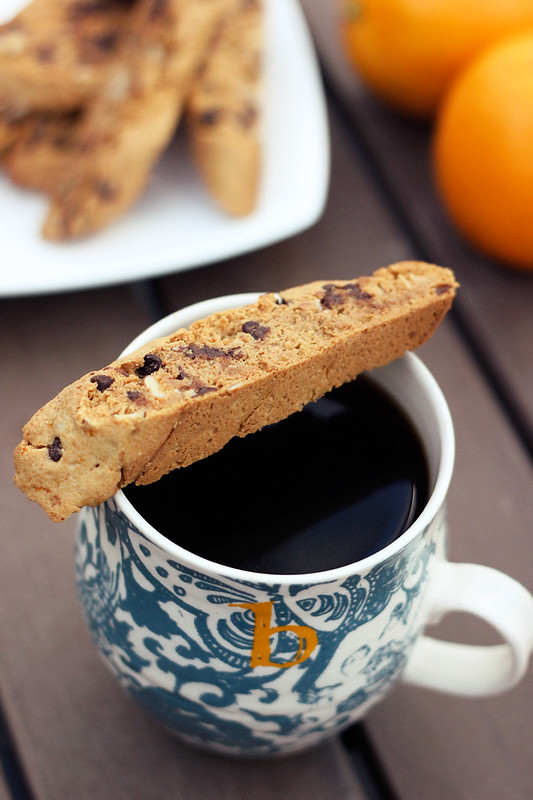
I wrote this recipe up back when we were still in Buffalo staying at my parents house but I never had the time to make them while we were there. Both of my parents and Mark are coffee-aholics. Man do they love their coffee. Me, I could take it or leave it these days. I probably drink 2-3 cups a month, at most. Most times it is part of a super early wake up call for an event or on a long road trip. I love the way coffee tastes, but I don’t always like how it makes me feel. I don’t like the caffeine jitters or the burny, acid bitterness of some cups of joe.
Mostly I like the smell of coffee and the culture surrounding it. Yeh, I know that’s weird. I love coffee cups and mugs, local coffee shops, french presses, pour over coffee, fancy organic fair trade beans, and yes, I even love cookies meant for dunking in coffee. That is exactly what I think of when I think of biscotti. That crispy, crunchiness is just begging to be dunked into coffee.
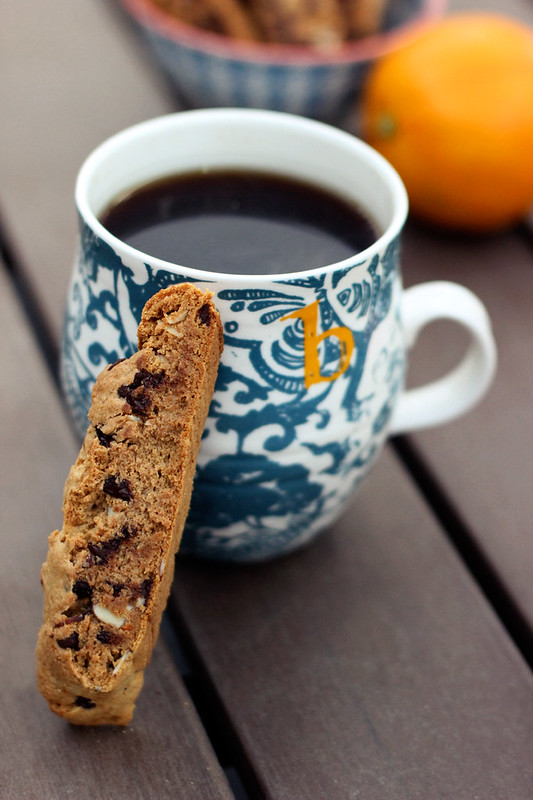
All the nights at my parents house when the three of them would fill up their mugs, add their splash of cream, grab a sweet of some kind and then come out to the living room to watch the evening news. I felt kinda left out. Sometimes I would have a cup (then have a terrible time getting to sleep that night), sometimes I would have some tea and other times I opted for another glass of wine! I should have made these cookies when I was staying there, they could have added dunking these yummy cookies to their evening ritual and I would have dunked mine into Mark’s hot cup of java.
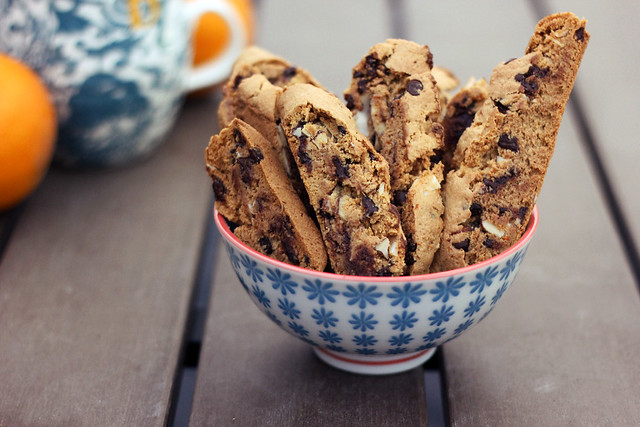
I was inspired to combine orange and dark chocolate in these biscotti because my mom LOVES that flavor combo. So do I. Just the smell alone is so delicious. Looks like I’ll just have to make these for my parents when then come visit in June! (Which by the way, I cannot wait for) I originally wanted to make these with cocoa nibs, but was unable to find any at the stores locally, so I just went with dark chocolate chunks, I cannot wait to get my hands on some cocoa nibs and make these again!
Do you drink coffee? What is your favorite thing about coffee?
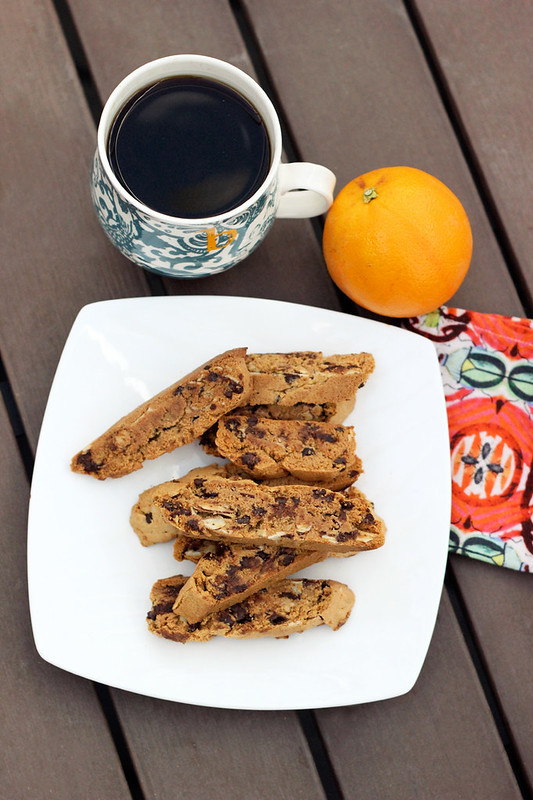
[print_this]Grain-Free Orange, Almond & Dark Chocolate Biscotti – Gluten-free + Vegan
Makes 12-15 cookies- 1 1/2 cups blanched almond flour (tightly packed)
- 1 tablespoon arrowroot powder (or tapioca starch)
- 1/2 teaspoon baking soda
- 1/4 teaspoon salt
- 1/4 cup maple syrup or honey
- 1/4 cup sliced almonds or other nut
- 3 tablespoons freshly squeezed orange juice
- 2 tablespoons orange zest
- 1/4 cup dark chocolate chunks, mini chocolate chips or cocoa nibs
Preheat oven to 350ºF. Line a baking sheet with parchment paper
In your food processor combine the almond flour, arrowroot powder, salt and baking soda. Process until all of the ingredients are well combined. Then pulse in maple (or honey), orange juice and orange zest until the dough forms a ball. Fold in chopped almonds and chocolate chunks by hand.
Dampen hands and form the dough into a log approx 10″ long and 2″ wide on the parchment paperlined baking sheet. Bake at 350° for 15-20 minutes, or until lightly browned and firm to the touch. Remove from oven and let cool for 1 hour. Turn the oven to 250º F.
Once fully cooled cut the log into 1/2-inch slices on the diagonal with a very sharp knife.
Spread slices out on a baking sheet cut side down and bake at 250° for 10 minutes then turn over and bake another 10 minutes on the other side. Turn off the oven and let them sit inside the oven on the baking sheet until cool.
Once cooled they should be nice and crispy. Serve with coffee, tea, ice cold almond milk, etc. Also, you’ll want to consider sharing these with friends or you will likely eat the entire batch yourself. In one sitting.
[/print_this]
-
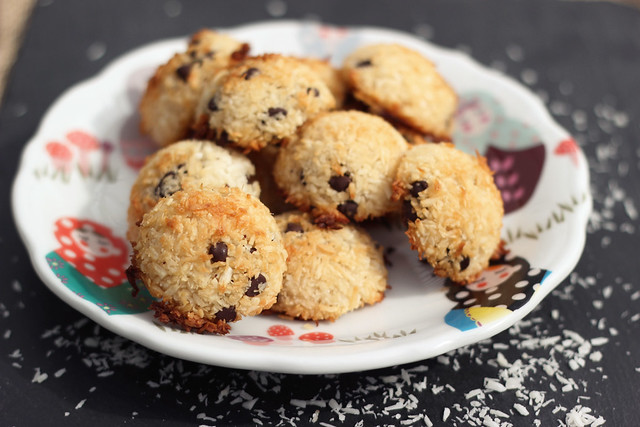
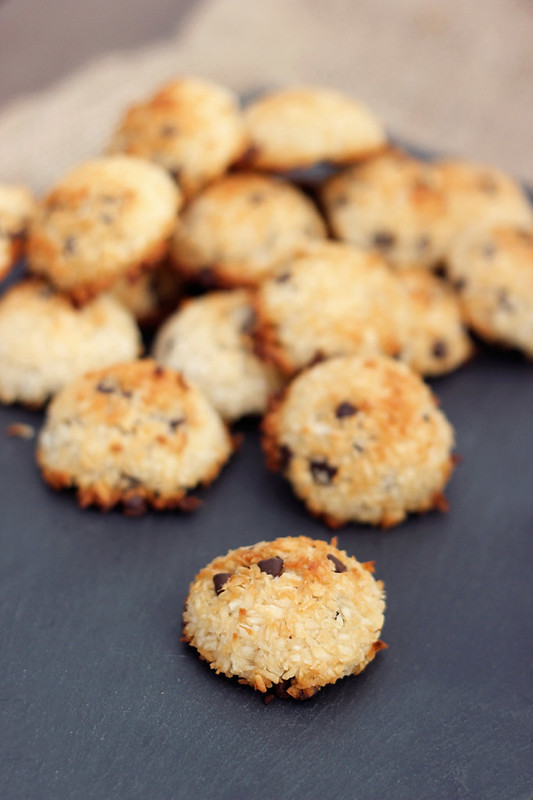
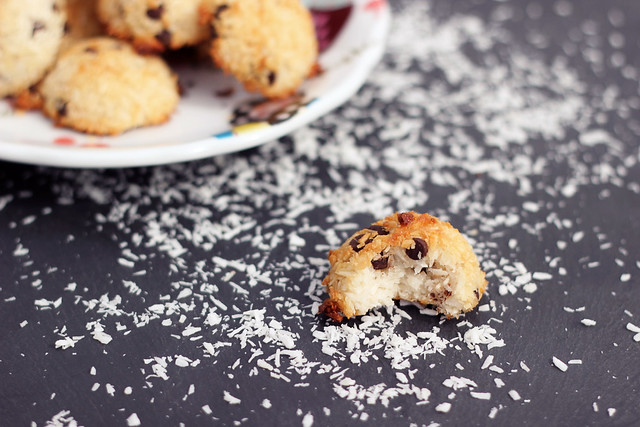
Chocolate Chip Coconut Macaroons – Gluten-free + Dairy-free

I have no problem admitting my obsession with coconut. I absolutely adore it. If I see a macaroon at a high-end bakery and they can assure me it is gluten-free, I am on it! Sadly, most times I take a bite and it is sooo overly sweet that it actually ruins it for me, I can rarely finish one of those from a bakery due to the extreme sweetness. I don’t think coconut has to be so overly sweetened. It is so amazing on it’s own. Add some chocolate and forget about it, I lose all control. But you already knew that, didn’t you? I mean really, is my obsession really that obvious?
I decided the best thing to do instead of always being let down and not being able to finish the ones I buy at bakeries, is to create my own macaroon recipe at home that utilized an unrefined sweetener instead of loads of sugar or that gross canned sweetened condensed milk that many recipes call for. Some recipes actually call for sugar, the canned condensed milk which is usually sweetened AND sweetened coconut. UGH. Hurts my teeth just thinking about it.
As much as I love macaroons dipped in melted chocolate, I can sometimes be lazy with melting chocolate. It can be annoying, I hate the mess and really the same flavor combo could be achieved by adding mini chocolate chips instead. Problem solved. If you want these cookies truly refined sugar-free, leave the chocolate chips out or make your own refined sugar free chips.
Most classic macaroon recipes are made with egg whites, I decided to keep that as part of the recipe, but I have seen many vegan recipes that utilize Ener-G egg replacer in place of the egg whites. I haven’t yet tried this myself, so please report back if you do.
[print_this]Chocolate Chip Coconut Macaroons – Gluten-free, Dairy-free, Paleo
Makes 18-20 cookies
- 2 cups unsweetened shredded organic coconut
- 1/4 cup local organic honey* or organic Grade B maple syrup
- 1 teaspoon vanilla extract (or almond extract)
- 1/3 cup dairy-free mini chocolate chips
- 2 large local egg whites
- pinch of salt
*If you want to use raw honey, just heat it up before hand over a very low heat, to liquify it.
Directions:
Preheat oven to 350º F. Line a baking sheet with parchment paper.
In a medium bowl mix together everything except the egg whites and salt, making sure the coconut is evenly coated with the honey (or maple syrup). Get your hands in there, that’s what I do!
In the bowl of your stand mixer, or using an electric mixer, beat the egg whites with a small pinch of salt. Beat for 2-3 minutes until stiff peaks form when you lift the mixer out.
Gently fold the coconut mixture into the eggs, being careful not to totally destroy the lovely beaten eggs. Let sit in the fridge for 10 minutes.
Drop batter onto the lined baking sheet, one rounded tablespoonful at a time. I like to really press the batter into the tablespoon, then carefully tap the cookie out of the spoon. It makes for the most perfect shape.
Bake for 12-15 minutes until golden brown. Let chill for 5 minutes on the baking sheet, then transfer to wire rack to continue cooling completely.
*To make vegan try using 3 teaspoons Ener-G egg replacer with 4 tablespoons of water and be sure to choose maple syrup over honey. I haven’t tried these yet this way, but there are many recipes online that use the egg replacer instead. Just whisk the egg replacer with the water, add a pinch of salt and add the coconut mixture to it.[/print_this]
Head on over to the Free People Blog BLDG 25, where I am sharing this recipe as part of my Restricted Diets series. Please leave a comment there if you enjoy the post and feel free to comment here let me know if there are any other classic recipes that you would like recreated to be gluten-free, refined sugar-free, cleaner, etc.
-
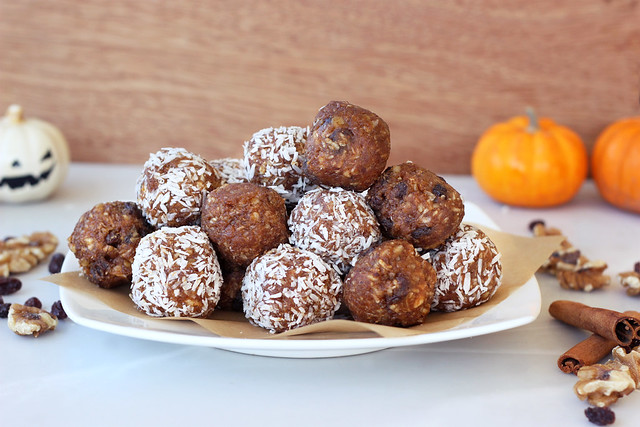
Mexican Mocha No-Bake Cookie Balls (grain-free, gluten-free, vegan + sugar-free)
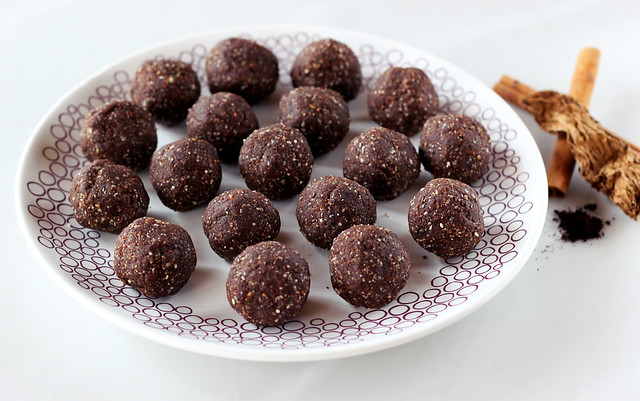
In stepping into a coffee shop next door to the yoga studio I go to here in Long Beach the other day, to grab a juice, I saw something called a Mexican Mocha on the menu. I was intrigued but didn’t order it since I knew it would be loaded with sugar and other stuff I try to avoid, but I was definitely curious, so I asked. It is basically a mocha, which we all know is a sinfully delicious drink where coffee meets hot cocoa, but this one comes with some additional spices, which can vary based on coffee shop and some even add in almond extract/flavor. In looking around online, most Mexican Mochas include cinnamon and some also chipotle or cayenne for a little extra kick.
I have had a Mexican style hot cocoa with those spices, but never with the addition of java. Sounded pretty delicious. Although, I drink very little coffee these days, I was still excited to try the flavor combination and I was inspired to have a little fun with it.So, I created these simple to make no-bake cookie balls. They are grain-free, vegan and sugar-free. If you are sensitive to caffeine, no worries, you could leave out the espresso and then you would just have Mexican Hot Cocoa Cookie Balls. Oh and either way, if you really wanted to go crazy with the chocolate, you could even dip them in some melted chocolate or add some mini chocolate chips.I think what I like most about these cookie balls, unlike the other no-bake cookie balls I have made in the past, is that normally I use uncooked oats and although they make for a really nice texture, I find oats in that state to be quite hard to digest. So I experimented in making these without any grain and I just added in the chia seeds to give these a little crunch and to also add some of that healthy Omega-3 Oil to this treat.These are a nice little sweet treat, with just a little hint of a coffee and spice kick, which are an extra added bonuses.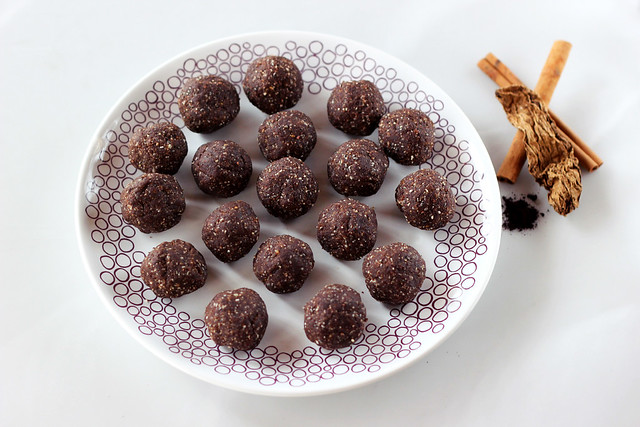
[print_this]Mexican Mocha No-Bake Cookie Balls (grain-free, gluten-free, vegan + sugar-free)
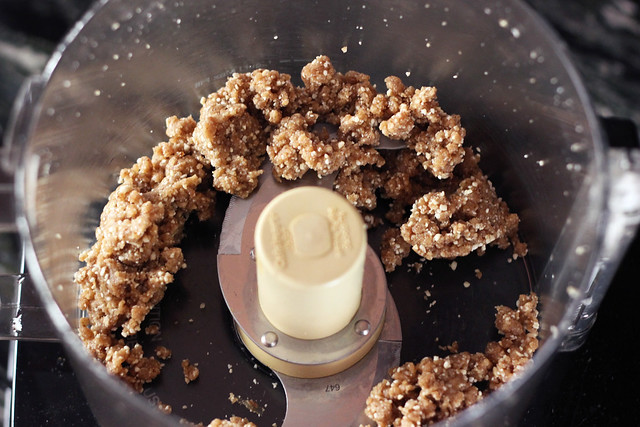
makes about 18-20 cookie balls1 /2 cup raw organic cashews
5-6 medjool dates, pitted and chopped
1/2 cup blanched almond flour (I like Honeyville)
1/4 cup coconut flour
2 tablespoons cocoa powder
1/2 teaspoon ground cinnamon
1 tablespoon chia seeds
dash or two of ground chipotle powder (optional)
1/2 – 1 teaspoon instant Espresso powder (optional)
1 tablespoon vanilla extractAdd the cashews and dates to your food processor and pulse a handful of times until it becomes a chunky crumble.(see below photo)
Add in the almond flour, coconut flour, cocoa powder, spices, espresso powder, chia seeds and vanilla. Process until it is a fine crumble, almost sand-like.
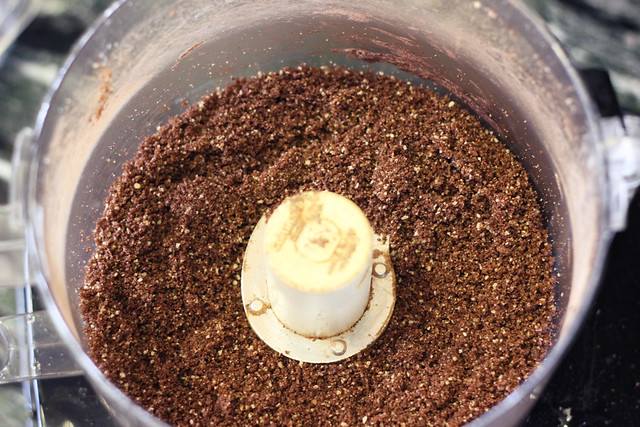
It may seem to try to roll, but you will be surprised. Put a bit of the mixture into your hands, roll it around, it should come together into a ball. If it seems a bit too dry and crumbly add a bit more water or if you want it a bit sweeter, maybe a little maple syrup. Don’t add too much though, you don’t want it to get to soggy.
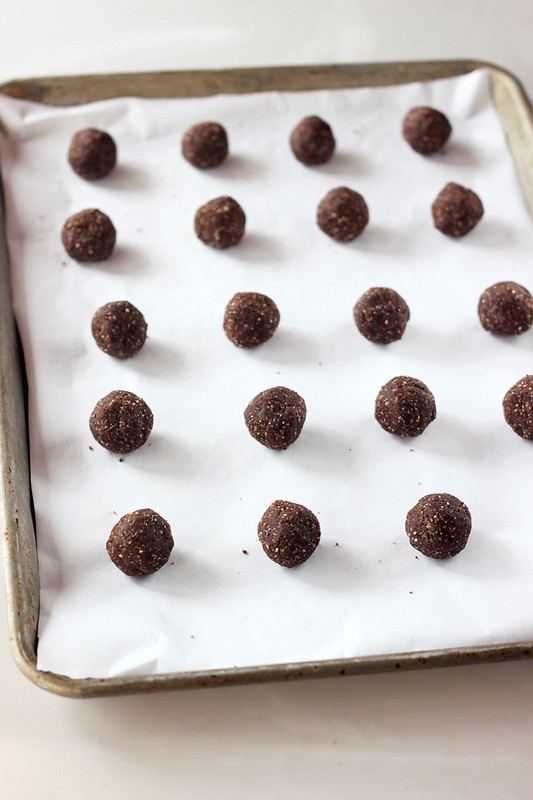
Roll the mixture onto ball and place on a parchment paper lined baking sheet. Refridgerate for 30 minutes or so to firm them up. [/print_this]
-
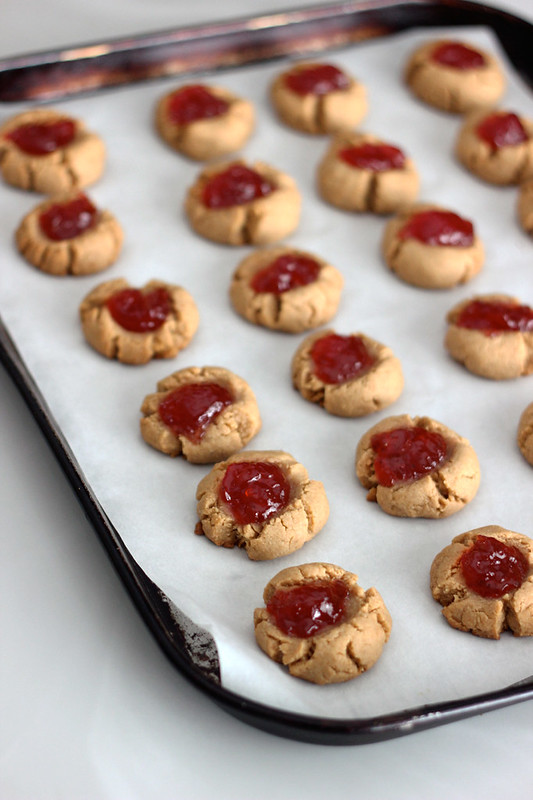
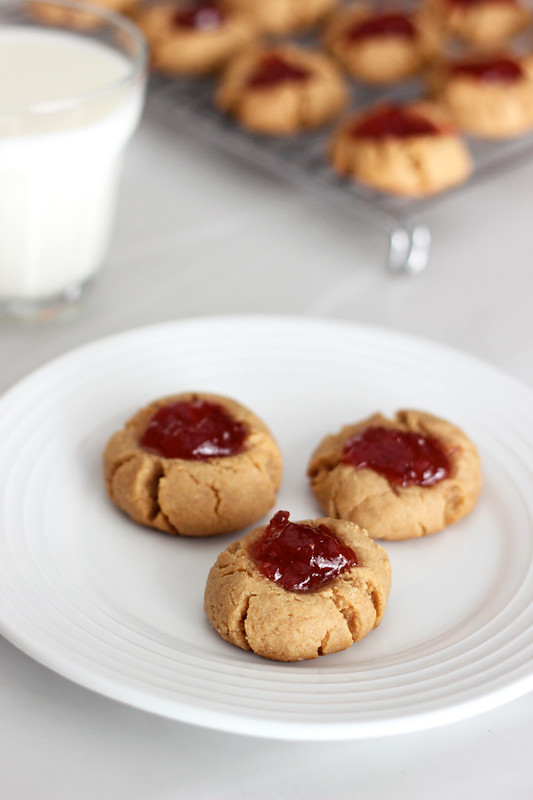
Grain-Free Peanut Butter & Jelly Cookies – Gluten-free + Vegan
I am writing up this post and recipe from somewhere in the sky over the middle of America while we fly from New York to California. We’ll be in Long Beach for 8 days checking out homes and hopefully securing something for our March 1st arrival. So exciting!
I am trying to keep my mind busy during this long flight by writing this up, watching episodes of Gossip Girl and dreaming of these cookies. I only wish I would have grabbed the last few and stuck them in my bag.
By the time this post goes live, we’ll already be in California for a day and starting to look at houses. I am so excited to find up next place and to start this new chapter. It’s all so exciting!

OK back to the cookies. I came up with the idea to make these on earlier last week after having a crazy hankering for peanut butter cookies, that I don’t even normally care too much about. I like them just fine, they just aren’t my first pick. Rather than a standard peanut butter cookie, I thought a cookie inspired by the popular sandwich would be fun and super delicious. Plus, one of my least favorite things about a lot of peanut butter cookies is how dry they can be. I thought the jam would be the perfect compliment.
These cookies came out so great, if I can say so myself. I brought them to my friend Carrie’s house for a little get together along with another sweet treat that I can’t wait to share with you guys. Everyone loved the cookies, hubby even proclaimed “these are the best cookies you’ve ever made”.
They are moist and chewy with the perfect amount of slight golden brown crisp to the outside and the jelly center is such a treat. You could use whatever your favorite jelly, jam or preserves is. I used a strawberry jam that I grabbed at the co-op and I was so pleasantly surprised at how well it held up, it didn’t melt or get watery at all. I am sure you could use these same recipe and replace the jam with a hunk of chocolate, too. Something I was certainly dreaming of while these were baking.
By the way, in case you were wondering, these cookies are AMAZING for breakfast with a nice cold glass of almond milk.
[print_this]Grain-Free Peanut Butter & Jelly Cookies – Gluten-free + Vegan
makes approximately 24 cookies- 1 1/2 cups blanched almond flour (I use this brand)
- 1/2 teaspoon sea salt
- 1/2 teaspoon baking soda
- 3/4 cup organic creamy peanut butter, almond butter or sun butter (I used this brand)
- 1/4 cup maple syrup (or honey)
- 3 tablespoons organic palm shortening (I used this brand)*
- 1 teaspoon vanilla extract
- 1 tablespoon unsweetened organic non-dairy milk, such as almond or coconut
- approx 1/4 cup of your favorite local jelly or jam, I went with strawberry
*I am sure grass-fed butter would also be great here.
Preheat the oven to 350ºF.
In a large bowl, cream peanut butter, shortening, maple syrup, vanilla and non-dairy milk together with mixer. Mix until smooth and creamy.
In a small bowl mix almond flour, salt and baking soda. Add dry ingredients to the wet. Mix with hand mixer until well combined, it may start out looking crumbly and dry. Just keep mixing it and it will come together into a thick cookie dough. (which by the way is SUPER delicious on it’s own).
Scoop the dough 1 tablespoon at a time onto a parchment paper-lined baking sheet. I found it easiest to form uniform sized balls, by rolling the tablespoon worth of dough in my hands. Gently press down and make a large thumbprint in the center of each cookie. Scoop the jam, approximately 1/2 teaspoon’s worth, into the center of each cookie.
Bake at 350° for 12-15 minutes or until lightly browned and slightly crisp. Allow to cool on the baking pan for 5-10 minutes, they will be quite delicate while they are warm, so make sure you let them cool and set for those few minutes. Then, transfer them off the cookie tray to a cooling rack to finish cooling fully. Store in an air-tight container, in the fridge for a few days. Allow to come to room temperature before serving.
[/print_this]
-
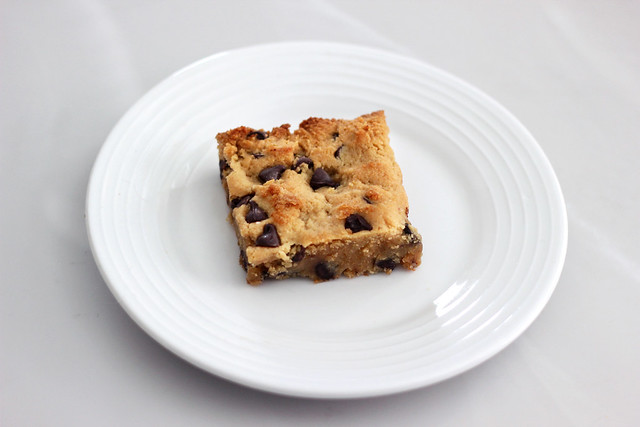
Grain-Free Chocolate Chip Cookie Bars – Gluten-Free + Dairy-Free
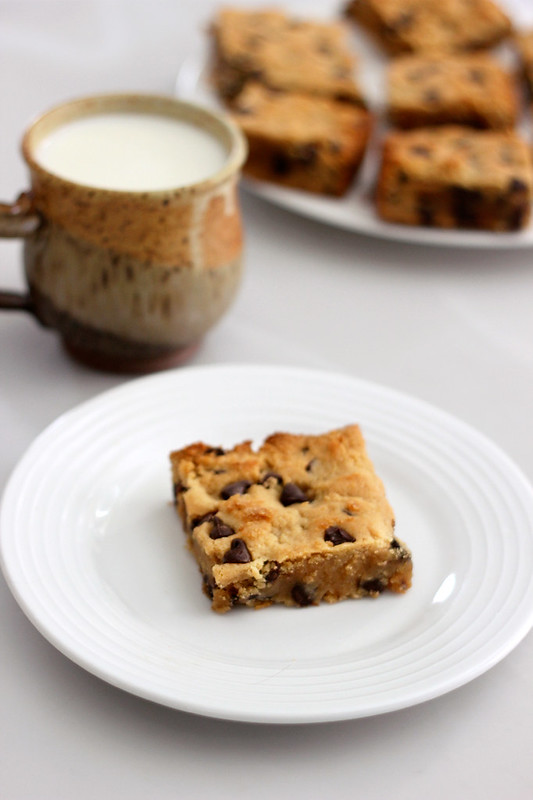
I finally made some time to play in the kitchen with a new baked good recipe and boy am I glad I did. I have been craving chocolate chip cookies like crazy lately but rather than another cookie recipe, which there are a ton of all over the internet, I wanted to make cookie bars. These tasty beauties are soft and chewy and the chocolate just melts in your mouth. They satisfy that craving for chocolate chip cookies, and then some.
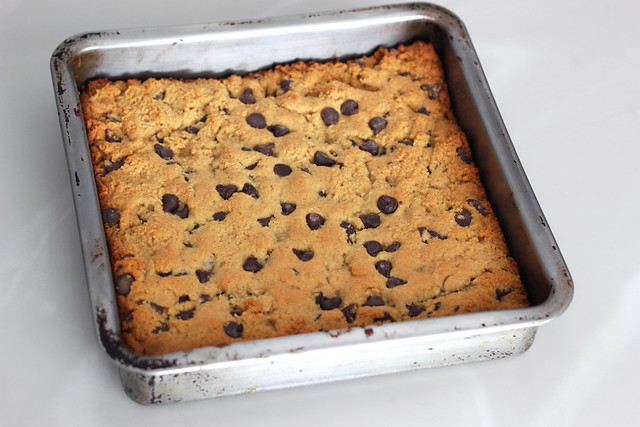
I made these with coconut oil, since that is what I had on hand, but I cannot wait to try it with palm shortening, since whenever I have made cookies with it they are always extra incredible. But, these are definitely not lacking in any way! These bars would be great with other goodies added like dried cherries, chopped walnuts, coconut, etc.

I cannot wait to share these with my parent’s tonight after dinner. I made these last night and I couldn’t try them until today after I took photos and the anticipation was killing me. As much as I don’t necessarily want to share these, I am quite happy to not only have other recipe testers around, but also a few more mouths to eat my creations, to save me from sitting down and eating ALL of them! Also two more people to judge me if I am a pig and eat ALL of them in one day. Ooh it’s so tempting.
[print_this]Grain-Free Chocolate Chip Cookie Bars – Gluten-Free + Dairy-Free
- 2 1/2 cups blanched almond flour (I use Honeyville)
- 1 teaspoon baking soda
- 1/2 teaspoon sea salt
- 1/3 cup honey
- 2 extra-large local farm fresh brown eggs
- 1/4 cup coconut oil, melted (grass-fed butter, palm shortening or ghee will also work)
- 2 teaspoons vanilla extract
- 1 tablespoon unsweetened non-dairy milk (I used almond)
- 3/4 cup dairy-free gluten-free semi-sweet chocolate chips (I like Chocolate Dream or Enjoy Life)
- 1/4 cup walnuts (optional)
Preheat the oven to 350º F and lightly grease the bottom and sides of an 8″ square baking pan with coconut oil.
In a large mixing bowl, whisk together all of the dry ingredients. In a smaller bowl, add all of the wet ingredients. Mix well with a hand mixer or a whisk. Add the wet ingredients to the dry and mix very well with a hand mixer. Then fold in the chocolate chips and nuts (if you are including) with a spatula.
Pour all of the batter into the greased pan and spread evenly with a spatula or your hands, gently press in.
Bake for 20 – 25 minutes until the top is nice and golden brown and the center is no longer doughy. Allow to cool 10-15 minutes before cutting into bars or they could fall apart.
*These keep best in an air-tight container in the fridge. You could put these in the microwave for a few seconds when serving to take the chill off or to get them slightly warm. [/print_this]
-
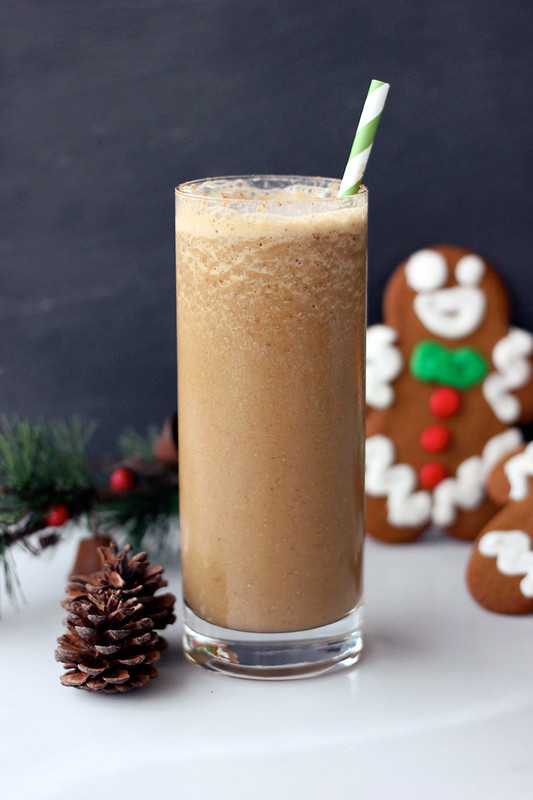
Gingerbread Smoothie – Gluten-free + Vegan

With the lack of time to play in the kitchen right now, I am certainly feeling the loss of certain seasonal flavors and tastes that are quintessential holiday treats for me. So, I have been getting creative when the time allows and enjoying the flavors of the season, however I can.
I had dreams of creating grain-free gingerbread cookies this year, but there just hasn’t been the time to experiment and play, so instead I created a simple and super tasty gingerbread smoothie to celebrate all of those same flavors, but without all of the mixing, cutting out and baking! It turned out great. The aroma from this simple treat alone is enough to satisfy that holiday hankering for those cute little cut out dudes.
Plus, you get to really enjoy some health benefits with this smoothie. Blackstrap molasses is just one type of molasses, the dark liquid byproduct of the process of refining sugar cane into table sugar. Blackstrap is my molasses as choice because of the variety of great nutritional benefits that comes with it. Blackstrap molasses is a sweetener that is actually good for you. Unlike refined white sugar and corn syrup, which are stripped of virtually all nutrients except simple carbohydrates, or artificial sweeteners like saccharine or aspartame, which not only provide no useful nutrients but have been shown to cause health problems in sensitive individuals, blackstrap molasses is a healthful sweetener that contains significant amounts of a variety of minerals that promote your health. Blackstrap molasses has a low glycemic index. Plus, because of its high iron content, many use blackstrap molasses to holistically overcome anemia. Blackstrap molasses is also a great source for calcium and magnesium. Potassium is another mineral abundant in blackstrap molasses, and the list goes on and on.
If you find the bittersweet flavor from the molasses to be a bit pungent, (which can often times happen to those who have taste buds conditioned for years by sugar and artificial sweeteners) or find it lacking as a sweetener, add a bit of additional sweetener of your choice, maple syrup, honey, etc. I personally felt like it didn’t need to be any sweeter. It was just perfect.
I also couldn’t help but think about how delicious this smoothie would be with a shot of some spiced rum or a good bourbon. Is it bad that’s where my mind goes right now?
If you are looking for a couple other creative gingerbread recipes, check out my recipes for Gingerbread Granola (gluten-free + vegan) and Pumpkin Gingerbread Muffins with Dried Cranberries (gluten-free + vegan).
Have you been enjoying the flavors of the season? What’s your favorite holiday treat?
[print_this]Gingerbread Smoothie
serves 1- 1 frozen banana
- 1 cup unsweetened organic vanilla almond milk (or other non-dairy milk)
- 1 tablespoon unsulphured blackstrap molasses
- 1 teaspoon vanilla extract
- 1 tablespoon flax-seed meal (or ground chia seeds)
- 1/2 teaspoon ground cinnamon
- 1/2 teaspoon ground ginger (grated fresh ginger would be extra nice)
- pinch of ground nutmeg
- pinch of ground cloves
- dash of all spice
- 1 small handful of ice
*additional sweetener, if needed
Add all of the ingredients to the blender and process until smooth and creamy. Pour into your glass, top with a little freshly grated nutmeg (or regular ol ground nutmeg will work too). Serve immediately.
[/print_this]
-
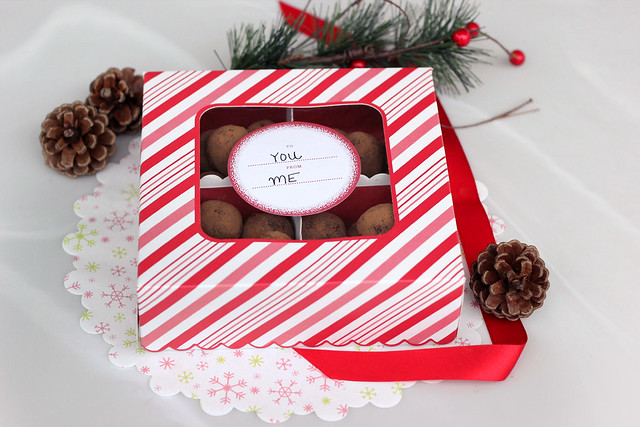
Dark Chocolate Peppermint Truffles – Gluten-free + Vegan
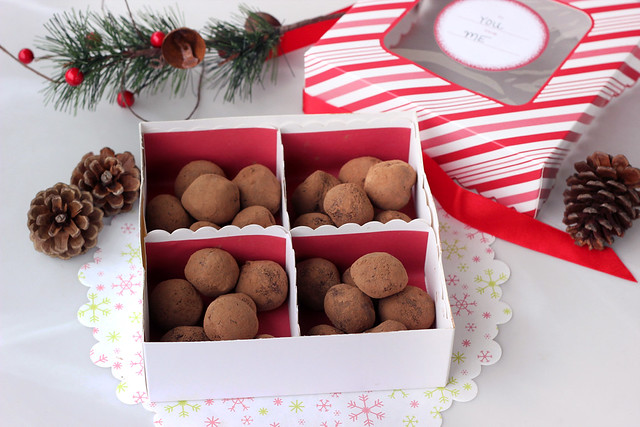
What better gift to give than the gift of chocolate, right? These dark chocolate peppermint truffles are sure to leave a smile on any chocoholic’s face. Especially when they find out you made these just for them.

These truffles are simple to make and they are naturally both gluten-free and vegan. Additionally, they are low in sugar and very simple to make. A few ingredients, a few minutes at the stove and that’s about it. You can even play around with the recipe and leave out the peppermint and roll them into other goodies, like chopped nuts, coconut, melted chocolate or chocolate bits, etc. Make this recipe your own and customize it for whomever will be receiving it.
[print_this]Dark Chocolate Peppermint Truffles – Gluten-Free + Vegan
makes about 24+ truffles (depending on their size)- 1/2 cup full-fat coconut milk (the canned kind)
- 2 tablespoons coconut oil
- 10 ounces high quality vegan dark chocolate (70% cocoa) – chopped
- 1 teaspoon vanilla extract
- 1/2 teaspoon peppermint extract
- dash of sea salt
- 1/4 cup cocoa powder
In a double boiler, heat coconut oil and coconut milk over a low/medium heat, whisking until just melted and well incorporated. Add the chocolate, stirring continuously, not allowing it to heat too quickly. Just as soon as it is melted, remove from the heat and stir very well to make sure it is all well incorporated. Add in the vanilla and peppermint extracts and salt.
Pour into a 8″ baking dish or a pie pan and refrigerate until the mixture is mostly set , but still pliable. Using a 1″ melon baller or a tablespoon, scoop out the chocolate and roll into balls using your hands, set them on a parchment paper lined cookie sheet. Once all have been rolled, place the sheet into the refrigerator for about 10-15 minutes, up to overnight.
Place the cocoa power onto a small plate and roll the balls in the cocoa powder to coat, you can also put the cocoa powder in your hands and roll them around that way. Store the finished truffles in the refrigerator.
These truffles will keep up to two weeks in an airtight container in the refrigerator. Allow to come to room temperature for about 15 minutes, just before serving.
[/print_this]
This recipe was originally shared on Free People blog BLDG 25
-
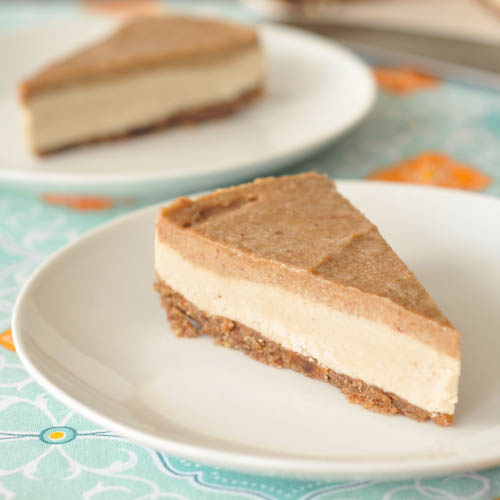
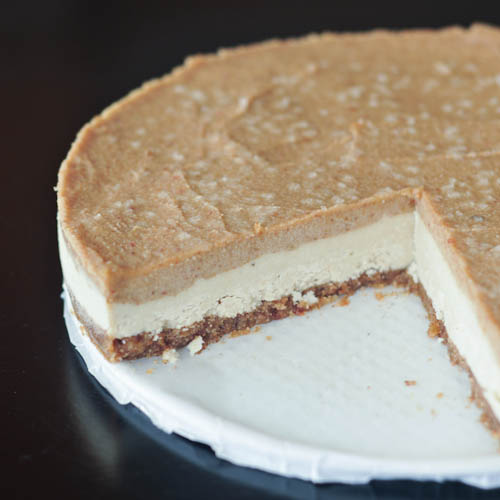
Salted Caramel Cheesecake – Gluten-free, Vegan + Sugar-free {Guest Post by Spabettie)

This next post in our Thanksgiving series comes from one of my favorite bloggers, Kristina of spabettie. I am not sure how, but every single time I open my google reader, there always promises to be at least one, if not more, amazing new recipes from spabettie. Every one looking even better than the last. I don’t know how she does it. Kristina’s recipes are always so delicious, healthy and totally approachable, plus you can tell she really has fun creating all of it. This recipe for Salted Caramel Cheesecake is definitely no exception and would make the perfect Thanksgiving dessert instead of all of the sugar and dairy-filled usual suspects. Enjoy.
• • • • • • • • • • • • • • • • • • • • • • • • • • • • • • • • • • • • • • • • • • • • • • • • • • • • • • • • • • • • • •
I am always honored when asked to appear on another website – especially when asked by someone like Beth – who shares the same ideals, is wonderfully creative, who is a bright spot in my days! I am thrilled to be a part of Beth’s Thanksgiving Series – I so love the holidays.
The dessert I created for Beth is a classic spabettie recipe – free of many ingredients but still insanely delicious! There are three layers and several steps, but this is a straightforward and simple recipe that is a proven crowd-pleaser!
[print_this]salted caramel cheesecake – dairy, egg, oil, soy, gluten and sugar free, vegan, raw
makes one 9 inch cheesecakeraw pecan crust
- 1 cup pecans
- 1 1/2 cups Medjool dates
Line a 9 inch spring-form pan with parchment. In food processor, pulse hazelnuts to a fine crumb. Add dates, process until combined completely. Press into spring-form pan.
salted caramel cream sauce
- 1/2 cup raw cashews
- 3/4 cup water*
- 1 1/2 cups Medjool dates, soaked
- raw sea salt, to taste (Moroccan Atlantic raw coarse sea salt)
*add more water for a more liquid sauce; for this recipe I wanted a thick salted caramel layer
In food processor, combine cashews and water to make a cashew cream. Add dates and raw salt, process to a creamy smooth sauce. Set aside (this will be used as the cheesecake sweetener and the top layer).
cheesecake layer
- 2 cups cashews, soaked several hours
- juice of two lemons
- 1/2 cup salted caramel cream sauce (see recipe above)
- 1/2 cup Irish moss paste (see instructions here)
Process cashews in food processor, add lemon juice and blend until creamy. Add caramel sauce and Irish moss, blending until incorporated and mixture is smooth. Spread in an even layer over crust. Pour / spoon salted caramel cream over cheesecake layer, smooth in an even layer. Place in refrigerator to set. [/print_this]

Thank you, Beth – and thank you all for reading – Happy Holidays!
spabettie focuses on (mostly!) healthy recipes with vibrant fresh foods – choosing clean and organic, while leaving room for indulgence. Kristina enjoys the challenge of making a ‘regular’ recipe vegan and or gluten free, and creating unique recipes from scratch.Visit Kristina’s blog spabettie
You can also follow Kristina on:
Twitter: @spabettie
Instagram: @spabettie
Facebook: facebook.com/SpabettiePage
Pinterest: @spabettie
-
No-Bake Pumpkin Spice Cookie Balls (Gluten-free, Vegan + Sugar-free)
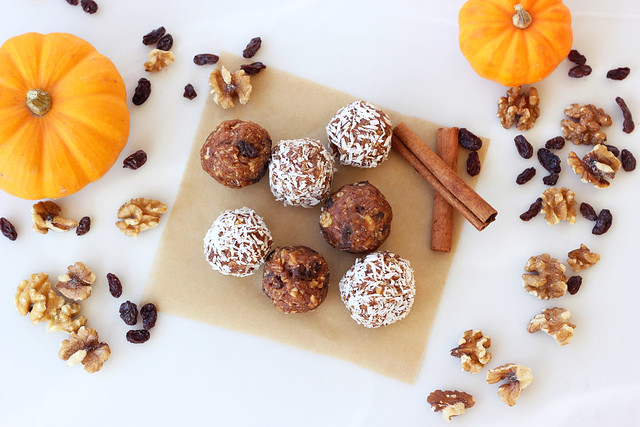
My final recipe in my healthy Halloween series with Free People this month is for a simple, quick no-bake cookie ball, that is full of delicious fall flavors. Instead of the cut-out cookies and donuts and wayyy too much Halloween candy, why not snack on these? Gluten-free, vegan and sugar-free these no-bake treats will still wow your socks off.
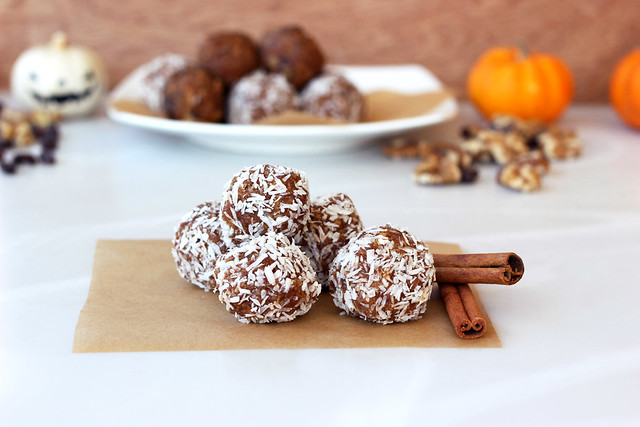
The spicy pumpkin flavor is perfect for this time of year and the whole recipe can be put together from start to finish in about 15 minutes. Plus, you can have fun with these and add in your own favorite extras like coconut, raisins, additional nuts, chocolate chips, powdered sugar or maybe even a drizzle of caramel sauce.
This recipe was originally shared on the Free People Blog, BLDG 25
[print_this]No-Bake Pumpkin Spice Cookie Balls (Gluten-free, Vegan + Sugar-free)
Makes approximately 18 balls
- 8 Medjool Dates, pitted
- 1/4 cup creamy almond butter
- 2 tablespoons pumpkin purée (canned or fresh, if you use fresh be sure to drain as much water out as you can)
- 1 teaspoon ground cinnamon
- 1/2 teaspoon ground nutmeg
- 1/4 teaspoon ground ginger
- Dash of ground cloves
- Pinch of salt
- 1 teaspoon vanilla extract
- 3/4 cup raw walnuts
- 1/2 cup unsweetened shredded coconut plus more for rolling
Optional Add-ins:
- raisins (I used raisins in half of the recipe, about 1/4 cup)
- additional coconut for rolling
- additional chopped walnuts for rolling
- mini chocolate chips
Add just the pitted dates to the food processor and process for a minute or two until a thick paste forms – if they are quite dry, you may need to add a teaspoon or two of water to get it moving. If they are pureed and form a large ball in the food processor, don’t worry too much, the other ingredients will thin it out. Next, add the almond butter, pumpkin puree, the spices, salt and the vanilla extract. Process for a minute or two again until thick and creamy. Add in the nuts and coconut and pulse a few times until the nuts are chopped and it all comes together into a thick dough. Try to roll a little in your hand, if it is holding together it is ready, if it is too crumbly try adding more almond butter and/or pumpkin. If it is too creamy and sticky, add more nuts and coconut. If you are adding raisins, just fold them in by hand with a spoon or spatula.
Take the blade out of the processor and roll the dough into balls, about 1 1/2-inches in diameter. Roll into shredded coconut, if you wish. You should end up with approximately 18 cookie balls. You can eat them right away, or place them in the fridge for a bit to firm up (which is what I prefer).
[/print_this] -
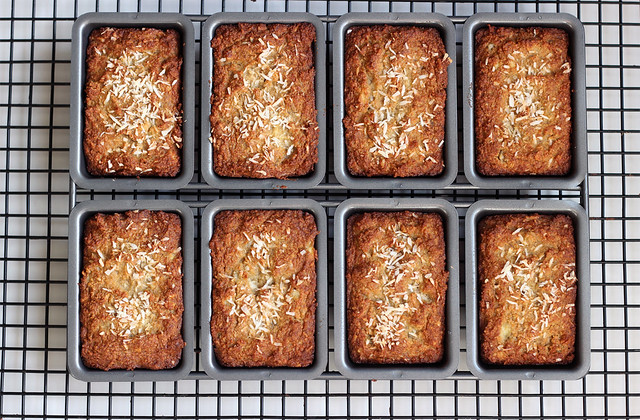
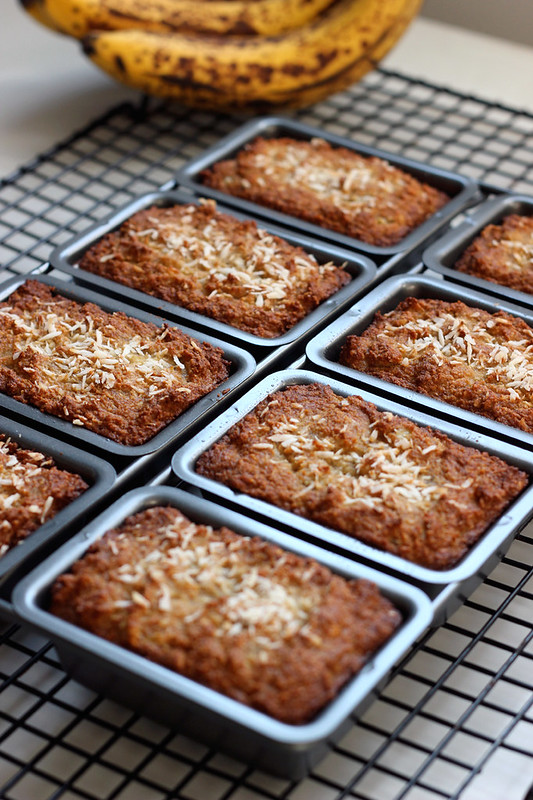
Grain-free Banana Coconut Mini-Loaves – Gluten-free, Dairy-free + Refined Sugar-free
If you follow me on Instagram you probably already know this, but I just love Instagram 🙂 It is probably my favorite social networking platform there is right now, because it is just a little glimpse into people’s lives. Very few words, just a quick glance. It doesn’t feel totally invasive and it is rare that you have people complaining on there or posting political rants, etc. I just feel like it is a big celebration of everything happy going on in our lives. I love seeing peoples pets, their kids, what they are working on, a snapshot from their amazing vaction and of course, all of the food. Some days I put up so many photos of food, I am sure most of my non-food blogging friends want to (or do) unfollow me, but I personally love seeing what is happening in everyone’s kitchens. It is always so inspiring and exciting.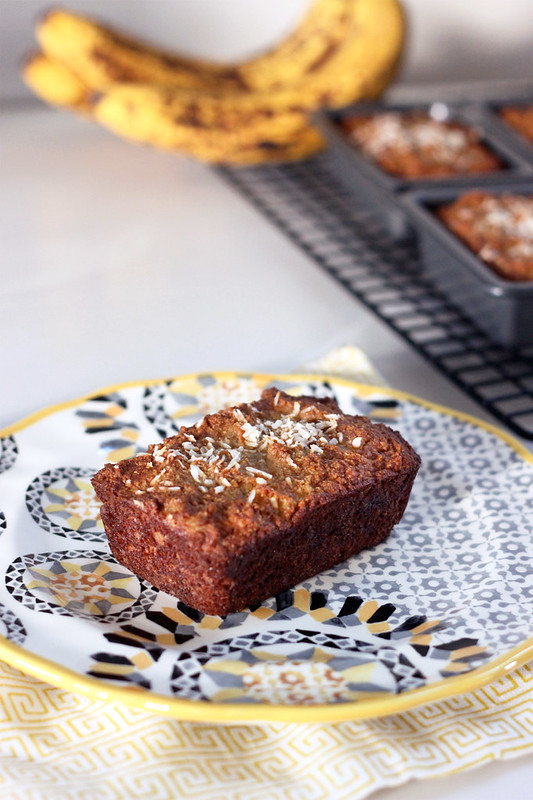
A week or two ago my good friend Esther, who I sadly haven’t seen in a while, posted a photo on Instagram of some amazing little mini-loaves she just pulled out of the oven. They looks delicious and I loved the pan she made them in. The pans are all connected and just the perfect sized little treat, I had never seen anything like it. I mean, what is it about miniature things that is just so irresistible? When I asked Esther where she got it from, she said just up the street from her (she lives in Princeton, NJ), and she offered to pick one up for me. Yay! So, I told her to tell me what it costs and I would send her the money. Next thing I know a package comes in the mail to me, with the pan and a sweet note, as a birthday gift from Esther. It made my whole day! Thank you again so much Esther! The very next morning I started thinking about what I would make with it.

I had some bananas in the pantry that were definitely overripe, so I thought I had to make some banana bread but I wanted to do something a little different and create a grain-free recipe made with my favorite, almond and coconut flours, that also included some yummy coconut, since the two go so well together.
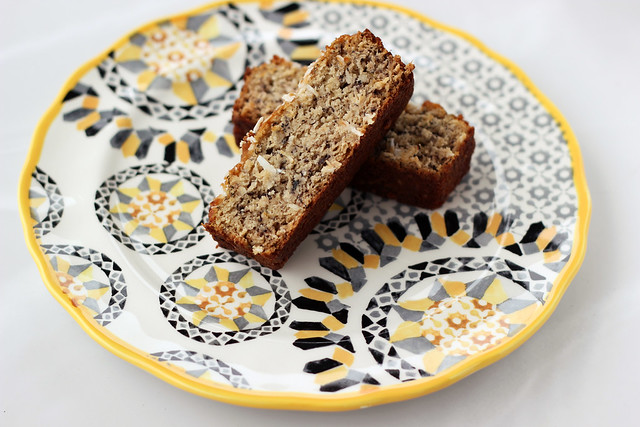
Even after playing around with so many baked-good recipes that use the combination of almond and coconut flours, I am still amazed every time I bake with it and it comes out with a grain-like quality to it, it really surprises me each time. I always expect a weird goopy mess that doesn’t quite work. These mini-loaves are just perfection, they are moist and spongey like any good banana bread should be, plus I really love the little bits of coconut throughout and on top. These loaves would also be good with nuts on top or some mini-chocolate chips (both of which I thought of after it was too late). By the way, how great is that plate? Perfect for these mini-loaves right? That was a super thoughtful birthday gift from my friends Sarah and Brian. I have some pretty amazing pals!
What’s your favorite mini-food or mini kitchen gadget?
FYI – this is the mini-loaf pan that I used for reference. Each loaf well measures 3 13/16″ x 2 1/2″ and 1 1/2″ high, I haven’t tried this recipe as a single loaf or even the slightly larger mini-loaf pans, so I cannot attest to how it will come out, likely it will work, the loaves will probably have less height to them and you will have to bake it for longer. If you experiment with different loaf pans and this recipe, please let me know how it comes out. Thank you!
[print_this]Grain-free Banana Coconut Mini-Loaves – Gluten-free, Dairy-free + Refined Sugar-free
makes 8 mini-loaves- 1 1/2 cups blanched almond flour (I like Honeyville)
- 1/4 cup coconut flour
- 1 teaspoon baking soda
- 1 teaspoon sea salt
- 1/2 cup unsweetened finely shredded coconut, saving a small amount for the top of the loaves
- 2-3 large ripe bananas, mashed (you are looking to get about 1 1/2 cups)
- 4 extra-large local farm fresh brown eggs
- 1/4 cup coconut oil, melted
- 1 tablespoon honey or maple syrup
- 1 tablespoon vanilla extract
Preheat the oven to 350º F. Grease your mini-loaf pans with a little coconut oil, I used this pan.
In a large bowl combine the almond and coconut flours with baking soda, sea salt and shredded coconut. In a small bowl combine the eggs with the coconut oil, maple syrup, vanilla extract and the mashed bananas, whisk until very well combined.
Pour wet ingredients into the dry and mix well until fully incorporated.
Divide the batter evenly into the 8 mini-loaf pans, smooth it out a bit with a spatula and sprinkle a little shredded coconut on top of each loaf.
Bake for 30 to 35 minutes. Test with a tooth-pick for doneness. Remove loaves from oven, let cool in pans for 10-15 minutes and then transfer to a wire rack to continue cooling.I find for these type of grain-free baked goods, that storage in the fridge seems to be best, I usually just cover or wrap them in plastic wrap or put them in a large ziplock bag. When I am ready to eat one, I pull it out, give it 20 seconds in the microwave or a minute or two in the toaster oven and then I slather a little coconut oil on top.
[/print_this]
-
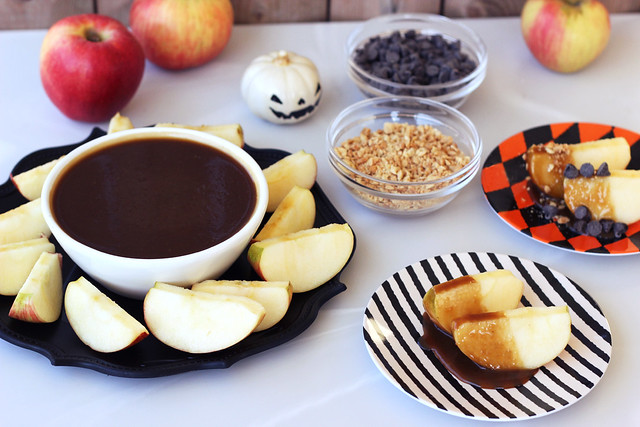
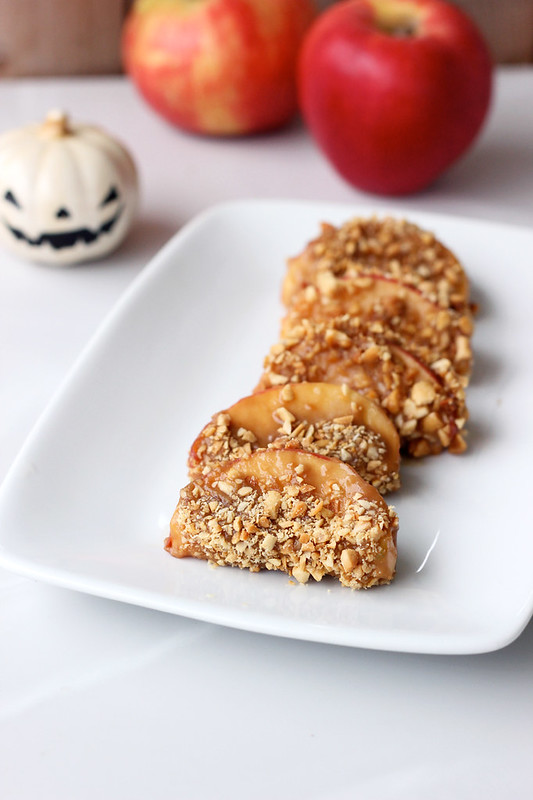
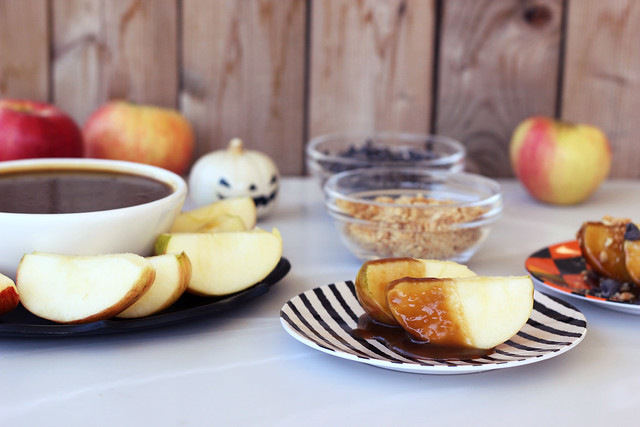
Vegan Caramel Apple Dipping Sauce (Gluten-free)
I am so very excited to share this recipe with you guys. I had so much fun creating it and even more fun eating it! In theory, caramel apples always sound amazing, but in reality they are always a sticky mess, hard to eat, and so sugary they actually hurt my teeth. I have learned to just pass on by and only dream of their caramel goodness. Until now. I finally decided to re-imagine a caramel recipe without heavy cream or butter, but I also wanted the sweetness to come from somewhere other than refined overly processed white sugar.
I am really excited with how this came out.
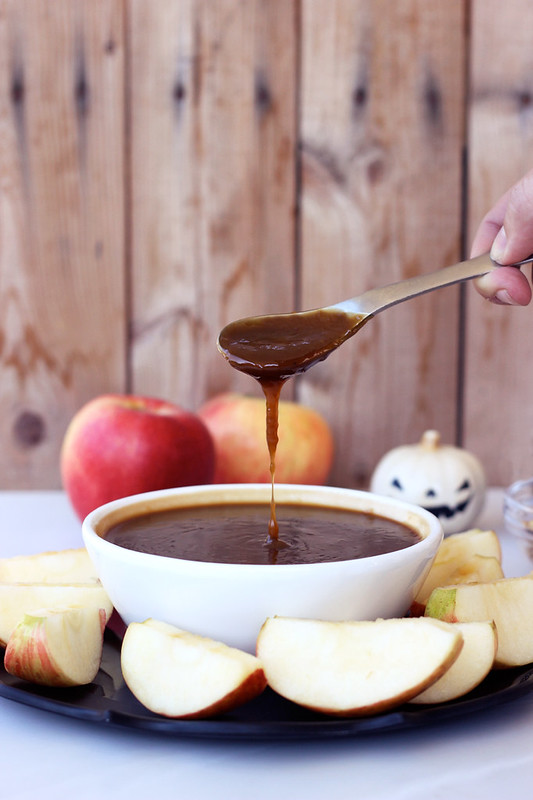
It has a beautiful dark hue from the coconut sugar and it is thick and luscious and perfectly creamy, and the right amount of sweetness without feeling yourself getting a cavity as you are eating it.

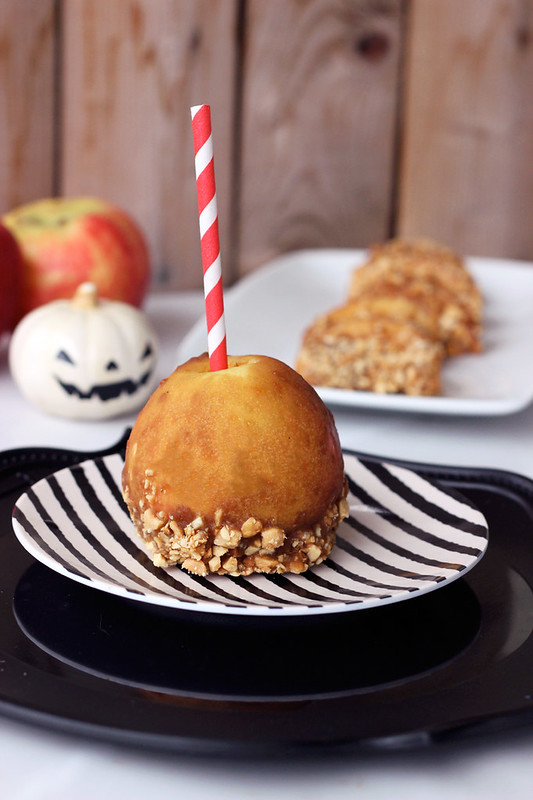
This caramel is great as both a dipping sauce for fresh apples (or whatever else you would like) that can be served while it is still a little warm or totally chilled, or you can let it fully chill, get nice and thick and actually coat whole or sliced apples in it, then coat them in nuts, chocolate, sprinkles or whatever you’d like.
Obviously, just because this caramel sauce is healthier than the original, it doesn’t mean you should sit down and eat a bowl of it in one sitting, though you easily could. Sugar is still sugar, but at least with this refined sugar-free, vegan version you can have a bit less guilt while you indulge.
[print_this]Vegan Caramel Apple Dipping Sauce (gluten-free)
makes about 2 cups
- 1 cup organic coconut sugar
- 2 tablespoons maple syrup
- 1 tablespoon water
- 1/4 cup coconut oil, melted
- salt
- 1 cup full-fat organic coconut milk, the canned kind
- 1 tablespoon vanilla
- 1tablespoon arrowroot starch (corn starch or tapioca starch would also work)
In a medium saucepan over a medium heat, mix together the coconut sugar, maple syrup, coconut oil and water, stirring often and well until the sugar has dissolved and it is smooth and creamy. Bring it up to a slight simmer, add a dash or two or salt and the coconut milk, whisking and bring back up to a simmer.
Once it has been simmering for about 5 minutes, add in the vanilla and the arrowroot starch. I find that slowly adding the arrowroot starch while whisking (by sprinkling it in), versus just a big dump, keeps the lumps to a minimum. Lower the heat and whisk until the arrowroot starch has dissolved and the sauce is nice and thick. Remove from the heat.
It is great served warm or cool as a dipping sauce for apples (or whatever else you might like to dip in it). Serve with chopped nuts or chocolate on the side as well.
Or you can let the sauce cool fully and it will get a little thicker and then you can roll whole apples or apple slices in it, cover with chopped nuts or chocolate pieces and place in the fridge to chill and harden up a bit.
[/print_this]
-
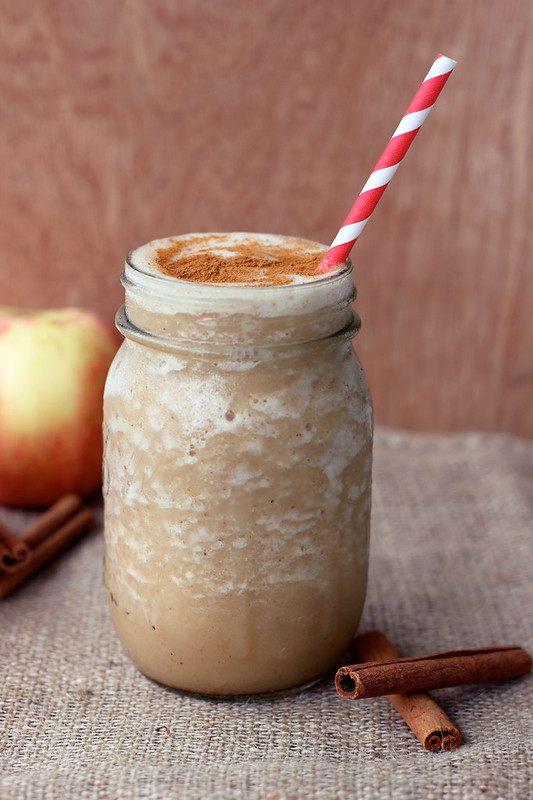
Apple Pie Smoothie – Gluten-free, Vegan + Refined Sugar-free
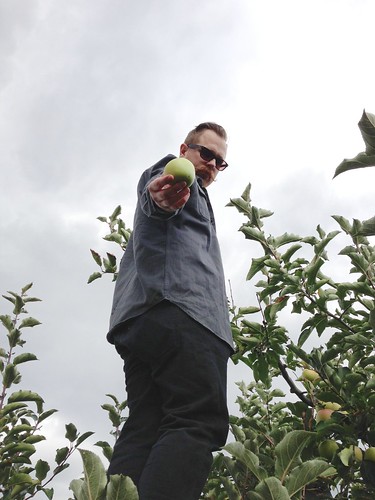
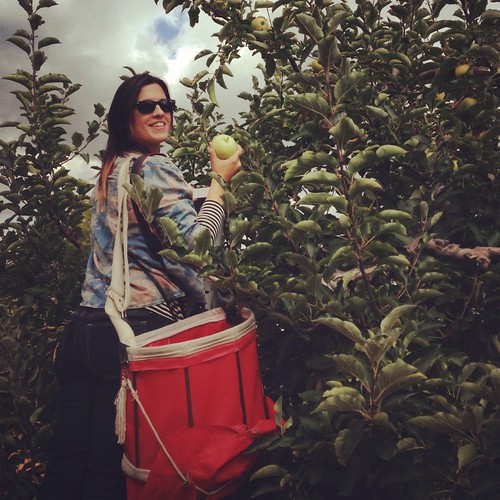
I honestly think I love fresh local apples this time of year just as much as pumpkins and I feel like they don’t get nearly the same amount of love! We finally got out this weekend apple picking at Blackman Homestead farm in Lockport. I didn’t realize it until it was too late that most all of the local farms that normally offer u-pick options started the u-pick earlier this year due to the unseasonably warm winter we had that started the trees blossoming early. That plus some late spring frosts and lots of rain and an extremely hot and dry summer – crops all across the region were definitely affected in lots of different ways. Thankfully most apple farms were affected by all of this only by having early harvests, otherwise no worse for the ware. (Most local apple farms may not have u-pick options, but almost all of them do have their apple harvest already picked and ready for purchase, so please make sure to continue to support your local farms whenever possible)
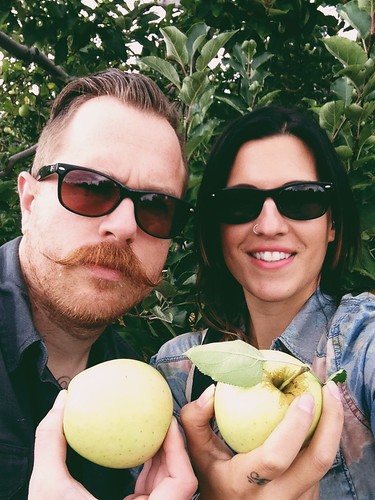
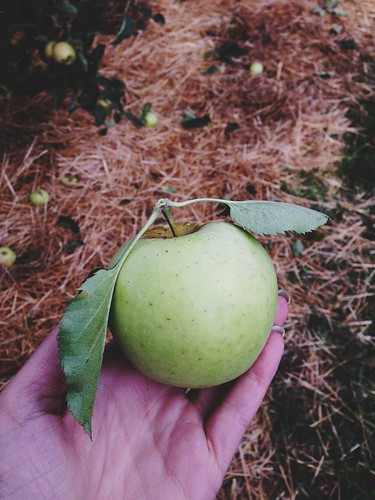
We were lucky that as of Friday at Blackman Homestead the Crispins were ready for picking so we were able to make the trip out on Saturday morning, grab some bags and pick some of the beautiful brightly hued apples! Most of the apples that were left were at the way tops of the trees, but we didn’t mind, we climbed up the ladders and grabbed as many as we could. It was the perfect crisp cool fall weather and the sun was even out for most of our time there. I didn’t want to bombard this post with photos so look for more pics from our trip in this week’s upcoming Friday Photo Fun Day post.
I plan to make lots of fun baked goods and also some fun savory dishes, with the Crispin apples we picked so look for more apple recipes in the coming weeks! I of course also grabbed a bag of my very favorite apple there is, the honey crisp. I seriously am in love with honey crisps, they are so amazing just on their own, sliced up. YUM!
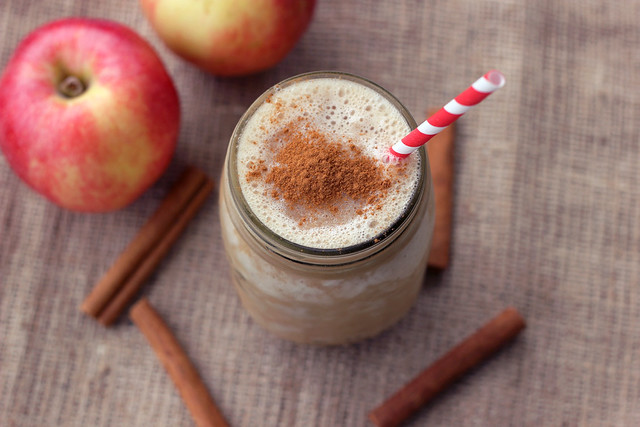
While we were at the farm, I of course grabbed a gallon of their delicious fresh pressed cider. Made from their apples and with no other junk added, it is so delicious. I love apple cider just on it’s own, but I also really love it hot and spiced (and sometimes spiked), it is great in baked goods and now, smoothies! This smoothie is so simple to throw together and it is like fall in liquid form. The comforting apple pie aromas from the spices and the crisp apple cider, plus a little bit of creaminess from the almond milk, it was perfect!
[print_this]Apple Pie Smoothie – Gluten-free + Vegan
makes 2 small servings or 1 large serving- 1 frozen organic banana
- 1 cup unsweetened organic almond milk (I use homemade)
- 1 cup unsweetened local apple cider* (look for good quality made with just apples, no sugar or preservatives added)
- 2 or 3 Medjool Dates (or use your own sweetener of choice such as maple syrup, stevia, honey,coconut sugar, etc.)
- 1 teaspoon ground cinnamon
- 1/4 teaspoon ground nutmeg
- dash of ground ginger
- dash of ground cloves
- 1 small handful of ice
Add all of the ingredients to the blender and blend until smooth and creamy, add as much ice as you would like. Top with a light sprinkle of ground cinnamon and serve.
NOTE: If you don’t have apple cider, a high quality apple juice will also work
[/print_this]
-
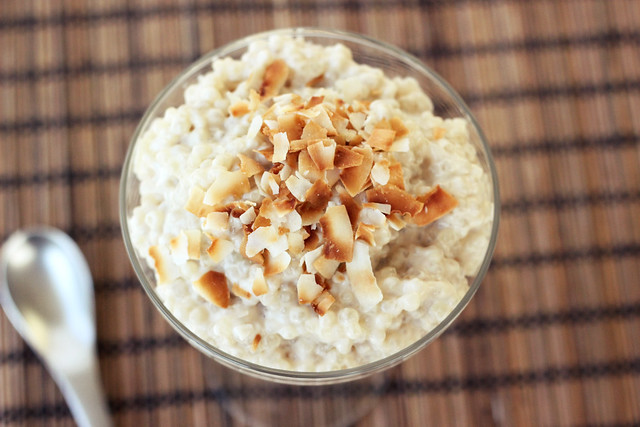
Coconut Tapioca Pudding with Toasted Coconut Chips – Gluten-free, Vegan + Refined Sugar-free

It is no secret that I have a serious love for all things coconut! Coconut milk, coconut oil, whipped coconut cream, vegan ice cream with coconut milk, piña coladas, chocolate coconut cups, and so on and on and on… It is fair to say I go through more coconut milk, coconut oil, shredded coconut and coconut chips than I actually care to admit.
When I stumbled upon this recipe on The Kitchn, I realized right away it was right up my alley, but of course, I of course tweaked it a little to add in even more coconut goodness. A creamy, coconutty, tapioca treat… YUM! The beautiful golden brown, toasted coconut on top brings a nice contrasting crispy texture to this super creamy decadent dessert, it was hard to not eat the whole bowl while it was on the counter cooling. I absolutely love tapioca pudding, always have, however Mark can’t get down with the texture of the little tapioca balls (he thinks bubble tea is one of the grossest things in the world), so I got to enjoy this myself over a couple of days. I definitely wasn’t sad about it.
[print_this]Coconut Tapioca Pudding with Toasted Coconut Chips – Gluten-free, Vegan + Refined Sugar-free
Recipe Via (and slightly adapted) from The Kitchn
Serves 4- 2 cups almond milk, divided
- 1/3 cup tapioca pearls
- 1 cup coconut milk
- 1/4 cup maple syrup (or agave syrup – you could also use honey if you aren’t vegan)
- 1 teaspoon vanilla extract
- 1 teaspoon tapioca starch with 1 tablespoon water mixed in
- 1/4 teaspoon sea salt
- Toasted coconut chips for garnish
In a large glass bowl, add the tapioca pearls and 1 cup of almond milk, stir then cover and chill in the refrigerator overnight (or at least 4 hours). When it has soak for at least 4 hours, add the additional almond milk and the chilled tapioca/almond milk mixture to a medium saucepan, over a medium heat. Once the pudding is boiling, pour in the coconut milk, vanilla and maple syrup. Cook for another 12 to 15 minutes, constantly stirring.
Finally, lower the heat and add in the tapioca starch mixture and salt, stirring and cooking for an additional 5 minutes. Cool in a glass bowl for at least an hour before serving. You can serve it a little warm or fully chilled. Garnish with toasted coconut chips.[/print_this]
-
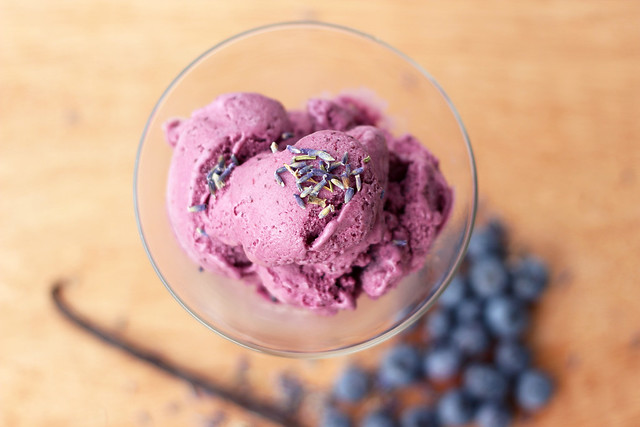
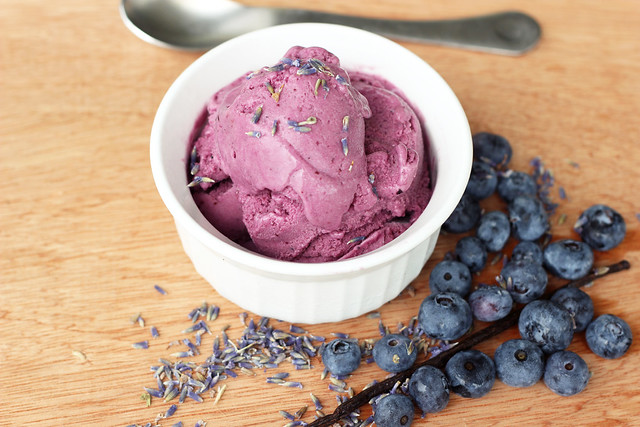
Blueberry Lavender Vanilla Ice Cream – Vegan, Gluten-free, Refined Sugar-free
I cannot believe this is the first time this summer that I have pulled out my ice cream maker. So many missed ice cream opportunities. It actually makes me a little sad. But, don’t worry, I am back and committed to playing with my ice cream maker.
I found myself insanely inspired this past weekend after a super fun trip to the farmers market after yoga. I met up with some friends and I ended up spending over 2 hours there, buying delicious foods, chatting, getting inspired and seeing tons friends and even some family. It was a really fun morning. I had planned in advance to meet up with Janine, Alyssa and her boyfriend Daren. Alyssa recently started a blog, Wild Roots, where she shares her recipes for allergen-free foods as well as her incredible knowledge of the many benefits of the foods she cooks with. Alyssa has some really big plans she is working on that is going to be great for Buffalo, I am so excited for her and plan to be one of her biggest cheerleaders. Alyssa and I talked forever about food and cooking, playing with pairing unsuspecting ingredients together and so much more. Alyssa is such a breath of fresh air with her food and I am totally inspired by what she is doing. After sharing a recipe last week for Lavender Honey Glazed Sweet Potato Wraps with Garlic Crusted Mushrooms & Spicy Pea Spread, I recalled my search for lavender a while back where I was left empty handed. I didn’t think it would be that hard to find. I had planted some lavender last summer and for whatever reason it never really grew that well. Whether it be hubby’s lawn mower, the dog, another critter or just imperfect conditions, it never really made it. I had so many plans for that little plant and it just left me dreaming.
After being reminded of my search for lavender, finding out where to buy it locally (the Lexington Co-Op near the other dried spices and herbs), spending a few hours at the farmers market (where I purchased a beautiful basket of blueberries) and chatting with friends about delicious food, I came home inspired to make something seasonal, beautiful and tasty. This Blueberry Lavender Vanilla Ice Cream is just as delicious as it looks. That color is even more beautiful that the photos show and as I was making it, I wished I could bottle the scents up and wear them as a perfume. If the idea of eating lavender doesn’t appeal to you because of it’s floral scent, I really recommend trying to give it a shot anyway. You’ll be quite surprised at how wonderful it is. The subtle flavor that the lavender brings is so beautiful, delicate and perfect with the fresh tartness from the blueberries. The strong vanilla undertones rounds it all out so nicely, bringing it all together into a creamy, dreamy dessert that is perfect on a hot summer evening.
It was quite hot and muggy today, so I took my photos as fast as I could. I may have eaten a bowl of ice cream in between shots, ya know – cuz it was melting and all.
Happy 4th of July to all of my American readers. I hope your day is filled with family, friends, fun, delicious food and lots of magic! Enjoy!
[print_this]Blueberry Lavender Vanilla Ice Cream * – Vegan, Gluten-free, Refined Sugar-free
- 1 quart fresh blueberries
- 1/2 cup maple syrup (honey or agave)
- 1 cup water
- 2 1/2 cups full fat organic coconut milk (about 1 1/2 cans)
- 2 tablespoons dried culinary lavender blossoms
- 1 vanilla bean (or an additional 1-2 tablespoons of vanilla extract at the end)
- 1 cup unsweetened organic vanilla almond milk
- 1 teaspoon vanilla extract
In a large sauce pan over medium-heat, add blueberries, maple syrup and 1 cup water, bring to the start of a boil then drop the heat down and allow it to simmer for about 5-8 minutes. Continue simmering until the berries begin to pop and break open, remove from the heat and using a fine strainer, pour the mixture into the strainer, over a bowl, catching the berries. Then add the syrup back to the saucepan and add the blueberries to the pitcher of your blender and set aside.
Add the coconut milk and lavender to the pan with the blueberry syrup. Slice open the vanilla bean and scrape the seeds into the pan, then go ahead and toss the whole bean in, too. Over a medium-high heat, allow to mixture to simmer for about 5 minutes, then remove from the pan from the heat, cover and allow the lavender and vanilla to infuse for about 15 minutes or longer.
Using the fine strainer, strain the liquid into the blender with the blueberries, gently pressing down onto the lavender and the vanilla bean to get all of the flavor. Add the extra vanilla and the almond milk and blend until very smooth.
Pour the mixture into a large glass bowl, cover and place in the refrigerator for at least a few hours, or overnight. I usually just leave it overnight.
Once chilled, pour the mixture into an ice cream maker and process according to manufacturer’s directions. Eat right away as a soft-serve or add to a freezable container and place in the freezer for at least 8 hours or longer, to firm up. Freeze until it is firm enough to scoop.
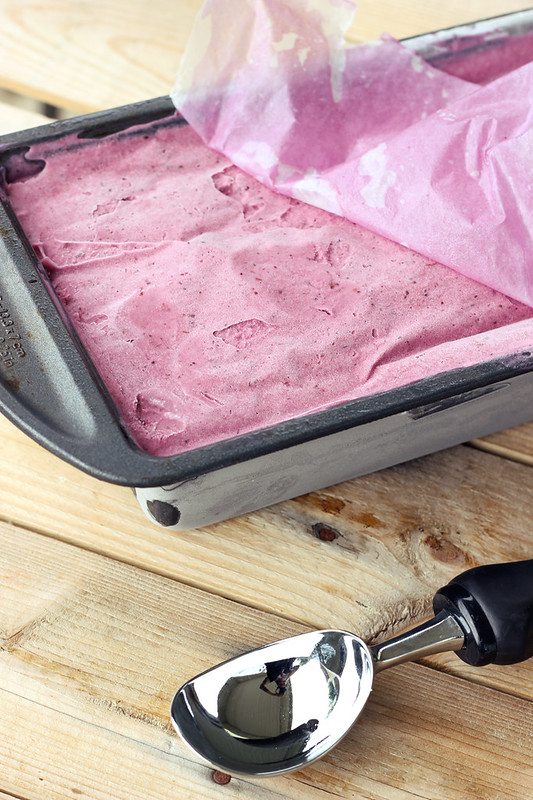
TIPS: Try freezing your ice cream in a loaf pan, covered in wax paper and foil. Really press that wax paper down and every time you serve some, repress the wax paper down. This will help to keep it from getting freezer burnt. You can also add a tablespoon or two of vodka to the mixture, which doesn’t affect the taste but will help keep it from getting too hard. I didn’t do it this time around since I didn’t have any vodka in the house, but I usually do.
*NOTE: If you don’t have an ice cream maker, these would be great as popsicles, too! Thanks for the idea, Alex!
[/print_this]
-
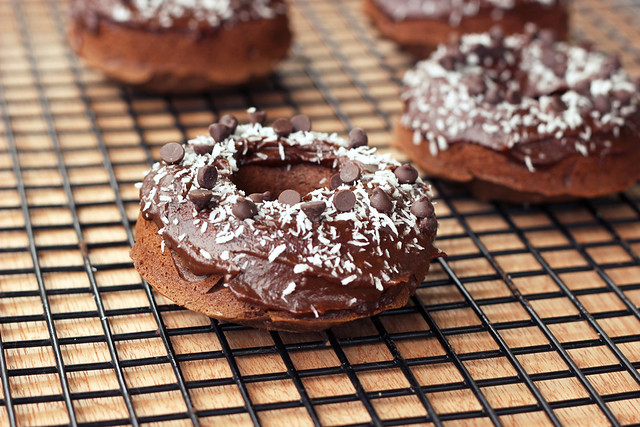
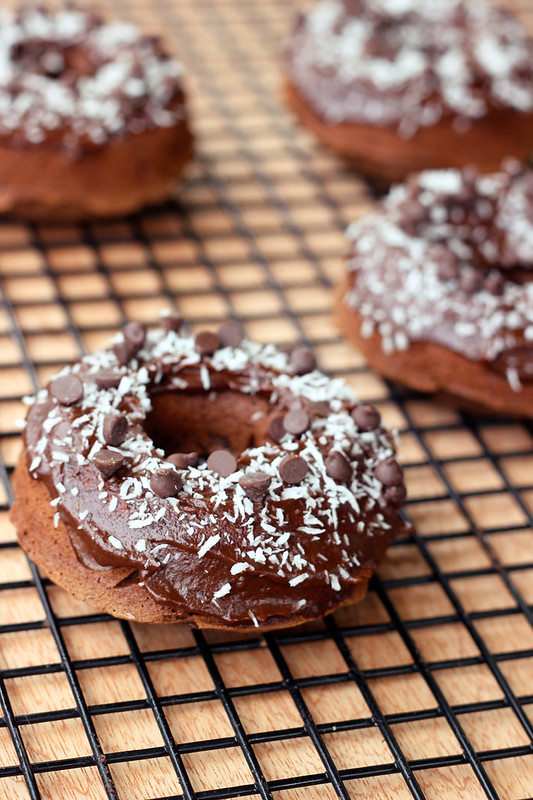
Paleo Double Chocolate Donuts with Coconut {Gluten-free, Dairy-free, Refined Sugar-free}
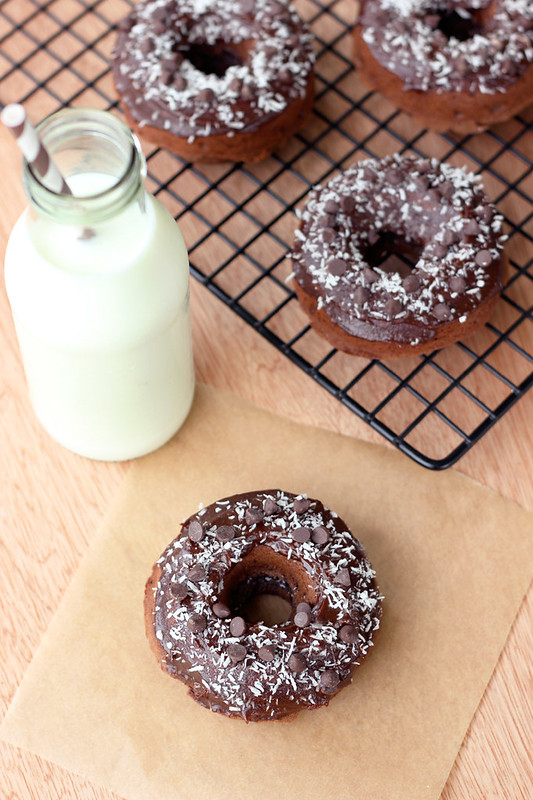
This weekend was the last hurrah for getting things done on the house. The realtor comes in the morning and we are starting the process of getting the house on the market, finally. Yay! Since yesterday afternoon my project was to re-caulk the bath tub and shower walls, it had to sit for at least 24 hours before getting wet. I woke up this morning, realized that I couldn’t shower before leaving for yoga, but felt so gross from all the house work yesterday, so I decided to take the day off and lay in bed for a bit this morning with hubby and the pooch to watch a movie! It felt really nice to just get up at my leisure and be lazy for a bit. It has been a while since I have done that. I will likely squeeze some time in later today for a brief yoga practice at home on the grass in the yard.After the movie was over, I rolled over and asked Mark what he wanted for breakfast. Since most mornings I don’t even eat breakfast since I am at yoga, I get really excited when I have the time to make something special. Mark exclaimed “donuts!” and I jumped out of bed and made my way to the kitchen to start creating. Even though we don’t have kids and Mark may only be a daddy to our pooch, our two cats and our business, I still thought that he should be spoiled this morning for Fathers day. So his wish was my command.
I used Coco from Roost’s recipe for donuts not too long ago and I was incredibly impressed, so I decided to make that my starting point for these. I also decided to play around with a simple frosting recipe that didn’t require any sugar. Topped with some shredded coconut and some mini-chocolate chips, these were perfect and Mark was happy!
[print_this]Double Chocolate Donuts with Coconut- Gluten-free, Grain-free, Dairy-free + Refined Sugar Free
(makes 6 regular sized donuts or 18 mini donuts)- 1 1/4 cup blanched almond flour (I prefer Honeyville brand)
- 1/4 tsp salt
- 1/2 tsp baking soda
- 1/4 cup cocoa powder
- 3 organic farm fresh brown eggs
- 1/4 cup coconut oil, melted (you could also use ghee, grape seed oil, etc)
- 2 tablespoons honey (you could also use maple syrup, brown rice syrup, agave, etc)
- 1/2 teaspoon pure vanilla extract
Preheat oven to 350F. Grease your donut pan with coconut oil.
In a medium-sized bowl, whisk together all of the dry ingredients. Transfer to the blender*.
In the same bowl, whisk together all of the wet ingredients. Add to the blender.
Blend the batter until is very smooth. Pour into greased donut molds, filling them about 2/3 of the way.
Bake for 12 minutes. DO NOT OVERBAKE or they will be dry. Remove the donut pans from the oven, allow to cool in the pan for 3 minutes, then pop them out and all them to cool the rest of the way on a rack. Make your frosting in the meantime.* I never thought to blend a batter like this, but I went with Coco’s suggestion and it is brilliant. It can be challenging to get a smooth batter with nut flours, but using the blender definitely gives you a very nice, smooth batter.
Chocolate Frosting – Gluten-free, Grain-free, Vegan + Refined Sugar Free
- 3/4 cup pitted Medjool dates
- 1/4 cup cocoa powder
- 1/4 cup sustainable organic palm oil shortening or coconut butter
- 1/3 – 1/2 cup water (you may need less or a tad bit more depending on how soft your dates are, be careful not too add too much though)
Add all of the ingredients to a high-speed blender, start with just 1/3 cup of water, you can always add more. Let everything sit for a few minutes, especially if your dates are very firm.
Blend everything together at a high speed. It may take a little bit to get the it started, so you can start at a slower speed and increase the speed a little at a time.
Continue blending long enough to get a smooth, velvety consistency, this may take 5 minutes or more. If the frosting seems like it isn’t moving around in the blender because it is too thick, before you add more water, use a spatula to unstick the mixture from the blades and make some room in there. Put the lid back on and keep blending. When there are relatively no bits of dates and you have a rich, smooth chocolatey mixture, your frosting is ready.
In addition to donuts, this icing would be great on cakes, cupcakes, brownies, cookies, etc. Store any remaining icing in the refrigerator.
SERVING THE DONUTS:
Additional toppings:
1/4 cup unsweetened finely shredded coconut
1-2 tablespoons of semi-sweet mini chocolate chipsOnce the donuts have cooled, spread a thin layer of frosting on top and sprinkle with some finely shredded unsweetened coconut and a few mini chocolate chips. Instead of these toppings or in addition to them, you could also add some crushed cocoa nibs, chopped nuts or anything else you might like.
[/print_this]
-
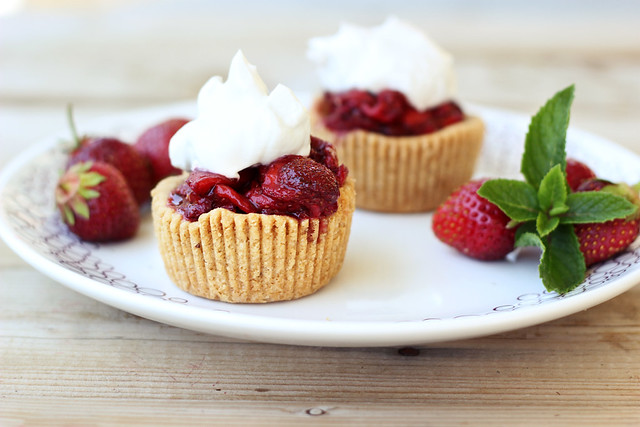
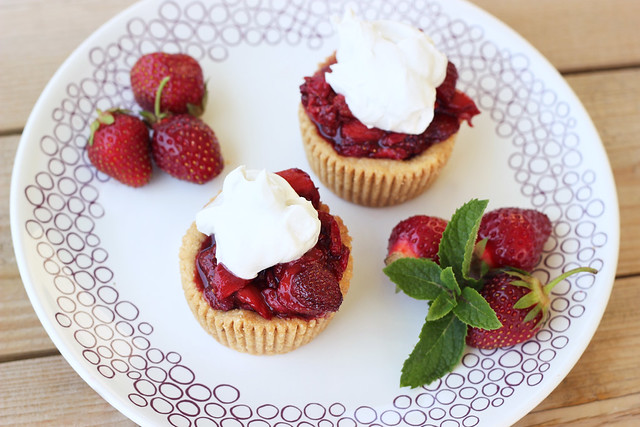
Roasted Balsamic Strawberry Mini-Tarts with Whipped Coconut Cream – Gluten-free + Vegan
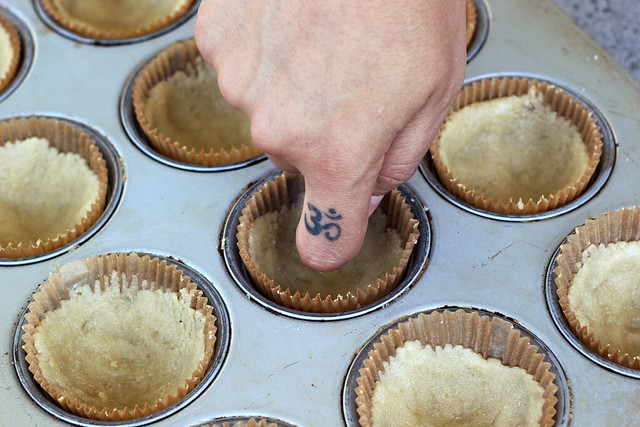
I am so elated over the outcome of this super fun, kickoff to summer-time recipe. It was one of those things I dreamt up (and loosely wrote up) while sitting at my computer working and when it finally came time to make it, I crossed my fingers and dove right in. I had to make a few subtle corrections from my original notes to make the tart shells work perfectly, but other than that, it all came together so perfectly. On the first batch, I didn’t use the paper muffin cup liners and the tart shells didn’t want to come out in one piece, even with greasing the pan, but add in the paper liners, and it was simple as can be!
This recipe is insanely simple to make, please don’t let the three-part recipe throw you off. Just remember to refrigerate your coconut milk the night before for the whipped “cream”. The dough for the tart shells takes just minutes to make, you need only one bowl and you can literally just use your hands to mix it, that’s what I do. It takes just a couple of minutes to get it evenly divided and pressed into the muffin cup and while the mini tart shells bake, you can cut up the strawberries and allow them to sit for a small bit in the balsamic/maple sugar mixture. Once they are done baking, you can chill the tart shells while you roast the strawberries, meanwhile you can whip up your coconut cream and when the strawberries are done, you can serve it all up. It can all be done in less than an hour, probably more like 45 minutes and it is so simple, you won’t believe it. If you want to make it even quicker and skip out on the heat from the oven, serve the strawberries fresh. With or without the balsamic vinegar. No matter which way you make it, this recipe will impress the pants off any one at a party, especially those that are gluten intolerant and vegan. They truly won’t believe that it is safe to eat. It is that good.
My favorite thing about this recipe is that although it is gluten-free and vegan, no one would never know it. Mark kept eating bite after bite telling me, that this was seriously one of the best things I had ever made. ‘Pastry shop grade’ – he even said. Quite the compliment. Beyond the shells being totally grain-free, and everything being refined sugar-free, it is hard to believe the fluffy, creamy whipped “cream” is dairy free. I honestly need to have a can of full-fat organic coconut milk on hand at all times, so I can always make some whipped “cream”. The other great thing about this recipe is how versatile it is. It can go through the summer with you as different fruits come into season. I cannot wait to make it in the fall with some baked spiced apple slices. YUM!
I am happy to once again be posting over at Free People’s blog, BLDG 25 where this week they are celebrating all things ‘Americana’. When they asked me to share a recipe that went along with that trend, I kept thinking of all of the wonderful summertime picnics, BBQs and beach trips. I wanted something simple and tasty, but full of beautiful, bright summertime flavors! Although nothing says summertime in America better than ice cream, berry pies and strawberry shortcakes, if you are the gluten-free and/or vegan at the party, that doesn’t always leave much for you. So, I decided to marry the idea of a berry pie with strawberry shortcakes to create these adorable little mini-tarts!
This recipe was originally shared on Free People’s Blog, BLDG 25.
[print_this]Roasted Balsamic Strawberry Mini-Tarts with Whipped Coconut Cream – Gluten-free + Vegan
makes 12Grain-free Mini Tart Shells
- 2 cups blanched almond flour
- 2 tablespoons maple syrup
- 1/4 cup coconut oil, melted
- 1/2 teaspoon baking soda
- 1/8 teaspoon salt
Preheat oven to 350ºF. Line 12 cups in a muffin tin with paper liners (you could also use greased mini tart pans). In a large bowl, add all of the crust ingredients and mix very well. Really get your hands in there to get it all together and work it into a nice dough. Add the crust mixture to the muffin cups and press down firmly into the cup using your knuckles, going up the sides a tad bit. Bake for 15-20 minutes until golden brown. Allow to cool in the pan for about 10 minutes, then place the pan in the refrigerator until you are ready to serve.
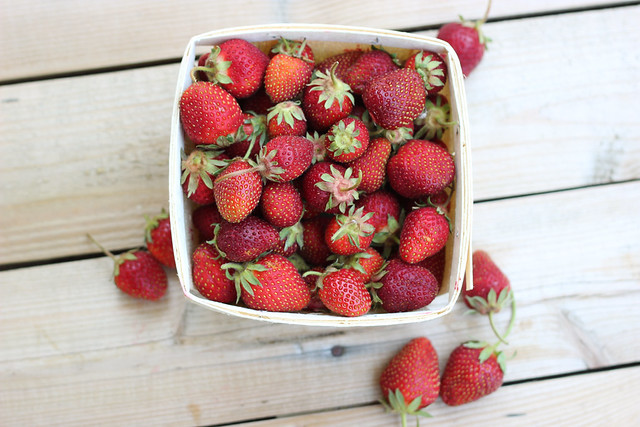
Roasted Balsamic Strawberries
- 2 pints baskets of strawberries, hulled and sliced (it’ll look like a lot of berries, but they cook down a lot)
- 3 tablespoons balsamic vinegar
- 3 tablespoons maple sugar (or palm/coconut sugar, raw sugar, etc)
Raise the oven to 400º F. Toss the strawberries with the balsamic vinegar and maple sugar. Allow to sit for a few minutes while your oven preheats. Pour all of the strawberries and their juices onto a parchment paper lined baking sheet or any other overproof dish or pan. Roast for about 10 to 12 minutes until the strawberries are hot but not too overly mushy. You can separate the berries and pour off some of the juices if you want to use it for drizzling, or you can just keep it all together. I kept some of the juice aside to add to some sparkling water for a refreshing drink.
Whipped Coconut Cream
- 2 cans organic full fat coconut milk, refrigerated overnight
- 1 tablespoon maple syrup (use more or less or none at all, or whatever your favorite sweetener is)
- 2 teaspoons vanilla
Make sure that your cans of coconut milk are well chilled. I recommend leaving item in the fridge overnight. Open the cans of coconut milk carefully, keeping them level. There will be a firm, waxy layer of coconut cream that solidified on top. Carefully scoop this off into a chilled glass bowl. Keep the leftover coconut water, it is great for smoothies.
Using a mixer, whip the coconut cream for 3 to 5 minutes until it becomes light and fluffy, with soft peaks. Mix in your maple syrup and vanilla, if you are using. Place the whipped coconut cream back into the fridge until you are ready to use. This may be more than what you need for all 12 tarts, but that’s ok, it keeps for several days, covered in the fridge.
ASSEMBLING THE TARTS:
Remove the paper liner off of the tart shells. Top each of the tart shells with a spoonful of the roasted balsamic strawberries and a dollop of whipped coconut cream. Serve immediately. [/print_this]


