-
Spring Cleanse: Warm Lentil Salad – Gluten-free + Vegan

YAY!!! Today is Day 7 of my 7-Day Spring Cleanse. Tomorrow is the Spring Equinox and I made it. I feel incredible and I am ready to start the new season feeling refreshed, energized, cleansed and invigorated!! I am so happy I did this, it is exactly what my body and my mind needed right now.
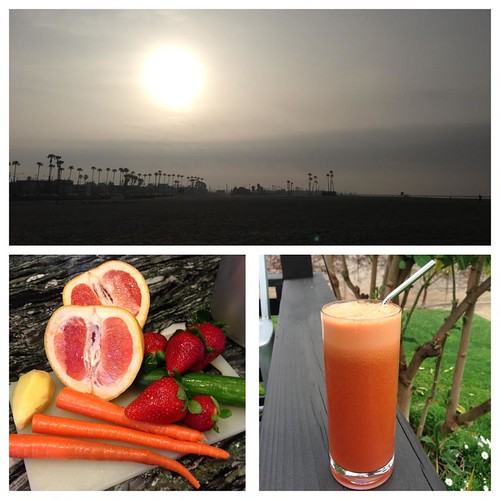
In celebration of Day 7, I took a 2-mile run this morning at the beach, then came home and did 30 minutes of yoga. For breakfast I made a super delicious fresh juice of pink grapefruit, ginger, carrot, strawberry and Persian cucumber. Such a perfect way to celebrate the final day of this cleanse!
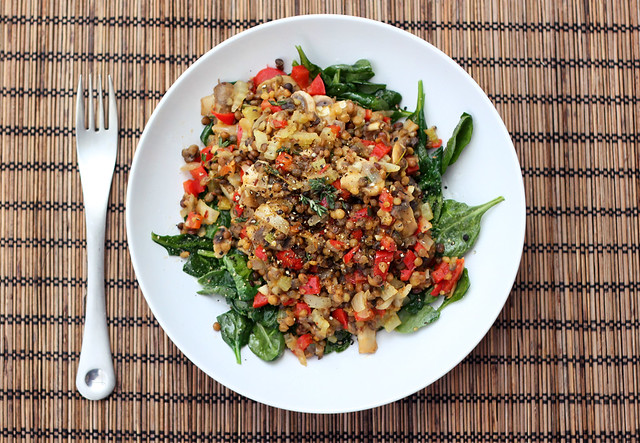
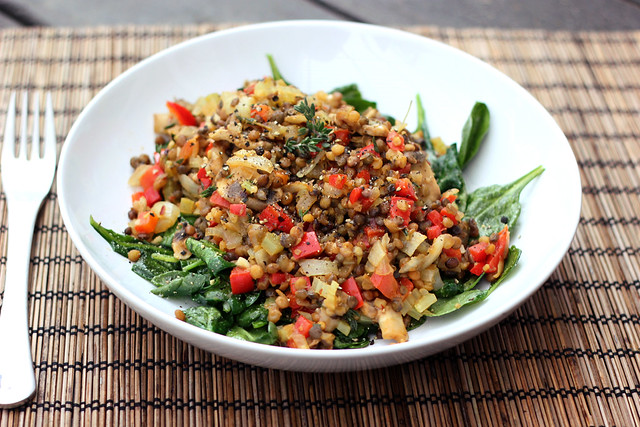
For lunch today, I made this humble and simple-to-make warm lentil salad. It has become my favorite thing this week. I have made it a couple times and I have a feeling it is going to be on regular rotation around here for lunch.
It is so quick to make and it is loaded with flavors, colors and it is so satisfying. I like to barely wilt the baby spinach to take the chill off and so it isn’t totally raw, but I like it to retain some of it’s crunch. Feel free to leave it totally raw if you wish. I rarely add onion powder to things, but the spinach was just screaming for a little something special to give it just a hint of flavor on it’s own.
The salad has so many great textures and flavors from all of the different vegetables and the lentils make it really hearty. By serving this salad warm, I have found it to be a really comforting meal. Recently, I have fallen in love with the white balsamic vinegar from Trader Joes, on my friend Kathleen’s suggestion, so I have been using it a lot this week. It was the perfect way to finish this dish. If you don’t have that, regular balsamic would work nicely as would rice wine vinegar, champagne vinegar, etc.
If you have been following along with this cleanse, whether you are on day 7 or day 1, how are you feeling? I hope everyone has enjoyed following along with me on this cleanse, I hope I didn’t annoy folks too much on my Facebook or Instagram feeds, but it has been great for me to stay aware and honest with myself by sharing what I was eating. It was also so encouraging to see how so many people were inspired to do a cleanse of their own in honor of the changing season. It really is the perfect time for it. Thanks for following along. Happy Spring Everyone!!
[print_this]Warm Lentil Salad – Gluten-free + Vegan
makes one fairly large entree-sized portion (and then some) or 2-4 smaller servings1 tablespoon olive oil
2 1/2 cups organic baby spinach, washed
1/4 teaspoon onion powder
1/2 organic onion, diced
1/2 organic red bell pepper, diced
2 organic celery stalks, diced
2 cloves garlic, minced
1 1/2 cups organic mushrooms, sliced
1 teaspoon fresh thyme, chopped
1/4 teaspoon dried red pepper flakes
1 cup cooked lentils
2-3 teaspoons white balsamic vinegar (regular balsamic will work just fine too)
Salt and pepper, to tasteIn a large pan over a medium-high heat, heat just 1-2 teaspoons of the olive oil. Add the baby spinach and onion powder and stir around till it is coated and cook just 2-3 minutes, for the spinach to just barely wilt. You want it to retain some of the crunch, just to soften it a tad. Add the spinach to your serving bowl.
Add the remainder of the oil, once heated add the onion, bell pepper and celery. Cook for about 3 minutes until they begin to get tender, add the mushrooms, garlic and the spices. Add a little salt and pepper to taste. Stir and cook until the mushrooms are cooked through, maybe another 3-5 minutes, stirring frequently. When the mushrooms are close to being cooked, add the cooked lentils and toss it all around together and cook only long enough for the lentils to be heated up (if they aren’t already). You don’t want them to overcook and get mushy and smashed up.
Pour the lentil mixture over the wilted spinach and drizzle the vinegar over top. Use as much as you would like. Salt and pepper, to taste and serve warm. [/print_this]
-
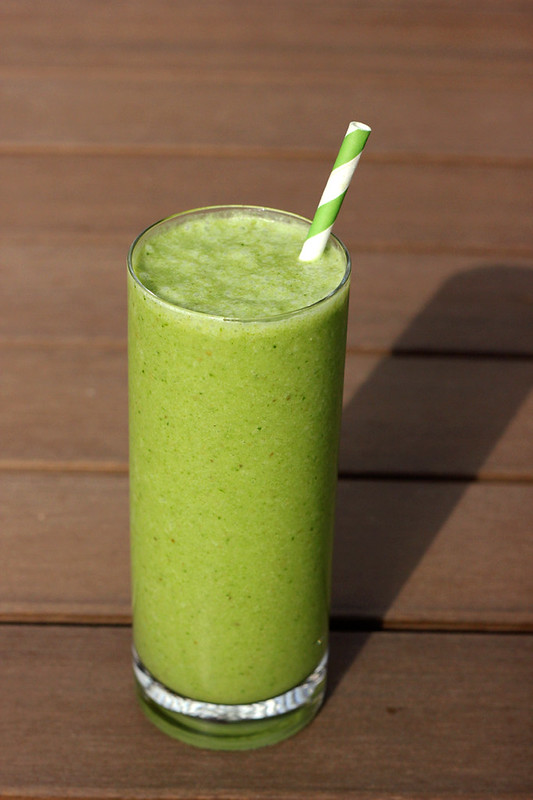
Spring Cleanse – Asian Pear Green Smoothie – Gluten-free, Vegan + Sugar-free
Happy St. Patrick’s Day and Happy Cleanse Day 5 to me!! I am feeling super great today. Tons of energy, my skin is clearing up and I just feel lighter and more grounded, all at once.
I am never one to celebrate St. Patrick’s Day, honestly I don’t think I ever have outside of possibly a grade-school classroom shindig. Since everyone was posting photos of their green clothes, green beer and green-filled parades and whatever else green you can think of, I was inspired to take a run first thing this morning enjoying all of the beautiful greenery around Southern California right now. The grass is vibrant, the trees are blooming and there is a wonderful aroma in the air. I am trying to get into a regular running routine, now that I have such incredible views to keep me inspired. Even though it will be a slow start getting my body used to the idea of running and everything that goes with it, I have to start somewhere.
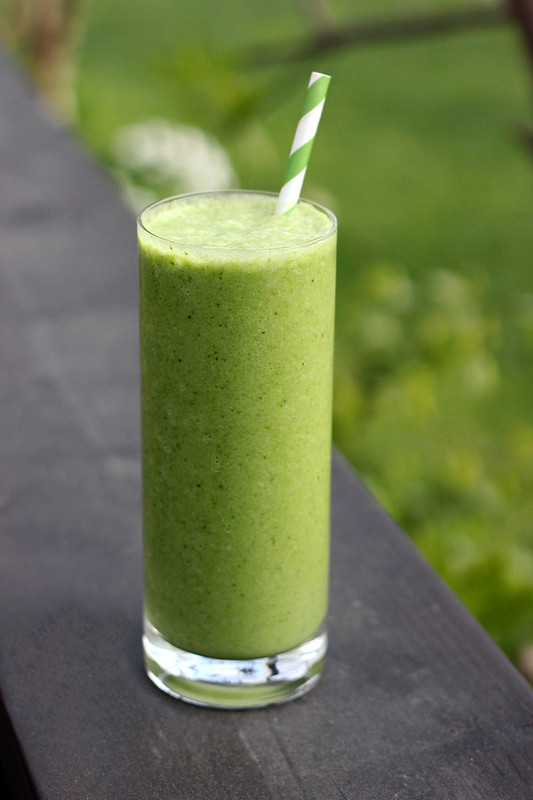
After this morning’s run, I was craving another green smoothie. I was super happy with the green smoothie I made the other day, but wanted to play with some of the other amazing ingredients I picked up at the farmers market earlier this week. There is a local organic apple farmer that had tons of delicious apples, but he also had some beautiful and super flavorful Asian pears, the large round yellow skinned ones, I believe they are Hosui. I grabbed a couple of those and anticipated adding them to a fresh crisp salad, but then was inspired to add some to this morning’s smoothie.
Besides the beautiful green hue, this smoothie was full of flavor and was nice and creamy, with just the perfect amount of sweetness. If you don’t have an Asian pear, just go with a medium apple, of your favorite variety. If you wanna add 1/2 an avocado instead of the banana, like my last smoothie, go for it, you may just want to add another date. if it is lacking sweetness.
Are you celebrating (did you celebrate) St. Patrick’s Day? If you are on the cleanse, did you eat something green today? Hope you have all been following along with my cleanse on my Facebook page, where I have been sharing what I am eating for each meal.
[print_this]Spring Cleanse – Asian Pear Green Smoothie – Gluten-free, Vegan + Sugar-free
makes 1 large serving or 2 small- 1 cup organic non-dairy milk or water (I used 1/2 coconut milk and 1/2 water)
- 1 cup organic baby spinach
- 1/2 large organic Asian pear, cored and diced (or 1 whole small/medium, mine was pretty big)
- 1/2-inch piece of organic ginger, peeled and chopped
- 1/2 organic banana (preferably frozen)
- 1 organic Medjool date, pitted
- 1/4 teaspoon ground nutmeg
- 1/2 teaspoon cinnamon
- A few ice cubes
Add all of the ingredients to your blender (in the order above) and process until smooth and creamy.
* I know it is repetitive on the “organic”, but it is especially important to consume organic produce when cleansing. All of my ingredients, included the flax and cinnamon were all organic.
[/print_this]
-
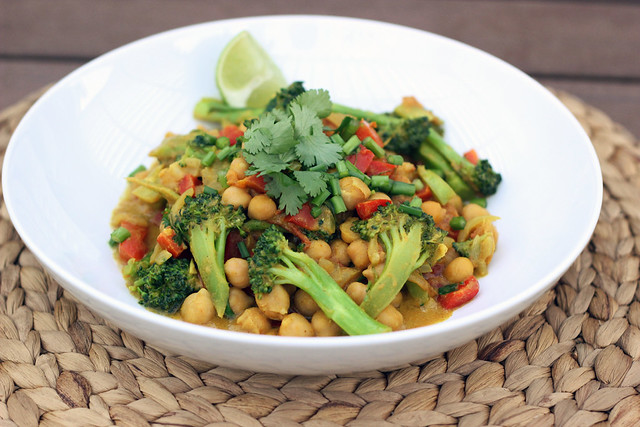
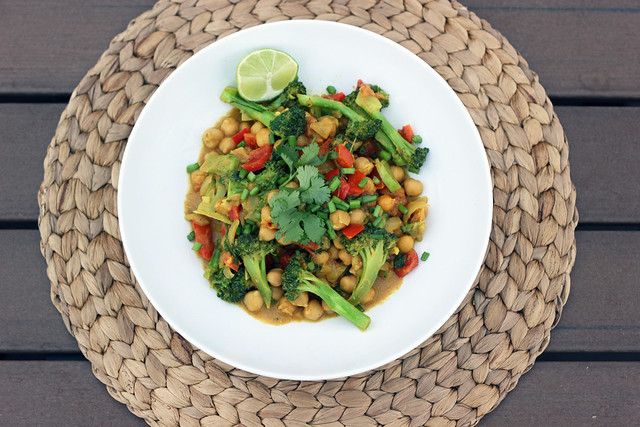
Spring Cleanse – Broccoli and Chickpea Curry – Gluten-free + Vegan

Good morning guys!! Today is day 4 of my 7-Day Cleanse. Yesterday, day 3, was a lot easier than day 2. No more headaches, but I definitely felt pretty tired. I had that delicious creamy green smoothie for breakfast and for lunch I heated up some of the leftover vegetable soup that I had made the night previously for dinner (see my Facebook page for a photo and description of the soup). I decided a curry for dinner sounded perfect. I need you to know that I fought off every single desire to serve this over brown rice, like I was craving. I wanted to keep the first 3-4 days of my cleanse totally grain free, since I am absolutely a carboholic!! Always have been. Honestly, I didn’t miss the rice one bit. Seriously.
This curry is full of flavor and has a very satisfying crunch and texture to it, and it is insanely simple and quick to make. There is so much going on with the different flavors and the creamy curry sauce is so delicious. And look at all of those beautiful colors! What a feast for your eyes and your tummy! I ended up sprinkling some shredded unsweetened coconut on top after I took photos, along with the fresh cilantro and garlic chives and it was amazing. Mark even liked this dish and it is hard to get him to eat anything that even slightly resembles Indian food (after last year’s food poisoning incident at an Indian restaurant in Austin).
FYI – if you prefer to make your own curry spice blend, definitely go for it. I have a premixed blend that I bought at an Asian market and I really love it, so it makes this dish that much easier.
How are you feeling today on Day 4 if you are following along? What have you been eating? Hope you have all been following along on my Facebook page, where I have been sharing what I am eating for each meal.
[print_this]Broccoli and Chickpea Curry – Gluten-free + Vegan
serves 2- 1/2 – 1 tablespoon olive oil (ghee or coconut oil would be great here too)
- 1 small organic onion, diced
- 1/2 large (or 1 small) organic red bell pepper
- 1-inch nub of ginger, peeled and grated
- 1 clove garlic, minced
- 1-2 tablespoon yellow curry powder (I prefer a lot and a lot of heat, so I use 2 TBS +)
- salt to taste
- 1 head organic broccoli, cut into florets
- 1 medium organic tomato, diced
- 1 cup organic chickpeas cooked, you can use canned (BPA free) or if you soak dried beans over night and cook them, those would be even better
- 2 tablespoons (up to 1/4 cup) full-fat organic coconut milk (you can certainly use more, I was just looking to go light)
- 1 lime
- bunch of cilantro
- Green onions or garlic chives
- shredded unsweetened coconut
In a large pan, heat oil. Add onion and bell pepper. Sautee for a couple of minutes until the onion is slightly translucent and both are beginning to get tender, add the ginger and garlic, stir around and cook for about a minute, until fragrant. Add the curry powder and salt to taste. Give everything a good stir to get it all covered in the spices.
Add in the broccoli, sautée/stir fry until tender to your liking. Add in the tomatoes, chickpeas and coconut milk, stir around and let it all simmer for a 5-10 minutes. Just before serving, squeeze in the juice from half the lime and a bunch of cilantro, stir around and taste. Adjust seasonings to your preference.
Serve as is (which is how I ate it) or over brown rice, topped with some fresh cilantro, green onions, a lime wedge and some shredded coconut if you wish (forgot to put it on for the picture, but it sure is good).
* I know it is repetitive on the “organic”, I truly believe it is always good to choose organic, but it is especially important to consume organic produce when cleansing!
[/print_this]
-
7-Day Spring Cleanse Shopping List
During a spring cleanse when we are transitioning from the dry cold winter season to the warm and wet spring season, we should be looking to eat more foods that are Pungent (Spicy), Bitter, Astringent / Light, Dry, Warm: such as flavorful steamed veggies, brothy soups, brown rice. Eat less foods that are Sweet, Sour, Salty / Heavy, Cold, Oily: such as fried foods, ice cream, heavy dairy.
Below is my personal shopping list for the upcoming week. Please remember you always want fresh, never frozen or canned and always look for organic, local and non-GMO. Herbs can be fresh or dried.
Again, as I previously mentioned in my original post about the basics of this 7-day cleanse, this isn’t a specific cleanse and I am not a medical professional. I base what I will be eating on this cleanse both on traditional Ayurvedic knowledge and knowing my own body well enough to know what gives me difficulties. Your cleanse and your shopping list will likely look different. Ayurveda doesn’t limit corn, soy or dairy, or even lean meats and fish, on many of it’s cleanses, I however find that I have issues and troubles digesting these things in large amounts and I am choosing to remove them on this particular cleanse to give my body the rest it needs at this time to heal, energize and rejuvenate in preparation for the new season ahead.
Vegetables
Artichokes
Avocados
Asparagus
Beets
Bell Peppers
Broccoli
Brussels Sprouts
Cabbage
Cauliflower
Carrots
Celery
Collard Greens
Fennel
Garlic
Ginger
Green Beans
Kale
Leeks
Mushrooms
Mustard Greens
Onions
Peas
Spinach
Swiss Chard
WatercressFruits
Apples
Blueberries
Coconut (fresh and dried)
Grapefruit
Lemons
Limes
Papaya
Pears
Pomegranates
Strawberries
All BerriesLegumes
Any Sprouted Beans
Adzuki
Garbanzo
Kidney
Lentils
Lima
Mung
Split PeaGrains (sparingly)
Amaranth
Brown Rice
Brown Basmati Rice
Millet
QuinoaOils
Olive Oil (in moderation)
Ghee (in moderation)Nuts and Seeds
Flax Seeds
Chia Seeds
Pumpkin Seeds
Sunflower SeedsSpices and Herbs
(Really anything goes, but here are the ones I like to make sure to have around during a cleanse)Black Pepper
Cardamom
Cayenne
Cinnamon
Clove
Cilantro (fresh)
Coriander
Cumin
Fennel
Fenugreek
Ginger (fresh and dried)
Turmeric (fresh and dried)Additional
Almond Milk (unsweetened, use sparingly)
Coconut Milk (use sparingly)
Honey
Herbal Teas such as hibiscus, chicory, cinnamon, dandelion, jasmine, lemon balm lemon grass, peppermint, yerba mate, etc -
My Spring Cleanse. The Basics.
As most of you know from following my blog the past few months, my life has been in a very transitional state. Probably more so than ever before in my life. We sold our house in Buffalo at the end of 2012, after living there nearly 10 years and we closed on it right after the New Year. We went from the hustle and bustle of a ton of events and travel, and all the rest of the holidays – right into packing our house up and putting most of it in a moving truck to go into storage in California awaiting our arrival two months later. From mid-January until mid-February we temporarily moved ourselves to my parent’s house in Buffalo, so we could wrap up all loose ends on the business and in our personal lives, we sold our second car and flew out to California for a week to find a place to live. We got lucky and found a place on day 1 of looking and we got to rest for a bit to take in what would soon be our new home. We flew back to Buffalo and had less than two weeks to finish packing up, see everyone we wanted to see, have one last big sale of our silkscreened posters and other products to what was home to our business for nearly 10 years. Then, we packed up what was left plus ourselves and the pooch into a moving truck and headed west on a week-long drive. We arrived just over a week ago and we have been getting settled and acquainted with our new home ever since.
Needless to say, life has been a whirlwind and I have felt quite floaty and ungrounded for quite some time. Coming from the cold hibernation of Buffalo as well as the hectic transitional state my life has been in for over 3 months, my body is looking to align with the lightness of spring and I am ready to get back to reality of what is my new life here in California. With the Spring Equinox beginning on Wednesday, March 20, I want to prepare my body and mind for a new season and a new life journey. I love celebrating new beginnings with a cleansed mind and body and this is the perfect time to do it. The spring and fall equinoxes are the only dates with equal daylight and dark as the sun crosses the celestial equator. As the earth comes into a time and energetic change, I am seeking to shift my mood and emotions away from the darkness of winter into the brilliant renewing energy of the Spring.
Now is the time to get things moving again and clear out our systems ready for a summer of activity. It is the perfect time to focus on cleansing and rejuvenation to rid the body and mind of toxins. Beginning this Wednesday, March 13 and ending on the Spring equinox, one week later March 20, I am embarking on a 7-day Spring cleanse and I wanted to share my plan with all of you, since I know there was some interest on Facebook.
PLEASE NOTE: I am not a doctor nor a health professional, coach or expert in any way, shape or form. This cleanse is what I have to created based on what I have found to work for me, my body and my energy. Do NOT do anything that isn’t healthy for you and if you have any medical conditions at all, please do not enter a cleanse or a detox without the care or guidance of a physician. I am simply sharing my plan and experiences for anyone that is interested in what I am personally following.
The Tasty Yummies 7-Day Spring Cleanse
Spring is a time of transition, the change from Winter to Spring is one of the most stressful and challenging shifts we go through all year. In many places, Winter, with its cold weather, gradually gives way to the increasing heat of Summer, so we go from a time of excess kapha (water and earth) energy to the increasing heat of the pitta (fire element) season.
As with the cleanses I have done in the past, I am loosely following the Ayurvedic traditions, along with the items I tend to have issues with, personally. Ayurvedic wisdom recommends working with the body’s natural shifts that occur at the juncture of seasons. In addition to this cleanse, I will be continuing my daily yoga practice, focusing a bit more on detoxifying and cleansing asanas. Plus, I will be making time each morning for meditation and self reflection. I would like to someday soon visit a proper Ayurvedic doctor and learn more about my dosha(s) and what is right for me, so I won’t be getting too dosha specific, this time around, as even with many online quizzes, I am still not 100% on which dosha(s) I am. I plan to just focus my food on what is right for the season and the transition from kapha to pitta.
Ashtanga Hrdayam, one of the classical texts of Ayurveda, reminds us that “foods which are hard to digest and cold, sleeping at day time, foods which are fatty, sour, and sweet should [all] be avoided.” Focus instead on foods and activities that are dry, heating, light, and energizing. Enjoy hot water to help flush and rehydrate the system, and eat light, well-cooked foods that will be easy for your body to digest. Each morning, I plan to, as I always do, wake up and enjoy a warm glass of lemon water. The Institute for Integrative Nutrition says “The simple combination of warm water with fresh lemon can boost your immune system, alkalize and kickstart your digestion, improve skin health, and hydrate you. Just make sure to drink the lemon water after you brush your teeth because the citric acid could wear down your tooth enamel if followed by brushing.”
Since, I have had quite a few people ask me about how I cleanse, I thought I would put together a post with a very loose description of what I will personally be doing for this cleanse. If you have any additional questions about what I am doing, please post them below and I will do my best to help. Again, please keep in mind, this isn’t a professional program, it is simply what I have created to work for me, my body and my health. Do what is right for you and please listen to your own body and it’s needs!

I am avoiding the following things:
Dairy†**
Eggs
Refined Sugar
Excess Salt (I will use a very small amount when cooking)
Caffeine
Alcohol
Meat (chicken, beef, pork, etc)
Fish and Shellfish (shrimp, scallops, mussels, etc)
Gluten (wheat, barley, oats, rye, etc)**
Soy
Corn
Peanuts
Foods with preservatives, additives or chemicals, and foods grown in an environment laced with chemical fertilizers or pesticides, and canned, frozen or processed foods.**
I am limited all grains and starches, hoping to avoid them through the entire cleanse, if possible.†Ayurveda doesn’t restrict dairy, but I personally seem to have issues with it and I typically avoid cow’s milk dairy all of the time. On this cleanse, besides ghee, I am avoiding ALL dairy during my cleanse.
** these are all things that I personally avoid on a regular basis, but are very important to a cleanseSo you are probably wondering what exactly I am eating, then…
What I am eating:
Fresh organic fruit. I am going light on the fruit because of the sugar and I am focusing on suggested fruits that are best for digestion such as apples, pears, figs, prunes, papaya, cranberries etc.
Fresh organic veggies. Some of the best for digestion are leafy greens, cabbage, celery, brussels sprouts, broccoli, etc
Whole organic grains such as brown rice, quinoa, amarynth, buckwheat, millet – I plan to limit my grains to VERY little during this cleanse, one serving a day or less
Beans like lentil, split peas, mung beans, etc
Vegetable juice and broth
Soups and stews made with vegetables, legumes and grains.
I am cooking with a small amount of olive oil and/or ghee (indian clarified butter that is GREAT for detox)
Raw honey and maple syrup (extremely sparingly)
lots of luke warm water with lemon and/or ginger
detox tea (I like Yogi brand Detox tea)
I am also taking probiotics in the morning after breakfast (I use a basic Probiotic from just Walgreens, which I am already taking daily)
I will continue to take my variety of daily supplements that I have discovered benefit me and my body’s need, through working with a professional.I plan to get as many recipes on this blog throughout the cleanse as I possibly can, so you can see a good example of how I eat when I am cleansing. During cleanses I like to give my mind the break and not get too crazy with my creations and stressing about my recipes and measuring foods, etc – so many times I will be cooking very, simple and humble dishes, that require little measuring and recipe specific instructions. For this reason, since recipes may not be as abundant on here as you may be looking for, I plan to share, throughout the day each day of the cleanse, what I am eating throughout the day on my Facebook page.
Here are some additional tips that I have learned along the way:
Some of the differences with an Ayurvedic cleanse vs a regular cleanse is that it teaches you to avoid or focus on foods specific to you and your body-mind type (or your dosha) and it’s needs. Also, although you should be eating TONS of fresh fruits and veggies, you shouldn’t eat them raw during this cleanse. Raw foods are harder on your digestive tract, so you should be heating and/or boiling your veggies and eating them warm.Eat whole, fresh, natural foods, organic if you can get it. Buy your produce fresh, and consume it quickly.
Also avoid ICE cold water and beverages, it can disrupt the “fire” needed in your digestive tract.
Cook with digestion-enhancing, detoxifying spices such as turmeric, cumin, coriander, clove, ajwain, fenugreek, dried ginger, Chinese cinnamon and fennel. Add the turmeric to foods as they are cooking, and sauté other spices in ghee or olive oil and pour over prepared dishes for the best therapeutic benefit.
According to Ayurveda, each meal should be a feast for all of your senses. When your plate reflects an appealing variety of colors, textures, flavors and aromas, your digestive juices start freely flowing in anticipation and your body, mind and heart are all fulfilled by the eating experience.
As I mention above, normally I avoid consuming raw vegetables and fruit since it can disrupt your digestive tract and it is harder to digest, however this time around, I am including juices that I am making from fresh, organic vegetables and fruit.
Look for posts throughout the week with tips on cleansing as well as some recipes and suggestions.
Will you join me on this Spring Cleanse? Let me know if you will be and feel free to share your thoughts, suggestions, tips or favorite recipes either here in the comments below or on the Tasty Yummies Facebook page. Thanks for following along and namaste!
CHECK OUT MY 7-DAY SPRING CLEANSE SHOPPING LIST HERE.
(tulip image above from Wallpaper Shock)
SPRING CLEANSE RELATED POSTS:
Facebook Album featuring Many of My Spring Cleanse Meals
Spring Cleanse – Curry Quinoa Crunch RecipeSunrise Spring Cleansing Juice Recipes
Spring Cleanse – Creamy Green Smoothie Recipe
Spring Cleanse – Broccoli and Chickpea Curry
Spring Cleanse – Asian Pear Green Smoothie
-
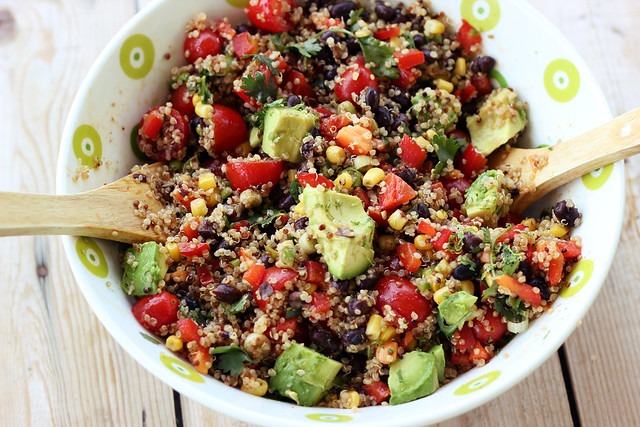
Fiesta Quinoa Salad – Gluten-free + Vegan
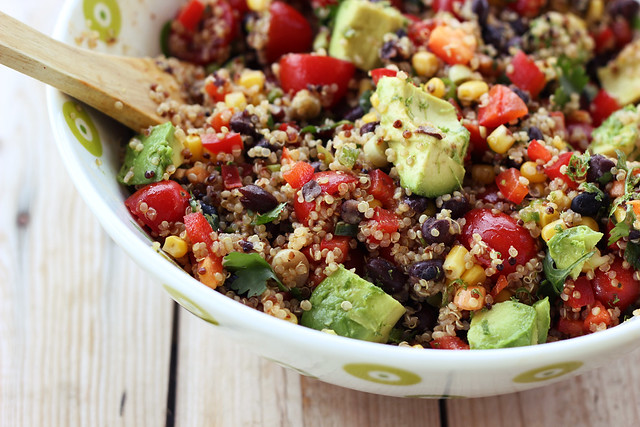
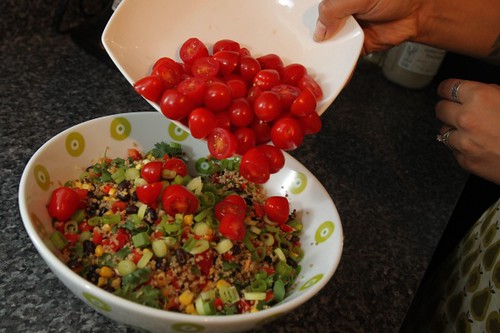
Here is a quick recipe, that I have been meaning to share in full here with you guys for some time now. I made this again this week with the abundance of peppers and tomatoes we have from our CSA. This salad is full of so many of my favorite flavors but even more so, it is so full of beautiful and vibrant colors. A real party in the bowl (hence the name).
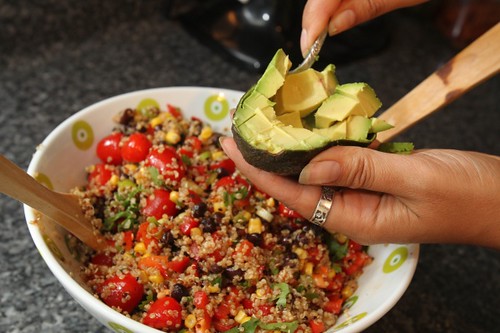
I am a big fan of Mexican flavors and spices, they are so bright and intense! If it were up to me, add just a little cilantro and cumin to a dish and you already have a winner, add avocado and now there is no way I would ever turn it down. Speaking of, I have heard that people either love cilantro or absolutely despise it, I just read a quick article the other day that it could be an actual genetic trait. So do you love cilantro or do you hate it?
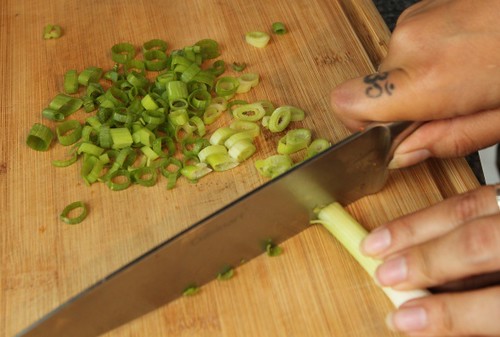
This quinoa salad is one of the recipes I made for my Buffalo News Cook of the Month feature back in July, so I included (above) some of the photos that Sharon Cantillon of the Buffalo News, took while I was preparing this dish. Since I take all of my own photos and really only feature photos of the finished dishes, I thought it would be fun to see some “action” shots. I hope you enjoy.
[print_this]Fiesta Quinoa Salad – Gluten-free + Vegan
serves 6-82 cups cooked quinoa, cooled to room temperature (I used an organic sprouted quinoa trio)
1 red bell pepper, diced
1 jalapeño, finely chopped
1 cup of cooked corn
1 cup black beans
1 pint grape tomatoes, halved
3 fresh scallions, thinly sliced
1/4 cup fresh cilantro, roughly chopped (if you don’t like cilantro, you can use mint instead)
1 avocado, diced
Zest from 1 limeDressing:
1/4 cup olive oil
1 lime, juiced
2 garlic cloves, minced
1/2 teaspoon cumin
1/2 teaspoon chili powder
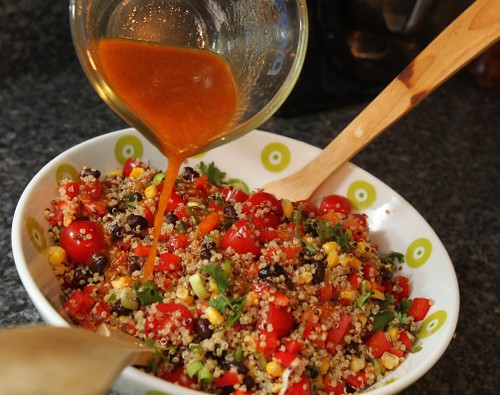
1/2 teaspoon saltAdd all of the dressing ingredients to a small bowl and whisk very well to combine. Set aside.
Add the cooked (and cooled) quinoa to a large serving bowl. Add everything to the serving bowl with the quinoa, except the avocado. Toss very well to combine.
Give the dressing a quick whisking again to combine and pour it over the salad. Top with avocado and lime zest. You can also add another small handful or two of the fresh scallions and fresh cilantro. Salt and pepper to taste. Serve the salad immediately at room temperature or chilled. [/print_this]
-
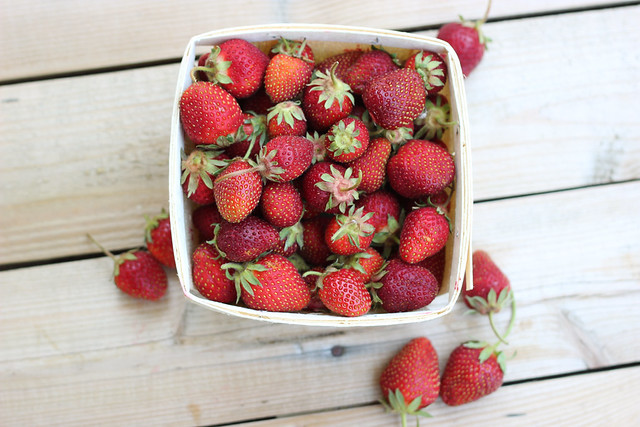
Roasted Balsamic Strawberry Mini-Tarts with Whipped Coconut Cream – Gluten-free + Vegan
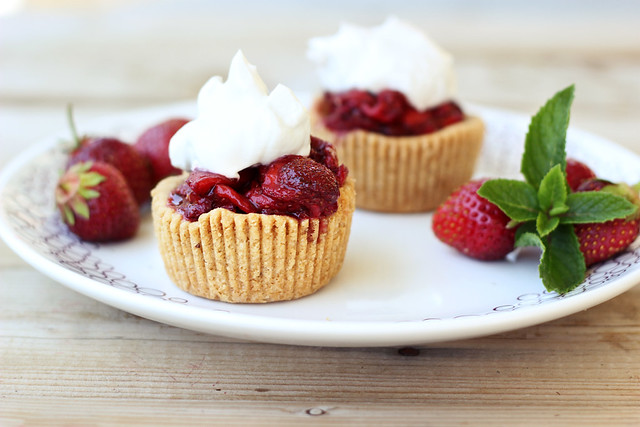
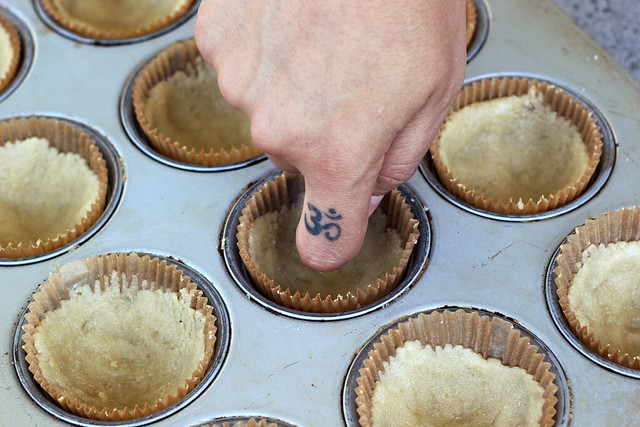
I am so elated over the outcome of this super fun, kickoff to summer-time recipe. It was one of those things I dreamt up (and loosely wrote up) while sitting at my computer working and when it finally came time to make it, I crossed my fingers and dove right in. I had to make a few subtle corrections from my original notes to make the tart shells work perfectly, but other than that, it all came together so perfectly. On the first batch, I didn’t use the paper muffin cup liners and the tart shells didn’t want to come out in one piece, even with greasing the pan, but add in the paper liners, and it was simple as can be!
This recipe is insanely simple to make, please don’t let the three-part recipe throw you off. Just remember to refrigerate your coconut milk the night before for the whipped “cream”. The dough for the tart shells takes just minutes to make, you need only one bowl and you can literally just use your hands to mix it, that’s what I do. It takes just a couple of minutes to get it evenly divided and pressed into the muffin cup and while the mini tart shells bake, you can cut up the strawberries and allow them to sit for a small bit in the balsamic/maple sugar mixture. Once they are done baking, you can chill the tart shells while you roast the strawberries, meanwhile you can whip up your coconut cream and when the strawberries are done, you can serve it all up. It can all be done in less than an hour, probably more like 45 minutes and it is so simple, you won’t believe it. If you want to make it even quicker and skip out on the heat from the oven, serve the strawberries fresh. With or without the balsamic vinegar. No matter which way you make it, this recipe will impress the pants off any one at a party, especially those that are gluten intolerant and vegan. They truly won’t believe that it is safe to eat. It is that good.
My favorite thing about this recipe is that although it is gluten-free and vegan, no one would never know it. Mark kept eating bite after bite telling me, that this was seriously one of the best things I had ever made. ‘Pastry shop grade’ – he even said. Quite the compliment. Beyond the shells being totally grain-free, and everything being refined sugar-free, it is hard to believe the fluffy, creamy whipped “cream” is dairy free. I honestly need to have a can of full-fat organic coconut milk on hand at all times, so I can always make some whipped “cream”. The other great thing about this recipe is how versatile it is. It can go through the summer with you as different fruits come into season. I cannot wait to make it in the fall with some baked spiced apple slices. YUM!
I am happy to once again be posting over at Free People’s blog, BLDG 25 where this week they are celebrating all things ‘Americana’. When they asked me to share a recipe that went along with that trend, I kept thinking of all of the wonderful summertime picnics, BBQs and beach trips. I wanted something simple and tasty, but full of beautiful, bright summertime flavors! Although nothing says summertime in America better than ice cream, berry pies and strawberry shortcakes, if you are the gluten-free and/or vegan at the party, that doesn’t always leave much for you. So, I decided to marry the idea of a berry pie with strawberry shortcakes to create these adorable little mini-tarts!
This recipe was originally shared on Free People’s Blog, BLDG 25.
[print_this]Roasted Balsamic Strawberry Mini-Tarts with Whipped Coconut Cream – Gluten-free + Vegan
makes 12Grain-free Mini Tart Shells
- 2 cups blanched almond flour
- 2 tablespoons maple syrup
- 1/4 cup coconut oil, melted
- 1/2 teaspoon baking soda
- 1/8 teaspoon salt
Preheat oven to 350ºF. Line 12 cups in a muffin tin with paper liners (you could also use greased mini tart pans). In a large bowl, add all of the crust ingredients and mix very well. Really get your hands in there to get it all together and work it into a nice dough. Add the crust mixture to the muffin cups and press down firmly into the cup using your knuckles, going up the sides a tad bit. Bake for 15-20 minutes until golden brown. Allow to cool in the pan for about 10 minutes, then place the pan in the refrigerator until you are ready to serve.
Roasted Balsamic Strawberries
- 2 pints baskets of strawberries, hulled and sliced (it’ll look like a lot of berries, but they cook down a lot)
- 3 tablespoons balsamic vinegar
- 3 tablespoons maple sugar (or palm/coconut sugar, raw sugar, etc)
Raise the oven to 400º F. Toss the strawberries with the balsamic vinegar and maple sugar. Allow to sit for a few minutes while your oven preheats. Pour all of the strawberries and their juices onto a parchment paper lined baking sheet or any other overproof dish or pan. Roast for about 10 to 12 minutes until the strawberries are hot but not too overly mushy. You can separate the berries and pour off some of the juices if you want to use it for drizzling, or you can just keep it all together. I kept some of the juice aside to add to some sparkling water for a refreshing drink.
Whipped Coconut Cream
- 2 cans organic full fat coconut milk, refrigerated overnight
- 1 tablespoon maple syrup (use more or less or none at all, or whatever your favorite sweetener is)
- 2 teaspoons vanilla
Make sure that your cans of coconut milk are well chilled. I recommend leaving item in the fridge overnight. Open the cans of coconut milk carefully, keeping them level. There will be a firm, waxy layer of coconut cream that solidified on top. Carefully scoop this off into a chilled glass bowl. Keep the leftover coconut water, it is great for smoothies.
Using a mixer, whip the coconut cream for 3 to 5 minutes until it becomes light and fluffy, with soft peaks. Mix in your maple syrup and vanilla, if you are using. Place the whipped coconut cream back into the fridge until you are ready to use. This may be more than what you need for all 12 tarts, but that’s ok, it keeps for several days, covered in the fridge.
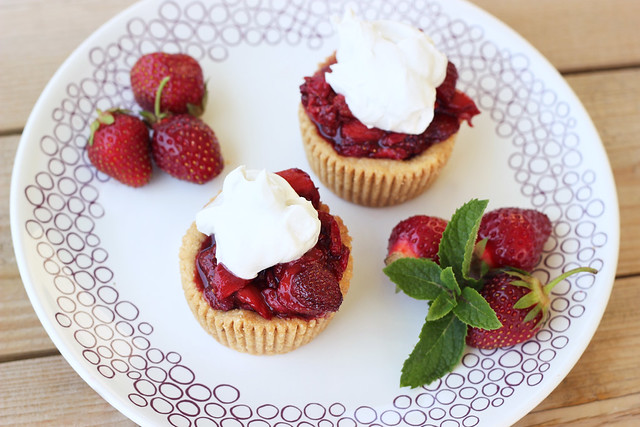
ASSEMBLING THE TARTS:
Remove the paper liner off of the tart shells. Top each of the tart shells with a spoonful of the roasted balsamic strawberries and a dollop of whipped coconut cream. Serve immediately. [/print_this]
-
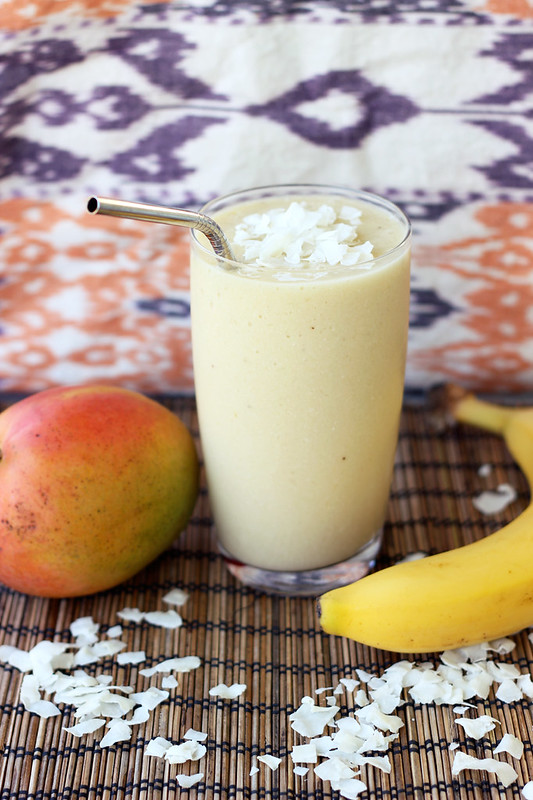
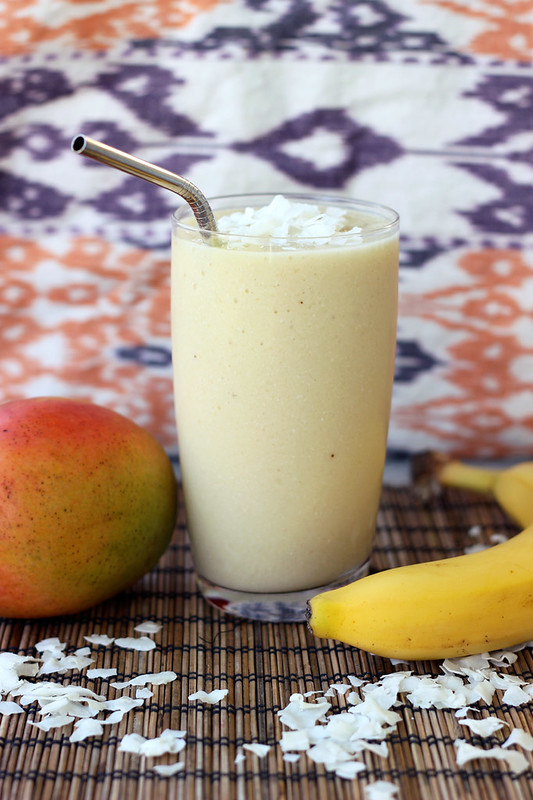
Coconut Mango Banana Smoothie – Gluten-free, Vegan + Refined Sugar-free
Not only did I live through my first run on Thursday evening, but I even went again today! So far, so good, I’m actually really enjoying it and I wasn’t even sore after. I definitely need to take it slowly and not try to do too much, but I could already see a slight improvement from my first run to the second.
In addition to adding running to my weekly fitness routine, I also decided I am going to try to wake up every morning at 6am (or thereabouts). I have found I am quite productive in the morning hours, so I really should be getting up as early as I can. With the sun already being up that early this time of year, it’s actually quite easy. I’ve done it every day this week since we returned home and I’m loving it. Even if I don’t jump right out of bed, at least I’m awake and getting my day started.
This morning I was up at 6 am and out of the house by 8:00 for a 90-minute vinyasa yoga class at East Meets West. Then I got home, grabbed my hubby and my iPod and we went for a 2-mile run together. It felt great to run after being nice and stretched out from yoga. I was hungry but I really didn’t have a huge appetite for a big meal after doing all of that. Since I had an afternoon’s worth of house cleaning to do, I decided to make this deliciously satisfying smoothie and it kept me full for many hours after while I washed flours, did dishes and cleaned the bathtub.
This filling and creamy little drink is so smooth and thick, almost milk-shake like. The flavor from the mango and banana are so bright and fresh which pairs so nice with the smooth creamy taste of the coconut and vanilla. I had grabbed a carton of unsweetened almond milk/coconut milk blend at the store the other day so I used that, but you could use straight coconut milk , almond milk or whatever your favorite non-dairy milk is.
[print_this]Coconut Mango Banana Smoothie – Gluten-free, Vegan + Refined Sugar-free
serves 1- 1 cup unsweetened almond milk / coconut milk blend (or any other non-dairy milk)
- 1 organic mango, sliced
- 1 organic banana, peeled
- 1 tablespoon maple syrup (or any other sweetener of your choice, dates, stevia, hone, raw sugar, etc)
- 1 tablespoon extra virgin coconut oil
- 1 handful of ice
- 1 teaspoon vanilla extract
- 1/2 tablespoon unsweetened coconut flakes for topping, optional
Add all of the ingredients to a blender and puree until smooth and creamy. Serve immediately. Sprinkle some coconut flakes on top, if you wish.
[/print_this]
-
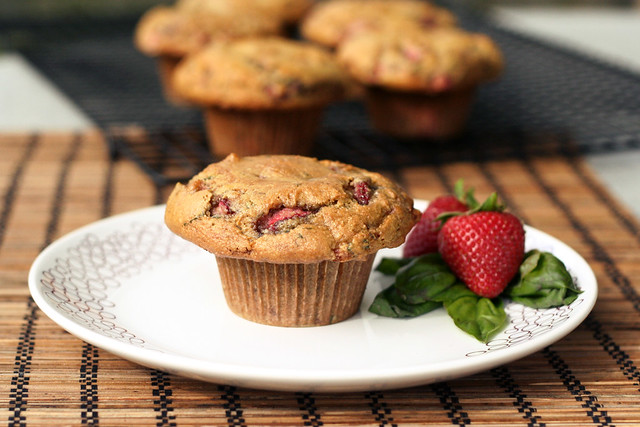
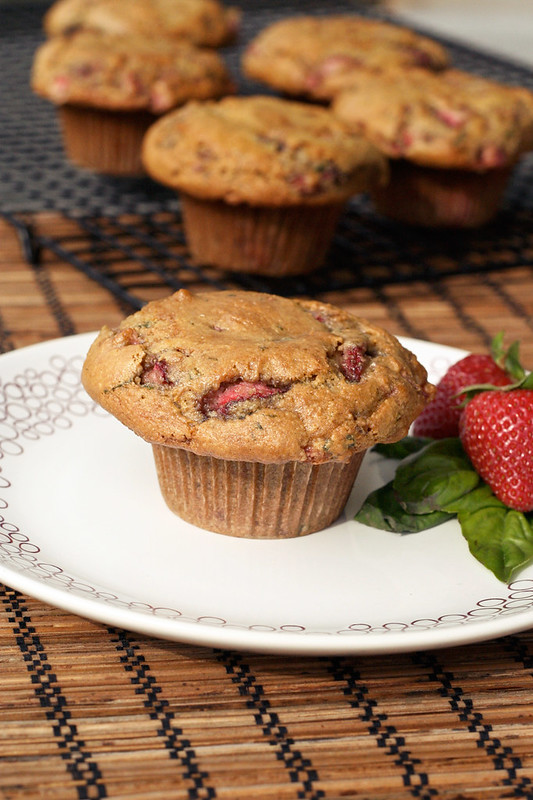
Strawberry Basil Almond Flour Muffins – Gluten-free, Dairy-free, Refined Sugar-free
Before I get into chatting about muffins, I wanted to take a minute to thank all of you for your amazing, inspiring and humbling comments on my two year blogiversary post. Besides hearing about how many of you read Tasty Yummies and have been inspired by it, reading all of your touching comments about what makes you happy, seriously moves me. I have read each and every comment and so many of them brought tears to my eyes. So, even though I haven’t responded to all of you, thank you all from the bottom of my heart!
The last week has been a really great one for me, between all the inspiring comments about happiness on my post, meeting a new friend and the wonderful week of yoga I had, I am seriously on cloud nine. I have managed to get to a ton of yoga classes this past week (6 in the last 7 days) and despite my injury a few weeks back, I seem to have found a really sweet spot in my yoga practice, at least it really feels that way to me. Every time I think I couldn’t possibly enjoy the practice of yoga and everything it brings, any more than I already do, I have a breakthrough week. This week that feeling came a few different ways, the first is that I got to spend some time with a fellow student that I have practiced alongside many times. Upon hearing the news that she would be moving back to Rochester tomorrow, after nearly a year of living in Buffalo, before heading off to Africa to teach yoga, we decided we had to get together before she left. We grabbed some food and had a couple drinks and just hung out and got to know each other better. I rarely meet people whom I feel that instant of a connection to, and it was yoga that brought us there. I know that although Lyndsey will be far away and I am relocating to California later this year, we both agreed we will stay in contact and who knows where that connection will take us. I feel there are people in this world that we are meant to meet and even though we wish the circumstances would be different or that they lived closer, etc, it is incredible how powerful it can be that we find one another despite all that. Life is pretty amazing. Besides all of the amazing teachers at East Meets West Yoga that I have gotten to know and love, there are so many other great people that are there, like me, to practice, that I have shared such meaningful conversations with, or even just a warm hello! I feel like I have never ever felt that sense of community anywhere else in my life.
The other thing that made this week of yoga a special one is that I was able to get into three different arm balances that I hadn’t quite been able to master before. I had gotten close on all three in the past at different times, and maybe popped up into them once or twice (likely in happenstance), but it was like I hit a light switch this week and found something that I hadn’t found before. It felt amazing! That is what I love most about yoga, it is ever changing and ever growing. I can’t believe there was ever a time I told myself that I would never be “better” then where I was at that point and that I just couldn’t get into certain poses. Once I let go of that frustration and fear, it not only became so much more enjoyable, but I also found myself doing things I never thought I could. I can honestly say that yoga has changed me both on the mat and off and I will be forever grateful for that.
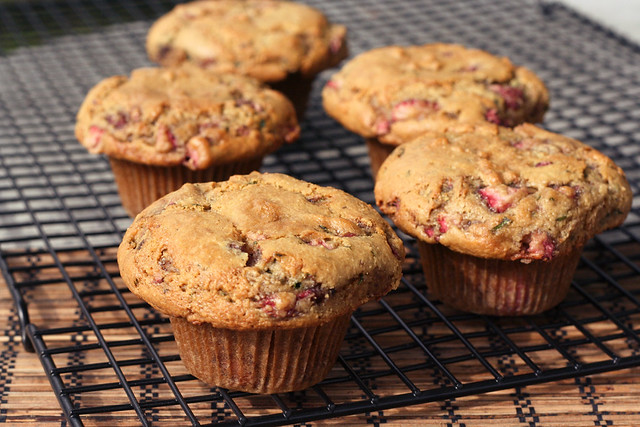
OK, let’s talk muffins! Strawberry basil is one of my absolute favorite flavor combos! I discovered it a few summers back when I was obsessed with mojitos. I started playing with basil instead of mint and adding in strawberries instead of lime. It makes for a great adult drink if you add rum, or a refreshing non-alcoholic drink if you just muddle the two together and top it off with a little sparkling water. They are so perfect together, the tart and subtle sweetness from the strawberries paired with the sweet, almost peppery flavor from the basil. If you aren’t a fan of basil, you can add in fresh mint to these muffins, or just skip it altogether. But I highly recommend trying the two together if you haven’t yet, it is a wonderful surprise for your palette.
These muffins are bursting with flavor and are also quite healthy for you. They are not only gluten-free, but they are totally grain-free, they are also dairy-free and refined sugar-free. I haven’t yet played with using an egg replacer to make these vegan, but I don’t see why it wouldn’t work. If you do try it out, please do let me know what you think. This recipe makes 6 large muffins. I fill the batter all the way to the very top and as you can see in the photos, that gives you the lovely puffy muffin tops, if you want more muffins, just fill the cups up less and keep an eye on your bake time, it may take a little less time.
Thank you again guys for your wonderful blogiversary wishes and if you haven’t yet entered the contest, please do. You have 5 different opportunities to enter and the giveaway closes on Wednesday.
[print_this]Strawberry Basil Almond Flour Muffins – Gluten-free, Dairy-free (vegan option)
makes 6 or 7 large muffins- 2 1/4 cups blanched almond flour*
- 1 teaspoon baking soda
- 1/2 teaspoon sea salt
- 2 local farm fresh large brown eggs (you can try an egg replacer here, I haven’t yet however)
- 1/4 cup maple syrup (or honey)
- 1/4 cup coconut oil, melted
- 2 teaspoons vanilla extract
- 1 cup fresh strawberries, hulled and roughly chopped
- 1/4 cup fresh basil, finely chopped
Preheat oven to 350˚F. Line a muffin tin with paper liners.
In a medium bowl, whisk together the almond flour, baking soda, and salt. In a separate bowl, beat the eggs. Add in the honey, vanilla and oil and whisk until well combined. Add the dry mixture to the wet, stirring until combined. Carefully fold in the strawberries and basil.
Spoon the batter into the muffin tin, filling to the top if you want a nice muffin dome, or as us ladies know it “muffin tops”. Bake for 25 to 30 minutes or until the tops are golden brown and a toothpick inserted into the center comes out clean. Cool the muffin pan on a wire rack for five minutes. Gently pop the muffins out to continue cooling on the rack (don’t cool them longer than 5 minutes in the hot pan they’ll definitely get soggy). Enjoy a muffin after they have cooled 10 minutes, you know you want to.
I find storing muffins covered tightly in the refrigerator or freezer to be the best. Just pop one out as you want it, heat slightly in the microwave if you want to take the chill off and go.
*Something I have learned from baking on my own and from reading Elana’s Pantry, is that not all almond flour (or meal) is created equal. Bob’s Red Mill makes an almond flour, though easy to find, that doesn’t seem to react quite the same as other almond flours. It doesn’t seem to rise as much and it just seems to leave recipes flat. On Elana’s recommendation I now buy Honeyville brand almond flour in a 5-lb bag from their website.
[/print_this]
-
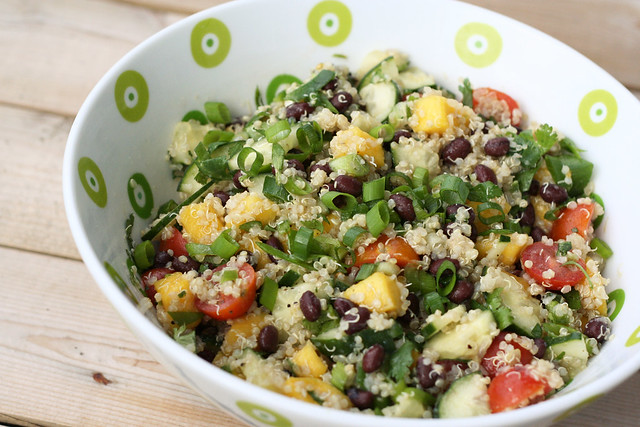
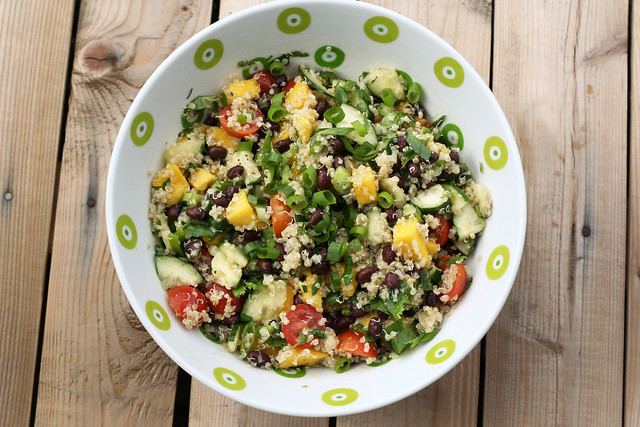
Sprouted Quinoa Salad with Mango, Black Beans and Avocado – Gluten-free + Vegan
Phew! Life has been a bit busy lately. We’re still trying to get caught up on all the work we have going on right now. Between being away from the studio for 2 weeks and with how much client work we have booked, we’ve really been putting in the hours. We also spent the weekend painting the downstairs here at the house, getting it ready to sell. OK, well actually we had a friend here doing most of the painting while we worked on client work, but I helped for a handful of hours on Sunday! We also spoke at the State University at Fredonia on Monday night, to final-year design and print making students, which was really, really fun. On top of all of this, I have been trying to get to yoga every morning for my 90-minute practice. I have had to miss a day here and there, but when life is busy, it is when I need it the most.
The last week and a half actually seems a little bit like a blur. So, I have been trying to sneak time into the kitchen here and there, when I can, but it is proving to be a bit difficult right now. Last week, besides the delicious Baingan Bharta that I made, I made a HUGE pot of vegetable soup and I also made a version of this delicious gluten-free flatbread with roasted vegetables from Karina, the Gluten-Free Goddess. I basically lived off of those meals and that worked fine, but now I am ready for life to calm down a bit, so I can start playing with new recipes!
I am hoping to have some time this weekend to play around with some gluten-free, vegan waffle recipes and I am also thinking of making a fun new dessert treat, similar idea to the coconut dark chocolate treats that I made and everyone has been loving so much! Plus, I have been dreaming of a pie recipe, that I just need to find the time to actually make. So look for those recipes, hopefully really soon, and definitely some others, too.
In the meantime, I made this salad for lunch today and I was really glad that I made the time to do so. It was super simple and a really nice bright and fresh spring meal. I happened to have sprouted quinoa that I had picked up at the market, but any regular quinoa would do. I also ended up topping this salad with avocado when I served it. I forgot about the avocado when I took the photos, but it was a perfect addition. You could also add in some red bell pepper if you have some on hand or fresh corn, etc. If you don’t want a little spice, skip the jalapeño or just start with half of one.
The weather is starting to really warm up here, but more than the temperature, the biggest change in this time of year that I absolutely adore is the sunshine. I miss the sunshine during the winter months and it is my favorite part of the spring. Salads like this feel like the perfect light meal to eat when the sun is shining!
What have you been eating lately? Have you had a lot of time in your kitchen or has life been hectic?
[print_this]Sprouted Quinoa Salad with Mango, Black Beans and Avocado – Gluten-free + Vegan
serves 4-6- 2 cups cooked organic sprouted quinoa
- 1 mango, diced
- 1 cup of canned organic black beans, drained and rinsed
- 1 cucumber, quartered the long way, then sliced
- 1 cup organic cherry tomatoes, halved
- 1 jalapeño, seeds removed, minced
- 3-4 scallions, sliced thinly
- 1/4 cup fresh cilantro, roughly chopped
- 1 avocado, diced
Dressing
- juice from 1 lime
- 2 tablespoons olive oil
- 1 clove garlic, minced
- zest from 1/2 lime
- salt and pepper, to taste
Cook the quinoa according to package directions. After it is cooked, fluff the quinoa with a fork and set aside to cool.
While the quinoa is cooling, mix the dressing in a small bowl, whisk well to combine.Once the quinoa is cooled, toss it with the mango, black beans, cucumber, tomatoes, jalapeño, green onions and cilantro. Drizzle the dressing over top the salad, and toss gently to evenly coat. Salt and pepper to taste.
Serve the salad at room temperature or chilled topped with a small sprinkle of sliced green onions and fresh cilantro, as well as some diced avocado on top, if you wish.
[/print_this]
-
Chilled Avocado & Corn Soup with Cilantro Oil

I don’t always love cold soups, sometimes I find them to be weird or odd. I almost hate the word soup being used at all since once chilled, it is hardly anything close to a classic soup recipe. I had a puree similar to this a couple of years ago at a local restaurant that has since closed, Juniper, and it was super delicious, light and full of flavor. I am obsessed with avocados, so short of sticking a straw directly into an avocado, it really doesn’t get much better than this. I had wanted to recreate that soup for so long, but kept forgetting about it, but I ended up running across the recipe that I pulled to work from, while moving our studio home a few weeks back. I couldn’t wait to try it out.
I knew I would be on my own with this one though, Mark refuses to try cold soups, he thinks they are “stupid”, haha. So on a work day a week or so ago, I prepped the soup and oil during my lunch time break and allowed everything to cool the rest of the day, while I worked. It was such a nice treat on a hot day where I didn’t feel like cooking. I have also been getting to a ton of yoga classes every week, so this was perfect the following day after a hot and sweaty yoga class. This soup has all the flavorings of a great guacamole recipe in each spoonful. It’s refreshing but adequately filling. The cilantro oil drizzled on top is loaded with a beautiful, fresh, clean finishing flavor and I especially love the subtle heat from the poblano pepper. I went pretty light on the sour cream, as it really didn’t need much, but a small drizzle was nice, especially in contrast to the heat from the pepper. If you love avocado as much as I do, I know you will love this soup. I served it with a handful of organic corn tortilla chips on the side, which ended up being delicious dipped right into the soup. Obviously if you are vegan, simply skip the sour cream or crema at the end and you have a beautiful, tasty vegan dish.
Chilled Avocado & Corn Soup with Cilantro Oil
serves 4-6
adapted from Gourmet Magazine, May 20052 fresh or frozen ears of corn, shucked
4 cups plus 2 tablespoons water
1 garlic clove, smashed
1 1/2 teaspoons salt
1 1/4 cups chopped white onion
1 fresh poblano pepper, stemmed and coarsely chopped (including seeds)
3 firm-ripe California avocados
3 tablespoons fresh lime juice
1/4 cup crema or sour creamFor cilantro oil
1 cup coarsely chopped fresh cilantro
1/4 cup olive oil
1/2 teaspoon saltMake soup:
Roast ears of corn on rack of gas burner over high heat, turning occasionally with tongs, until kernels are charred in spots, 4 to 5 minutes. (Alternatively, heat a dry well-seasoned cast-iron skillet and roast corn over moderately high heat, turning occasionally, about 10 minutes.) Transfer the ears of corn to a cutting board and, when cool enough to handle, cut kernels from cobs with a sharp knife, then cut cobs into thirds.
Bring kernels, cob pieces, 4 cups water, garlic, salt, and 1/2 cup onion to a boil in a 3-quart saucepan and boil until liquid is reduced to about 3 cups, about 20 minutes. Remove from heat and cool, uncovered. Discard cob pieces.
Purée corn mixture along with the poblano pepper and remaining 3/4 cup onion in a blender, then pour through a fine-mesh sieve into a bowl, pressing hard on and then discarding solids. Return broth to cleaned blender.
Quarter, pit, and peel 2 avocados, then add to blender with 2 tablespoons lime juice and purée until smooth. Transfer soup to a bowl and cover surface with plastic wrap. Cover bowl with plastic wrap and chill soup at least 1 hour.Prepare cilantro oil while soup chills:
Purée cilantro, oil, and salt in cleaned blender, scraping down sides of blender several times. Pour oil into cleaned fine-mesh sieve set over a bowl and let drain 15-20 minutes (do not press on solids). Discard solids.Assemble soup:
Halve and pit remaining avocado and cut into 1-inch cubes, toss gently with remaining tablespoon lime juice in a bowl.
Whisk together crema or sour cream and remaining 2 tablespoons water in a small bowl until smooth.
Season soup with salt and ladle into 4-6 soup bowls. Divide avocado chunks among bowls, then drizzle with crema and cilantro oil.Notes:
Soup can be chilled up to 1 day ahead.
Cilantro oil can be made 3 hours ahead and chilled, covered.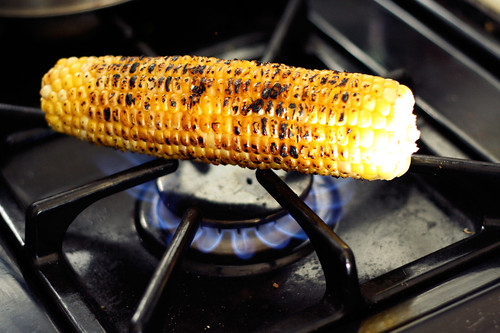
-
Gluten-Free Pea and Goat Cheese Tart with Fresh Herbs
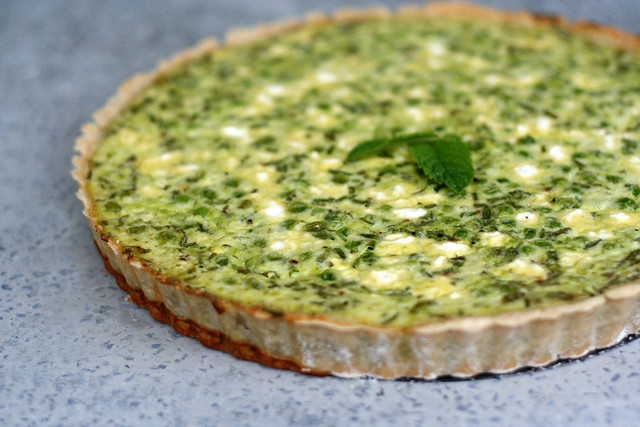
I actually made this recipe more than 2 weeks ago but life has been so very hectic and I am super behind on posting recipes. We were in NYC last weekend for the Renegade Craft Fair so I made this the weekend before we left, since I knew life would be crazy and it would make for some very lovely leftovers. For some reason I have been dreaming of making a gluten-free spring tart for some time now. I literally could see how I wanted it to look and taste all the flavors I had envisioned. I really wanted it to incorporate all things spring. I recalled a tart shell recipe in Gluten Free Girl and The Chef’s newest book, so I decided for my first attempt at a tart I couldn’t go wrong with one of Shauna’s recipes, they are always so wonderfully created, with each measurement precise and every ingredient well thought-out. It’s so impressive. I once again weighed my flours instead of measuring, which has always yielded such perfect results for me. One of the things I love the most about this tart recipe is how few ingredients there are, it is so simple.
The flavors from the fresh herbs in the tart were incredible,so refreshing and light, so spring. The fresh peas burst with flavor in each bite and the crust was absolutely to die for. NOT KIDDING. It was flaky, light, crusty and browned, if I hadn’t made it myself I would have sworn some one was fooling me and I was eating a gluten-laced crust. Besides being delicious this tart was quite easy to put together and was great for leftovers. We had it for both dinners and breakfasts. This would actually be quite perfect for a brunch where you really want to impress people, but don’t wish to spend all morning in the kitchen. You could actually prepare the tart dough the night before and pull it out of the refrigerator that morning. Simple!
Now that I experimented with and LOVE this tart recipe, I plan to have all kinds of fun with it. I cannot wait to play with both sweet and savory tart recipes now.

Gluten-Free Pea and Goat Cheese Tart with Fresh Herbs
serves 8-10Tart Shell
via Gluten Free Girl and The Chef – A Love Story1/2 cup (63.5g) sorghum flour
1/2 cup (60g) tapioca flour
1/2 cup (96g) potato starch
1/2 cup (102g) sweet rice flour
1/4 teaspoon salt
8 tablespoons (1 stick) frozen organic butter
1 large local farm fresh brown egg
1/4 cup of ice cold water(if making a sweet tart, instead of savory, include 2 tablespoons sugar and 1/4 teaspoon cinnamon)
Sift the sorghum flour, tapioca flour, potato starch, and sweet rice flour into a large bowl. Stir in the salt (sugar and cinnamon if making a sweet tart). Sift into another bowl.
Grate the frozen butter directly into the dry ingredients. The butter will fall into the flours in soft swirls and start to melt in as soon as you stir. Work with your hands to mix everything, until the dough feels like cornmeal or large pieces of sand.
In a small bowl, whisk the egg and water together with a fork. Make a well in the center of the flours. Stir in the liquid, working from the inside out. Feeling the dough for soft suppleness, instead of stiffness or sogginess. Feel free to use your hands at the end.
Refrigerate the dough for at least 1 hour, or overnight if possible.
Preheat the oven to 375ºF. Butter and flour an 11-inch tart shell, I used sweet rice flour as the original recipe suggested. Pull the dough from the refrigerator and allow it to come to room temperature, about 1 hour.
Roll out the dough between 2 pieces of parchment paper, to the approximate shape of the tart pan. (this way you don’t have to flour your countertop and add more flour to the dough).If the dough falls apart or breaks a bit, don’t worry – there is no danger of the crust becoming tough by overworking it, which can happen with gluten dough. Press the dough into the pie pan and repair it that way.
Place the tart shell into the freezer until the crust is frozen, approximately 1 hour.
Butter a piece of aluminum foil approximately the size of the pie crust. Place it butter side down, onto the tart crust and fit snuggly against the sides. Bake pressing down any puffed up spots with a spoon until the shell has a good color, about 15 minutes. The tart should look and feel flaky, rather than sticky. Prepare the filling while the tart is blind baking.
Pea and Goat Cheese Filling
3 cups fresh (or frozen) peas
3 local farm fresh brown eggs
2 tablespoons fresh mint, chopped
2 tablespoons fresh chives, chopped
1/2 cup organic half and half
1 1/2 cups organic whole fat milk
6 ounces goat cheese, crumbled
kosher salt
freshly ground black pepperAdd the peas to a small saucepan of boiling salted water with a pinch of salt, cook for 3-4 minutes until tender, do not overcook, you don’t want mushy peas. It may take less time for frozen peas, than fresh. Drain, cool slightly, then puree half of the peas in a food processor until smooth. Transfer both the pureed and whole peas to a large mixing bowl, add the eggs, mint, chives, half and half and milk. Beat well with a spoon to combine, then stir in approximately three-quarters of the goat’s cheese. Season with kosher salt and freshly ground black pepper.
Once the tart shell has been adequately blind-baked, pour the filling into the shell, sprinkle the remaining cheese on top. My tart shell was very full, so be careful transporting, you may also find you want a cookie sheet on the oven rack below if you think it may boil over at all. Bake for 35-40 minutes until the filling is completely set. Allow the tart to cool for at least 30 minutes, top with fresh chives and/or fresh mint, serve while still warm.
-
Gluten-Free Whole Grain Spring Pizza with Asparagus, Parmesan and Eggs
I’ve been using the same gluten-free pizza dough recipe for sometime now and though I do like it, I wanted to try something a little different and without the gums. I came across this recipe on Gluten Free Girl and The Chef a while back and when I saw that it contained no gums and it was flexible with the flours you can use, I was very intrigued. Shauna has a formula she created to make your own gluten-free all-purpose flour without gums and by weight instead of volume, plus it is very easy to make it a whole-grain mix by using different flours. Here is the original post about their pizza recipe that they changed a bit since their book came out. There are a few different flours you can choose from if you have sensitivities to things like corn or potato. I used their whole grain flour mixture that they featured in their post for whole grain muffins. I don’t have a ton of experience with baking, it is something I have only learned to love in the last year or so, but with the little bit I have done, I find that weighing your dry ingredients as opposed to measuring really gives you a consistent result, time and time again.
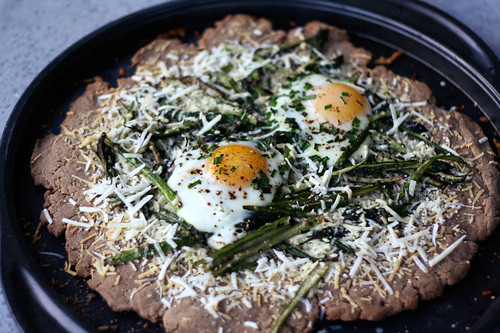
I decided a nice way to try out this new pizza dough recipe was to really let it shine, by not loading it with ingredients and sauces. I wanted a simple, tasty spring pizza that featured asparagus and eggs. The only thing I may change next time would be to use some mozzarella in addition to the parmesan to give it a bit more melty of a cheese base since the parmesan tends to not get super melty, however the dough was so delicious it honestly didn’t need it. Overall it was full of flavor from the asparagus and the fresh chives and the eggs were a wonderful compliment on top. The runny yolk was perfect for dipping the delicious crust into. You’ll be so surprised when you taste this crust at how it tastes just like real pizza crust – you’ll never know it’s gluten-free.
I know this post is large and contains a lot of info – but I promise it is all worth reading through. I am happy to finally have a good all-purpose flour mix to have on hand for different things and an even better pizza dough recipe. Play around with different toppings and flour combinations and please feel free share, I’d love to hear what you come up with.
GLUTEN-FREE GIRL’S ALL-PURPOSE FLOUR MIX
Here is the original information on the all-purpose flour mix (all content and info contained in both the flour mix and the pizza recipes is copyright of Gluten Free Girl and The Chef)
Want to make a whole grain AP mix in your kitchen? Here’s how.
We’re working with 70% whole grains/30% starches. We might someday go to all whole grains for some baked goods, but this blend works well for us now.
If you want to make a big batch for all the baking in your kitchen?
Choose 700 grams of any combination of the following flours:
Almond
Amaranth
Brown Rice
Buckwheat
Corn
Millet
Oat
Quinoa
Sorghum
Sweet Brown Rice
Teff
Almond is not a grain, but it is a whole flour, so I’ve thrown it in there. You might notice that I have not put in garbanzo (I don’t like it) or coconut (I don’t like the way it tastes or the way it sucks all the moisture out of a baked good) or soy (I’m having a hard time finding a good gluten-free one). You might like those. Substitute if you want.
This means that you can make your own blend. If you are allergic to corn, and you know you can’t eat the certified gluten-free oats, blend up 100 grams each of almond, brown rice, buckwheat, corn, millet, sorghum, and teff. (I want to write more about this later, but the flavor you find by blending all these different taste is fascinating. It’s amazing how boring regular AP flour seems after you use this.) Find your own favorite combination.
And then throw in 300 grams of any combination of the following:
Arrowroot
Cornstarch
Potato Starch
Tapioca Flour
White Rice Flour
We like using 150 grams each of arrowroot and potato starch, at the moment.
Combine the 700 grams of whole-grain flours with the 300 grams of starches in a big container. Shake it all up. You have whole-grain flour mix.
———————————————————————————————————————————————————-
For my AP mix I went with 175 grams each of Almond, Millet, Sorhum and Teff flours and 150 grams each of potato starch and tapioca flour. It was super simple to mix up and it made 1000 grams of all-purpose flour so I have enough to make pizza again.
The flours brought so much flavor to the crust and it was perfectly crispy on the outside and soft and chewy inside. This was by far the best crust I have ever made at home and it was simple. I’ve noticed that some gluten-free crusts get abnormally puffy and airy and don’t taste like usual pizza, others are so thin and crusty that it’s almost like eating a large cracker. I also really love
GLUTEN-FREE GIRL’S WHOLE GRAIN PIZZA CRUST
1 tablespoon ground flaxseed or ground chia seeds
500 grams whole-grain gluten-free flour mix
1 1/2 teaspoons kosher salt
15 grams (4 teaspoons) active-dry yeast
50 grams (1/4 cup) extra-virgin olive oil
85 to 190 grams (1/2 to 1 cup) warm water, about 110º
olive oil for brushing on top of the crust
Making the flaxseed or chia slurry. Mix the flaxseed (or chia seed) into a bowl. Pour 2 tablespoons of boiling-hot water over the seeds. Whisk immediately and quickly until you have a thick paste. Let this set aside and cool down.
Combining the dry ingredients. Put the gluten-free flours and the salt into the bowl of a stand mixer. Mix them up together.
Activating the yeast. Put the yeast, olive oil, and half the warm water into a small bowl. Stir gently. Let them sit for a moment to activate the yeast.
Making the dough. Add the slurry to the dry ingredients and mix for a moment. Pour the yeasty water into the dry ingredients. With the mixer on medium, whirl for a few moments, until the dough comes together into a soft ball around the paddle of the stand mixer and feels soft and pliable. If the dough feels too dry, add more of the warm water in small amounts until the dough feels right. (You might not need all the water. You might need more. Yeast doughs can differ from kitchen to kitchen.) Set the dough aside in a warm place and let it rise for 1 hour.
Preparing to bake. Preheat the oven to 450°. (If you feel comfortable with heat, take it up to 550°. Just watch the dough in the oven, carefully.) If you have a pizza stone, make sure it is in the oven. If not, sprinkle a pizza tray or baking sheet with gluten-free cornmeal.
Rolling out the dough. Grab 1/2 of the dough and put it between 2 pieces of parchment paper. Through the paper, roll out the dough to your desired thickness. (We like super-thin crust around here. You might like it thicker.)
Pre-baking the dough. Take the parchment paper off the dough, then transfer the dough to the pizza stone or prepared pizza tray. Brush the top with olive oil. Bake until the dough has started to crisp up and browned at the edges, about 8 to 10 minutes. (And less if you have the oven cranked up to 550°!)
Take the crust out of the oven. You now have a pre-baked pizza crust. Top with anything you fancy and continue baking until the cheese is bubbly and melty.
Makes 2 – 8-inch pizza crusts or 1 – 16-inch pizza crust. I went with 1 large round pizza. Don’t worry too much about the shape, enjoy the rustic wonkiness of handmade pizza dough.
SPRING PIZZA WITH ASPARAGUS, PARMESAN AND EGGS
Makes 1 large pizza or 2 small pizzasGluten-free Girl’s Whole Grain Pizza Dough Recipe (above)
Olive oil
Kosher flake salt
Black pepper
10 asparagus stalks
1 clove garlic, minced
1 – 1 1/2 cups freshly grated Parmigiano-Reggiano or mozzarella (or both)
1 bunch of fresh chives, chopped
2-4 local farm fresh brown eggs (I put 2 eggs on one large pizza, but you could certainly put 2 eggs each on 2 small pizzas)Prepare dough according to above instructions (or whatever instructions come with your dough recipe). Preheat oven to 450ºF.
Rinse the asparagus, snap off the tough ends and cut in half or thirds depending on how long they are. You want to end up with 20-30 3-inch pieces. Take each 3-inch piece, cut in half on the long side, and then again to quarter. Heat a tablespoon of oil over medium-high heat , saute the asparagus slivers and the minced garlic with black pepper and a large pinch of kosher salt until tender and still bright green. Remove the asparagus from the heat and set aside.
Brush the pre-baked pizza crust (pre-bake according to above directions) with olive oil. Sprinkle the crust with the cheese, reserving a small amount for sprinkling on top. Arrange the asparagus in a single layer over the cheese. Crack two eggs into the center of the pizza, sprinkle fresh chopped chives over everything and top with another light sprinkle of cheese. (If you are making two small pizzas, divide all the ingredients in half over the two crusts and arrange in the same order)
Bake for about 10-15 minutes, or until the egg whites are cooked and the pizza is golden brown. Allow to cool slightly for a few minutes, then cut and serve while still warm.
-
White Bean and Chive Patties
Since we’ve closed the store and now work from home, I really look forward to the time of day when I can take a break from working and prepare a healthy dinner for us. Many nights we finish dinner, do up the dishes, feed the pets and then return up to our offices to work for a few hours, which is something we never did before, but somehow it is all so much more relaxing and laid back. Working from home has allowed me to really play with my schedule, make it more flexible and find even more time for yoga, dog walks and other fun and physical activities. I think the pressure of having to be at the studio set hours because of the store really put an unnecessary amount of self-imposed stress on both of us. We were always very happy and content before and we definitely miss the store some days, but I really find myself loving my life and my job more now than ever before. I feel so lucky.
One of my other favorite things about the new schedule is being able to take on more involved dinners during the week, that require more prep time or even down time for things to cool or set, etc. Now during the “wait times” in recipes, I can just walk upstairs and get more work done. Both last night’s dinner, Spring Pizza with Asparagus and Eggs that featured a homemade gluten-free multi-grain pizza crust and tonight’s Spring Pea and Goat Cheese Tart, with a homemade tart dough, are perfect examples of that. (Don’t worry those recipes are coming soon.) This particular recipe isn’t nearly as involved or time-consuming, but having to pan fry the patties in batches can take time and patience and it is certainly something I wouldn’t have made after a long day of work at the store and getting home around 7pm.
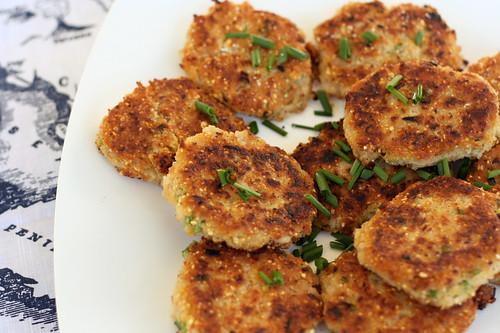
These patties are simple, healthy and full of flavor. They have a wonderful crispy crunch on the outside and a nice soft inside. They are naturally gluten-free and vegan, too. The original recipe features them with sage instead of chives and amidst a delicious spring brunch menu topped with a roasted tomato sauce. I thought the sauce would take away from the lovely crisp, so I instead envisioned them atop a lovely mix of baby spring greens salad as a meal in and of itself. I made a quick lime cilantro vinaigrette and served it as dinner.
You could definitely play around with different herbs and even different veggie additions, the big thing to keep in mind is to make sure the patties aren’t too moist or dry to where they will fall apart in the pan and to make sure you have your pan is hot enough to get that initial “searing” to create a nice crust on the outside and to keep the patties together. Use a spatula to look at the face-down side before you flip to make sure it is adequately browned before you flip.
We tossed some baby spring greens with the vinaigrette, put the patties on top and drizzled those with a bit more dressing and topped everything with more fresh chives. A perfect spring-time dinner.

White Bean and Chive Patties
makes 12 patties
Adapted from Whole Living, June 20111 19-oz can organic white beans
1 shallot, finely diced
1 small carrot, finely grated
1/3 cup yellow cornmeal
1 tablespoon chopped fresh chives, plus more for serving
Coarse salt and freshly ground black pepper
1/4 cup extra-virgin olive oilDrain beans, reserving 2 tablespoons liquid. Transfer to a bowl and mash. Stir in shallot, carrot, cornmeal, and chives. Season with salt and pepper. Add 1 tablespoon reserved liquid. If mixture is too dry, add the other.
Heat a large skillet over medium-high heat. Add 2 tablespoons oil. Form mixture into 12 patties (about 2 1/2 inches diameter each) and saute in batches until golden brown and crisp, 2 to 3 minutes per side. Repeat with remaining oil and patties. Serve topped with a tasty dressing, yogurt sauce or atop a salad.
-
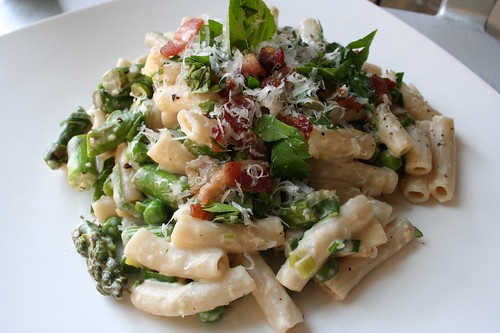
Pasta with Peas, Asparagus and Bacon
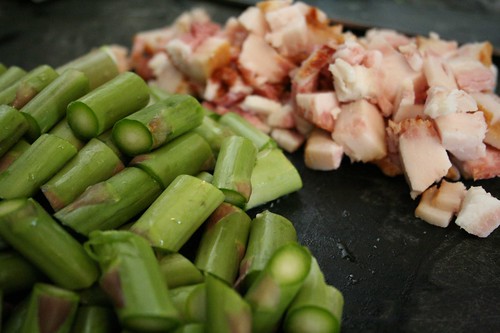
This is a lovely Spring/Summer pasta dish that was the perfect way to use some of the delicious bacon we got from Sojourner Farms last week. The bacon from Sojourner is the tastiest bacon I can ever recall eating, there is a sweetness to it that I have never tasted before and the perfect amount of smokiness. Since there is a very small amount included in this recipe, it isn’t overpowering or greasy in the least (which is something I dislike sometimes about bacon).
I bought some beautiful bunches of asparagus at the market as well as some fresh sugar snap peas. When I got to shelling the peas, I noticed the peas inside were super tiny and delicate and there just wasn’t enough considering I needed 2 cups for the recipe. So, I decided to go ahead and use some frozen organic peas I had on hand, instead. They worked out perfect, though I really would have preferred the fresh, had they been a bit bigger.
This dish has the perfect amount of creaminess without being heavy and the crunch from the fresh asparagus and bacon is wonderful. The brightness from the lemon is really a great compliment to the salty bacon and creamy sauce. I did however, realize after we ate, that the original recipe called for 3 tablespoons of olive oil when mixing the pasta at the end, I accidentally omitted it. I didn’t miss it a bit and honestly, I personally don’t think it needs it. It definitely needed a decent amount of black pepper when serving to give it a bit more punch, so I think next time I may consider adding crushed red pepper as well.
Pasta with Peas, Asparagus and Bacon
adapted from Bon Appétit, May 2010
serves 412 ounces gluten-free organic brown rice penne (any pasta will do however)
3 ounces bacon, chopped (we prefer fresh from the farm, humanely raised, hormone and antibiotic free)
1 pound asparagus, trimmed, cut on diagonal into 1-inch pieces
2 cups shelled fresh green peas, blanched 1 minute in boiling water, drained, or organic frozen peas (do not thaw)
1 bunch green onions, thinly sliced, white and pale green parts separated from dark green parts
2 garlic cloves, pressed or finely minced
1/2 cup finely grated Parmesan cheese plus additional for serving
1/3 cup heavy whipping cream
3 tablespoons of olive oil (I omitted this)
3 tablespoons fresh lemon juice
1 tablespoon finely grated lemon peel
1/4 cup chopped fresh Italian parsley, divided
1/4 cup thinly sliced fresh basil, divided
salt
fresh ground black pepperCook pasta in pot of boiling salted water until just tender but still firm to bite. Drain, reserving 1/2 cup pasta cooking liquid. Return pasta to pot.
Meanwhile, cook bacon in large nonstick skillet over medium heat until crisp. Using slotted spoon, transfer bacon to paper towels to drain. Pour off all but 1 teaspoon drippings from skillet. Add asparagus to drippings in skillet; sauté 3 minutes. Add peas, white and pale green parts of green onions, and garlic; sprinkle with a bit of salt and black pepper; sauté until vegetables are just tender, about 2 minutes. Remove from heat.
Add vegetable mixture, 1/4 cup pasta cooking liquid, dark green parts of green onions, 1/2 cup Parmesan, cream, olive oil (if you wish), lemon juice, lemon peel, half of parsley, and half of basil to pasta. Toss, adding more cooking liquid by tablespoonfuls if needed. Season with salt and freshly ground black pepper. Transfer to large bowl. Sprinkle bacon, remaining parsley, and basil over. Serve, topped with additional Parmesan cheese, and freshly ground black pepper.
-
Shaved Asparagus and Parmesan Salad
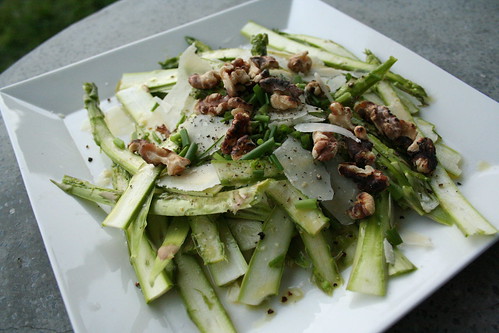
It was unseasonably hot in Buffalo today, mid-eighties and muggy. I am certainly not complaining, I love it. However, the last thing I wanted to do was come home and cook, it was far too hot for that. So, I took out a bunch of the beautiful asparagus that we grabbed on Saturday at the farmer’s market and made this delightful raw Spring salad. I served it with a piece of gluten-free focaccia and it perfectly complimented this bright and beautiful, sunny Spring day.
Shaved Asparagus and Parmesan Salad
serves 21 lemon
2 tablespoons of olive oil
1 teaspoon of kosher salt
freshly ground black pepper
1/4 cup walnuts
1 pound bunch of asparagus spears, trimmed
1 bunch fresh chives, snipped
wedge of Parmigiano-Regiano cheese, for shavingIn a small bowl whisk together the juice from one lemon, olive oil, salt and pepper. Whisk until combined. Set aside, whisk together again just before serving. In a dry pan over medium-high heat, toast the walnuts until they are lightly browned, set aside to cool. Using a mandoline, set over a cutting board, shave the asparagus lengthwise. Add the dressing to the asparagus on a large platter, let sit 5 minutes. Just before serving, top the salad with the toasted walnuts, chives, shavings of the Parmigiano-Reggiano and freshly ground black pepper. Enjoy.
-
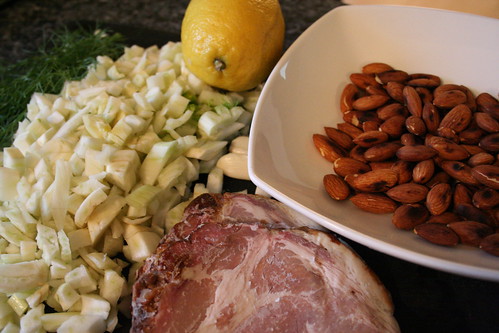
Wild Rice with Spinach, Fennel & Toasted Almonds
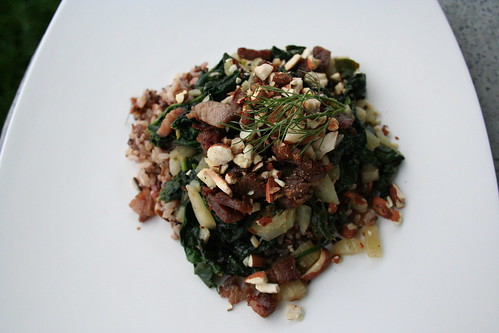
This was a recipe I came up with this morning while I drank my tea, after doing a quick inventory on the refrigerator and pantry and thumbing through my Flavor Bible. I wanted to use some of the goodies we got at the Farmer’s Market this weekend and make something Springy and tasty. The wild rice had a beautiful earthy and nutty flavor. The spinach and fennel had a lemony tang and the perfect amount of that fresh crisp that I crave. The little bit of fresh country bacon brought a salty and smokey flavor and the toasted almonds brought a robust, toasty sweetness that really enhanced the flavor of the dish as a whole and finished it off nicely.
If you wanted to make this a vegetarian dish, you could easily leave off the country bacon and the dish would be equally delicious. I rarely cook with bacon, but when we saw this beautiful fresh bacon at the Farmer’s Market, that we bought directly from the farmer, I knew I would find the perfect dish for it to compliment. The country bacon was a cross somewhere between traditional bacon and ham, not too salty and not too greasy. This is the first time I have ever cooked with it and I most definitely will again.
Wild Rice with Spinach, Fennel & Toasted Almonds
serves 24 cups of fresh spinach, stems removed and washed
2 cups fennel, chopped
3 small cloves garlic, minced
1/2 cup whole raw almonds, unsalted
2 slices of local farm fresh country-style bacon, diced
1/2 lemon
2 cups wild rice, cooked
salt
freshly ground pepperPrepare 2 servings of wild rice, according to the directions on the package. While it is cooking, over a medium-high heat, toast the whole almonds in a large dry non-stick saucepan. Remove the almonds from the pan once they begin to brown up and make slight popping sounds. Set aside. Once cooled, crush the whole almonds to your desired size.
Add the diced country bacon to the pan and brown it up over a medium-high heat (if the pan is too dry, add a drizzle of olive oil). After the bacon is browned up and heated through, remove it from the pan, cover and set aside.
Using the little bit of grease in the hot pan from the bacon, add the garlic and fennel, sauté over medium-high heat, stirring often, being careful not to burn them. Once the fennel is beginning to soften and brown up a little, about 6 minutes, add the spinach. Stir to combine the ingredients. Add a dash of salt, freshly ground pepper and the juice of half of lemon. Once the spinach has cooked down but still has a slight crisp, about 5 minutes, place 1 cup of wild rice on each plate, top it with the spinach and fennel mixture, then the bacon, crushed toasted almonds and freshly ground pepper. Serve.
-
Asparagus & Leek Frittata
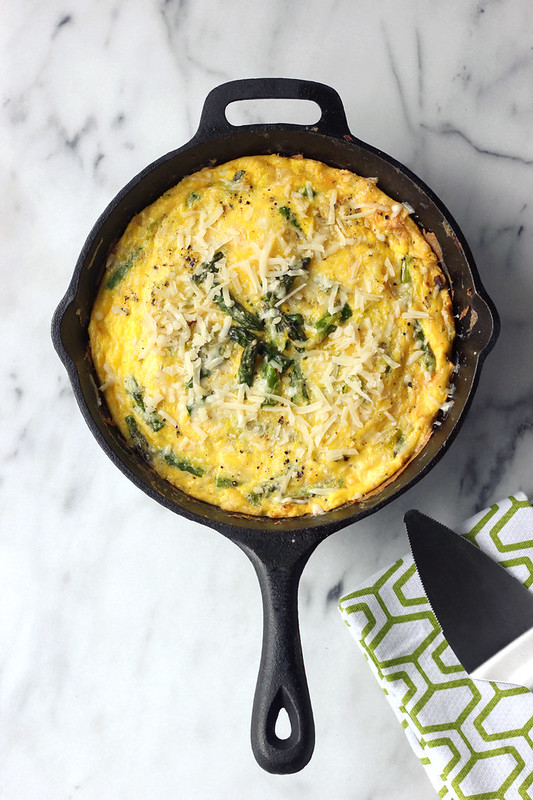

I had some asparagus and leeks in the refrigerator that I really needed to use up and I was contemplating what to do with them as I laid awake in bed this morning (yes, I think about food when I am waking up). Since I woke up pretty early and wasn’t falling back asleep, I decided I would get up and make a hearty Sunday morning breakfast for me and the hubby. An Asparagus and Leek Frittata sounded like the perfect Spring weekend wake-up to me and it was. The subtle crisp from the fresh asparagus, the oniony bite from the leeks, the creamy cheeses and the tasty farm fresh eggs that we grabbed at the farmers market were all so perfect together. This recipe would also make for a great dinner.

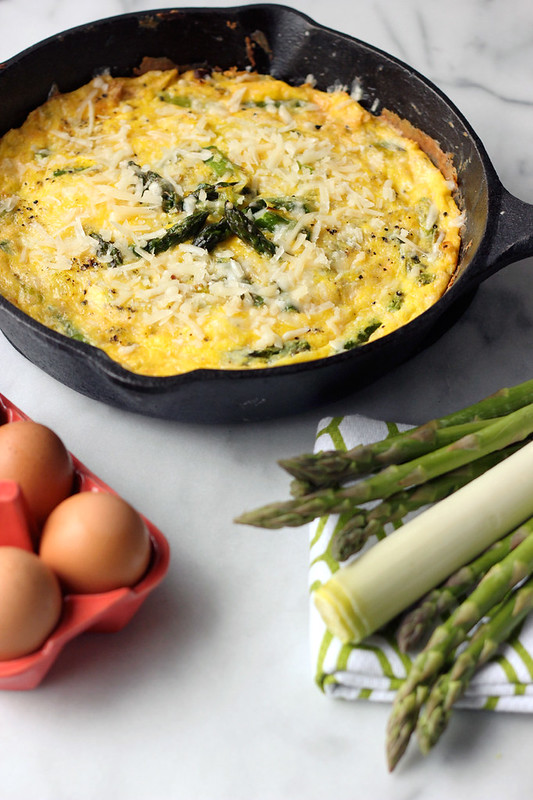
[print_this]Asparagus & Leek Frittata
serves 4-6- 2 tablespoons butter (or olive oil)
- 1 cup chopped leeks (white and light green parts only)
- 1 bunch of thin asparagus, cut diagonal into 1-inch pieces
- 7 large farm fresh eggs
- 1 cup fontina cheese, diced or grated (optional)
- 1/2 teaspoon sea salt
- 1/2 teaspoon fresh ground pepper
- 1/4 cup grated fresh parmigiano-reggiano (optional)
- a pinch or two of red pepper flakes (optional)
Preheat the oven to 400° F
Melt butter (or heat olive oil) in heavy cast iron skillet (9 or 10 inches in diameter) over medium heat. Add leeks, sauté 4 minutes. Add asparagus and sauté until tender, about 5 minutes. Whisk eggs, fontina cheese, salt and pepper in medium bowl. Add egg mixture to the skillet, fold gently to combine. Allow the eggs to begin to set. With a spatula, lift up an edge of the frittata and tilt the skillet to allow the uncooked mixture to flow to the bottom of the pan. Continue to lift until the egg on top is no longer runny. Sprinkle some of the freshly grated parmigiano-reggiano on top and slide the skillet into the oven. Bake the frittata until it is firm to the touch, about 5 minutes. Sprinkle with a bit more fresh parmigiano-reggiano when it comes out of the oven. Cut into wedges and serve. [/print_this]
-
Spinach Salad with Gorgonzola, Walnuts & Grapes
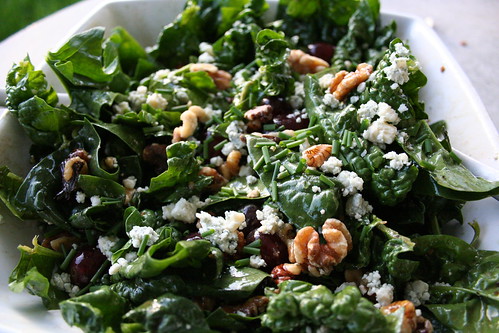
We bought two beautiful bags of fresh spinach at the farmers market last Saturday and I finally got to using some of it with our dinner Friday night. As soon as I saw the spinach, I planned on making a crisp and springy salad, so that is just what I did. This was perfectly crisp and super tasty, the grapes brought a sweet dimension, the walnuts brought the crunch and the gorgonzola gave a creamy tang. I whipped up a quick balsamic vinaigrette and that was it. Super easy and super satisfying. We enjoyed this salad as a side with some grilled Italian sausage we bought fresh from a farmer at the market.
Balsamic Vinaigrette
yields 1 cup1/4 cup balsamic vinegar
2 teaspoons honey
1 tablespoon chopped garlic
1/2 teaspoon salt
1/2 teaspoon freshly ground black pepper
3/4 cup olive oilBeat the vinegar in a bowl with the honey, garlic, salt and pepper until honey and salt dissolves. Then beat in the oil by droplets, whisking constantly. Taste and season to taste.
Spinach Salad with Gorgonzola, Walnuts & Grapes
serves 44 cups of fresh young spinach
2 handfuls of seedless red grapes
1 cup of chopped walnuts
2 oz of gorgonzola cheese, crumbled
4 tablespoons of balsamic vinaigrette
1 bunch of chives, chopped
pepperRemove the stems from the spinach and wash, drain and pat dry thoroughly. If the leaves are large you can tear them or chop them to make smaller. Place into a large mixing bowl. Add in grapes and walnuts. Toss to combine. Just before you are ready to serve, add half of the gorgonzola cheese, whisk up the vinaigrette, drizzle over the salad and gently toss to coat the entire salad with the dressing and to mix the cheese throughout. Taste, add more vinaigrette, if necessary. Top the salad with the remaining gorgonzola, freshly ground black pepper and fresh chives. Serve.
-
Roast Chicken, Apples, Leeks and Baby Potatoes

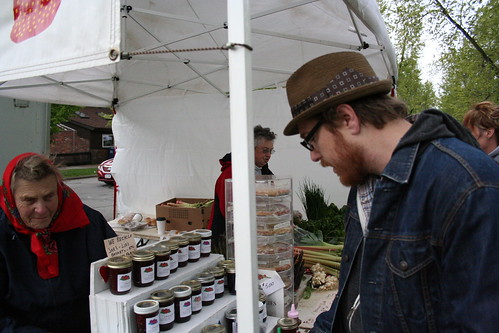
Yesterday was the first day of our big Farmers Market at Elmwood and Bidwell and I knew all week that the weather was doomed for it’s opening day. We decided to meet my parents there right at 9 am to possibly beat the rain and wind. It actually wasn’t too bad, though it felt more like a very cool Autumn Day, not Spring. We walked around, looked at everything, ran into friends and began to make a plan for what we wanted to buy. The sun even peaked out a time or two. Eventually dark clouds made their way overhead, the wind picked up and we knew we should probably make our purchases soon.
We got so much great stuff, apples, leeks, spinach, asparagus, baby potatoes, veggie burgers, yogurt leek sauce, homemade strawberry jam, fresh from the farm eggs, sausage, bacon, and a beautiful, whole, fresh Heritage chicken. I decided this would be dinner. A roast chicken. It was the perfect day for it, it was cold, rainy and windy and I just wanted to stay in. So, I took a look at everything else we bought and made a plan.
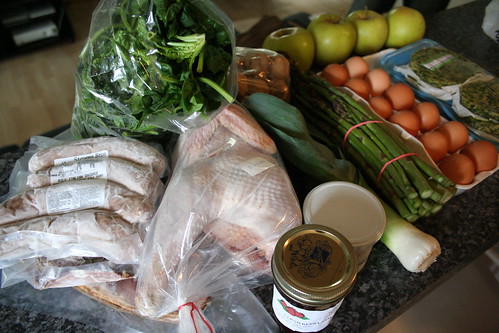

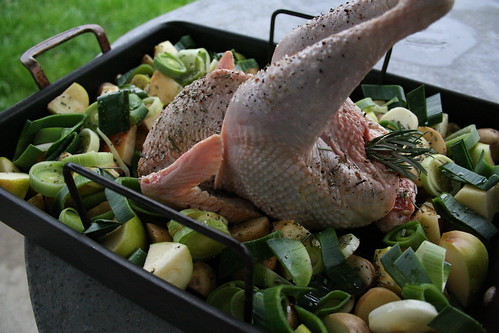
Roast Chicken, Apples, Leeks and Baby Potatoes
Serves 2 with leftover veggies2 medium apples (I used Crispin) chopped
1 leek (white and light green parts), chopped
1 pound of baby potatoes, halved
4 small sprigs fresh rosemary, chopped
olive oil
Sea salt and freshly ground black pepper
1 3 pound whole chicken – we had a farm raised, all natural, heritage chicken from Painted Meadows Farms in Franklinville, NYPreheat your oven to 350° F
Rinse the bird, inside and out and pat dry. Place the potatoes, leeks and apples in the roasting tray of a large roasting pan, place the chicken in the center (breast side up). Drizzle olive oil over everything, making sure to get a good light coating over the whole bird to give you a crispy, perfectly browned skin. Sprinkle everything with rosemary, sea salt and freshly ground pepper. You can also sprinkle the inside of the bird with your spices as well, I did that plus I stuffed a couple of chopped leeks in there, as well as a whole sprig of rosemary. Toss the vegetables gently to make sure they are coated.
Roast the chicken until it is cooked through and the apples, potatoes and leeks are tender. I took the chicken out around 2 hours and the veggies could still use more time, so I took the chicken out to rest, took the vegetables out of the roasting tray so they could cook in the juices from the chicken and turned the oven up to 400° F. I wanted to get them really brown and crispy, the way we like them. Taste the veggies as they are done and season to taste with salt and pepper.
Allow the chicken to rest 10-15 minutes before cutting into it, this will allow the juices to redistribute. Serve with a nice helping of the apples, leeks and potatoes.
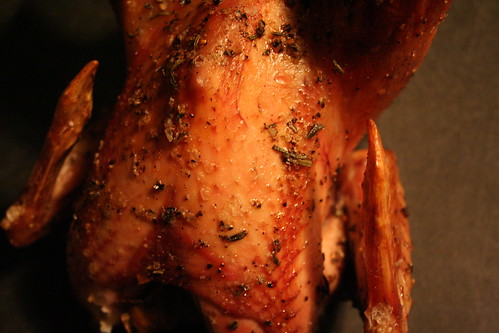
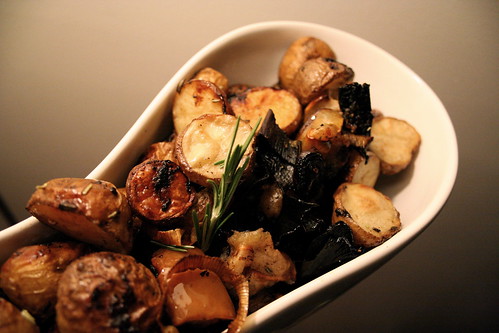
We found that the Heritage Chicken was much different from any other chicken we had ever roasted before, it had an incredible scent when it came out of the oven and it tasted so amazing, a much more rich chicken flavor than from the grocery store chickens. We found the dark meat to be very dark and slightly tougher (almost gamier), a bit more like a cornish hen. However, the breast meat was impeccable, what chicken should taste like, the best I have ever had. The skin, though I don’t typically eat it any way, was thicker than usual and tough to eat. Mark usually eats as much as he can before I start nagging him about the fat, but this time he couldn’t eat much. I’ll have to ask the women we bought the chicken from next week if there is a trick for cooking the Heritage birds, from what I had read it is best to cook these birds low and slow so as not to dry them out and toughen the meat. The legs on this bird seemed longer than I have ever seen and they were sticking straight up (!), but I didn’t have any kitchen twine to truss them, so I went without. I am curious if that could have been why the leg meat seemed tougher, maybe it was overcooked.
We ate dinner a bit later than normal last night, so by the time it was ready it was fairly dark and the pictures of the finished bird are not that great. Still working on a way around the night-time photos.
All in all, this was the perfect start to the farmers market season, I cannot wait to make more meals this week with the goodies we bought and of course to go back next week.
-
Balsamic Strawberries with Mascarpone
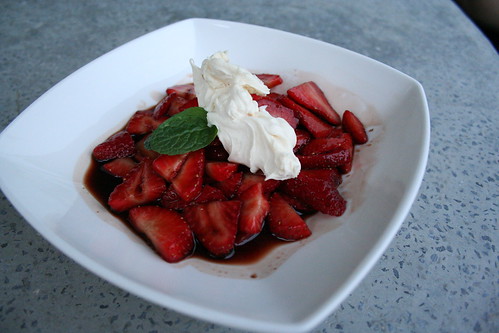
Believe it or not, I do not have much of a sweet tooth. Occasionally, I crave a small piece of really nice chocolate or other little bits, but generally I am not one to go for dessert. However, his time of year the strawberries are just begging to be eaten, they are so sweet and delicious. I thought this was the perfect way to showcase the berries with the mellow flavor from the vinegar and the richness of the mascarpone.
Mascarpone cheese is a soft, rich and easily spreadable cheese, made from cream. It is native to the Lombardy region of Italy, where it is used in both desserts and savory foods. It is the main ingredient in Tirimisu but can also be found in pasta dishes, risotto, sauces etc. It has an almost butter-like quality and a small amount of this stuff goes a very long way, this is one of the things I like most about it.
Balsamic Strawberries with Mascarpone
Serves 21/4 cup balsamic vinegar
2 teaspoons raw honey
2 tablespoons sugar
1/2 teaspoon fresh lemon juice
1/3 cup chilled mascarpone cheese
1/2 teaspoon vanilla extract
1-pint of strawberries, hulled and sliced
fresh mint leavesCombine vinegar, 2 teaspoons raw honey, and lemon juice in small saucepan. Stir over medium heat until honey dissolves. Boil until syrup is reduced, about 3 minutes. Transfer to small bowl; cool completely. (Can be made 2 days ahead. Cover and refrigerate.)
Combine berries and 2 tablespoons sugar in large bowl; drizzle with balsamic syrup and toss to blend. Let stand 30 minutes, stirring occasionally.
Whisk mascarpone and vanilla in small bowl.
Divide berries up between two dishes and top with mascarpone topping and mint leaves.
This can also be served over biscuits or shortcakes, which is how Mark requested his.