-
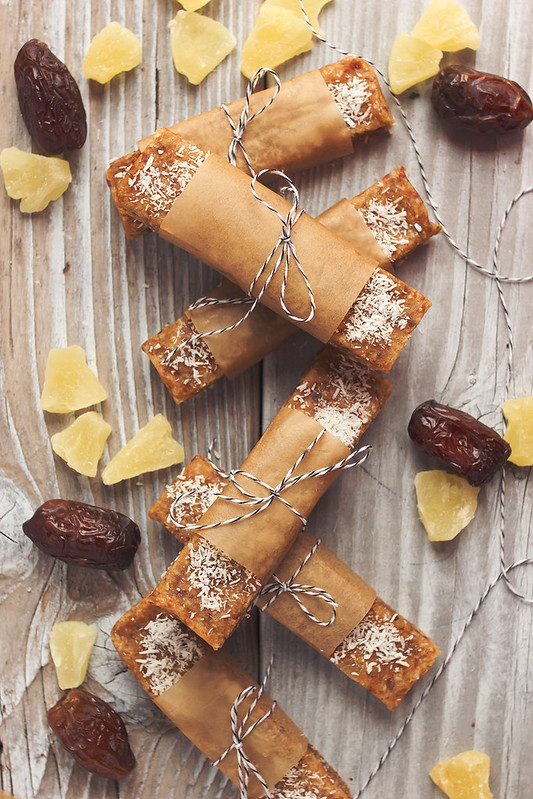
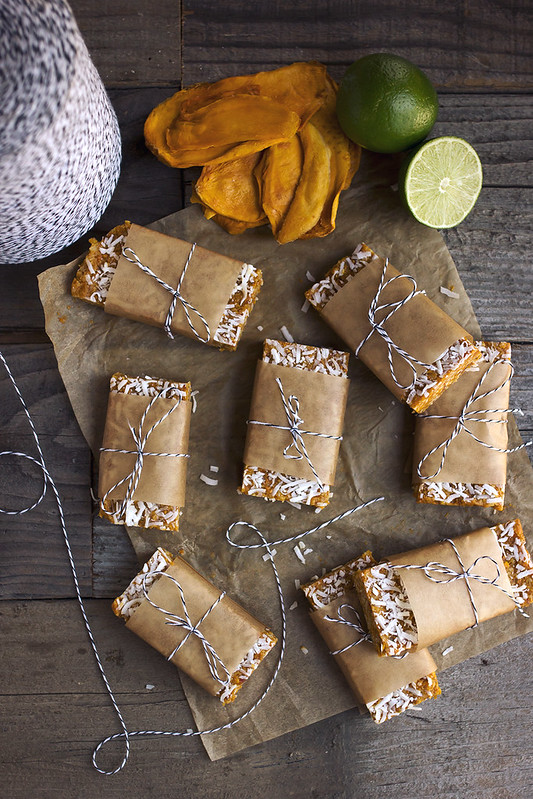
Pineapple Coconut Energy Bars

It’s quite fitting that my fifth and final recipe for this series of healthy travel snacks, I created with Albertsons, is being written from around 37,000 feet in the air. I am flying from California to the East Coast where I will be spending a total of 10 days between Maine and New York. As usual, I have a large selection of healthy snacks packed away for my travels. While I find when flying I have to be a bit more selective with my snack choices, homemade energy bars are always a must. They are super travel-friendly and so simple to whip up the night before my trips.

By now I am sure you’ve caught my tutorial on how-to make your own homemade energy bars, but if you haven’t get to it. It’s the perfect formula to create the perfect bars for your favorite flavors. These bars were one of the few that I have made more than a few times and inspired the ideas of the adaptable tutorial.
These tropical-inspired bars are a great, healthy snack for bringing along on your vacation, but they are also a wonderful way to bring the vacation to you at home. Coconut and pineapple always summons the tropics. Think fancy frozen drinks with umbrellas on the beach.
These particular energy bars are made nut-free, but you can certainly add nuts to fill them out a bit more, if you prefer. Almonds, walnuts, pecans – these are all great options.
-
Honey-Sweetened Strawberry Fruit Leather

As summer winds down, I am clinging to every last bit of the season that I can. I refuse to acknowledge it’s almost over. Keeping with the theme of healthy summer road trip snacks this Honey-Sweetened Strawberry Fruit Leather is the perfect way to take the sweet tastes of summer with you, wherever you go.
This fruit leather recipe calls for strawberries but you can use this as a guide to create fruit leather with whatever fruit you have an abundance of. Peaches, apricots, apples and so on. You can even create a blend of your favorite fruits.
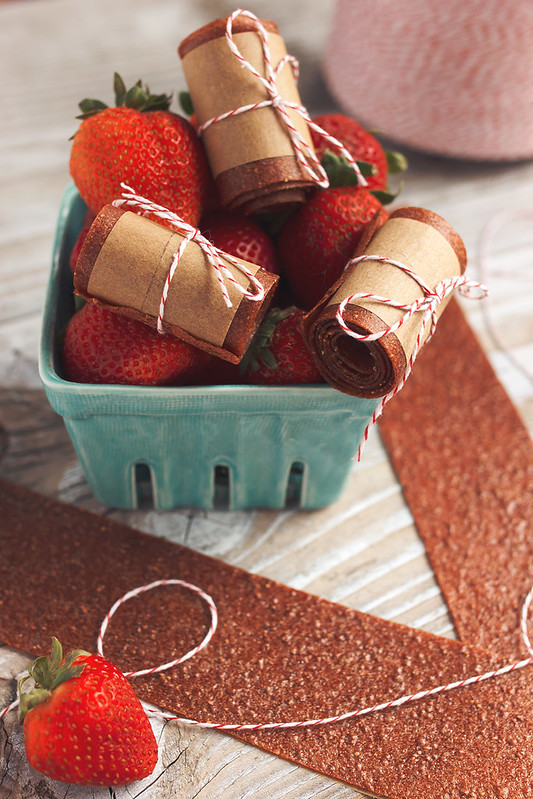
Fruit leather gets a wrap for being a kids-only snack, but I can tell you, adults truly love the stuff, too. This could partially be the fact that it will instantly transport you to being a kid. It’s also great for travel and being on-the-go, just roll it up with a little parchment paper and pack it into your bag and you are ready to go. Sweet, summer berry goodness, wherever you are. Try out different berries or other seasonal fruit for additional variations. For a smoother leather, you can strain the seeds or any pulp before dehydrating, if you’d like. You can cook the fruit first if you’d like to intensify the flavor a bit.
-
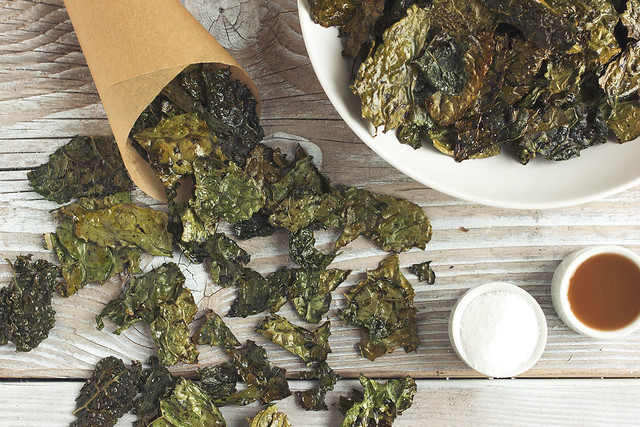
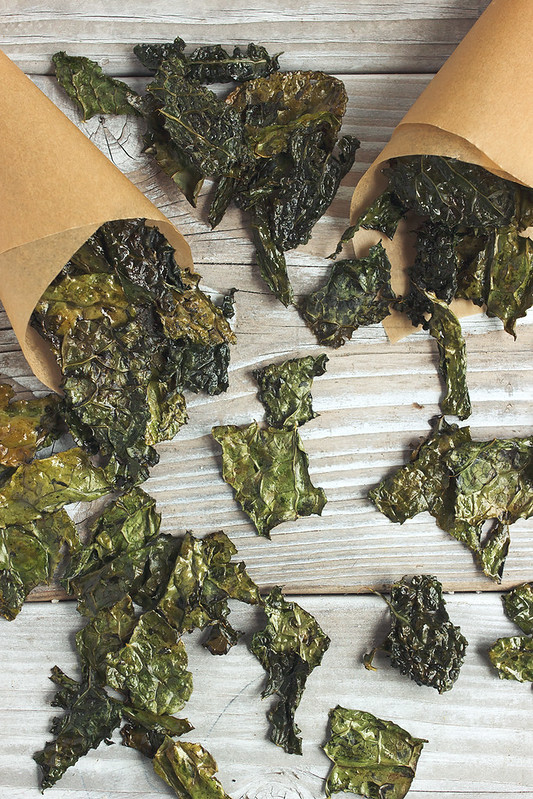
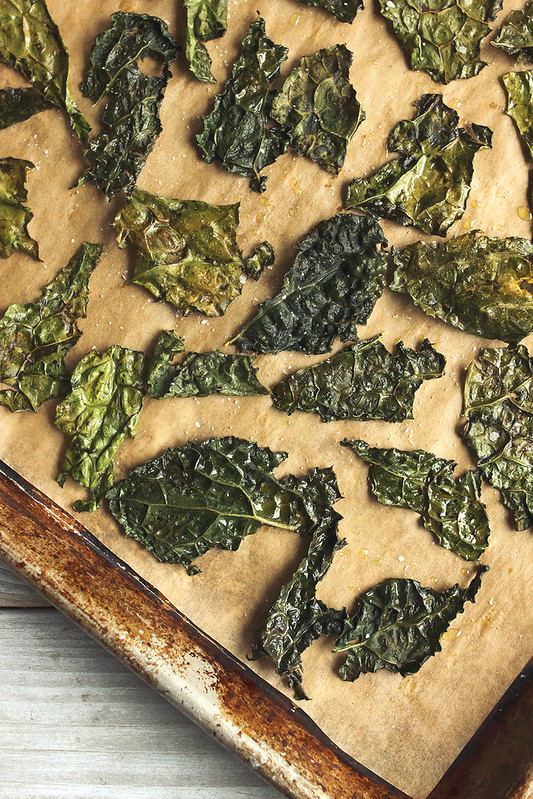
Salt and Vinegar Kale Chips
Summer is winding down, the days are getting shorter, the nights longer. This time of year I always find myself antsy for those end-of-summer road trips, hitting the open road and exploring. For those that have kids, I can imagine that travel urge is even stronger, these are the moments to escape, one last time before school is in-session and life gets back to the hustle and grind of the day-to-day.
I partnered together with Albertson’s to create a series of healthy summer road-trip recipes. This series of recipes is a great way to keep on-track with your mindful eating while you are away from the comforts of the kitchen. I created 5 delicious, gluten-free recipes that will let you enjoy convenient and tasty treats that satiate those snacking urges we all have while out traveling.
I don’t know about you, but for me the car is one of my favorite places to snack. It could be boredom, it could be all part of the letting-go into vacation experience, but I know it’s always important I come prepared for these urges. It would be so easy to stop at a gas station grab a bag of chips or cheese doodles, maybe a sugary drink and a sweet treat for later. But, mostly this would just end up in a car full of crumbs, a belly full of gas and a heart full of regret.
-
How-to Pack for a Yoga Festival

I am hitting the road tomorrow, heading to Lake Tahoe and Squaw Valley for the Wanderlust Festival. I have been counting down the days to this trip, for months. I am so excited for all the yoga, the meditation sessions, teacher-only workshops, hikes through the beautiful Squaw Valley, epic music and dancing, maybe some stand-up paddle boarding and of course, reuniting with friends I haven’t seen in forever and connecting with many new-to-me, beautiful souls.
I thought it might help some of you heading off to a yoga festival this summer to share some of my go-to’s when packing for a yoga festival. No reason to get stressed before you head off to a weekend of peace and bliss. I’ve got you covered.

-
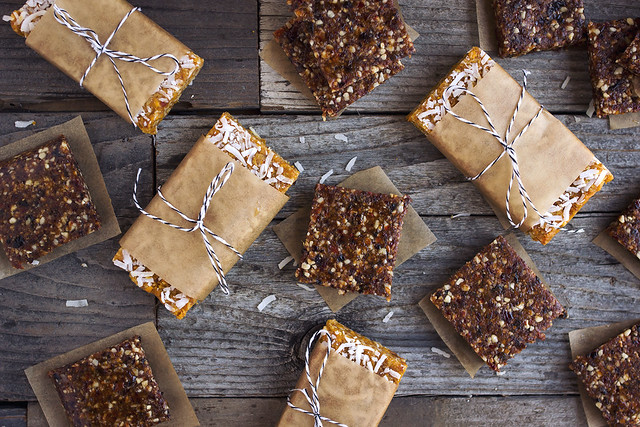
How-to Make Homemade Energy Bars

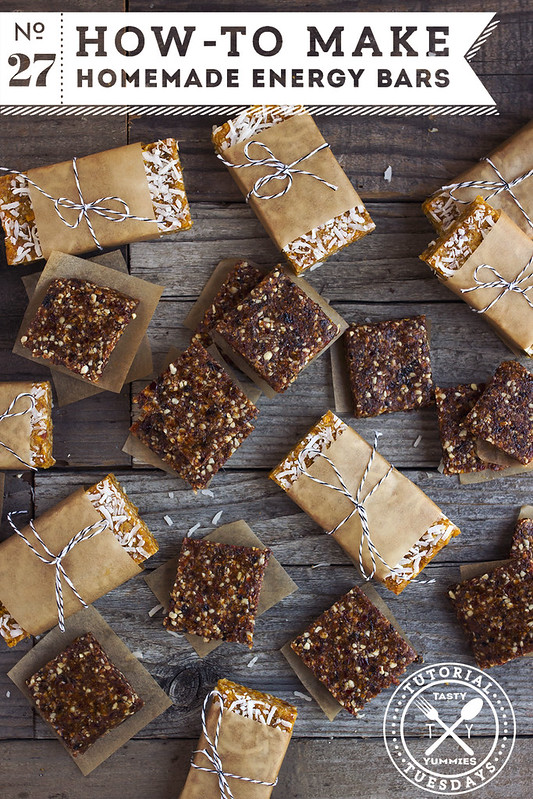
I’m leaving town tomorrow. No, not for good, just for a few days. I am hitting the road to head up to Lake Tahoe for the Wanderlust Festival in Squaw Valley. With an 8+ hour drive ahead of me, I have to plan ahead with snacks and food for both the drive and when I get there. It’s super important for me to know that I have what I need to be nourished and energized, especially when I am away from home and my routines, but also with how active I will be over the 4 days of the festival. Lots of yoga, hiking, maybe some stand-up paddle boarding and definitely some dancing!
One of my favorite things to make are homemade energy bars. They are so simple to make, a great way to energize with healthy fats, proteins and fiber and they are always soo yummy! I have gone from baking my own with oats and nuts, to keeping it super simple with these no-bake, grain-free, date-sweetened bars, reminiscent of the LÄRABAR®.
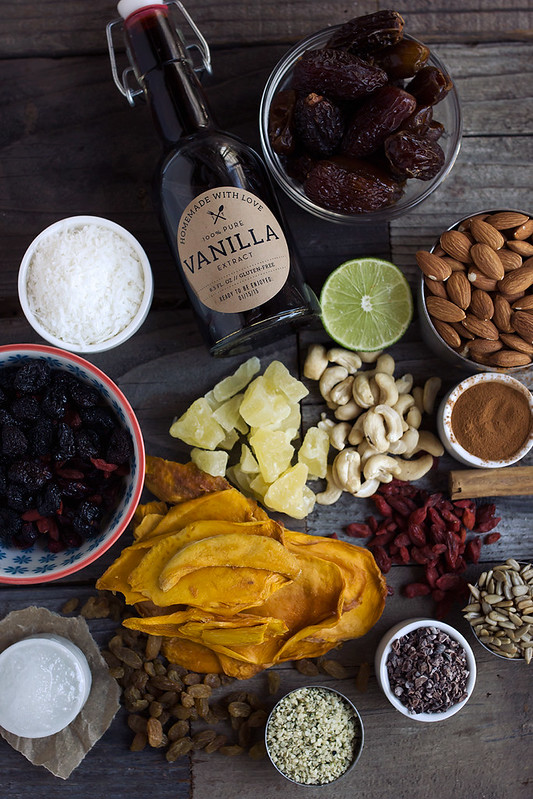
The great thing about making these yourself is not only having full control of the quality of the ingredients, but also having fun with various flavor combos. You can get creative with by pairing your favorite flavors or you can simply go nuts with whatever you happen to have on hand in the pantry, that you need to use up. The latter tends to be the case for me.
For the sake of this tutorial I whipped up two of my favorite flavor combos: Coconut Mango Lime and Berry Cobbler. The Coconut Mango Lime Energy Bars on top of being grain-free and vegan they are also totally nut and seed-free, so they are perfect for those with allergies or intolerances or even someone following the autoimmune protocol. The Berry Cobbler bars, I made bite-sized and those do contain nuts.
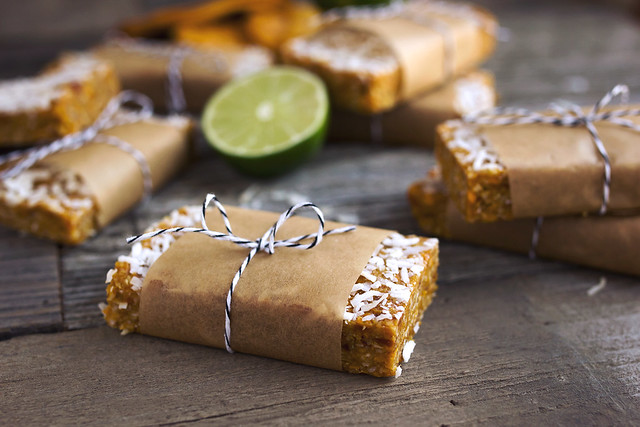
All you have to do is follow my simple base recipe and then you can get creative from there. Trust me when I tell you, these are really hard to screw up. Once you’ve made your base mixture and get creative with your flavors, you can decide if you want to opt for full-sized bars, smaller bites or little balls. If you really wanna get crazy, dip them in some melted chocolate.
-
Salted Dark Chocolate Nut Bites
A true test of how much I love one of the many cookbooks in my collection, is how messy and “used” the book appears. If there are oil stains, melted chocolate fingerprints, bookmarked pages, etc – you know it’s one of my favorites. I haven’t had Kelly from The Spunky Coconut’s new cookbook in my collection for even a month yet and it already has quite a few of those things. If you pulled it off my shelf right now, you’d swear I have had it over a year. It looks that used, already.
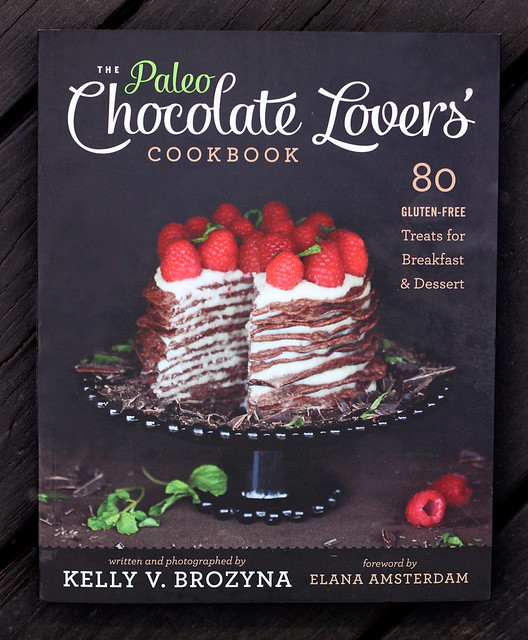
The Paleo Chocolate Lover’s Cookbook features 80 gluten-free treats for breakfast and dessert and it will have you drooling just a few pages in. I know you guys know this already, but I don’t go crazy over all sweets and baked goods. I am just not wired that way. But, if you were to set something in front of me that has been dipped in some melted high-quality dark chocolate, it almost doesn’t matter what it is. I will eat every last bit of it. I don’t need heavy rich desserts, I rarely crave sugary, sweetness, but when I do – just a little something chocolatey usually does the trick for me. Sometimes just a small square of cold dark chocolate is all I need. Satisfying and comforting.
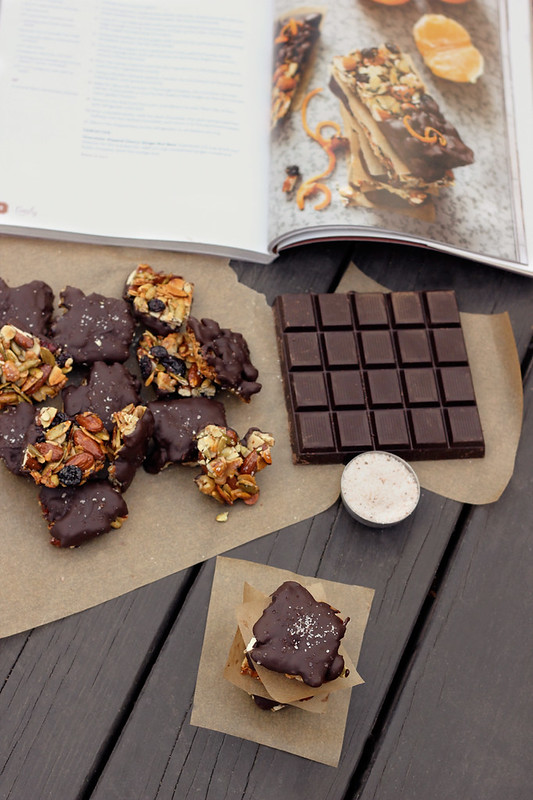
Making healthy, gluten-free chocolate treats that aren’t loaded with refined sugars and grains is just so gratifying and you can still enjoy the rich goodness without the guilt. I am so excited to now have a healthy chocolate “bible” of sorts, to refer to for the perfect chocolate treats whenever I want. An entire book filled with recipes, every single one safe for me and my way of eating. There are breakfast options, cakes, cookies, pies, ice cream, candy and so much more. There is even a section of savory recipes including stews, salads and other dinner-time meals. Besides all of the recipe goodness, Kelly explains some basic tips on getting started with a Paleo lifestyle, going in depth about specific ingredients and techniques. Plus she shares the science, history and ethics of chocolate and some of her favorite brands of store-bought chocolate. It is an incredibly comprehensive book about one of the most yummy topics you can think of! Read the rest of this entry »
-
Chocolate Peanut Butter Road Trip Energy Bars – Gluten-free, Vegan + Refined Sugar-Free
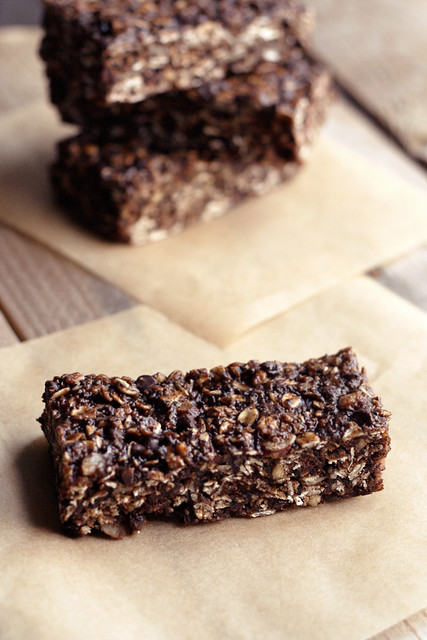
Some of you may recall seeing this recipe before, I shared it in the spring of last year during one of our busiest travel seasons. After sharing my tips for traveling with a restricted diet last week on the Free People Blog BLDG 25, I thought it would be great to share one of my favorite recipes for traveling with the readers over there. These Road Trip Energy Bars are one of my go-to treats to make and bring along on every trip. They travel well and they are super simple to make. Read the rest of this entry »
-
Photo Fun Day Friday – Cross Country Move Edition
[imagebrowser id=1]This is a unique Photo Fun Day Friday for many reasons. First it is my first post from our new home here in Long Beach, California and secondly, it is a TON of photos (long overdue, I might add). We left Buffalo on Saturday, February 23, nearly two weeks ago for our cross-country move to Long Beach, CA. It was 7 long days of driving with lots of fun, adventures and unplanned stops along the way due to weather. We had to change up our original route due to Winter Storm Rocky, but we made it here safe and sound last Friday. We have been unpacking like crazy and trying to get this place all set up to feel like home, so we could get back to work asap! I got my kitchen unpacked earlier this week and I have NEVER been happier to see my stuff. It had been packed up since around January 5th! I have already made quite a few trips to various grocery stores and a farmers market to get all stocked up. I finally cooked my first real meal for us last night (I made a version of my Thai Chicken Soup) after lots of take out, salads, sandwiches and snacks all week long. Tonight I am even hosting our first dinner here, with our friends Patrick and Summer. I cannot wait, this house was made for entertaining.
Once we are a bit more settled, I plan to do a fun photo post to give you a tour of the new house and neighborhood, so look for that soon. Wait until you guys hear about all of my fruit trees and the farmers marker in walking distance. I am dying! In the meantime, I hope you enjoy the photos from our road trip, I decided to go with a gallery this time so make it a bit easier to view. I know it isn’t perfect, the photos are all taken on an iPhone (since my SLR was safely packed away) and some view a little large for the page, but it works (I hope).
Oh and don’t worry, I haven’t forgotten about the yummies!! I hope to get back to the recipes in the next week or so, and I also have some fun product reviews and other goodness for you guys. So stay tuned. Thanks for your patience in this transitional time for me, it was great reading all of the comments both here and on Facebook. I cannot wait to get back to creating in the kitchen and sharing my recipes!!
Here are all photos from above as thumbs, so you can pick and choose what you’d like to see larger. In case you don’t wanna page through them all.
[nggallery id=1] -
Photo Fun Day Friday
It’s a short one this Friday, since I just did a photo post on Monday! It’s been a nice couple of days, we were getting ready for our trip to Chicago for the Renegade Craft Fair and we even had time to decorate our Christmas tree!! I hope you have had a nice week and have an even lovelier weekend! Do you have anything fun planned for your weekend?
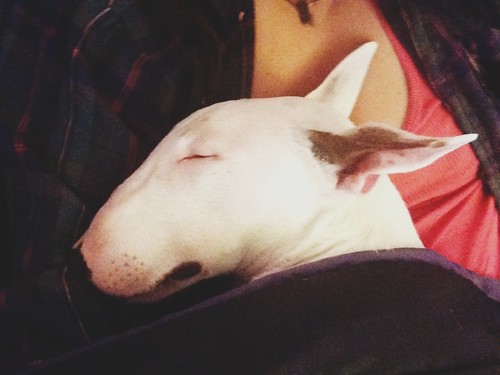
My sweet baby, Seri, sleeping on me.

I just LOVE this stuff!!

We went simple and sweet this year with our tree. Handmade felt bunting with brightly colored flocked ornaments.

How insanely sweet is this photo? Ahhh!

Our new print “Beauty Shop” is now available in our etsy store (as long as a few other new prints).

We stopped for our obligatory road-trip Mexican yesterday on our way to Chicago.
-
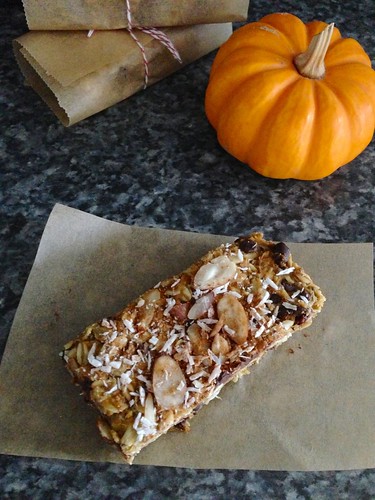
Chewy Pumpkin Spice Granola Bars – Gluten-free + Vegan
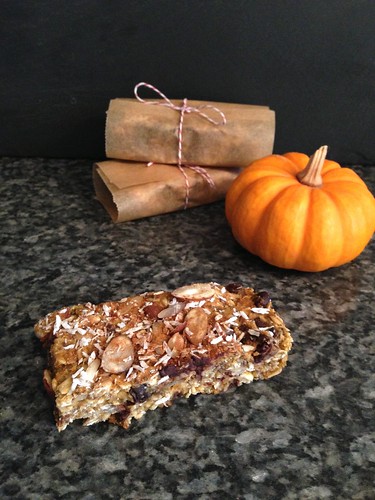
So, I’m doing a little something different today, I’m posting this recipe from the road. I don’t mean just that I’m on the road away from home, but I am actually in the road, in the car. We are driving to Chicago and we are somewhere in Ohio right now, about 6 hours from our final destination. I made these granola bars for this trip and I had every intention of photographing them and writing up the recipe to share before we left. Of course I ran out of time and didn’t get time to set up a quick photo shoot with my nice camera, as usual. As I was packing these up for the drive, I thought rather than not sharing the recipe at all, I would just snap a few quick photos with my iPhone and make it work.
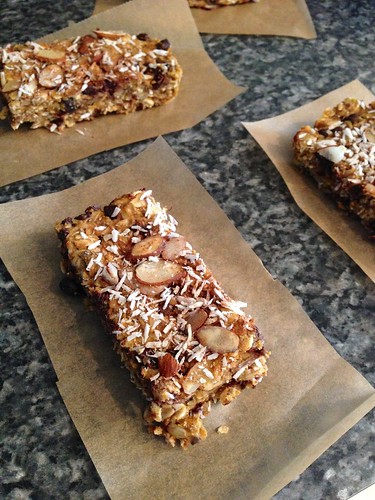
They may not be the best photos, but you get the idea. These granola bars are full of goodies and lots of flavor. They aren’t the super crispy crunchy kind, but more soft and chewy, which I prefer. I added in mini chocolate chips, dried currants, sliced almonds and shredded coconut. Feel free to add in your favorite extras and make these your own. If you are using fresh pumpkin purée , which is what I did, make sure you squeeze or drain any excess water from it, so you don’t end up with soggy bars.
if you are in Chicago this weekend, come see us at the Renegade Craft Fair Holiday Market on Saturday or Sunday!
[print_this] Chewy Pumpkin Spice Granola Bars – Gluten-free + Vegan
Makes 8 bars (you can also cut them into smaller squares to 16 or more)- 2 cups certified gluten-free rolled oats
- 1/2 cup certified gluten-free oat flour
- 1 cup fresh pumpkin puree (canned will also work)
- 1/2 cup maple syrup (honey or coconut nectar would also work)
- 1 teaspoon ground cinnamon
- 1/2 teaspoon ground nutmeg
- Pinch of cloves
- 1/4 teaspoon salt
- 1 teaspoon vanilla extract
- 1 tablespoon chia seeds (or flax seeds)
- 1/2 cup mini-chocolate chips (certified gluten-free and vegan)
- 1/4 cup dried currants, cranberries or raisins
- 1/4 cup sliced almond, plus a tad but extra for the top
- 1/2 cup shredded coconut, plus a tad but extra for the top
Preheat oven to 350º F. Grease an 8″ x 8″ glass baking pan very well (with coconut oil, butter, oil, etc), or line it with foil, leaving some overhang on two of the sides so you can easily pull it out of the pan to make cutting even easier (this is what I did).
In a large mixing bowl, add all of your ingredients. Mix and mash up very well until it is all well combined. Get your hands in there if you really want to.
Press the mixture firmly and evenly into your pan. Sprinkle a bit more coconut, chopped nuts and some cinnamon on top. Place the pan into the oven and bake for 20-25 minutes. Don’t worry if the bars seem a bit soft, they will firm up as they cool. After it has completely cooled, either lift the entire thing out of the pan and cut into bars or squares, or cut while it is in the pan.
These can be stored individually in the fridge or freezer. Since I made these two days ago, I stored them in the fridge and then wrapped each one individually in a little piece of parchment paper and a sandwich bag for easy eating in the car. [/print_this]
-
On the Road / A Very Tasty Thanksgiving

Hey everyone!! Some of you may have
heardread me mention that we had some upcoming travels that would take me away from my kitchen for a bit this month! We are leaving at the end of this week on a 10-day East Coast tour for our business, Hero Design Studio. In a brief explanation we are going to be traveling from Buffalo to Washington, DC, with a quick stop in Baltimore, then we are on to Philly and lastly Brooklyn. We have a bunch of different events and appearances planned for this time, all of which you can read about in detail here on the Hero blog. If any of you will be in the area of DC or Brooklyn, be sure to swing by and see us at the craft fairs we will be vending at. I’d love to meet some of you!Of course, while we are away that also means I won’t be in my kitchen creating and with it being one of my favorite times of the year for food and eating, I just couldn’t leave you guys without some seasonal yummies! So, I enlisted the help of some of my most talented friends.
We are calling it A Very Tasty Thanksgiving and starting tomorrow, November 8th until November 21st, each day we will have a brand new post featuring clean, unprocessed, wholesome, healthy and of course, gluten-free and dairy-free creations for your holiday feasts! Plus, we have some extra special posts featuring seasonal transition tips, yoga asanas, holiday stress relieving tips and more. If you aren’t in the US and therefore won’t be celebrating Thanksgiving, consider this a jump start on your holiday meal and life planning, I am sure there are lots of celebrations coming up in the next month or so where these delicious, seasonal recipes and tips will certainly come in handy.
Visit the Very Tasty Thanksgiving page to follow the entire series, see the full list of participating bloggers and we will be updating that page daily with the new posts. Be sure to check back every day as we have a new guest here to help make your holidays a little tastier and take a moment to comment on the posts and let our guests know we appreciate them being here!
Thank you so much to all of the wonderful contributors that are filling in for me while I am away, it is so comforting knowing Tasty Yummies is in such good hands.
*PS – If you have any suggestions on places to eat, practice yoga or just check out in any of those four cities, please feel free to comment below. We are staying in Arlington, VA when we are in DC, right downtown in Philly and on the edge of Greenpoint and Williamsburg in Brooklyn! Thanks!
-
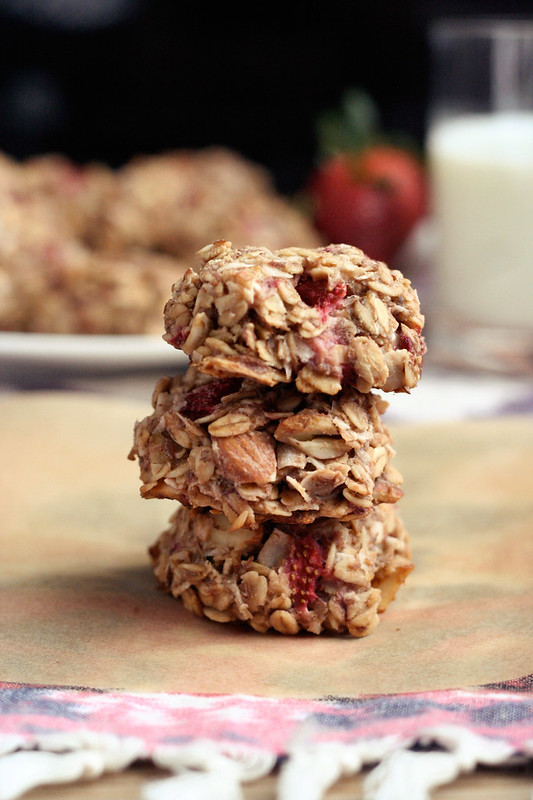
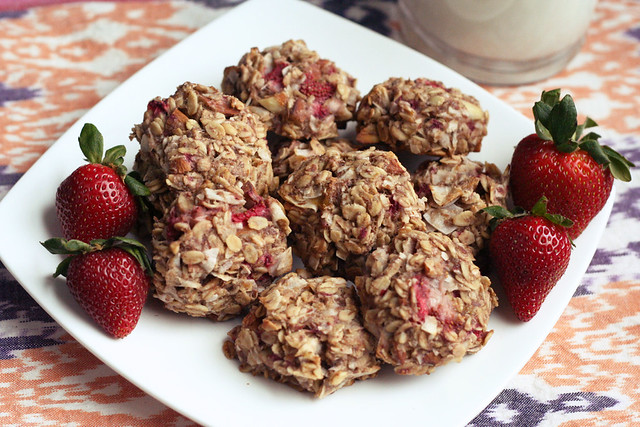
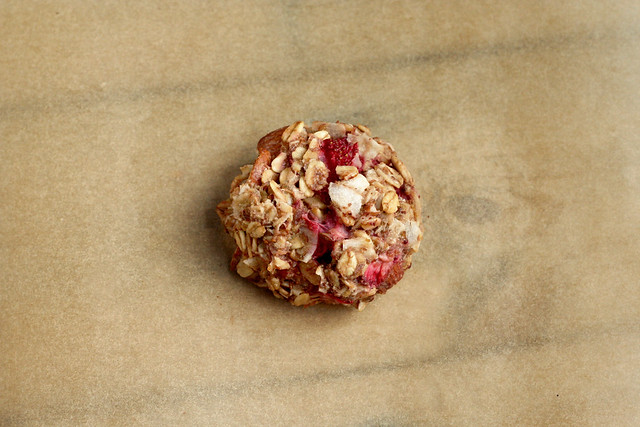
Strawberry Coconut Breakfast Cookies – Gluten-free + Vegan

Since I made my chocolate peanut butter energy bars last month for our road trip to Austin, I have made them a couple more times, sometimes the same exact way, other times tweaking the ingredients a bit to what I had on hand. But, I have been thinking of lots of different things I could do with the recipe since it is so versatile. I had planning to make strawberry almond bars this week until I came across this recipe for breakfast cookies made with dried blueberries. It gave me the idea to instead take the bar recipe I had thought up, and turning it into cookies, to end up with more and smaller servings. Plus, I loved the idea of having cookies for breakfast, even if it is the exact same recipe. Who doesn’t love a cookie for breakfast?
These cookies were so simple to make and they are bursting with flavor! They are subtly sweet from both the bananas and maple syrup and the strawberries bring a bright, fresh and tangy bite. You could definitely substitute your favorite fresh berry in this recipe, raspberries, blackberries, blueberries, etc. You could also use dried fruit, just skip the oat flour and maybe use a little less oats (obviously the fresh berries contain more liquid that dried would, so that is why the difference). Also, you can add your favorite nut, walnuts, pecans, pistachios, etc. Originally I had planned to use almond butter instead of the coconut oil, but I really loved the combination of the strawberry and coconut, two of my absolute favorites, together!
I made these delicious breakfast cookies late last night after we got home from grocery shopping. I, of course, had to have one when they were still a little bit warm, and it was delicious. Then I grabbed one on the way out of the house first thing this morning on my way to yoga. It was the perfect quick little treat. The nice thing about these cookies are they aren’t too sweet, so you don’t have to feel any guilt eating them for breakfast. It’s just like having a granola bar, but better! But they are sweet enough that they are great as a healthy dessert, too!
Do you ever have cookies for breakfast?
[print_this]Strawberry Coconut Breakfast Cookies – Gluten-free + Vegan
makes 18-24 cookies- 2 cups of certified gluten-free rolled oats (I use Bob’s Red Mill)
- 1/4 cup certified gluten-free oat flour (or just process some gluten-free rolled oats into a fine powder)
- 1 cup unsweetened coconut flakes
- 2 tablespoons ground chia seeds or ground flaxseeds
- 1/2 cup almonds, roughly chopped
- 1/4 teaspoon sea salt
- 2 organic bananas, mashed
- 2 tablespoons maple syrup (or honey)
- 1/4 cup coconut oil, melted
- 1 cup fresh organic strawberries, roughly chopped
- 1 teaspoon vanilla
Preheat the oven to 350º F. Line a baking sheet or two with unbleached parchment paper. In a large bowl combine oats, oat flour, coconut, chia seeds, almonds and salt. Stir in bananas, strawberries, coconut oil, maple syrup and vanilla. I use my clean bare hands to mix it all up so I can really get in there and get everything well mixed. You can of course just use a large spoon or spatula.
Form the dough into 2 1/2 inch balls/discs with your hands and place into even rows with just a little room in between them. Press them down very gently to flatten them a bit.
Bake at 350° for 25-30 minutes or until fragrant and golden. Cool on pan for a few minutes than transfer to a cooking rack. Enjoy for breakfast, dessert or an anytime snack.
[/print_this]
-
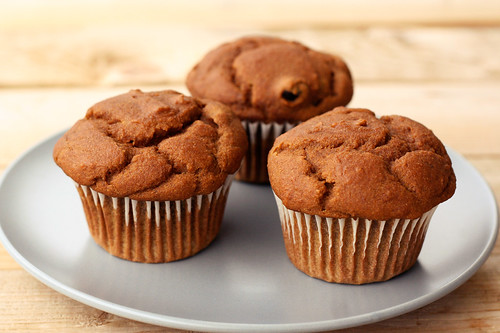
Pumpkin Gingerbread Muffins with Dried Cranberries {Gluten-free, Vegan}
We’re leaving bright and early, hopefully before the sun rises, tomorrow morning for Kentucky to visit my husband’s family. We’re gonna celebrate Christmas a little late, ring in the new year and enjoy the last of the holidays. It’s about 8 or 9 hours to drive there, possibly longer with having the pooch with us, but it’s not too bad. I usually try to pack some healthy snacks and foods both for the drive and for when we get there.
So, this morning I baked a small pie pumpkin to purée to make these muffins, I toasted the seeds with a super spicy pepper blend and I also made dark chocolate bark with dried bing cherries, pistachios and grey sea salt (recipe soon).
I had to change my pumpkin muffin recipe a bit as I was nearly out of almond flour, so I turned to Gluten Free Goddess‘s pumpkin muffin for some changes and additions to my original recipe. I used the last of some coconut milk I had and since I wanted to skip the regular sugar, I decided use coconut sugar and some blackstrap molasses. The minute I smelled the molasses with the spices it gave me the idea to add additional flavors to create a “gingerbread” type muffin.
The gingerbread flavors went so well with the pumpkin and these turned out great, they are so moist and tender. These will be great for the drive and wonderful for breakfasts when we get there. Since hubby likes to cram in as much Southern junk and comfort food as he can while we’re down there, I’m usually on my own for food. I’m ok with it, I even encourage it, since he’s such a trooper all the time here at home and he usually only gets this food once a year. But, this does mean I am on my own while we are down there. I usually pack snacks and food to cook for myself while everyone else is having fried chicken and pizza from their favorite local joint.
I am making my tortilla soup for everyone on New Years night, and I’m super excited for them to try it for the first time.
What do you have planned for New Year’s Eve?
I hope everyone has a peaceful, safe and blessed New Years celebration, surrounded by loved ones. I am so excited for all the lies ahead in 2012. It promises to be a year full of wonderful adventures, big changes and so much more. We are planning a big move and we already have some super amazing projects lined up. I am so full of anticipation for the journey ahead. I am not sure I have ever looked forward to a new year, as much as this upcoming one.
[print_this]Pumpkin Gingerbread Muffins with Dried Cranberries – Gluten-free, Vegan
Adapted from my own pumpkin muffin recipe and Gluten-free Goddess’ recipe1 cup sorghum flour
3/4 cup almond flour
1/3 cup organic coconut flour
1/2 cup tapioca starch
1 1/2 teaspoons baking powder
1 teaspoon baking soda
1/2 teaspoon sea salt
1/2 teaspoon xanthan gum
1 teaspoon ground cinnamon
1 teaspoon ground ginger
1/2 teaspoon nutmeg
1/4 teaspoon ground cloves
1/4 cup blackstrap molasses
3/4 cup coconut sugar
1 1/3 cups fresh pumpkin puree (canned organic puree would also work)
1/4 cup light olive oil
2 large pasture-raised eggs, beaten (or 1 tablespoon Ener-G Egg Replacer whisked with 1/4 cup warm water)
1 teaspoon vanilla extract
1/3 cup coconut milk (or almond milk)
1/2 cup dried cranberries (you could also add raisins, dried cherries, nuts or chocolate chips here, instead or in addition to)Preheat oven to 375º F. Line a standard muffin tin with paper liners.
In a large mixing bowl whisk together all of the dry ingredients (up to and including the cloves). In a medium mixing bowl, whisk together the wet ingredients (up to and including the milk). Add the wet ingredients to the dry and mix very well by hand or with a stand mixer or hand mixer to incorporate the ingredients. The batter should be very smooth and not clumpy. Fold the cranberries into the batter by hand.
Divide the batter evenly among the muffin cups. Bake in the center of the preheated oven for 20 to 25 minutes until golden and firm to the touch. A wooden pick inserted into the center should emerge clean.
Cool the muffin pan on a wire rack for five minutes. Gently pop the muffins out to continue cooling on the rack (don’t cool them longer than 5 minutes in the hot pan- they’ll definitely get soggy). Enjoy a muffin after they have cooled 10 minutes.
Freeze any leftover muffins in tightly sealed freezer bags and pop one out for a quick and easy breakfast.[/print_this]
-
Baked Sweet Potato Chips
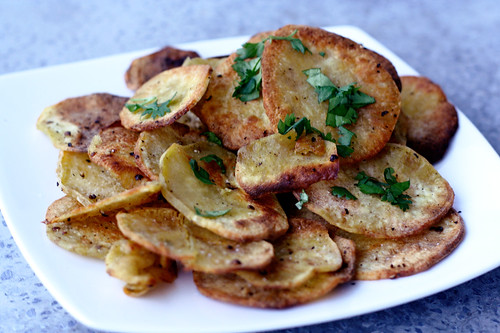
This is a super easy and healthy treat you can make at home that is perfect for a mid-day snack or for the road trip munchies. I made these for our drive to NYC a couple of weekends ago, they were perfect for the car.
You can certainly leave the peels on, though the potatoes that I had on-hand were looking a bit rough, so I decided to peel them. I used organic white sweet potatoes but any sweet potato or regular potato would work just as well. You can have fun with spices, oils and other flavors. I kept it simple with just salt and pepper and a good olive oil and topped them with a squeeze of lime and a bit of chopped cilantro. You could add chili powder, cinnamon or any other spice or herb you desire. I made these again today, for a mid-afternoon snack, and this time I used applewood smoked sea salt! WOW, it was incredible.
Once you get into making your own chips, you’ll really laugh at the thought of eating them out of a bag. These are so much more filling and have a great flavor. You will still have the great crunch but without the insane amount of fat from frying and all the chemicals and preservatives.
Once thing I recommend highly when it comes to making your own chips at home is to slice the potatoes (or whatever you are making the chips from) with a mandoline slicer. This ensures a consistent thickness on all the chips so they will cook evenly, plus it is incredibly easy to use. You can go-it by hand with a sharp knife and a steady hand, but it isn’t easy.
Baked Sweet Potato Chips
serves 42 medium organic sweet potatoes, scrubbed well or peeled, sliced about 1/8 inch thick
1 tablespoon olive oil
1/2 teaspoon coarse sea salt
1/2 teaspoon freshly ground black pepperlime wedges for serving
fresh chopped cilantro for servingPreheat oven to 400º F.
In a large bowl, add the potato slices, olive oil, salt and pepper. Toss gently to evenly coat.
Place the potato slices on two rimmed baking pans, drizzle with olive oil and sprinkle with salt and pepper. Gently toss to coat evenly. Arrange in a single layer between the two pans.
Bake uncovered for 20 to 25 minutes until the potato slices are golden brown, crisp and cooked thoroughly, turning a couple of times to crisp evenly. Sprinkle with a bit more salt and pepper a squeeze of lime juice and the chopped cilantro just before serving.
-
Toasted Spicy Almonds

Sorry for the lack of posts – we have been very busy over here. We were in Chicago this past weekend for the Pitchfork Music Festival and Flatstock 26 and before that we were busting our butts designing and printed, getting ready for the festival. I have still been cooking, but pulling out the camera, trying out new recipes, etc., gets put on hold when life gets this crazy. Before we left town I did get a chance to make this delicious snack to munch on in the car on the road trip to Chicago. I know most of the reason I crave salty snacks in the car is due to boredom, but I have accepted that and I am happy to enjoy not having a mountain of work and a long to-do list, and to sit back watch the road and enjoy my hubby’s company. Rather than salty processed potato chips from a random gas station, I thought that these would be the perfect alternative. We also packed up some of the gluten-free blueberry muffins that I had previously made and froze and some chipotle hummus with sliced cucumbers from our garden. No reason to hit a drive-thru for lunch or to eat junk!
These almonds were so satisfying and easy to make. I started with roasted almonds since that is what I had on hand, but you could also start with raw almonds, and just toast them even longer. Mark and I both really love spicy food, so you can adjust the peppers accordingly. I used a premade salt-free Black and Red Spice mix from Penzeys, that was a mix of Tellicherry black pepper and hot cayenne red pepper.
We leave again in less than one week for San Francisco for the Renegade Craft Fair, then we are back home for a bit. Hoping to be able to cook a bunch and really use all the goodies we’re getting from the garden.
Toasted Spicy Almonds
1 tablespoon organic butter
8 ounces organic roasted almonds, unsalted
1/2 teaspoon black pepper
1/2 teaspoon cayenne pepper
1/2 teaspoon kosher saltSlowly melt butter in a non-stick skillet over medium-high heat. Add the nuts, peppers and salt. Toss with a rubber spatula to coat the nuts and spread them out in the pan in a single layer. Allow the nuts to start to brown a bit, then toss or stir to flip, allow them to continue to toast. This process only takes a few minutes (3-5), remove the pan from the heat when the desired amount of doneness is achieved. Adjust spices and salt to taste. Allow to cool before serving.


