-
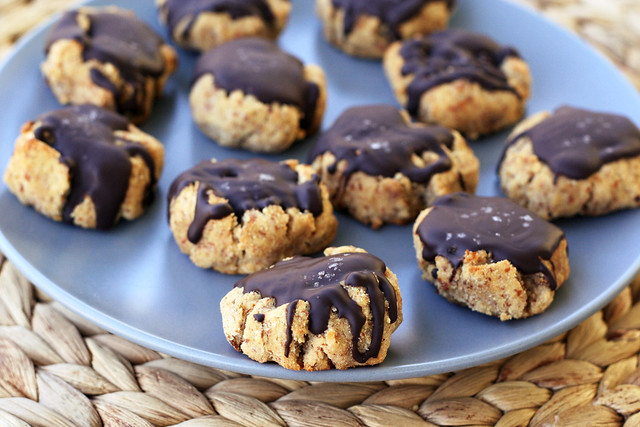
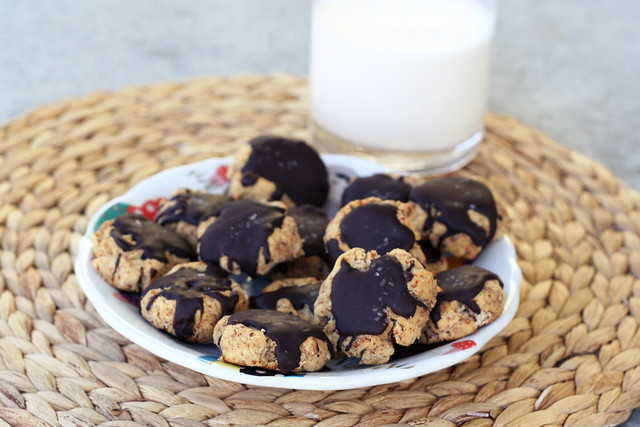
Vanilla Almond “Sugar” Cookies Made from Almond Milk Pulp – Gluten-free, Vegan + Refined Sugar-free
Every time I make my homemade almond milk, I swear that I am going to do something amazing with the leftover almond pulp. Enter Vanilla Almond “Sugar” Cookies Made from Almond Milk Pulp! Most times I put it in the fridge with really great intentions and plans, then within a few days it has mold and I feel horrid throwing it out. Happens way more often that I would like to admit. Almond pulp has to get used up within a day or two, so if you can muster up the motivation to do something with it, you have to do it quickly. This time as soon as I finished making the almond milk I started looking around online at different recipes I could use the pulp in. I have seen many recipes for savory crackers made from the almond pulp, but since this time the almond milk (and therefore the almond pulp) that I made was sweetened and I added vanilla, I wanted to make some type of sweet cookie. I still want to play around with a cracker recipe, too. So hopefully soon.
These cookies have a really great vanilla flavor and they are delicious with an ice cold glass of almond milk, or a mug of hot tea or coffee. If you want to skip the chocolate and sea salt on top, go for it, I just felt like it was the perfect compliment to them, who doesn’t love chocolate? These cookies are subtly sweet and reminiscent of a classic sugar cookie, but without all the junk. Side note, even after baking and making dozens of different sweet treats and smoothies, etc – sweetened only by using dates, I am still completely amazed by them. Who knew those funny looking little things could be so sweet and sinful. The sweet nuttiness from the almond pulp is so delicious and pronounced in these cookies, it’s really one of my favorite flavors. After eating a bunch of these, I started thinking about different ways I could play with this recipe. I think you could add cocoa to make a chocolate cookie and I also think a spicy gingersnap version of these cookies made with ground ginger and cinnamon would also be delicious, so I will definitely have to play around with both of those.
Just a quick note, the original recipe has an option to dehydrate these cookies to make them “raw”, but since I don’t have a dehydrator and I was making these at night and wasn’t comfortable leaving them in the oven overnight, I just baked them as the recipe also suggests. The bake time can vary a bit depending on how moist your pulp was when you started, I think mine ended up baking for nearly 30 minutes, but I would suggest checking them around 18 or 20, since you don’t want them to dry out or burn.
[print_this]Vanilla Almond “Sugar” Cookies with Dark Chocolate and Sea Salt – Gluten-free, Vegan + Refined Sugar-free
Makes approximately 2 dozen cookies
Recipe adapted from Choosing Raw- 2 cups almond milk pulp
- 8 soaked and pitted medjool dates
- 1/3 cup almond or coconut flour
- 2 teaspoons vanilla extract
- dash of sea salt
- 1/4 – 1/3 cup melted dairy-free dark chocolate (I melt unsweetened bakers chocolate and sweeten it with a little maple syrup and/or stevia, you can use semi-sweet chocolate chips or whatever your favorite chocolate happens to be)
1 teaspoon course sea salt
Preheat the oven to 350º F. Line a cookie sheet with parchment paper.
Add the almond pulp, dates, coconut flour, salt and vanilla extract into a food processor and process until the “dough” is the same texture and consistency of sugar cookie dough, or there about. You may need to add a little more flour, depending on how moist your almond pulp was to start.
Using your hands, make small little round balls with the dough (about a tablespoon or so each) and line them up in rows on your parchment paper lined cookie sheet. Press each one down very gently using a fork. (the original recipe called for using a fancy cookie press, but since I don’t have one, I improvised)
Bake cookies for about 20 – 25 minutes, or until golden brown. This time may vary depending on how moist your cookies are. Just keep checking on them so you don’t burn them or dry them out.
Allow the cookies to cool totally then drizzle the dark chocolate over top of each cookie and sprinkle a small amount of seat salt on each cookie.
[/print_this]
-
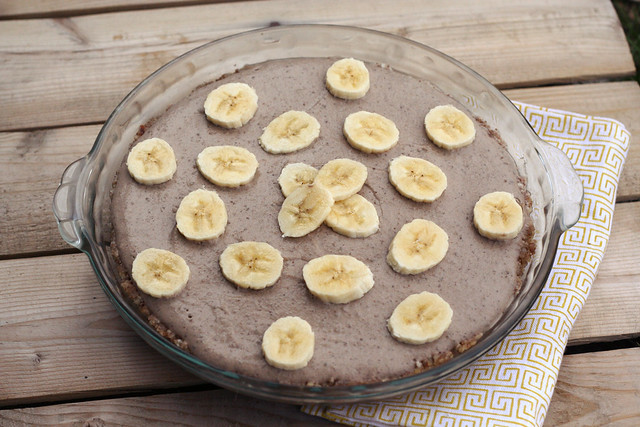
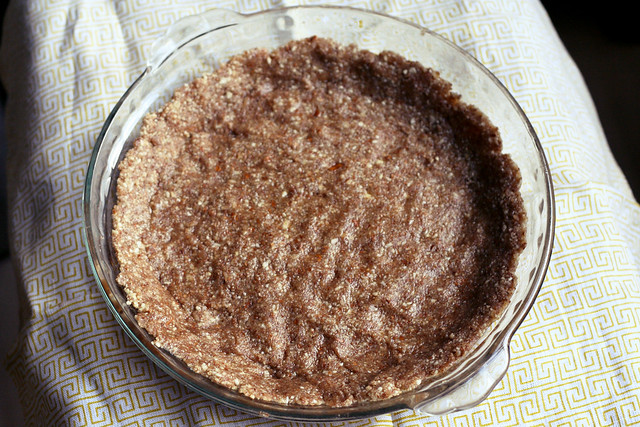
No-Bake Banana Cream Pie – Gluten-free + Vegan
I was very excited when I got an email a few weeks ago from Free People asking if I’d like to be a guest blogger on their popular blog, BLDG 25. I, of course, said yes, and I am a regular lurker of the blog and I really love it. They asked if I would share an exciting recipe for the launch of their newly designed and updated blog, so I knew the perfect recipe to share.
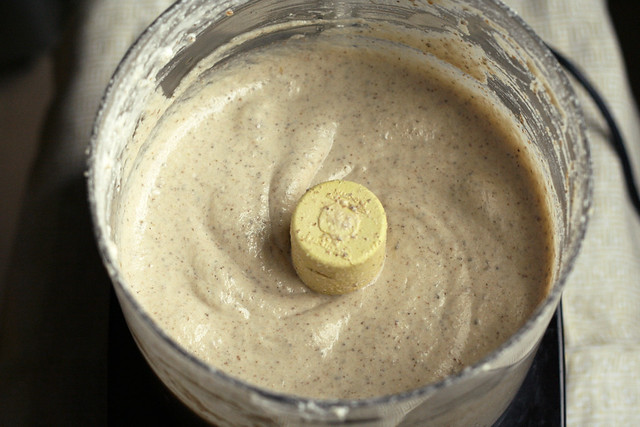
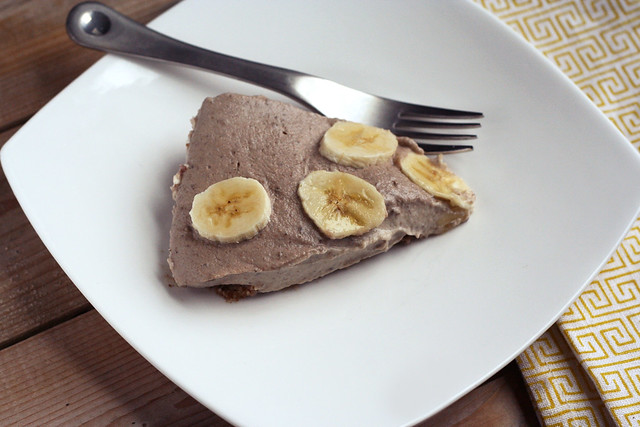
I had been working on a recipe for No-Bake Banana Cream Pie, with a raw nut based crust and a non-dairy filling, so that seemed like the absolute perfect fit. This pie is both gluten-free and vegan and easily made raw, and it is of course absolutely delicious, even without all the sugar, dairy and other yucky stuff. And come on, who doesn’t love pie?
So, go on over to the newly redesigned and updated Free People Blog, BLDG 25, now and check out the recipe for my No-Bake Banana Cream Pie and please take a minute to comment, if you will. There was mentioned of me being an ongoing guest poster, so who knows, there may be more Tasty Yummies on the Free People blog soon enough! Enjoy.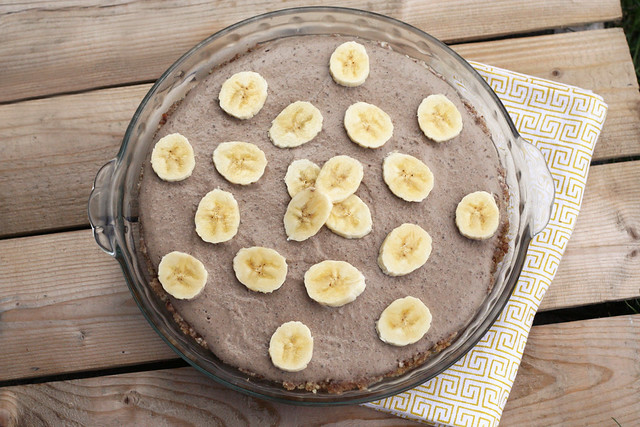
-
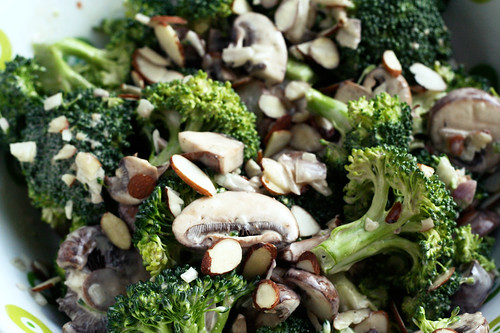
Creamy Vegan Broccoli Salad with Mushrooms and Almonds
Hey guys – I apologize for the lack of recipes right now, but I have had my head buried in work while we get ready for SXSW and the Flatstock Rock Poster Convention in Austin, Texas. We leave next Saturday for the long and fun road trip down there and we will be on the road for a total of 11 days. Many of you probably recall me talking about it last year at this time, it is such an enjoyable excursion that comes at the perfect time of year for us. We get to see so many of our wonderful and talented friends from all over the world, we eat lots of delicious Mexican food, plus some of the best BBQ food you will ever have, oh and we get to sell all of our handmade goods and wares to music fans from all over the world for 4 days! Plus, did I meantion it is usually somewhere in the 80s, with the sun shining every day. Ahhh, see it couldn’t come at a better time, it is the perfect break at the end of a dreary, grey and cold Buffalo winter. The only thing I dislike about this trip is how much time I am away from my own kitchen, the comforts of my own homemade foods and my daily yoga practice. In an effort to circumvent the lack of these daily comforts, I plan to pack a cooler full of my homemade Kombucha and some tasty snacks for the road trip down and I will most definitely have my yoga mat rolled up in a corner of the car somewhere so I can squeeze in some practice and meditation each day of the trip.
I plan to get a couple more recipes up here before I leave and if I can pull it together, I plan to get some guest posts together from some of my favorite bloggers! It is funny, this is the first trip I have taken that I am actually feeling weird about the lack of posting on here while I am away. I think because I am finally getting a really decent amount of visits each day, I don’t want people to get bummed when they stop by and nothing new has been added. Yup, my blogging obsession is officially official, I don’t wanna leave Tasty Yummies the way I don’t wanna leave my pets! haha
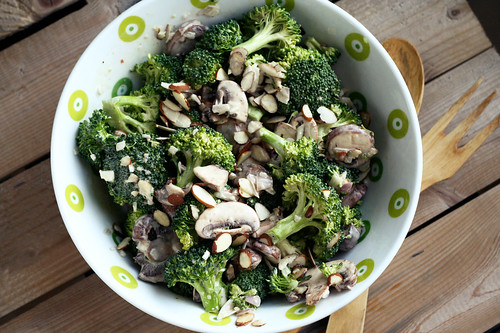
Anyhow, this recipe is one that I have been sitting on for a few days and I finally made time tonight to get the photos edited and the recipe fully written up. This salad is my take on a salad I had recently at local food shop/deli/cafe, Globe Market. They are located on Elmwood, literally right at the front door of my yoga studio, East Meets West Yoga. Though I rarely grab food after yoga, since I just head home and eat something light, I stopped in there one day after yoga, about two weeks ago to grab a quick gluten-free hummus and veggie sandwich before heading to a meeting. When he found out I was stopping there, Mark asked me to grab a serving or two of one of their delicious-looking side salads, for him to eat alongside sandwiches at lunch at home during the week. I opted for a creamy raw broccoli salad with red onions, bacon and almonds. That sounded just up his alley, healthy enough with some naughty stuff, too. Mark loved it, but truthfully I ate most of it. I couldn’t help it, it was so tasty, it was perfectly simple. It wasn’t even the bacon that got me, it was the delicious dressing and the combination of all of the ingredients.
So, I decided that it was a simple enough salad that I could make my own version at home, but with a Tasty Yummies twist. I wanted to make it vegan. I was determined to make it just as delicious without the bacon and with a delicious egg-free and dairy-free creamy dresssing. So I bought some Grapeseed Veganaise from Follow Your Heart, to make the dressing creamy and I went from there. I was honestly surprised that I pulled it off and was even happier with my own version that the bacon containing version from Globe. I decided to use shallots instead of red onions for a bit milder of a flavor and I added in some mushroom slices that I had on hand. This salad has been the perfect side dish with so many different lunches and dinner. I made sure to make a large enough batch that we could eat it throughout the week.
If you aren’t crazy about totally raw broccoli, feel free to blanch or steam yours for about 3-5 minutes. I love raw broccoli, myself, though I should probably consider steaming it to take down on the :ahem: gassy after-effects (sorry TMI, but it’s the truth)!
If you aren’t vegan, you can use your favorite mayonnaise and you could even consider adding in some crispy bacon crumbles. It really is quite complimentary.
[print_this]Creamy Vegan Broccoli Salad with Mushrooms and Almonds
Serves 6-8Dressing
1/2 cup grapeseed oil veganaise (or other vegan mayo)
2 tablespoons apple cider vinegar
1 tablespoon coconut sugar (you could also use brown sugar, maple syrup, honey or any other sweetener of your choice)
1 tbsp gluten-free unsalted whole grain mustard
kosher salt and freshly ground black pepper, to taste
1 clove garlic, mincedSalad
Approximately 8 cups of broccoli florets (about 2 pounds of florets)
2 shallots, chopped
9 ounces mushrooms, sliced
1/2 cup sliced toasted almondsIn a small bowl, whisk together all of the dressing ingredients, until well combined and smooth. Set aside.
Place the broccoli in a large serving bowl, toss with the shallots, mushrooms and almonds. Pour the dressing over the salad and toss well to combine. Serve.
This salad can be stored covered in the fridge for up to 3 days. Toss well before serving. You can serve this room temperature or cooled.
[/print_this]

-
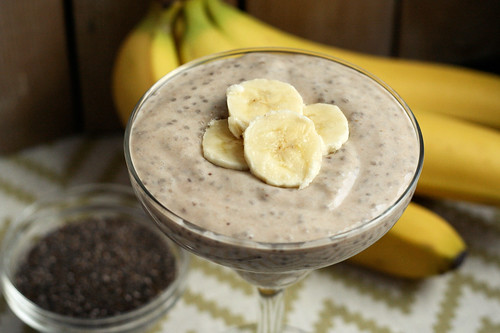
Banana Cream Chia Pudding (gluten-free, vegan, refined sugar-free)
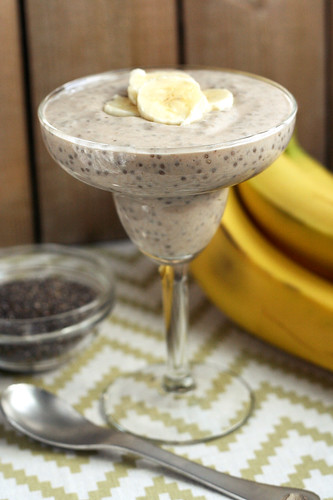
This creamy and delicious pudding turned out way better than I ever dreamt it could, I love when that happens. This was another one of those kitchen creations that had me doing the “yum yum dance”. You know exactly what I am talking about, you take a bite before you even sit down, and with the spoon or fork still in your mouth, your hips and butt start swaying and without thinking, you start some version of a song where the only lyrics are “yum”, “mmmmm” and/or “ooooh”. I swear this is something we are born with, I have seen babies under a year do this dance. It’s the best!
I have been working on a recipe for a healthy gluten-free and vegan banana coconut cream pie and I had to take a detour when I thought of this tasty breakfast treat. Fear not though, the pie recipe is still in the works and I cannot wait to play around with it.
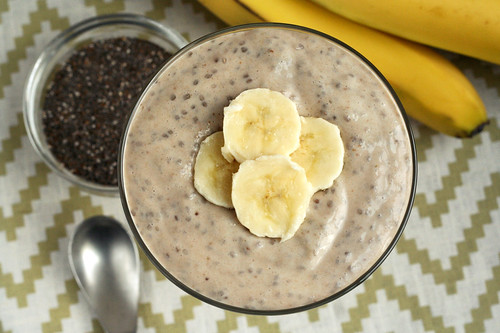
I had a serving of this for an after-yoga breakfast treat this morning and it kept me full for many hours, I love that. This perfectly and naturally sweetened pudding would also be great for a dessert or mid-day snack when you are craving something a little sweet. It’s amazing how wonderfully sweet this is without adding any sugar or sweetener besides the dates. I love that! The creaminess from the coconut milk, almond milk and bananas are all so amazing that most people wouldn’t believe there isn’t any dairy in this. It’s treats like this that keeps me from being intimidated about removing dairy from my diet. I would never miss dairy if I had this pudding once or twice a week.

This week has been a bit crazy and stressful and it’s only Thursday. Hubby had to take a quick and unexpected flight home to Kentucky to be with his Grandmother who is very ill. We have been working many evenings, so we’ve been eating a lot of quick dinners and we’ve been eating up leftovers, so I am starting to get that urge to cook and bake since it’s been a couple of days. We have a weekend full of work ahead of us, but I need to find time to attempt this banana coconut cream pie that I have created in my head. After making this pudding I am starting to think that ground-up chia seeds may be the perfect ingredient to make my pie filling thick and luscious. Hmmm… I can’t wait to get to experimenting.
How has your week been going? Have you had time to make meals this week? Do you have any cooking and baking plans for the weekend?
[print_this]Banana Cream Chia Pudding (gluten-free, vegan, sugar-free)
serves 2-4 – makes approximately 3 cups1 cup lite coconut milk (the canned kind)
1 cup unsweetened almond milk
2 bananas
2 teaspoons vanilla
3 medjool dates, pits removed
2 tablespoons chia seedsPuree everything but the chia seeds in a blender until smooth, combined and thick. You may see a few little bits of the dates still, it’s OK. Pour the mixture into a glass bowl or a mason jar, stir in the chia seeds. Make sure to stir well to combine. Cover the bowl or put the lid on the jar. Keep in the refrigerator overnight or for at least 4 hours.
Spoon or pour into bowls, top with fresh banana slices or banana chips, if you wish. Serve.[/print_this]

-
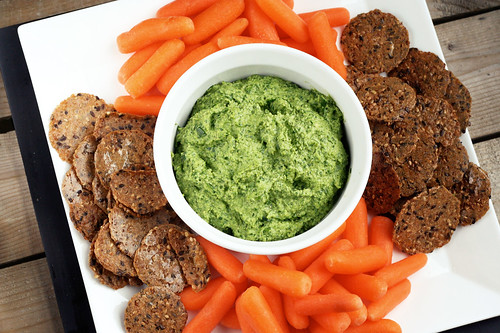
Creamy Dairy-Free Spinach Dip (vegan, gluten-free)
I am having a lot of fun making different dishes and snacks dairy-free. For the most part, as with my gluten-free or even vegan cooking, I have just been cooking around it, enjoying things that are naturally such, I don’t usually make tons of substitutions with weird processed things like fake cheeses or fake meats, etc. Even though I think that some dairy-free cheeses (like Daiya) might be nice for the occasional special treat if I really feel like I am missing out or want some cheese, I usually just get really creeped out by how much weird stuff are those types of foods. Many times you read the package and you don’t even know what the ingredients are, you can’t pronounce them, etc.
I was craving a delicious Italian-style pasta dish the other night, so I made gluten-free penne with a creamy roasted tomato and basil sauce. No cheese or dairy! The creaminess came from soaked cashews and I added in a little nutritional yeast for the nutty/cheesy flavor it brings. It was so perfectly delicious and it really hit the spot. I didn’t miss the dairy one bit. There is always the option of using nut milks instead of dairy milk in recipes, which I have been doing for a long time when making, but it doesn’t always give you that super creamy cheese-like texture when cooking, so that is where raw nuts have been coming in handy for me.
I did some serious cooking, baking and making over this weekend. I made my first ever batch of Kombucha, which I cannot wait to try, I love that stuff. I also made gluten-free, dairy-free refined sugar-free chocolate donuts for breakfast yesterday in my new donut pan (recipe coming soon) and all of my Super Bowl treats. We watched the Super Bowl last night at my parents’ with my family and some friends, so I decided to experiment a little with my Super Bowl snacks, making things that not only I would eat, but that would still appeal to everyone else. So, I made three different things: this creamy spinach dip, a creamy eggplant and roasted red pepper dip and Thai Meatballs (made from some grass-fed beef from our local farmer) with a red curry peanut sauce. I will be posting the eggplant dip likely tomorrow so look for that. As for the meatballs, I basically just altered this recipe to be gluten-free and I used some of our lean grass-fed ground beef from the half cow that we shared with my parents. I was really excited to find a meatball recipe that wouldn’t need any cheese of some sort, since I was initially playing with the idea of making regular Italian style meatballs. They were so delicious! I really recommend that recipe.
I served the two dips with tons of fresh cut raw veggies, regular whole grain crackers and some Mary’s Gone Crackers Black Pepper Crackers for me. Both the dips were enjoyed by everyone and the meatballs FLEW off the plate. This particular dip is so creamy, you would swear it had ricotta cheese in it. It has a nice flavor from the garlic and the nutritional yeast brings an almost “cheesy” taste. Nutritional yeast is low in sodium and it is one of the few non-animal sources of B-12, it is rich in folic acid and many other nutrients and amino acids. This is not your typical yeast and is free of the Candida Albicans strain, making it safe for those concerned with candida. Per ounce nutritional yeast packs in 14 grams of protein and 7 grams of fiber.
I’ll be honest, I did a lot more gabbing and snack-eating then football watching last night. We did manage to keep quiet through the half-time show, which I thought was just so-so. I love old-school Madonna and was excited to hear some of the old hits but that is about it. I was a bit let down, it didn’t do it for me. Though I did make it a point to listen to all of her old albums today on Spotify to make up for it!
Did you watch the Super Bowl? What did you think of the half-time show? What foods did you make or eat?

[print_this]Creamy Dairy-Free Spinach Dip (vegan, raw, gluten-free)
1 cup raw unsalted cashews, soaked for 1 to 3 hours and drained
2 cloves garlic
1 tablespoon nutritional yeast
1-2 tablespoons of water
4 cups baby spinach (split to 3 cups and 1 cup, roughly chop the 1 cup)
1/4 teaspoon kosher saltAdd the cashews, garlic and nutritional yeast to the food processor, puree until thick, creamy and smooth. You can add a tablespoon or two of water to the mixture as needed to make it more creamy. Add 3 cups of the spinach and continue pureeing until smooth. Fold in the remaining chopped spinach and stir by hand to combine. Pour the creamy spinach mixture into a serving dish and serve with fresh cut raw veggies, tortilla chips, crackers, toasted bread, etc.
[/print_this]
-
Overnight Cinnamon Raisin Chia Pudding (vegan, gluten-free, raw)

I have seen many recipes for chia pudding on my internet travels, some seem to be thicker than others, but they have all looked delicious to me. I have been meaning to make this for some time. I have seen chia puddings made with all types of milk, including coconut, I’ve come across many many different toppings and “extras” including chocolate chia puddings made with cocoa. This Berries and Cream version from Leanne at Healthful Pursuit looks super duper creamy, containing less chia seeds and adding in coconut milk. I plan to make something very similar to this soon, myself, I really love how creamy it looks.
I decided on a thicker version for this first time, with similar flavors to my dad’s famous Greek style rice pudding, that I love so much and have mentioned on here before. Since, I wanted it to be a bit thicker of a pudding – I used a ratio that I found on Whole Food’s website, of seeds to milk. I do plan to make another version of this later this week, with less seeds and with coconut milk, similar to the one I posted from HP, but I had been dreaming of this thick rice-pudding like version for a while now. I will plan to post the next one I make as well, so I can compare to this. In fact, I plan to be making lots more chia pudding, so look out!
When soaked overnight chia seeds turn into a simple pudding, similar in consistency to tapioca (which I love). This pudding was thick and creamy, and it had a little bitty crunch from the seeds. I drizzled a bit of honey overtop of this to add a subtle sweetness, you could also add stevia, coconut sugar or any other sweetener you desire. You probably could also just use sweetened non-milk, I just never have that in the house. I am super surprised at how filling this pudding is, I was worried I would be hungry in an hour or two, and I wasn’t. For me that is when I know I have found a breakfast winner! In addition to breakfast, this pudding would be great for dessert or even a little afternoon snack.
If you haven’t yet had chia seeds, you must try them. I like them in muffins, granola, breads, smoothies, etc. Chia seeds are a super food that provides a variety of wonderful health benefits. It a nutshell – by adding just 2 tablespoons of chia seeds to your daily diet it will give you approximately 7 grams of fiber, 4 grams of protein, 205 milligrams of calcium, and a whopping 5 grams of omega-3! The benefits are far too many to list here, so I will direct you to this simple to read list, Top 10 Benefits of Eating Chia Seeds. And yes, these are the are the same chia seeds made famous by the Chia Pets. Ch ch ch chia! Chia seeds can be found at most healthfood stores, normally where you would find the flaxseeds.
Obviously you can play around with your toppings and flavors of this pudding, skipping the cinnamon and adding your own spices, going with fresh berries instead of dried fruit, adding nuts, cocoa or topping with shaved fresh coconut, etc.
[print_this]Overnight Cinnamon Raisin Chia Pudding (vegan, gluten-free, raw)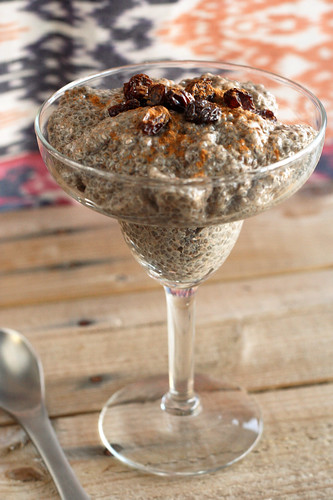
Serves 2 to 4 (depending on serving size)2/3 cup chia seeds
2 cups unsweetened organic non-dairy milk like almond or rice milk (I bet coconut milk beverage would also be great)
1 teaspoon ground cinnamon
1/2 teaspoon pure vanilla extract
1/4 cup raisins
Coconut sugar, stevia, honey, maple syrup, or any other sweetener of your choice, to taste (optional)Combine chia seeds, almond milk, cinnamon and vanilla in a glass bowl, stir well to combine. Cover with plastic wrap or lid. Or add those ingredients to a glass mason jar with a lid, tighten and shake well to combine (this is what I did). Refrigerate overnight. Stir well before serving, spoon into bowls and top with raisins, a dash of cinnamon and a little sweetener, if you wish.
[/print_this]
-
Chocolate Cherry Fudge Bites – Vegan, Gluten-free, Sugar Free, Corn Free
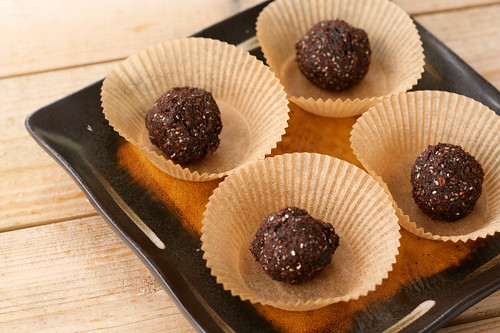

I don’t usually put all those health terms in a recipe title, since I fear that it may scare some people off. Although on the other hand, I worry that if I skip out on adding them, sometimes people looking for healthy recipes, may just pass over something called “Chocolate Cherry Fudge Bites”, assuming that it is loaded with fats and sugars. These little fudge balls are super simple to make and they are so tasty. It is hard to believe there is no sugar in these. They have such an amazing chocolatey fudge flavor with a little bit a chewy tartness from the bing cherries and a little crispy crunch from the chia seeds.
You could use this same recipe and instead of the dried bing cherries add in peanut butter and/or chocolate chips for a peanut butter fudge bite. You could add in candy cane pieces and peppermint extract. You could also leave out the cocoa use oats instead of the nuts and add in raisins for little oatmeal raisin cookie bites (which I have made before and I love). The possibilities are endless. Once you make these once you will know what the consistency of the dough needs to be for the next time you are experimenting. I love having these on hand to satisfy my sweet craving without the guilt. Not only do you not have to feel guilty about eating these, you can feel like you are doing yourself a favor – we all know the many benefits of chocolate, more specifically cocoa in it raw state, such as decreased blood pressure, improvement in blood vessel health and cholesterol levels, plus it is believed that the phenylethylamine in cocoa has mood boosting effects. The dates used to sweeten these fudge bites are a great source of dietary fiber and they are an energy powerhouse. Dates are low in calories and they are fat and cholesterol free, they are a great source of B-complex vitamins and they are one of the best natural sources of potassium.
So come on, don’t you just wanna reach for dessert when you hear all of that? Trust me, make these and you will always want to have them on hand to satisfy your sweets cravings. They do the job and then some.
Are you getting ready for the holiday? What do you have to make this week still? In addition to working all week, I am hoping to have time to finish up all of my craft projects that I took on for gifts, plus finish all of my shopping and then I have to get started on my wrapping – one of my favorite parts. I am hoping that I can squeeze a little cooking and baking in there too, somewhere.
[print_this]Chocolate Cherry Fudge Bites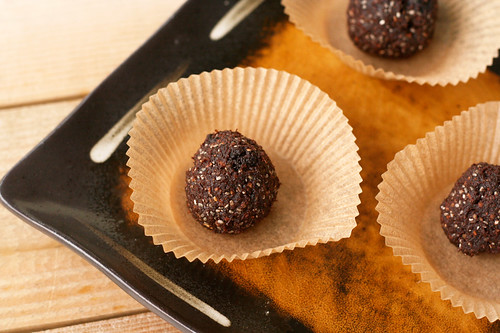
Makes approximately 16 balls3/4 cup medjool dates, pitted
4-5 tablespoons water
2 teaspoons vanilla extract
4 Tablespoons unsweetened cocoa powder
1/2 cup raw organic almonds
1 1/2 tablespoons chia seeds
1/4 tsp sea salt
1/2 cup dried organic bing cherries (other dried cherries will also work here)In food processor puree the dates, water and vanilla until a sticky paste/ball forms. Pulse in cocoa powder, almonds, chia seeds and salt until solid dough forms. Stir in the dried cherries. With small scoop, form mixture into 16 tablespoon-sized balls.
Refrigerate for 30-60 minutes to set.You can dip the balls in melted chocolate, roll them in seeds, nuts, coconut or cocoa, etc. – if you wish. See above for other fudge and cookie bite ideas. Have fun.
[/print_this] -
No Bake Pecan Pie Bars – Gluten-free, Raw and Vegan

I have become obsessed with Medjool dates and I am still just as amazed now as I was the first time I baked with them. It is incredible how sweet they are. I have made quite a few simple raw “cookie” balls in the processor with just oats and/or nuts, some dates and other goodies like chocolate chips or peanut butter. They are so simple and a totally healthy way to get your sweets-fix. I need to start taking photos of those and sharing them with you. You will love them.
A few months back while shopping at the Lexington CoOp here in Buffalo, I ran across something called a “Raw Pecan Pie Bar” (I forget the name of the company that made it) – it was raw and sweetened only with dates and also had sprouted pecans and sprouted something else (can’t remember, again). It immediately peaked my interest, so I picked one up. It was quite tasty, but I couldn’t help but think I could make it even better. Plus, at $3.50 for a single small bar, I knew I could make it cheaper.
I had been looking at different recipes online for date bars as a base for my recipe and ultimately settled on Oh She Glow’s blog, once again. I liked how simple her recipe was and that it included everything that I love! I made a few additions and changed it up a bit to make it similar to a pecan pie. I am so excited about how these turned out. Oh and one quick thing to mention about these bars, because they aren’t loaded with sugar, you could even have this as a breakfast bar. I cannot believe it is sugar-free, egg-free, dairy-free, gluten-free and it’s even raw! If someone rattled off all of those things to me, with the words “pecan pie” – I would likely laugh in their face. You have to trust me though, these are so amazing. Even my southern-boy pecan pie loving hubby liked him, though he took one bite and said “man, these are good, a big ‘ol scoop of vanilla ice cream over top would really make this.” haha some things will never ever change.
I tend to actually have cravings for sweets around this time of year, which is crazy since I really don’t crave sweets that often. I think it could be the fact that everywhere you look there are holiday cookies and sweets just laying out, begging to be eaten. I am trying really hard to stick with my usual way of eating through the holidays this year, so I don’t step on the scale after the holidays to find I put on 5-lbs. I am planning to make a handful of alternative holiday sweets over the next couple of weeks, so I can still partake in the festive eating, but in a healthy way. I am also making sure when and if I do partake in some not-so healthy holiday eating – that I remember that everything in moderation is OK, a taste here won’t kill me and I would much rather have a little and know when to stop then to feel like I am missing out on something I really want.
Do you try to eat healthy during the holidays or do you just forego all healthy eating rules during the holidays?

No Bake Pecan Pie Bars – Gluten-free, Raw and Vegan
Adapted from Oh She Glows
Makes 9 large squares or more if cut smallerCrust:
1 1/2 cups whole raw almonds (you could also do 3/4 cup almonds and 3/4 cup shredded unsweetened coconut)
1 1/2 cups gluten-free rolled oats (if you aren’t gluten-free just use regular rolled oats)
1/2 tsp kosher salt
10 Medjool dates, pitted and roughly chopped (about 1 cup)
1/4 cup coconut oil
1/4 teaspoon vanilla extractDate and Pecan Topping:
25 Medjool dates, pitted and roughly chopped (about 2 1/2 cups)
1/4 – 1/2 cup water
1 teaspoon vanilla
1 cup roughly chopped raw pecansLine an 8″ x 8″ pan with two pieces of parchment paper going opposite ways. In a food processor, process the almonds, salt, and oats until a fine crumble forms. Add in the chopped dates and process until crumbly again. It your coconut oil is solid, melt it quick and add to the mixture with vanilla and process until sticky and a bit doughy. If your dough seems a bit dry, you can add a bit more oil, mind was fine as is. Remove from processor and press the dough very firmly and evenly into the pan to form your crust.
Clean the food processor real quick and process the dates with water (adding a little at a time so it doesn’t get too runny) and vanilla until a thick paste forms, it should be mostly smooth and creamy. You may need more or less water, depending on how soft your dates are. You will have to stop and scrape down the sides of the bowl often. You can add a tiny bit more water if needed, but you want the paste quite thick. Scoop out the date mixture onto the crust and gently spread with the back of a wet spatula until even.
Sprinkle the chopped pecans evenly across of it and gently press down with fingers. Refrigerate in the fridge until firm for at least 1 hour, preferably overnight. Cut into squares and serve. Store in the fridge or freezer.
-
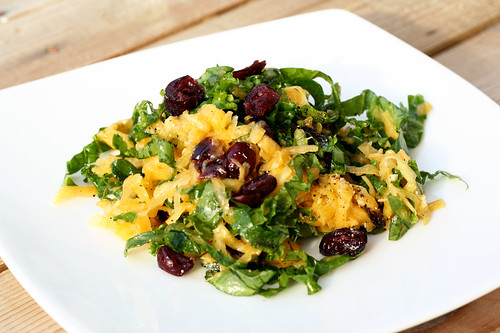
Raw Butternut Squash and Kale Salad
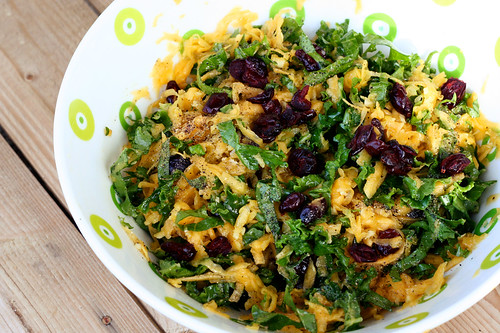

I was so excited to be participating in A Book of Yum’s Gluten-free Vegetarian Thanksgiving Event, that I of course couldn’t decide on just one recipe, so I made two! I wanted to re-imagine a classic side dish like stuffing, but I also really wanted to bring something completely new and unique to the table (pun intended). I came across a recipe in Edible Buffalo’s Fall 2011 issue a few weeks ago that I cut out and set aside, since it really intrigued me. It was a raw butternut squash salad – I had never thought about eating squash raw, but I honestly couldn’t wait to try it. In thinking about the recipe and really wanting there to be a rainbow of beautiful fall colors, I decided to change it up add some fresh local kale and dried cranberries instead of golden raisins. I also had some a fresh organic navel orange that I had zested earlier in the day to make another batch of my Chai concentrate and I thought the juice from that would be the perfect complement to all of the flavors going on in this salad.
This beautiful salad is crunchy, sweet and bright. It would be a welcome side dish at any Thanksgiving feast and it is a wonderfully unique option everyone, especially for those who are gluten-free, vegan and/or vegetarian. Plus, I personally love the idea of any Thanksgiving sides that aren’t heavy and carb loaded and more importantly, that don’t require the use of the oven that is always far too crowded on Thanksgiving.
Raw Butternut Squash and Kale Salad
Serves 4-61 butternut squash (about 1 pound), peeled, seeded and grated by hand or with a food processor
1 cup kale, washed and stems removed, cut into very thin strips
1/2 cup dried cranberries
1/4 cup olive oil
1 tablespoon rice vinegar
1 tablespoon fresh orange juice
2 tablespoons fresh ginger, minced
Salt and freshly ground black pepper, to tasteCombine all ingredients, toss and adjust seasonings to taste. Refrigerate, covered, for an hour before serving.
-
Vegan, Gluten-Free Fettucine Alfredo
I have fully admitted to my love-affair with pasta on this blog, many times. It is something I cannot live without and is almost always included in my weekly menu planning. Not only are pasta dishes simple and fun to create but they can easily be made with ingredients you have in the pantry and your refrigerator and many times can easily be made healthy. Even with the healthiest of pasta recipes, to me it is a major comfort food, it always will be. Probably the number 1 comfort food on my list.
Although I am on a cleanse, I wanted to make sure to experiment with at least one cleanse-friendly pasta dish. Of course, as I mentioned in my post about my cleanse, there are many different types of cleanses out there and many different items you can remove from your diet when cleansing. Obviously this recipe may not work on every cleanse. For me already being on a totally gluten-free diet, removing gluten when cleansing is never a major hassle or issue, but it is very important to a cleanse and to detoxify your body. For me one of the biggest things I like to remove from my diet while cleansing is dairy. I am not a milk drinker and I rarely cook with it, but cheese is what gets me. I love cheese. So with that in mind, I wanted to come up with a cleanse-friendly pasta dish that would bring the comfort of any other gluten-free pasta dish I would make, but with cleanse friendly ingredients.
I love gluten-free pastas and find them to be much lighter compared to traditional wheat-based pastas. I personally prefer brown rice pastas and I love Tinkyada brand organic pastas. They have three or less ingredients, organic brown rice, rice bran and water. That’s it. When I cleanse the majority of what I eat is fresh vegetables, legumes and whole grains – I certainly cannot go without pasta. Brown rice pasta falls within the constraints of my cleanse and though I don’t eat a ton of it, a dish like this is a perfect way to forget you are even cleansing at all. If you don’t care much for brown rice pasta, there are also corn and quinoa based gluten-free pastas that are also quite delicious, as well.
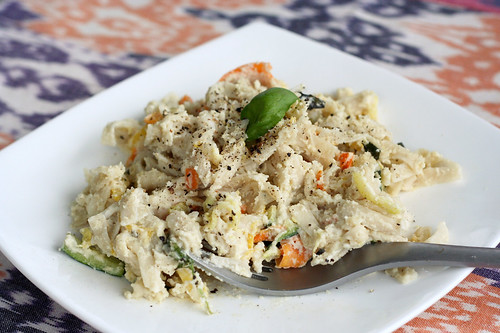
I decided when making this alfredo sauce rather than trying to experiment with different nut milks, which I knew wouldn’t give me the thick and creamy affect of an alfredo sauce, I would go the route of a raw nut based sauce. Cashews tend to be great for this. Even without excessive soaking, you can just add boiling hot water to cashews just before pureeing and get a delicious creamy sauce. I took the above photo the next day with the leftovers, since it was too dark to take photos the night we ate it. I honestly don’t think the image fully captures just how creamy the sauce really is, it is incredible. There isn’t an overwhelming nutty flavor to the sauce and by adding garlic, basil and some nutritional yeast, it’s very hard to tell that it is even dairy free. Beyond nutritional yeast’s nutty and cheesy flavor, is a great source of protein and fiber, it is rich in B-complex vitamins including B12 and it contains the glucose tolerance factor that helps in the regulation of blood sugar. If you are a vegetarian or vegan, it is definitely worth exploring adding it into your diet.
The beauty of this sauce is that it doesn’t actually need to be heated up, so if you like to eat raw, you could skip heating it up, use your favorite alternative raw noodle, like thinly sliced raw zucchini (or other raw vegetables), kelp noodles, etc and just pour the raw cashew cream sauce right over for a delicious and healthy raw meal.
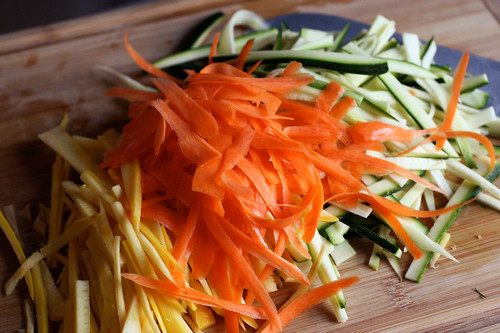
I had some beautiful zucchini and yellow squash that we picked up at a farmers stand on our drive home from NYC so I added that and a carrot to the dish for some additional health-benefits as well as the very lovely colors. You could play around with many different vegetables here including fresh spinach, peas, etc.
I had a small amount of sauce leftover that I put in the fridge, I figured it would be delicious on some steamed broccoli or over a baked potato, etc. I have a feeling you will fall in love with this healthy alfredo sauce.
Vegan, Gluten-Free Fettucine Alfredo
serves 61 1/2 cups raw, unsalted organic cashews
3 cloves garlic
1 cup warm water (you may need more)
3 teaspoons nutritional yeast
1/2 teaspoon kosher salt
1 teaspoon freshly ground black pepper
14 ounces of your favorite gluten-free fettucine or linguini, I use Tinkyada’s organic brown rice pasta
handful of fresh basil, roughly chopped
1 tablespoon olive oil
1 zucchini, julienned
1 yellow squash, julienned
1 carrot, peeled, julienned (or you can wash and peel the outside, then peel the entire carrot instead of julienning it, which is what I did)
kosher salt and freshly ground black pepper to tastePlace the raw cashews in a glass bowl, cover in water. Let soak as little as a few hours or overnight.
In a large saucepan bring your water to a boil and cook your pasta according to package directions.
Drain the soaked cashews and rinse well, place into your food processor with garlic, salt, pepper and 1 cup of water. You may find you need to add more water if the sauce is too thick, but you can always add more. Process until smooth and creamy. Once it is at your desired consistency, add in the nutritional yeast, pulse a few times to combine. Set aside until you are ready to heat it up.
While your pasta is cooking, heat olive oil in a skillet over a medium-high heat, add your julienned vegetables and sauté a few minutes until tender. Remove from heat.
Once the pasta is cooked, reserve 1/2 cup of your cooking liquid, drain and place in a large serving dish. Pour the alfredo sauce into the saucepan you used to cook your pasta and heat over a medium heat, stirring often to keep from sticking. Once warm, pour over the pasta.
Add the vegetables and fresh basil to the pasta and sauce. Toss to combine, adding some of the pasta cooking liquid if the sauce is too thick. Salt and pepper to taste. Serve immediately, topped with freshly chopped basil and a sprinkle of nutritional yeast, if you wish.
-
Mint Pesto

Last summer I made, what I later learned, to be a big mistake – I planted mint in our yard, not in any pot or planter, just in the dirt on the side of the yard near my vegetable and herb gardens. I originally planted it because I absolutely LOVE fresh homemade mojitos in the summer time. There is nothing more refreshing. The reason my planting of said mint turned out to be a mistake, was the fact that it has grown out of control and it is taking over that section of the yard. Because I have never grown it in my own yard, I didn’t realize how quickly it grows and how far it can spread. We travel so much, that getting into the yard and weeding my gardens gets increasingly difficult as the summer goes on. I know I should get out there more, but I don’t, so I always try to plant things that need very little upkeep. Well, mint definitely falls into that category. Early in the summer I took a look out in the yard to see the progress of things and I was floored at how the mint was spreading. It was crazy. So I made a lot of mojitos this summer. I also decided I needed to find other things to do with the mint. I mentioned something on Twitter and Kelly from Design Crush made the wonderful suggestion of mint pesto. I had never thought of that. So, earlier this summer I played around and made mint pesto to serve with gluten-free penne. It was sooo good that we ate it all up and I forgot to write-up my recipe or photograph it. Ooops. That just meant I needed to make it again. Darn.
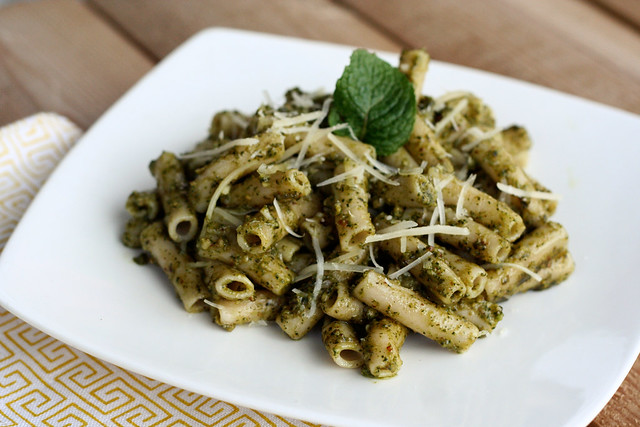
This time around, I again served this over delicious organic gluten-free penne with some gluten-free crispy zucchini rounds on the side. We both were in heaven with this meal. This pesto, much like the original that we all know, is bright and light but chock full of flavors. I like my pestos garlicky, which gives a bit of a spicy kick, you can certainly take it down to one clove if you don’t like a lot of garlic (shame on you). I also love playing around with different nuts in my pestos. Most original basil pesto recipes call for pine nuts, which I really love, but they can be hard to find sometimes and many times are insanely expensive. I have played with both toasted almonds and walnuts in pesto recipes, both of which are absolutely equally delicious, if not more. I think any one of those nuts would be great in this mint pesto. I went ahead and still included some basil in this mint pesto, since I also grow that in my yard and I thought it would round out the flavor of the mint nicely, so it wouldn’t be too overpowering. Also, it should be noted, it is crucial to use a good quality olive oil in your pestos, since the sauce is left raw and is never cooked, the olive oil flavor remains in the forefront of the flavors, so you want it to be a good one.
In addition to all the usual dishes that pesto is great in; pasta, sandwiches, pizza, in soup, over a baked potato etc, – you could definitely use this mint pesto for other non-traditional uses as well, such as a marinade or served over-top grilled lamb or steak, etc, you could just skip the basil and cheese, maybe add some lemon juice and red pepper flakes and make it more of a Chimichurri style condiment. Have fun with it and make sure if you plant mint of any kind in your yard plant it in a pot, unless you are looking to be able to make enough mojitos and pesto to serve a small country.
Mint Pesto
makes approximately 1 cup2 cups fresh mint
1 cup fresh basil
1/4 cup toasted sliced almonds (walnuts or pine nuts would also be great)
2 medium-large cloves garlic
1/2 cup extra-virgin olive oil
1/4 – 1/2 cup parmigiano reggiano, shredded (plus more for serving)
1/4 teaspoon sea salt
freshly ground black pepperPlace mint, basil, almonds, garlic and salt in a food processor; pulse a few times, and process until everything is finely chopped and combined. With the processor running, gradually pour the olive oil in and process until smooth. Use a rubber spatula to scrape down the sides to get all the little bits. Add the parmigiano reggiano and pulse again until blended and smooth. Season with additional salt, if needed, and freshly ground black pepper to taste.
If you are serving this immediately, keep the sauce at room temperature and pour it over your cooked pasta (I used my usual gluten-free organic brown rice penne) and quickly stir to combine, top it with fresh parmigiano reggiano and serve immediately. I always recommend reserving approximately 1/4 cup of the cooking liquid from your pasta so you can add it in to the final dish, if need be, to thin the sauce if it is too thick.
If you aren’t serving this immediately, it can be stored in a tightly closed container in your refrigerator for up to 3 days.
Notes:
To toast sliced almonds, cook them over a medium-low heat in a small dry skillet, stirring and tossing constantly, until fragrant and lightly browned, this will take less than 5 minutes.
If you’d like to freeze your pesto, leave out the parmigiano reggiano. When you’re ready use the pesto, defrost it first, then stir in the cheese.
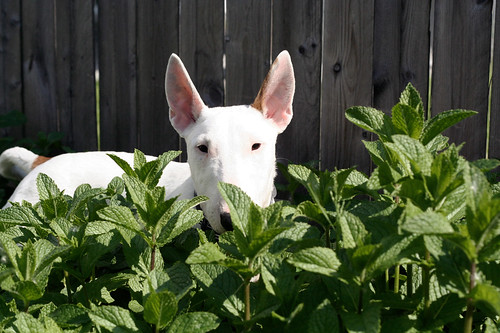
Seri hiding out in the mass amount of mint in our yard, earlier this summer
-
Heirloom Tomato Caprese Salad with Balsamic Reduction
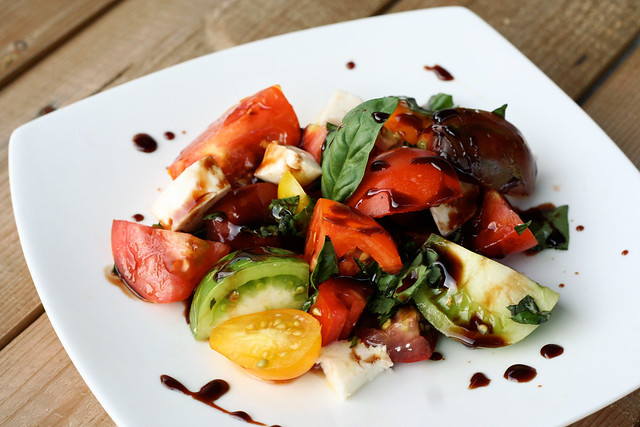
This recipe is a fast and simple twist on the original, with no accurate measurements needed. It’s all about taste. I grabbed a quart of colorful local heirloom tomatoes at the market and I couldn’t wait to pick some of the beautiful heirloom black cherry tomatoes from my own garden to make a big tasty salad with. Since the tomatoes themselves had so much flavor and the basil from our garden was abundant, I decided to not go crazy and put the full 8 oz of fresh mozzarella into the salad, it just didn’t need it. I also decided that by saving half of it, I could use it to add to an omelette with the next morning.
I wanted to get a nice sweet and tart punch from the balsamic, so rather than just pouring it on as is, I made a simple reduction syrup to drizzle over top the salad when serving. It is incredible how the concentrated flavors from the vinegar reduction really sing with the subtle sweetness. It is one of my favorite, simple kitchen tricks that works for so many dishes. In addition to drizzling over top salads like this one, the balsamic reduction is also wonderful drizzled over a steak, grilled fruit and so much more.
There is something about a good insalata caprese that just screams summer to me. But much like the balsamic, it is bitter-sweet, by the time the tomatoes in our gardens are ripe enough to start picking for the beautiful salad, summer is on the down-swing and definitely more than half over.
Heirloom Tomato Caprese Salad with Balsamic Reduction
serves 4Approximately 1 quart of mixed heirloom tomatoes, any variety. (Mine were all smallish – cherry and grape sized, some from our garden)
4 oz fresh mozzarella, cut into small cubes (you can use the full 8oz, but I was attempting to keep this light and much more about the tomatoes)
1/4 cup tightly packed fresh basil, roughly chopped
1/2 cup high quality balsamic vinegar
3 teaspoons brown sugar
A few tablespoons of good quality extra virgin olive oil
sea salt and fresh cracked black pepper, to tasteIn a small saucepan over a medium-high heat bring the balsamic vinegar and sugar to a boil, constantly whisking to prevent burning. Continue cooking until it is reduced by half, stirring often. Remove from heat, allow to cool. (The sugar is optional as the vinegar has a natural sweetness when reduced, but I find that just a little is nice to compliment the tartness of the vinegar)
Meanwhile, half or quarter the tomatoes and place in a large serving bowl. Add the fresh mozzarella and basil. Toss lightly to combine. Season the salad with a bit of salt and pepper to taste. Serve individual servings of the salad on small side plates, drizzle both the olive oil and the balsamic reduction over top each serving. Serve immediately.
-
Vegan Chocolate Mousse

I plan to keep this post short and sweet, much like this recipe. It may sound a bit bizarre and hard to believe, but you really need to trust me and make it yourself.
After making some no-bake cookies for Mark in the afternoon yesterday (recipe coming soon), I was having a major sweet craving last night. Since I try not to keep too many sweets in the house for myself, I was feeling a bit bummed out that I couldn’t satisfy my sweet-tooth. I have seen many takes on vegan mousse that involved silken tofu, but I don’t really love tofu since it often bothers my tummy and I wanted to play around with the two very ripe avocados in my fridge that needed to get eaten up.
This mousse is so creamy, it is unbelievable that there is no dairy in there. It is decadent, rich and so satisfying. I was actually dancing around the kitchen and swearing with the spoon hanging out of my mouth on the first bite, I couldn’t get over how delicious it is. This mousse is naturally gluten-free, vegan and raw, it takes only 4 ingredients and you can make it in less than 5 minutes, so you can enjoy every last bite of it, guilt-free.
If it needs a bit more moisture when blending, try adding a little splash of almond or soy milk. You could also play around with adding peanut butter, chunks of your favorite chocolate bar, or simply just topping the mousse with your favorite vegan whipped topping and/or fresh berries. You could also play with adding in a dash of cinnamon or even cayenne for an extra little kick!
Now I need to do a little research about avocado fudge, a fellow food-loving friend, Kate, mentioned it to me on Facebook last night after I was carrying on about how amazing this was.
Vegan Chocolate Mousse
serves 22 ripe avocados, pitted and chopped into large chunks*
1/2 cup organic fair trade baking cocoa
1/2 cup maple syrup (you could also use coconut nectar or honey)
2 teaspoons organic vanillaAdd all of the ingredients to a food processor or heavy-duty blender, process until smooth and creamy. Serve immediately or refrigerate and serve cold.
*your avocados need to be very ripe and very soft to be able to get that just right smooth silky texture.
-
Honeydew Almond Milk Smoothie
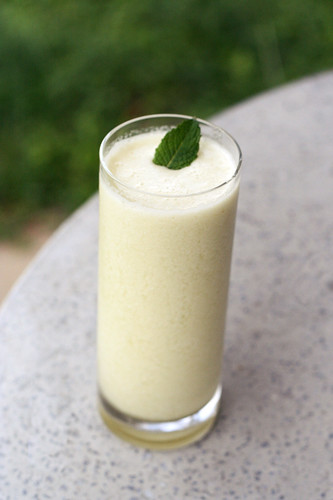
After our nearly 2-week long trip that we took mid-July to California for the Renegade Craft Fairs in San Francisco and Los Angeles, I am so happy to be home for a stretch and back into a more normal routine. It seems to take a week or two for things to settle down and feel calm again after a trip that big and with how crazy we were before we left. Besides being able to cook and bake in my own home, one of the most important things for me is to get right back into my daily routine of yoga. I try to get to 5 or 6, 90-minute classes a week. I tend to prefer the morning classes, since I can just come home after I practice and get right to my desk and work for the rest of the day. I don’t eat before I leave for yoga, I usually have a kombucha after I practice, so most times when I get home I am not looking for a large meal, just something light to hold me over until lunch. Many mornings I whip up a quick smoothie and head up for my office. So I can “eat” and work. This past week I was just making up smoothies as I went along, trying out new flavor combinations and just exploring. This honeydew almond smoothie is probably my favorite discovery of the week. It was simple, very light and had a unique and bright flavor. The honeydew that I cut up was so sweet on it’s own I didn’t even have to add any sweetener. If your honeydew leaves a bit to be desired in the sweetness department, feel free to add in a tablespoon of agave syrup or honey.
We don’t leave home again until August 24, when we had back to NYC for another event with the Metropolitan Museum of Art. We are doing a poster for St. Vincent who is playing on the rooftop of the Met. I am so excited to be going back to the city again but I am trying not to count down the days to that trip so as not to rush our time at home, but it is hard. I am hoping to accomplish a ton in the time before we leave again. Beside all of the work we have on the schedule, I have a ton of cooking and baking I want to do, a few crafty projects and some work around the house. Here’s hoping I can be that productive.
Honeydew Almond Milk Smoothie
serves 22 cups honeydew, diced (this was half of a melon for me)
2 cups, organic unsweetened almond milk
1-2 cups of iceAdd all of the ingredients to the blender and process until smooth. Serve immediately.
-
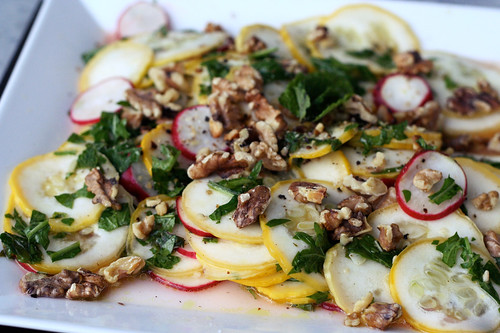
Summer Squash Salad
Zucchini and yellow squash are two of my favorites and both automatically come to mind when I think of summertime eating! They remind me so much of growing up, my parent’s always had an abundance of both growing in our garden. The last few years when I have planted them in my own garden, they take up a HUGE amount of real estate and never really produce much. They must not like my soil. I skipped out on planting them this year. Thankfully, my parent’s still grow both in their garden and never have a problem sharing with me.
After our family dinner this past week, I came home with a bag full of beautiful yellow summer squash and I couldn’t wait to start cooking with them. They are wonderful sliced and browned up on the grill, sauteed or roasted and added in salads or pasta, etc. Not only as a kid when my dad would cook with them, but now as an adult in my own kitchen, I always find myself eating the raw squash slices as I am cutting them to cook, so I decided I wanted to experiment with a raw salad.
When I was dreaming up this salad, I was so excited about it combining so many beautiful summery ingredients and flavors, some of my favorite ingredients. The soft and flavorful squash pairs so nicely with the crisp and spicy radishes and the peppery arugula rounded it all out with a refreshing bite. The fresh mint was a nice compliment to the light and refreshing dressing, the brightness from the lemon sings in your mouth with every bite and the toasted walnuts were a bonus crunch at the end. I couldn’t help but feeling like this salad is everything that summer is about, on one plate.
The other great thing about this salad are the many wonderful variations you could take, by changing out the herbs and going with fresh basil, oregano or chives. You can play with different nuts and seeds like toasted pine nuts, almond slivers or even sunflower seeds. You could even top the salad with cheeses like feta, goat cheese, fresh parmigiano reggiano, pecorino or asiago. I personally opted for no cheese since we wanted a vegan side-salad to accompany our vegan creamy avocado pasta. There is so much you can do with this salad. Keep in mind when picking squash that smaller, younger squashes are better since the larger squash tend to have larger tougher seeds and sometimes a tough skin.
Summer Squash Salad Recipe
serves 41 pound summer squash (yellow or green, or a mixture of both)
5 to 8 radishes (depending on how large they are)
3 tablespoons extra-virgin olive oil
2 tablespoons fresh lemon juice
1 large garlic clove, minced
1/4 teaspoon kosher salt
freshly ground black pepper, to taste
1/4 cup whole walnuts
1 bunch of baby arugula, roughly chopped
1/3 cup fresh mint leaves, roughly choppedToast the walnuts in a dry skillet, the oven or toaster oven and set aside and allow to cool, then roughly chop.
Slice the squash very thin slices using a mandoline or a steady hand and a sharp knife. Set aside in a large bowl. Do the same with the radishes. Add in the roughly chopped arugula.
Combine the oil, lemon juice, garlic and salt and pepper in a small bowl and whisk together. Pour the dressing over the squash, radishes and arugula, toss lightly. Let stand for at least 10 minutes. Add in the fresh mint and toasted walnuts, toss gently again to thoroughly combine.
Serve to individual salad plates or on 1 large serving platter, top with fresh mint and freshly ground black pepper. Enjoy immediately.
-
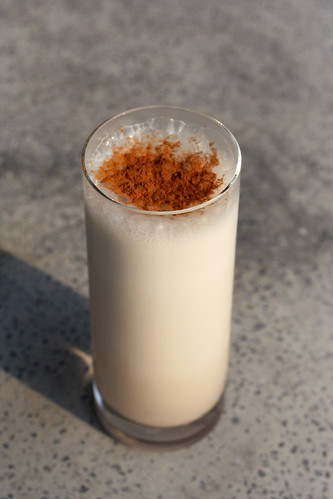
Horchata
It has been a hot summer in Buffalo. One of the hottest that I personally can recall. We’ve been traveling a ton and trying to enjoy every last-minute of the heat and sun while we are in town. We don’t leave again for another month so we hope to get the bikes out a few times, head to the beach and maybe even squeeze in some hiking or camping or something. Now that we are working from home, we really want to take advantage of the summer months while we can and enjoy the beautiful weather, before the snow and cold set in.
One of my favorite things about the short-lived summertime in Buffalo, is playing around with refreshing drink recipes. Admittedly, I planted mint in my yard, just to make mojitos and this summer I even infused my own liquors after reading this article in Bon Appetit magazine. Now that I made my first two batches and they turned out great, I plan to write-up a post about them. Don’t worry though, it isn’t just “adult beverages” I like to create, I love making fresh smoothies in the morning, iced teas, flavored sparkling waters and the like. Naturally, when I came across a post on David Lebovitz’s blog about making homemade horchata, I couldn’t wait to try it. There is nothing better than an ice-cold refreshing glass at an authentic mexican restaurant. OK, so maybe it is a close second to a good margarita, but it’s still incredible. It’s light, full of delicious flavors and it is perfect on ice on a hot summer day. There are few “authentic” Mexican restaurants here in Buffalo, (as far as I am concerned, none of them are authentic) and definitely no taquerias, so the chances of finding horchata here, are slim to none. I usually reserve my mexican indulgences for when we travel, rather than being let down, so when we aren’t traveling and I am craving Mexican, I tackle it myself at home. It isn’t nearly the same, but I still find it to be better than any of the Mexican restaurants here. I make my own tortillas, pico de gallo and guacamole, which is already a step above most places. We are actually having black bean tacos at home this week and I cannot wait.
When I saw how easy this horchata recipe was, I knew that this would be another Mexican treat worth trying at home. It is quite simple, you will spend more time waiting for the rice to soak then all of the prep time combined. You definitely want to make sure you strain in through cheese-cloth so you get all the rice bits, otherwise it will settle to the bottom of the pitcher in the fridge.
In addition to David’s recipe, I also checked out Rick Bayless’ recipe and many others. I came across many variations on the recipe, some include almonds, lime zest, etc. I decided to alter them all slightly and go with my own combination and I was very happy with the results. Oh and definitely try a glass with a shot of good rum stirred in, YUM!
Another fun twist you can take with the horchata is something that I have now learned is called a “Cochata”: Iced Coffee + Horchata. I made this apparently trendy drink in accidental desperation the morning after making the horchata. I wanted an iced coffee and realized after it was poured that we were out of any milk or cream, so I poured in a large glug of the horchata and was instantly in love. You have to try it.
On a side note, I apologize for the lack of posts and recipes on here, we just got home from nearly 2 weeks on the west coast. So I am hoping to get more recipes up here in the next few weeks as we are home for a month straight, finally. It has been a busy summer, full of travel and events, so I am excited to have some time at home.
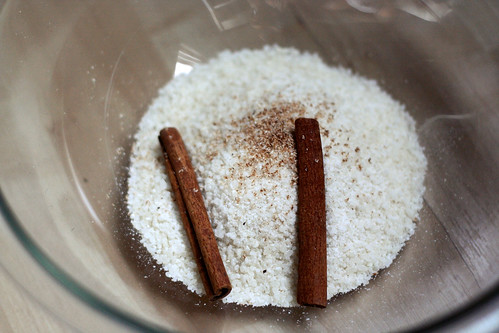
Horchata
Makes 7 servings
Adapted from recipes from Rick Bayless and David Lebovitz2/3 cup white rice
2 cinnamon sticks
Pinch of freshly ground nutmeg
3 2-inch strips of lime zest (colored rind only) 3/4 inch wide
3 cups of hot water
3/4 – 1 cup sugar
3 cups of cold waterGrind the rice in a blender or spice grinder into fine pieces. Transfer to a medium-sized bowl and add in the cinnamon sticks, nutmeg and lime zest. Stir in 3 cups of hot tap water, cover and let stand at least 6 hours or preferably, overnight.
Remove the cinnamon sticks and pour the mixture into a blender and blend for 3 to 4 minutes, until it no longer feels very gritty. Add 2 cups of water, and then blend for a few seconds more. Set a large sieve over a mixing bowl and line with 3 layers of dampened cheese cloth. Pour in the mixture a little at time, gently stirring to help the liquid pass through. Squeeze the cheese cloth firmly to extract as much of the rice flavor as possible.
Add 1 cup of water and stir in your desired amount of sugar, mix until the sugar is dissolved. Taste, and adjust sweetness, if necessary. If the consistency is too thick, add additional water. Cover and refrigerate until you’re ready to serve. Stir before pouring. Serve over ice with a sprinkling of ground cinnamon on top.
-
How-to Make Homemade Raw Almond Milk (Vegan)
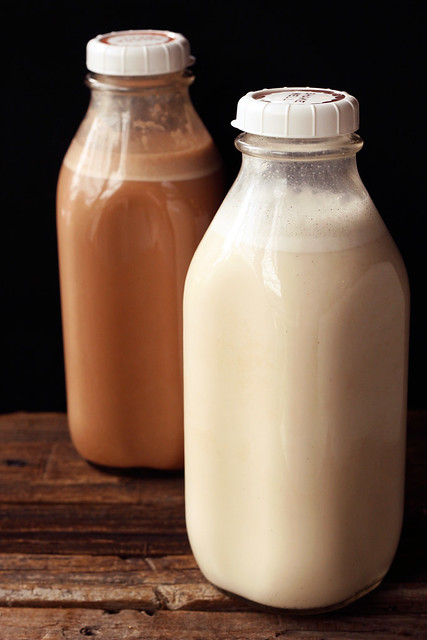
I have been meaning to make homemade almond milk for sometime now. I absolutely love almond milk and tend to buy it often. The thing I really dislike about it (as with most foods from the grocery store) is that a lot of times it has added ingredients that really just don’t seem to need to be in there, even the organic stuff. Though that tends to be the story of most of the food products people buy. It’s all so over-processed and filled with unnatural junk. These are all reasons why I’ve changed my lifestyle and rarely consume store-bought processed foods, I try to make everything I can myself and eat as many fresh foods as possible.
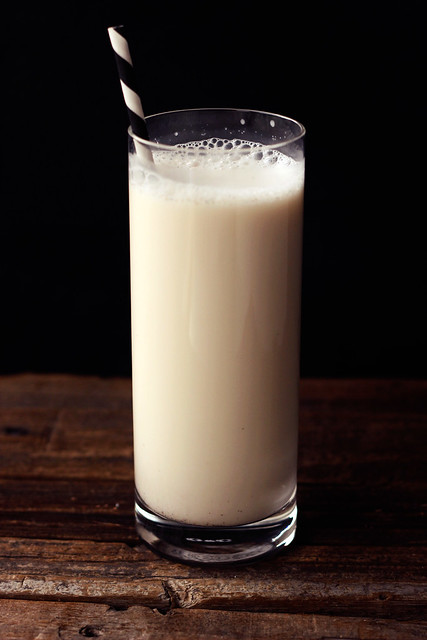
I came across a few really great recipes and finally took the time to experiment and make my own homemade almond milk and now that I have, I will never buy it again. This recipe is simple, fast (besides soaking time) and it requires only a few ingredients. It is creamy, sweet, nutty, rich and full of luscious nutrients, plus it is great for those on dairy-free or raw diets and vegans. It’s great as is, in smoothies, served over your favorite granola or cereal, heated up with chai spices or chocolate, etc.
In addition to all these other great things, it’s also much cheaper than the almond milk you buy at the store and it isn’t loaded with all that scary junk like carrageenan, gums, etc. Bonus if you are into chocolate milk – try adding 1-2 tablespoons of raw cacao powder or unsweetened baking cocoa when blending.

[print_this]How-to Make Homemade Raw Almond Milk
- 1 cup whole raw organic almonds (look for unpasteurized if you can)
- 4-6 cups water (you can use more depending on how light you want it, I used about 5 cups)
- 1 teaspoon vanilla or 1 vanilla bean split open
- 2-4 tablespoons local raw honey* (you could also use maple syrup, dates, stevia or whatever sweetener you prefer)
- A dash of sea salt (I prefer Pink Himalayan Salt)
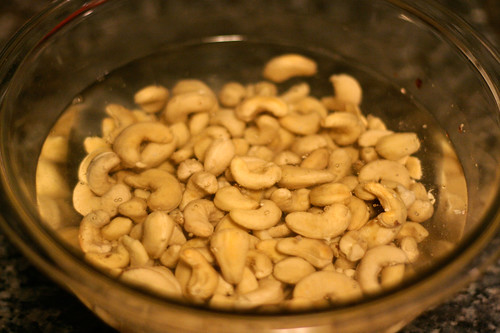
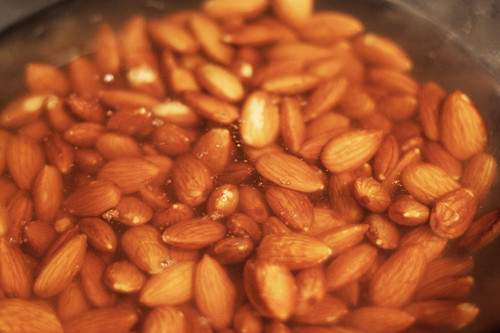
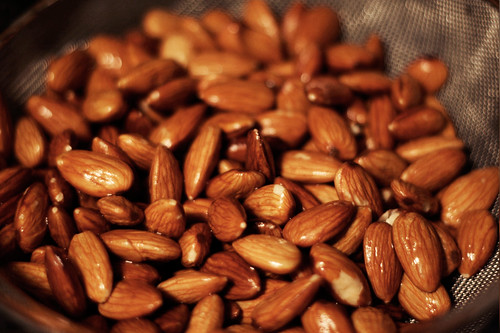
Soak almonds and vanilla bean (if you are using one) for at least 6 hours, preferably overnight.
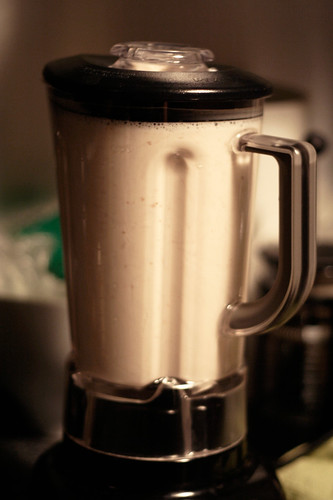
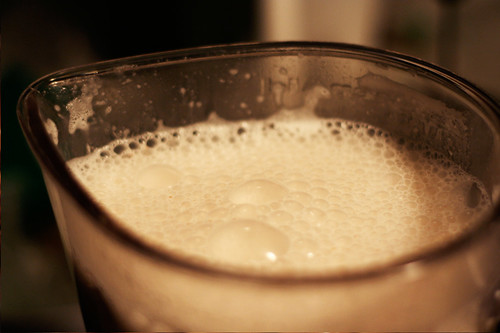
Discard soaking water and rinse almonds and the vanilla bean.Place soaked almonds, the whole soaked vanilla bean chopped up or vanilla extract, honey (or other sweetener), a dash of sea salt and 4-6 cups of water in a blender. Cover and blend on high for 1-2 minutes. It will be milky and have a bit of foam on the top.
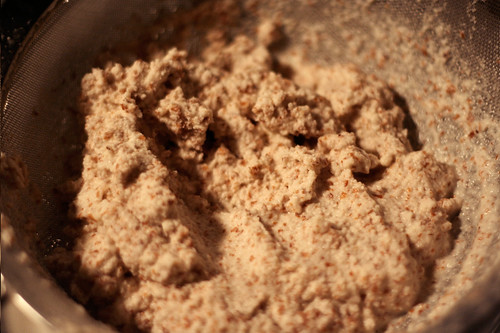
Strain milk through a nut bag, doubled up cheesecloth or a fine mesh strainer. You will then be left with almond pulp that can be saved and used for spreads, butter, crackers, cookies, crusts, etc. You can also freeze the almond pulp for later use.
Serve or store in a covered jar or pitcher in the refrigerator, it’ll be good for about 5 days.
Try adding 1 tablespoon of raw cacao powder or unsweetened baking cocoa when blending for delicious chocolate almond milk!!
* You can also leave out the sweetener if you wish to have it be unsweetened
[/print_this]EDIT 9/2013 – I realized I was using far too many almonds than what was needed so I changed the recipe from 2 cups of almonds to 1. Still just as good and way cheaper to make!
-
Chipotle Hummus
I have been making this hummus for years and it is always a hit at parties. There is just the right amount of spiciness with a smokey heat that sneaks up on you from the chipotles. I try to buy low or no sodium organic garbanzo beans (chick peas) when they are available, so I can control the salt myself. Garbanzos are naturally high in fiber and low in fat so this is a perfect snack with carrots when you have the munchies.
 Chipotle HummusMakes 3 cups2 cans (15.5 ounces each) garbanzo beans (chick peas)1/3 cup fresh lemon juice1/4 cup tahini2 cloves garlic, chopped (I used 1 this time since it was HUGE)1 1/4 teaspoons coarse or kosher salt1 T olive oil1 or 2 chipotle peppers canned in adobo, chopped*
* sometimes I just put a tablespoon or two of the adobo sauce instead of the peppers – go easy with this if you don’t like spicy, it can get spicy quickReserve 1/4 cup liquid, rinse and drain 2 cans of chickpeas. Place chickpeas and reserved liquid in a food processor. Add 1/3 cup fresh squeezed lemon juice, 1/4 cup tahini, well stirred, 2 garlic cloves, chopped, chopped chipotles, and 1 1/4 teaspoons coarse salt. Process until smooth. I drizzle in just a bit of olive oil while its processing, it makes it even smoother and gives it a bit of a better taste. To store, refrigerate in an airtight container up to 1 week.
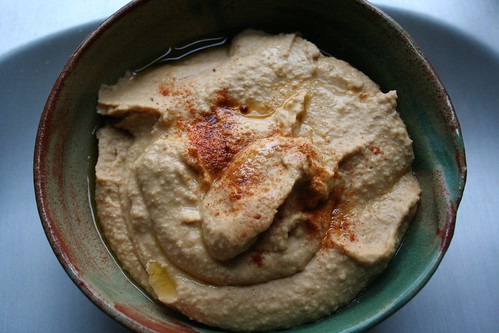
Sprinkle a bit of cayenne or smoked paprika and drizzle a bit of olive oil on top when serving. Serve with pitas, tortilla chips, crackers, raw veggies, on a sandwich and more.
Other variations:
Try making with roasted garlic instead of raw garlic.
Add roasted red peppers.
Substitute cumin for chipotle.
Blend in 1 cup of roasted vegetables such as eggplant, zucchini, bell peppers, and garlic for a roasted vegetable hummus.
For olive hummus, fold in 3/4 cup of chopped green or black olives.
Try adding some lightly toasted walnuts or pine nuts for a yummy nutty hummus.Do you have any other hummus variations you would like to share?
**The beautiful bowl above is a handmade pottery bowl made by a good friend of mine, Karen Felicetta. I love the way this hummus looks served in this bowl.


