-
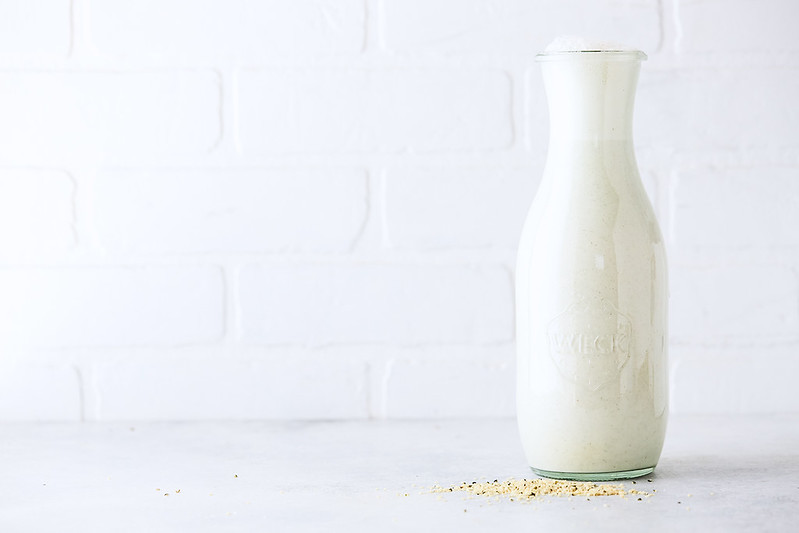
How to Make Hemp Milk +Video {Keto, Paleo, Vegan, Nut-free, Whole30}
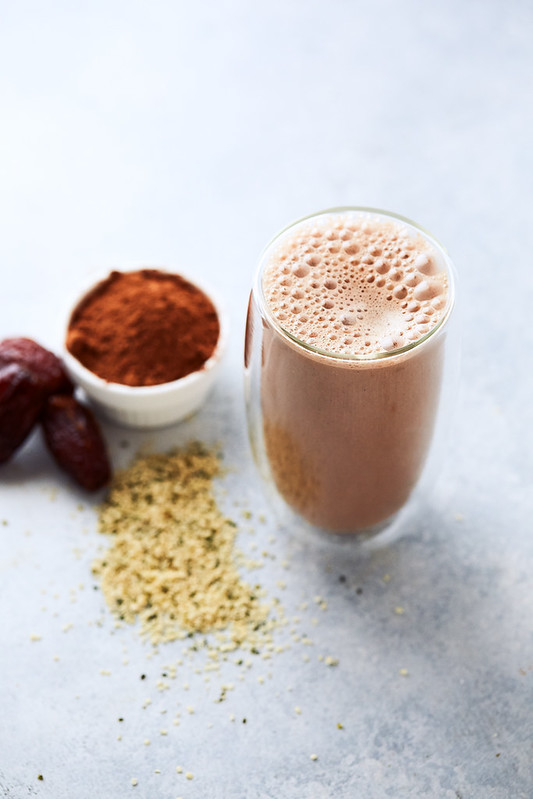
How to Make Hemp Milk. Today I am teaching you to make my super simple homemade hemp milk. No need for soaking or straining, no planning ahead, just two ingredients to super easy homemade non-dairy milk. Plus, a few of my favorite flavor variations, Creamy Strawberry Vanilla Bean and Rich Chocolate Hemp Milks.

I am excited to show you how to make Easy Homemade Hemp Milk. It’s one of my favorite meal prep recipes and it’s great when you are in a pinch. Whether avoiding dairy milk is a priority, preference or necessity, I find homemade non-dairy milks to be the best for taste and cost as well as knowing exactly what is in there.
There are so many reasons to make your own non-dairy milks at home, but if I am being honest, often the time and the planning ahead becomes a big reason why I just don’t do it. I forget to plan ahead to soak the nuts or seeds, then I don’t want to fuss with straining the milk.
This homemade hemp milk is a favorite of mine for those last minute moments when I realize I have nothing on hand and I just want a quick smoothie, post-workout shake or even a tasty latte. Unlike most homemade nut milks or non-dairy milks, there’s no soaking overnight and no straining after you blend, so it’s ready whenever you are. You just need a high speed blender, like a Vitamix and about 2 minutes of your time! That’s literally it.
By not straining your homemade hemp milk, you maximize the nutritional benefits of the hemp seeds (hemp hearts) along with the extra fiber.
You can strain if you want it to be more like commercial non-dairy milks, it’s super easy, with a nut milk bag or cheesecloth, but the best part about not straining, you retain all the amazing benefits of the hemp hearts.
NO SOAKING NECESSARY
Hemp seeds contain no phytic acid, the mineral-binding antinutrient common to most nuts, seeds, grains, and legumes (which we talk about at length in my nut milk how to post and this sprouting tutorial for nuts, seeds, grains and beans).
Nutritional Benefits of Hemp Seeds (Why I Don’t Strain my Hemp Milk)
Hemp seeds (or hemp hearts) are a great source of vitamins, minerals, and they are rich in plant-based essential fatty acids, omega 3s, omega 6s, plus due to the optional ratio of these two EFAs in hemp seeds, it’s a great option for reducing inflammation. Hemp also contains including GLA, Gamma-Linolenic acid (GLA), a necessary building block for some prostaglandins that has been shown to support hormone balance, inflammation and more.
Hemp seeds are also rich in vitamin E which is great for your immune function. As far as minerals, hemp is a great source of manganese and magnesium, potassium, phosphorous, zinc, among others. Most excitingly, hemp seeds are a quality complete plant based protein, with all 20 amino acids present, including the 9 essential amino acids our bodies cannot produce – this is CRAZY rare in the plant kingdom, this is part of why I never bother straining them out. Per a 30 gram serving of hemp hearts, (approx. 2 heaping tablespoons) you get 10 grams of protein and 10 grams of Omega 3 + 6s. Hemp seeds are also rich in fiber, which is one of the other reasons why I prefer to leave the whole seeds in my homemade hemp milk.
My Blender of Choice + A Special Offer:
All you need is a good blender! That’s it. I recommend a high speed blender for the very best results for super creamy Homemade Hemp Milk. Vitamix is my preferred high speed blender. Using this link, you, the Tasty Yummies community receives $20 off of your first purchase of an Ascent Series product (featured above) plus FREE SHIPPING.
-
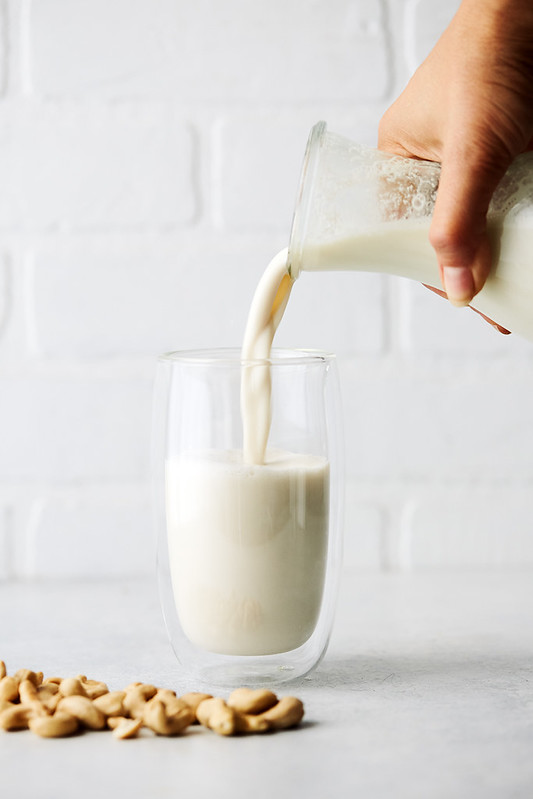
Easy No-Strain Cashew Milk {+ Video} + bonus flavor ideas
Are you curious how-to make delicious cashew milk? While nut milks and other non-dairy milks can seem intimidating and like far more work than they are worth, this definitely doesn’t apply to my Easy No-Strain Cashew Milk. Just two ingredients, a minute or two of blending and that’s it you’re done! Be sure to scroll down for my tasty chocolate cashew milk recipe along with a few other super tasty, fun flavor ideas.
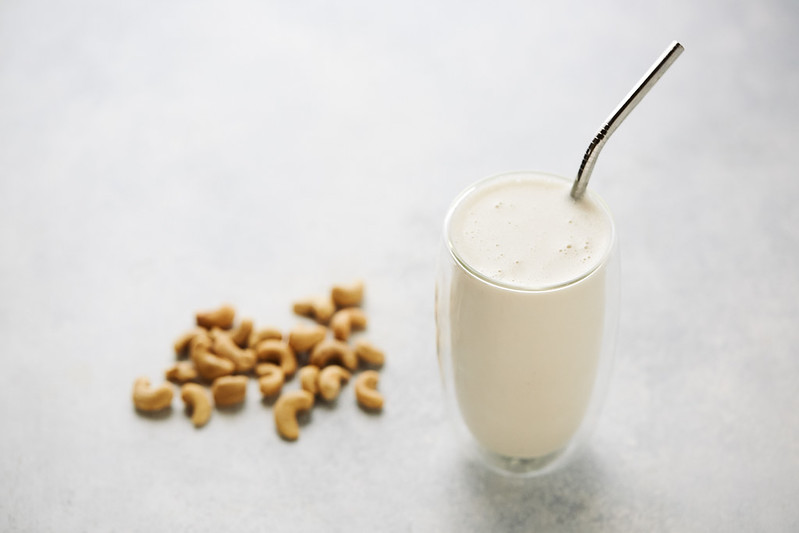
In typical “food blogger” fashion, by way of photos and personal anecdotes it make appear that this recipe is far more complicated than what it actually is. Don’t get it twisted, this is THE MOST simple recipe I may have ever posted. Spoiler alert: to make cashew milk, you need raw cashews and filtered water. THAT’S ABOUT IT! I generally prefer to add a pinch of quality sea salt, sometimes I will sweeten it or add vanilla and I really love my homemade Chocolate Cashew Milk – but in all it’s simple glory you just need water and raw cashews.
I particularly love this cashew milk recipe, because it’s no-strain! No need to fuss with filtered or straining, no nut milk bags. Just blend and enjoy. It’s creamy, rich, silky and super versatile.
You all have known for years that I generally prefer to avoid dairy, I don’t have an intolerance or allergy, I simply feel much better without it. I do OK with some cheeses in small amounts, along with sheep and goat’s milk from time to time, but there is nothing in me that ever feels a desire to sit down with a glass of cold dairy milk. We were never allowed to drink milk as children. My mom was ahead of her time. She knew that dairy can be inflammatory, that the lactose can be troublesome for most folk’s digestion and it can also exasperate respiratory issues.
-
Edible Earth Day: Cookies and Milk, the Healthy Way
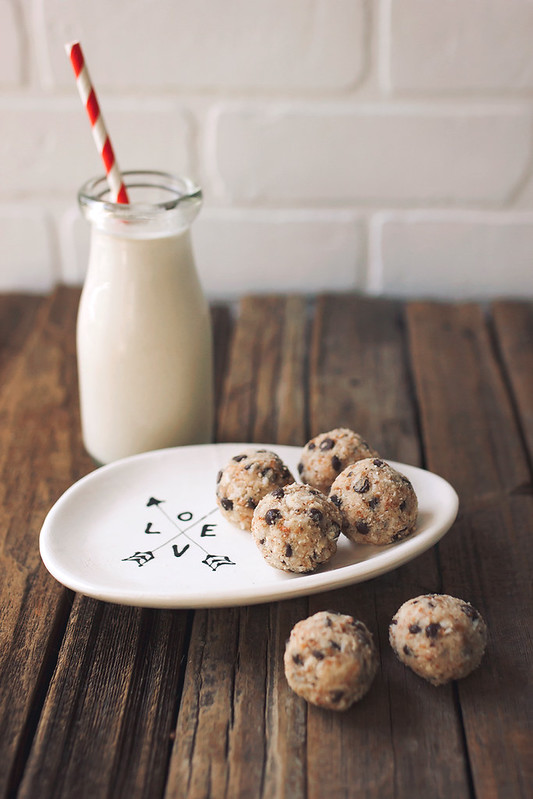
For many of us, eating and living consciously is already part of our everyday life; eating clean foods, using clean or homemade beauty and household products, incorporating yoga and meditation. But, beyond an awareness of what we consume, it’s also important that we think of the far reach of our consumption. The results of our actions and our purchases, the energy needed to produce what we consume, our waste and what we are leaving behind.

I personally choose to make as much as I can at home for myself, not only because I prefer to know what exactly is in the foods and products that I consume, but I also love the idea of creating less waste, fewer things to throw away or recycle. As much as I can, I try to remove the worry about packages and boxes, cartons or wrapping. To me, the ripples and reach of my actions carries a heavy weight. Buying one box of almond milk, isn’t just about the actual almond milk inside, it’s the carton, the plastic top, the energy needed to produce and of course, all of the unnecessary ingredients being added.
-
How-to Make Nut Milk

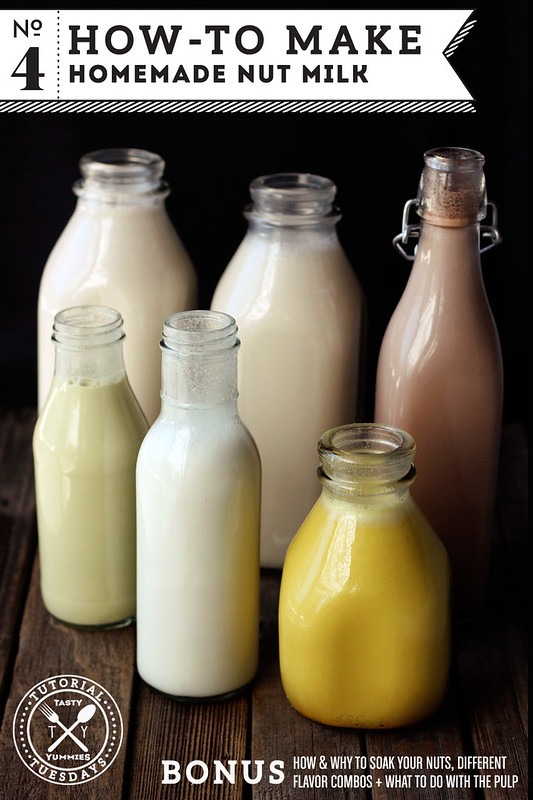
How-to Make Nut Milk
I am super excited to share this tutorial with you guys! Many of you have asked for a tutorial on nut milks, since I started the Tutorial Tuesdays Series. I have been making my own nut milks for quite a few years now. Once I realized just how simple it was, I have made a quart of almond milk nearly every single week.
I also love making variations on the flavors, at least once a month I make a quart of raw cacao almond nut milk. It’s the perfect sweet treat for me.
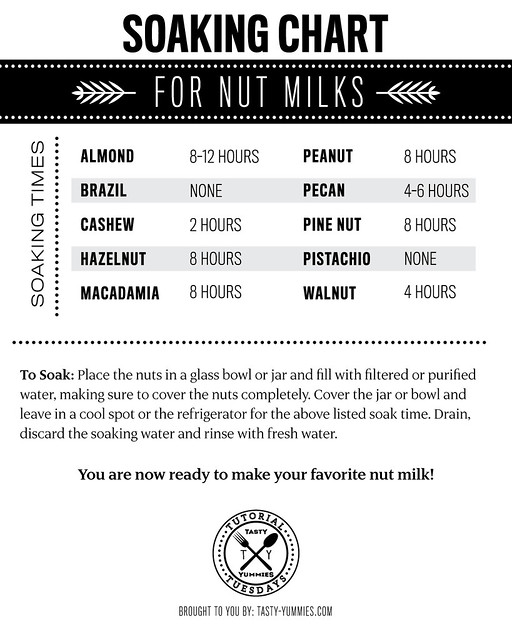
Much like my nut butter post, this is a general overview on how to make nut milks, but really the sky is the limit. If you have a favorite nut – I say MILK IT! As with the nut butters, I recommend soaking your nuts first, but for nut milks dehydration isn’t necessary, so it’s that much easier. Below you will find a chart on soaking times for various milks.
What Nuts Can You Milk?
First of all, let’s just get all the giggles out now. Sooo many amazing innuendos when it comes to nut milks. Oh, and guess what? It doesn’t get old. Everytime I pull my nut bag out. A good laugh is had! Anyhow – I myself have made nut milks from almonds, cashews, hazelnuts, macadamia nuts and pistachios, but from what I understand the same rules apply no matter what nut you choose, so you can create nut milks from any of the other nuts listed below and likely many others, too. FYI macadamia nut milk is amazing, so rich and full of incredible flavor, but literally it may be the most expensive nut milk you can make. I made a batch for this testing and I kinda wish I hadn’t. It was so good.
How & Why to Soak Your Nuts
Why I Choose to Soak: Most nuts, seeds, grains and beans are covered in natural chemicals – enzyme inhibitors and toxins – that protect them while growing, both from sprouting prematurely and also from predators. These nutritional inhibitors and toxic substances are enzyme inhibitors, phytates (phytic acid), polyphenols (tannins), and goitrogens. Once harvested, those same chemicals, the major one being phytic acid – are indigestible to the human body and must be broken down before consumption. When food containing phytic acid is consumed, the acid combines with important minerals like calcium, magnesium, copper, iron and especially zinc in the intestinal tract and blocks their absorption which inhibits our digestive systems’ ability to break the nut down properly.
The very simple process of soaking releases these chemicals, helping you to absorb your food’s essential minerals and nutrients. Additionally, by soaking the nuts with the removal of these nutritional inhibitors and toxic substances, the flavor and taste is much more ideal and appealing.
To summarize: Soaking nuts makes them easier to digest and improves their flavor.
How-to Make Homemade Nut Milks
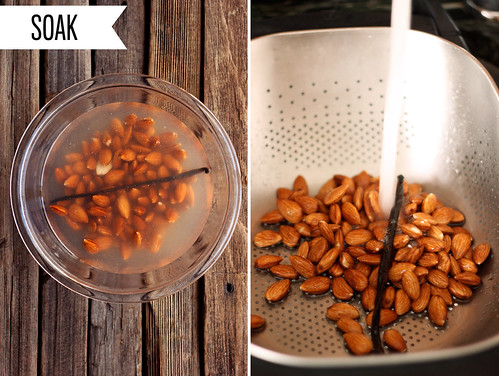
1) Soak your nuts in filtered water for the appropriate time, drain and rinse.

2) Blend your soaked nuts with filtered water, adding in any flavorings you would like.
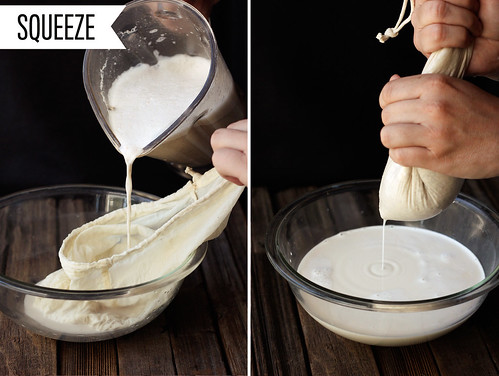
3) Pour into your nut milk bag and squeeze. Separating the pulp from the milk. Read the rest of this entry »
-
Spring Cleanse – Creamy Green Smoothie – Gluten-free, Vegan + Sugar-free


Today is day 3 of my 7-day Spring Cleanse and I have to be honest that the second half of yesterday just kinda sucked. I had a terrible pounding headache, that started out not so bad and just got worse as the day went on, then my tummy got involved a little, too. I just felt crazy worn out. Oh yeh, and there has definitely been an excess of mucus. (sorry, gross I know, but I am all about sharing) However, hubby and I decided to take advantage of the beautiful weather here in Long Beach last night and we took 2+ mile walk around out new neighborhood, down to 2nd Street and I got myself an iced herbal tea unsweetened. It feel great to get out and move and I needed that, but boy when I got home was I ready to hit the hay. I was in bed and ready for sleep before 10pm. I didn’t sleep super great since I was dealing with the headache, but when I woke today at 6am I was feeling a lot better.
Since we took that long walk last night, I decided to skip a morning workout today to give my body the rest I think it is craving right now. I may try to get a run in later today depending on my energy level. Cleansing and detoxing is a lot for your body to go through and you have to read your body’s cues on what it is craving (besides the sweets and salty snacks). This morning I was craving rest and something very green! With St Patrick’s Day just two days away, I found myself inspired to make the first smoothie of the cleanse, this creamy green smoothie! Since I am consuming most of my fruits and vegetables cooked, the only time I will eat raw is first thing in the morning, when I feel like my digestion hasn’t been taxed yet and can take on the task of breaking it all down. Since a smoothie basically does a lot of that for you, I felt like that was an even better way to enjoy some raw.
From what I know of cleansing and what I have personally been through, I know that once (if) you can get past day 3, the worst is over. Your body will have detoxed from many things by the end of 72 hours and you shouldn’t be going through withdrawals or any of that sort of thing. So hopefully today is a little easier than yesterday.
Feel free to change this up however you’d like. Any apple type will do, but please only include the skin if you are using a certified organic apple. And please still wash it well. You could also use kale in place of the spinach if you wish. Also, I included ground flaxseeds to help with the thickness of the smoothie but also for their many benefits, like omega-3 essential fatty acids and fiber. If you don’t care for avocado, go with 1/2 banana instead. Have fun with the recipe and make it your own.
If you have been joining me on this cleanse, how are YOU feeling? Experiencing any detox side effects? Hope you have all been following along on my Facebook page, where I have been sharing what I am eating for each meal.
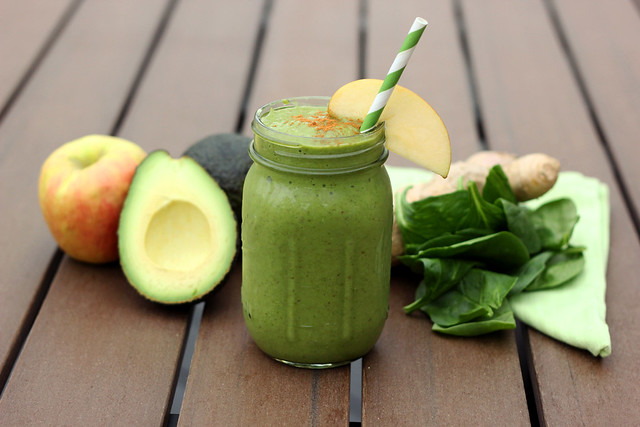
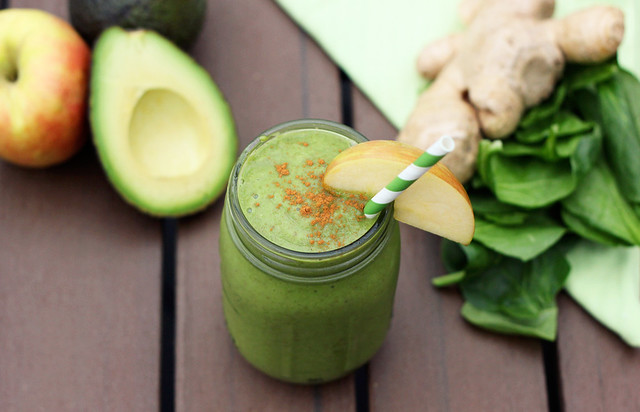
[print_this]Creamy Green Smoothie – Gluten-free, Vegan + Sugar-free
makes 1 large serving or 2 small- 1 cup organic unsweetened non-dairy milk or water (I used almond milk)
- 1 cup organic spinach
- 2 organic Medjool dates
- 1 organic medium apple – cored, skin can be left on, if organic
- 1/2 organic avocado
- 2-inch organic piece ginger, peeled and chopped
- 1 tablespoon ground flaxseed (optional)
- 1/2 teaspoon ground cinnamon
- 3 or 4 ice cubes
Add all of the ingredients to your blender (in the order above) and process until smooth and creamy. Serve with an apple slice and a sprinkle of cinnamon or a cinnamon stick to get real fancy!
* I know it is repetitive on the “organic”, but it is especially important to consume organic produce when cleansing. All of my ingredients, included the flax and cinnamon were all organic.
[/print_this]


