-
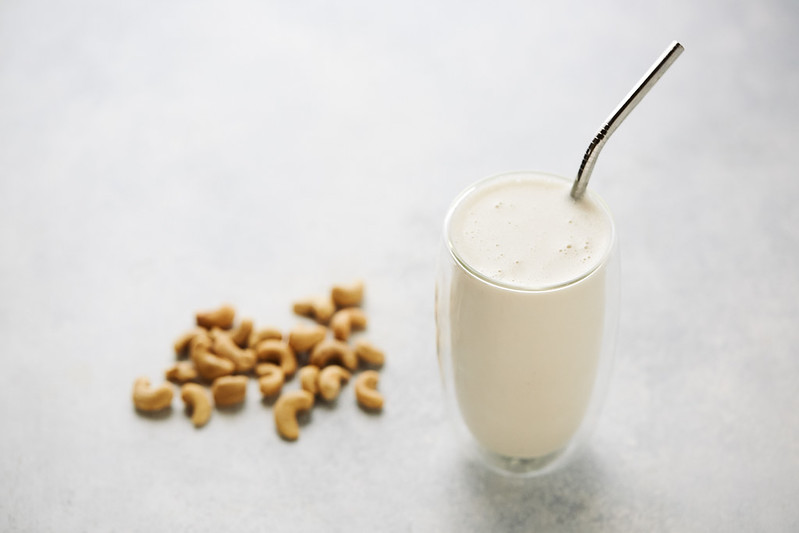
Easy No-Strain Cashew Milk {+ Video} + bonus flavor ideas
Are you curious how-to make delicious cashew milk? While nut milks and other non-dairy milks can seem intimidating and like far more work than they are worth, this definitely doesn’t apply to my Easy No-Strain Cashew Milk. Just two ingredients, a minute or two of blending and that’s it you’re done! Be sure to scroll down for my tasty chocolate cashew milk recipe along with a few other super tasty, fun flavor ideas.
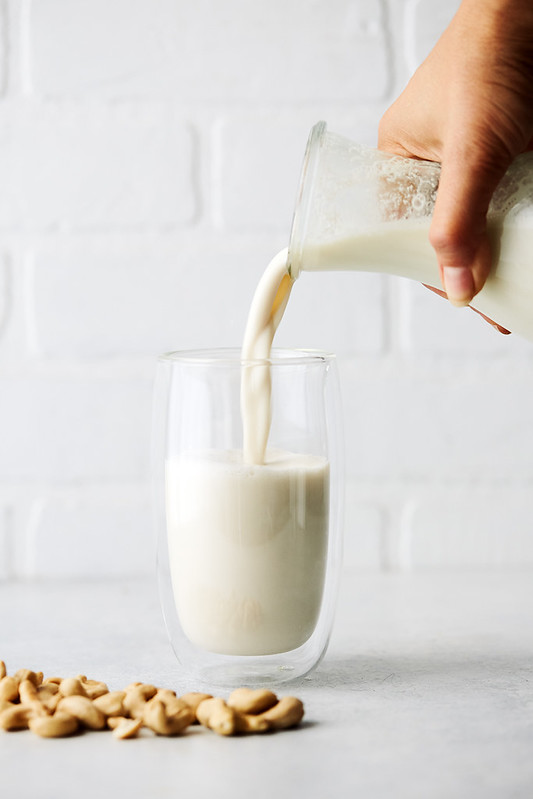
In typical “food blogger” fashion, by way of photos and personal anecdotes it make appear that this recipe is far more complicated than what it actually is. Don’t get it twisted, this is THE MOST simple recipe I may have ever posted. Spoiler alert: to make cashew milk, you need raw cashews and filtered water. THAT’S ABOUT IT! I generally prefer to add a pinch of quality sea salt, sometimes I will sweeten it or add vanilla and I really love my homemade Chocolate Cashew Milk – but in all it’s simple glory you just need water and raw cashews.
I particularly love this cashew milk recipe, because it’s no-strain! No need to fuss with filtered or straining, no nut milk bags. Just blend and enjoy. It’s creamy, rich, silky and super versatile.
You all have known for years that I generally prefer to avoid dairy, I don’t have an intolerance or allergy, I simply feel much better without it. I do OK with some cheeses in small amounts, along with sheep and goat’s milk from time to time, but there is nothing in me that ever feels a desire to sit down with a glass of cold dairy milk. We were never allowed to drink milk as children. My mom was ahead of her time. She knew that dairy can be inflammatory, that the lactose can be troublesome for most folk’s digestion and it can also exasperate respiratory issues.
-
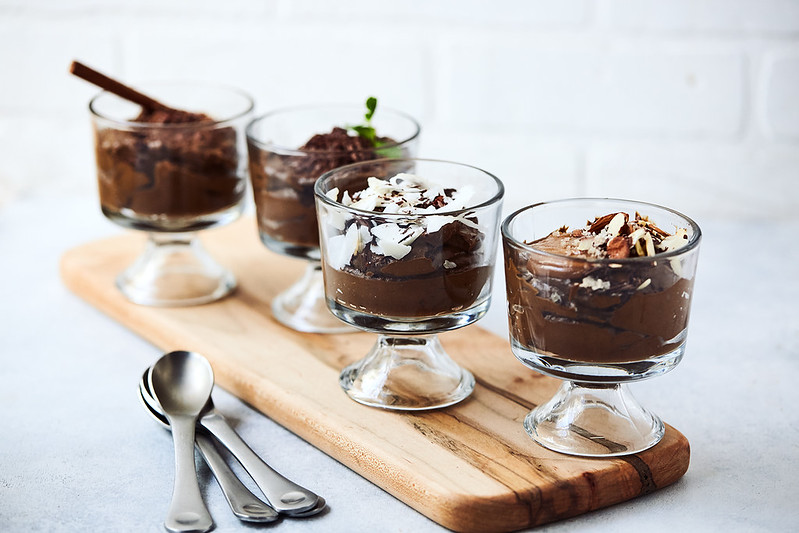
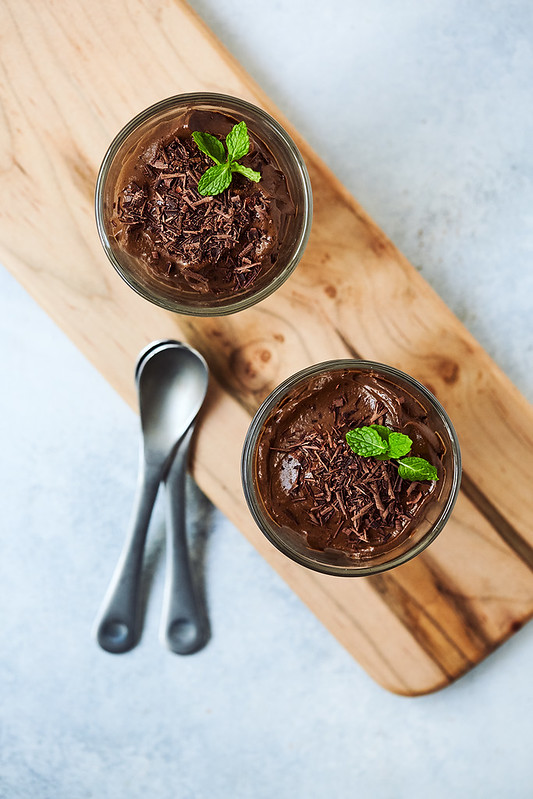
Keto Chocolate Avocado Pudding {Paleo, Vegan}
This rich, decadent, smooth Keto Chocolate Avocado Pudding has become a favorite treat around our house. It’s decadent, creamy and so so easy. Ready in just a few minutes, with just 5-ingredients!
You all know from following me, I am not a big treats and sweets gal. I just don’t crave sweets these days and I generally prefer to avoid the keto-fied treats loaded with suspect sweeteners. I generally just stick to my daily dark chocolate. A square or two of 85-100% dark chocolate and I am a very happy girl. Chocolate truly is my love language.
Hubby is a little bit different than me. The man grew up on sweets. The really sweet sweets! They are his comfort food, so I am always looking for ways to please both our palates.
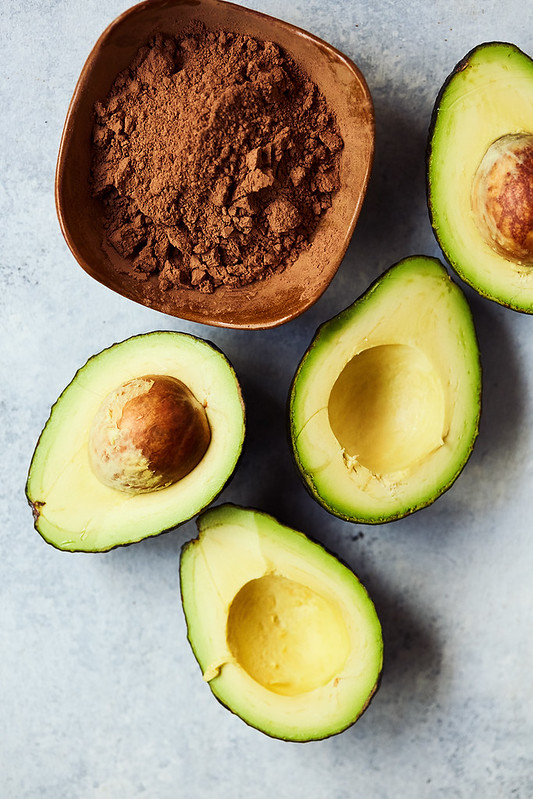
This Keto Chocolate Avocado Pudding is a creamy, whipped mousse-like dessert that comes together quickly and it really hits the spot. The best part, as like most recipes you’ll find here on Tasty Yummies, SO many fun flavor options. Add in a little nut butter and some sea salt and it’s delightful. Bump up the coconut flavor with shredded coconut, toasted coconut flakes or maybe a little coconut extract. Mint Chocolate pudding is nice, add a little mint extract and/or fresh mint leaves. Try adding some cinnamon and a pinch of cayenne for a spicy Mexican Chocolate pudding. Lastly a little espresso powder is also really really nice. Read the rest of this entry »
-
Sweet Potato Noodles with Sage “Cream” Sauce
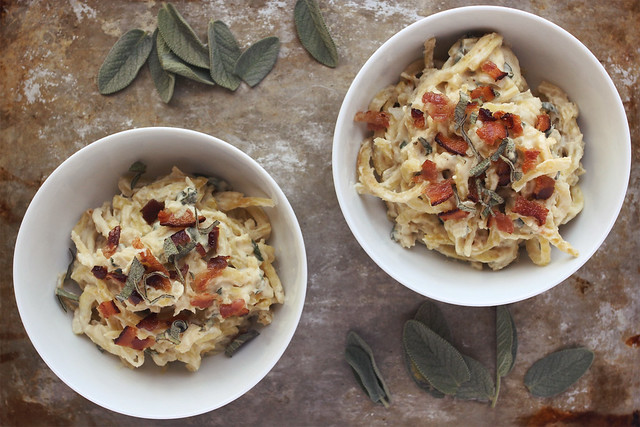
Yes, I am aware it is summer and a typical summer recipe, this is not. Amongst the cold salads, popsicles, ice cream and grilled stuff – I had a craving for something a bit more hearty and comforting over the weekend. I guess because of the sage, in my mind, this dish belongs more on a fall menu than summer menu – but I just couldn’t ignore this desire for something other than another cold salad.

Although I am all about eating seasonal and celebrating the freshest local flavors, I am also all about eating intuitively. If your body wants something more hearty than a cold salad, if you are sick of the grilled veggies, or you find yourself wanting something more suited for the cool crisp weather of fall than the hot sweaty summer days – I say go for it. This obviously, like everything should be taken with a grain of salt. If your body is telling you it wants a whole cheese pizza, with a side of Doritos and a 2 liter of Coke, I am not actually suggesting you listen to that voice! You should probably kick that nasty jerk voice right out of your head space!
-
How-to Make Nut Milk

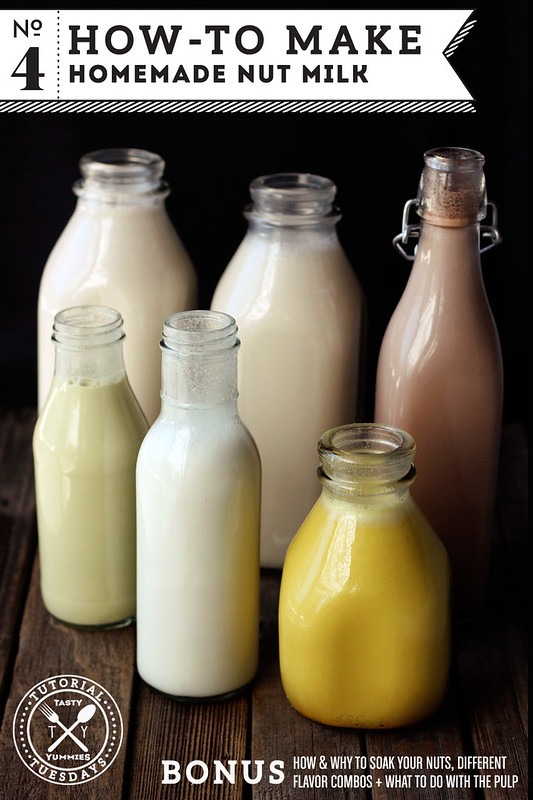
How-to Make Nut Milk
I am super excited to share this tutorial with you guys! Many of you have asked for a tutorial on nut milks, since I started the Tutorial Tuesdays Series. I have been making my own nut milks for quite a few years now. Once I realized just how simple it was, I have made a quart of almond milk nearly every single week.
I also love making variations on the flavors, at least once a month I make a quart of raw cacao almond nut milk. It’s the perfect sweet treat for me.
Much like my nut butter post, this is a general overview on how to make nut milks, but really the sky is the limit. If you have a favorite nut – I say MILK IT! As with the nut butters, I recommend soaking your nuts first, but for nut milks dehydration isn’t necessary, so it’s that much easier. Below you will find a chart on soaking times for various milks.
What Nuts Can You Milk?
First of all, let’s just get all the giggles out now. Sooo many amazing innuendos when it comes to nut milks. Oh, and guess what? It doesn’t get old. Everytime I pull my nut bag out. A good laugh is had! Anyhow – I myself have made nut milks from almonds, cashews, hazelnuts, macadamia nuts and pistachios, but from what I understand the same rules apply no matter what nut you choose, so you can create nut milks from any of the other nuts listed below and likely many others, too. FYI macadamia nut milk is amazing, so rich and full of incredible flavor, but literally it may be the most expensive nut milk you can make. I made a batch for this testing and I kinda wish I hadn’t. It was so good.
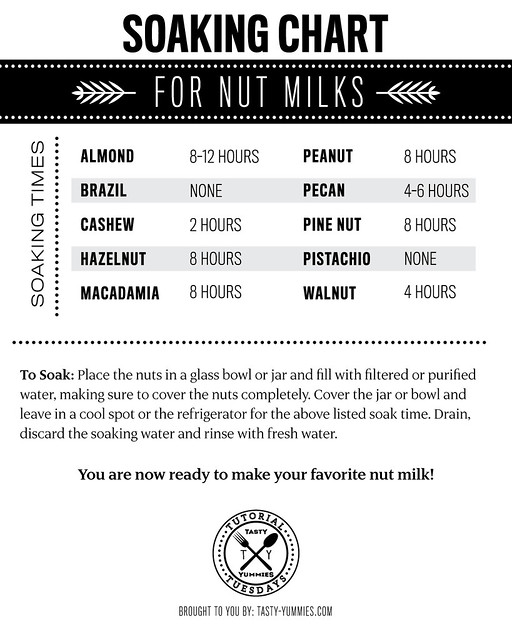
How & Why to Soak Your Nuts
Why I Choose to Soak: Most nuts, seeds, grains and beans are covered in natural chemicals – enzyme inhibitors and toxins – that protect them while growing, both from sprouting prematurely and also from predators. These nutritional inhibitors and toxic substances are enzyme inhibitors, phytates (phytic acid), polyphenols (tannins), and goitrogens. Once harvested, those same chemicals, the major one being phytic acid – are indigestible to the human body and must be broken down before consumption. When food containing phytic acid is consumed, the acid combines with important minerals like calcium, magnesium, copper, iron and especially zinc in the intestinal tract and blocks their absorption which inhibits our digestive systems’ ability to break the nut down properly.
The very simple process of soaking releases these chemicals, helping you to absorb your food’s essential minerals and nutrients. Additionally, by soaking the nuts with the removal of these nutritional inhibitors and toxic substances, the flavor and taste is much more ideal and appealing.
To summarize: Soaking nuts makes them easier to digest and improves their flavor.
How-to Make Homemade Nut Milks
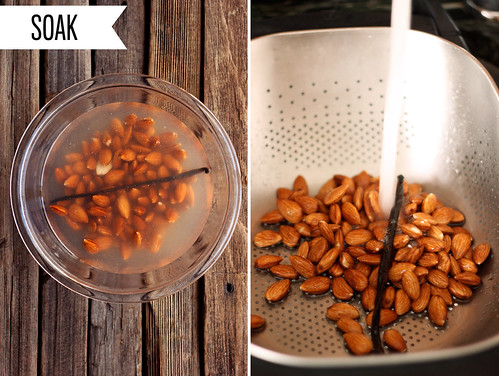
1) Soak your nuts in filtered water for the appropriate time, drain and rinse.

2) Blend your soaked nuts with filtered water, adding in any flavorings you would like.
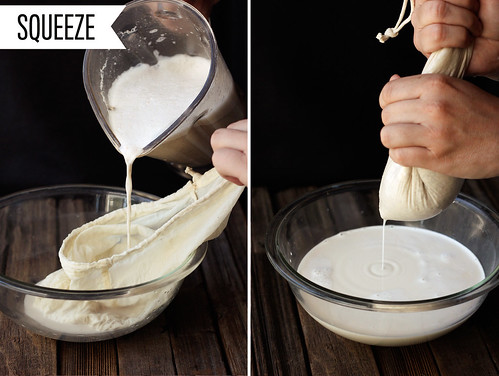
3) Pour into your nut milk bag and squeeze. Separating the pulp from the milk. Read the rest of this entry »
-
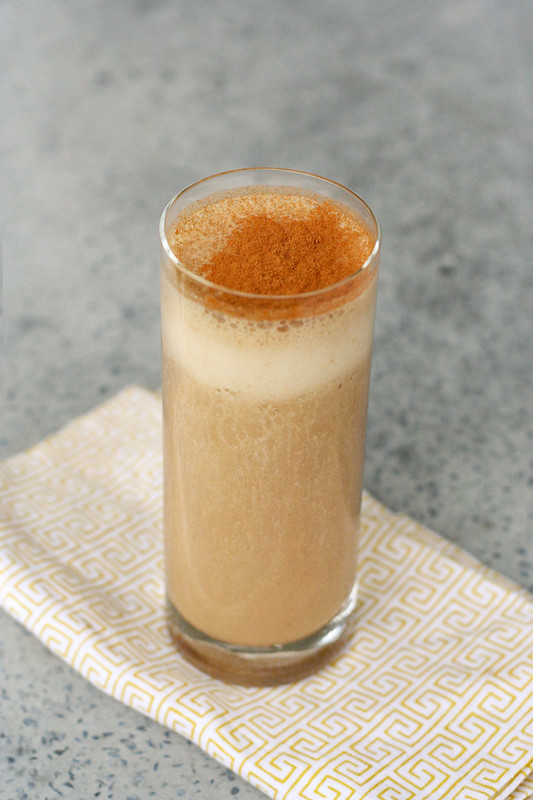
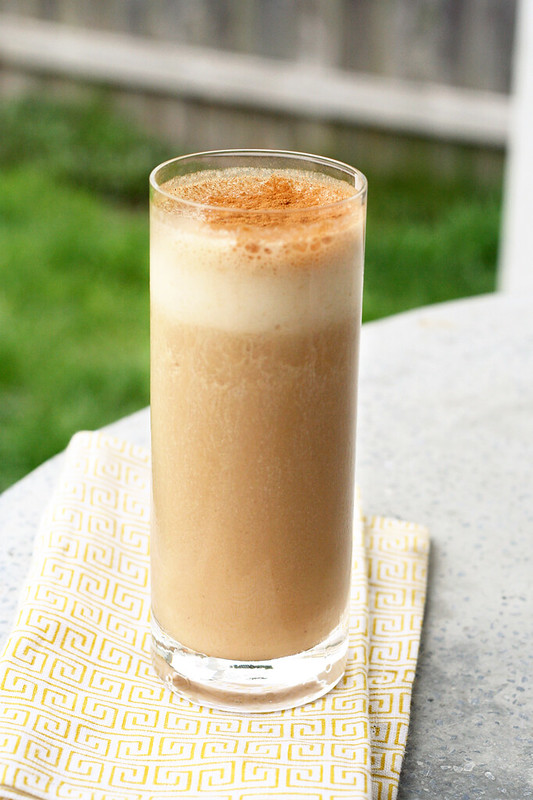
Vanilla Banana Chai Smoothie – Gluten-free + Vegan
So, this is a short but sweet post. I actually didn’t plan on creating this recipe, it just kinda happened. Hence the single haphazard looking photos! But this was too good not to share. Sunday night I made some homemade raw vanilla almond milk. It had actually been a while since I have made it. I forgot how easy it is and how amazing it tastes. I also made my chai concentrate late last week. When I got home from yoga Monday morning, I was in a bit of a rush to get something into my tummy and to get upstairs to get to work so I thought up the idea of a banana chai smoothie. Once again, like the socca I made last week, I am not sure why I haven’t done this sooner. What a lovely combination of flavors, the rich vanilla flavor, the creaminess from the almond milk and the banana, the subtle nutty flavor and all those delicious spices! YUM!
It has actually been a while since I made almond milk at home. Even though it is super simple, I somehow always talk myself out of it when I am at the store looking at the bulk raw almonds, contemplating it. Somehow it seems easier and quicker to just grab a carton of my favorite organic unsweetened almond milk. Then when I do find the time to make it and take one sip, I remember that it is totally worth it. This time, I also finally made an effort to do something with the leftover almond pulp from making the almond milk. I made some delicious vanilla “sugar” cookies drizzled with chocolate, with just a few additional ingredients besides the almond pulp. Look for that recipe later in the week.
If you don’t have chai concentrate at home, see the note at the bottom of the recipe for a suggested alternative. I think it would work just great.
[print_this]Vanilla Banana Chai Smoothie – Gluten-free + Vegan
serves 1- 1/2 cup chai concentrate*
- 1/2 cup vanilla almond milk
- 1 organic banana
- 1 teaspoon vanilla extract
- 1 handful of ice
- Sweetener of your choice, to taste, if your chai and almond milk aren’t sweetened – a bit of maple syrup or a few drops of liquid stevia would be perfect, you could also add 1 or 2 pitted dates
- 1/8 teaspoon ground cinnamon
- 1/8 teaspoon ground nutmeg
Add everything but the cinnamon and nutmeg to the blender and process until smooth and creamy. Pour into your glass and shake a little cinnamon and nutmeg over top. Serve immediately.
*Note – if you don’t have chai concentrate on hand, you could probably just brew a strong cup of chai using a tea bag. I would suggest just adding about 1/2 cup of boiling water to a mug with your favorite chai tea bag, removing the tea bag after it steeps long enough to be a strong dark cup of tea, then chill it and then add it to the smoothie. Or maybe you are inspired to just go with straight almond milk and add some classic ground chai spices themselves to the smoothie like cinnamon, cardamom, ginger, nutmeg, etc. Play around and let me know if you try any of those either variations.
[/print_this]
-
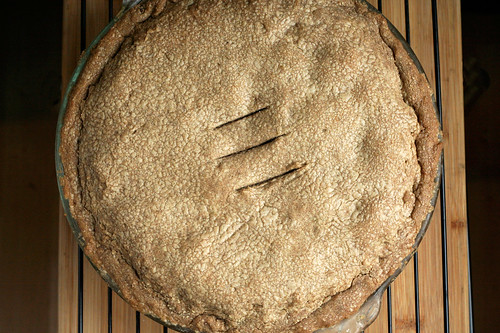
Gluten-free & Vegan Vegetable Pot Pie
I am super excited to share this recipe with you. I know it seems complicated and like a lot of steps, but it really isn’t that bad. If you want to buy a store bought pie crust or mix, and just make this filling, I say go for it. If you aren’t gluten-free and you wanna make this filling, just sub in your regular flour. Just looking for vegetarian not vegan, use butter and regular milk. But whatever you do, make time to make this pot pie. It is so delicious!
I have really come to love baking and even though I am not quite at the point with my baking where I can completely, on my own, create a complicated recipe yet, like a vegan gluten-free pie crust, I still really love doing it. Having a beautiful and perfect recipe for a pie crust from a true pro like Shauna (Gluten-free Girl), is seriously a blessing. It is a great jumping off point for recipes like this one and I am truly grateful for people like her that can find the perfect ratios, keep their cool while experimenting and destroying things and come up with the perfect pie crust! It is so damn admirable.
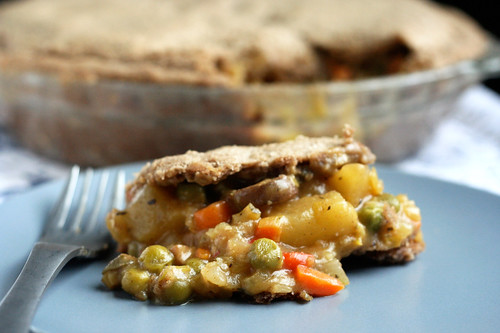
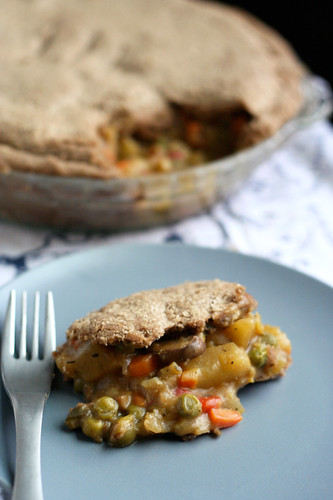
I keep my own gluten-free whole-grain flour blend on hand (that I make using Gluten Free Girl’s suggestions on flours, starches and ratios) in a large quantity for use in lots of different recipes. I used Shauna’s pie recipe after Thanksgiving to make a turkey pot pie and I made it exactly as the recipe calls for, with the same flour blend that she uses and with butter. It turned out perfectly. Since I have since cut out dairy, I was very excited to try it all again but making the pie dough vegan and using a whole-grain blend of flours instead. The crust was definitely a bit flakier with the butter than the vegan butter sticks, but I have to say I am extremely excited and impressed with both the crust on this pie and the delicious vegan filling. The pie crust was tender and it had a beautiful tasty crisp and even a slight flakiness to it. The filling is thick, hearty and even a bit creamy. It amazed even me that there wasn’t a bit of dairy in this whole pie. Since it has been nearly 3 weeks since I have had any dairy, I kept feeling like I was doing something wrong when I was eating this. But I made the entire thing myself, not a drop of dairy in the whole thing. Considering my meat and cheese loving hubby, Mark, not only at this, but went back for seconds – I knew I had struck gold!
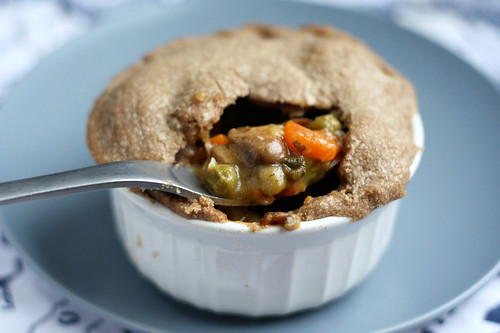
When making the large pie, I was afraid to overload it with too much filling, so I had a little bit leftover after putting the top crust on (though I realized after I should have just mounded it all in there), I also ended up with the smallest piece of extra pie dough since I had over rolled it just a tad, so I made the tiniest little mini-pot pie in a ramekin. I was actually really excited that it worked out this way, since I wanted to see how it would turn out if I made mini pot pies instead. It was perfect! The only thing I would change for the next time is to load all of the filling in, even though it seems like a lot. The filling does cook down a bit, so there is more room there than you think. I just had visions of veggie filling overflowing all over my own and ruining the pretty picture-perfect pie I had made.
You can have some fun with your pot pie fillings and add or take away any of your favorite or not so favorite ingredients. Turnips or parsnips would be good, asparagus or butternut squash, chives instead of sage. Play with your ingredients depending on what is in season. You could add some tofu. Have fun with this!
[print_this]Gluten-free & Vegan Vegetable Pot Pie
serves 6-8This pot pie has a top and bottom crust, which is how my husband requires his pot pies! If you wish to only have a top crust or if you wish to make smaller pot pies in ramekins with just top crusts, make sure to halve the pie dough recipe.
Gluten-Free Vegan Whole-Grain Pie Dough:
Adapted from Gluten-free Girl350 grams all-purpose gluten-free whole-grain flour (or your favorite gluten-free AP flour) – I used Shauna’s ratio and flour suggestion list to make my own whole-grain flour mix. My blend included a combination of almond flour, buckwheat, teff, sorghum, arrowroot and potato starch.
1/2 teaspoon kosher salt
226 grams (2 sticks) Earth Balance Vegan Buttery Sticks (you can use two regular sticks of butter if you aren’t vegan)
1/2 cup ice-cold water, plus a few splashes moreGluten-Free Vegan Veggie Pot Pie Filling:
1 tablespoon olive oil
1 medium onion, diced
1 leek, white and green parts only, diced
1 clove garlic, minced
3 carrots, peeled and diced into 1/2-inch pieces
2 stalks celery, diced into 1/2-inch pieces
1 red bell pepper, diced into 1/2-inch pieces
1 sweet potato, diced into 1-inch cubes
1/2 cup dry white wine
1/2 cup gluten-free flour
2 cups vegetable broth (mushroom stock would also be good)
1 cup non-dairy milk (almond, cashew, coconut, etc)
1 cup frozen peas
1 tablespoon fresh sage, roughly choppedCut the buttery sticks into one-inch cubes. Place them on a plate in the freezer for 15 minutes.
Put the flour and salt into a large food processor. Pulse them together a few times until the flour is fluffy and aerated. Add the butter cubes. Pulse ten times. Your flour mixture should now look sandy, with some butter chunks still visible.
Pour in the ½ cup of ice-cold water. Pulse five times. Look at the dough. If it still looks a bit dry, add a splash more water, not exceeding another ¼ cup. The finished dough should like curds of dry cottage cheese. Do not add anymore water.
Forming the dough into a disk. Dump the dough onto a clean, cool surface. I work on a piece of parchment paper on the counter top. Gently gather all the dough together in your hands. Working quickly, take half the dough, make it into a ball, then flatten it into a plump disk, about 2 inches tall. Wrap it in plastic wrap and let it rest in the refrigerator for 30 minutes. Do the same with the remaining dough.
While the dough is chilling you can make your pot pie filling. Heat 1/2 of the olive oil in a large saucepan over a medium-high heat. Add in the carrots, celery, onion, garlic, bell pepper, sweet potato and leek. Stir frequently and allow to cook for 5 minutes. Add in the white wine and turn the heat down to medium-low, cover and allow the vegetables to simmer and steam for about 15-minutes, stirring frequently. Meanwhile heat a medium pan over a medium-high heat and add the remaining olive oil. Add in the mushroom and saute until they are browned and tender, about 10 minutes.
Add the mushrooms to the other vegetables and sprinkle the flour over the vegetables, stir to evenly distribute and add the vegetable broth, sage and frozen peas. Stir to combine and break up the flour clumps, it should immediately start to thicken. Add in the non-dairy milk. Stir. You can add more broth if the mixture gets too thick. Allow to simmer on low for another 5 minutes, to cook the peas, then turn off the heat.
Once the filling is done, set it aside to cool slightly.
You are now ready to assemble your pot pie. Take the pie dough disks out of the refrigerator and let them sit out for 15 minutes or so, so they are still slightly chilly – but a wee bit closer to room temperature and preheat the oven to 425°. (Honestly, this time around I forgot to let the dough sit and it rolled out just perfectly.)
For rolling out the dough you can either work on a floured countertop, a floured marble pastry board, or two pieces of parchment paper (I go this route and I still add a tad bit of flour). I would love to one day make my pies with a marble pastry board!
Gluten-free dough is definitely stickier than regular gluten dough. Be sure to use plenty of gluten-free flour on your surface when rolling it out. When I use two pieces of parchment paper, I lightly dust a bit of flour down on each side of the dough before I place it between the sheets of parchment paper. Shauna recommends very, very lightly oiling the parchment paper, to try to prevent sticking. (I have never done it this way)
could try really hard to explain in detail exactly how to do these next steps, or I could quote Shauna’s beautiful and incredibly descriptive words on rolling out the dough and prepping it to place in the pie pan. Honestly I wrote this part out in my own words so many times and it just never sounded as good as how Shauna put it. Somehow she makes rolling out a pie dough sound like a graceful dance. Seriously, you’ll see what I mean…
“Pat down the disk and put the rolling pin on it. Now, imagine that the dough is the face of a clock. Roll out once at 12 o’clock. Then, lift the pin and roll at 12:10. Moving in “ten-minute” increments, roll out the pie dough to slightly larger than your pie pan. Be patient. Think of this as meditation. Roll out the dough evenly.
Now, if you have worked with the parchment paper, lift the top paper, put the pie pan on top of the dough, and flip it over. Carefully, strip away the parchment paper. Go slowly. Voila! Pat the dough down into the pan.
Now, if some of the pie dough has stuck onto the parchment, do not despair. Simply peel it off and pat into the rest of the pie dough. With a gluten dough, this might make a crust tough. Guess what here? No gluten! No problem. Pat away.
(If you have used the marble board or countertop, roll the dough onto your rolling pin and transfer to the pie pan. Again, if it sticks, no worries.)
Crimping the edges. Crimp the edges of the pie pan by working with floured fingers. I press from the inside of the pie pan with my thumb and first finger on the left hand, then press between those with the first finger of my right hand from the outside. (That’s a lot of words. Try to visualize it. This will make sense.) This is one of my favorite activities in the world. Go slowly and enjoy it.
Fill the pie with the filling. Pat it down.
Roll out the remaining dough the same way. Lay it onto the pie gently, like you’re putting a blanket on a sleeping child. And if the dough sticks and breaks, just pat the pieces together. (That’s what happened with both the finished pies you see here. They didn’t suffer.) Tuck the edges into the crust.”
I will be honest, crimping the edges of a pie crust just isn’t my thing, not because I don’t like it or think it is pretty, I just find myself getting frustrated and wanting to just get it in the oven and then eat it. I guess I just go with the rustic look. I make sure all the edges are sealed and tucked in and go with that! Maybe some day I will have the patience and the eye for pretty pastry techniques.
It is now time to bake the pot pie! YAY! Cut a few slits into the top crust. Place a sheet pan on the bottom rack of the oven, under the rack where the pie pan will be, to catch any potential drip overs. Place the pie pan into the oven and bake for 15 minutes at 425ºF, then turn the temperature down to 375°F. Bake until the juices are bubbling out of the pie (this may or may not actually happen depending on how juicy or thick your pot pie filling is) and the crust is browned, about 45 to 55 minutes.
Allow the pot pie to cool 10 to 15 minutes before serving. Enjoy!
Please note, instead of one large pot pie with a top and bottom crust, you could certainly halve the dough recipe and make mini-pot pies in 6 – 10 ounce oven-safe ramekins. Just cut the dough into 6 rounds that are slightly larger than the circumference of the ramekins. Lay the dough onto the filling and bake the same way. I had a little extra filling and some extra pie dough, so I made one this way to try it out. It was perfect and super adorable.[/print_this]


