-
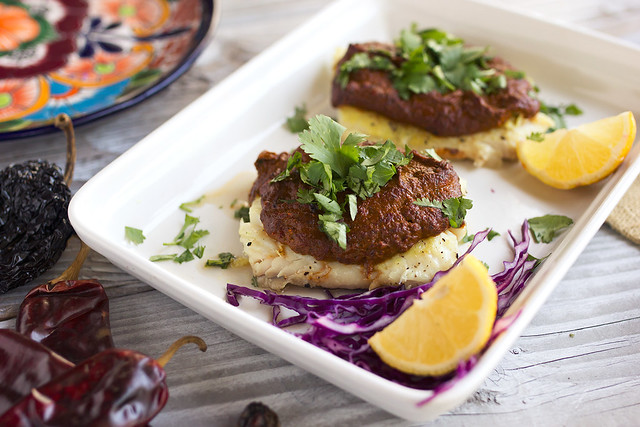
Danzante Halibut with 3 Chile Sauce


It’s been a few weeks since my trip to Loreto in Baja California Sur, Mexico and I’d be lying if I said I didn’t miss the food as much as I did the incredible views and starting each day with yoga on the beach. OK and maybe those creative cocktails and mocktails, the spa treatments and the sunsets…


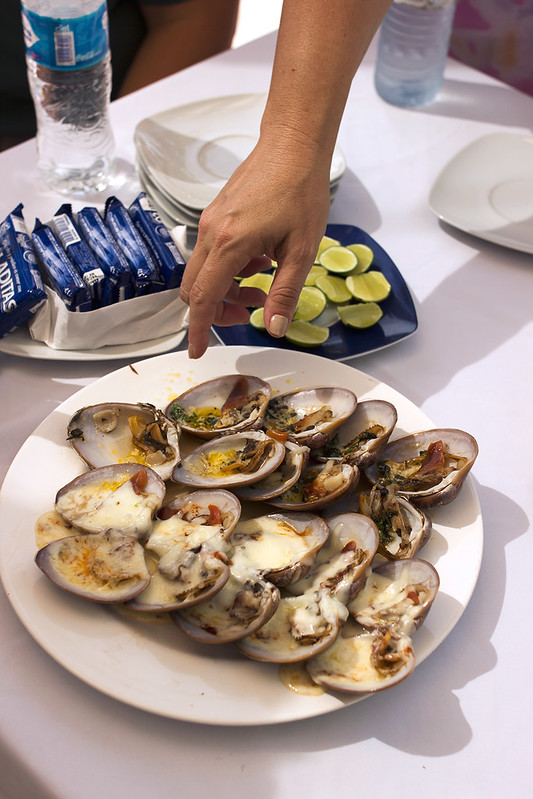
Besides all the beautiful, fresh local fruit, the traditional Mexican foods and of course, their house-made gluten-free baked goods, the beautiful seafood was above and beyond, it is certainly what I most remember, when I think of all the delicious food. Most, if not all, the seafood served at the Villa del Palmar is sourced from the local waters, the Sea of Cortez. Chocolate clams (chocolate for their color, don’t worry they didn’t serve with chocolate) and the various fish were my favorites. You cannot beat fresh seafood, caught in the morning and served up to you in the evening.
-
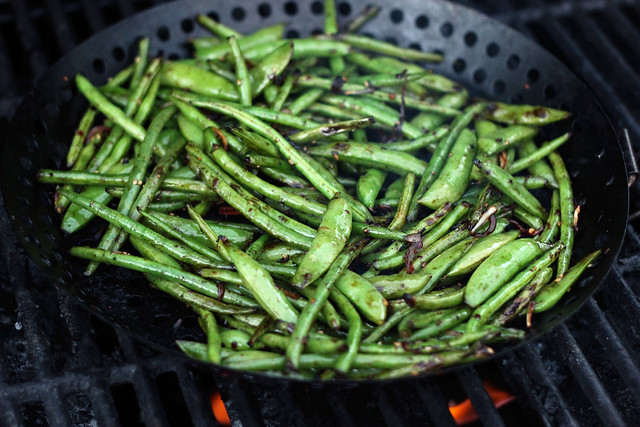
Grilled Asian Green Beans – Gluten-free + Vegan
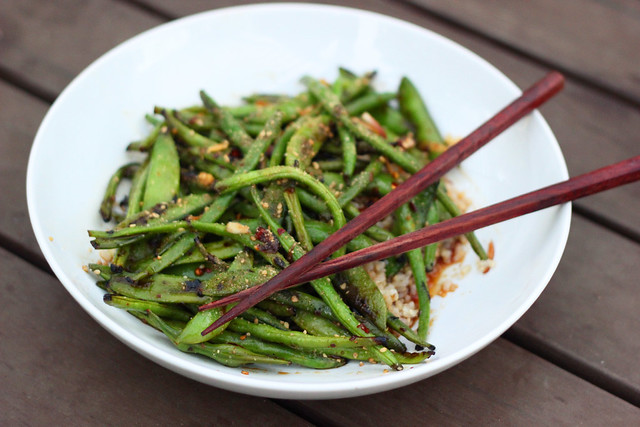
This recipe is one of those times I created something on the fly with what I had on hand, haphazardly adding ingredients that made sense to my vision, doing my best to measure and take photos when possible. This particular night I hadn’t made any plans for dinner, it was getting late and I came up with the idea to grill some green beans that we had from our CSA and sugar snap peas I had that also needed to get eaten up. I am pretty sure Mark was a tad apprehensive about having so much green stuff for dinner, but let’s be honest he had no choice really! It was this or cereal. We all know those nights.
I decided to snap photos while I was making this, since some of my most favorite dishes I create are the ones that I don’t stress over, that are inspired by what is fresh from our farmer and what is quick and easy. The sun was literally setting quicker than I could get this served up, so although these may not be the most glamorous or well-styled photos, this dish was far too good not to share with you guys, especially with green beans in season right now.
For the record, Mark absolutely LOVED this green dinner! He couldn’t get over all the flavor and how filling it all was served over a small serving of brown rice. I liked it because for not only the wonderful flavors, but the fact that in less than 30 minutes I went from not knowing what to make us, to this delicious, light and satisfying dinner. Read the rest of this entry »
-
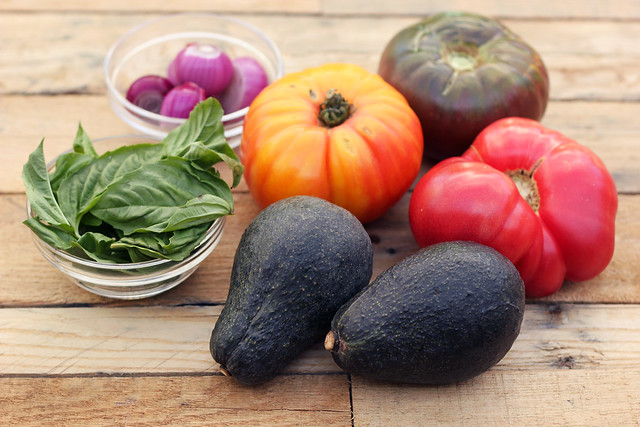
Heirloom Tomato and Avocado Salad (Gluten-Free + Vegan)
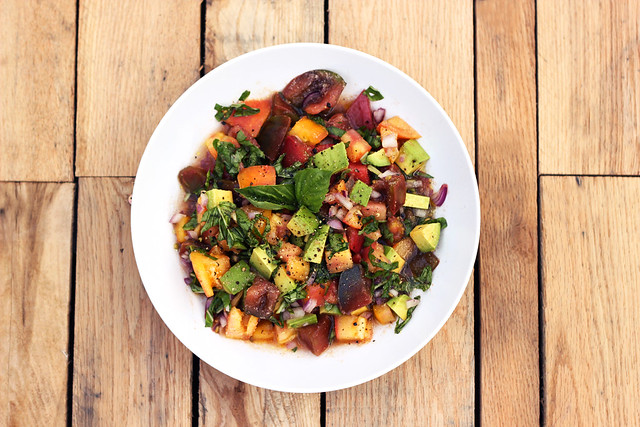
I get really excited as different fruits and veggies come into season. Whether in my garden or a neighbors’, at the farmers market or in my weekly CSA box. Tomatoes, especially the beautifully vibrant heirloom varieties, that is my favorite time of the season. If those don’t feel/taste like summer. I don’t know what does.
This vibrant and fun vegan take on the traditional caprese salad celebrates all that is great about summer! Instead of mozzarella, I substitute creamy avocado, which works so well with these flavors. I had some beautiful basil from my garden, some red onions from my friend Dan’s garden plus some beautiful heirloom tomatoes and an avocado from the local farmers market. It doesn’t get much more fresh than that.
-
Photo Fun Day Friday
Happy Friday!! This week flew by for me, how about you? Got anything fun planned for the weekend? Hubby is originally from Louisville, so we are celebrating the Kentucky Derby tomorrow, as we do every year, but this year we can actually host a little party at our new home. We are so excited.
I plan to make a bunch of food that reminds Mark of home, most of which I cannot eat myself, but I definitely don’t mind one bit. I think Mark actually gets more homesick this time of year than at the holidays. It is such a big deal there. So I plan to make some Hot Brown Sandwiches, a black-eyed pea salad, pimento cheese dip, jalapeño cornbread, deviled eggs, apple cobbler and a bourbon pecan tart and of course mint juleps. Then we are picking up some homemade fried chicken from the market at the corner. Depending on how all the cooking and baking goes I will try to share some of the recipes on here, afterward. But I make no promises!

An update on our banana tree. Look at all those bananas. I cannot wait to eat some.

Some of the beautiful roses from our yard.

Having a home yoga practice means sometimes you get a little kitty in your down dog.

And sometimes your mat gets taken over by a real dog.

Mark was in San Francisco for a few days for work and Seri really missed him. She wouldn’t leave his side when he got home.

Tried running on the beach this week since I have been having a little knee pain. It felt really great on my knees and my back.
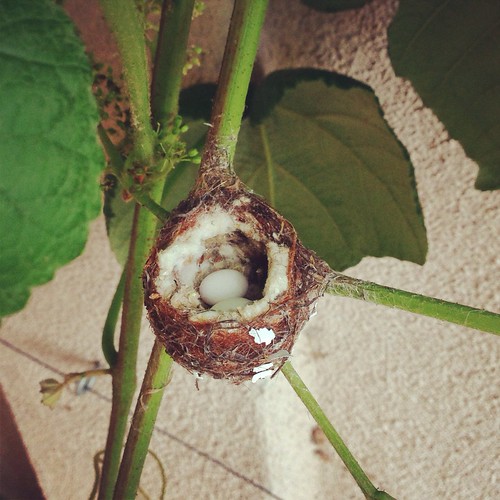
Discovered the most teeny tiny adorable hummingbird nest, cozied up in our grapevines. It is barely 2″ wide. If that. Incredible.
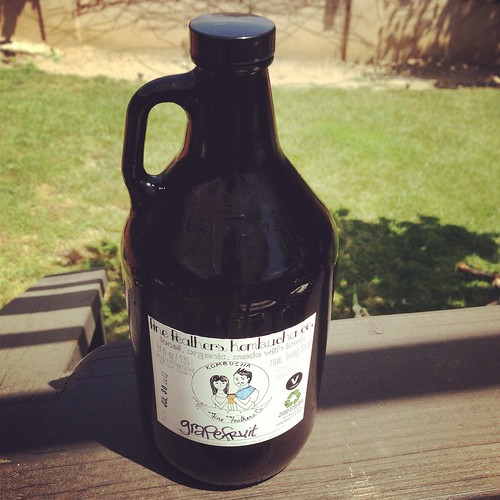
Had a growler of local organic grapefruit kombucha delivered by bike from local husband and wife company, Fine Feathers Kombucha. I just adore where I live.

I *think* I found what I was looking for on yesterday’s run. I KNOW that Seri did. Look how happy she is

Went to the doctors yesterday for the first time in over a year. It really is the one place in the whole wide world that can give me anxiety as soon as I walk in. I really don’t like doctors.
-
Grain-free Meyer Lemon Bars

Since we’ve moved here to Southern California, just about two months ago, we haven’t had any guests come stay with us just yet. My sister comes two weeks from today and I have literally been counting down the
daysminutes, then my parents come just one month later! I cannot wait! Last week however, our very good friend Jane, who lives in Colorado, came to see us for the day. She had been in Corona, CA for the week and she was able to borrow a car to drive out to our neck of the woods.Although we have quite a few good friends here in Southern California, whom we have known for many years, it was really nice to have our first “family” guest since we’ve moved here. Even if just for a few hours. Jane has been a part of my life since I can remember, she and Mom went to high school together and have remained in contact since. My sisters and I have always jokingly called Jane, “our other Mother”. There hasn’t been a Christmas morning that we didn’t share with Jane, she would always make the trip back to Buffalo from Colorado to spend the holidays with her family and we were always lucky enough to steal her away for a few hours on Christmas morning. Before she had nieces Jane would actually spend Christmas Eve night at our house and we would wake up in the morning and she would make us clean our room before we could go downstairs and attack the tree. Likely buying my parents time to get more sleep, since I am sure they were all up late.

Besides my own actual immediate family, I don’t think that we could have another guest here in the first two months that could have made me any happier. Since she was here a short time, I offered to make her lunch. She absolutely adores my family’s Greek Avgolemeno soup, which she loves to tell me Mom that I make better than her. So I of course, made a big pot of that for her visit. I am sure you have heard me mention many times before that this soup always reminds me of home and my family, so it really couldn’t have been more perfect for this visit.
When Jane arrived she brought me a huge bag FULL of fresh produce from the organic farm on the land where she was staying. So many different varieties of oranges, lemons, a few grapefruits and a few types of citrus that I have never even seen before, plus the most delicious avocados. Besides looking beautiful and tasting amazing, all of the citrus have been making the house smell incredible.
There were some Meyer lemons in the bag. Those are my absolute favorite. They are just so tasty and subtly sweet, so much so that I hate to waste them just in my morning lemon water or in a juice. I wanted to make something extra special with them. I just wish I could have made these bars and then shared them with Jane.

What makes this recipe extra special, besides who/where I got the Meyer lemons from, is that you actually use an entire whole lemon in the filling. Yes the whole fruit. Peel, pith and all. So, it is quite important that you use an organic lemon, or at least one that is unsprayed and free of pesticides or other chemicals.
You can certainly use a regular lemon in place of the Meyer lemon, but you’ll want to increase the sweetener a bit since it won’t be as sweet as the Meyer lemon is. The filling of this recipe was adapted from David Lebovitz. His recipe utilizes corn starch, a regular lemon, regular sugar and butter, so I tweaked it to make it work for me and to highlight the flavor of the Meyer lemon.
*If you are vegan, I would be hesitant to recommend any egg replacers in place of the eggs, since there is a fluffiness from the eggs that gives the filling it’s texture. There are many vegan lemon bar recipes that use silken tofu or soaked cashews to created a creamy topping, but since I had a dozen beautiful brown eggs fresh from a local farmer, I decided they would be perfect for this. If anyone does experiment in making this vegan, please do report back, I would love to hear how it turns out.

[print_this]Grain-free Meyer Lemon Bars
{Gluten-free, Grain-free, Dairy-free + Refined Sugar-free}
One 8-inch Square Pan – Makes 16 squaresCrust:
- 1 1/2 cups blanched almond flour, I prefer Honeyville brand
- 2 tablespoons honey or maple syrup
- 1/4 cup coconut oil, melted
- 1/2 teaspoon baking soda
- 1/8 teaspoon salt
Lemon Topping:
- 1 whole organic Meyer lemon, washed (organic or unsprayed)
- 3 tablespoons honey or maple syrup*
- 1/3 cup freshly squeezed Meyer lemon juice (approx 2 additional lemons)
- 4 large farm fresh brown eggs, at room temperature
- 4 teaspoons arrowroot starch (tapioca starch or corn starch would also work)
- 1/4 teaspoon salt
- 3 tablespoons coconut oil, melted (make sure it isn’t too hot when you add it in, you don’t want it to cook the eggs)
- Unsweetened shredded coconut for topping or the traditional powdered sugar works, too.
*Please Note – since the sweetness and bitterness on Meyer lemons can vary drastically, you may need to increase your sweetener to account for more tart Meyer lemons. Give the mixture a quick taste before you add the eggs to see if you need to. It should be a bit bitter but not too much so. Obviously the sweetener will have to be increased if you choose regular lemons over Meyer lemons. Additionally, if they are on the tart side, powdered sugar on top can definitely help with that, as well.
Preheat the oven to 350º F. Line an 8-inch square pan with two pieces of parchment paper, one going in each direction. In a medium bowl, mix all of the crust ingredients together. You may want to get your hands in there to really get it mixed together well. This will be a thick crumbly crust that you will need press onto bottom of pan. Make sure it is even and gets into the corners. Place in oven to pre-bake the crust. Bake for 15-20 minutes or until lightly golden brown. Remove from oven.
While the crust is baking, cut the whole lemon in half, remove the seeds, and cut the lemon into chunks. Put the chunks of lemon in a food processor or blender along with the honey and additional lemon juice, and let it run until the lemon is completely broken up. Add the eggs, arrowroot powder, salt, and melted coconut oil and blend until almost smooth. (A few tiny bits of lemon pieces are ok and totally encouraged.)
Once the crust comes out of the oven, lower the temperature of the oven to 300ºF. Pour the lemon topping over the hot crust and bake for 25 minutes or just until the filling is no longer jiggling and is barely set.
Remove the bars from the oven and let them cool completely. Once totally cool, carefully lift out the bars out grasping the parchment paper. Cut the bars into squares or rectangles. I like to cut into 16 smaller sized squares. They last longer that way. Add shredded coconut or sift powdered sugar over the top just before serving, if desired.
These bars will keep covered or in an airtight container at room temperature up to three days. The crust will definitely get soggy as they sit, however. You can also freeze the lemon bars for up to one month, letting them come to room temperature before serving. [/print_this]
-
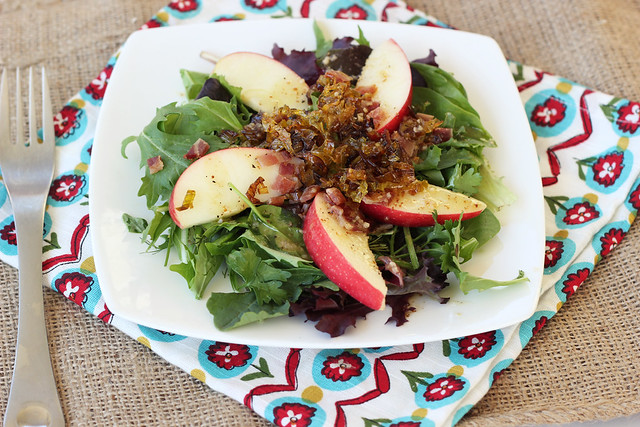
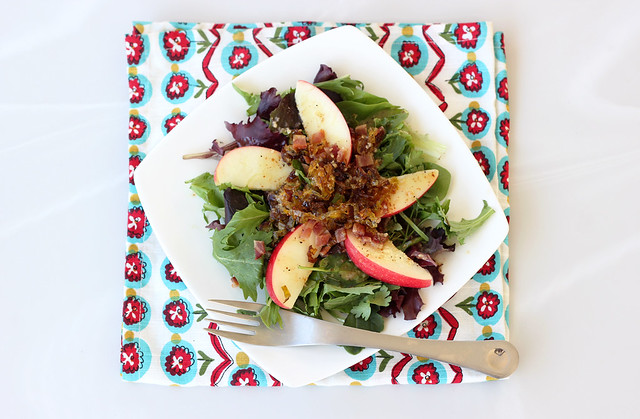
Mixed Greens Salad with Apples, Caramelized Leeks and Maple Dijon Dressing – Gluten-free + Dairy-free (vegan option)
This has been a bit of a trying week for me, getting back into town after being on the road for a week, plus I generally feel just a little bit down. Could be the change of the season and the daylight hours shifting (both always affect me with every season, even with fall, my favorite season) or maybe it’s the lack of sleep from traveling or the stress of this house-selling business. I have generally been staying upbeat and positive about trying to sell this house and our pending move to California, but I think it all might finally be getting to me. While we were away we had my mom come by the house to make sure it was all ready for a showing we had scheduled (we had it all cleaned and ready, but I wanted her to make sure there wasn’t mail sitting on the porch and I had her open windows and make it smell nice). While she was at our house and texting me about what to do, I got notice that the showing for 2 hours later was now cancelled. It happens, I know that. They have actually already rescheduled, so no major loss there, but there was something about being so far away, feeling terrible about my mom having to go out of her way to help and everything else on my mind. I actually welled up with tears and felt like I could lose it. Over one showing. I guess I hit my breaking point. Doesn’t happen often, but it does happen.
Really none of that has anything to do with this salad, except that with the change of the season and the general feeling of being a little down, I still know what my body craves and it is craving all of the wonderful seasonal produce we are surrounded by right now. Besides craving comforting foods like warm soups and stews, I also find myself craving beautiful vibrantly colored meals. Celebrating what is happening all around me outside, but also knowing that in a few short months it will be hard to find those beautiful hues. My very good friend April is beginning a new journey into Holistic Health Coaching and she sent out her first newsletter this morning. Not only was it super informative and so timely for me, but it had a line that really stuck with me “The transition to fall may leave us feeling exhilarated but unsettled, ungrounded.” That thought really resonated with me and definitely allowed me to accept what I was feeling right now with a bit less judgement and harshness.
With so much great produce in season right now, it is easy to plan simple meals to celebrate it all. This week I have been celebrating squash and apples specifically, but with this quick and light dinner I wanted to also include some of the beautiful greens that are in season as well as the leeks, both of which I picked up at my local Co-Op. This salad is so simple to put together and it really packs a beautiful punch of flavor from the applewood smoked bacon, the crisp and tart local gala apple, the delicious crispy and rich flavor from the caramelized leeks and of course the tart and slightly sweet maple dijon dressing. So much delicious goodness in one small salad.
If you are interested in reading a few Ayurveda tips for Autumn, check out this great article from Yoganonmous here. I came across it this morning and it definitely validated me in the way I have been feeling this week. Also, you can also check out my good friend April’s first newsletter that discusses the transition into Autumn and Winter and what we can do to ground ourselves and make it an easier shift. Plus, look for some upcoming guest-posts filled with informative holistic health tips and corresponding recipes from my good friend April here on Tasty Yummies.
How have you been feeling lately? Does the change in the seasons affect your moods?
[print_this]Mixed Greens Salad with Apples, Caramelized Leeks and Maple Dijon Dressing- Gluten-free + Dairy-free (vegan option)
Serves 4- 6-8 cups of mixed greens of your choice – lots of great greens in season right now
- 2 local, organic gala apples, cored and cut into slices (I cut each apple into 16 slices)
- 4 slices of local, pasture-raised applewood smoked bacon (leave off to make vegan)
- 1 large leek, rinsed very well, slice thinly white and light green parts only*
- 1-2 tablespoons of olive oil
- salt and pepper, to taste
Maple Dijon Dressing
adapted from this recipe- 1/4 cup olive oil
- 3 tablespoons apple cider vinegar
- 2 cloves garlic, minced
- 3 tablespoons maple syrup
- 2 tablespoons no-salt added dijon mustard
- salt and pepper, to taste
Preheat your oven to 400ºF
Combine all of the ingredients for the dressing in a small bowl or bottle and whisk (or shake) together well, to combine. Set aside.
Start by cookin your bacon in the oven (you can also cook it on the stovetop, but I find this way to be much easier and cleaner), line a baking sheet with foil and place your bacon on top. Place into the oven for 12-18 minutes until the bacon is nice and crisp. No need to flip it.
While the bacon is cooking, start caramelizing your leeks. Heat olive oil in a large skillet over a medium-high heat, once the oil is hot enough add the properly cleaned and thinly sliced leeks to the pan. Give them a good stir or two to coat them all in oil and to break them apart a bit. Turn the heat down if need be at any point if they start to cook too quickly. Gently toss the leeks around in the pan and cook slowly until they are golden browned and caramelized. Just as you would with onions. Take it slow, you don’t want them to burn up quickly, you want a nice slow cook to them. Once they are cooked to your liking, turn off the heat.
Once the bacon is done lay it on a paper towel lined plate to absorb some of the excess oil. Then cut it up or crumble it into small pieces.
Toss the greens with a small amount of the dressing. Plate the dressed greens and top each serving with a few apple slices, sprinkle the crumbled bacon over top and top it all with a good spoonful of the caramelized leeks. Drizzle additional dressing overtop all of it.
Serve immediately.
* a quick note on cleaning leeks: leeks tend to have a lot of dirt and grit in them. If you aren’t careful when cleaning them, you may think they are totally clean, start cooking with them and find your entire dish has a nasty grittiness to it. This can ruin a dish. After trimming off the ends (called the beards) and the dark green tops (save these for stocks). You can run them under cold water at this point, or even better, you can submerge the leeks in a large pot of cold water. Swirl them around to really remove all the grit and dirt. Drain well and then cut.
[/print_this]
-
Seasonal Shopping: Fresh Fruit & Veggies to Buy in October!
With the start of October comes a new shopping list of in-season vegetables and fruit. It may feel like with summer coming to an end and the cold weather looming, that produce would be limited and unexciting, but for my money October is one of the most plentiful months for fresh local produce here in NY state. With the much-welcomed cooler nights and mornings, we are seeing more greens again, if we are lucking there might be some peppers and tomatoes still lurking around, plus of course we have all of the squash, the apples, etc. So many fresh and tasty treats to get creative with. Look for a recipe here on Tasty Yummies later today that features some of this beautiful produce.
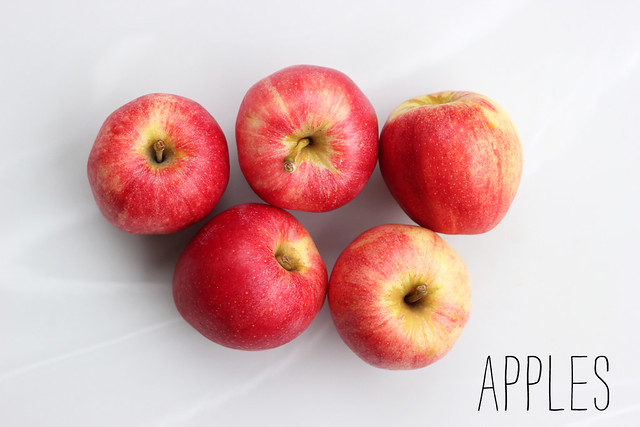
What is your favorite October produce? I think for me it is a tie between apples and pumpkins.
October Shopping List:
Pumpkins
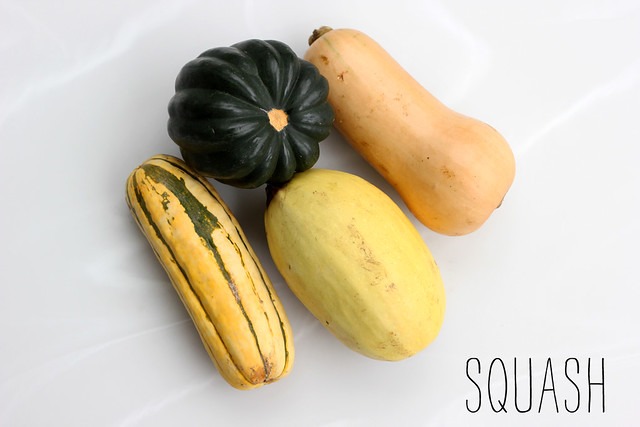
Squash
Apples
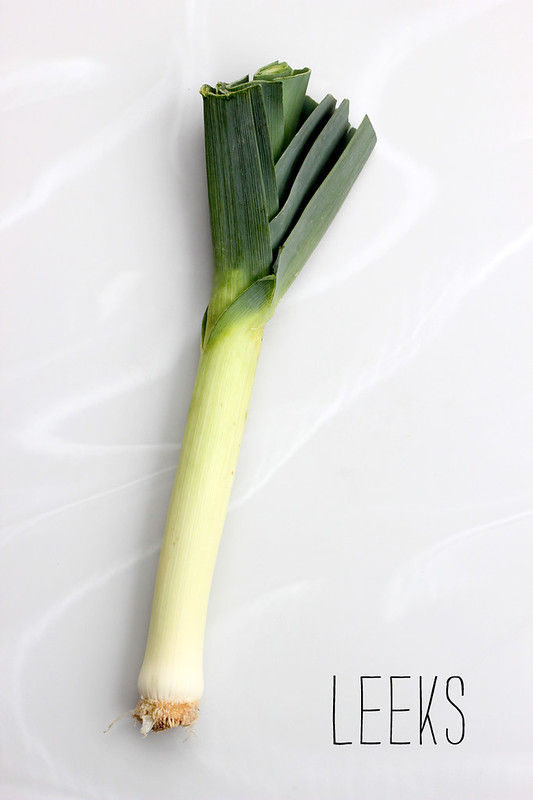
Leeks
Swiss chard
Rutabaga
Concord grapes
Figs
Beets
Broccoli
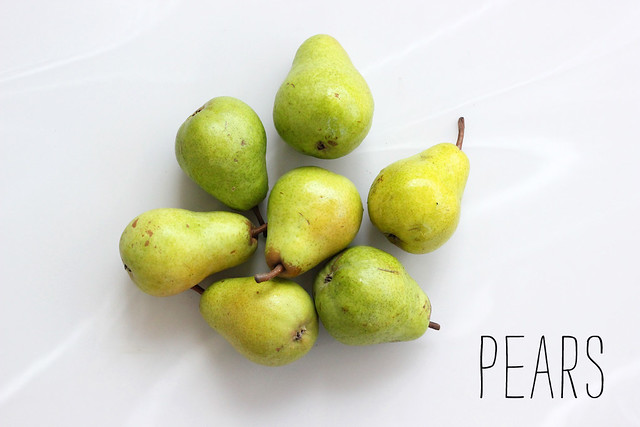
Pears
Cabbage
Potatoes
Bok choy
Spinach
Turnips

-
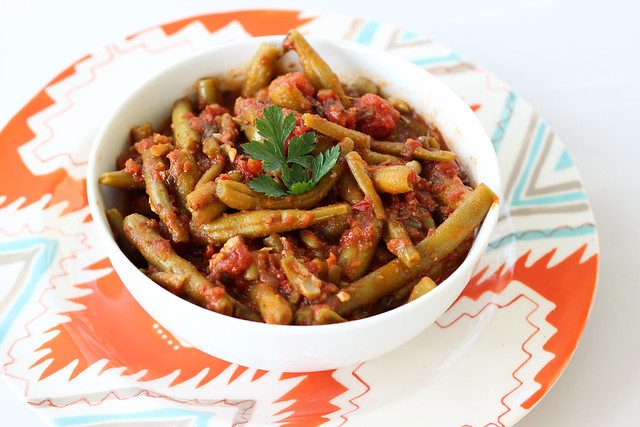
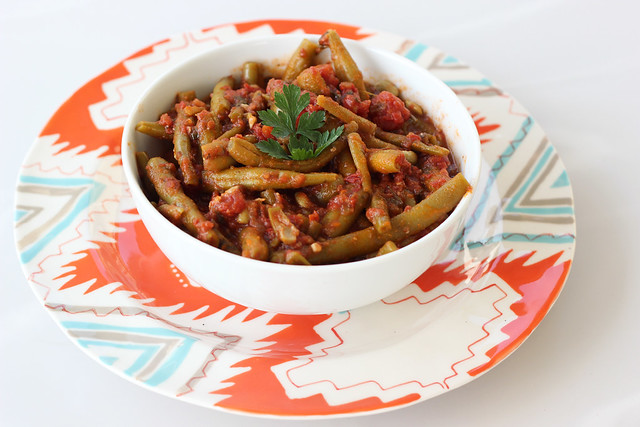
Fasolakia Freska (Greek Green Bean Stew) – Gluten-free (Vegan option)
This is a traditional Greek dish that many different people in my family have made for my entire life. My Great Yia Yia (Yia Yia is Greek for grandmother), in my opinion made it the very best, I still think of her any time I smell this stew cooking. I can still remember exactly how her kitchen always smelled and just how it felt in there. There is something about the smell of this stew cooking that reminds me of her unlike any other smell can remind me of anything else in the whole world. I am not sure if it was actually this way, but in my mind I swear she had to always have had always something like this, or one of her other stewed green concoctions, cooking on the stove at her house. I swear it always smelled like this. She passed away when I was 12, so my memory is likely not exactly accurate, but that is how I like to remember it anyway 🙂 My dad’s mom, my Yia Yia, also used to make this stew and my Dad and my great Aunt Marge still make it. Even though it is a little different based on who makes it, I absolutely love it every single time. It is one of those dishes that I am not sure anyone in our family has an exact recipe for and I doubt that they ever really measure(d) as they add things. I think it is just made based on what how your own family makes it and then you just taste as you go. That is how I make it.
When we were kids on our birthday as a special treat, my parent would have us request whatever meal we wanted, and they would make it for us. I really don’t recall anything else that I would consistently ask for besides fasolakia, almost every year that was my pick. I think my parents probably thought I was insane. What child requests a vegetable based meal when they can have whatever they want only one meal a year? THIS ONE DID!!This dish can be made either with meat or vegan, my family usually makes it by cooking it low and slow for many hours with a quickly braised bone-in cut of lamb, but I have also had it without meat and it is still very good. I do think that the meat brings a nice depth of flavor and it adds a lot more taste and flavor with the extra fat. Most times they would pull the bones out just before serving so it isn’t a meat stew by any means, you may get a bit or two or stay meat, but generally it is just for the flavor. This stew may not look like much, but while it’s humble appearance it really packs a punch in the flavor department.
I didn’t have any lamb on hand, but I did have some beef spare ribs in the freezer from our cow share that we got from Sojourner Farms. Since the spare ribs are a fatty cut with a lot of flavor but not a lot of meat to really savor, they were perfect for this. I am not sure exactly how large the package of spare ribs were, maybe 2 lbs or so, it was three small sections of ribs.
I will apologize in advance for the lack of photos with this post, I hadn’t exactly planned on sharing this recipe when I started cooking it. However, when I had mentioned on Instagram and Facebook that I was making it, a handful of people requested the recipe, so I decided I would. My measurements in this recipe won’t be exactly accurate or perfect since I definitely didn’t measure as I went along, AT ALL. But you will get the general idea of the flavors that you want and you can taste as you go to make this exactly how you wish, (you may want to add more or less of something). This stew is great as a side dish with a large meal, or in my opinion it is a wonderful meal on it’s own. Just spoon the saucy stew in a bowl, with some fresh parsley and fresh ground black pepper on top. Maybe some crumbles of feta cheese and a serving of your favorite crusty gluten-free bread. It is absolute heaven in a bowl and it is for me the most comforting kind of comfort food there is.
[print_this]Fasolakia Freska (Greek Green Bean Stew) – Gluten-free (Vegan option)
serves 6- 1 package (about 2 lbs) of local pasture-raised beef or lamb spare ribs or a bone-in shoulder piece, etc (something suitable for braising)
- 2 tablespoons olive oil (if you are making it without meat)
- 1 medium onion, diced
- 3 cloves garlic, chopped
- 1 pinch red pepper flakes (optional)
- course sea salt
- 1 (28 ounce) can organic diced tomatoes
- 4 or 5 fresh tomatoes diced or quickly processed in the blender or food processor (you could also just add in another can of crushed or diced tomatoes)
- 1 bay leaf
- 1 teaspoon dried herbs de Provence (you could also just use the dried oregano and add some basil or use an Italian seasoning blend, etc)
- 1/2 teaspoon dried oregano
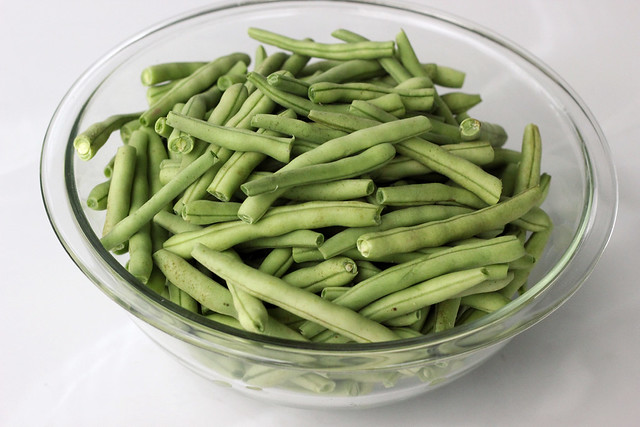
- 2 pounds fresh green beans, trimmed and cut into bite sized pieces if you’d like (you can also use frozen green beans thawed to room temperature)
- salt and pepper to taste
- 1 handful fresh parsley, chopped
- 1 small handful fresh dill, chopped (or 1 teaspoon dried)
If you are adding meat, heat a large pot or dutch oven over a medium high heat and quickly sear the meat on all side, getting a nice brown crust on each side. If you are making this vegan, just heat the pot over a medium high heat and add the olive oil.
Next, add in the onions, garlic, red pepper flakes and a pinch or two of sea salt, stirring constantly until the onions are translucent and starting to slightly brown. Reduce the heat and add in the tomatoes, bay leaf, and any dried herbs you are using, plus some salt and pepper. Allow it to simmer for an hour or two, the longer the better, in my opinion.
After the tomato sauce has simmered a while, give it a taste and add salt and pepper to taste. Then add in the fresh green beans, the parsley and the dill. Cook for another hour or so, over a low heat. You want the beans to be a dark army green color and nice and tender, you aren’t looking for a bright green bean with a crisp bite to it.
You can remove the meat when you are ready to serve, or just spoon around it. You can also pull some of the meat off the bones and add it back to the stew, which is really nice. Serve in a bowl with a piece or two of your favorite crusty gluten-free bread and chunks of feta (if you eat dairy) and top with some fresh parsley.
[/print_this]
-
Seasonal Shopping: Fresh Fruit & Veggies to Buy in September!
As part of my ongoing guest posts with Free People, each month I will be sharing a seasonal shopping list of produce that is at it’s best for you to create deliciously inspired meals with. Although the onset of September reminds us that summer is winding down, it is one of the best months for delicious local, fresh produce, in my opinion! So many delicious things that have been flourishing and growing all summer long just waiting to be ripe and ready for the picking before the cool weather sets in.
Here is a list of some of my favorite produce that is in season right now!
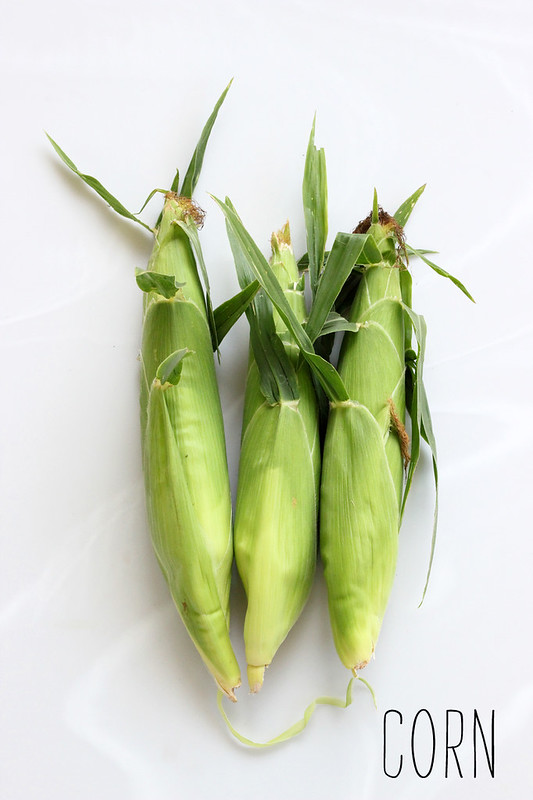
Shopping List:Corn
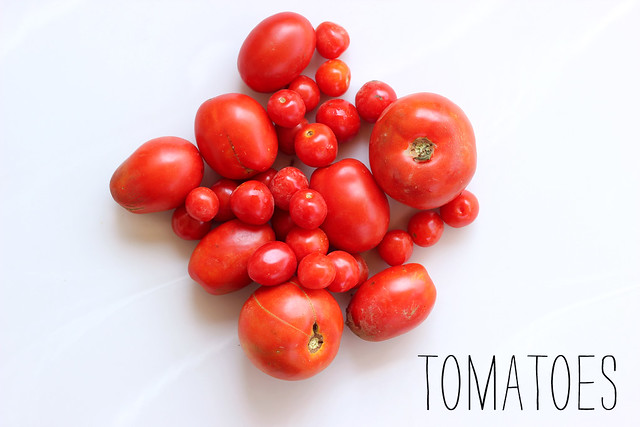
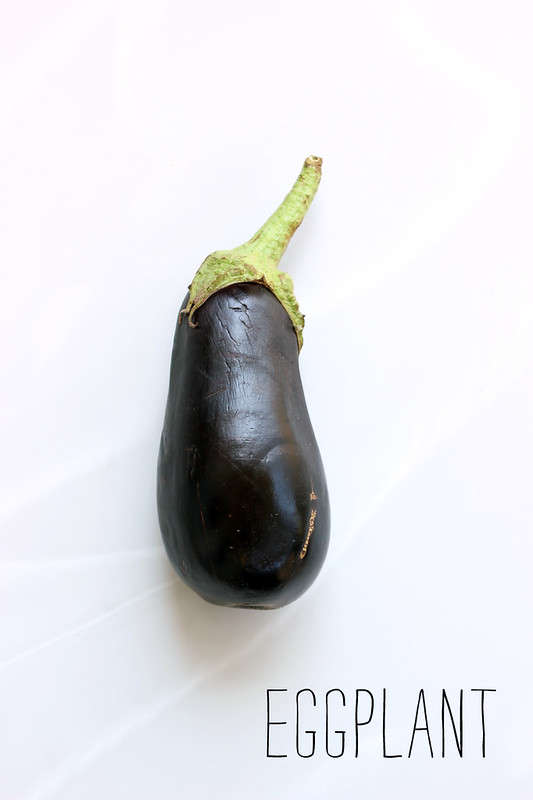
Eggplant
Tomatoes
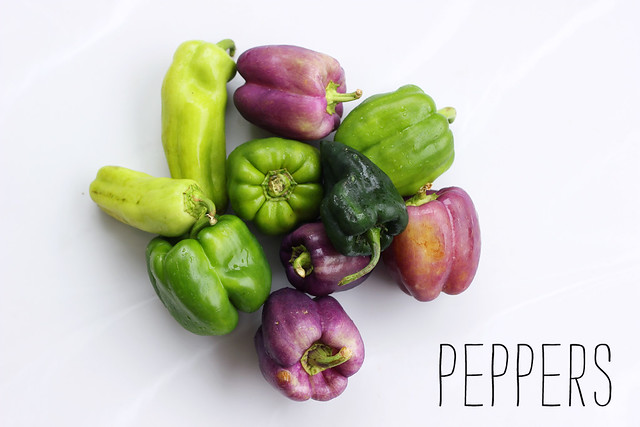
Peppers
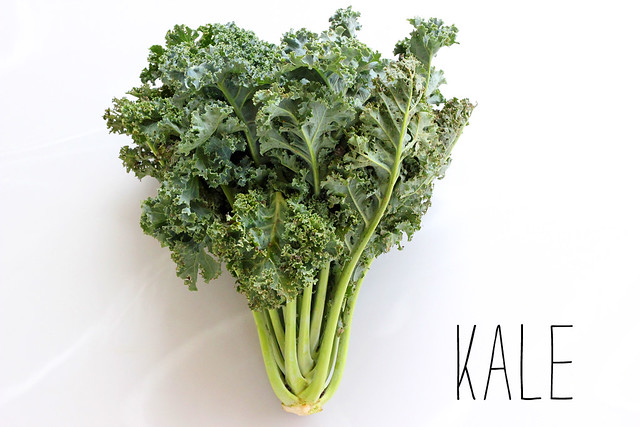
Kale
Pears
Basil
Parsley
Beets
Grapes
Summer Squash
Green Beans
Spinach
Celery
Onions
Turnips
-
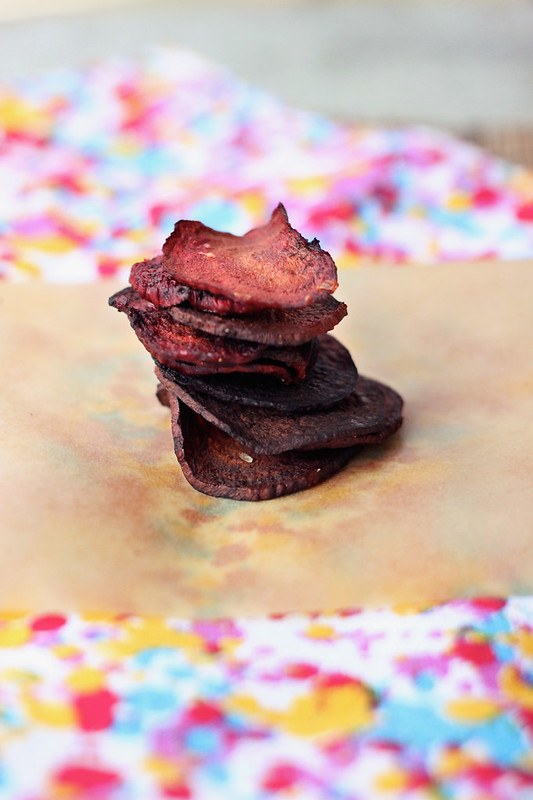
Crispy Baked Beet Chips – Gluten-free + Vegan

See, I told you that I would use up the beets from our CSA share. I wanted to do something fun and different with the beets, since I usually just juice or grill them. My husband, Mark, absolutely HATES beets, he despises them and won’t try them no matter how good I tell them they are. He thinks they are gross and taste like ‘ground’ or ‘dirt’!
Well, I can officially say – I have WON the beet war in our house! I got Mark to eat beets and he actually liked them. I didn’t even have to sneak them into something else. I just said “here, just try this beet chip, don’t be a jerk”. He tried it and he liked it, then he had another and then a few more. Then he proclaimed “I have never,ever liked beets before, ever, but these I actually like!” S U C C E S S !
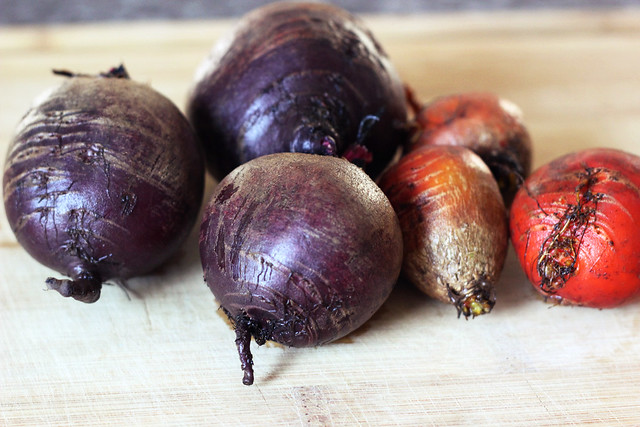

These beet chips are super easy to make and you can keep them simple with just a little sea salt, or you can add some fun things like onion powder, or rosemary or any other spices or herbs you desire. I used a mix of both golden beets and red beets that we got in our CSA share from Porter Farms. Once you peel the feels and slice them, you will not believe the vibrant bright colors. They are almost too pretty to eat. Almost. These chips are so crispy and satisfying that you won’t be able to eat just one or even a couple. I made this batch and had planned to eat a few for a mid-afternoon snack and then save the rest for an evening snack. That didn’t work. At all. We ate them all.
As far as storing goes, these chips will likely lose a bit of their crisp when you store them, so as with most crispy baked foods, best to eat these up right away when they are their crispiest. Darn.
Besides being super delicious and so vibrantly beautiful, if you need even more reasons to eat beets here are a few of their wonderful benefits, beets are a unique source of phytonutrients called betalains. The betalains found in beets have been shown to provide antioxidant, anti-inflammatory, and detoxification support. If that isn’t enough, the combination of antioxidant and anti-inflammatory molecules in beets makes this food a highly-likely candidate for risk reduction of many cancer types. Oh and don’t forget the fiber! Beet fiber (along with carrot fiber) are two specific types of food fiber that may provide special health benefits, particularly with respect to health of our digestive tract (including prevention of colon cancer) and our cardiovascular system. More info about the wonderful benefits of beets can be found here.

[print_this]Crispy Baked Beet Chips – Gluten-free + Vegan
- 3-4 medium beets (or 6-8 small beets), peeled and sliced thinly about 1/16 – 1/8 inch – using a mandoline slicer is the best and easiest way to do this
- 1 tablespoon olive oil
- Sea salt to taste
- Feel free to add any additional seasonings that you wish *
Preheat oven to 350º F. Toss beets slices with oil in a medium sized bowl until they are all well coated and lay them flat in a single-layer on a rimmed baking sheet (bake in multiple batches, if necessary). Bake for 20-30 minutes, until chips are crispy. Check after about 15 minutes since the time will vary based on thickness of chips and how dark your baking pan is, mine took about 30 minutes since my baking pan was really light in color. The second batch I made was on a much darker baking pan and they cooked up much quicker. Sprinkle a little sea salt over top when you take them out. Transfer to a wire rack and they will crisp up a bit more as they cool.
* Play around with adding in different spices and herbs. I made one batch with some fresh rosemary, another with some onion powder and then just a plain batch, all were very good.
[/print_this]
-
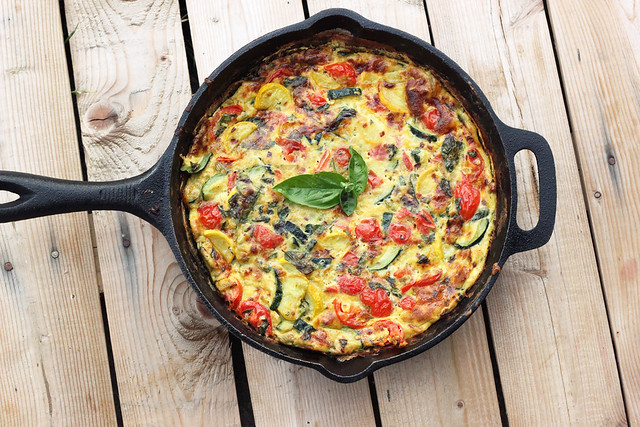
Summer Harvest Frittata – Gluten-free + Dairy-free
 <
<I am seriously in love with my CSA from Porter Farms. It is so cost effective, the produce is all organic (and obviously local) and each week there are new surprised in the bag that I get excited about playing with.
I am sure most of you do know, but if you don’t know what a CSA is, here is a quick description from the Porter Farms website:
CSA stands for “community-supported agriculture”. The idea behind it is simple: individuals share the costs, risks and bounty of growing food in an environmentally-friendly fashion. The concept first appeared in the U.S. in the early 80’s, when people sought higher quality foods available from local sources.
The meaning of “community-supported agriculture” as it relates to the mission of our program here at Porter Farms is as follows: CSA participants, through their membership, help pay for seeds, compost, irrigation supplies, equipment maintenance, fuel, labor, etc. In return, the farm provides, to the best of its ability, 22 weeks of fresh, certified organic produce throughout the growing season.
Community supported agriculture is a grassroots movement that reconnects the local community with its food source, the local farmer. This alternative to the grocery store and big chains couldn’t fit more perfectly into my lifestyle and my mindset. My only complaint about CSAs is that I didn’t join one sooner! This most definitely will be a yearly thing for us.
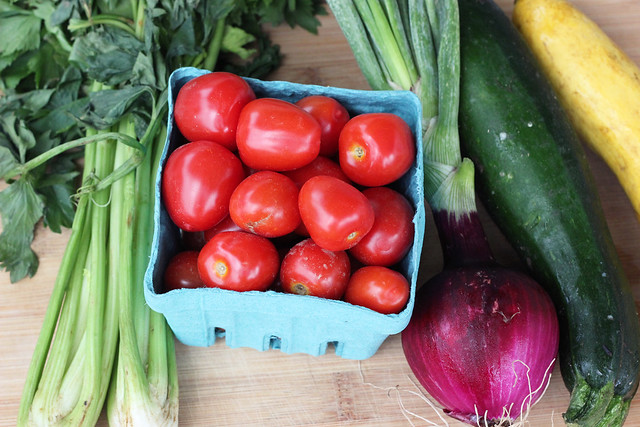
Each week I try to get creative with the offerings in my bag, playing around with new recipes, getting inspired. This week we received zucchini, yellow squash, cucumbers, celery, red and golden beets, tomato berries and red onions with their tops. So many things that I love! I wanted to play around with a dish that would really highlight as many of the ingredients as I could. I did pretty well, the only two that didn’t make it into this dish were the beets and the cucumbers and don’t worry I have big plans for both of those.
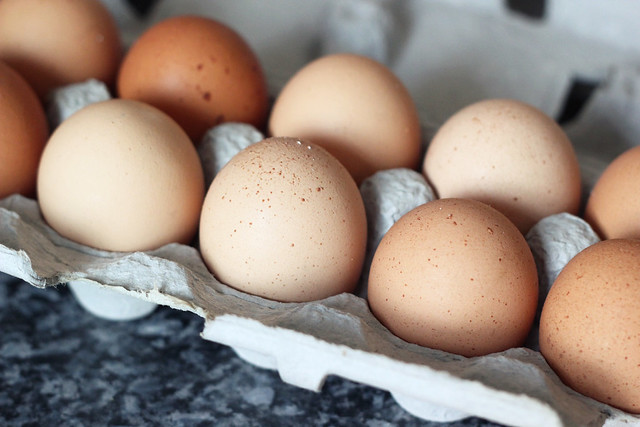
In addition to the CSA, each Saturday morning, I always pick up a dozen (or two) brown eggs from Painted Meadows Farm at the Elmwood Bidwell Farmers Market. I am telling you, until you have had eggs fresh from a farm (or maybe you have my ultimate dream and you have your own chicken in the yard), you have no clue what you are missing. The taste isn’t even comparable, the yolks are a shade of yellowy, orange you wouldn’t believe. Now I am spoiled, it’s the only kind of eggs I want to eat.
 <
<In looking over our pantry and refrigerator and all of these lovely, seasonal ingredients, I had the perfect thought for a light summertime dinner – a Summer Harvest Frittata. What a great way to highlight all the wonderful items in season right now.This recipe is quite versatile so feel free to play around with it and add or take away anything you’d like or have on hand from your own CSA, farmers market or your garden. I added a bunch of fresh basil since it is growing abundantly and beautifully in our yard, but the flavor profile can easily change to whatever fresh herb or spice you have readily available. This frittata was perfectly satisfying for dinner with a small salad on the side, but it would also be great for breakfast, brunch or heck even lunch, you can eat it all day!

[print_this]Summer Harvest Frittata – Gluten-free + Dairy-free
Serves 6-8- 6-8 large local farm fresh brown eggs (more eggs will give you a fluffier thicker frittata, less eggs and it will be thinner)
- 1/8 teaspoon red pepper flakes (optional)
- 1/4 cup fresh basil, roughly chopped
- 1 tablespoon olive oil
- 1/2 cup celery, chopped
- 1 small red onion, chopped
- 2 cloves garlic, minced
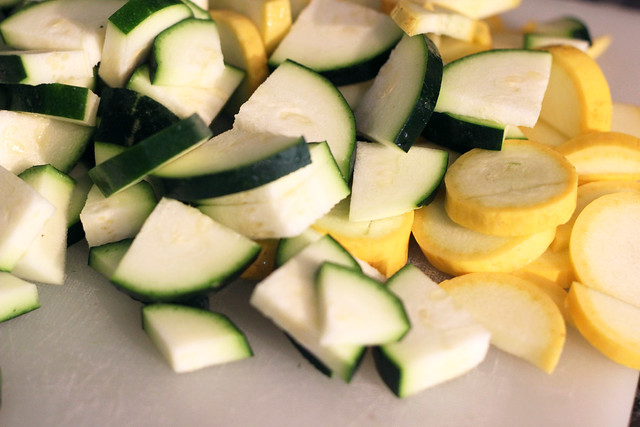
- 1 medium zucchini, cut in half-length wise, then cut in half again (if it is large enough) and sliced
- 1 medium yellow squash, cut in half length wise, then cut in half again (if it is large enough) and sliced
- 1 cup grape tomatoes, halved or quartered depending on what size they are
- Salt and pepper to taste
Preheat the oven to 400ºF.
In a medium bowl, whisk the eggs with a small pinch of salt, red pepper flakes and basil. Set aside.
In a 8 to 9 inch oven-safe, cast iron skillet, heat olive oil over a medium-high heat, make sure you get the olive oil all up the sides using a brush or some wax paper, etc. (you can also use an oven-safe nonstick skillet). Add the onion and celery, with a dash of sea salt, sauté about 3-5 minutes until the onion is translucent. Add the garlic and sauté another 2 minutes, being careful not to burn it. Add the zucchini and squash, toss around and sauté about 8-10 minutes, until they are tender. Add the tomatoes and cook for another 2-3 minutes until the tomatoes start to soften and get tender. If there is any water sitting in the pan from the veggies, pour it off. Salt and pepper to taste.Turn down the heat a bit. Add the egg mixture to the skillet by pouring over the veggies and giving it all a really quick stir to combine. Cook over a medium-low heat for about 5 minutes or until the eggs are just set and there isn’t a lot of liquid running around the pan. To do this, run a spatula underneath the sides of the frittata and tilt the pan so the uncooked eggs run to the underside and cook.
Place the skillet in the center of your preheated oven. Allow to bake for 13-15 minutes, until it is golden brown, well set and puffy. Remove from oven with oven mitts and let cool for several minutes, cut into wedges and serve.
[/print_this]
-
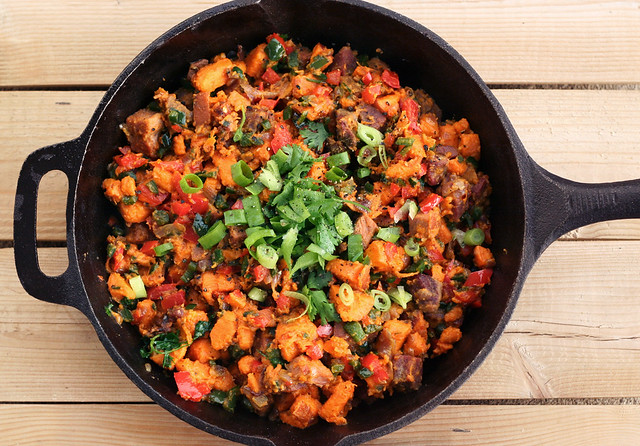
Sweet Potato and Poblano Hash – Gluten-free + Dairy-free with Vegan Option
And the craziness of life continues. We are still quite busy with work, though it seems to be getting a bit easier each day as we check things off of our list. We were lucky enough to be able to enjoy our holiday weekend, though I had a little bump in the road along my way. Saturday morning in the middle of my 8:30 am 90-minute Vinyasa yoga class, I suddenly had a strange pain in my upper back, near my right shoulder blade. It came on sharp and so suddenly, but nothing ever seemed to happen to cause it. I sat back into child’s pose and gave it a second, took a deep cleansing breath, then I stood up and attempted to meet up with the class in Utthita Trikonasana, extended triangle pose. That really hurt. Weird. So back to child’s pose I went. It wasn’t my shoulder, I had full mobility, but it was something in that area, and it really hurt when I twisted my torso. I took restorative poses for the remainder of the class and thankfully my teacher that day was Elyssa, my super amazing chiropractor!! She immediately knew what it was. A rib subluxation, in other words, my rib popped out of place. If this hadn’t happened to me before, on 2 or 3 other occasions, I may have been concerned upon hearing that. Thankfully I knew that I just needed it to be popped back in and I would be on my merry way. Elyssa, fit me in, gave me an adjustment, gave that rib a good jarring “umph!” and I felt some immediate relief, though I was still very sore. I spent the remainder of the weekend, icing and trying to take it easy. Elyssa told me that unfortunately this is the result of hyper-mobility or being extra flexible. Sometimes our bodies can do something easily, that they maybe shouldn’t. So yay!
I get so frustrated when I have an injury, not because of the pain or the injury itself, but more because that means I have to take time off from my daily yoga practice. It has become such a part of my daily routine and I feel like it is what makes me, ME! When I am forced to take a few days off, it is so much harder for me mentally, than any physical pain I could endure. I guess in some ways it is good for me though, it gives me time to take a step away and reflect on my practice, on everything it means to me and what I can do to continue evolving it.
I plan to be back to my usual practice by this weekend, hopefully. I am feeling better each day. I think I just may have to make some modifications and take it easy for a while, so as not to risk another unexpected rib popping!
What do you dislike the most about being injured? Do you like the forced time away from your daily workouts or do you dread it?

While I am on this forced time away from yoga, I did get to squeeze in some time for a new tattoo!! I guess if I am already gonna be out of commission with yoga for a few days, why not, right? Josh Schlageter, at Hand of Doom Tattoo, drew up this lovely lady for me and he tattooed her on my left thigh yesterday. I am so excited about it. It is huge and the colors are absolutely beautiful. This iPhone photo doesn’t do it any justice, so I will have to post another once it is fully healed. I keep thinking I am done getting tattooed, that I have enough. Then I end up with more. Oops!

So, besides popping ribs and tattooing thighs, I have actually been able to find a bit more time in the kitchen. Over the weekend, I got to play a little, I made these delicious almond-flour cinnamon rolls (recipe courtesy of The Urban Poser), I was honestly amazed at how incredible they turned out! I subbed coconut sugar for the honey in the filling and I skipped out on the raisins and nuts in the filling. I am telling you – if you love warm cinnamon rolls, these hit the spot! They are almost a bit biscuit-like. It is incredible that they are totally grain-free! Recipes like this, honestly get me dancing around the kitchen. Totally brilliant.
I also made a delicious Easter dinner for us on Sunday night since my parent’s are away on vacation. I roasted one of our delicious pasture-raised smoked hams from Sojourner Farms in Olean, NY, and I served it with some oven-baked sweet potato fries and roasted asparagus. It was a perfect and simple dinner. But, of course, we had a ton of ham leftover and I bought way too many sweet potatoes, so I had to figure out something to do with all the leftovers. That is where this delicious breakfast for dinner hash came in.
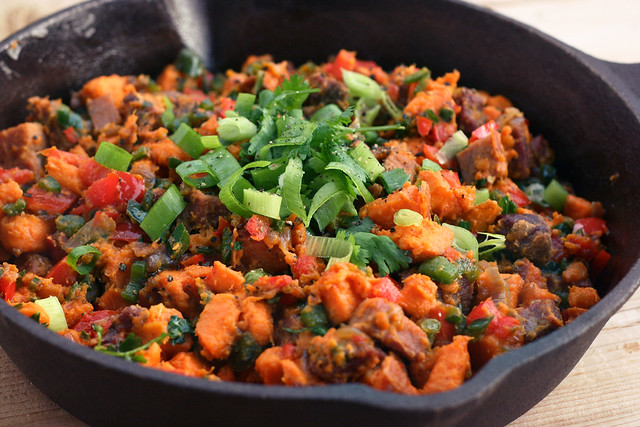
It was simple to put together and it is easily customizable to what you have on hand. If you are vegan, simply don’t add any meat or eggs. If you are a cheese addict, sprinkle a bit of sharp cheddar, jack or whatever your favorite cheese is, over top. You could also add cherry tomatoes, jalapeño, corn, black beans, etc. I feel like there are no rules with hashes! So have fun with it. This hash would obviously work as a main breakfast dish or a brunch side dish, but really it is great for dinner or even lunch. It takes such little time to prepare and you could even eat it right out of the pan to keep it really simple. Since I had just picked up some local farm fresh eggs this morning, I decided to top the hash with one egg for each of us, since they cook so easily and perfectly on top of the sizzling hash. If you don’t like or want eggs, you can leave them off and the hash will still be incredible.


[print_this]Sweet Potato and Poblano Hash – Gluten-free + Dairy-free, Vegan Option
Serves 2 as a main course, more as a side dish- 1 large organic sweet potato (mine weighed just over 1 pound), cubed (I leave the skin on because I like it, feel free to peel away)
- 1 red onion, diced
- 2 tablespoons olive oil
- 2 cloves garlic, minced
- 1-2 poblano peppers, diced
- 1 red bell pepper, diced
- a pinch or two crushed red pepper, to taste
- salt and pepper, to taste
- 1 cup leftover local pasture-raised smoked ham, cubed (optional)
- 2 farm fresh local brown eggs (optional)
- 1 handful of cilantro, roughly chopped
- 4 scallions, thinly sliced
Heat olive oil in a cast iron skillet over a medium-high heat. Add the onion and cook for about 2 minutes until they begin to soften, add the sweet potato, salt, pepper and crushed red pepper. Cover and cook about 5 minutes, until the potatoes begin to soften. Try not to stir around too much, just enough to keep them from sticking. You want them to get a nice brown outside to them.
Remove the lid and add in the garlic, peppers and ham. Toss everything around to combine and try to leave in a single layer so the potatoes can begin to brown a bit. Allow to cook for another 5 to 8 minutes. Tossing once the underside begins to brown. Taste and season with salt and pepper, if needed. Toss in half of the cilantro and the scallions.
If you are adding eggs, crack two eggs on top of the hash. Cover the pan and allow to cook another 3 to 5 minutes until the whites are set. Serve immediately topped with the remaining fresh cilantro and green onions.
[/print_this]
-
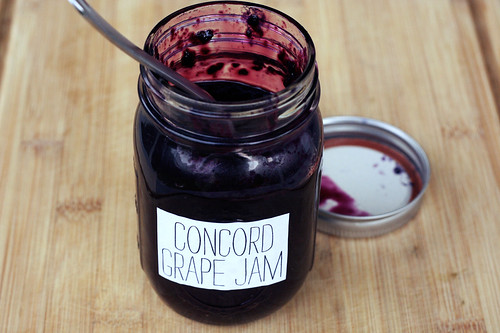
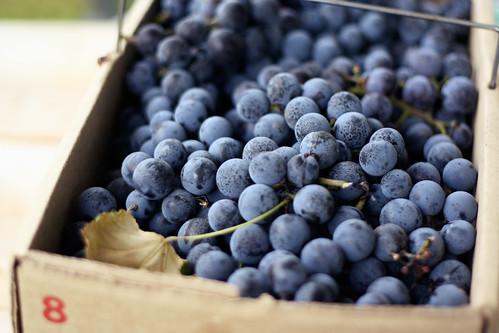
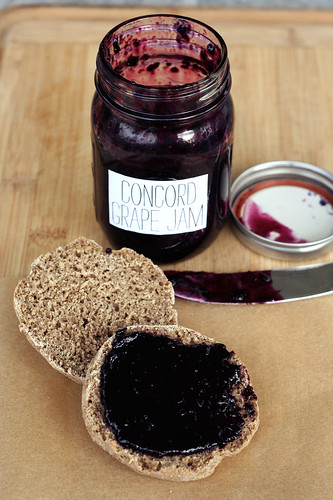
Concord Grape Jam
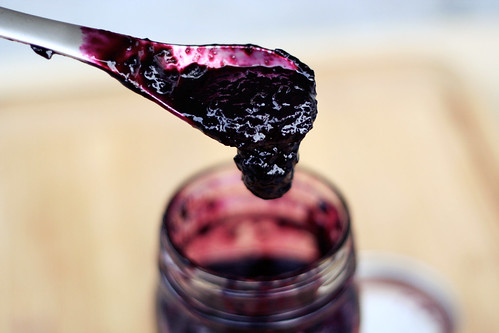
I got an email a few weeks ago from Farmers & Artisans, an amazing local shop that features produce, dairy and meat from local farms. They were offering 4 and 8 quart baskets of Concord grapes from Blackman Homestead Farm in Lockport. I decided with how much I am in love with my juicer right now, I need to buy the 8 quart basket, so I could experiment with making juice and trying to make jam for the first time. I never buy jam at the store because I hate all the preservatives, but occasionally I will buy a jar from the farmers market. I was a little concerned about the jam making since I had never done it before and I really didn’t have a great way to remove the seeds as I don’t have a food mill. I made jam twice, trying out two different methods to see which would work best. The first way, I added the grapes whole to the food processor, with the sugar and pulsed them a few times to break them down and mash em up. Then I cooked the jam down, allowing it to thicken. Once it seemed like it had cooked down enough and was quite thick, I ran it through a strainer to remove the seeds. The only problem with this method is that not only did it remove the seeds, but it also removed the thick hunks of gooey goodness (the natural pectin) that makes jam what it is. I ended up with more of a Concord Grape sauce or thinner jelly. I tried adding it back to the saucepan to allow it to thicken more, but it just didn’t do it. The jam needed bits of the skins and more of the natural pectin. All was not lost, I have been spooning the first batch of jam over granola and oatmeal, it would also be great drizzled over ice cream or yogurt or in a smoothie.
So, the second time around I decided to separate the skins from the flesh or pulp (and therefore the seeds) of the grapes, one by one. It sounds kinda tedious, and I guess it kinda was, but I didn’t mind, I knew it would be worth it. Then I pulsed the skins with the sugar in the food processor and cooked that down on its own, cooking the pulp down in a second saucepan by itself, mashing every so often to break it down. Once the skins had cooked down quite a bit and really gotten thick and jam-like, I strained the pulp from the other saucepan through the strainer to get as much of the juice and added it to the beautiful skin mixture. It was surprising how easy the whole process was. From what I have read Concord grapes are a slip-skin variety grape so I suppose that is what made that part of the process so much easier than I had anticipated.
You could certainly make a larger batch and go through the hassle of canning and preserving if you wish. I am not versed at all in preserving and honestly am quite intimidated by the whole process. Maybe some day when I have a huge kitchen and tons of storage space I will experiment with it.
This jam is preservative free and is full of intense grape flavor. It is perfectly sweet and tart. I am sure you could experiment with using honey as a sweetener instead of sugar, I just wanted to go the traditional route for my first time. If I get around to experimenting with honey, I will report back.
Obviously if you have a food mill you can simply process the grapes whole with the sugar, then use your mill to remove the seeds and cook down the mixture in one pan, no need to strain.

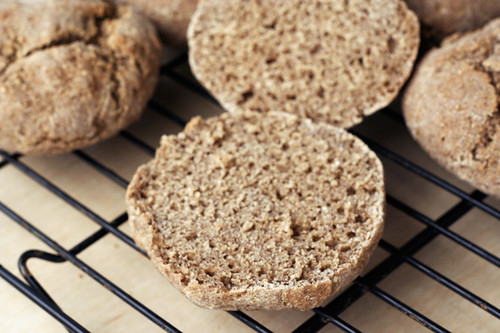
I decided to fully enjoy this jam I needed to make some delicious gluten-free multi-grain rolls. I couldn’t just slop it on any ol’ store-bought bread or roll, it seemed sacrilegious. I used gluten-free girl’s recipe with a few subtle substitutions. I used tapioca starch instead of potato flour and I made my own oat flour since I couldn’t find any that was certified gluten-free. I highly recommend this recipe. These rolls are incredible and I love that the recipe is gum free (no xanthan or guar gum). They are super crusty on the outside and soft and chewy on the inside. These rolls are perfect as is with a little jam, toasted with a veggie burger, etc. The same recipe with make two boules instead of the rolls, if you wish. I thought I was in love with gluten-free girl’s previous bread recipe, but this one blows it out of the water. Try it!
Oh and by the way, I have a very small amount of grapes left – not enough to really do anything major with – so I plan to soak them in vodka to make some tasty Concord grape infused vodka!! Come on, how could it not be good?

Concord Grape Jam
makes about 1 cup
Inspired by Healthy Green Kitchen and a handful of other recipes I came across2 lbs fresh local concord grapes, about 5 1/5 cups or so (if you can find them seedless YAY – I wasn’t that lucky)
2/3 cup organic raw sugar plus 1 tablespoon
juice from 1/2 lemonSeparate the skin from the pulp of each grape, by applying pressure to the grape with your thumb and index finger, shooting the pulp right out. It’s fun and very simple to do.
Process the grape skins with the sugar in your food processor or blender until mostly smooth but still a tad bit chunky. If you want your jam super smooth, process longer. Transfer to a medium saucepan and add the juice of half a lemon. Bring to a boil over medium heat. Watch it carefully and stir often so it doesn’t stick or scorch. Once boiling, reduce the heat and simmer for approximately 25 minutes until it has reduced down and thickened.
Meanwhile in a smaller saucepan cook the grape pulp (insides) and 1 tablespoon of sugar over a medium-high heat, bring to a boil and mash the pulp as it cooks to break the down. Once bowling reduce the heat and allow to simmer as long as your grape skins do. Once the grape skin mixture has thickened, remove the pulp from the heat and strain through a strainer or cheesecloth to remove the seeds. Add the juice that drained out to the grape skin mixture.
Allow the jam to continue cooking another 10 minutes until thick. Taste for sweetness and add more sugar if it isn’t sweet enough for you. This was plenty sweet for me. The jam will continue to thicken as it cools. Trust me. It also thickens a bit more once in the refrigerator, so down cook it down too much.
Allow the jam to cool before pouring it into a well cleaned and tightly sealing jar. This jam will keep in the refrigerator for approximately 1 month.
NOTE: I have to apologize for the lack of process photos with this post, I had intentions of showing step by step photos of the entire process. However, the morning I was making this jam it was very dark and stormy. The lighting in my kitchen was horrible and with the yucky wind and rain, I wasn’t able to tote things out to the back patio as I usually do. If you have any questions regarding the process, please don’t hesitate to ask.
-
Creamy Italian Sausage and Potato Soup

As you can probably tell from reading my recipes, we eat very little meat in our household. We aren’t vegetarians, but I would say we are mostly vegetarian. I consider myself to be a conscientious omnivore, I do eat meat occasionally, but only meat that I know where it comes from, how it was raised, what it ate, etc. At this point the only meat in our house comes from a local farm where it was all pasture-raised without the use of hormones, antibiotics or other chemicals. We have visited the farm, we have seen the animals and we have shaken the hand of the man who does it all. This is the only way I will ever buy meat for our home. It feels right. This fall we shared a pig with my parents. We have more pork that you can even imagine in our freezer. At home I would say we probably enjoy pork once or twice a month and chicken once a month. I have a good supply of this wonderful ground italian sausage that is unlike anything you can ever imagine. So tasty, sweet, subtly spicy and not too greasy, it is perfect. Without the ability to make patties and throw them on the grill (it is WAY too cold for that), I was trying to think of some winter friendly ways to enjoy the sausage. I thought a nice hearty soup would be perfect. I was torn between a tomato-based vegetable pasta sausage soup but then I thought something creamy and hearty sounded even better (though I plan to make that first soup soon).
This soup was really incredible, spicy and creamy with a nice green crunch from the spinach. The fresh herbs were wonderful, though dried will do if you can’t find fresh. I wanted it to be nice and brothy and wanted more servings so I used about 7 or 8 cups of chicken broth, you can certainly go with less, 5 or 6, if you want it to be a chunkier and less brothy soup. I also decided to go with half and half versus heavy cream to keep it a bit lighter per serving, but heavy cream would certainly be delicious and with less broth you would have a nice thick soup, just a bit fewer servings. Oh and the freshly grated parmesan cheese on top really sets this soup over the edge. It is the perfect finishing move.
*I am not at all crazy about the photo of this soup, it was hard to photograph with all the lovely bits, and I forgot to put the cheese on top for the photo, but you get the idea.
Creamy Italian Sausage and Potato Soup
serves 6-82 tablespoons of olive oil
1 large onion, diced
3 cloves garlic, minced
1 pound of ground Italian pork sausage, local, pasture-raised and free from hormones and antibiotics
6-8 cups of organic chicken broth, low sodium
5 small russet potatoes, washed and cut into 1 inch cubes with the skins still on
1/2 cup of fresh basil, roughly chopped
1/2 cup of fresh parsley, roughly chopped
1 teaspoon of red pepper flakes (more if you like spicy)
1/4 teaspoon freshly ground black pepper
1/2 teaspoon kosher salt
1 cup of organic half and half
2 cups of coarsely cut spinach
1/4 cup of freshly grated Parmesan cheesePlace the olive oil in a large pan over a medium-high heat. When the pan is hot add the onion and garlic and saute until the onion gets soft. At this point add the Italian Sausage and cook until its browned. Our sausage isn’t very greasy so I didn’t need to pour any out, if your sausage produces a lot of grease pour some off before adding the soup.
In a large stock pot over medium-high heat add in the chicken broth, potatoes, basil, parsley, red pepper flakes, pepper and salt. Bring to a boil. Reduce the heat and bring to a simmer, allow to simmer for 20 minutes.
After the soup has been simmering add the sausage, onion and garlic mixture and cook another 5-10 minutes. After it is done simmering, add in the half and half and stir. Reduce the heat and be sure it doesn’t boil. Cook another 2 minutes. Taste the soup, add more salt and pepper to taste. More red pepper flakes if you want it spicier.
Remove the soup from the heat, add in the spinach and cover. Let it sit for an additional 3-5 minutes until the spinach is cooked.
Ladle the soup in your bowls and sprinkle with a little parmesan cheese.