

Sauerkraut and all it’s live culture, raw, funky smelling goodness, it’s been a favorite of mine for sometime. But, it wasn’t until this past year, while taking on the arduous task of healing my gut, that I have truly learned to love and appreciate this stuff for all of it’s magical healing qualities. I have shared this simple tutorial at workshops, including retreats I have hosted and cooking demos. It’s a very simple process, a food that has been around for thousands of years that produces incredible, tasty and healing results. While not very cumbersome at all, sauerkraut is a timely process, but I can tell you that patience is very much a virtue in this game. It’s worth the wait. For those new to sauerkraut, I do recommend starting out consuming a very small amount, a tablespoon or two, used as a condiment of sorts. As with any fermented or probiotic rich food, too much too soon, even when it’s good bacteria, can have some gnarly affects on your gut. More isn’t always better. Take it slow.
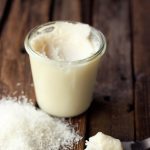
This tutorial offers the step by steps on making small batch sauerkraut, in a glass mason jar. To make a larger batch in a fermentation crock, you can just double or triple the recipe, as necessary.
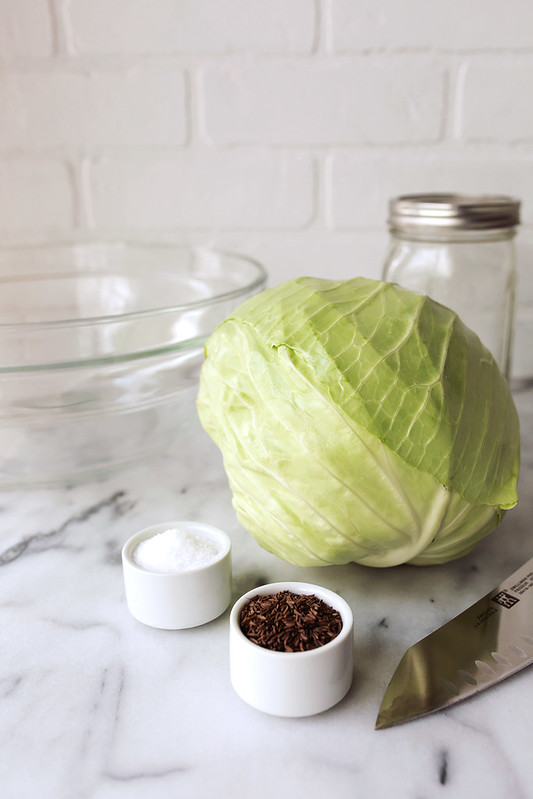
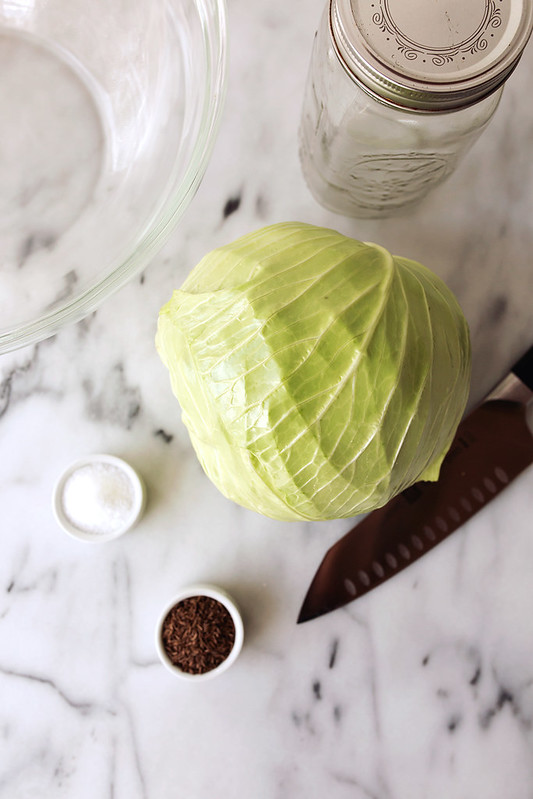
All You Need:
1 or 2 quart wide mouth glass canning jar or 3 pint size glass jars, with tight fitting lid(s)
1 medium head organic cabbage
1 tablespoon sea salt
additional spices, vegetables or fruit you wish to add
glass mixing bowl
sharp knife and cutting board (or food processor with shredding plate)
HOW IT WORKS:
Letting the cabbage ferment at room temperature invites beneficial bacteria to grow via lacto-fermentation. These microorganisms feed on sugars in the vegetables and raise levels of lactic acid, giving fermented foods their tang while also preserving them. Most commercial sauerkraut is required by the FDA to be pasteurized—which effectively destroys all the bacteria in it, including the beneficial bacteria— so making your own sauerkraut at home is definitely a better choice to improve your digestive health.

Why Fermented Foods are Good for Us:
The proliferation of lactobacilli in fermented vegetables enhances their digestibility and increases vitamin levels. These beneficial organisms produce numerous helpful enzymes as well as antibiotic and anticarcinogenic substances. Their main by-product, lactic acid and the not only keeps vegetables and fruits in a state of perfect preservation but also promotes the growth of healthy flora throughout the intestines. All this works to strengthen the immune system, improve metabolism, help your body make vitamins, and aid in the absorption of minerals.
Consuming fermented foods and probiotic beverages introduces healthy, beneficial bacteria to the gut. Often, damaged microvilli and loss of brush border enzymes leads to small intestine dysbiosis. Food becomes stagnant and ferments because your body simply does not have the enzymatic power to break it down quickly enough. Beneficial microbes, like the ones found in sauerkraut, cool the inflammatory process in it’s interaction with the immune system. They are able to balance out pathogenic overgrowth and reduce the pain, bloating, and spasms that are associated with gut dysbiosis.[1]
Experiment with Varying Flavors and Additions:
For a straight-up sauerkraut, all that you need is cabbage and sea salt. But, you can also add other sliced vegetables or fruit, including carrots, fennel, jalapeños and apples. It is generally suggested to keep the mix to 75 percent cabbage to 25 percent other produce. Skip cucumbers or zucchini; both contain enzymes that make kraut lose its crispness.
Watch the Temperature:
Sauerkraut ferments best in a cool, dark place at a temperature that is consistently around 72º F (I seek to keep it between 64 and 72 degrees). In hot weather, let the jars stand in a dark corner in the back of a closet. At cool times of the year, a cupboard above the refrigerator is a great place.
Keep it Submerged:
It is important that the cabbage stay submerged in liquid. If the brine bubbles out during fermentation, replace it with a solution of sea salt dissolved in filtered water, using a ratio of one tablespoon to one cup.
Burp that Jar:
After five days, open and close the lid quickly to release air (specifically, carbon dioxide) from the jar. Repeat every five days or so during the (approximately) three weeks of fermentation.
Choose High Quality Organic Vegetables:
It is important to choose the freshest, highest quality, organic vegetables. Lactobacilli need plenty of nutrients to do their work and if the vegetables you choose are deficient, the process of fermentation will not proceed. Likewise if the salt choose has any impurities, the quality of the final product will certainly be jeopardized.
About the Salt:
Fermented foods often rely on salt because salt inhibits putrefying bacteria and mold for several days until enough lactic acid is produced to preserve the vegetables for many months. Salt is also important when making sauerkraut because as it helps draw the moisture out of the cabbage to create the brine.
It is important to note that salt reacts with metal. Do not use metal bowls, crocks or containers with fermentation and do not let a metal utensil sit in the kraut. Additionally, choose sea salt or kosher salt. Iodized salt can affect the bacteria in the fermentation process.
How-to Make Sauerkraut
Be sure you working with a clean knife and cutting board, a well-washed jar and super clean hands.
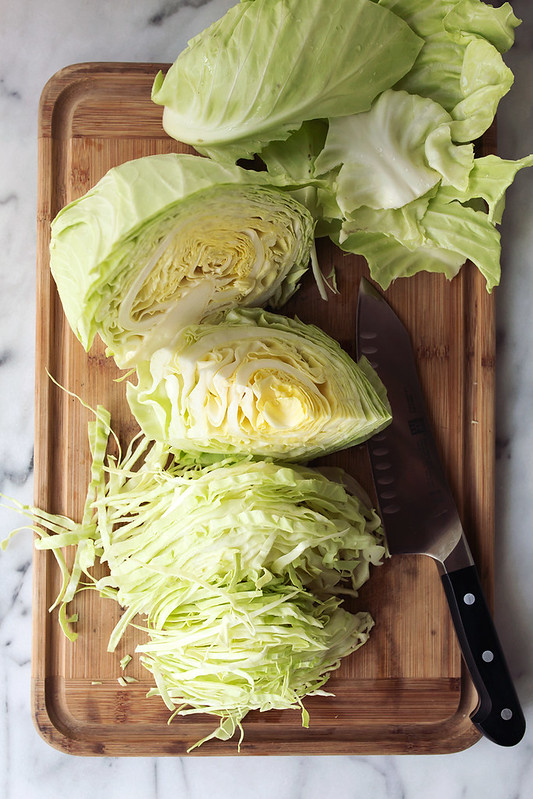
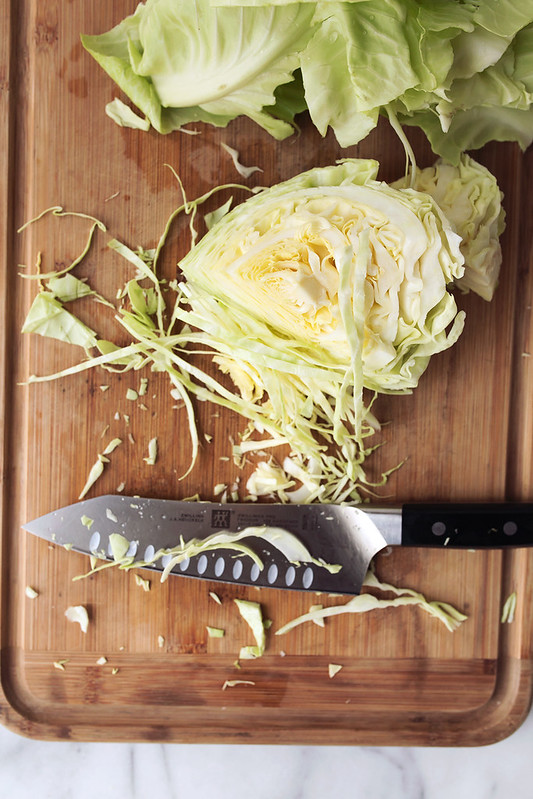
Discard the outer sad looking leaves of the head of cabbage, but reserve a few whole leaves. Using a sharp knife, remove the core, cut the cabbage head into quarters and cut into thin ribbons. You can also use the food processor to shred the cabbage.
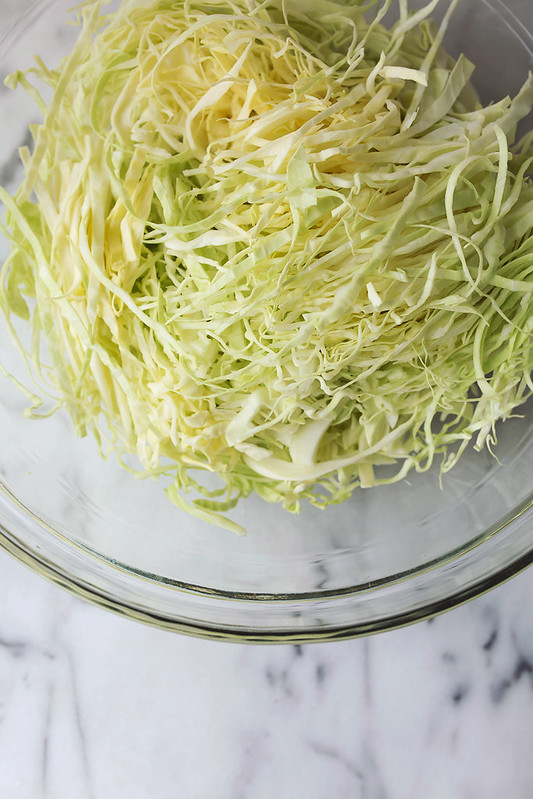

Place the shredded cabbage into a large glass bowl. Sprinkle 1 tablespoon sea salt over top. Let sit a few minutes.
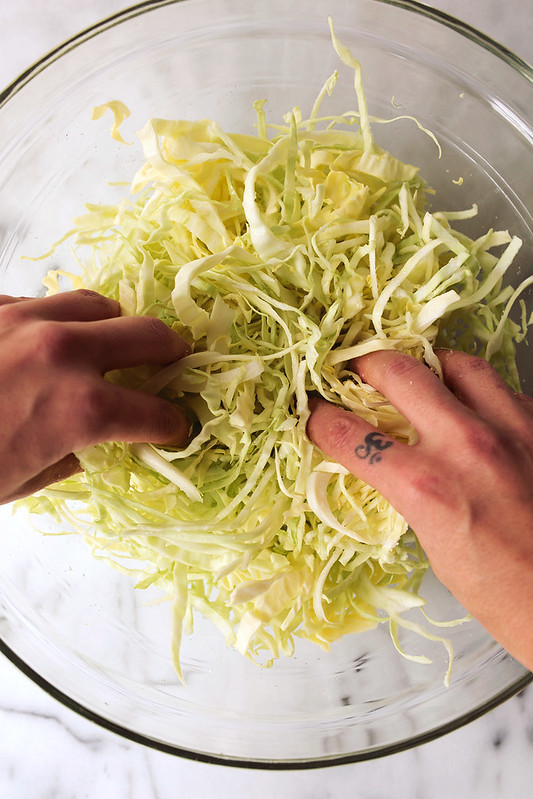
Massage and knead the cabbage with your hands, to break down and release liquid from the cabbage (forming a brine). The cabbage will be wet and there will be water in the bowl. This will take at 5 to 10 minutes.
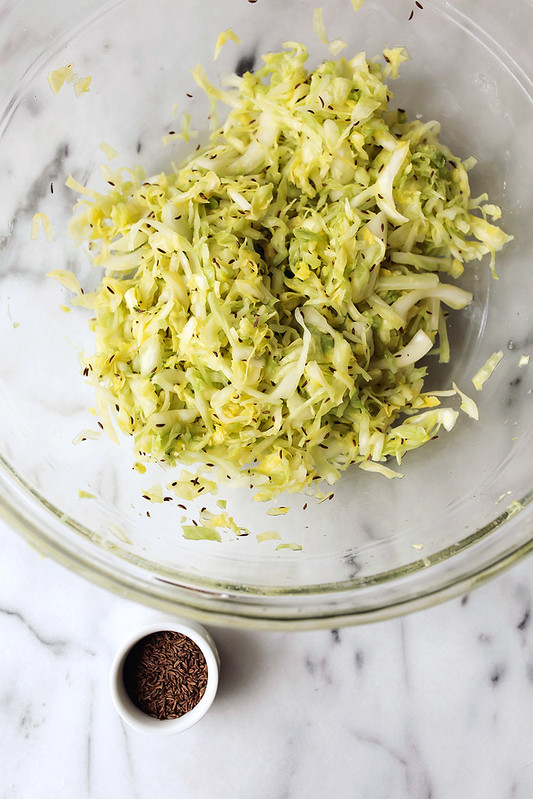
Add any other vegetables or spices you’d like to include in your blend. Mix well.
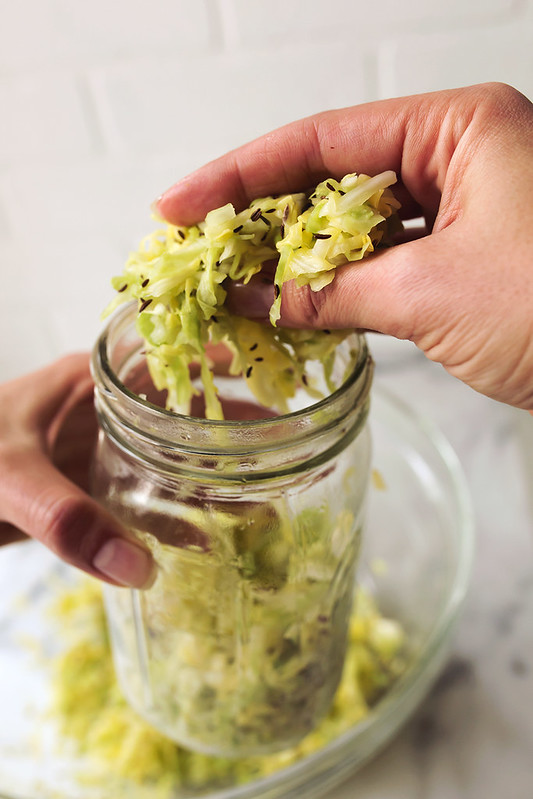
Pack the cabbage mixture into your jar, pressing down as you go, continue doing so until you have about 2 inches left at the top of the jar.
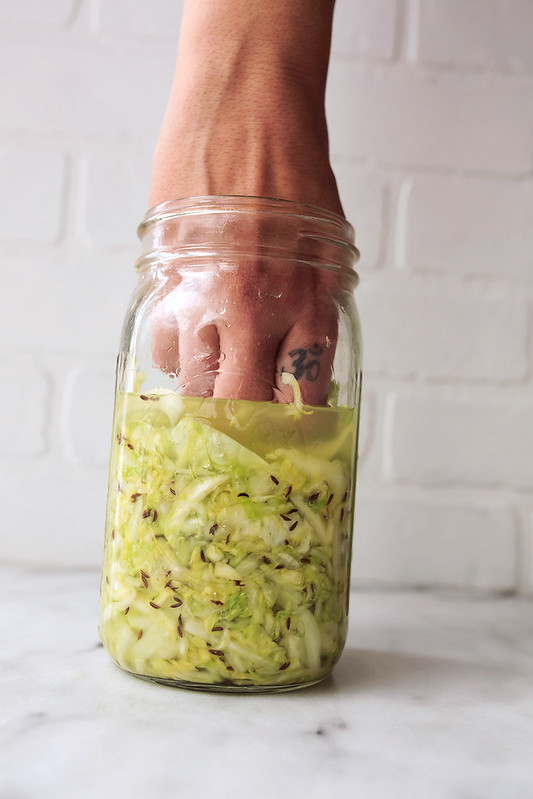
Using your fist, press the mixture down firmly to keep it fully submerged by the brine. Make sure brine covers cabbage by at least 1 inch and leaving 1 to 2 inches of space at the top of the jar for the vegetables and juices which expand slightly during fermentation. Fold and push 1 reserved leaf into the top of the jar, filling the top space. You may want to use a shot glass or small bowl as additional weight to keep the mixture down, if it isn’t staying down on it’s own. Place the lid on and close the jar tightly.
Leave for 5 days, undisturbed. After 5 days, slowly loosen the lid and gently release any pressure that has built up then quickly close again. Leave for another 5 days, give it a burp. Repeat for at least two more weeks, I personally find a 21-day fermentation to be my preferred flavor. Once the flavor is to your liking, transfer with at tightly closed lid, to the refrigerator.

[print_this]How-to Make Sauerkraut
- 1 head cabbage, approx. 3 lbs, cored and shredded, reserve several whole leaves
- 1 tablespoon course sea salt
Optional:
Spices of your choice (I love caraway)
additional vegetables or fruit
DIRECTIONS
Combine cabbage and 1 tablespoon salt in a large glass bowl. Let stand for a few minutes, then begin to massage the cabbage with your hands, to release liquid from cabbage (forming a brine). The cabbage will be wet and there will be water in the bowl. This will take at least 5 minutes.
Add any additional vegetables or spices. Mixing well with your hands.
Pack the cabbage mixture into 3 pint-size canning jars or 1 quart-sized jar, pressing down as you go, continue doing so until you have about 2 inches left at the top of the jar. Make sure brine covers cabbage by at least 1 inch and leaving 1 to 2 inches of space at the top of the jar for the vegetables and juices which expand slightly during fermentation. Fold and push 1 reserved leaf into each, filling the top space. You may want to use a shot glass or small bowl as additional weight to keep the mixture down, if it isn’t staying down on it’s own.
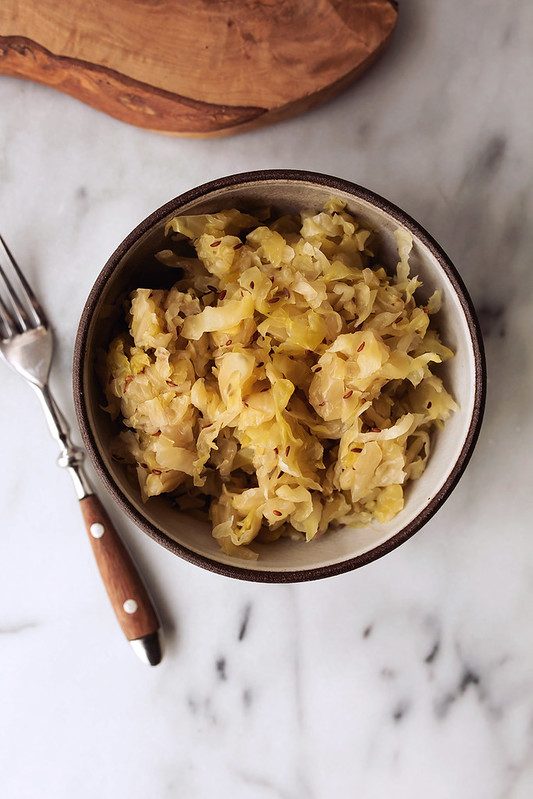
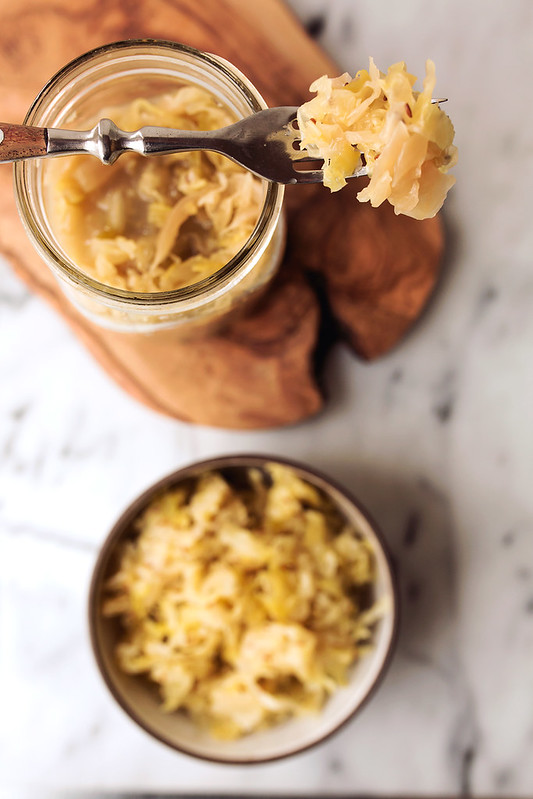
Close jar(s) tightly, and transfer to a glass baking dish or a nonreactive container with sides. Let stand in a cool, dark place (64 to 72 degrees) for 5 days. Slowly open and quickly close jar(s) to gently release built-up pressure, being careful not to let the liquid bubble out. You can try your sauerkraut now, if you’d like, it may be the flavor you are seeking, but it probably needs more time. Otherwise, let stand for another two weeks or so, reopening the jar(s) to release pressure every 5 days, tasting whenever you’d like, to determine if the kraut is sour enough. The flavor improves with age. Let stand until kraut is to your liking (I tend to like a 21-day ferment), continuing to open jar(s) every few days to release pressure.
Once fermented to your liking, transfer to the fridge, with a tight lid.
Storage: Kraut can be refrigerated, submerged in brine for up to 6 months. [/print_this]
Is My Kraut OK?
Be sure to close your jars very tightly. Lacto-fermentation is a anaerobic process and the presence of oxygen, once the fermentation has begun will ruin the final product. A sign of successful fermentation is that your cabbage will remain preserved over several weeks or months of cold storage.
You will likely notice bubbles in your sauerkraut, or possibly a little white foam, these are all signs you have a normal, healthy fermentation happening, you can lift the white foam out with a spoon, if you wish. If you get a very active fermentation or if your mason jar is very full, the brine can sometimes bubble up over the top of the jar. This is why it is recommended you use a larger mason jar than is really necessary to hold the sauerkraut. If you do get a bubble-up, don’t worry — this is why you have a plate or dish below, to catch the drips and make sure the cabbage continues to be covered by the brine.
If your cabbage isn’t fully submerged in the brine, you may develop a small amount of mold. Do not fear. Anything that is submerged is protected, so scrape that little bit off or thrown that small amount out and continue on with your fermentation. As I always recommend with fermentation or any hand crafted foods like this, use your best judgment, if it smells or looks funky, if it’s giving off some serious “do not eat me vibes” – go with your gut (pun intended)and toss it out.
Sources:
[1]


7 Responses
Great post Beth! I just signed up for a fermentation workshop, learning to make sauerkraut and kimchi. Now with your post in mind I can ask all the smart questions 😉
Also helpful that you included the risk (and recognizing) of mold and bubbles.
Greetings from the Netherlands!
I didn’t even think about the store bought pasteurized ones I’ve been spending sooo much money on. How simple is this and I love the idea of using caraway seeds! I wish I read this at the start of my 21 days cleanse; it would have been the perfect treat to celebrate my achievement with.
I have begun the sauerkraut process. This is the fourth day I did need to release pressure on day 3 and remove some bubbles. I think it going well. Will comment again later on progress.
Awesome!! I cannot wait to hear how it comes together for you. You are gonna love it.
I think I’m going to try this out this weekend. I’ve been trying to add sauerkraut into mine and my husbands diets and I’m tired of spending $7 on a little container each week. You’ve made me not scared of the process! Sounds pretty simple!
I just want to check whether a metal screw on lid is ok to use? Is it just utensils and the jar itself which are in contact with the sauerkraut that cannot be metal? Thanks
I love sauerkraut! The recipe I have used in the past does not put the lid on top of the big cabbage leaf; it leaves the crock open. Are there different reasons for using a lid or not using a lid during the fermentation process? Thanks for the great information!